The UKW Infill Project

UKworkshop.co.uk

Help Support UKworkshop.co.uk:

This site may earn a commission from merchant affiliate links, including eBay, Amazon, and others.
Sheffield Tony":22yo7r7g said:
Do I take it that you never want to use a plane like this on a shooting board ?

It's looking amazing .

AH!

Now I hadn't thought of that...and even the remotest possibility that I might would scupper that idea wouldn't it! :oops:

Very observant of you mate! I guess it might be best to recess to the top of the dome then in which case I will have to wait for the M6 counterbore which should be here before the weekend...all things being equal.

The second one took only an hour so I guess I know what I'm doing now...

20140729_222546.jpg


This one is closer than the last one was before I made it exact too...only a shaving to come off this side.

I polished up the Tru-Oil to see if we need a few more coats and the decision is yes...we do...quite a few more.

I will put another layer on tonight.

Jimi
 
Ah right Phil...well let's answer the simple question first...the lever cap bolt.

phil.p":3mfgmtej said:
- is there any reason for the screw in the cap to be so long?

There isn't and it isn't going to be. That's just left more than final length so that I can saw off what I don't need when I'm done with all the setup.

I suppose that could really be now with this iron which is the thickest but I've just not got around to shortening it yet. There will be at least a third less when finished and the knob will be about three threads up from bottoming out.

Now...the more difficult question...why are the lever cap side bolts proud...well...they're probably not going to be now following from Tony's observation about shooting board use.

Richard did set the sides so that with the infills in (instead of the spreader)....the sides would be parallel and square to the sole so I guess it would be naughty of me to then bugga this all up but adding side screws which are proud. SO....the plan is to use the counterbore shown on the previous page to set a shelf down in the side so that this dome is still there but the top of it is level with the outer side wall.

I think this would be neater anyway...I'm just being lazy!! :mrgreen:

Thinking this way has made me wonder whether a complete cheesehead bolt would be better with a flat top flush with the sides...and maybe a tiny polished bevel...I have that option too.

I hope this answers your questions.....and you just reinforced my thoughts about counterboring them...so thanks for kicking me on the job.

I just hope it doesn't go all skew whiff when I do it!! :D

Cheers

Jimi

p.s. Anyone else see the waterfall from the top of the bun to the toe? I look at this too much and I'm starting to see things!!! :oops:
 
Actually Jimi , I see a prone tiger if it (the plane) were lain on it's right hand side. Thats right hand as you use it and seen from the front and top at an oblique angle. But that's just me.
 
Well, this proves the wisdom of sharing all your musings online!

I think a submerged domed screw would look like a mismatch. A flat cheese head screw in a hole with a matching flat counter bore would be a good simple option. You have plenty of sidewall thickness to accommodate this. You might even be able to buy the screws!

I guess you got too used to looking at the plane while it still has the infill screws protruding.
 
Jimi,
If you decide to use the counterbore, please try it on some scrap metal first :)
 
lanemaux":acj0cjjl said:
Actually Jimi , I see a prone tiger if it (the plane) were lain on it's right hand side. Thats right hand as you use it and seen from the front and top at an oblique angle. But that's just me.

My ante-espresso brain first thought that your comment was based on the inability of the plane to lie flat on its side and that "prone tiger" was some sort of French colloquialism for "latent problem"....then I realised that you were reflecting on my musings on the figuring. :mrgreen: :mrgreen:

As it was about 4 am when I read it having been woken up by ALFIE who needed a pee...I then spent ten minutes trying to look at the picture on its side until I realised that on my phone, I had "screen rotation" switched on...so that every time I tried to turn it sideways...it corrected itself! :oops: (homer)

So...leaving it until a more sensible hour and with the ability to turn the picture over in Picasa a far more sensible solution...I DO see the tiger!!! WOW! You are clearly worthy of your avatar mate! :mrgreen:

Now..back to the problem in hand. Even though I am getting the counterbore soon...I was thinking EXACTLY what I think you are thinking rxh....that the pilot...not being the one to have created the hole itself...may decide to "throw a wobbly" in the most literal sense, taking the counterbore with it.

The very last thing I want it to create a scrappy surround.

My immediate thought was to..... very carefully on the milling machine....set up the plane on its side backed by a lump of hardwood wedged below the screw holes and create a false pilot into the hardwood which will then guide the counterbore preventing runout. Obviously, ensuring that everything is tight first and the counterbore is right up in the chuck to prevent lateral movement.

OR....

Plan C....just make countersunk flat head bolts which was my intention in the first place leaving the slot deepish and the top a tad proud so that when I finish the sides and rub down the remains of the infill screws...this gets flattened back to the steel along with the others.

I think this is the safest overall solution by far. :idea:

What'd ya think guys? =P~

Jim
 
MickCheese":12c1fxxg said:
£80 for two screws attached to that lovely plane is a bargain. Put me down for two. :D

Really enjoying the read and I love your photography.

Mick

Thanks Mick! You'll have to pop over for another coffee...I have some rather nice Marley "Lively Up" espresso...yup..you couldn't make it up! :mrgreen:

Actually I can do you a half price deal on the reject bolts if you like...I should have a warehouse full by then! :mrgreen: :mrgreen:

No plane attached unfortunately...that one's reserved I'm afraid and was for a limited time only! :mrgreen:

Jimi
 
It's Wednesday so work again this afternoon but before I go...another two coats of Tru-Oil were laid down..one last night and one this morning when the other had dried properly.

So some shots of how the figuring is coming with the finish progressing:

20140730_124829.jpg


Note how the flower is popping on the top of the handle...I really like this bit of the "tiger's back!".

The top of the bun is flattening nicely...

20140730_125210.jpg


...as are the sides and scallops...

20140730_124737.jpg


The rear infill ripples are standing out around the handle sides..

20140730_125129.jpg


...and we are starting to get some really nice reflections which was the plan...

20140730_125107.jpg


I will now add two more coats..tonight and tomorrow and then cut the whole lot back to flat again...

20140730_125048.jpg


....hopefully for the last time.

When I am convinced that the addition of further layers will only increase depth and not quality of finish...that will be the time to call it a day.

I must admit...I am getting rather impatient myself now to get those screws flattened down to brass spots and reface the sides..which are looking a bit shabby with all this working going on.

Cheers

Jimi
 
Hi Jimi

Flat screws seem to be the easer safer option, a lot less chance of a cock-up.
Probably the best option at this stage with so much work in it.

Pete
 
Jimi
May I very politely suggest that you are getting a bit stressed out with this screw making. I have found that hand turning countersinks and domed screw heads is pretty easy, particularly in brass.
The slots again are straightforward, in that if you leave the centre pip slightly proud, it provides an accurate marker. Mount the screw in a timber stock in a vice, then use a junior hacksaw to cut the slot and widen and take out any slight inaccuracies with a the edge of a slim warding file. All that toing and froing with the cross slide sounds a bit dull.
Given all the skills you already have shown in this masterwork, you have all the hand skills necessary, and for me, it is rather more satisfying to minimise the use of machinery.
Hopefully by this weekend, both daughters being home, I will have an silly person proof system for posting photographs, and can post some work.

Regards
Mike
 
Now that the Tru-Oil has had time to harden I cut it back from 1500 mesh up to 6000 mesh and then applied a thin coat of the finish.

After this dried...I was able to see how much further to go again...

20140731_172009.jpg


Apart from the deep burrs which I wanted to remain natural...there are still some areas I want more finish...so this is going to be cut back again after half a dozen more coats...but we are getting there slowly...

20140731_172508.jpg


...and the sheen is coming out nicely...

2014-07-31%2018.12.26.jpg


I don't suppose it will be long now...

2014-07-31%2017.56.06.jpg


The second iron goes off to Philly tomorrow for hardening...so this gives me a while to relax and lay down the final coats...allow these at least 72 hours to harden solid and then cut back and polish.

I'm going to use the existing bolts which will cut back along with the infill screws come the time. This will be the last thing done.

Cheers

Jimi
 
Blimey I used to call myself a perfectionist but will have to re-think that after watching this thread with great interest.

Bravo Jimi, we are simply not worthy.
 
Jim,

I've just been catching up, but must agree that flat scews would be much better to my eyes - understated and completely functional, Whether it's a simple countersink on a recessed cheesehead doesn't seem very important to me. The glint of a subtle chamfer on a cheesehead would be an attractive bit of gilding, but remember that in brass, it's not going to glint for long and would soon be subtle to the point of near invisibility. It would still be a nice detail but one you would really need to look for. Is it worth the trouble?

Jim
 
yetloh":2br8e8pl said:
Jim,

I've just been catching up, but must agree that flat scews would be much better to my eyes - understated and completely functional, Whether it's a simple countersink on a recessed cheesehead doesn't seem very important to me. The glint of a subtle chamfer on a cheesehead would be an attractive bit of gilding, but remember that in brass, it's not going to glint for long and would soon be subtle to the point of near invisibility. It would still be a nice detail but one you would really need to look for. Is it worth the trouble?

Jim

Hi Jim

That's the conclusion I came to Jim. I thought I would nail that part of the project on the head before it became too involved.

All I need to do is cut the domed bolt slots below the surface a bit more and then tighten them up and flatten them to the sides when I do the whole thing for the infill screws.

I agree...brass ones are not going to look any better with a bevel or without so I will leave them flush as are all the other spots.

Jimi
 
Apologies...missed a couple of replies there in my rush to get today's pics up on the thread.

Mike...yes...I had thought of hacksaw and file but the idea of scraping the slot came to me in a nocturnal musing...and I just had to try it.

Actually...the second one took minutes.....and the reason being...I locked the apron down this time!!!! (homer)

It was moving back with every turn of the cross slide before! (Did I feel a fool or what!)

I am a bit of a techno-luddite....machinery intrigues me but I love working by hand too! Both the lathe and the mill have dc motors and are whisper quiet....so much so I forget they're on sometimes!

Looking forward to the pics of your work.

Mr P....I am no perfectionist mate....more "anally retentive nut with too much time on my hands" but I thank you for your encouraging words!

Another coat is drying...so bed for me...

More tomorrow if the weather holds...

Jim
 
Code:
Glad you've decided on completely flush heads for the bolts - domed just didn't look right to me and I hadn't even thought of the problem with plane on its side. But there's a little voice in my head that says maybe slotted head isn't the best solution here - if nothing else, you'll have to do like vintage car freaks and make sure all the slots line up, which then raises the question of horizontal/vertical/angled alignment. I know you've already discounted the thought, but the little voice is asking why not use Allen head bolts? It would avoid the alignment question and would somehow say "this plane is homage to an old style and to a brilliant metalworker, but it's also a modern version"
Just a thought from an aesthetically challenged reader :D .
 
Hi Dick...and welcome on board mate!! :mrgreen:

The good thing about these bolts is that I can take out one set...and put in another...daily if the mood takes me.

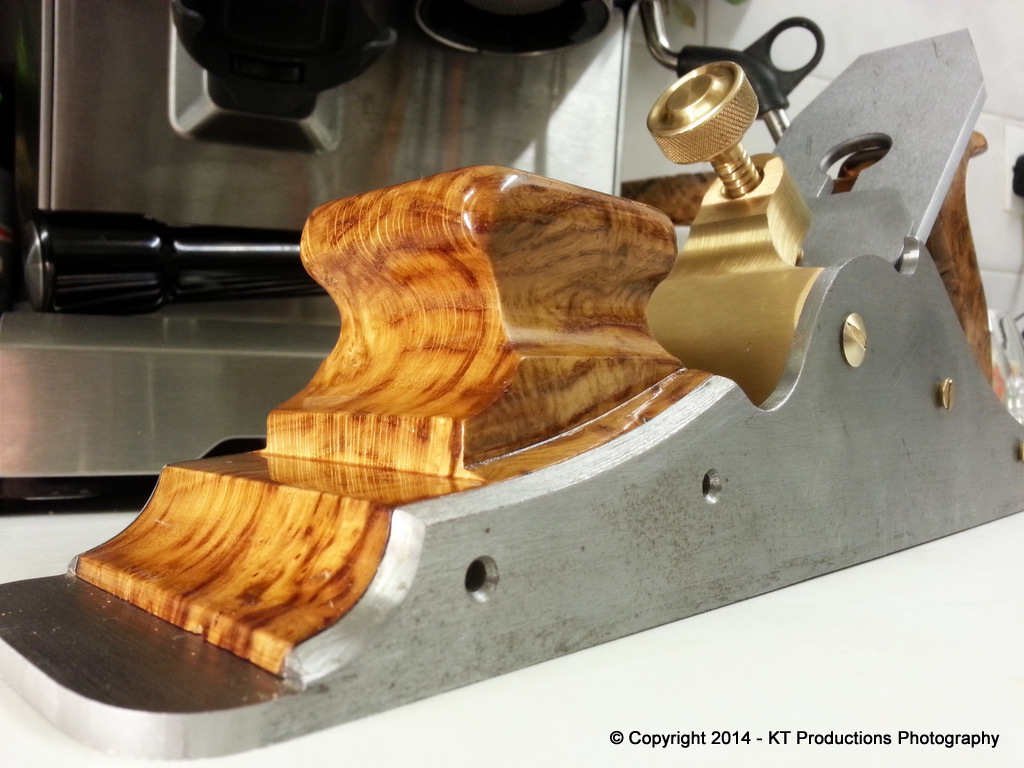
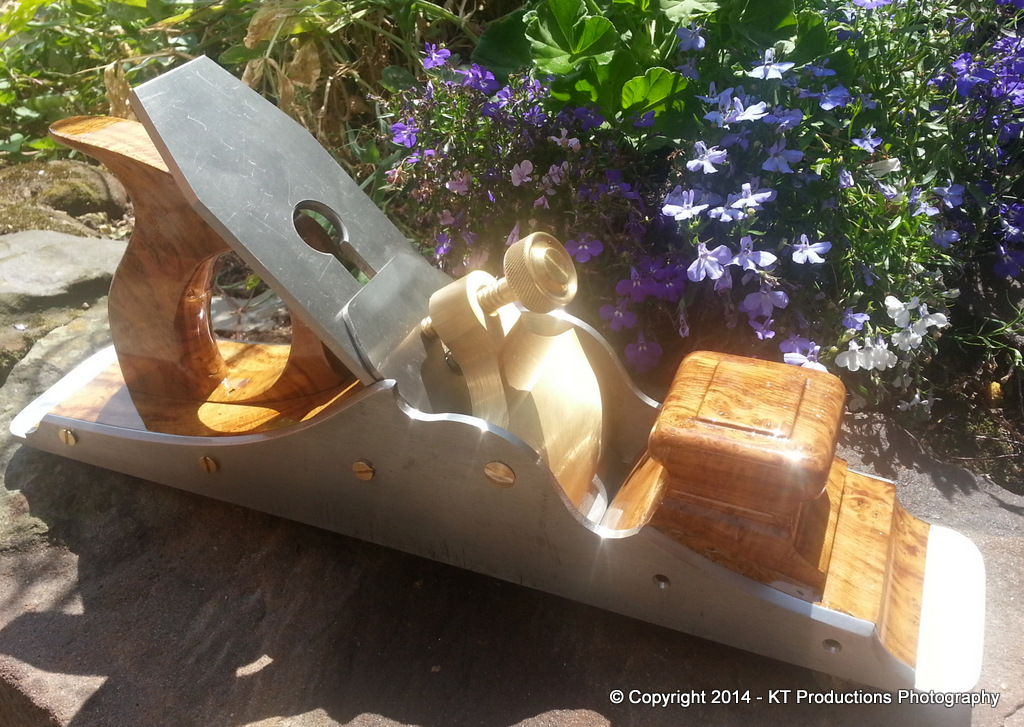
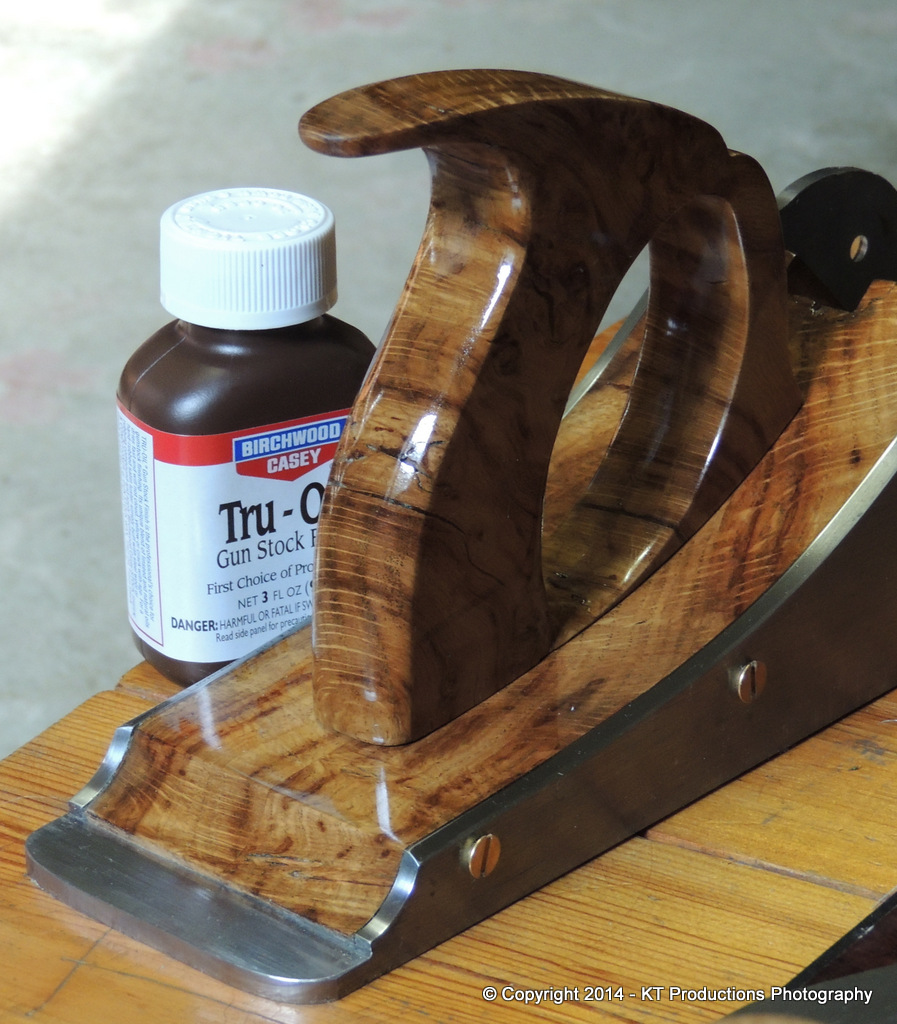
I did start out wanting just that..modern take on an old design. The lever cap itself is certainly not traditional! But lest we break into pages of opinion on these screws...I will sidetrack a moment....

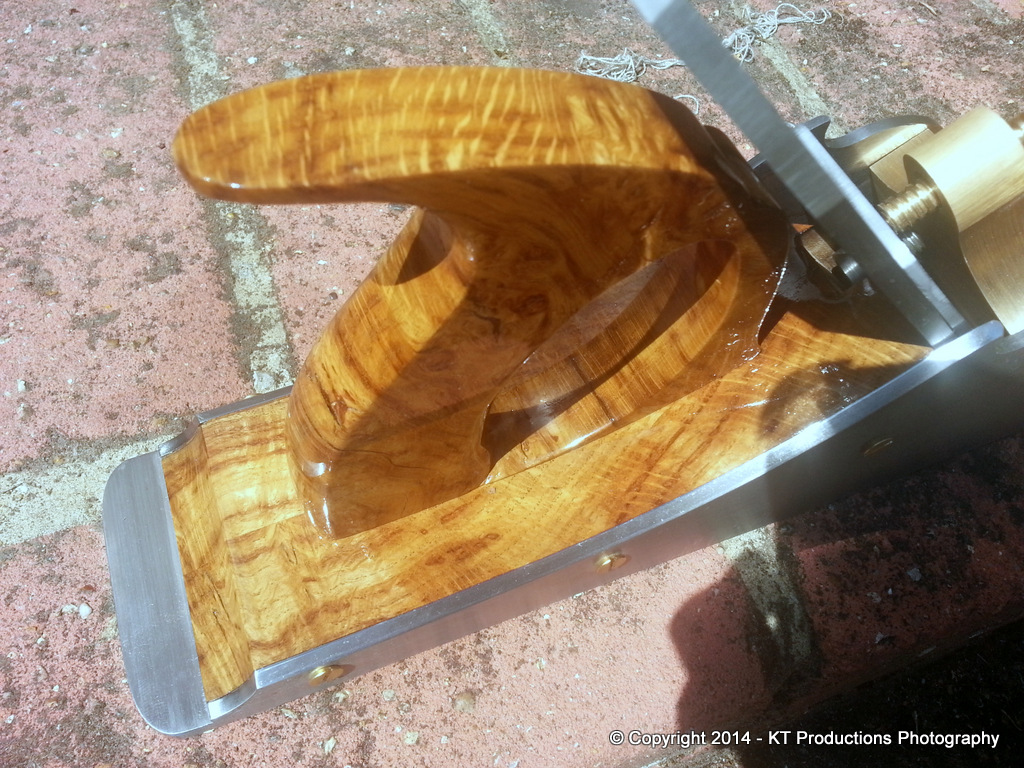
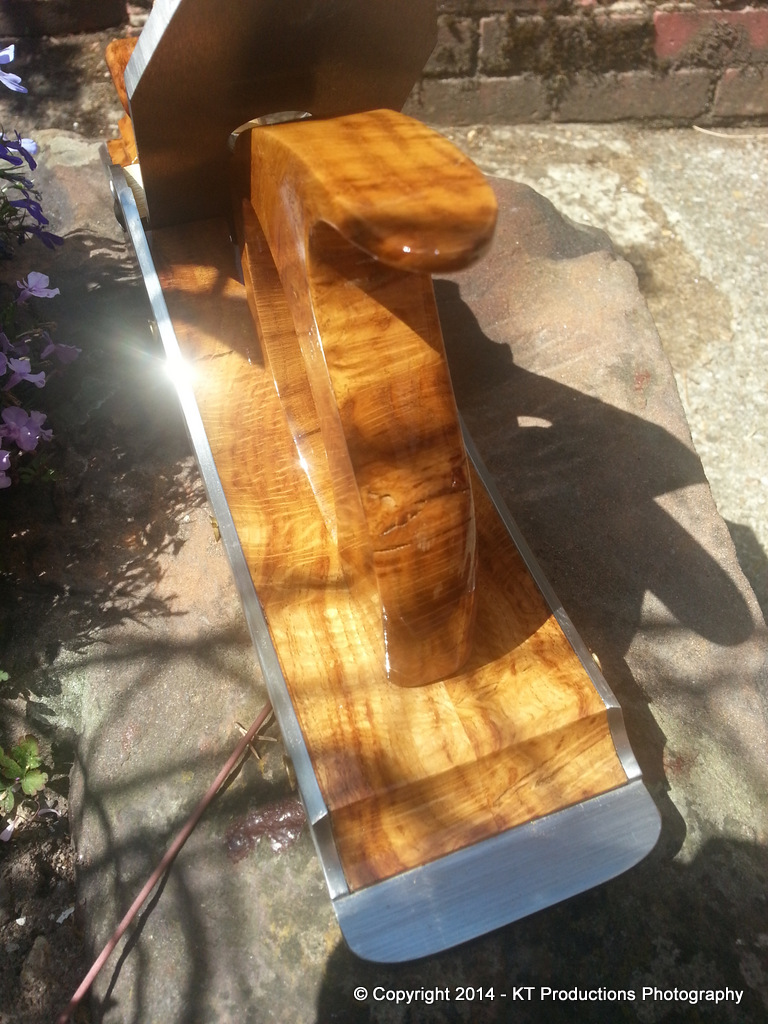
Incidentally...before I go on...those wood screws sticking out the sides ain't gonna stay like that you know! In case anyone is not aware...they are there to hold in the infills while I work on them...at the end..they become French and very aristocratic...their heads come off!!!

So...what to do when putting yet MORE pictures up of the Tru-Oil process would be about as exciting as watching...um...paint dry...finish dry...well you know..boring!! :)

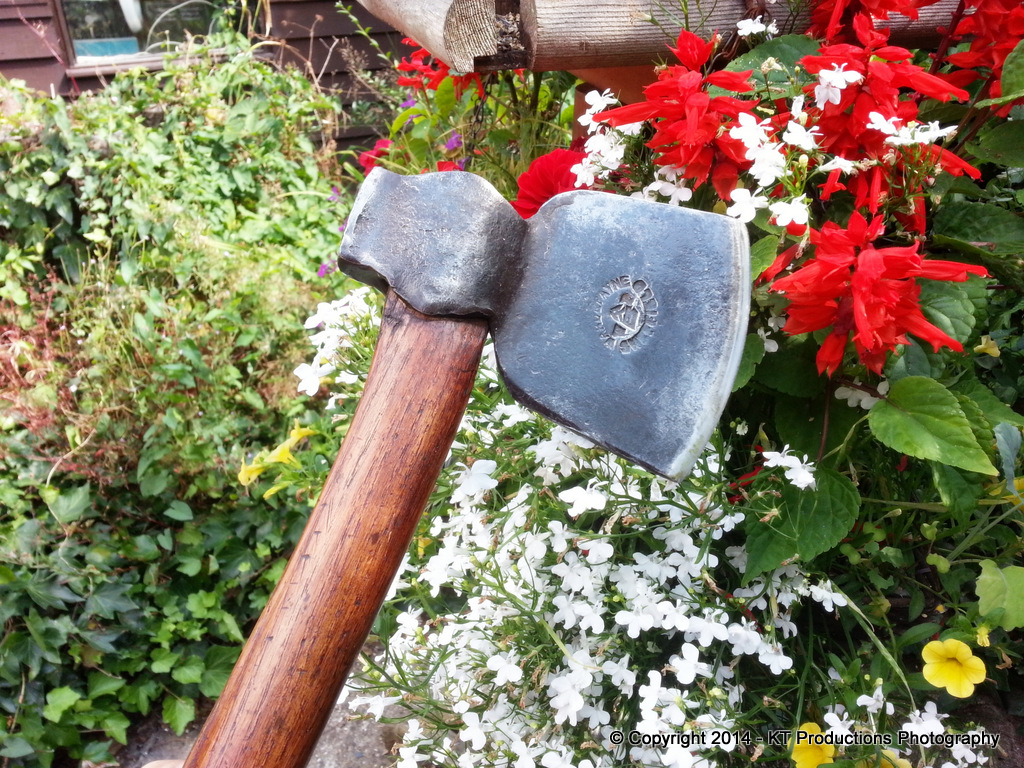
Instead...I went a-whittling today...first with this baby...

20140801_144409.jpg


...to cut down a rather straight piece of holly...which is in the way...and will become a future project.

I love working with this axe...an old WARD and PAYNE favourite of mine...(actually anything with the word WARD stamped on it is a favourite of mine).

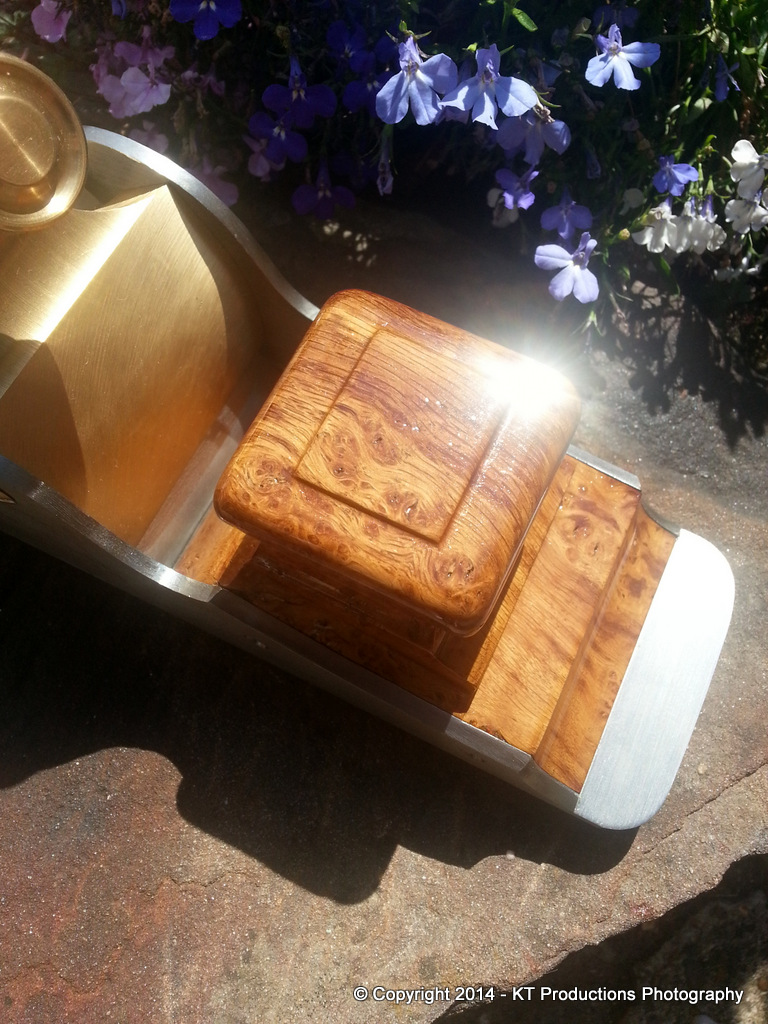
But that was only a five minute job and ALFIE and I retired to the workshop to decide what to do with a lump of the infill burr oak which was left.

Scratching my head for a little while I espied a nice piece of square section brass I had found in a junk box a few weeks ago at the local bootfair...and the two just cried out to be mated together.

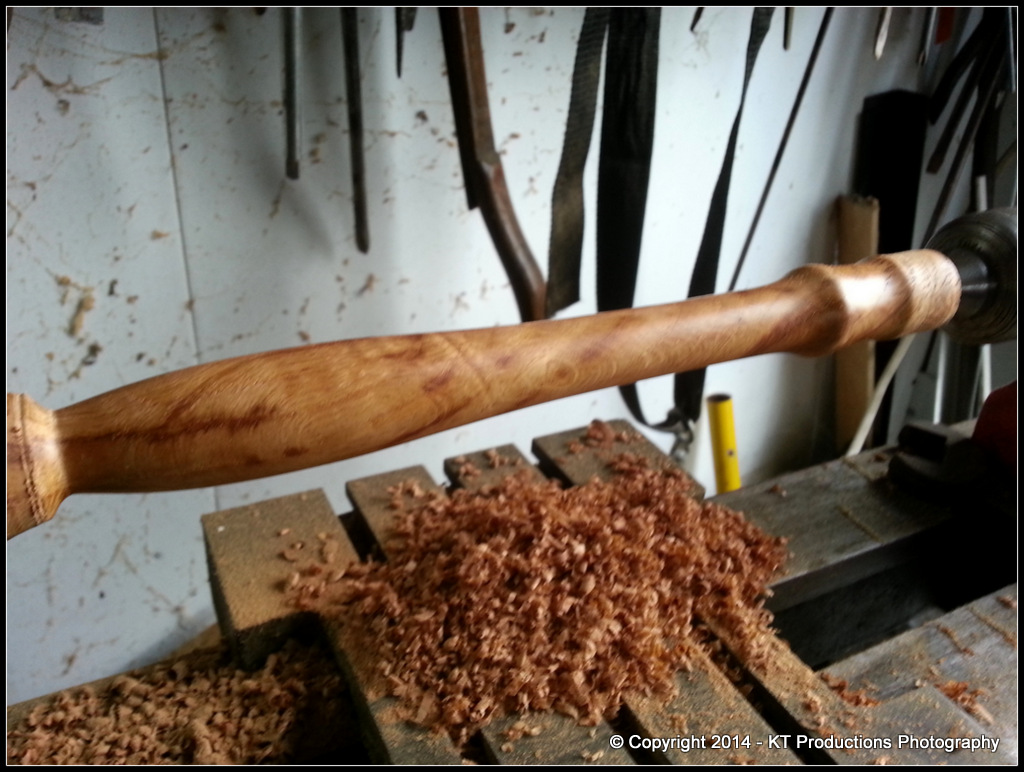
So I fired up TAYLOR...

20140731_184336-001.jpg


TAYLOR is over a hundred years old...he thinks he's a metal lathe but sadly...time and wear has taken its toll on this masterpiece from Hulme...and he now serves as my (rather non-H&S) woodturning lathe.

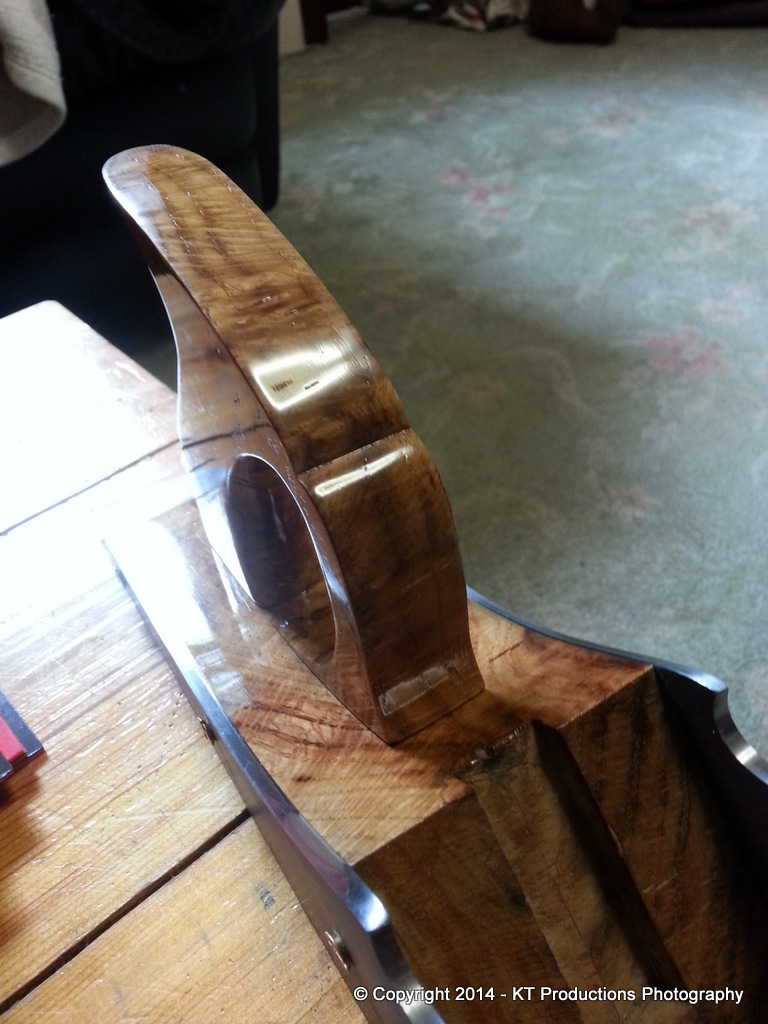
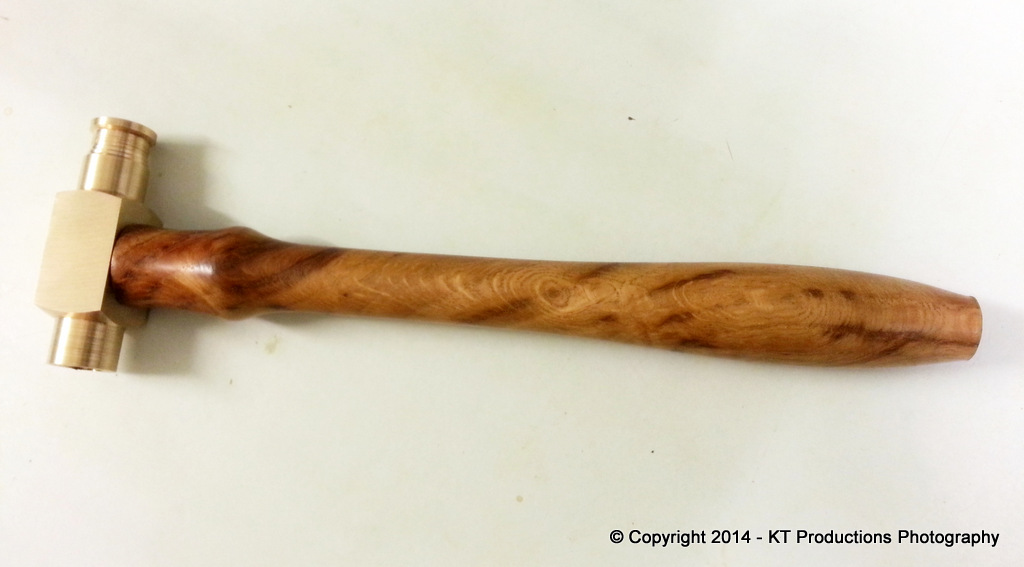
So a bit of turning on that...and a bit of turning on the SIEG C6B....and the two lonely scrap parts were starting to become friends...

20140801_193708.jpg


Further whittling and scrubbing and they were distinctly good friends....

20140801_223025.jpg


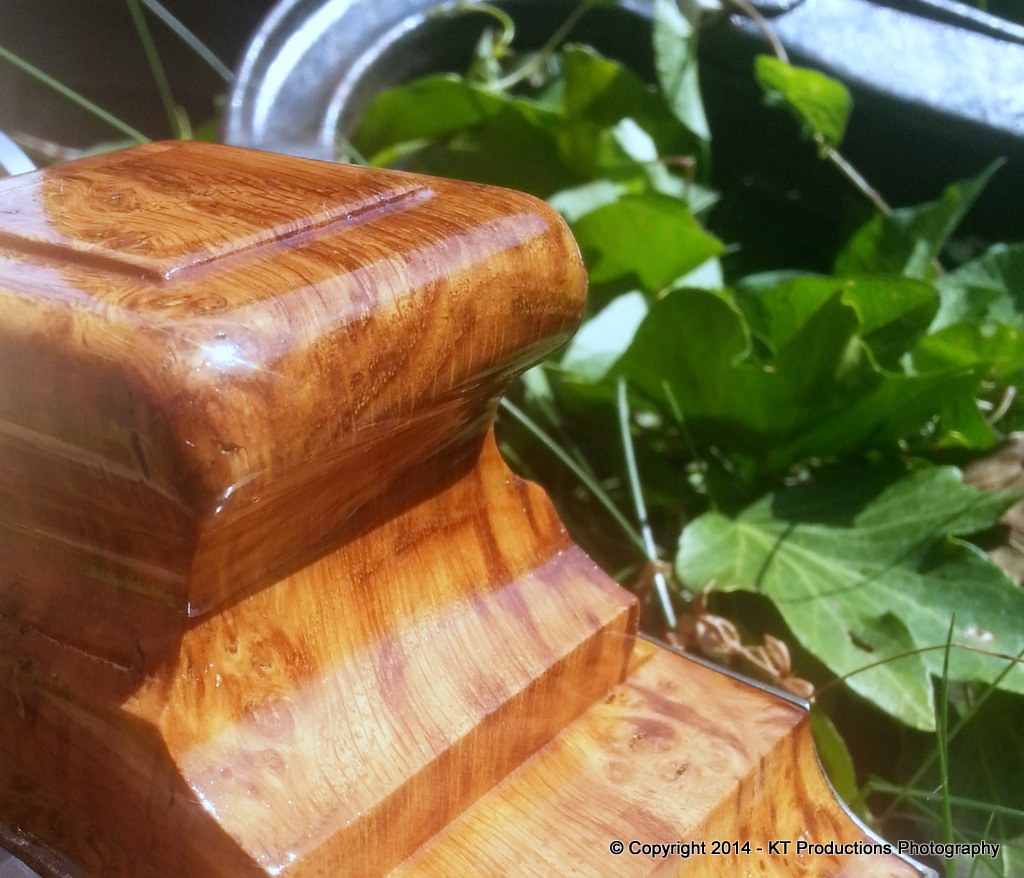
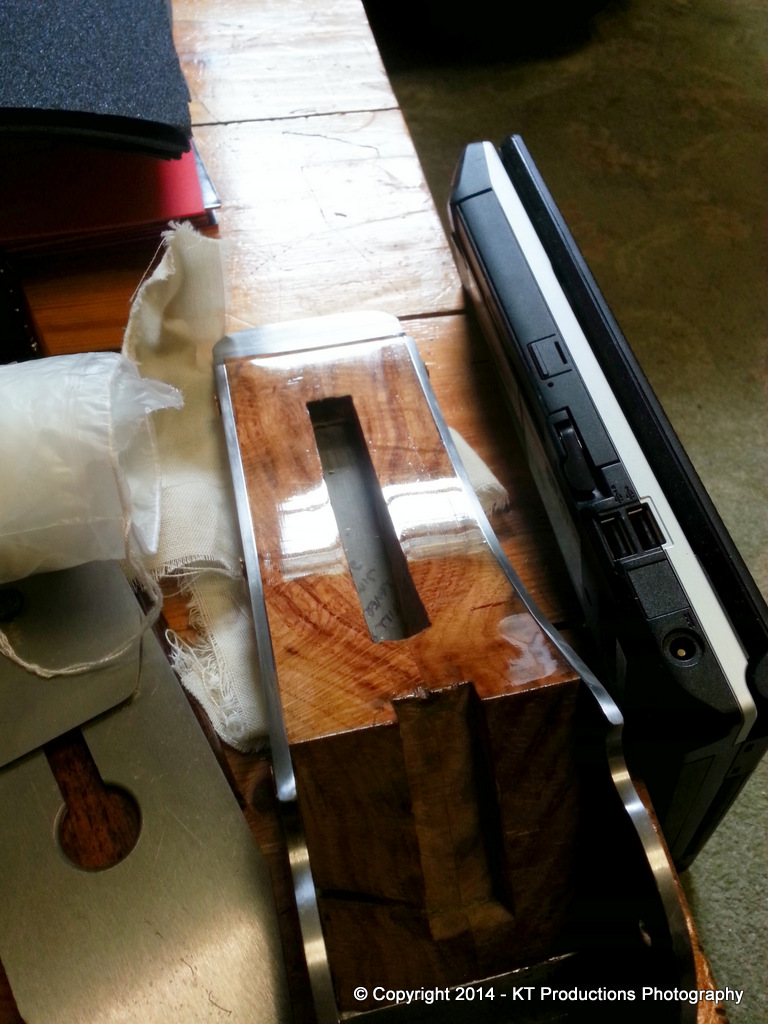
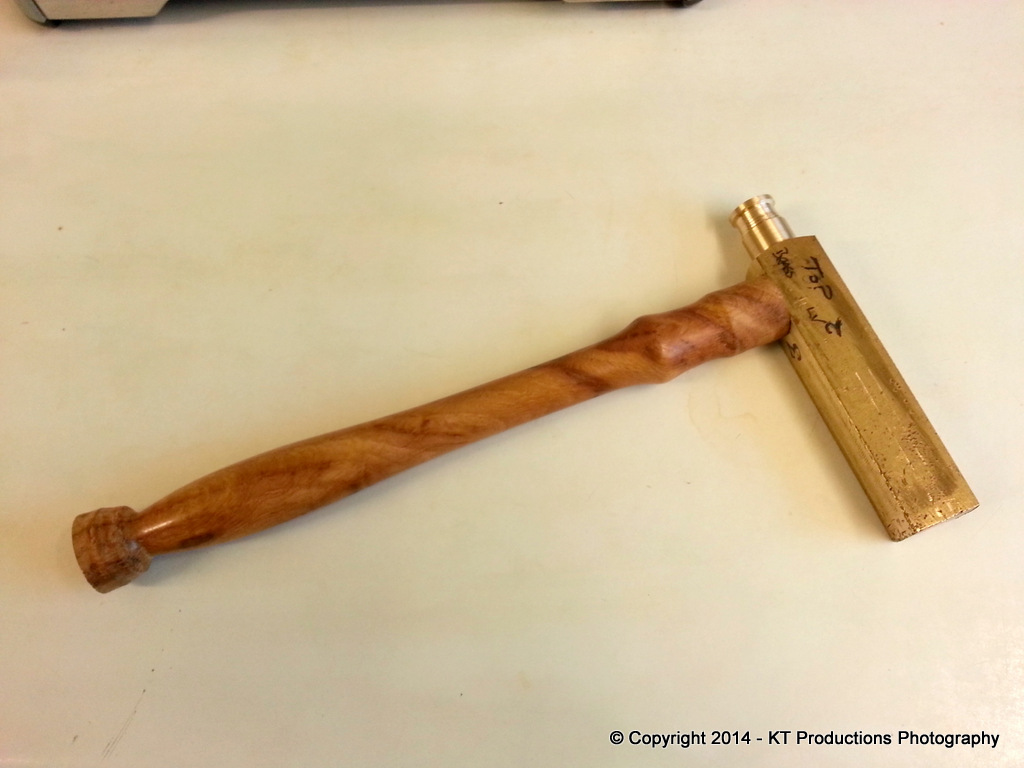
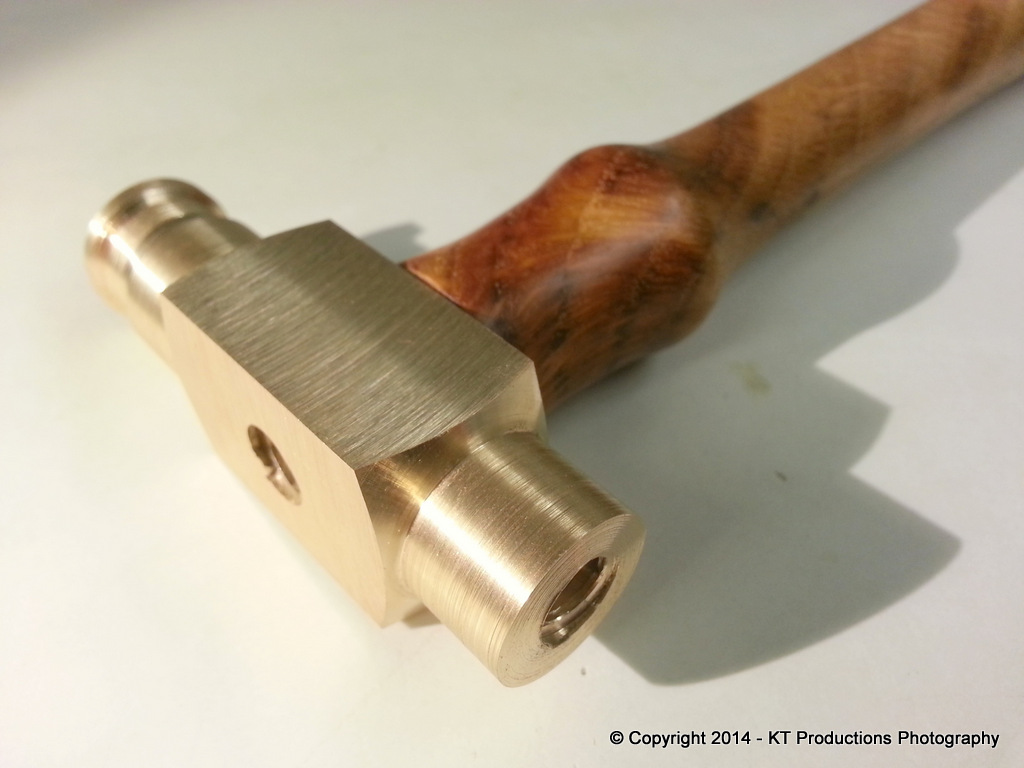
Now some may notice a slight imbalance between sides...which becomes fairly explanatory when you look from the side...

20140801_222943.jpg


The thread (ACME YEH!)...in the end is a clue...and the letters on the earlier stage on the "TOP" marked with arrows....------>BRASS on one side and ----->LV on the other side may be a clue.

YUP...the naked side will have a replaceable lignum vitae insert screwed into it for the more delicate tapping!!

20140801_222920.jpg


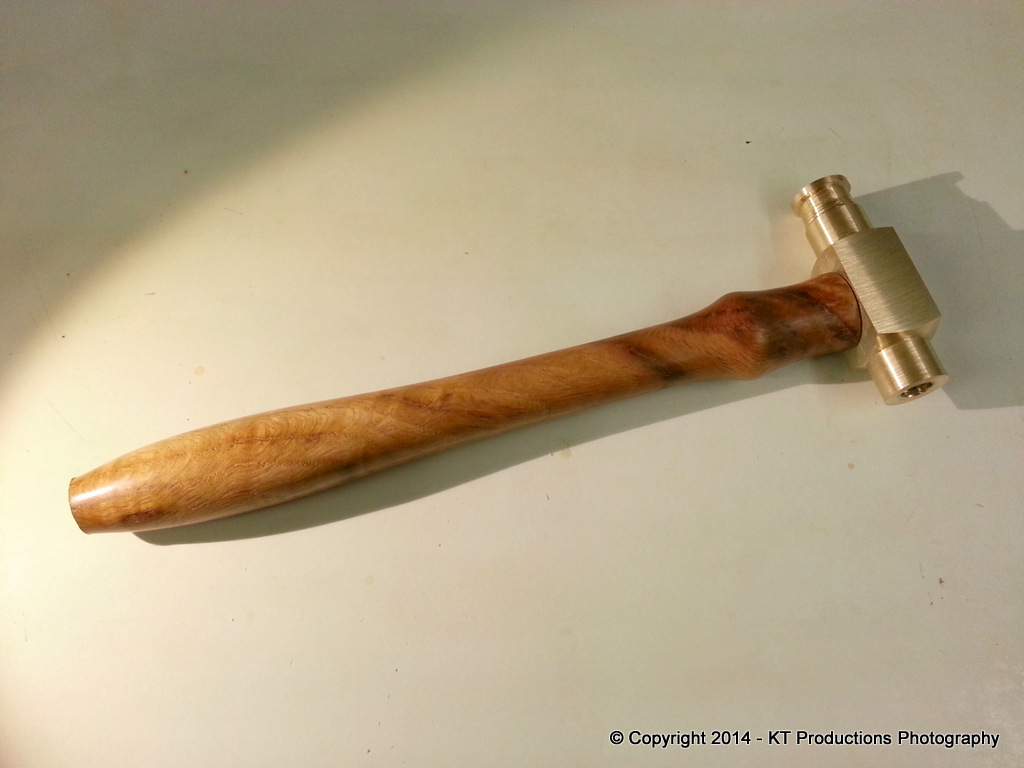
There will be more on these little plane hammers as the project progresses...suffice to say that I have enough scrap for about four of these.... :wink:

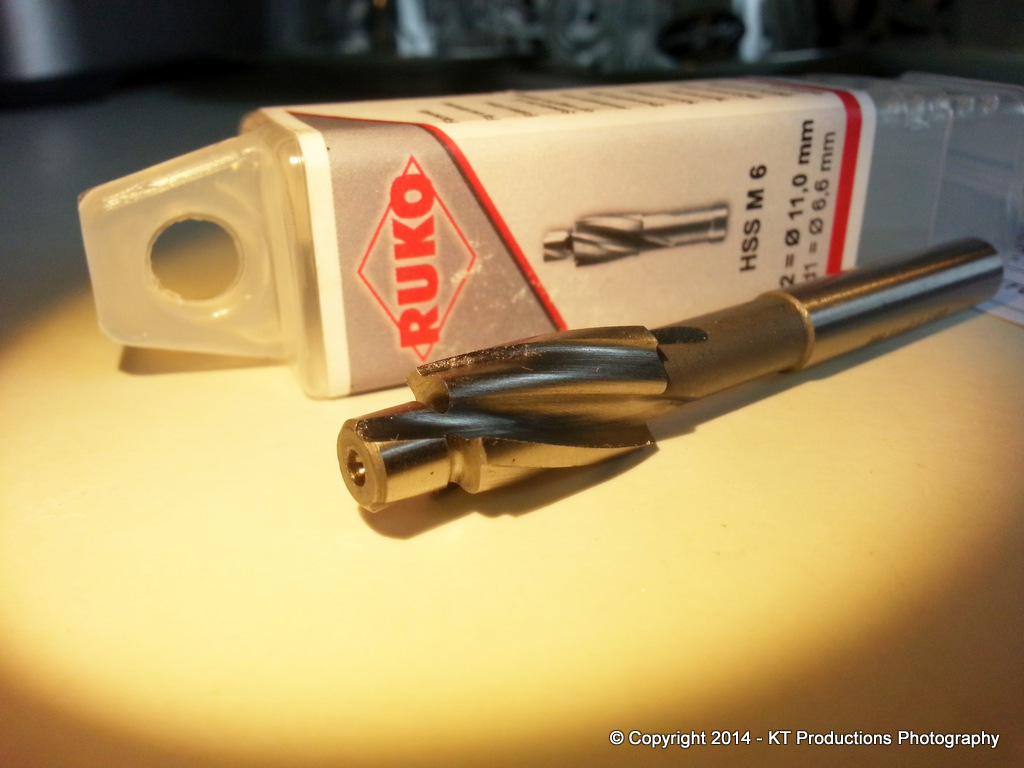
Oh...and the counterbore arrived and what a lovely piece of German engineering it is...

20140801_125907.jpg


Well...at least it SAYS "Germany" on the tin.....it may very well come from China but it's a nice bit of steel. And the good news is...if I choose to counterbore..the holes are a TINY bit small so the pilot will cut its own way and stop judder when the big boy hits! Result!

Cheers

Jimi
 
Back
Top