The UKW Infill Project

UKworkshop.co.uk

Help Support UKworkshop.co.uk:

This site may earn a commission from merchant affiliate links, including eBay, Amazon, and others.
Noggsy":17bta0pk said:
Looking good Jimi and I like the way the stamp looks. It somehow ages the handle to my eyes.

If it isn't too personal a question, what does the 'KT' stand for?

My sister died prematurely aged 34.....and my nickname for her was Katie...

When I left the safe world of monthly pay and started a business on my own...I needed a company name and it just came to me....

She's keeping an eye on me....make sure I don't get into too much trouble! :mrgreen:

Cheers

Jimi
 
Jimi, what a great answer, although I am sorry for your loss. Keep up the great work mate.
 
jimi43":23gwf9fu said:
20140804_233629.jpg

Gorgeous.
 
Hi Noggsy...no problem mate...she's looking after me!

Thanks n0legs...appreciated.

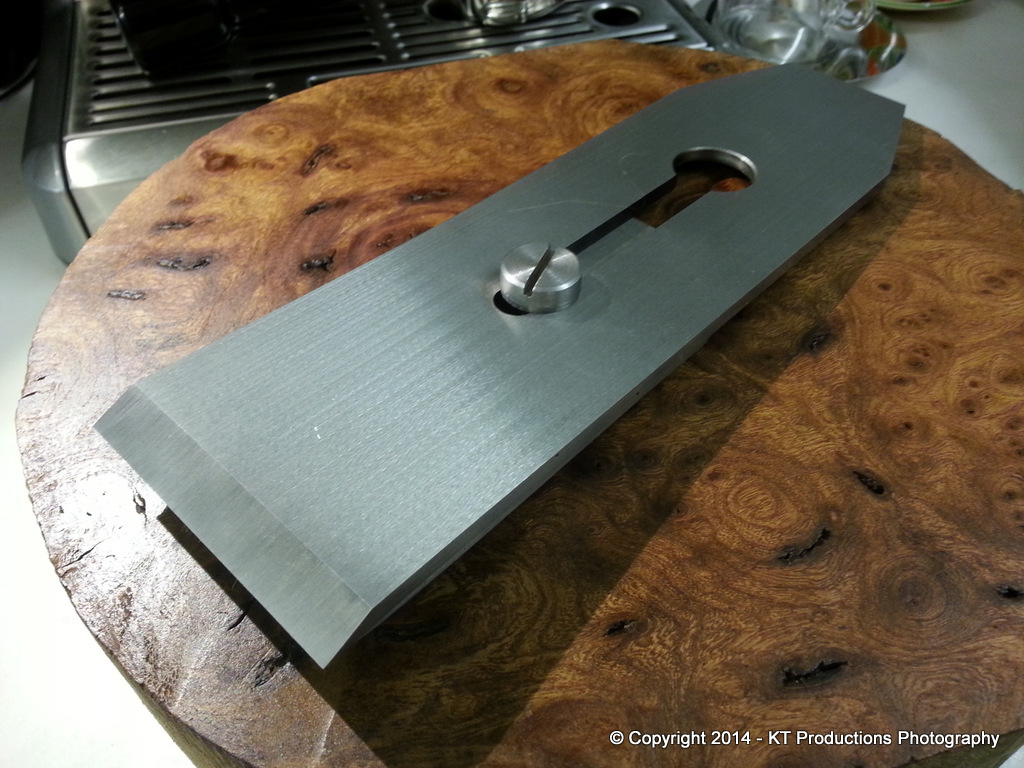
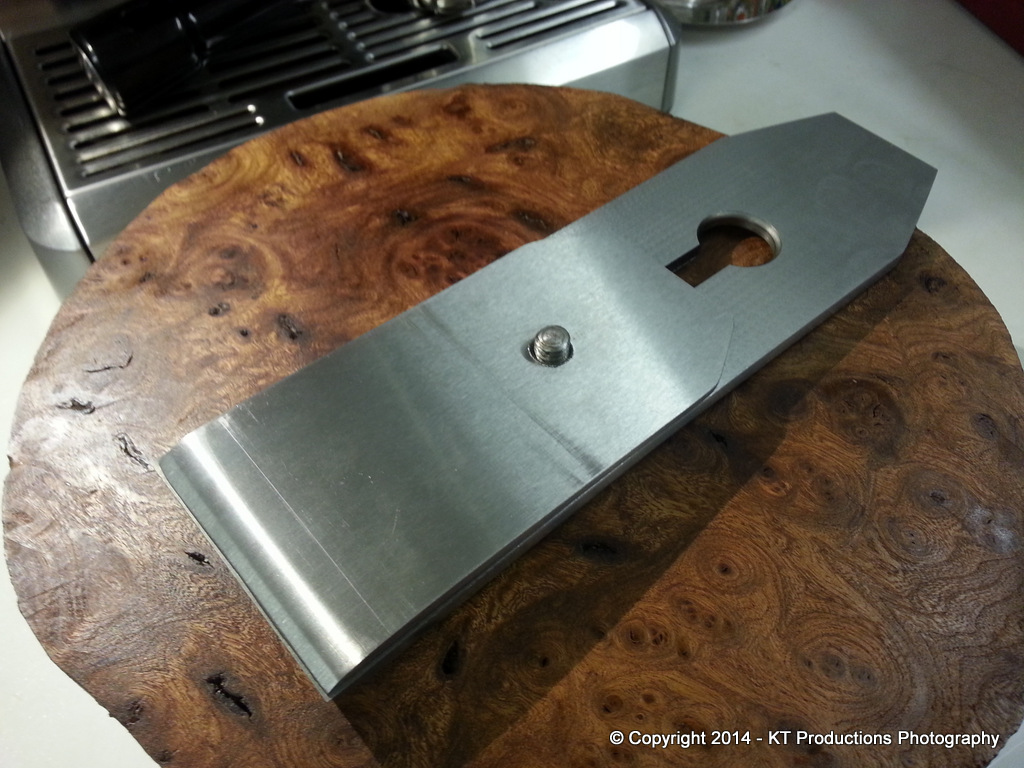
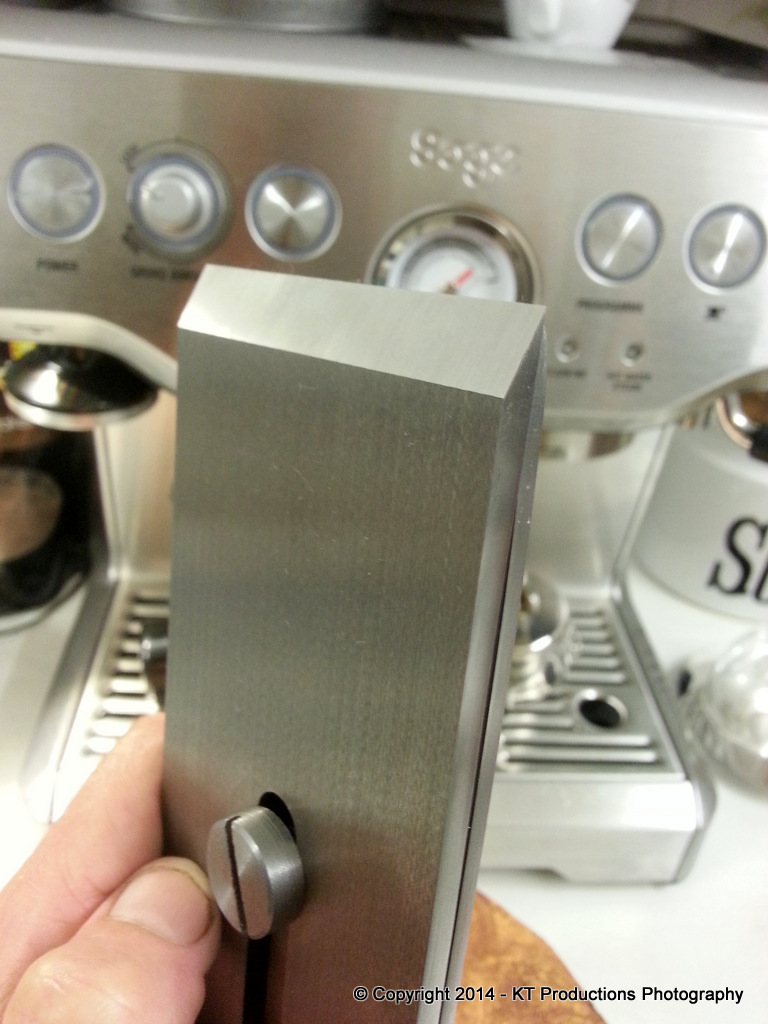
A little parcel arrived from Dorset this lunchtime....a little but heavy one containing the thicker of the two irons which went of to Philly for some hardening and a bit of grinding on his new machine.

WOW...is about all I can say really...WOW!

20140814_234201.jpg


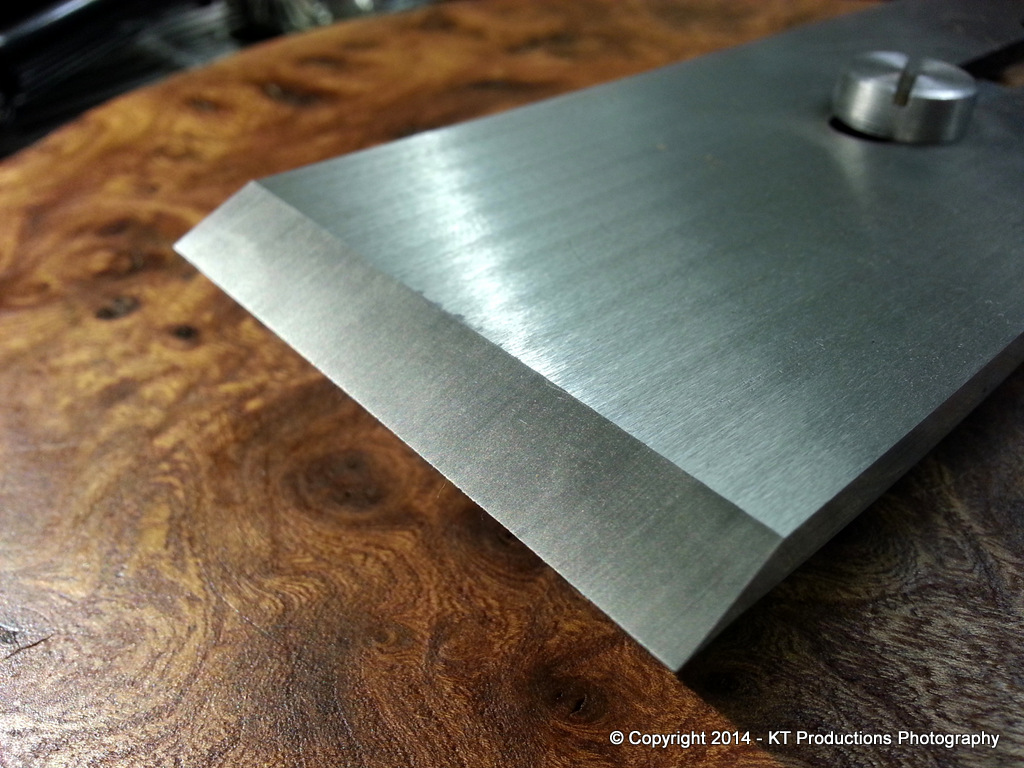
I'm not sure the exact RC...I'm sure Phil may chip in here...but it's HARD...up to the correct position and then perfectly ground with a very pleasing pattern.

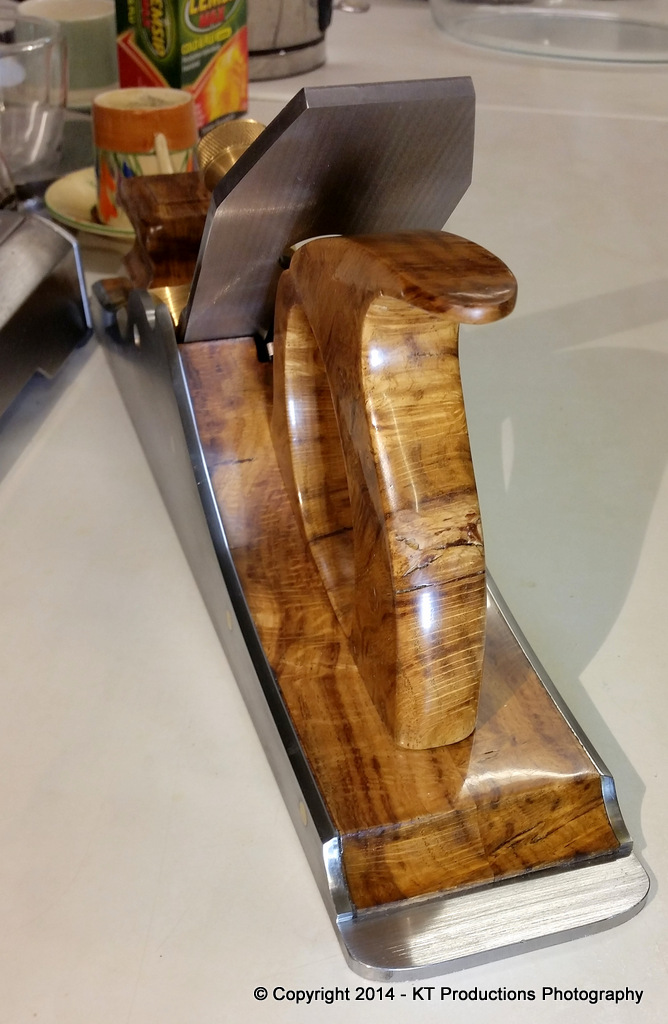
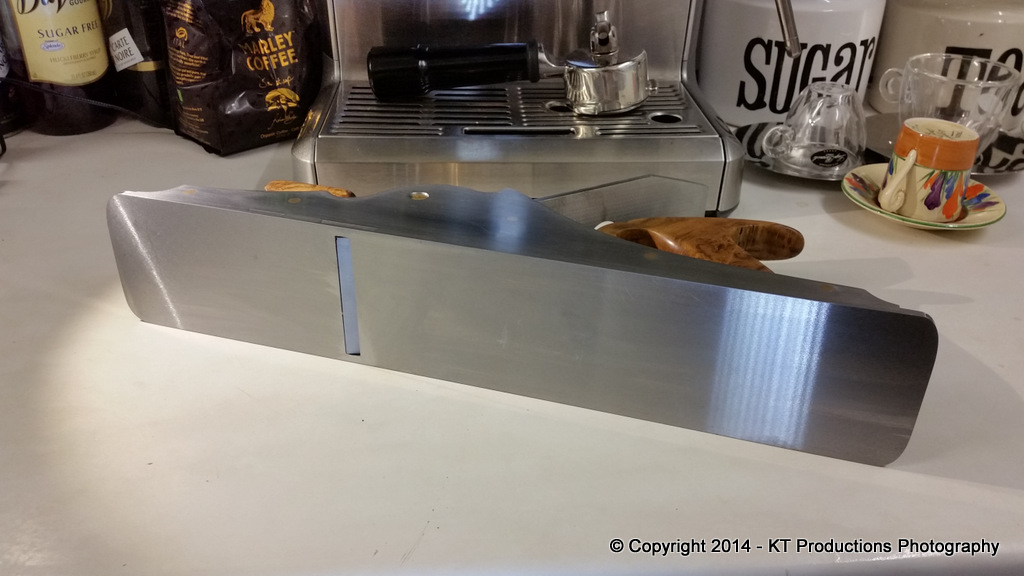
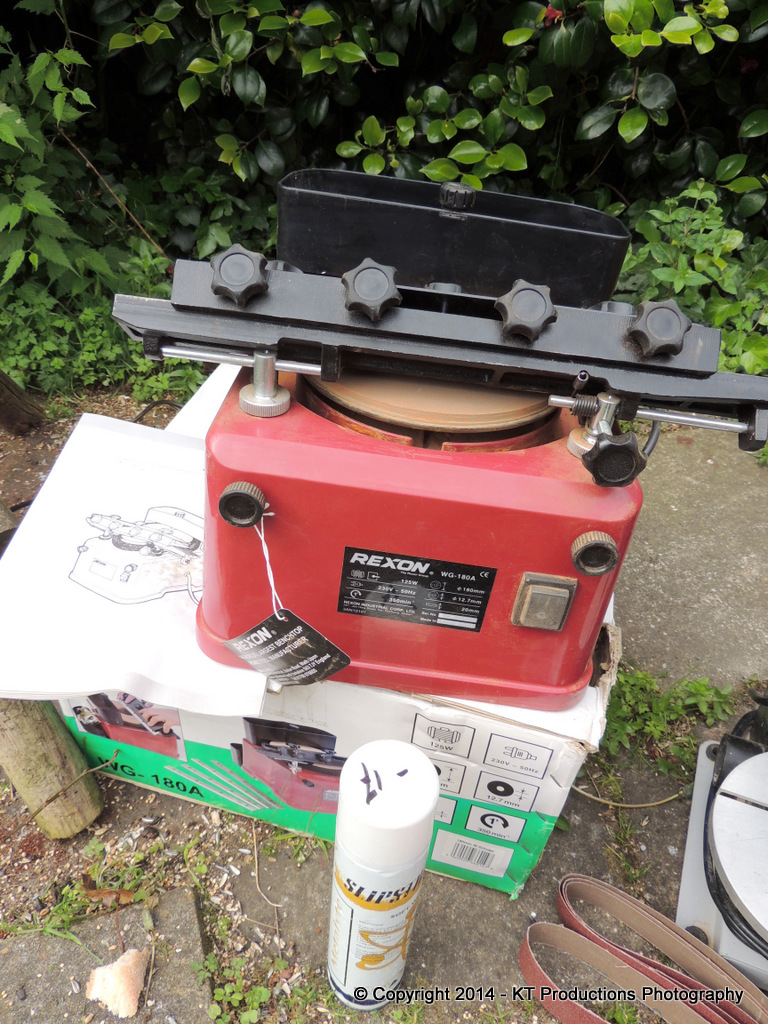
The only two things I had to do was finish cleaning up the sides and put my own bevel on the tip....which I did as a flat bevel on the REXON watercooled thingy I got at a bootfair recently for a tenner.

2014-05-17%2009.38.58.jpg


This is a REALLY fine machine....so I really don't see how it got such a bad press...it was quick...clean(ish) and accurate...

20140814_234512.jpg


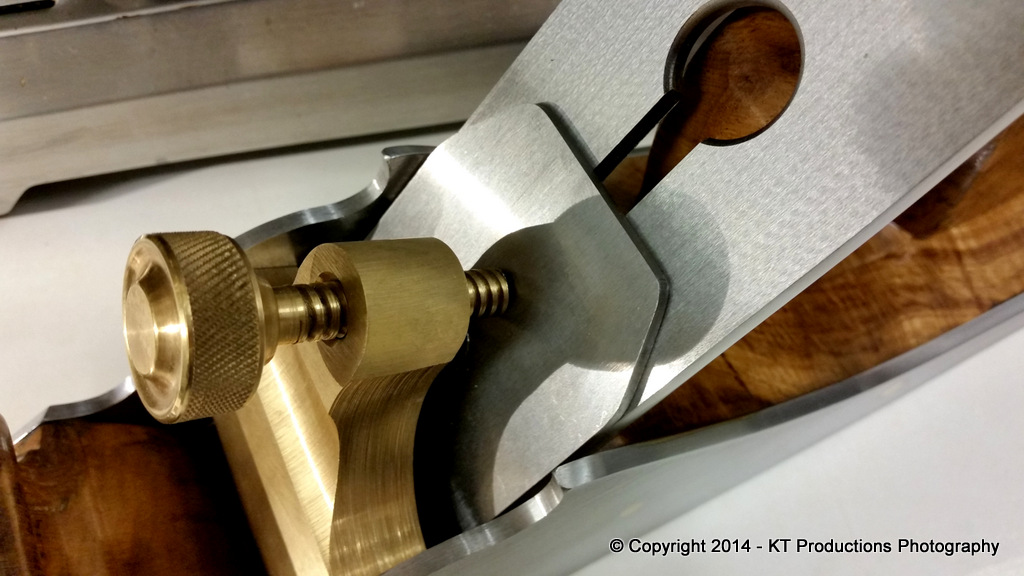
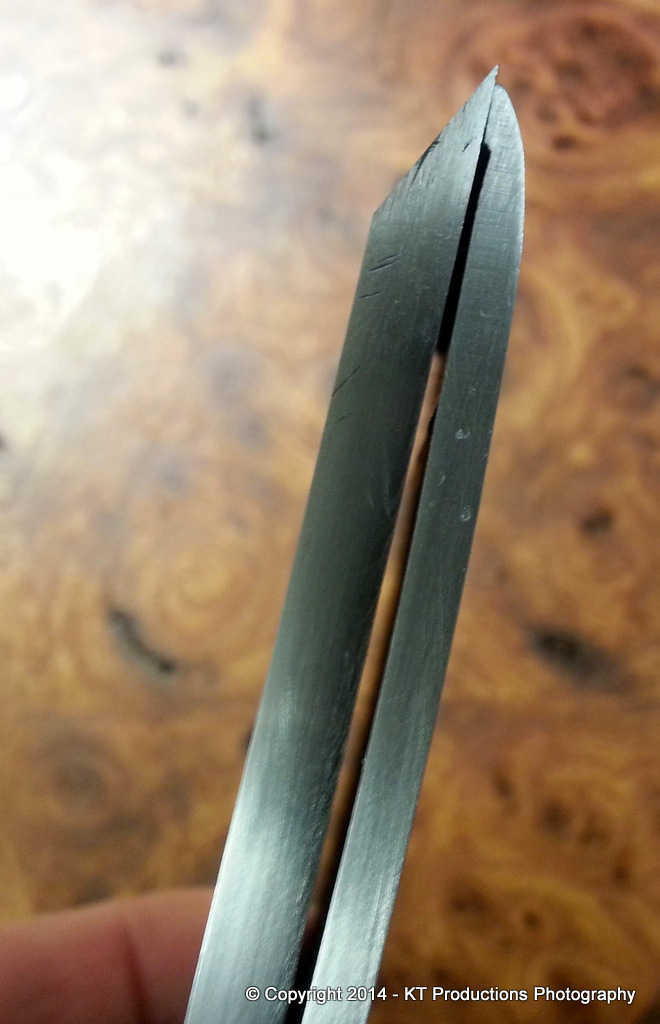
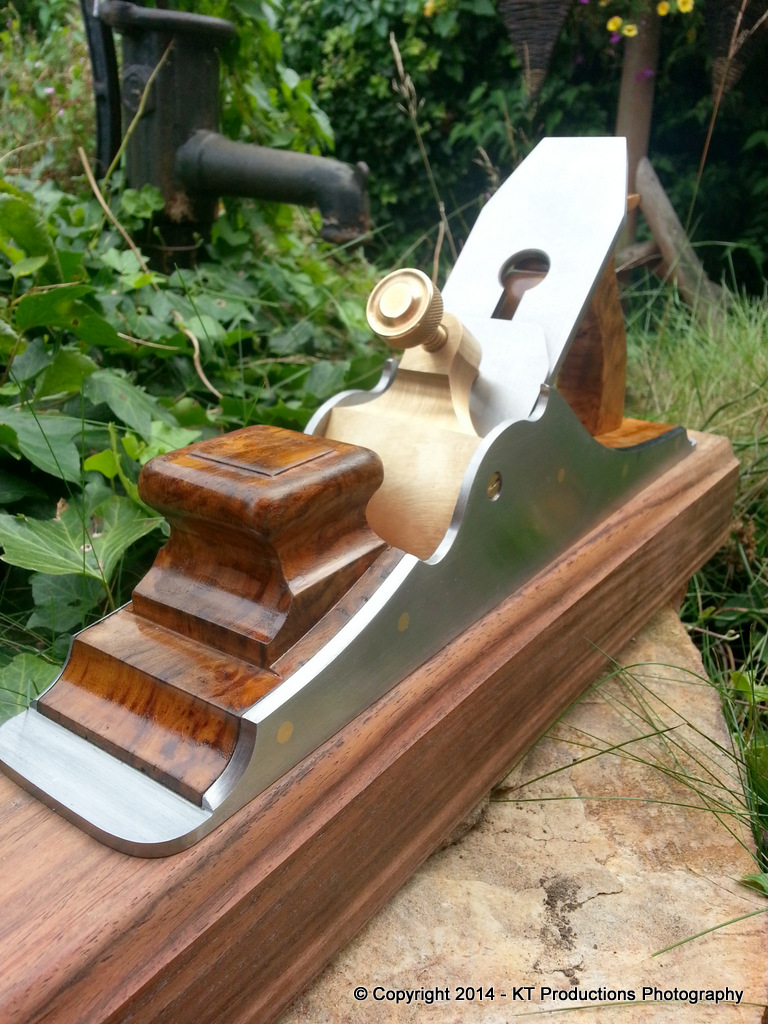
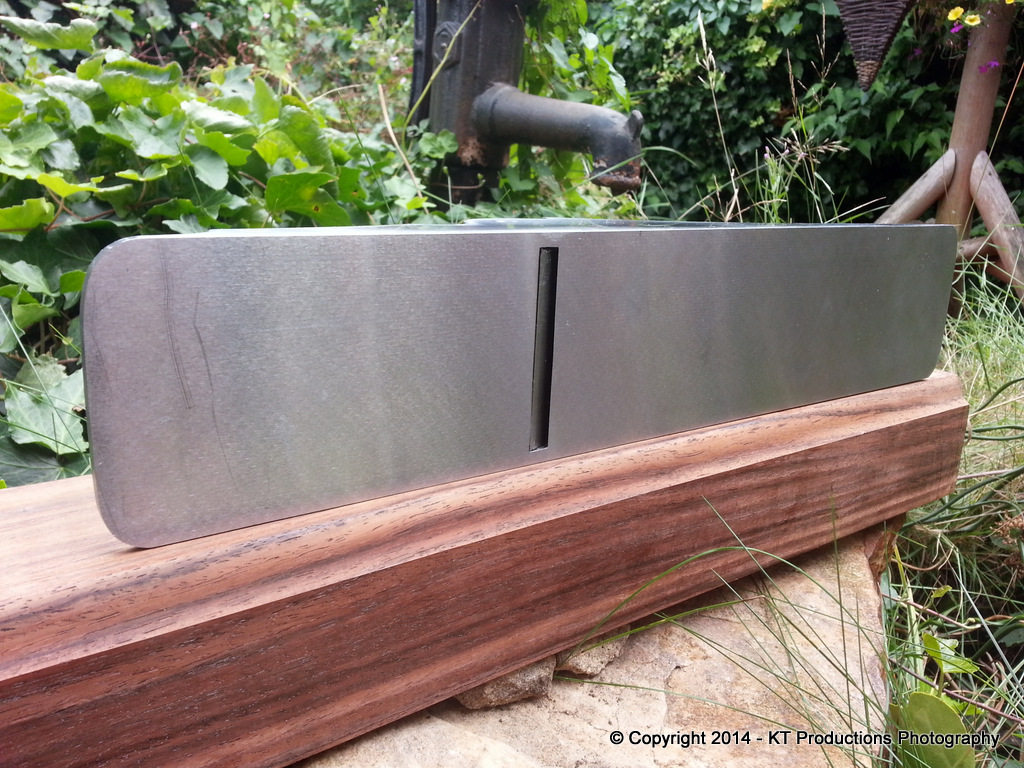
I then refined the leading edge and curve of the cap iron...

20140814_234543.jpg


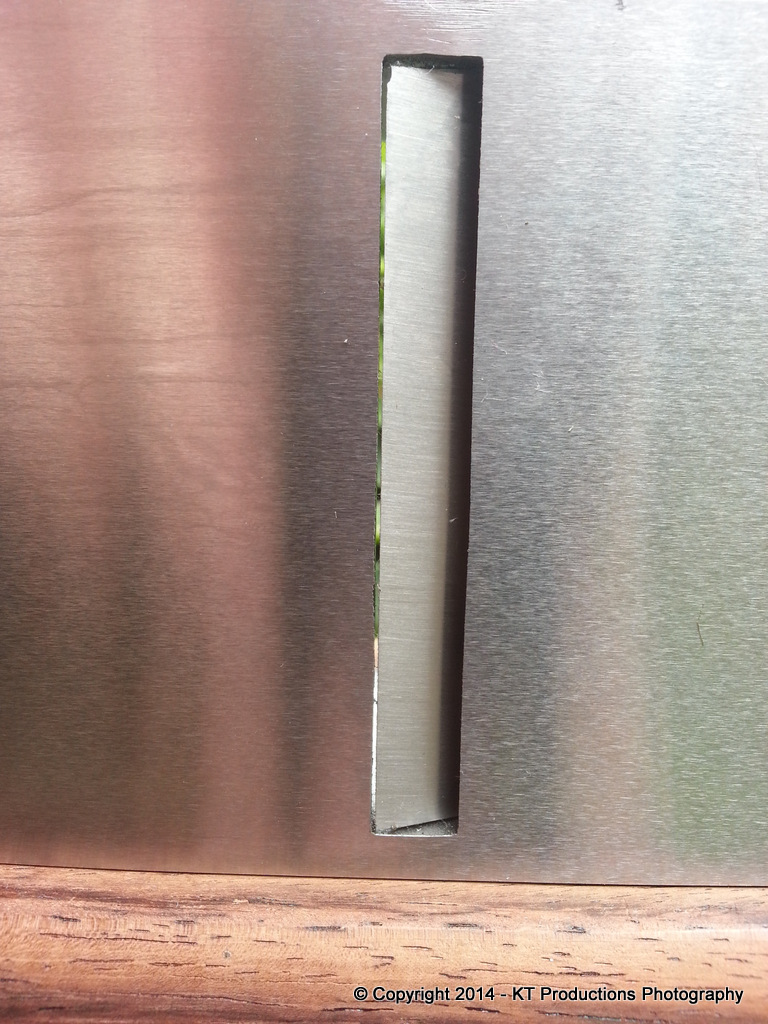
....which locks down ALMOST flat as planned...

20140814_234621.jpg


I will test this in situ when the plane comes back...hopefully fairly soon...and then we can put the whole plane through some rigorous testing which I am really looking forward to.

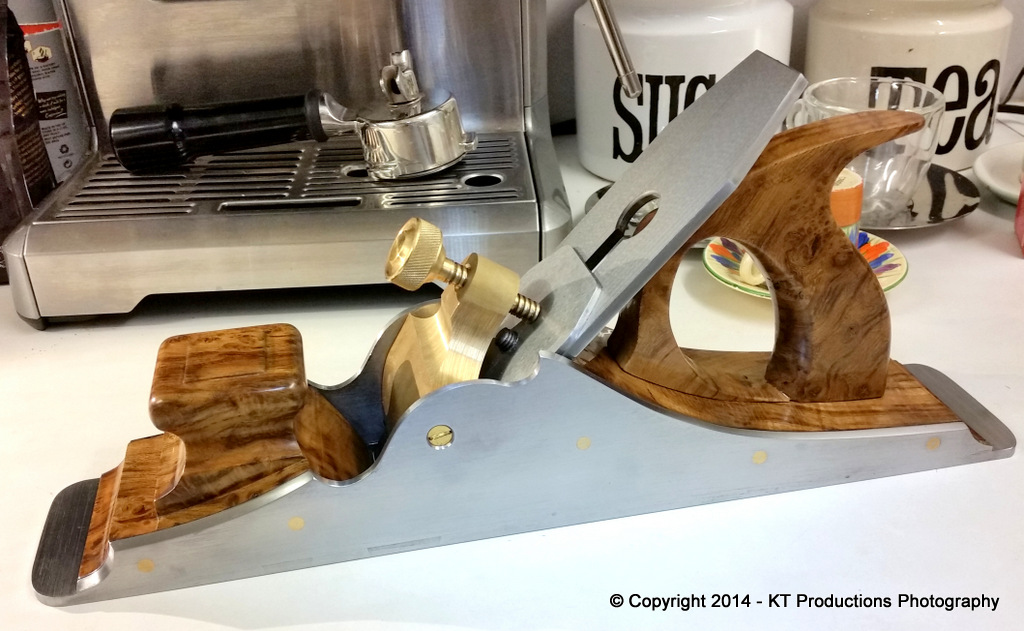
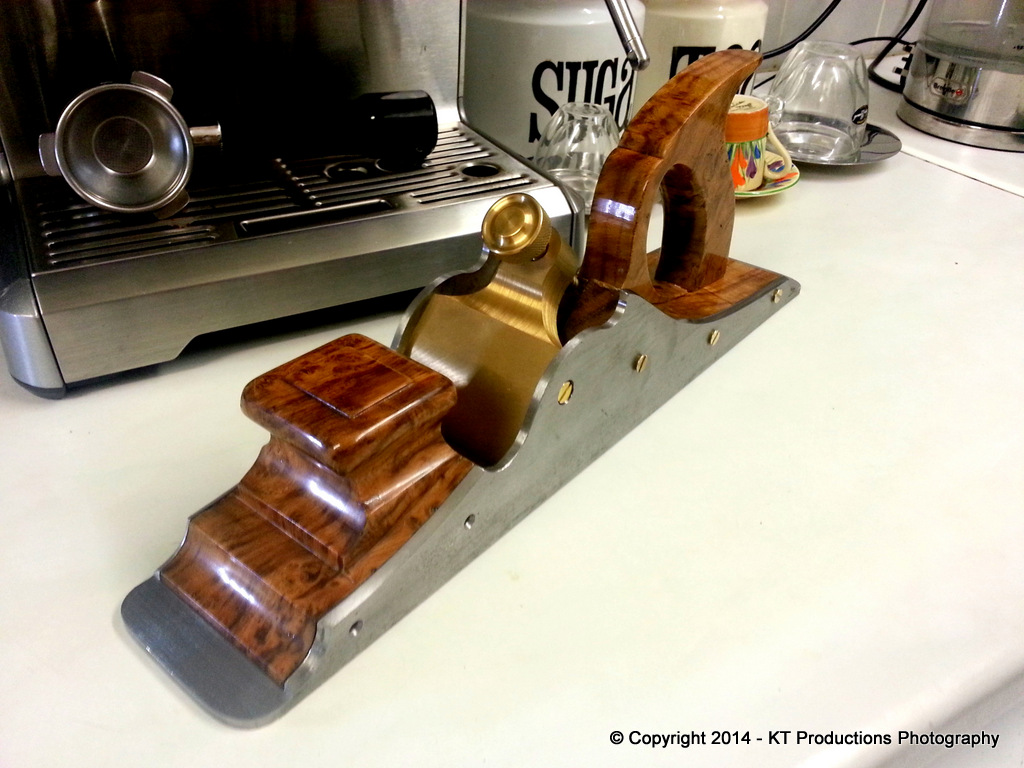
So that's another stage finished...and what a beautiful addition to this project....

20140814_234708.jpg


I'm absolutely chuffed to bits with this iron...and once again huge thanks to Phil Edwards for his kindness in doing the bits I haven't the gear to do professionally.

Jimi
 
Serious bit of metal there amigo , a hats off to phill . Looking forward to seeing plane and thick iron united in wood peeling harmony amigo.My guess is that the "tiger" will be a fine tribute to all her parents.
 
Thank you gentlemen...much appreciated.

It's been a while since I last posted and those of you keeping track will remember that I had left the plane with a local engineering company for surface grinding.

Well...he's back!!!


20140821_154800.jpg


Now I did ask that they took the grinding carefully and avoided water...for obvious reasons but owing to a slight cock-up in instructions between engineers...and one of the guys going off on site for a while...an oil/water coolant was used and this has affected the Tru-Oil on the front bun.

Not a major problem...I just spent tonight stripping it ALL back to bare wood again and even laid down the base coats tonight...but I'm disappointed as I didn't really want to go through all the finishing yet again. But it's a bit of a Catch-22 really.

In hindsight (for which I have 20/20 vision! :mrgreen: )....I would have had the sole surface ground before inserting the infills then when the sides were done...fit the infills and linish the sides. But there ya go...ho hum...

The good news....the sole is SUPERB!

20140821_154956.jpg


...and the guy who did it was their top man...apparently it's flat to within microns across the entire sole!! :shock:

The iron set hardened by Philly was inserted and check out this mouth...

20140821_155017.jpg


So it might take me another few weeks to get the finish of the infills sorted out AGAIN...but I am sure this is going to be a glorious user!!

We shall see! :wink:

More later as I redo the finish...but I promise...I won't be doing each stage this time...I will post the final pictures up when it's ready.

Jimi
 
wow, that looks stunning Jim.
Pity about the finish being spoiled, but if anyone can fix it, you can.
Is there a chip off the iron, or is it a trick of the light?

Can't wait til we next meet to see this beauty again.

Adam.
 
rileytoolworks":2wmmuhrp said:
wow, that looks stunning Jim.
Pity about the finish being spoiled, but if anyone can fix it, you can.
Is there a chip off the iron, or is it a trick of the light?

Can't wait til we next meet to see this beauty again.

Adam.

Hi Adam...

Good eyesight!!

I was standing in front of it and I didn't even see it.

It's really quite tiny...I must have done it when I was fitting the iron after getting it back because it wasn't there when I ground it (obviously!)....so I will just regrind that out...there's plenty left. :wink:

I need to be a bit more careful next time! (homer)

Having stripped the entire finish back to bare wood...on the bun only....I have so far managed four coats and the finish is coming back much quicker than the frist time around because the old finish is now acting as a sanding sealer.

20140822_173000.jpg


Both of the infills have darkened considerably over the last few weeks as oak generally does...and I really prefer the darker look...but it's difficult to tell until I've done a few cut-back and lay down sessions...

I know...I know..I promised not to report on all that again...

I will be back when it's done...

AND..there's now chip on the iron.

I was hoping to test him out this weekend...that will now have to wait a bit longer!

Cheers...

Jimi
 
rileytoolworks":3cccgv3m said:
phil.p":3cccgv3m said:
Yes - if you look carefully through the whole of the mouth opening, you can see the background.

Yep, I get that Phil, but look closely at the top corner of the iron. It looks like a chip.

Sorry, I stand corrected on that one. :oops: My eyes are definitely getting worse.
 
phil.p":2rqv9e28 said:
rileytoolworks":2rqv9e28 said:
phil.p":2rqv9e28 said:
Yes - if you look carefully through the whole of the mouth opening, you can see the background.

Yep, I get that Phil, but look closely at the top corner of the iron. It looks like a chip.

Sorry, I stand corrected on that one. :oops: My eyes are definitely getting worse.

Phil mate...trust me...I sure wish you'd won this little debate!! :mrgreen:

Not a major issue...I will probably round the corners off a touch anyway.


Jim
 
Sorry Jim. I wish it wasn't a chip.
I feel almost responsible now. :cry:

It is truly a stunning tour de force mate, and I know Richard would have loved what you've done with it.
Thank you for sharing the journey.

Adam.
 
Having seen this plane in real life today and meeting Jimi and can honestly say the pics (decent photos I may add) don't do it justic, the plane is 1000x better looking in the steel.
Look forwards to a better look again tomorrow.
Well done jim, stunning work.

Thanks
TT
 
Thank you guys and thank you for your tremendous support throughout this project..it has been fun.

Tomorrow I shall finish the "finish" so to speak and try to complete the whole thing within the week. Sadly..doing that Toby, means that we can't get to test it out together on some wood and make some shavings but I've no doubt there will be other opportunities again.

I'll take some more shots tomorrow during the daylight hours if the rain holds of.

Cheers again

Jimi (AND ALFIE!)
 
Well...there does come a time when you have to say "enough!!" and that time is tonight.

It being dark...I was only able to do "kitchen" shots...maybe I will do some in daylight during this heat wave we are supposed to be getting...

After the soul-destroying damage to the finish following sole grinding...I really did not feel like starting all over again...but after all this time...I couldn't just leave it and so over the last week or so, I stripped the finish on the bun back to base and relaid coat after coat of Tru-Oil.

As the rear infill was not too badly damaged...all I did was take the gloss down to clear finish and then did that a few times too. The handle (which stayed with me all the time) was not affected.

As I mentioned...Tru-Oil yellows to a beautiful golden colour over time and so at the moment there is a slight disparity in hue between front and rear but this should not be there for long... a few weeks and they will balance out. In actual fact...they did me a favour screwing up the bun finish as the remainder acted as a great base and so the top coats were far easier to refine.

So rather than bleat on and on about how the repair was done...I will just leave you with the final shots for now...testing shots maybe over the weekend...

Thanks to everyone who has helped me finish the plane that Richard started so beautifully...the support and particularly Philly and Pete who did bits I could not do.

There are some really nice people on this forum and your constant encouragement and ideas have are in every piece of this plane...every piece!

20140829_215226.jpg


20140829_215254.jpg


20140829_215047.jpg


20140829_215605.jpg


20140829_215437.jpg


20140829_221051.jpg


20140829_220715.jpg


20140829_224133.jpg


It's been such a long but enjoyable journey...I do hope I have done justice to Richard's memory...

A tough act to follow that's for sure!

Jim
 
Back
Top