The UKW Infill Project

UKworkshop.co.uk

Help Support UKworkshop.co.uk:

This site may earn a commission from merchant affiliate links, including eBay, Amazon, and others.
Hijack away Toby...that's partly what this thread is for...learning and development.

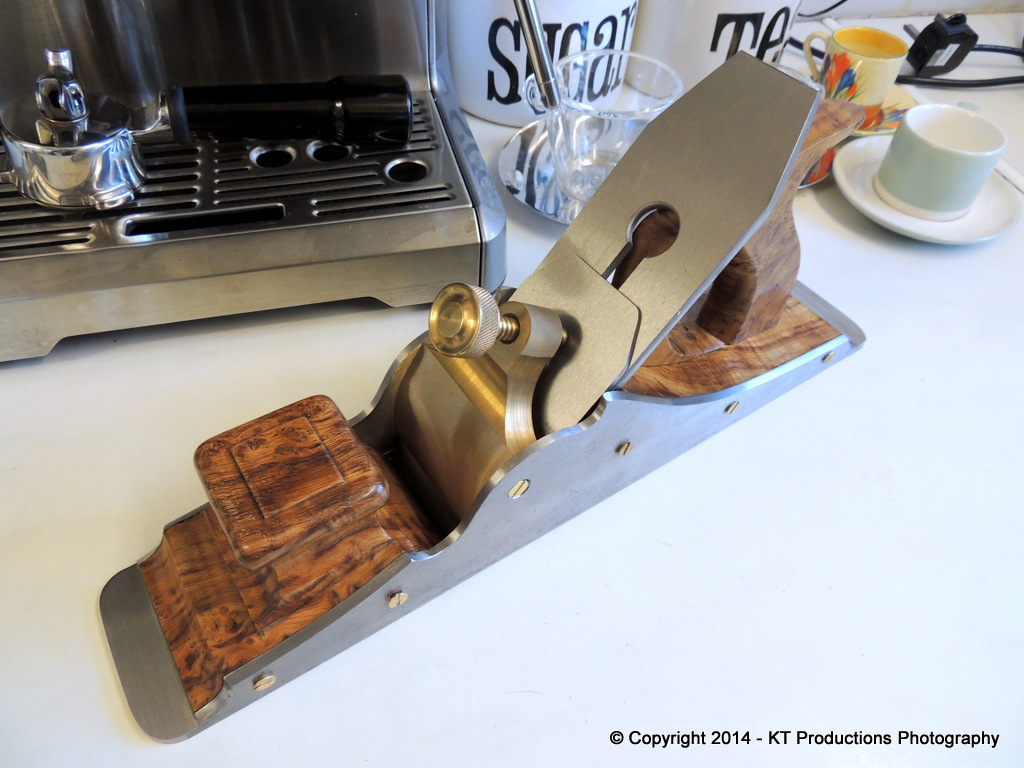
And on that very subject..we moved today to the making of the cap iron.

I say "we" because....yet again...I had help!

DSCN5264.jpg


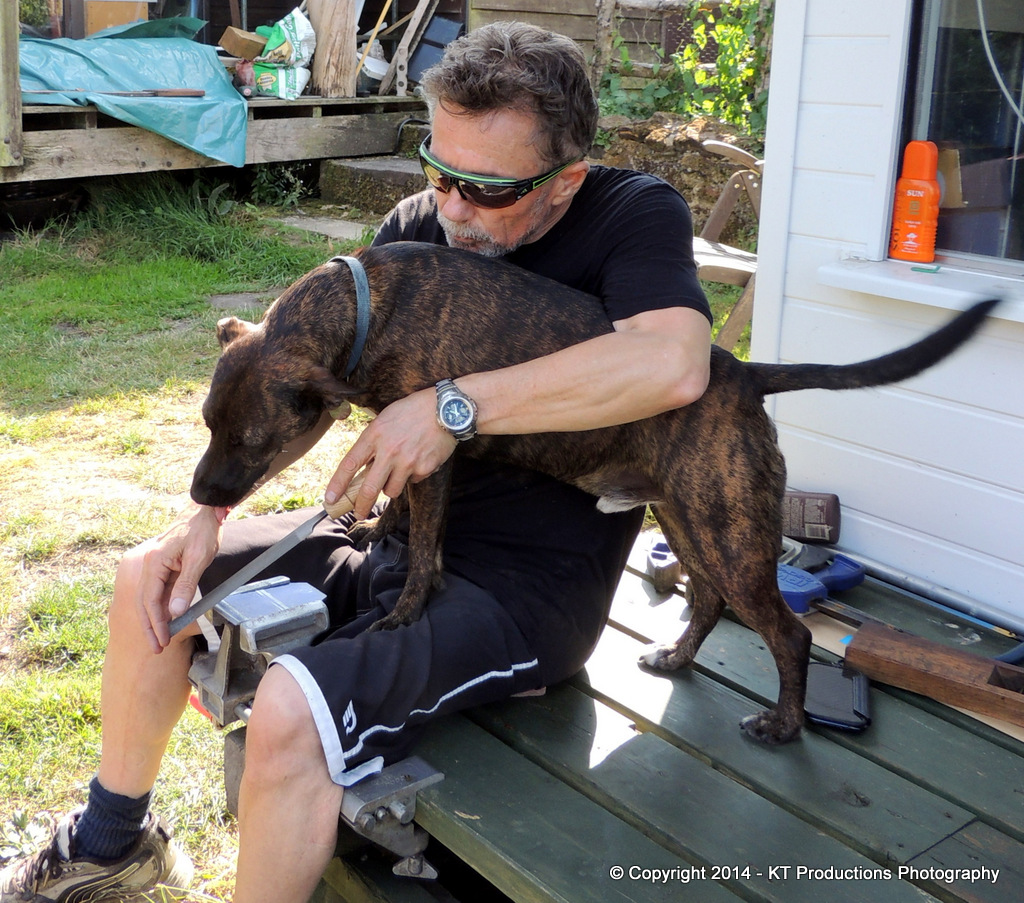
As always...ALFIE has to be involved at each stage!!

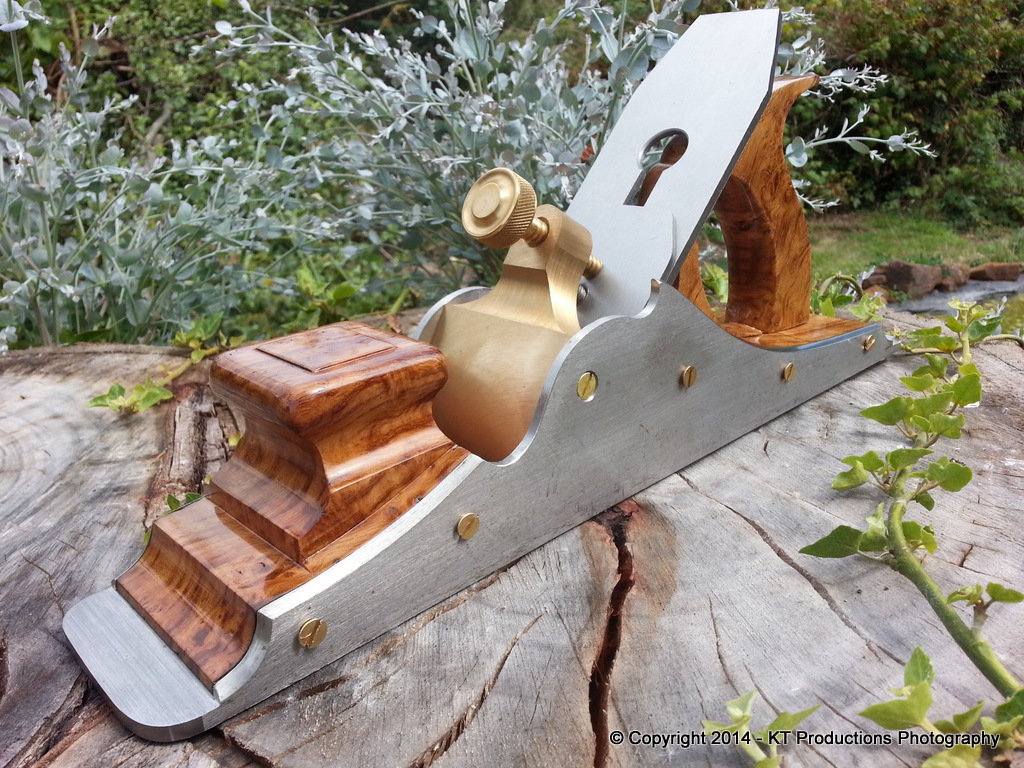
As I briefly mentioned before...I wanted something a bit more than just a bit of bent metal...so I have been doing some research.

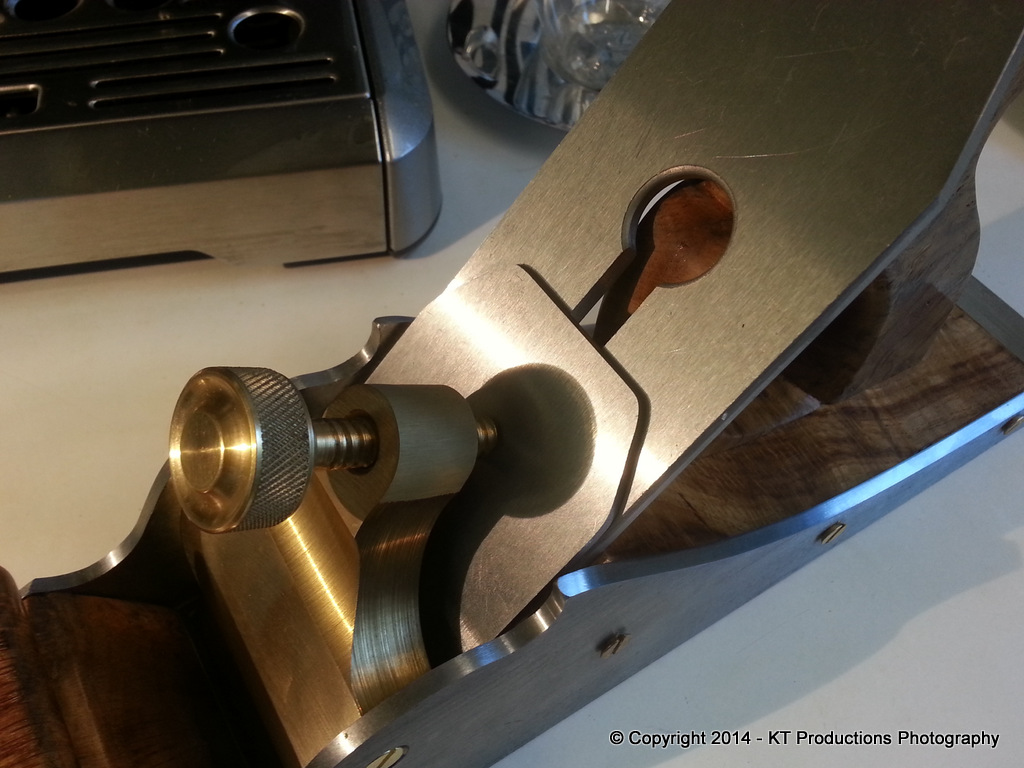
I love the shape of the Clifton two part cap iron at the very front where it mates with the face of the iron.

And also there is a belief that when the cap iron and iron are mated tightly the spring in the cap iron should close down flat onto the surface of the iron to create a very thick and undeformed integrated unit.

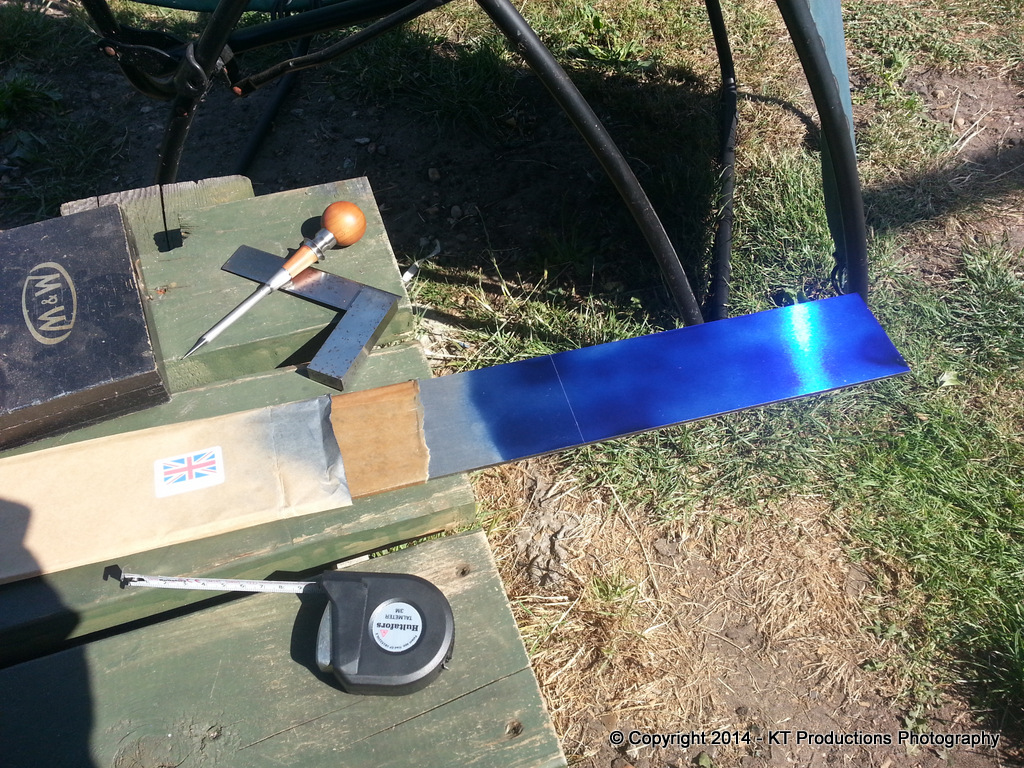
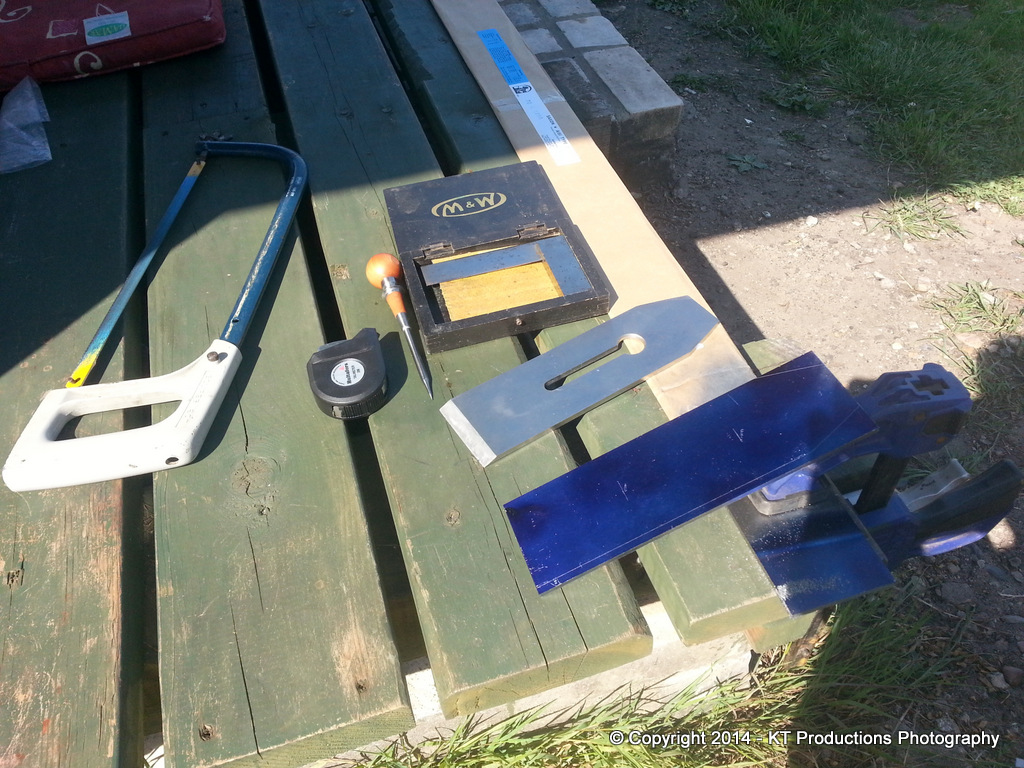
To this end we cut a piece of 3mm x 70mm O1 Saxon Ground Flat Stock....

20140722_155210.jpg


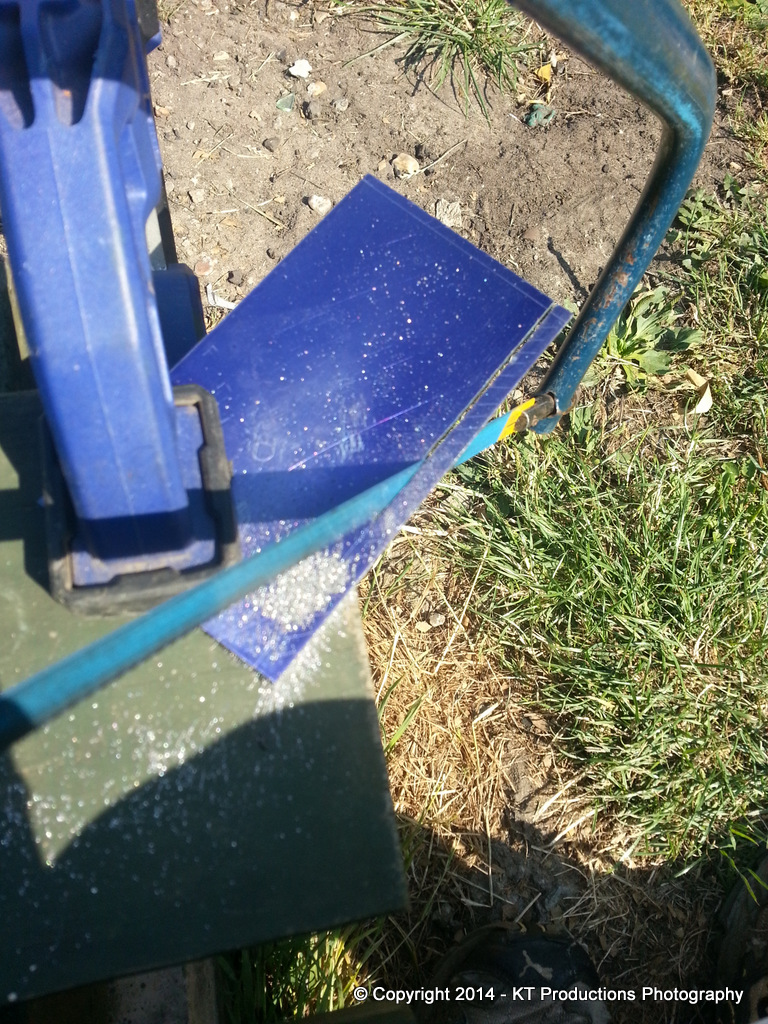
(apologies for the poor focus on this one...phone was used again!)

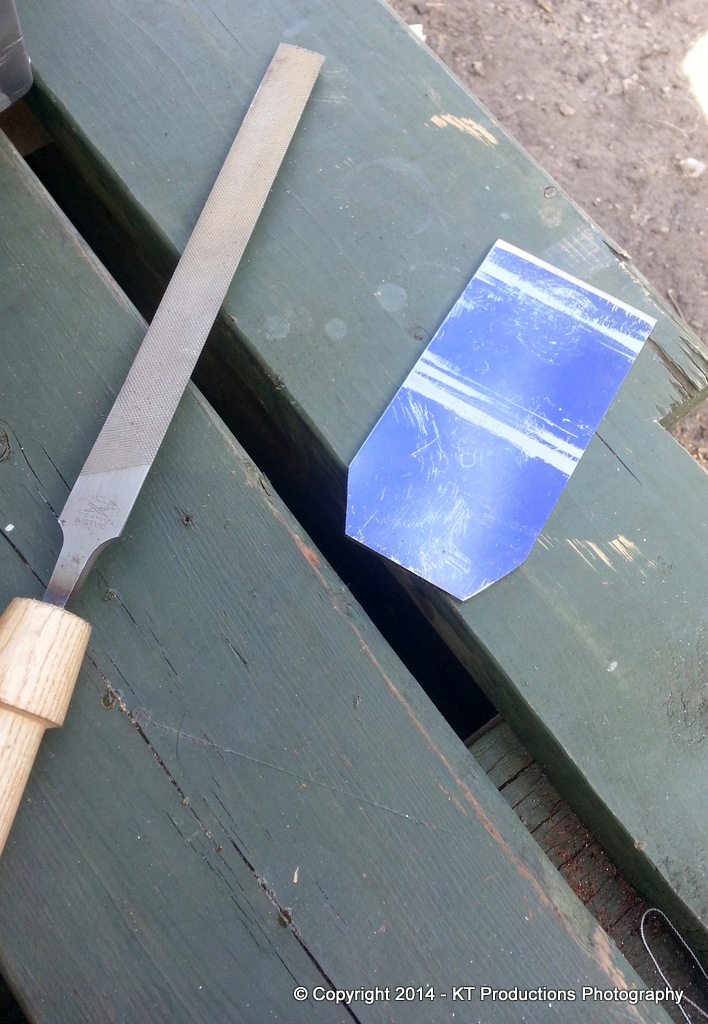
Having cut the rough shaped blank...this was draw filed to clean up saw marks from the hacksaw...

20140722_161917.jpg


An 8mm tapping hole was then drilled in the correct place...and this is always just below the place the lever cap bolt will rest when the iron is new...as the iron is sharpened and is shortened...the whole slot moves down and the cap iron stays where it is so this is critical.

That's right isn't it ALFIE????

DSCN5268.jpg


I tarted up an old original bolt for the cap iron in the standard way and used a 3/8" 16 BSW tap to tap the hole drilled with an 8mm clearance hole.

DSCN5283.jpg


....and it fitted perfectly...

DSCN5285.jpg


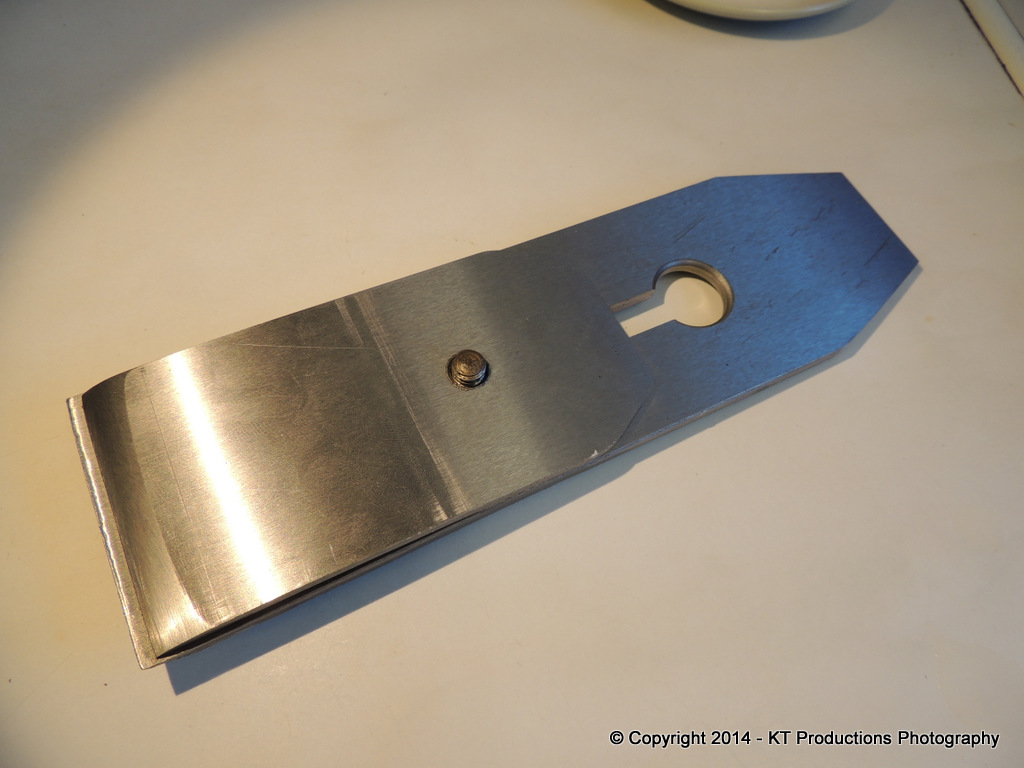
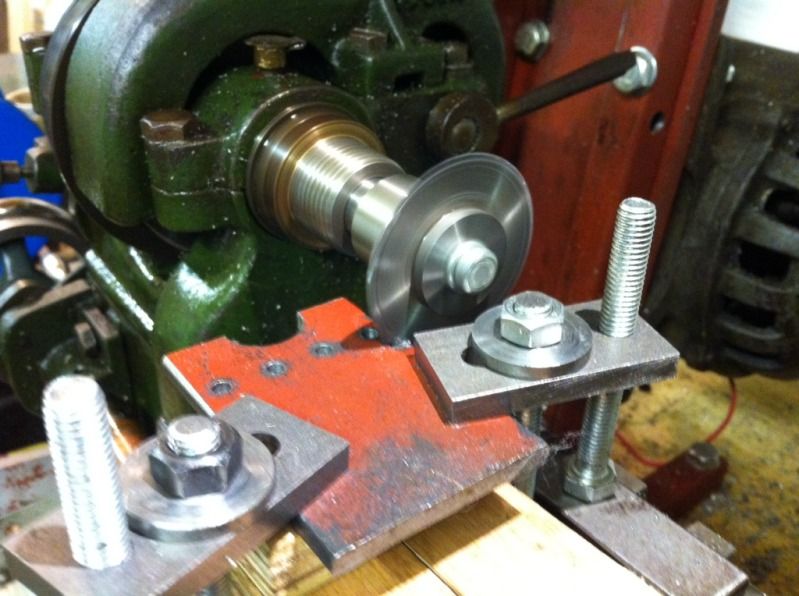
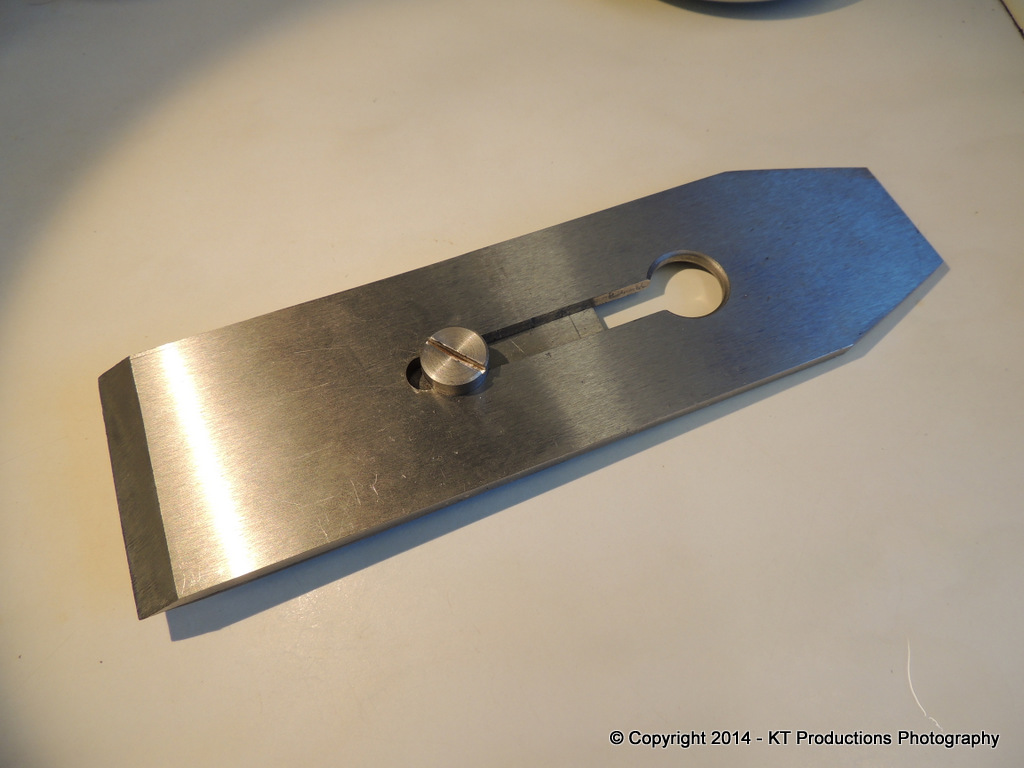
The cap iron was then given a slight bend at exactly the same place as the old Marples one.

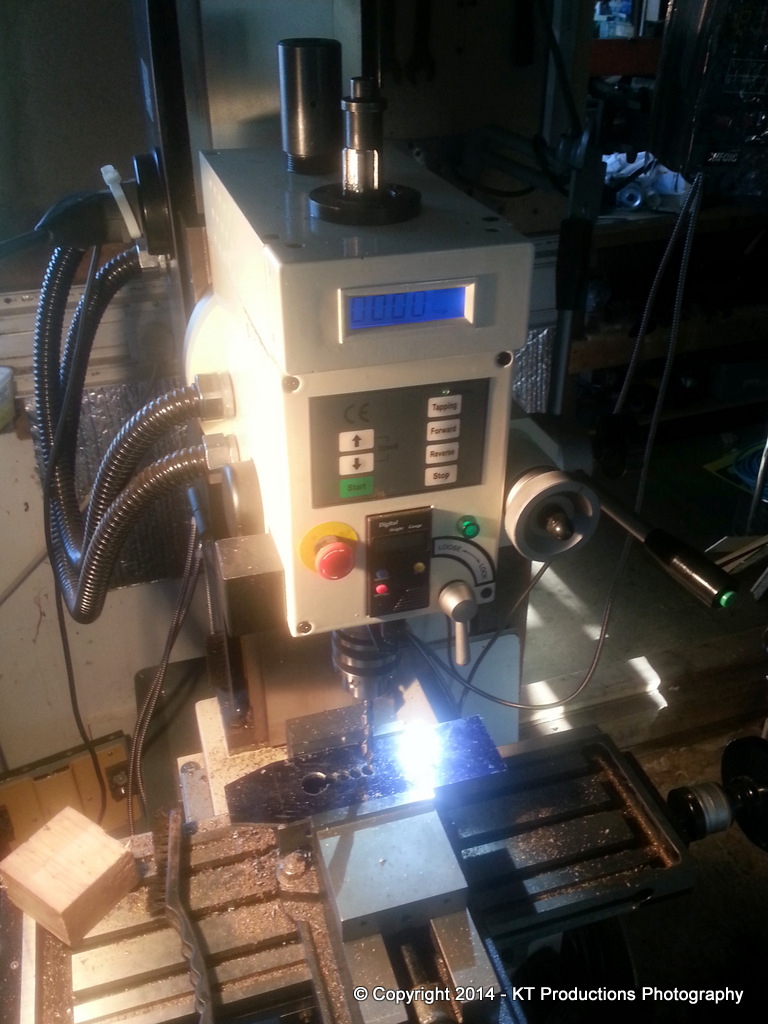
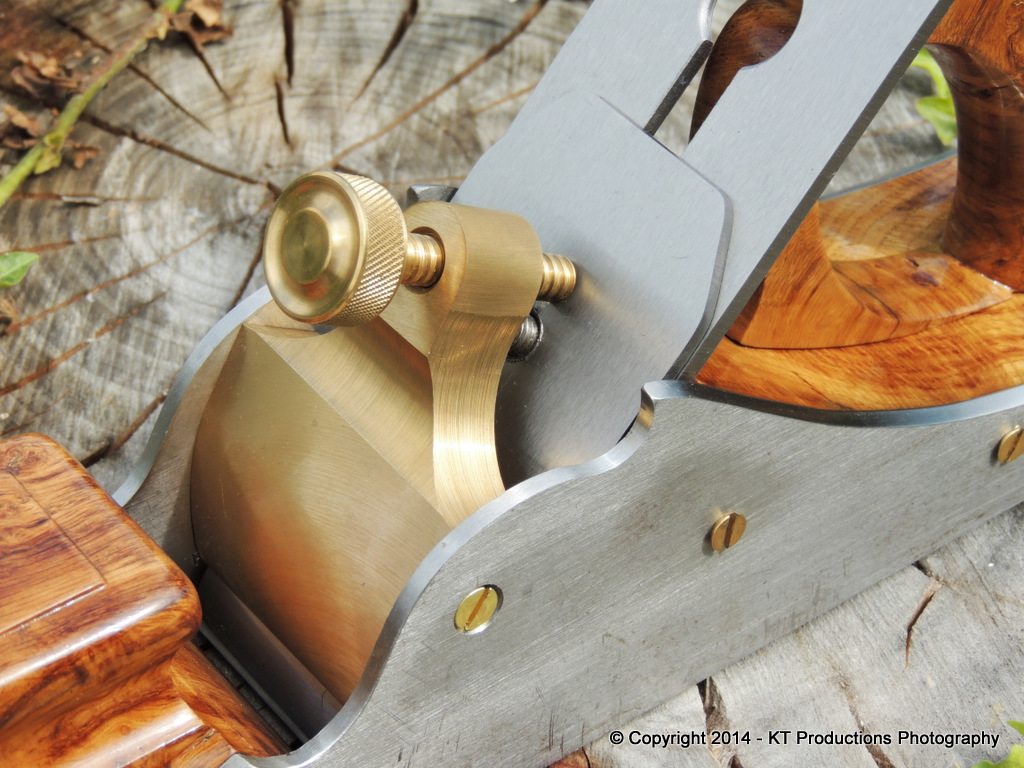
On the inner face of the cap iron a recess was milled out...and this is where the design differs from the original...

DSCN5281.jpg


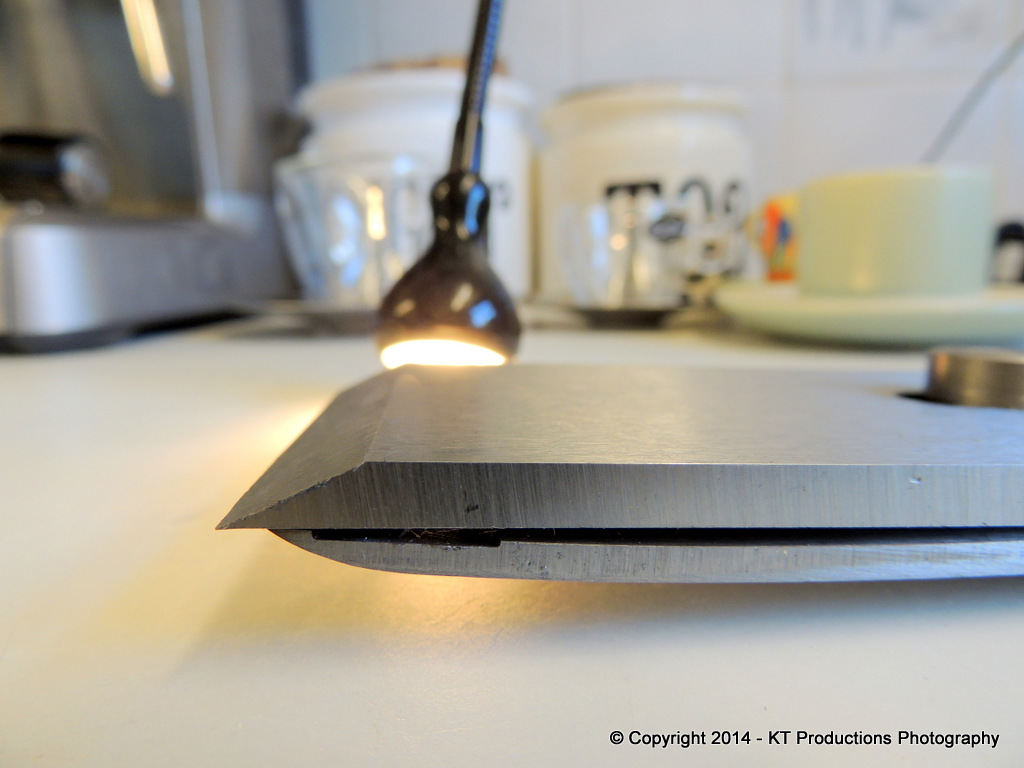
The front lip has a bevel on it....this is shown in the "untightened" position...and as the nut is tightened...the rear main body of the cap iron moves downwards and mates with the iron...leaving the recess and the bevel pinching down very tightly at the leading edge contact point.

There will now follow questions and suggestions (if I know our forum members!)....and of course I welcome this. The definitive design however, won't be fully proven until I get the iron back from hardening and I can do some actual testing. In the meantime...I will be reinforcing the protruding cap iron screw with the brass boss common with planes of old.

20140722_191815.jpg


I was going to bevel the top of the cap iron but I quite like the plain look...what do you think guys and gals?

DSCN5286.jpg


All for today...tomorrow I work...but I may be able to rough out the lever cap bolts...or mark the next iron...we'll see.

Cheers

Jimi (and ALFIE!)
 
I think the cap iron looks fine as it is and suits the overall style of the plane.
 
rxh":9c5jya9d said:
I think the cap iron looks fine as it is and suits the overall style of the plane.

I did too...but in truth...I think that doing the three bevels as is traditional...is open to all sorts of failure...they have to be so very perfect and I am frightened of getting that wrong.

If I have enough energy left I will do it on the second one...and we can compare.

I just know it's an accident waiting to happen!! :mrgreen:

Jimi
 
Hello,

Stop wimping out and put the bevels on! You've done everything else so brilliantly, why would you get it wrong? If you're honest, it needs them, they look right.

Mike.
 
woodbrains":ca2lnpi1 said:
Hello,

Stop wimping out and put the bevels on! You've done everything else so brilliantly, why would you get it wrong? If you're honest, it needs them, they look right.

Mike.

You are quite right Mike...total wimp!!! :mrgreen:

So that second one will be for you mate...and then we can vote on it.

The head on my mill does tilt but I spent so bloody long setting up the tramming...I don't really want to muck about with it again so I will probably bevel the top by hand starting with the lateral one and then doing the ears.

Thanks for the encouragement! :mrgreen:

Jimi
 
Really Nice work Jim

I suppose Philly is the man to ask, but I thought grinding the bevel was done after hardening to prevent differential heating treatment over the taper or unless you use different thicknesses of protective clay like the Japanese sword smiths?

Though I could be reading your WIP wrong of course? :)


Rod
 
Yes bevels! I love these long wide bevels on the old woodies and infills.

It looks like you put a 45 degree angle on the front of the capiron. That's about perfect!
 
Harbo":2id8e6pi said:
Really Nice work Jim

I suppose Philly is the man to ask, but I thought grinding the bevel was done after hardening to prevent differential heating treatment over the taper or unless you use different thicknesses of protective clay like the Japanese sword smiths?

Though I could be reading your WIP wrong of course? :)


Rod

Funny enough Rod...I did ask Philly that very thing last week and he told me to grind the bevel as it's a nightmare to do it when it's hardened.

I think his method of hardening involves something out of Star Trek and I think it doesn't matter.

But you've set me thinking about what to do with the other one Pete's doing for me.....what do you think Pete?

Jimi
 
Corneel":1nrwfkhs said:
Yes bevels! I love these long wide bevels on the old woodies and infills.

It looks like you put a 45 degree angle on the front of the capiron. That's about perfect!

It's a good job I'm making two then...with the split opinion we have here already.

It will be tomorrow now as I start work at 3pm. :cry:

Cheers

Jimi
 
jimi43":39z2a0xj said:
Harbo":39z2a0xj said:
Really Nice work Jim

I suppose Philly is the man to ask, but I thought grinding the bevel was done after hardening to prevent differential heating treatment over the taper or unless you use different thicknesses of protective clay like the Japanese sword smiths?

Though I could be reading your WIP wrong of course? :)


Rod

Funny enough Rod...I did ask Philly that very thing last week and he told me to grind the bevel as it's a nightmare to do it when it's hardened.

I think his method of hardening involves something out of Star Trek and I think it doesn't matter.

But you've set me thinking about what to do with the other one Pete's doing for me.....what do you think Pete?

Jimi

Hi Jimi

Grind the bevel up to about 0.5-1mm of the face, to leave some meat to get decarburized and ground away when its sharpened.

Its what I do with my blades.

Pete
 
Racers":9hpxro3v said:
jimi43":9hpxro3v said:
Harbo":9hpxro3v said:
Really Nice work Jim

I suppose Philly is the man to ask, but I thought grinding the bevel was done after hardening to prevent differential heating treatment over the taper or unless you use different thicknesses of protective clay like the Japanese sword smiths?

Though I could be reading your WIP wrong of course? :)


Rod

Funny enough Rod...I did ask Philly that very thing last week and he told me to grind the bevel as it's a nightmare to do it when it's hardened.

I think his method of hardening involves something out of Star Trek and I think it doesn't matter.

But you've set me thinking about what to do with the other one Pete's doing for me.....what do you think Pete?

Jimi

Hi Jimi

Grind the bevel up to about 0.5-1mm of the face, to leave some meat to get decarburized and ground away when its sharpened.

Its what I do with my blades.

Pete

Wilco Captain!!! 8)

Jimi
 
Nothing much to show today as I spent the day making the second iron...the one that Pete has kindly offered to harden in his barbeque....I expect pictures of that bit mate!! 8)

So...this time we are using 5 mm stock....

20140724_153310.jpg


It really is quite amazing how much easier it is to cut for every mm that the thickness is reduced....but cutting 23 cm of the excess off had me sweating a bit, I can tell you! :oops:

20140724_154815.jpg


Then it was over to the mill for some more drilling and milling...

20140724_183420.jpg


So that's most of the metal stuff over with....

20140724_214300.jpg


I haven't put the bevel on it yet Pete...I will do that tomorrow and get it off to you as soon as it's done.

The final coats of Tru-Oil will go on between now and next week...I got a new bottle as my old one was getting rather thick and for this one I needed a fresh supply. It's handy to have a gun shop in the next village!!

Cheers

Jimi
 
Hi Jimi

Looks a lot easier cutting the slot with a mill rather than a hacksaw like I have to!

Pictures will be done of the hardening process and the subsequent food metamorphism.

Pete

p.s. all that fancy marking out kit and an old tape? :)
 
There is no way you could cut the excess using the mill?

jimi43":9lcd52fr said:
It really is quite amazing how much easier it is to cut for every mm that the thickness is reduced....but cutting 23 cm of the excess off had me sweating a bit, I can tell you! :oops:

20140724_154815.jpg


Then it was over to the mill for some more drilling and milling...

20140724_183420.jpg


So that's most of the metal stuff over with....

20140724_214300.jpg


Jimi
 
Tom K":3ufueqqi said:
There is no way you could cut the excess using the mill?

I did the first one on the mill...took off about 7mm with an end mill and it took just as long and was rather "messy"! :mrgreen:

By the time you've set it all up and clamped it all down you're half way through with a hacksaw armed with a new Swedish blade.

Plus...the sun was shining and I don't get a tan in the workshop! :mrgreen: :mrgreen:

The slot...now that's a different kettle of fish altogether! :wink:

Jimi
 
jimi43":wl3yhlzh said:
Tom K":wl3yhlzh said:
There is no way you could cut the excess using the mill?

I did the first one on the mill...took off about 7mm with an end mill and it took just as long and was rather "messy"! :mrgreen:

By the time you've set it all up and clamped it all down you're half way through with a hacksaw armed with a new Swedish blade.

While it might not save any time in this instance, I absolutely despise hacksawing so I use this contraption on my Myford:

681A4492-8C35-45AF-BDEC-EF3CBEA96C17-139-00000005EA75EC6A_zpscdc1c7cc.jpg


It's less messy and wasteful than milling off the excess. I'm actually thinking about getting a Burgess 3-wheeler and using it just for sawing metal.

Love how the infill is coming along Jimi, it's a work of art :)
 
Earlier this year...I was saddened to have to remove a beautiful old eucalyptus tree which was threatening to kill my neighbour..(I nearly beat it too it! :mrgreen: ) who threatened me with a solicitor's letter if I didn't sort it...

2014-04-03%2013.18.15.jpg


I loved that tree but it was getting way to big so now...it's a photo set!

2014-07-24%2011.35.50.jpg


And look!! The tree's growing back so "up yours neighbour!! :mrgreen: )....and I simply love the way the ivy is taking over...searching for every crevice and hold...such a wonderful plant ivy...as long as it's not near the house!

So...I think we're nearly done with the finish...a few more coat sets should do it...

20140725_145606.jpg


I don't want to go cutting off the heads of the screws until I'm really certain as it's MUCH easier to take the bun and the handle out to apply the finish at this stage.

2014-07-25%2015.08.26.jpg


In the natural light you get to see the true colour of this fabulous wood...Mike at MAC Timbers certainly can pick wood!

20140725_145421.jpg


Another benefit of being near this photo location...you get to see all the other beautiful things around...

2014-07-24%2011.24.54.jpg


...and ALFIE gets to chat to his friend over the wall....

2014-07-25%2015.05.01.jpg


Cheers...

Jimi and ALFIE!
 
Hi Dave

Yup...you're right...a cutoff saw would be the answer and I have one somewhere but it's setting it up etc...but I do like the idea of getting another Burgess and if TUFFSAWS make metal blades...that might be an answer.

I think I might be able to cut straighter by hand however...even it it does take me hours these days! :oops:

I got through a few new blades, I can tell ya! :mrgreen:

Cheers

Jimi
 
Harbo":iu0edfn0 said:
Come on nicely but Crikey Jim who built that wall?

Rod

Suffice to say..it wasn't me! :mrgreen:

AND...my neighbour had the cheek to say that the tree roots were pushing the wall over! :roll:

Gee Louise...ALFIE could push that wall over on his own!! :mrgreen:

Jimi
 
Back
Top