


Crooked Tree
Established Member
I have been working on this for months and it is now almost there.
The plan was to build a box to hold chess men etc. with a chess board as a lid. The box material was to be from some old doors which I have "recycled".
The original plan for the board was to cut thinnish strips of black walnut and sycamore(?) from offcuts donated by my brother. This failed when the strips broke up on the table saw - they were too thin and I probably needed a zero clearance plate. Instead, I purchased a selection pack of veneers and did my first piece of veneering. In at the deep end with parquetry... how hard can it be?!
First, recycle some old doors donated by the god parents from their daughter's house (thank you). Removed the locks and hinges first then chopped them up to convenient size for future use:

Ripping up with a circular saw and removing mouldings:
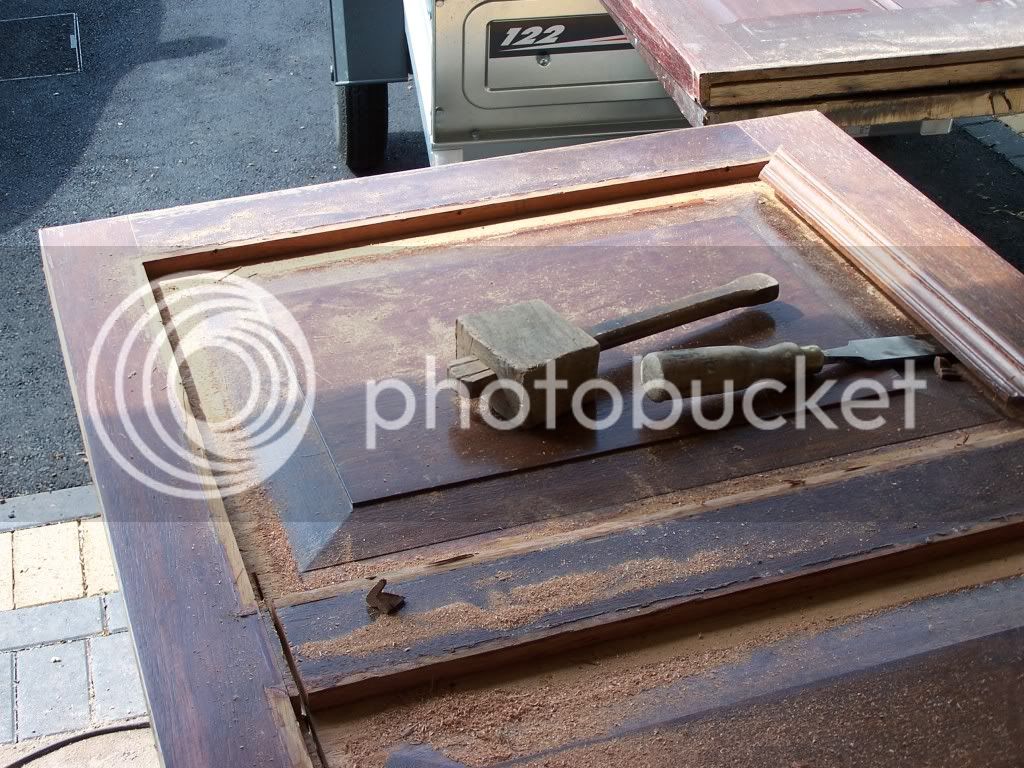
I found after doing this one that the saw had gone through nails without my even noticing! Probably did not do the blade any good, but impressed with the saw.
Squaring up with Record No.5 planer:
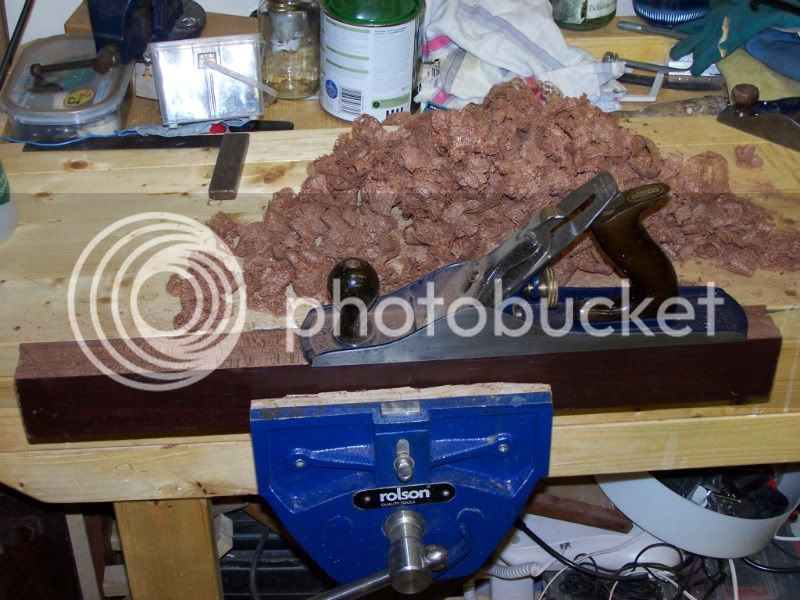
Ripped into strips on the table saw then thicknessed with my Record No.5 thicknesser:
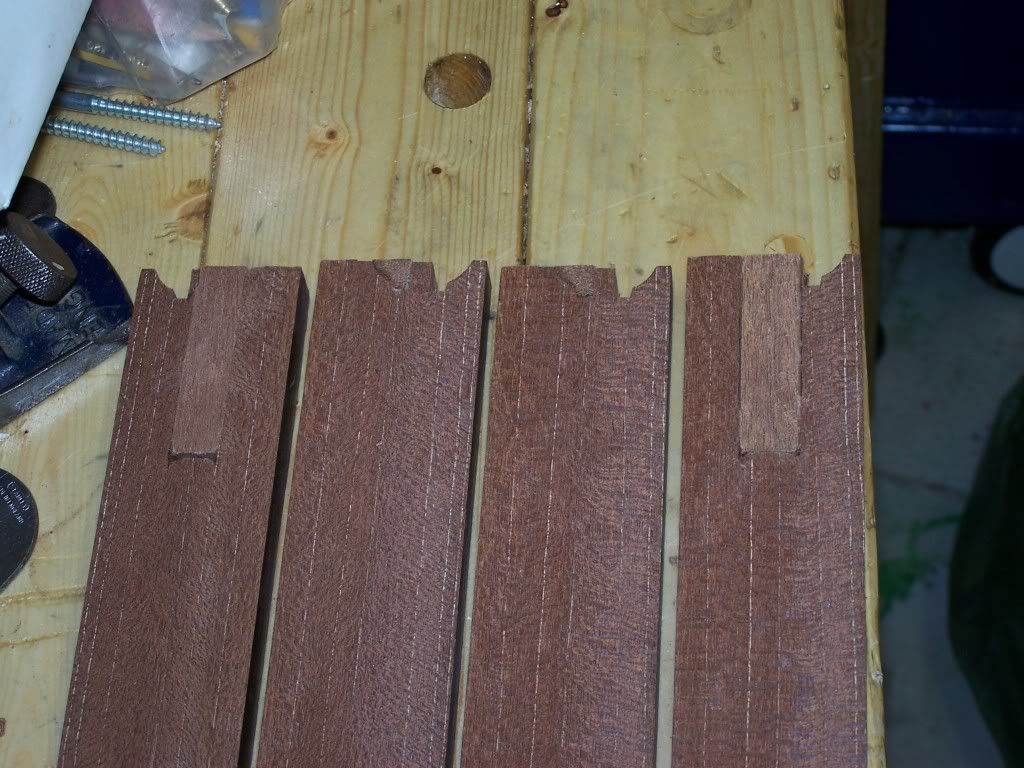
Now start making the box using the reclaimed timber (from looking in books I think that it may be dark red meranti - any better guesses?).
Cut to length:
Square the ends:
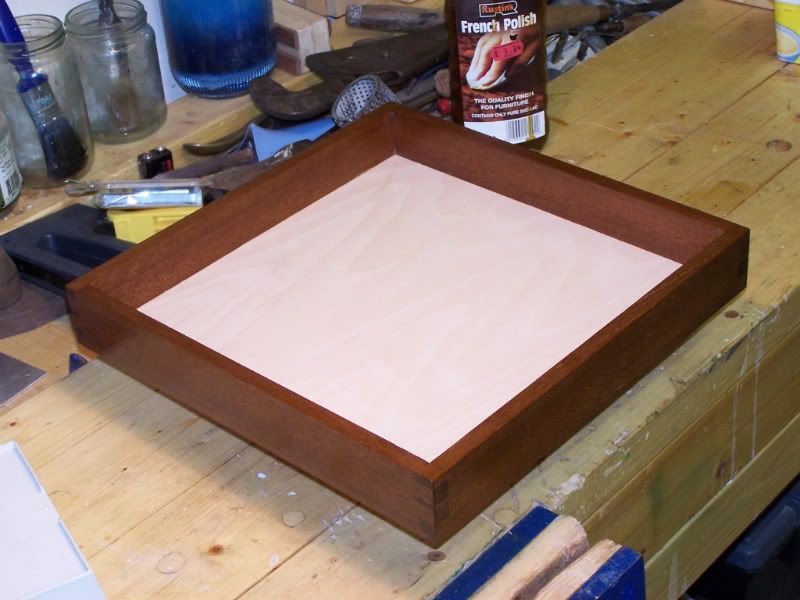
Dovetailed and french polished. The base is beech veneered MDF (bought already veneered) rebated into the frame:
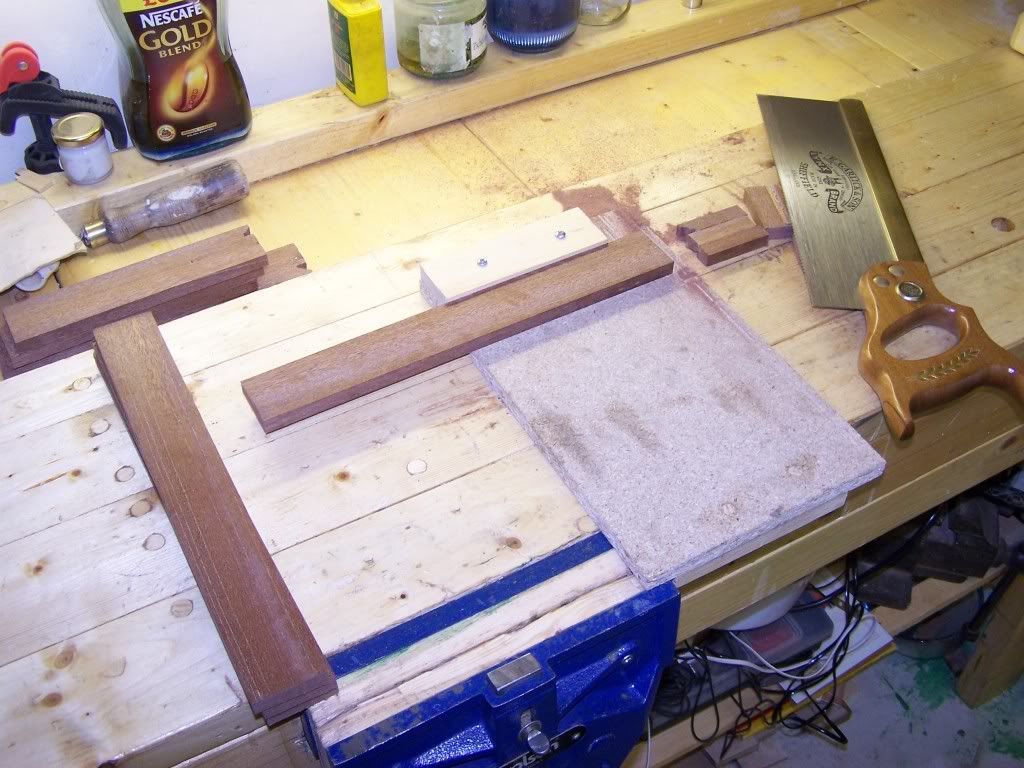
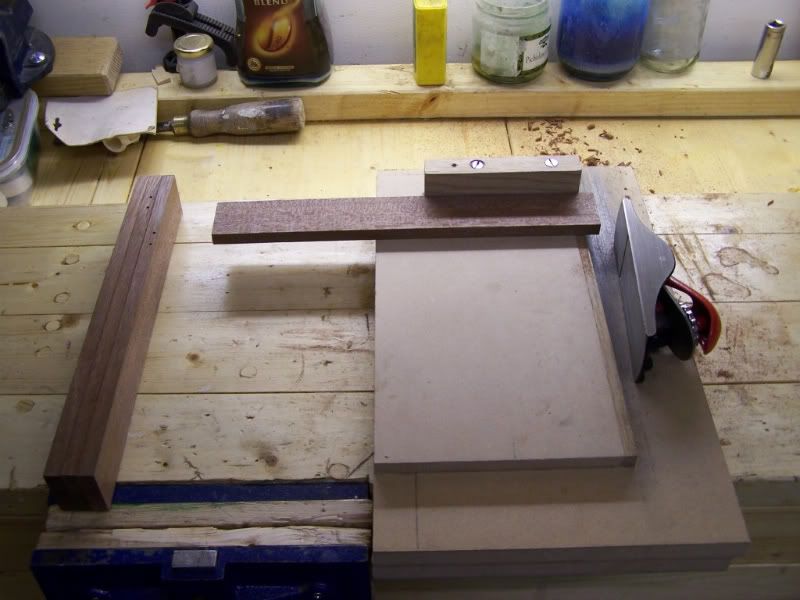
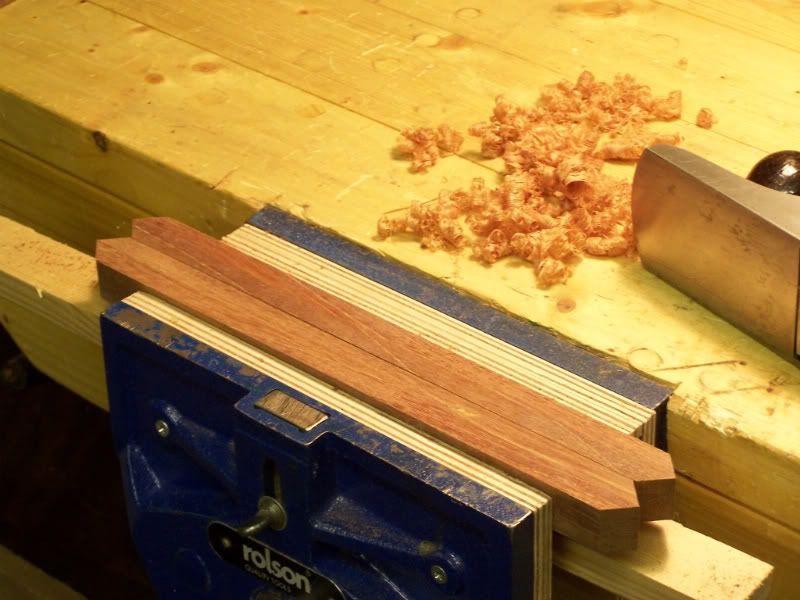
Preparing edge frame for the lid. This is to be mitred and keyed using walnut veneers to match board:
Dry assembly:

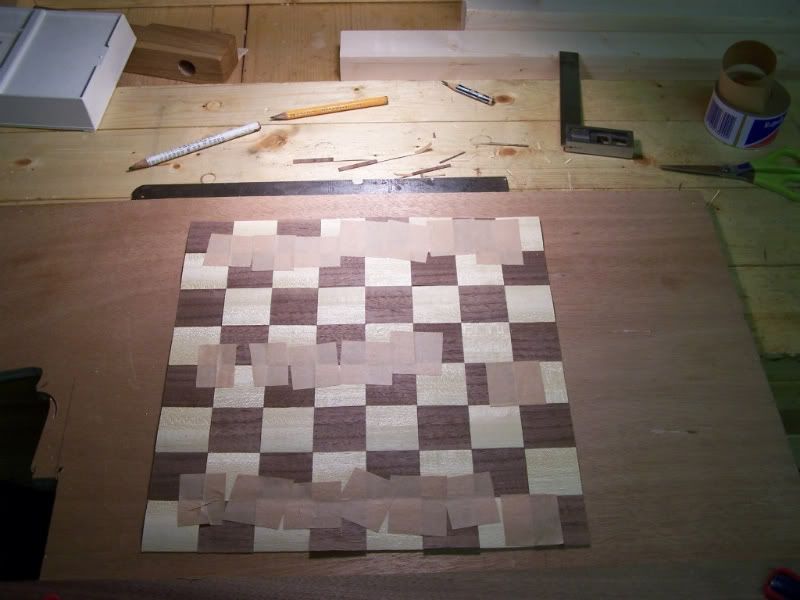
Veneers being assembled with gum tape prior to gluing to a piece of beech veneered MDF to make the board/lid. These were cut using a fence, steel rule, spacer blocks and a stanley knife. I gave the blade a hone on a fine oil stone first to make sure that it would cut cleanly:
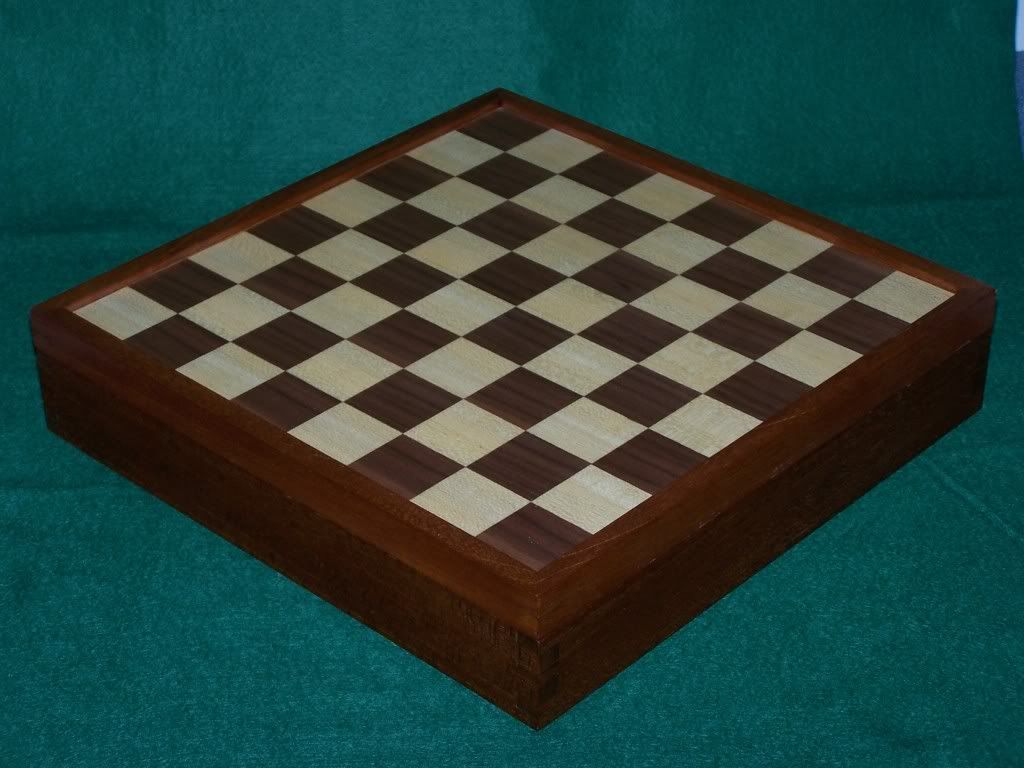
The board was fitted into a groove cut into the middle of the top frame using a router.
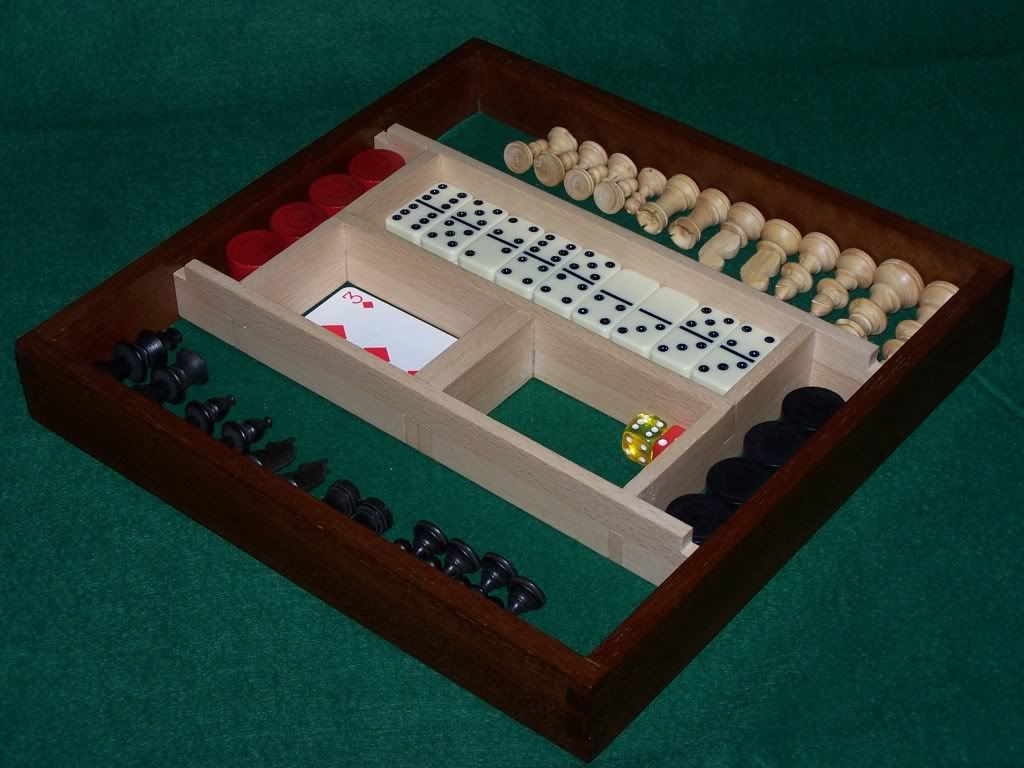
The finished article. Interior dividers are cross-halved together from beech to provide a contrast with the dark timber of the box. The same beech is used to provide a locating lip to the lid, to make it sit on the box. The beech was given one coat of white french polish to seal then waxed. The board was given many coats of white french polish, the meranti of the box itself was finished using brown french polish, lots of it because the grain was fairly coarse and I should perhaps have filled it. The unattractive veneered MDF surfaces are hidden using green felt. The chess men etc. are all pre-existing off-the-shelf items.

The interior may receive some further work because there is too much space for pieces to rattle around... or it may not, owing to time constraints. I may do some more veneering. I have plenty of the pack left, although not so much of the walnut now. Perhaps some coasters?
The plan was to build a box to hold chess men etc. with a chess board as a lid. The box material was to be from some old doors which I have "recycled".
The original plan for the board was to cut thinnish strips of black walnut and sycamore(?) from offcuts donated by my brother. This failed when the strips broke up on the table saw - they were too thin and I probably needed a zero clearance plate. Instead, I purchased a selection pack of veneers and did my first piece of veneering. In at the deep end with parquetry... how hard can it be?!
First, recycle some old doors donated by the god parents from their daughter's house (thank you). Removed the locks and hinges first then chopped them up to convenient size for future use:
Ripping up with a circular saw and removing mouldings:
I found after doing this one that the saw had gone through nails without my even noticing! Probably did not do the blade any good, but impressed with the saw.
Squaring up with Record No.5 planer:
Ripped into strips on the table saw then thicknessed with my Record No.5 thicknesser:
Now start making the box using the reclaimed timber (from looking in books I think that it may be dark red meranti - any better guesses?).
Cut to length:
Square the ends:
Dovetailed and french polished. The base is beech veneered MDF (bought already veneered) rebated into the frame:
Preparing edge frame for the lid. This is to be mitred and keyed using walnut veneers to match board:
Dry assembly:
Veneers being assembled with gum tape prior to gluing to a piece of beech veneered MDF to make the board/lid. These were cut using a fence, steel rule, spacer blocks and a stanley knife. I gave the blade a hone on a fine oil stone first to make sure that it would cut cleanly:
The board was fitted into a groove cut into the middle of the top frame using a router.
The finished article. Interior dividers are cross-halved together from beech to provide a contrast with the dark timber of the box. The same beech is used to provide a locating lip to the lid, to make it sit on the box. The beech was given one coat of white french polish to seal then waxed. The board was given many coats of white french polish, the meranti of the box itself was finished using brown french polish, lots of it because the grain was fairly coarse and I should perhaps have filled it. The unattractive veneered MDF surfaces are hidden using green felt. The chess men etc. are all pre-existing off-the-shelf items.
The interior may receive some further work because there is too much space for pieces to rattle around... or it may not, owing to time constraints. I may do some more veneering. I have plenty of the pack left, although not so much of the walnut now. Perhaps some coasters?
