Painted MDF Library Units WIP

UKworkshop.co.uk

Help Support UKworkshop.co.uk:

This site may earn a commission from merchant affiliate links, including eBay, Amazon, and others.

DangerousDave

Established Member
Joined
18 May 2008
Messages
245
Reaction score
0
Location
Norn Iron
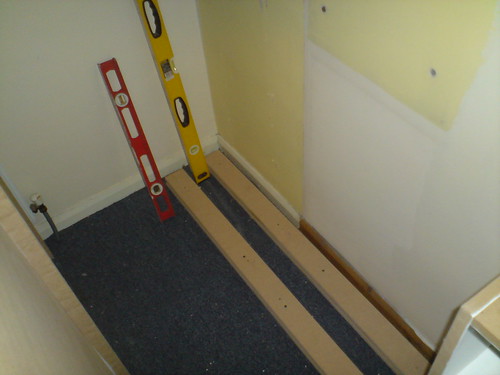
Have been at this a couple of months now, so I thought I'd post some WIP pics.
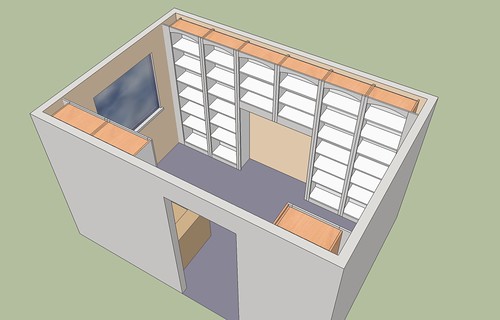
After a lot of faffing about with different designs (most of which looked like post office pigeon holes) I came up with this

3486091452_b54bd6332f.jpg


3486091746_76ab879dc8.jpg


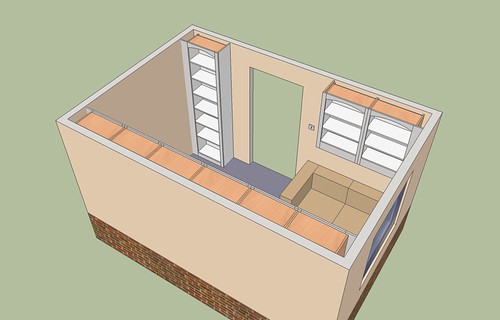
Constructing components on SU as if I would build them in real life (i.e. from individual flat panels) makes it easy to explode each component and import each parts dimensions into the cutting list program;

3729524796_ed86b455e3.jpg


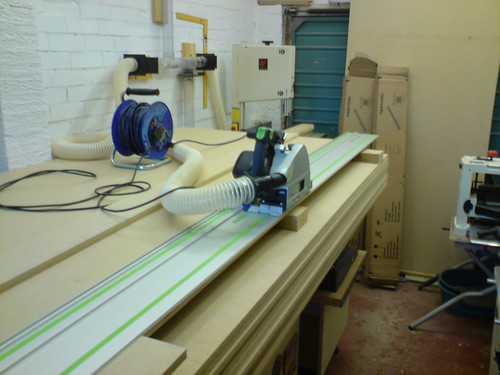
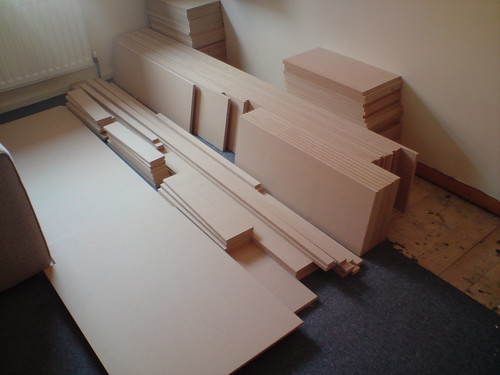
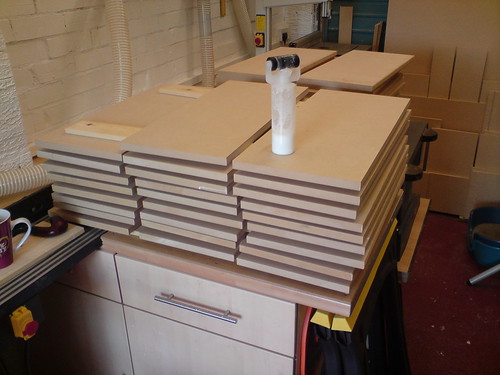
Ordered up the MDF sheets. When they arrived, I stacked them flat on the bench. Then its only a matter of sticking a couple of 4x2's under the top sheet and start cutting;


3427171412_a1a37bbb2e.jpg


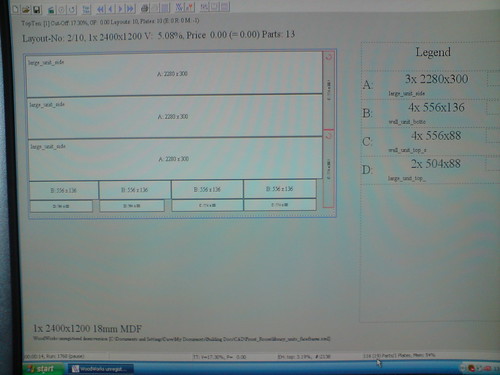
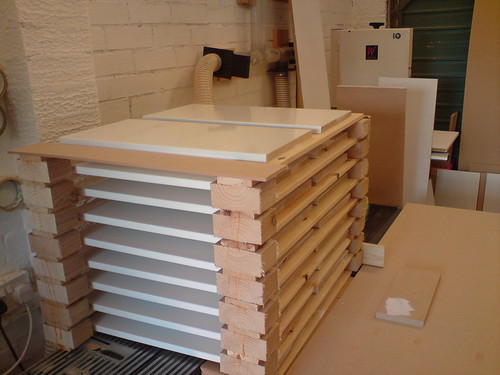
And thats all the components cut. In total, 10 sheets of 18mm and 5 sheets of 6mm (for the backs)

3486100738_ae55650dd7.jpg


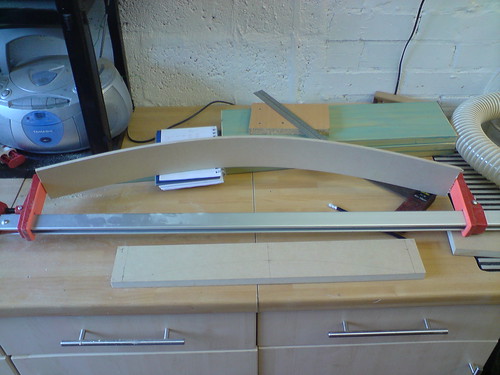
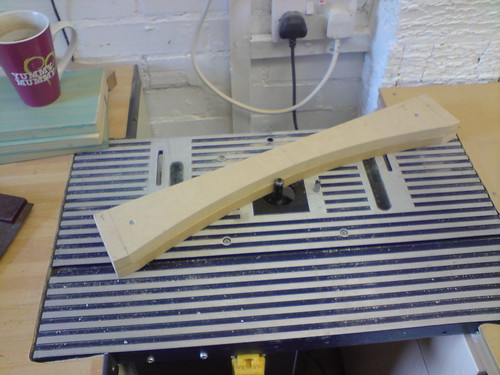
Next thing to do is to mark out the templates for the top arched rails of the face frames. I call this 'The Curvulator' :D Its a length of 6mm MDF in a big clamp. Simply tighten the clamp to tighten the radius. By using this I can mark out curves one-handed without faffing around with bending the MDF around nails etc...

3485260145_5718b87808.jpg


The bulk is then removed at the band saw...

3485261363_4087fc0829.jpg


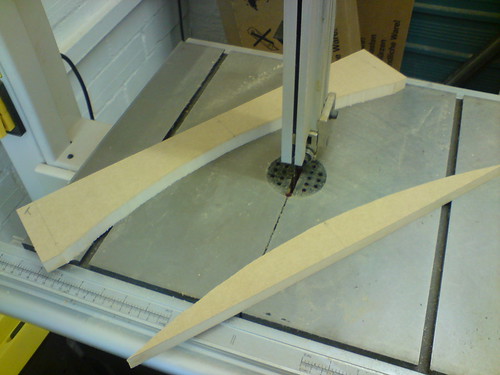
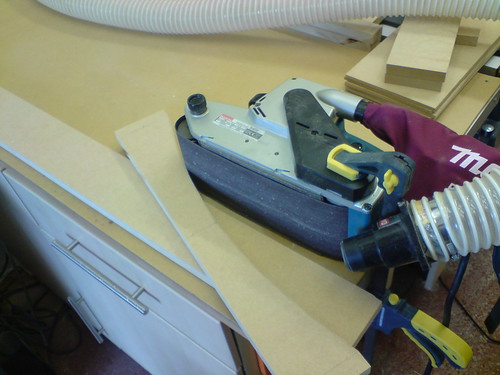
...and carefully sanded to the line

3486072478_bc06088f78.jpg


I then screwed the template to the rail (with the bulk removed at the bandsaw) and used a bearing guided straight cutting bit in the router table

3485258887_24c7cd725e.jpg


Face frames assembled using Kreg pocket screws

3729527414_7f00454f94.jpg


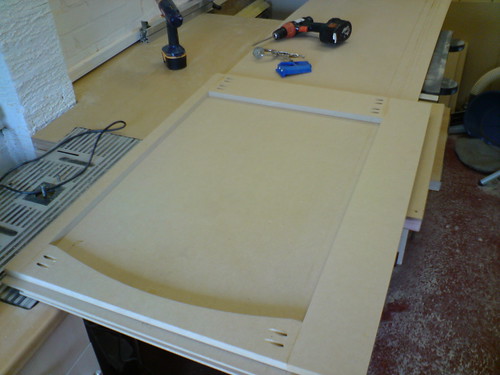
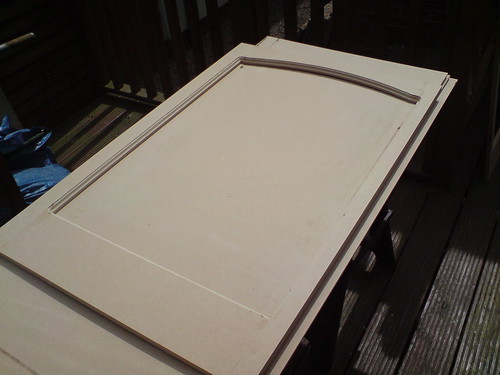
And an ogee profile routed on the face

3729528692_f31e122637.jpg


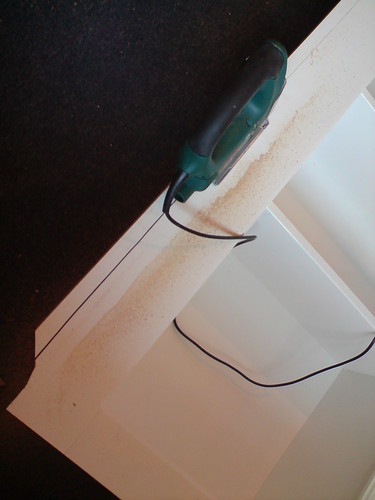
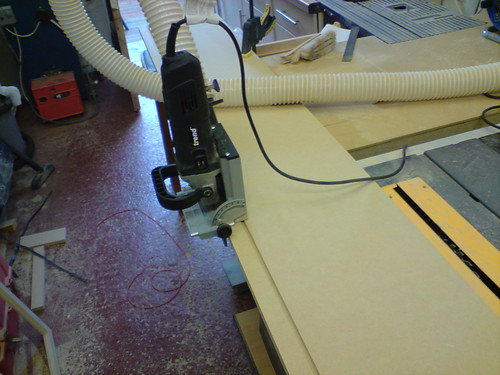
Next I machined the groove in the side panels to accept the back panels, using the biscuit jointer. I found this to be the quickest, most accurate and dust-free way of doing it. Just make sure the fence is tight against the panel, the jointer is flat on the surface and the jointer is moved right to left (against the rotation of the blade). I also tried cutting the groove with a router and kerfing with a circ. saw but neither was as accurate as the biscuit jointer and both created much more dust.

3728728841_2e4660b08d.jpg


Next up was sealing the fluffy cut edges of the shelves that will be painted. I found I got excellent results by applying a 50% aqueous solution of PVA with a roller bottle, letting it dry then knocking it back with 180 grit. This gave an almost glassy smooth surface that took the paint really well

3728727665_539d04eef1.jpg


Finishing was next. 1 coat of Dulux Trade U/C and 2 coats of Dulux Trade High Gloss applied with a small gloss roller. I was really impressed with the finish, although I had to take care when striking off to avoid getting 'tram lines'. Here's some shelves in a home made drying rack;

3729526090_a06a4aa2a6.jpg


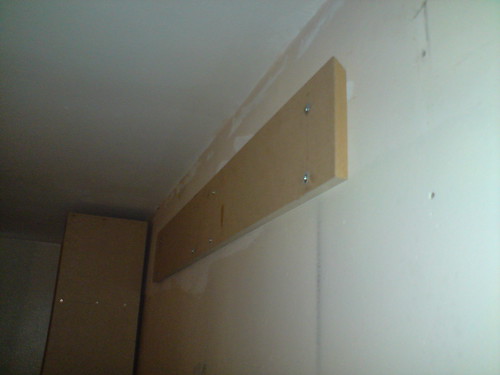
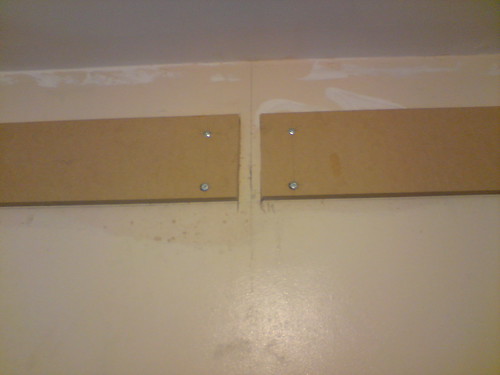
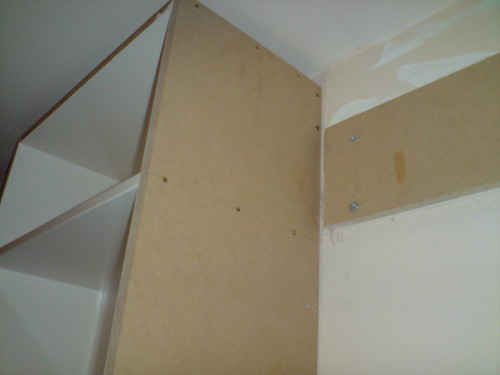
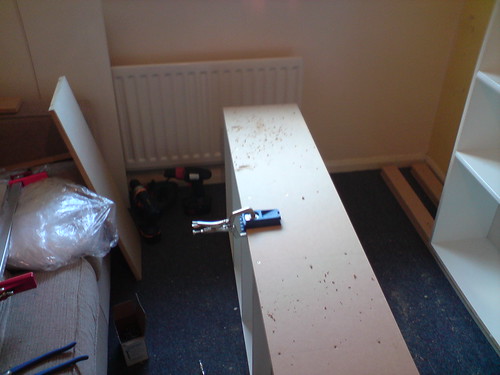
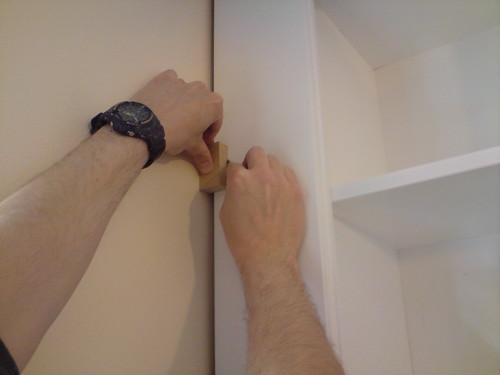
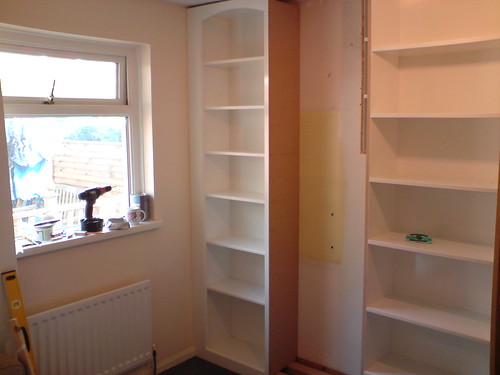
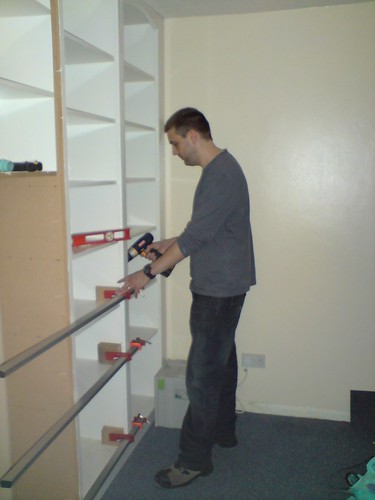
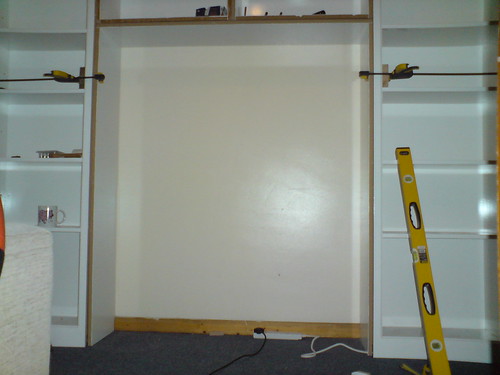
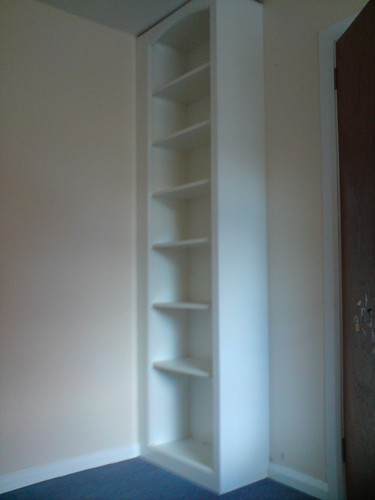
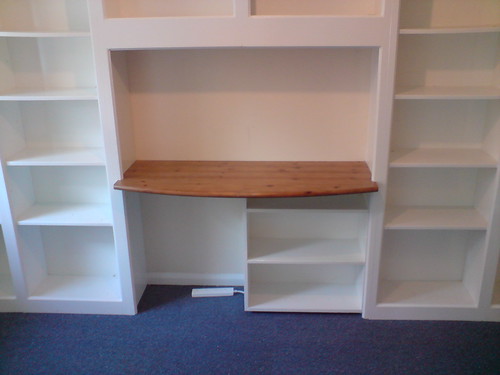
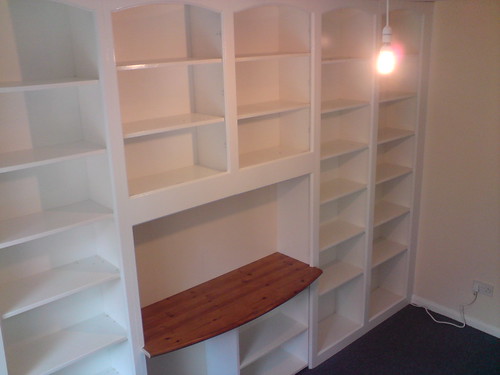
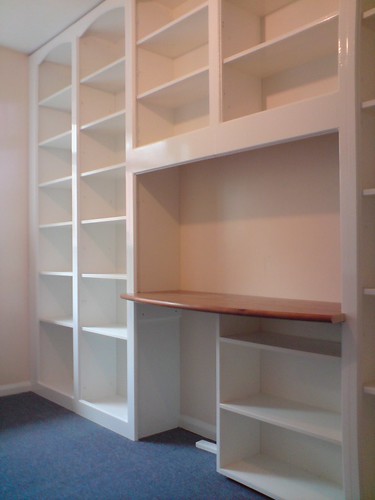
And I'm now in the middle of assembly;

3729523528_ae2fd4fb68.jpg


I'll post more WIP pics after the units are fitted. I know it's not exactly fine furniture making and prob not to everyone's tastes but I've learnt quite a bit and I really like the painted finish.
DD
 
Looking good. Thanks for the WIP pics. I like the biscuit slot idea.

Did you cut each panel to size with just the Festool or was there for table saw magic involved? If just Festool how did you square everything up?
 
I did the cross cuts with the Festool as well, Tom. Made 2 marks measured from the end and lined the guide rail up with these. All cuts were perfectly square (amazingly), which makes assembly an absolute joy. Compared to what assembly used to be like when I used an old B&D circ saw and homemade guide rail :D TBH I was going to do all the crosscuts on the TS after ripping with the Festool, but it was quicker to do both at the same time. Also, I was using the TS as a 'bench' to set the sheets on :D
 
Interesting post,excellent pictures,nice-looking and very practical piece of furniture - and the Curvulator is definitely a top tip worth remembering :D

Andrew
 
PowerTool":eq41b5b1 said:
Interesting post,excellent pictures,nice-looking and very practical piece of furniture - and the Curvulator is definitely a top tip worth remembering :D

Andrew

Points to note on using the Curvulator; mark the centre line on the Curvulator and the piece and line them up, making sure the apex is in line with the CL on the piece. Also sometimes the MDF does not bend about its centre line and you end up with what looks like a skewed binomial curve :D and with tight radii it can sometimes bend into a sort of hyperbola. Having said that though, it worked pretty much most of the time when I was trying it :D HTH
 
I enjoyed reading this write-up.
Grooving the back panel with a biscuit jointer sounds interesting - I usually use a slot cutter on the router table.
Did you need to make several passes with the biscuit jointer to make the groove wide enough to accommodate the thickness of the back panel?
Andrew
 
Excellent.

Jobs like this in MDF are not as easy as they look. There is not much required in the way of traditional woodworking skills but you need to be very organised and precise.

Well done on finishing eveything before assembly. This is a mistake that most people make the first few times - me included!

I would have used green moisture resistant MDF - the edges don't fluff up as much and finish much more easily and quickly.

The use of pocket screws on the face frames demonstrates your urgent need to splash out on a Domino. Go on - you're worth it... :wink:

Clever use of the biscuit joiner - I must try that. After buying a Domino though, I've no idea what I did with my old biscuit joiner - it must be around here somewhere...

Please tell me that you have squared off the routed ogee profile with a chisel in the corners...


I look forward to seeing more.

Cheers
Brad
 
Sorry haven't replied before now, been away.
Andrew; yep 2 passes with the biscuit jointer at 2 different depth settings to give a 6mm groove (+2mm to allow for paint). A bit of experimentation on some scrap to determine the depths. Very quick and very accurate.

Brad; Next time I'll use MRMDF. I got a good enough finish by treating the fluffy edges, but it took a bit of time. The Domino is next on the purchase list :D I'm going to be fitting the face frames in the next couple of days with pocket screws, I know I'll be wishing for the Domino then :D Check if your biscuit jointer has a couple of wee rubber things on the face to stop it sliding about and pop these off with a screwdriver...makes the grooving operation a lot easier! The one thing I would definitely do differently is to rout the face frame profile before assembly and like you say mitre it properly. I couldn't be bothered and just routed around the assembled frame with a bearing guided ogee bit. The rounded corners of the profile give the frames a definite "low class cheap and crappy kitchen cabinet door" look :D I'll have to live with it... Hopefully will be job done by the end of the week and I'll post more pics 8)
D
 
Job done, at last :D Here's some pics of the fitting;

First of all I levelled pairs of rails and screwed them to the floor joists for the floor mounted units;

3858999568_6ed08dd1be.jpg


The wall cleats are attached as one piece (easier to level) and bolted to the wall with hammer in fixings;

3859000700_fe85dc264d.jpg


And then the cut out for the wall cabinet sides made in the middle of the cleats. Doing it this way ensures that both cleats are exactly level.


3858212111_623ebe9a27.jpg


The matching cleats are attached to the backs of the wall cabinets. Here you can see the 45 deg chamfer that locks with the corresponding 45 deg chamfer on the wall cleats;

3858213415_a7ab14a46d.jpg


The wall cabs are then simply hung on the cleats and the chamfers lock together. The only problem I discovered was I couldn't lift the cabs high enough to get them on the cleats whenever the faceframe was attached. Which meant that the wall cab face frames had to be fitted with KD blocks after the cabs were fitted. A minor compromise, but annoying all the same :x

3859004592_0f52d3aafc.jpg


Next I attached all the face frames to the cabinets with pocket screws & Titebond. If only I had a Domino... :D

3859005800_43939a4f1b.jpg


Next I had to scribe the first cabinet's faceframe to the left hand side wall. I used the same method Norm did when he fitted his library units :norm:
First off I marked a plumb line on the wall where the right hand side of the first cab will be. I then measured a set amount to the right of this and marked another plumb line...


3859007166_da34235587.jpg


...I lined up the right hand side of the cab with this second line and scribed the left hand side of the faceframe to the wall using a spacer block equal to the distance between the 2 lines. Found it easier to scribe the line with a nail and then mark this score line with a pencil...

3858218583_662f5c28ff.jpg


Then it's only a matter of cutting the scribe line with a laminate blade in the jigsaw. I undercut away from the face by 15 deg to make tweaking a little easier

3858220163_da13c7b20d.jpg


A little tweaking with the block plane (yes, you can plane MDF :shock: ) and thats the first cab fitted

3859011430_45d1609819.jpg


The rest of the cabinets installed in a similar manner

3859086436_fb19844650.jpg


And then after ensuring plumb and level, screwed together and screwed to the floor rails. The good thing about installing the cabinets on level floor rails is that you know they're gonna be level without too much shimming etc... Its much easier to shim and level a couple of floor rails than it is to shim and level bloody big cabinets :D

3858287457_3425e7c4b0.jpg


Decor panels installed under the wall cabinets;

3859017084_916d7ca30d.jpg


And the single floor mounted unit on the other side of the room installed with it's side decor panel;

3858302279_0509840082.jpg


I decided to bin the idea of having wall mounted units above the sofa, primarily due to my fear of them falling on someone's head when loaded with books (despite my faith in the french cleats). So one of them got adapted into a right hand pedestal for a desk. The desktop started life as an old pine headboard;


3858228493_36c5be129f.jpg


And that's more or less job done;


3858229679_c34860d755.jpg


In total;16 hours design, 48 hours machining, 27 hours finishing, 14 hours assembly and 33 hours fitting. Only 1 minor injury (banged head on wall cabs) and total cost of around £300. Like I said it's not exactly fine furniture making, but it wasn't as easy as it looks and I'm well chuffed with the result :D

3858306383_7cc818abea.jpg


All thats left to do is install a cornice along the top to hide the gap :D
 
Proper Job Dave. Looks good. Are the units installed on top of the carpet?
 
Yep, the rails are screwed through the carpet into the floor joists, the large cabinets are installed onto the rails. The face frame is designed and fitted so that the overhang at the bottom equals the height of the rails that the unit sits on, bringing them flush with the carpet. The scribed edges at each side wall were caulked (see Brads signature) and the cornice when fitted will be caulked to the ceiling :D
 
is that gonna cause a problem if you decide to change the carpet?
 
Yes :oops: It'll be a case of cutting the carpet flush with the faceframe and 'pushing' the residue under the cabinets so that the new carpet can slide under a bit :D pineapple knows what I'll do if I decide to install wood flooring or tiles. Have to buy a Fein Multimaster I suppose :D
 
Looks great, and I'm going to need to do something similar soon so useful to see how you tackled it.

Can you explain on the thin unit have you built the shelving unit then put another piece of painted MDF on the side?

Also do the face frame widths match the shelving unit side widths?
 
Matt_S":1npkvniu said:
Looks great, and I'm going to need to do something similar soon so useful to see how you tackled it.

Can you explain on the thin unit have you built the shelving unit then put another piece of painted MDF on the side?

Also do the face frame widths match the shelving unit side widths?

Matt, the single cabinet is identical to the 4 other tall cabinets except that the RH stile of the faceframe is 18mm wider, so that I could fit a scribed decor panel to the side. This decor panel hides the gap at the bottom between the base of the cab and the floor and is scribed to the wall and skirting board to give a neat finish. The only down side is that the 'endgrain' of the RH stile of the faceframe is visible (suppose I could have mitred it... :? ), so had to be treated in the same way as the edges of the shelves. The faceframe widths are the same as the shelves and carcasses (all 18mm). HTH :D . If you have Sketchup 7 send me a PM and I'll email you the SU file. BTW, the decor panels were screwed (from the inside) and glued to the cabinets, the screws being countersunk and covered with white plastic screw caps. Good tip is to use a dab of caulk on the screw heads before attaching the screw caps; helps to stop them falling off while filling any minute gaps. Just remember to wipe off the excess with a damp cloth before it dries. Like what I did every time :oops:
 
Cheers guys. I'm very happy with the finish, I did a test piece with eggshell and I liked that as well, a bit flatter. But I'm glad I went with the gloss in the end and took my time with the finishing. BTW the PVA I used on the edges was Evostick Resin W (the one in the blue bottle). I was amazed at the glassy smooth edge it gave after knocking back with 180. Tried the same thing the other night with Titebond II; complete cr@p, very rough and took a lot more sanding than the Evostick. Also, the MDF I used throughout was decent Medite stuff. HTH :D
D
 
Matt_S":mfw6zcog said:
...Also do the face frame widths match the shelving unit side widths?

Matt, sorry...just got what you meant. I'm a complete dufus (homer) D'Oh. Disregard my previous reply to this... No, the faceframes overlap on the inside only (i.e. they are flush with the outer sides so that the carcasses can butt together). I forget how much they overlap, its not much...about twice the width of the ogee moulding. HTH.
 
Back
Top