


Wouldchuk
Established Member
Well it's time to share a simple project which I completed quite a while ago, but seeing as I just finished the Spring Clean I thought i'd take some snaps!
These are the spice racks/cup holder on my narrowboat home - one hung on the side wall with cup hooks and a smaller one on a bulkhead wall.
I'm afraid I don't have a work-in-progress as I didn't take any pictures. However, the process was as follows:
I inherited some oak library shelves around 20mm thick, which I only really needed to sand off the varnish to make useable.
The challenge with the boat is that the walls slope inwards, so I had to make a simple template/jig thing to ensure I had the right angle to match the wall, while keeping the shelves level.
Using this, I made a mdf template, experimenting to get a nice looking curve at the base for the sides of the main cupholder. Used this to draw round onto the timber, which I then roughcut out with the jigsaw, then the final cut to the line on the bandsaw and a bit of a sand to smooth out the bandsaw marks. Then I routed in rebates to the sides to receive the shelves, squared off with a chisel.
Then glued on the mdf template using hot-glue gun and used a Wealdon triple-bead router bit in the table to put on the double-bead (basically, the top bead on the cutter was high of the timber). A good sanding and the sides were good.
Shelves were a doddle - they were sized long enough so there was length to slot into the rebates in the sides. I had to cut the backs of the shelves to match the slope of the wall, so they fit snug. Then used a Wealdon profile cutter to put the profile on (not sure what it is - Ogee?), then using a tenon saw I cut out the very ends of this profile mould, so that the shelves can slot into the stopped rebates without anything showing.
The tricky bit was the retaining bars, which are very thin. I used a 2" thick piece of timber, profiling on the router table, then cutting off the thin strip needed on the table saw. I used a roundover bit first to relieve the bottom edge, then a sunken bead tool for that bead.
Fitting it all together was easy enough - glued the shelves in to the rebates and clamped square. However, the retaining bars were a pain. I tried using tiny dowels at first, but i just couldnt get the hole accurate, so in the end I bodged by simply gluing and then putting a long panel pin in from the side. These have worked well, but I needed to fill the holes still.
Chiseled rebates for the mirror-plates to hang them on, sand, couple of coats of Osmo Polyx satin oil.slapped 'em up on the wall and covered them with spices we never use.... :roll:


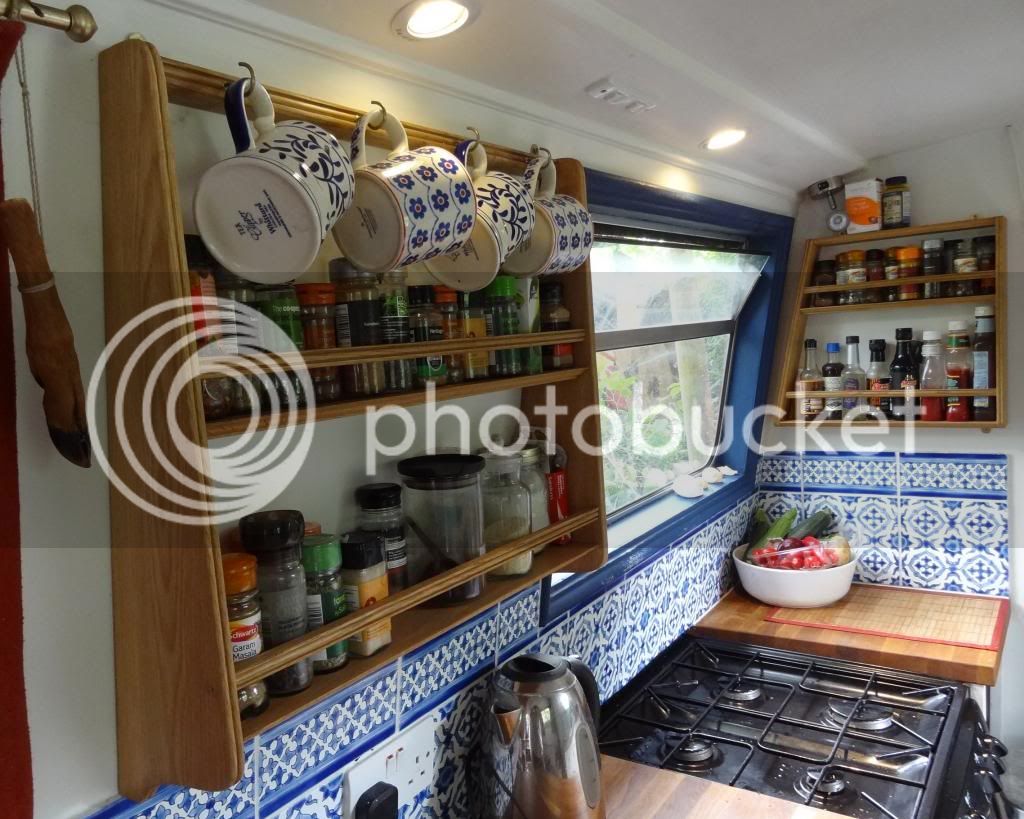
If anyone is wondering why there is a deer's foot hanging from our curtain-rail, I can only say that the Peruvians think they bring great luck!
These are the spice racks/cup holder on my narrowboat home - one hung on the side wall with cup hooks and a smaller one on a bulkhead wall.
I'm afraid I don't have a work-in-progress as I didn't take any pictures. However, the process was as follows:
I inherited some oak library shelves around 20mm thick, which I only really needed to sand off the varnish to make useable.
The challenge with the boat is that the walls slope inwards, so I had to make a simple template/jig thing to ensure I had the right angle to match the wall, while keeping the shelves level.
Using this, I made a mdf template, experimenting to get a nice looking curve at the base for the sides of the main cupholder. Used this to draw round onto the timber, which I then roughcut out with the jigsaw, then the final cut to the line on the bandsaw and a bit of a sand to smooth out the bandsaw marks. Then I routed in rebates to the sides to receive the shelves, squared off with a chisel.
Then glued on the mdf template using hot-glue gun and used a Wealdon triple-bead router bit in the table to put on the double-bead (basically, the top bead on the cutter was high of the timber). A good sanding and the sides were good.
Shelves were a doddle - they were sized long enough so there was length to slot into the rebates in the sides. I had to cut the backs of the shelves to match the slope of the wall, so they fit snug. Then used a Wealdon profile cutter to put the profile on (not sure what it is - Ogee?), then using a tenon saw I cut out the very ends of this profile mould, so that the shelves can slot into the stopped rebates without anything showing.
The tricky bit was the retaining bars, which are very thin. I used a 2" thick piece of timber, profiling on the router table, then cutting off the thin strip needed on the table saw. I used a roundover bit first to relieve the bottom edge, then a sunken bead tool for that bead.
Fitting it all together was easy enough - glued the shelves in to the rebates and clamped square. However, the retaining bars were a pain. I tried using tiny dowels at first, but i just couldnt get the hole accurate, so in the end I bodged by simply gluing and then putting a long panel pin in from the side. These have worked well, but I needed to fill the holes still.
Chiseled rebates for the mirror-plates to hang them on, sand, couple of coats of Osmo Polyx satin oil.slapped 'em up on the wall and covered them with spices we never use.... :roll:


If anyone is wondering why there is a deer's foot hanging from our curtain-rail, I can only say that the Peruvians think they bring great luck!
")