New toy - Meddings Pillar drill

UKworkshop.co.uk

Help Support UKworkshop.co.uk:

This site may earn a commission from merchant affiliate links, including eBay, Amazon, and others.

TobyT

Established Member
UKW Supporter
Joined
22 Jul 2008
Messages
94
Reaction score
14
Location
West of Bristol
Hello,

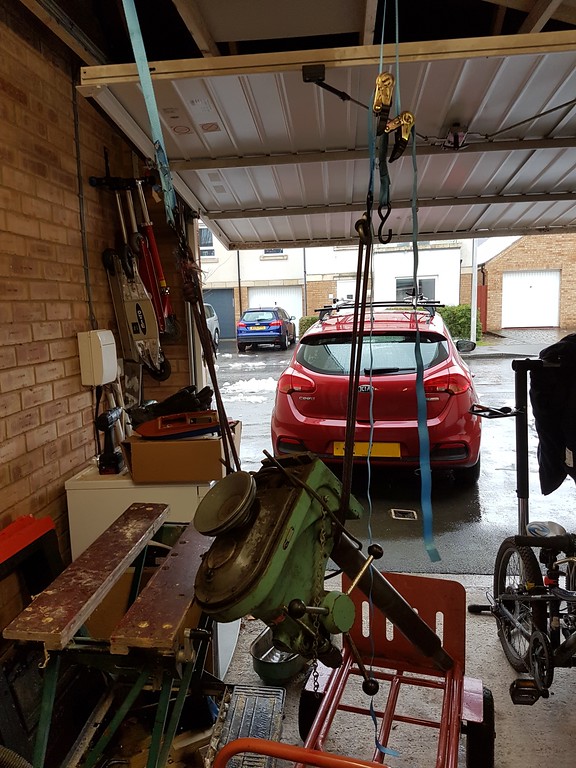
a long time since I posted on here. I've since moved house a few times and so lost my previous workshed. I've got a single garage which si going to be the new one (and on the downside, bike and junk store). First task is to build a new workbench as I am working off an old workmate (a proper old one though).

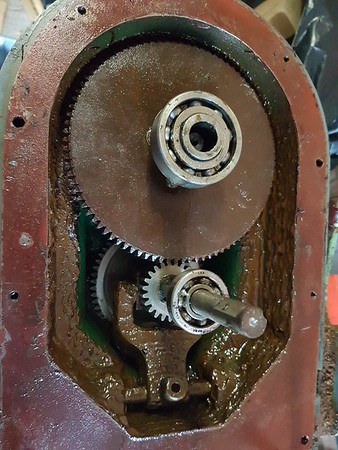
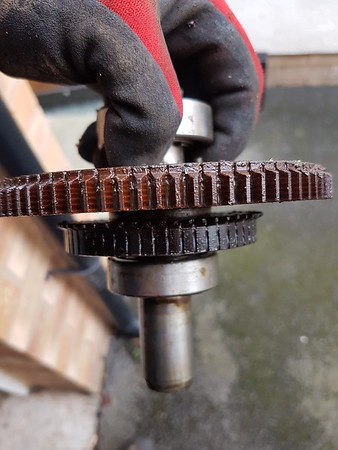
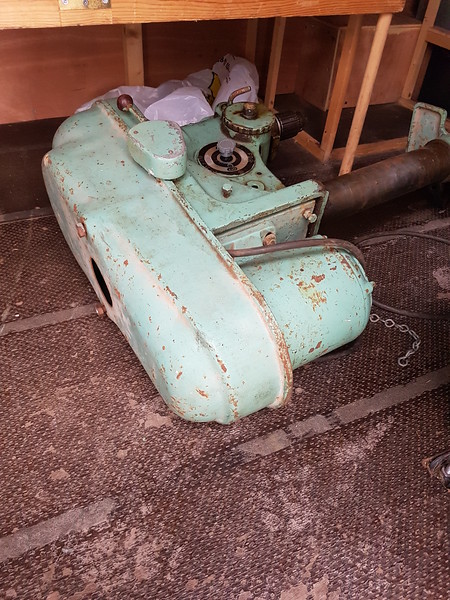
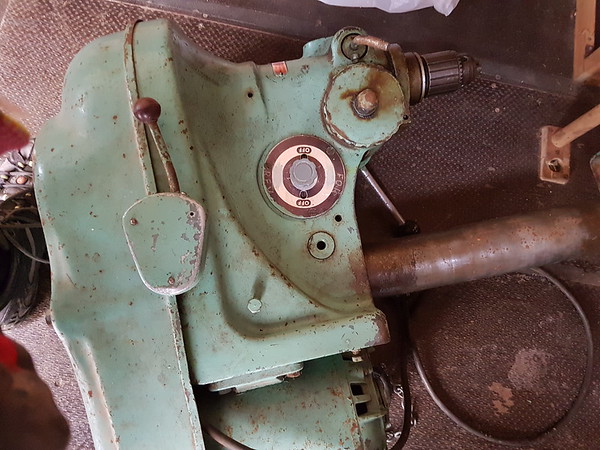
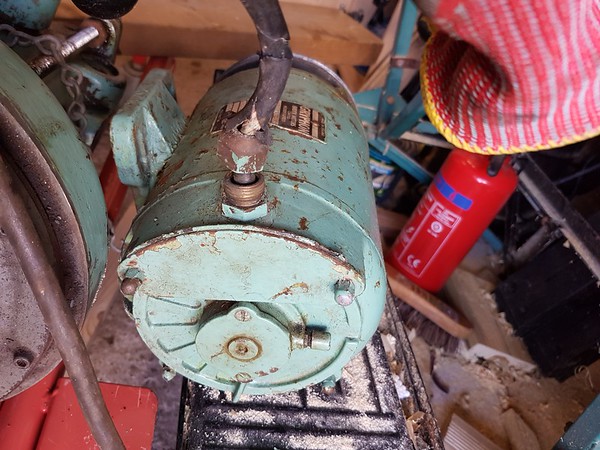
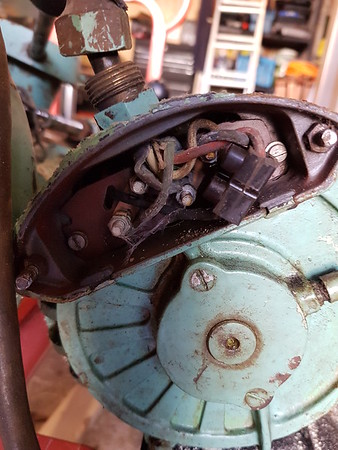
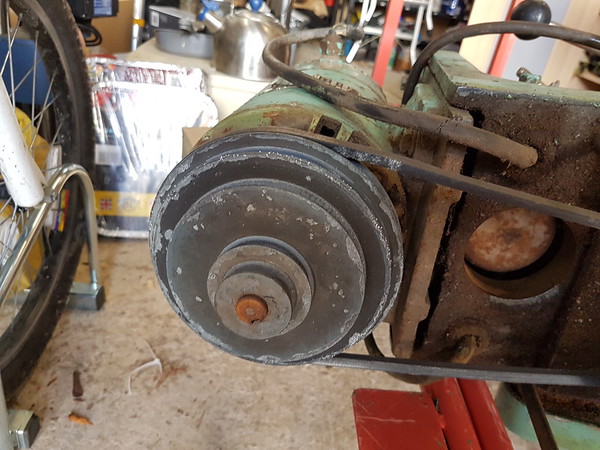
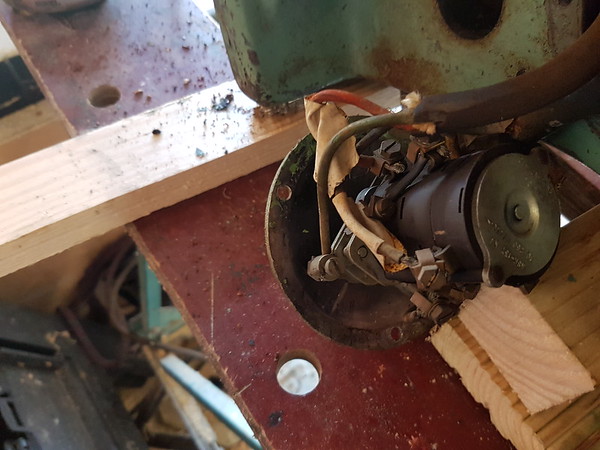
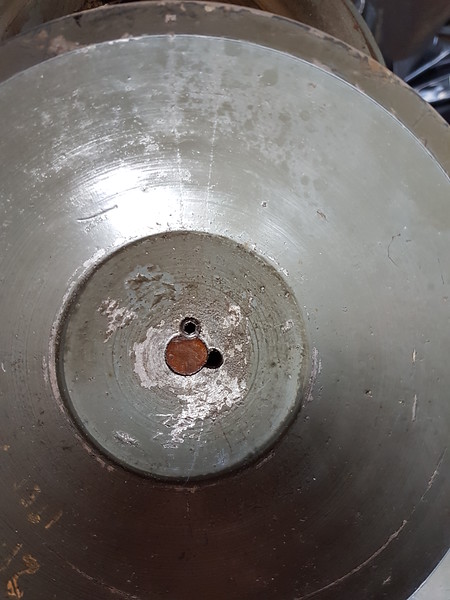
Anyway this thread isn't about that. While idly thinking about what I need to sort out in the pub I 'accidentally' pressed the buy button on an old Meddings Pacera MF4 (I think) because it was just up the road. It's now sitting in two pieces in my van until I find some muscle to help me get it out. I saw it running at the buyers, although it was a bit intermittent; sometimes it would just make a humming noise. It only works in low gear as well.

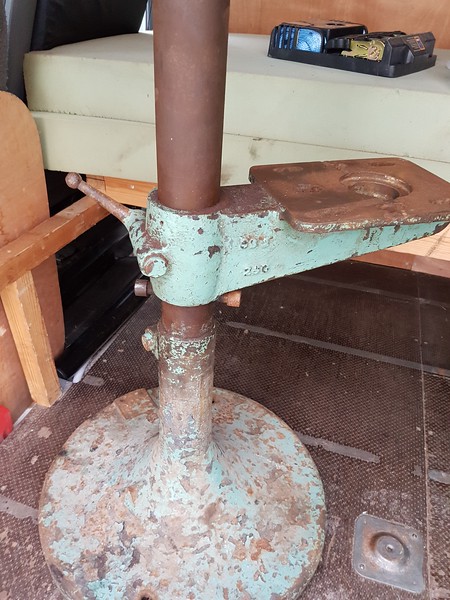
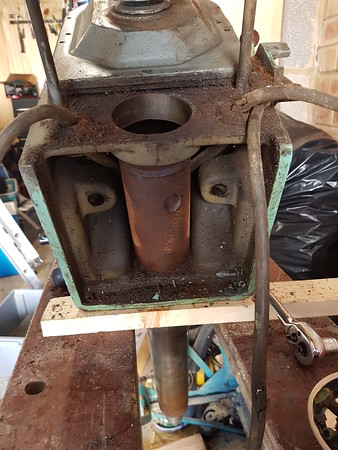
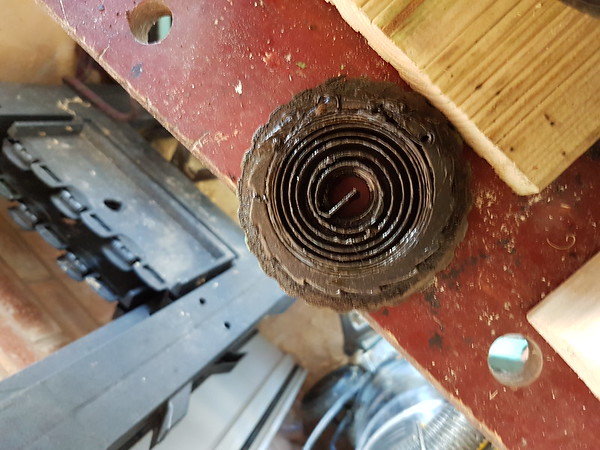
Once it does make its way into the garage what should be my next steps? Obviously needs a clean up and probable paint job. The table is siezed in the bottom position, but I assume a bit of elbow grease and directed force will sort that out.

I've seen this thread but any other advice for a drill newbie would be helpful.
new-meddings-owner-if-i-ve-learnt-one-single-thing-t106700-15.html

Toby

>edit< to make the title clearer
 
The motor not starting correctly is possibly the capacitor. I've always found the best thing is just to take it to my local rewind place - they have it sorted same day usually.
 
its almost certainly the capacitor if its running intermittently...
if its an effort to take anywhere you could either:

- order a new one off ebay on the advice of meddings
- take just the motor down to the nearest suitable place
 
I meant to include a few pictures
The base.
20180227_150257-L.jpg


The head
20180227_150313-L.jpg

20180227_150441-M.jpg

Looks like original paintwork

The motor
20180227_150352-M.jpg


Once I get it onto a workbench I will start to take it apart.
Reading through the other thread, it looks like I might need to get a set of imperial allen keys.

Anything else to expect/be wary of? (there isn't a pool of oil on my van floor so I assume this is missing already!).

Thanks for the advice so far on the capacitor. Where can I find that? And anyone know a suitable place to the west side of Bristol?
 
Hiya Toby,
That's my drill in the link. Its pretty much done, just waiting on me finishing the loft extension till I have time to complete the rewire.
First things first. Phone meddings up. They are brilliant. I ended up sending a pack of biscuits and teabags to the lass on the phone. They are that friendly.
The capacitor is a 16 mfd. Cheap as chips. Mine came from Eurocarparts. Couple of quid.
All the threads are BSF (wih a few exceptions). Worth bearing in mind if you need to tap new bits.
On that note, if you go to the meddings site they will list a few available parts as standard. What they don't tell you is they keep more than those in stock but you need to get in touch with them. Took me a while to work this out...
Mine turned into a labour of love. Having said that I don't suppose I'd get a similar quality of drill for anywhere near the money I spent.
Good luck with your one. Look forward to any progress.
Cheers

All the best
Chris
 
Thanks Chris, I emailed Meddings and they sent a prompt reply. I didn't have the serial number so they couldn't identify the model exactly but sent me the parts manuals for all 3 versions of the type 4. I have now found the model plate so passed that back to them. Did Meddings have the user manual, or just the parts manual for you? I see there is a manual for sale on the lathes site, but at £30 it is a significant proportion of the drill cost. I do need to work out what all the levers and dials do though.

With some effort I managed to get the drill out of the van. I removed the motor but the head was still too heavy to move without risking serious injury to my back. So using a combination of lidl heavy duty ratchet straps and old climbing rope I lifted it up. Probably at risk to my feet and legs if the straps or rafters had broken though.
i-L8PxpRr-XL.jpg


I've taken a few more things apart. I have removed one grub screw from the side of the pulley on top of the gear box, but there seems to be another one in the head of the pulley. I assume I need to remove both of these to get the pulley off (and that needs to be done before I can open the gear box).

With some WD40 and gentle persuasion with a mallet I got the table moving on the stand. Needs a proper derust.
What chemicals do people recommend? I've got normal WD40 for penetrating, and WD40 degreaser (as that is all Screwfix had on Sunday). Are there better alternatives? Chris, I noticed you were a fan of 'Jizer', was this purely on the name or does it have more effective powers (I tried to think of a tasteless pun to squeeze in there but thankfully can't).

For those who recommended I replace my capacitor, where is it? I was expecting a big bulge on the side (fnar fnar) but can't see it here.
i-kz6q9K3-M.jpg

Is it inside the casing, in which case how do I get to it? The opening is quite small (I am getting bored of the double entendres now).
i-6hBPBXt-M.jpg

Having a quick look suggests I need to do some more modern wiring. Considering that the casing has cooling vents it is probably full of crud. Am I just best taking it down some magical old motor shop for a complete strip, or is there much I can do myself? It did spin up originally without any burning smells.
i-5VMvD4k-M.jpg
 
And the ever helpful and prompt lady at Meddings has just replied that this is a MK4 dated November 1958, so is a Mk1.

Bit before my musical time preference but the wonders of the web show that of the top 100 singles of the year I recognise Elvis, Little Richard and Buddy Holly. But I think I may have to go with Lonnie for the name of the drill, as the great Mr Donegan released 3 top 100 singles in that year. The house favourite of My Old Mans a dustman was not released until 1960.
 
Nah!!!!!!!!¨"Rock Island Line" matey (not sure if it's the right year though) ;-)

Looks like it's gonna be a goodun! Keep posting please.

AES
 
A little bit more work:-
Motor plate off the back. Lots of crud in there.
i-jW5X5cZ-M.jpg

Two bolts on each side hold the plate in, which itself is on rods which slide in and out.
Confusingly when I was looking online, someone had a youtube video for a Mark3 dissassembly, which uses a different method of mounting the plate which tilts on an axle. To my mind this is not as good as then the pulley wheels won't be in the same plane. Must be a reason why they changed it from Mk1 to Mk3 though.
I assume the head is suppsoed to freely move up and down and spin on the pillar. It's not doing that at the moment. I've applied directed force using a mallet and piece of wood but nothing moving yet. I have sprayed some more WD40 into it and then apply more brute force.

The return spring looks to be fine (sorry for the slightly blurry picture):-
i-QD2wJzP-M.jpg


The switch. No idea on what that is doing at the moment. I will look at it later. Needs rewiring with non-perishing cables and probably a proper NVR.
i-7FKKHhF-M.jpg


This is my current pain. I need to get the pulley wheel off the top of the gear box so I can take that apart and work out why high gear isn't working. I have loosened a grub screw in the side of the pulley but there appears to be another one on top which cuts into both the pulley and the shaft. I can't seem to loosen this, I have applied force but I'm worried my nice new wera hex key is going to snap.
i-ZKbCdBZ-L.jpg

According to the documentation that Meddings sent me this pulley should be held on by the side grub screw only. It doesn't show anything on top. The MK2, shows a top fixing, but this looks to be an L shaped piece (described as 3/16" G.S.T x 1 1/2" Lg Key). So if this is original, it is not normal (then again the base of this drill is circular rather than the normal rectangular).

Any ideas for freeing it? I've tried a blowtorch on the pulley wheel and probably got to about 60-70 C, but no movement either in the pulley or the grub screw.
I could try drilling out the grub screw but that seems like a possible path to major damage to the pulley.
 
You could try a hex bit in an impact driver after giving the pulley a bit of heat. I would be tempted to soak the grub screw in a mix of oil and acetone for a while first. Obviously be careful with the acetone if your applying heat, let it evaporate :)

Acetone and oil was tested against all the leading thread freeing brands and is just as good if not better than most. It separates so you have to give it a shake but I keep mine in s squirty bottle so easy to do. I use cheap hydraulic oil.

I may have some Meddings spares if your willing to wait, I have 4 meddings, 3 are the M4 variety. One head casting was badly smashed so I will be making 2 out of the 3. I have nearly completed renovation of one, it is on here under this thread the other two are still to be looked at, both are bench not floor mounted.

Cheers
Andy
 
Thanks Andy,

My drill is a bit of a runt compared to yours.

I may take you up on the spare parts if needed. I'm hoping that there isn't too much wrong at the moment, although until I get the gear box open I can't be sure. That's assuming I don't break anything trying to get it open!

Coincidentally I had come to the same idea about the impact driver yesterday. Of course this meant I had to buy some imperial socket hex bits and an impact driver; coming today hopefully....I suspect by the time I have finished this restoration the price of new tools will have doubled the cost of purchasing the base item. I may have to restore something else afterwards to justify it.

I have also gone out and ordered some acetone. It seems the wife's nail varnish remover is acetone free. Lets hope the police don't take too much of an interest in my amazon history.
 
TobyT":2qfkdwe3 said:
I suspect by the time I have finished this restoration the price of new tools will have doubled the cost of purchasing the base item. I may have to restore something else afterwards to justify it.

Slippery slope - I did the same when I started renovating machinery, I went from a few odds and sods of tools to oodles, but it's taken me a few years and finding bargains is fun.

It may be a while before I get around to consolidate the two into one and find out what I have spare, I have an extension to the daughters bedroom to fit out and a complete utility room and kitchen fit out. If I have spare delrin cogs I will probably keep them as they tend to be the main wear/break points but you can still buy these from Meddings.

Here's the base of one I robbed the innards of the head from. You can see the pressed steel pulley cover, my radial arm drill didn't have a proper cover so apart from various spares this was one of the main reasons I bought it.

P1070167.jpg


Here's the remains of the head casting after robbing the innards for the radial arm drill, I'm just pressing the bushes etc. out before scrapping the casting.

P1070168.jpg


and here's the last one I bought, it was really local and cheap and had a cast pulley cover so I thought I would buy it, use this cover then consolidate what was left from the two into one later..... may be a while........

P1070169.jpg


I'm not sure which base to use yet, they are very different. One has the rack and pinion but not intermediate table, the other has a separate table but no rack and pinion. I will probably use the rack and pinion but I don't need to make a decision yet, eventually one base will be spare.

Cheers
Andy
 

Attachments

  • P1070167.jpg
    P1070167.jpg
    122.9 KB · Views: 642
  • P1070168.jpg
    P1070168.jpg
    138.2 KB · Views: 644
  • P1070169.jpg
    P1070169.jpg
    134.3 KB · Views: 643
Andy,

What is the rack and pinion supposed to do? Support a table that has gone missing or something else?

The base on mine is different to all the other models I have seen photos of, being round rather than rectangular. The paint looks original (but may not be) so I'm assuming it is what came with it. The base did support the stand before I moved it, but looking at the picture now it barely extends out to the quill. I should go and measure it, but it is raining a lot. This would suggest I can only put a limited, or small dimensional, weight on the table, otherwise the drill will tip over.
 
Rather than move the table up and down to get the chuck within striking distance of the workpiece, the base is the table and the rack and pinion moves the head up and down on the pillar.

You will have to bolt or clamp the base down on yours I think.

Cheers
Andy
 
Sorry for the delay in replying Toby.
I should have made clear that the capacitor on mine was strapped to the outside of the motor by the previous owner. The rating for the new one I mentioned was offered up by an internet mate in Italy who took pity on me. Not sure that's the right answer for your motor. You will have guessed if you managed to read between the lines very very carefully ( :-$ ) I don't have a clue what I'm doing by now, and anyway, Andy has turned up to lend some actual knowledge so all is well.
There's some far better and vastly more knowledgeable restorations on here than my old guff, so I'd have a good search if you haven't already.
I don't want to teach Granny to suck eggs but I maybe able to help a little on the derusting?
There's a variety of methods that different people espouse. Electrolysis, molasses, coca cola, white vinegar etc etc etc.
I have never tried the first three. I've used vinegar a fair bit but now I use citric acid. (buy it in powdered form off the net to add to your internet history pinging in some darkened room somewhere) . ... it seems milder and I add a drop of fairy liquid and a splash of meths. I have also found that washing it off if I use water and bicarb of soda seems to prevent flash rusting. Unfortunately, for the initial stages you're looking at green pads, wet and dry, lubricant, brass brushes, and a sh*t ton of elbow grease. Drill attachments help a huge amount
The Jizer was good gear as a degreaser but it's not the cheapest way by a country mile. Some people just use diesel. Not half as many puns available though and it doesnt come in a handy spray gel form from Amazon etc.
I'd suggest once you get the drill apart you can look at dedicated (and work free) baths. (ie from dedicated hot tanks to garden trugs/ buckets etc)
Spares for bsf screws etc can be quite dear relatively. Supply and demand. I would think I have some spares so pm me or post on here before buying. I'd like to keep a couple of spares for each but if I have extras I will be glad to post them gratis. Worth trying at least.
I can post pictures of how I've rewired the switch but I only rewired in copy with what was there. I have no idea if it's right before I get round to having time to connect it all up or if it's fixed the no reverse issue on mine.
Until I get the loft extension done I can't justify getting out to my shed to mess about and finish the drill as it's purely a hobby really and TBH I quite like my Jacobs (non-chucking variety) firmly attached to my body and the Wise One is really quite fed up with living in a building site. So I need to be a bit balanced here. :|
Best regards
Chris
 
Thanks for the advice Chris. I haven't started the cleaning yet (well other than a quick wipe to get the worst off). I have used electrolysis in the past for smaller parts of the vice I renovated. Where it is not pratical for the larger parts I will go with your suggestion of citric acid or elbow grease. TBH the rust doesn't seem to bad.

Well, after squeezing ten minutes here and there out of a normal day I managed to get the pulley off. I didn't need to use the impact driver (god job as it seems to be rubbish and keeps getting stuck) but the 1/8" hex key on a socket gave me enough torque to get the grub screw out.
I then had to purchase a gear splitter to pull the pulley off...

With a bit of leverage the head of the gear box came off.
i-2Bgjx6L-M.jpg

Bit of gunk in there but doesn't seem to be any loose bits of metal.

Oy! who let the tooth fairy in here? Surely this can't be right (although I have never played with a gear box before so prior knowledge is zero). No wonder I couldn't enage high gear, the drive wheel on the other shaft has very little to engage with. It almost looks like the majority of the teeth have been knocked away in a bad meshing accident. However the edges are clean and look factory made. But why make the bulk of the gear so thick?
i-TngpDx8-M.jpg

i-9pQzVwh-M.jpg


The parts list from Meddings for the MK1 just show the gears as blocks, without the individual teeth being drawn so I can't work out what is supposed to be there. If anyone has taken a Mk1 apart does it have the same setup? Or even on the MK2. If this is usual I obviously just need to adjust something to get the gears to engage properly; otherwise I need to get on to Meddings to get a new part. I don't want to do this, because a) it will be expensive, and b) I suspect it will be a right pain to swap the gears.
 
Can't help here Toby, because mine seems to run okay tbh, I have put off taking the gear box apart in case I caused myself more issues until some point in the future when I'm a bit braver.

This thread by Mindthatwhatouch, might help.
meddings-mf4-rebuild-t102573.html
 
Back
Top