Need advice restoring the Virgin Mary

UKworkshop.co.uk

Help Support UKworkshop.co.uk:

This site may earn a commission from merchant affiliate links, including eBay, Amazon, and others.

builderchad

Established Member
Joined
11 Apr 2006
Messages
85
Reaction score
0
Location
Oxford
SWMBO inherited this little statuette of the Immaculate Conception when her mum died, who got it from a monastery in Singapore many years ago when they were tearing it down. It spent the last 15 years in the garden and is not in a good way as a result. Its actually a very nice looking sculpture and I would like to restore it to its former glory.

It seems to consist of two pieces stuck together which have since split apart a lot. Right side:

normal_108-0896_IMG.JPG


It also has splits on her face and torso but there are no obvious seams on the front or back (just the sides):

normal_108-0897_IMG.JPG


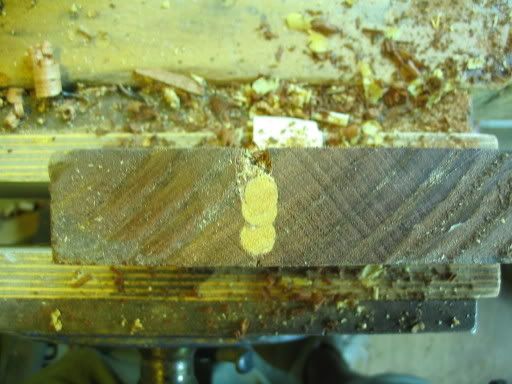
The bottom shows the split very clearly and also evidence of little critters chewing away at her:

normal_108-0898_IMG.JPG


Here is what I would like to find out:

1) I assume this was made no less than 40 years ago and would like to split it along the right-left seam and plane down this to a flat again. Is this the right approach?

2) If it is - what is the best way to split the two pieces? Would they have been using hide glues back then?

3) I assume that the face and torso cracks are just dryed out wood and not evidence of splitting seams where wood has been joined. Whats the best way to fill these cracks?


I have no idea what wood it is but if I do split her to plane down the front and back pieces true then that would probably reveal the grain nicely and I could try find out what she's made of then.

All and any advice most appreciated, thanks.

Chad.

(P.S. sorry haven't been around the last few weeks, I am playing Murderer #1 in a student production of Macbeth here in Oxford so its been mad with rehersals etc. :) )
 
I have no real ideas but I think I'd check with an art conservator or something like that. I think if you were to split it along the seam, flatten the faces and reassembly it, you'd have some breaks in features as they cross that seam.

My inclination would be to carefully clean out the critter leavings and make some sort of base for it to stand on. Otherwise, I'd leave it alone at this point.

If you do figure out what to do with it I for one would like to see what you do and how it turns out.
 
Are you sure it is made from two pieces. It looks more like it is carved from a single log and the split is in the outer area of the log with less getting towards the heart. I would do as Dave R suggests about the base and I have seen sculptors fill the shake with a sliver of timber and carve it back to suit the statue.

Drew
who doesn't purport to be an expert in this :)
 
\:D/ At last some thing I DO know about 8-[ :roll:
First dont split it, you will be asking for trouble as Dave R said put a sliver of timber in there.
You will need to clean up the edges of the cracks as straight as you can and from there you hopefully you can see what the timber is ( not alwat that easy but your best bet ).
On the base of the statuette you need to stop the spliting from moving by get the longest drill bit you have and drill between the crack as far up as you can, then put a dowel in the hole. Then do it again until you have no gaps, this after you have filled the splits.
To make your slivers, you need to get some wood and plane an angle on the side of the board and then cut a long the board. This should give you a peice of wood like wedge, this is much easier that try to plane a long peice to fit.
As for the glue you should use what you have ( PVA would be good )
Try to get a board that is as think as your thinkest part, if you can.
I hope that is clear :)
 
Also be carefull when putting in the wedges as you might split it more so try to push them in and clamp them if you can.
 
Hi all

as colin said He covered the subject well.

Only suggestion instead of clamps I would use old tyre tube rubber as a rap around bandage, as tight as you can pull the tube. holds it all together whilst the glue dries.

Norman
 
topofseam.jpg


It really does look like two pieces glued together and then carved, though I guess as you said it is still safer to use a sliver and dowels rather than try force the rest of the split. Also, good point that splitting and planing would take away some of the carving along the seams and cause a mismatch when glued back together. I will sand down the base a bit to see if I can reveal the wood more as I will need a fairly close colour match.

Colin, the dowels need to go right the way through the piece or can I just drill *almost* through? I am thinking of her face mostly here - I could drill through the back of her head and not come out on the other side and glue in the dowel - is that right?
 
Builderchad
I mean the split in the bottom, you need to do the splits first and drill in line with split ( the bonus with this is you dont have to try and clean out the split where you are going to drill), if this is still not clear I will post a pic of what I mean :)
What the dowel is doing is bridging the gap and making the peice solid again ( a pic might be better if you need one ) :)
 
Ok
I will do some tomorrow as I have just come back from training for 4 1/2 hours today ( Karate, 2 hours in the morning and 2 1/2 after lunch ), so I now have lager in hand and will more than likely be sat down for the rest of the day (homer)
 
A chap gave a talk about this very subject at my woodturning club last night. He had to repair a carving on top of a horse-draw hearse. He researched the problem and found that soaking the object in a 10% solution of sugar, increased by 5% every other day and left for a month(You would need to research the exact details) reduced the cracks. The effect also seemed to be long lasting.
 
Hi builderchad
Here are the pics of what I was talking about, I hope this makes it clearer :)
IMG_1813.jpg

You drill the first hole near the edge with what ever sizs drill and dowel you are using, then glue in the first dowel.
 
You can then drill the next hole, making sure that it over laps the first dowel.
You keep doing it untill the split is filled.
You should end up with some thing like this
IMG_1817.jpg
 
I almost forgot #-o
Use a brad drill bit for doing it, as it will help cutting the dowel you have just put in :)
If you do use the sugar, you can do this after it help keep it together
 
It can also be used on the edge of a table if it has a split in the top but it is best to repair the split first
 
Thanks Colin, its very clear now. I see it means making the wedges will be simpler as they will be quite thin - obvious I guess now but it didn't occur to me at the time. I will sand her down (carefully) this week and see if I can expose the wood properly.

Cheers, Chad.
 

Latest posts

Back
Top