Multi TH3/TH1 Thicknesser Restoration Project

UKworkshop.co.uk

Help Support UKworkshop.co.uk:

This site may earn a commission from merchant affiliate links, including eBay, Amazon, and others.
................UPDATE................
I have transferred all the photos from photo bucket to Flickr and placed them back in the original post.
................UPDATE................


I have since complete 2 of my tasks that were left to do on this machine.

1: Extraction outlet
2: Digital thickness gauge.

Both of these items were on my list to do and was the main reason for getting my 3D printer.

So both these modifications have been done on it.

1: The extraction outlet.
My current setup calls for a 100mm extraction hose connector. Using CAD I designed this connector thats fits into the thin rectangular slot, then gently morphs into the 100mm outlet I needed.


I then 3d printed it in two halves then glued together after.


After a quick test I found that the hose always covered the out feed end as it dangled down. This meant that wood just pulled the hose off.

So next I printed an adapter that connected to a 45 100mm pipe connector. I have it loose enough that i can rotate it depending on where the hose is coming from.


2: Digital thickness gauge.

I had wanted to get a digital thickness gauge on it. Looking around for specific ones for this purpose they tend to be around the £100 mark. I had seen digital callipers modified to work will drill presses and lathes so thought a thickneser is no difference.

I started out with a cheap £13 digital calliper and designed some brackets to hold it.
There are 2 main components: An upper adjustable bracket and a lower fixed bracket.
The idea is as follows: The top of the calliper is fixed to the body of the machine. The lower bracket attaches to the thicknesser table. As the table moves down it pulls down the calliper and the measurement is read out.

To calibrate: I send a piece of timber though the machine then measure it using a separate calliper.
Using the adjustable top bracket I adjust it until the read out is the same as the thickness of the piece of wood.
The i run a test piece through and check.


So 2 jobs remain:

1: Switch Gear.
I would still like new switch gear for the machine. Ideally one higher up as the current one is low to the ground.

2.Side panel.
I still need to manufacture a new side panel to cover up the gears and chain/

Potentially...

I have a potential idea to turn this into a jointer. By removing the top cover i have access to the cutter with no obstructions. There are also multiple possible mounting points to add feed tables without having to alter the machine directly

Similar to how Matthias Wandle's homemade jointer is made. But this will have to wait for now.

Thanks for looking and the kind comments before.
 
I have the Wanhao i3 Plus from Amazon.
Fairly budget printer but works a charm.

Im pretty pleased with it. Makes so many things possible.
 
You need to export to a .stl
There is a plug-in that you can download for free that enables you to do this.

Although sketchup works. Fusion 360 is a lot more powerful and better for making models. It’s free to use to. Just sign up for the education one. It’s worth learning if you get a 3D printer. It’s also not that difficult. After a few basic tutorials it’s easy to understand.
 
I've been wanting to do the digital readout thing, one question. How does one calibrate the readout to what is being planed. You cant exactly raise the table till its touching the cutterhead and zero the readout. Do you put a piece of wood through of a known thickness say 10mm and then zero it.
 
To calibrate: First I close the caliper then zero it. Then i attach the bottom bracket on the caliper to the table by opening the caliper. Then I send a piece of timber though the machine, then measure it using a separate caliper. Does not matter what thickness it come out as long as i know the new thickness.
Using the adjustable top bracket I adjust it until the read out is the same as the thickness of the piece of wood.
The I run a test piece through and check and then its all set up.

I think as well, that I will convert the caliper to run of an AA battery instead of the coin cell, as they tend not to last that long.
 
Thanks, I figured it out in bed last night :D 
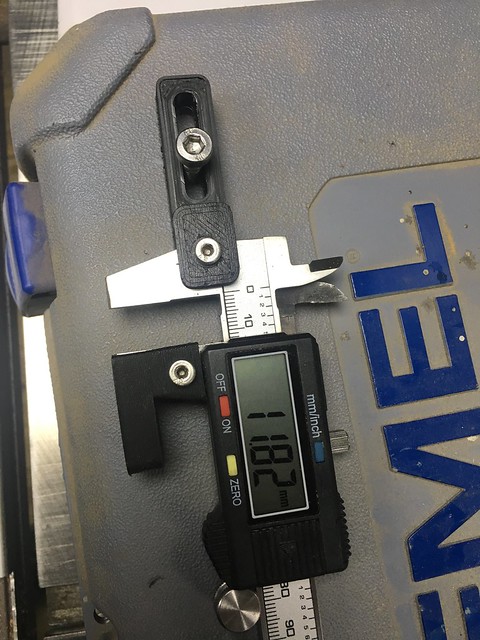
. I think you can buy lengths of the mag strip to make the gauge longer so might work on the saw bench
 
You have inspired me to restore the TH1 machine I bought second hand some 15 years ago. You have made a fantastic job here and renovated a great tool. I set my blades very simply with the method of "shifting" a wood plank 5mm on the base plate. The method is accurate, simple (due to the really straightforward adjusting mech with the TH1) and cheap (well free actually!), I get great results when new blades are fitted with this method.

One big question .... Mine has the original on/off switch which is somewhat unreliable these days as it will start cutting out after 20mins use (when it gets warm it seem to drop out). I see your machine has a much different arrangement. Have you replaced the switch? I'd really appreciate some advice on the alternatives I could use (and where to source them from) as the current zero volt and load cut out seems valuable but also has the disadvantage that the Amp load on start up is pretty significant (I guessing the relay/capacitor arrangement causes an initial surge)

Thanks in anticipation .... Ian
 
Despite having an aversion to metalwork, it's great to watch an old sad machine brought back to life. Great job.
 
DedhamMayor":18nqmyff said:
You have inspired me to restore the TH1 machine I bought second hand some 15 years ago. You have made a fantastic job here and renovated a great tool. I set my blades very simply with the method of "shifting" a wood plank 5mm on the base plate. The method is accurate, simple (due to the really straightforward adjusting mech with the TH1) and cheap (well free actually!), I get great results when new blades are fitted with this method.

One big question .... Mine has the original on/off switch which is somewhat unreliable these days as it will start cutting out after 20mins use (when it gets warm it seem to drop out). I see your machine has a much different arrangement. Have you replaced the switch? I'd really appreciate some advice on the alternatives I could use (and where to source them from) as the current zero volt and load cut out seems valuable but also has the disadvantage that the Amp load on start up is pretty significant (I guessing the relay/capacitor arrangement causes an initial surge)

Thanks in anticipation .... Ian


I haven't replaced the switch as of yet..
But ill be getting something like this: https://www.ebay.co.uk/itm/ELECTRIC-MOT ... Sw241YgNQl

Then with an rotary Isolator:
https://www.ebay.co.uk/itm/20-or-32-Amp ... SwWDNZlbHC


Toolstation have a good selection here too:
https://www.toolstation.com/shop/Electr ... ies/sd3080

Just about to order a emergency off switch for my table saw that I can kick. Had a minor accident today...
 
Nice job! I have an earlier version i think its an L3? Its main sideplates & most of the rest of it are cast iron & it goes about 3cwt.
I bought it for £100 back in 1984 & it had been in a fire. It was quickly done up & put to work, i keep meaning to do a better job but it just keeps on going!
 
What are the belt sizes you use on your TH1? I cant seem to find any literature on it.

On my machine which is an older version than Jamie's so it may not be the same as the later models gained an inch of thickness depth later on, it uses two A60 belts to run the cutter head and one A47 belt to run the feed.
 
Back
Top