Making Corbels

UKworkshop.co.uk

Help Support UKworkshop.co.uk:

This site may earn a commission from merchant affiliate links, including eBay, Amazon, and others.

ajayre

Established Member
Joined
2 Dec 2013
Messages
49
Reaction score
0
Location
East Yorkshire
I quite like the corbel shown below. What steps would be involved in making something like that? My guess (and I'm new to woodworking):

Bandsaw for the general profile
Bandsaw for the bottom shaping
Routed bead across the middle
Rosette cutter for the bottom design feature

What about the three vertical cuts and the scroll on the side? Could a jig be created for the scroll engraving?

Thanks, Andy

Victorian_Open_Bookcase_as006a2397b-2.jpg
 
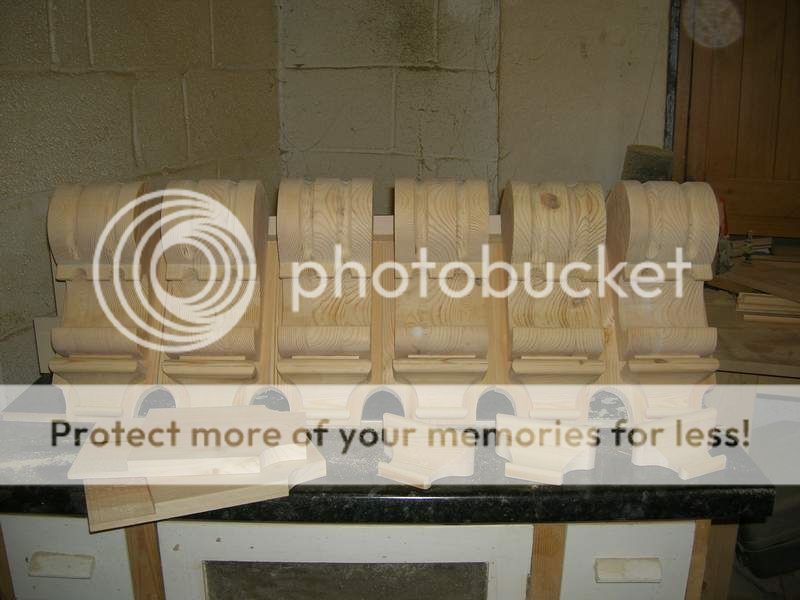
I made some similar to this a couple of years ago. I split the corbel vertically into two sections and routed out the central grooves using a radius sunk bead cutter. The router was placed on the side with a template and guide and one groove cut in each section. Then all the pieces were glued back together. These are the ones I made.
 
You could use a winged stackable bearing cutter


something like this, axminster do one with a selection of washers to make pretty much any size you want.

14700_2.jpg


Just lie it on its side, the out side ones are easy as you just flip it over, then raise the cutter up a bit for the middle groove.

adidat
 
Are you sure that this is all from one piece? For starters, I'd say the round button is an add-on and I'm not sure whether the centre half round and quirks is also an add-on.

If it is all one lump then (1) and (2) I agree with. But you'll never manage to get the wood into a router to do the rest. It's handtools, moulding planes and gouges. I'd split it into three pieces plus stick-ons....the half round and the button.
 
The button is almost certainly turned on a lathe and glued into recess of the same size done with a simple boring tool. Apart from that, although a bandsaw would be useful, the whole thing can be accomplished fairly easily with basic carving tools and techniques.

For the flutes, it would take longer to set up a router, than to carve them with a gouge, unless you're doing a lot of them.
 
Sawyer":357l6k7y said:
...

For the flutes, it would take longer to set up a router, than to carve them with a gouge, unless you're doing a lot of them.

I can't see how you are going to do these with a router. Surely the base will get in the way?
 
Router devotees can be very ingenious and would probably find a way. Interested to see what suggestions appear. A spindle moulder would do it, I think, but the set-up required to do it safely would take ages. Not worth it except for a sizeable batch.

I'd still stick to a mallet & gouge personally.
 
Thanks for the responses. I am planning on turning a room into a Victorian library so these would be at the top of each bookcase section. No idea how many - perhaps 10 or 15 are needed.

I have no problem buying corbels but I would like to make the bookcases out of Oak or reclaimed Mahogany. I presumed to get the staining to match the corbels needed to be the exact same wood.

I can probably do the spirals on my CNC machine.

Andy
 
I'm also certain that the original one shown was hand made, and would recommend making new ones the same way, as it's more fun!

Looking at the three coves on the face, you can see that they are cut with just one tool, a gouge. At the foot of the cut there is the shape you get from a downwards, stabbing cut and at the top there is the shape you get as the gouge enters the wood.

I reckon the astragal is out of the single piece too, looking at the grain pattern. Cross grain mouldings are not that difficult if you have the right wood and sharp tools. I did these on a smaller scale on my Victorian library chair/steps and probably spent more time thinking about them than they took to cut:

IMG_0266.jpg


You establish square stopping cuts first, then just go at it with a gouge, or moulding plane if it's big enough.
 
Back
Top