HELP..I think I've bitten off..

UKworkshop.co.uk

Help Support UKworkshop.co.uk:

This site may earn a commission from merchant affiliate links, including eBay, Amazon, and others.

woody67

Established Member
Joined
24 May 2007
Messages
625
Reaction score
0
Location
Cumbria
...more than I can chew :oops:

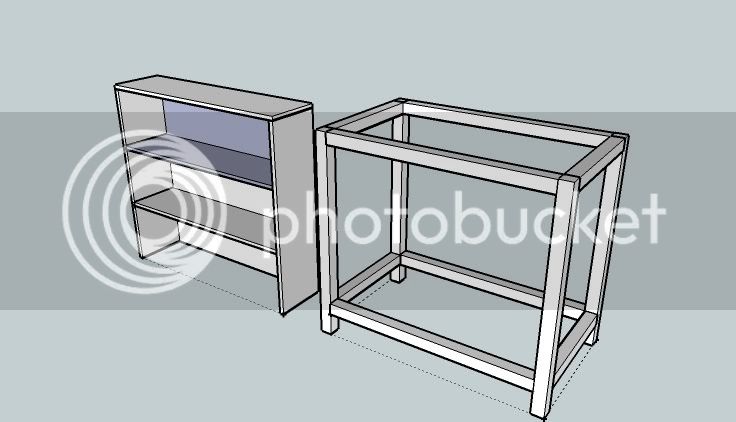
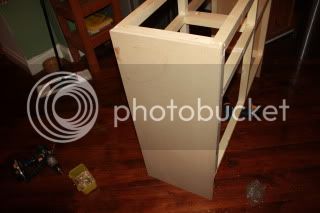
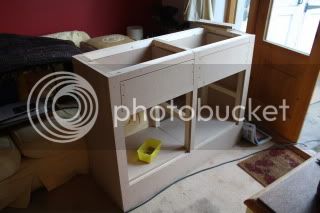
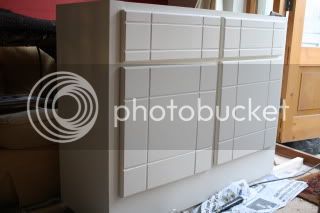
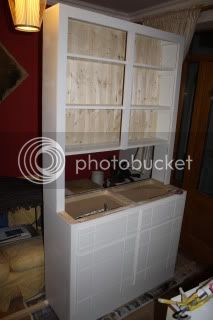
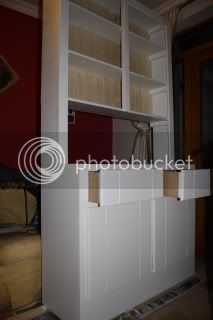
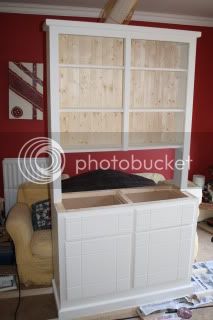
I've been asked to construct a "simple" kitchen dresser in a "similar" mode to the attached. For some inexplicable reason, I agreed. :shock:

pinedresserlg.jpg


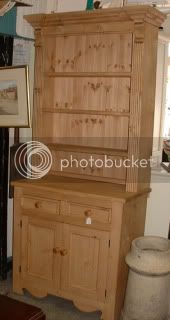
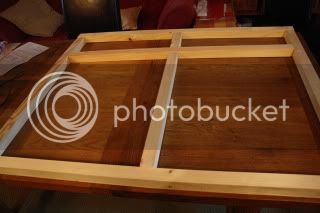
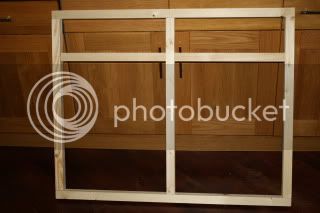
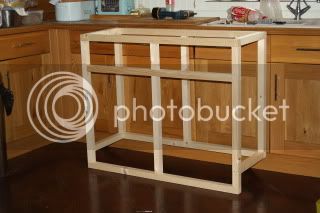
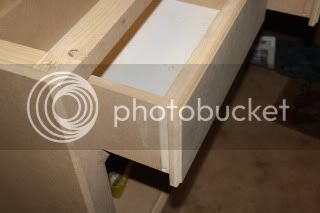
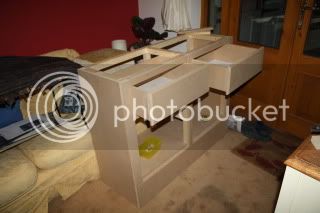
Materials are 18mm MDF and 40mm x 40mm framing stock. It's designed to be very basic at it's to be painted, so MDF shouldn't be an issue.

So folks, herein lies the rub....what's the best way of going about it? Any simple plans around? Make the carcass solely from MDF, or a simple frame to box in with the MDF? I've hopefully got the tools I need, including a biscuit jointerand router table. Sadly my mortice and tenon skills are somewhat limited - as is time and space!

This post probably makes as much sense as a nuclear fission dissertation written in ancient latin, but panic's slowly starting to creep in and I'm desperate! :wink:

Please feel free to tell me what a dimwit I am and that I have indeed took too big a bite. If this is the only response I get, then I'll be happy. :oops:

Apologies again for the ramble. :oops:

Thanks all

Mark :cry:
 
I think we have a resident ex-pine furniture builder who can help you with this.

Don't panic tho Mikke, rome wasn't built in a day. You can do it if you...
 
If it helps, you can buy ready made doors, drawer fronts and (ugh) plastic extrusion for the drawer sides. You could then design the rest around those dimensions.
Best to use MR MDF ( the greenish one) as it takes paint better and the edges are far less 'furry' and routed profiles look better.

Bob
 
Don't panic!! Don't panic!! :lol:

I agree that Brad's your man for this but until then you can try and look at the project as 2 separate items. The top shelving section and the base cabinet.

help11.jpg


The top section is essentially a bookcase. two sides, a back, a top and shelves. If I were making this, I'd use 18mm MDF for the top, back, sides and shelves and 6-9mm for the back. I recently made a set of basic bookshelves for my wifes classroom this way and they're holding up just fine. Cornices/moldings can be planted on after if that's what's required.


For the base, I'd make a wooden frame from 2x2 and either skin it / rebate in some 9mm MDF to provide stiffness. The top can be 18mm MDF with the overhanging edge molded to suit. Doors and drawers can then be fitted to the unit.

I know I'm making this all sound oh-so-easy but that's how I look at my projects. I find that if I concentrate on the details too much right from the beginning, I can get a bit overwhelmed.

This is not necessarily the correct/accepted way to do it, just how I would go about it.

Hope that helps! :D

Breath! :lol:
 
I have made dozens and dozens of these over the years.

I would simplify it even further than Pren's sketch, above, and suggest that the base is a series of flat panels, fixed together at the edges. So, make up 2 side panels, with ex 3x1 PAR for the frame rebated to take, if you must, your MDF panel, and rebated for a flat panel of MDF across the back.

The front is a face frame of ex 3x1 PAR.

I would make the bottom (base) shelf of the base unit from solid timber, as per the "worktop", but I guess that with some cross members for support you could do it of MDF. Let this into another rebate in your side panels and the face-frame, then you wont have to deal with the edges.

The doors are simply another pair of panels........ex 3x1 PAR with a panel of MDF.

So, as you can see, if you can put a groove in the edge of a bit of pine, and if you can run the odd rebate, and chop things up to length, this is actually a very simple project. What makes it special, though, is doing some stop-chamfers, and applying mouldings around the top, and a bit of shaping to the toe-board etc.

Have a crack at it........you soon see that you haven't bitten off more than you can chew at all.

Mike
 
The finished article 'always' looks way more complicated than it is. Broken down like Mike has for you shows that it's really made up of numerous fairly straight forward bits.
I'm sure you'll be able to manage it once you break it down into manageable chunks.
 
wow some excellent advice and ideas, even makes me want to have a go when you simplify it like that.
 
Phhhewwwww :D Thanks all EVER so much - I can now cancel the order of razor blades and paracetamols :wink:

Much appreciation fellas, but please feel free to carry on submitting ideas - or even better, pop up to Cumbria and you can show me how it's done. :wink:

Mark :D
 
woody67":25xcueik said:
Phhhewwwww :D Thanks all EVER so much - I can now cancel the order of razor blades and paracetamols :wink:

Much appreciation fellas, but please feel free to carry on submitting ideas - or even better, pop up to Cumbria and you can show me how it's done. :wink:

Mark :D
As you live in a very scenic part of the country we'll all come up for the weekend and help you make it. :D :D .

Hope you have enough rooms :D :D
 
Yipppeeeeee.....................I've done the deed....

KitchenCabinet001.jpg


KitchenCabinet003.jpg


KitchenCabinet004.jpg


KitchenCabinet010.jpg


KitchenCabinet020.jpg


KitchenCabinet023.jpg


KitchenCabinet022.jpg


Kitchencabinet036.jpg


Kitchencabinet045.jpg


Kitchencabinet047.jpg


The euro hinges need fine tuning, hence the misalignment and a kitchen worktop (laminated wood effect) is to go on top of the base.

Please feel free to post critiques, but bear in mind I've still got my paracetamols and razor blades!! :wink: :wink:

Thanks

Mark :D
 
It looks alright. I would of followed Mike's advice though on the No mdf touching the floor. It may swell from washing the floor and potential spills.

It sounds like this is your first one so i have to say job well done!

edit: It has to be asked. Is your workshop any room that no one is in? or do you sneak the tools in the house when your partner is out?
 
crazylilting":3m45sf37 said:
It looks alright. I would of followed Mike's advice though on the No mdf touching the floor. It may swell from washing the floor and potential spills.

It sounds like this is your first one so i have to say job well done!

edit: It has to be asked. Is your workshop any room that no one is in? or do you sneak the tools in the house when your partner is out?

Thanks for your comments and advice Crazy - it is my first one and YES I did sneak some tools into the snug when Mrs W was at work. It's less prone to damp than my workshop :wink:

Thanks

Mark :D
 
HOLY rubbish!! :shock: THAT's your first project?! *quickly hides his first few projects out of shame*

That's really good! =D> Is that the final paint or is it going a different colour?

I'd have to agree about the base. I think I'd have kept the bottom the same level all round, put adjustable feet on followed by a plinth set 20 - 30mm back if it's to go with the kitchen units in the pic.


That said - nice work! What's next? :D
 
pren":35ivtuzx said:
HOLY rubbish!! :shock: THAT's your first project?! *quickly hides his first few projects out of shame*

That's really good! =D> Is that the final paint or is it going a different colour?

I'd have to agree about the base. I think I'd have kept the bottom the same level all round, put adjustable feet on followed by a plinth set 20 - 30mm back if it's to go with the kitchen units in the pic.


That said - nice work! What's next? :D

Thanks ever so much Pren - you've no idea how such comments can give an amateur like myself a boost :D

Yes - this is the final colour, a cream to match my "clients" units. The ones in the photo's are our oak kitchen.

I think I'm maybe too late for adjustable feet ? The current height - now I've added a cornice, comes to 85 inches! :oops:

I've added a skirting to the base to hopefully break it up a little. I'll post the fully finished item soon if anyone's interested. :oops:

I had a break to make a "post box" for a young man with Autism who functions better if he can post pictures of his daily routine. Once posted, he's happy and in the know that the activity is finished. :D

Kitchencabinet033.jpg


Thanks again

Mark :D
 
woody67":8ys8ligb said:
Thanks ever so much Pren - you've no idea how such comments can give an amateur like myself a boost :D

Hey, we all started somewhere! My first project was a kitchen for my MiL. After posting pics of it on another forum I recieved a couple of very unhelpful comments along the lines of 'It's rubbish - give up'. It was a year before I had another go at woodworking.

If you're anything like me you'll be looking at it, mentally listing all the glaring errors and faults that no-one but yourself will know about or care. You'll still be dead chuffed with your efforts, tho. Also, after you've had a few more projects under your belt, you'll look at it again and be horrified by how 'belt and braces' it is compared to your latest masterpiece! :lol:


That skirting finishes it off nicely! What it is made from? I think there may still be issues with the MDF being in contact with the floor if there are any major spillages.

Am I right in thinking you used an 18mm skin of it over a timber frame? It's not exacly going to explode, killing all around it should it get wet, but the bottom edge could swell a little which might warp the sides.

As a quick bodge, you might try coating the underside of the side sheets with some waterproof varnish/paint that should help keep the water out. (I'm sure someone'll be over in a sec to tell me I'm talking oot me buttocks) :lol:


I like the idea behind the postbox. My wife works with mildly autistic kids so I've a basic understanding of how routines and 'ritualistic behavior' can be very important to them.

Liking it! :)
 
Thanks yet again Pren for your kind words of wisdom and encouragement. :D

The skirting is made of 18mm MDF :oops:

I think I will try waterproofing the end grain as you wisely suggested.

I e-mailed my pics to my workmate and she's chuffed. :D

The shelving unit was made separately so do you think it will be fine free standing, maybe attached to the wall or should I try and attach it to the base unit somehow? It's easy to break down for transportation at the mo.

Thanks

Mark :D
 
Wisdom? Who, me?! :lol:

Try and seal the edges best you can. Like I said, not the end of the world. The beauty of this forum is that you can learn from other peoples mistakes. I daresay there's someone reading this, learning from yours. :D I know I've dodged a few bullets from reading other people's work-in-progress threads. I've also walked face first into plenty of stupid errors and will undoubtedly continue to do so. You lives, you learns! :D :lol:


Most of the Welsh dressers I've seen have had the top section just sat on the base. However, I've always felt that something that tall and narrow would quite easily topple over given the right persuasion. An answer could be to affix a mending plate to the back, lower edge of the 'shelf' section so that it bridges the joint between the base and the shelf. Provided you get a good fixing (50mm screws with pilot hole first :idea: ) this should prevent a forwards wobble taking the shelf over. A backwards wobble will be caught by the wall behind it, but a 90degree plate could be fixed inside the front face frame to add stability. These can be fitted 'on site' to make transportation easier.
 
Back
Top