


Rural Platypus
Established Member
I've recently completed a few things as presents for friends so thought it would be a good opportunity to post what I've been up to recently.
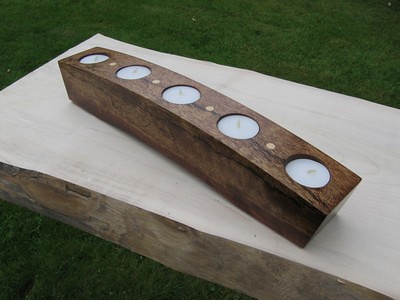
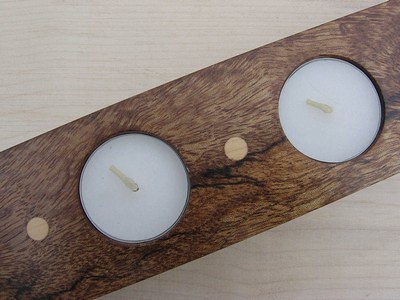
First up is a candle holder in bubinga with maple detailing
The closeup shows the maple plugs - I did these with a Veritas plug cutter; I think they make a nice contrast to the bubinga
I roughed out the curves on the bandsaw then template routed to finish off.
The finish is Liberon oil and wax.
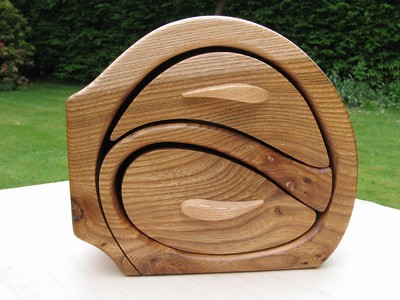
Next one is a bandsawn jewllery box in Elm. This was from a rather nice plank I bought from Yandles but that had to be crosscut to fit in the car
Since I could't bear to waste the offcut I made the jewellery box from it.
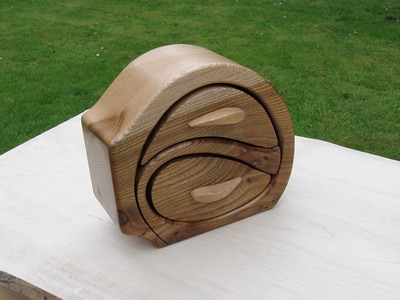
The handles are Elm as well - I roughed out a couple from the lighter offcuts then carved them to shape. The finish again is Liberon oil and wax.
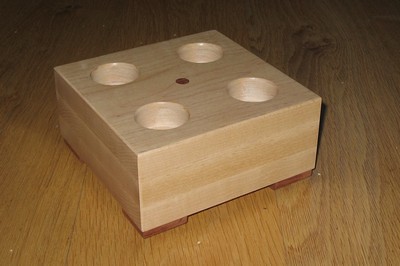
Finally another candle holder, this time in Maple with Bubinga detailing.
Apologies for the poor photo this time
Finish on this was matt polyurethane and wax, as I didn't want to darken the natural light colour of the Maple. I tried a variety of finishes on maple scrap but found the end grain darkened too much.
Hope you like them,
Cheers
RP
First up is a candle holder in bubinga with maple detailing
The closeup shows the maple plugs - I did these with a Veritas plug cutter; I think they make a nice contrast to the bubinga
I roughed out the curves on the bandsaw then template routed to finish off.
The finish is Liberon oil and wax.
Next one is a bandsawn jewllery box in Elm. This was from a rather nice plank I bought from Yandles but that had to be crosscut to fit in the car
Since I could't bear to waste the offcut I made the jewellery box from it.
The handles are Elm as well - I roughed out a couple from the lighter offcuts then carved them to shape. The finish again is Liberon oil and wax.
Finally another candle holder, this time in Maple with Bubinga detailing.
Apologies for the poor photo this time
Finish on this was matt polyurethane and wax, as I didn't want to darken the natural light colour of the Maple. I tried a variety of finishes on maple scrap but found the end grain darkened too much.
Hope you like them,
Cheers
RP