Three little castings (less skilled Northern version). WIP

UKworkshop.co.uk

Help Support UKworkshop.co.uk:

This site may earn a commission from merchant affiliate links, including eBay, Amazon, and others.

Mr_P

Established Member
Joined
22 Mar 2013
Messages
1,094
Reaction score
2
Location
Oldham
I'm sure like me you have seen and drooled over Jimi's Three little castings page on his blog

http://www.ktproductions.co.uk/blog/?page_id=43

and to quote Jimi

"One day…flicking through FleaBay…I stumbled on these three "

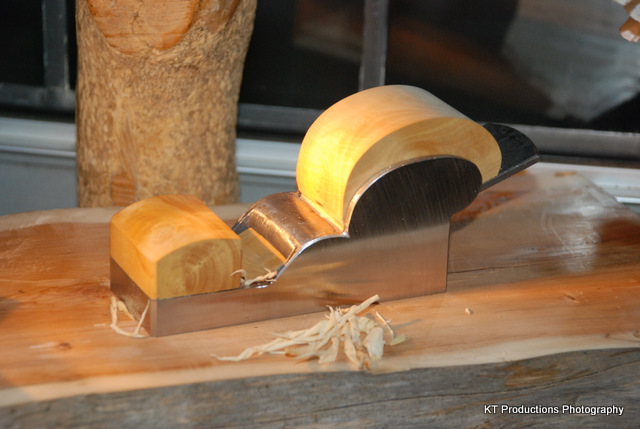
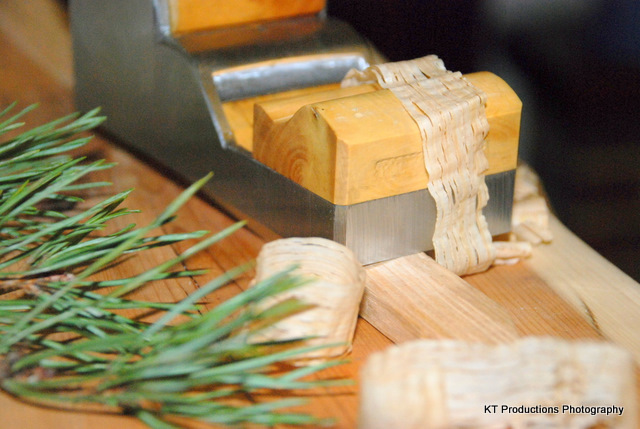
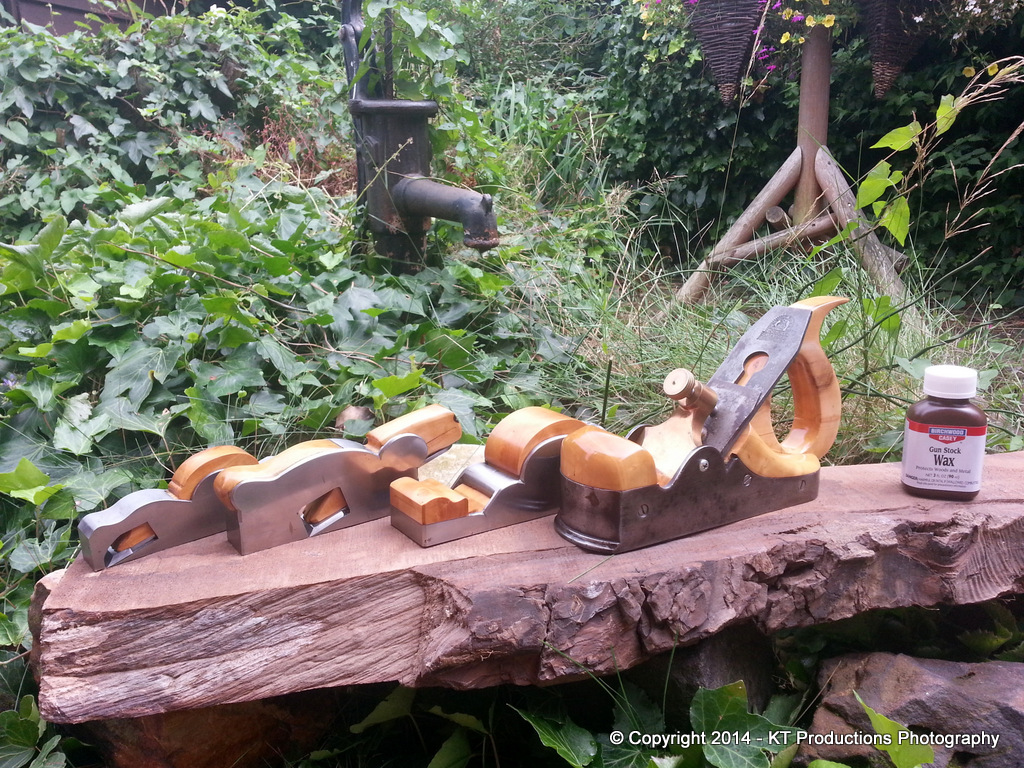
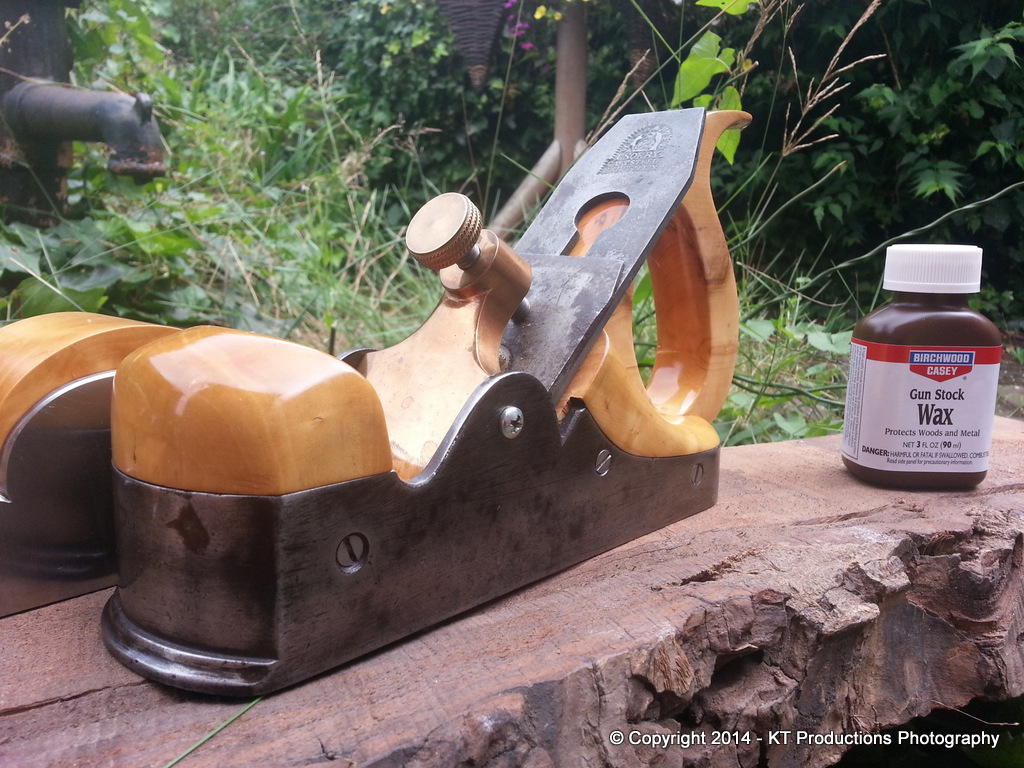
Unlike Jimi's mine are far newer, bronze and have probably covered more miles than I in the last decade.

Bristol - America - Lancashire

http://www.ebay.co.uk/itm/331177446119? ... 1497.l2649

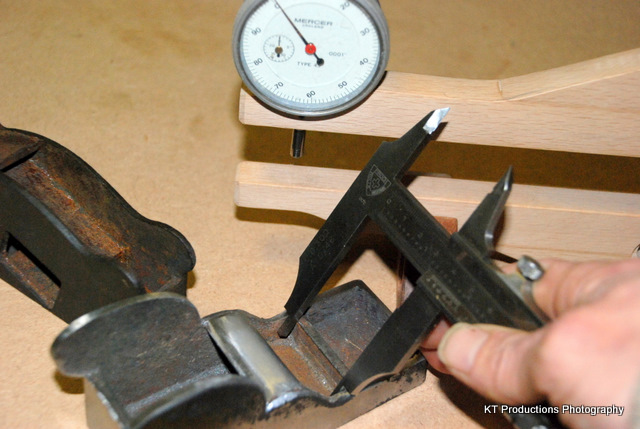
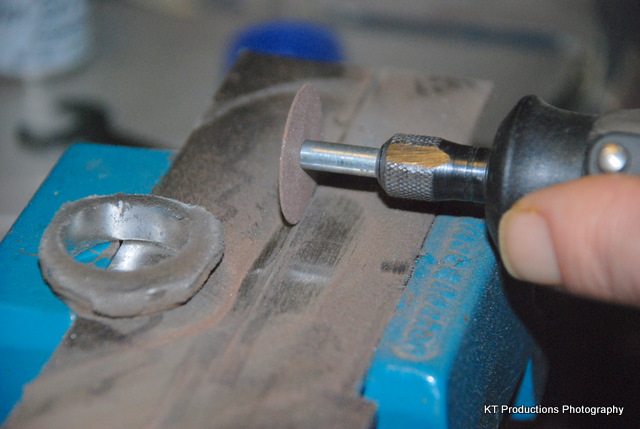
Not here yet but seemed quiet on the forum today so thought I would give you a laugh, especially as I don't own a milling machine.

Step 1 will be sweating the steel soles on.

http://philsville.blogspot.co.uk/2006/12/sweating.html
http://bbs.homeshopmachinist.net/thread ... ther-means

Any ideas on what thickness / type of steel I should order ?
 
Oooer. There's a challenge. Or three.

I'm hopeless at soldering so I've never been tempted to have a go at that type of plane. They do look great when done though.

I'd say you need o1 tool steel, not much point in putting mild steel over bronze. The heat required for soldering shouldn't make much difference to its softness from its bought, annealed state. But ...

What about mouth cutting in the castings? The trad BD smoother is 'easy' - chain drill and file enough to get a saw blade in to cut the slot out to a hole at the other end ... then file to clean up and continue the slope of the frog into the mouth. If you use a thick enough iron to necessitate a wide enough mouth to accommodate a thin file (flat file from a needle file set I should think)

The BUs mouths ... I can't imagine. Small Dremmel blade? For both slot and frog continuation? You could stop short of the sides with the small, circular blade and finish off with the edge of a tiny, flat file but then the edges of the frog slope ...? Micro milling??

Is there something I'm not thinking of? (There usually is) .... Jim?
 
Richard I am new to this plane making business so go very easy with me - but why O1 steel for the sole? Is mild steel not good for the body of a plane. I ask because I have ambitious plans to start with some mild steel plates and make a dovetaild infill plane at some stage in the future. Only asking!
I looked at those 3 as well but thought there was far far too much to do for a novice like me
Really good luck though and please post all your best and worst!
Thanks Mark
 
I bought a Bristol PB mitre plane casting plus adjuster some 10 years or so ago. It came with a steel sole already attached. The steel, which looks like gauge plate, ie O1, is 1/8th thick and there are clear but minor signs of riveting. The joint between the steel sole and the PB casting is pretty seamless, and I assume that it is sweated on as well as the riveting.
The Norris type adjuster is fixed to the rear infill by a couple of brass woodscrews, but as this is a low angle plane, there was not a lot of "meat" for the screws to fix to. So far no problem, but care is needed, if you decide to go for an adjuster on the larger casting.
I have dealt with Bristol only a couple of times, but always found them pretty helpful. Why not give them a call?
It came with the sides machined but the inner faces as rough casting. That in fact was the longest task. Not having a milling machine, I set up a drum sander in the pillar drill, and ran the outer face up against a straight batten, clamped to the drill table.This worked pretty well to give a flat inner face for the infilling, but needed to be taken slowly, and overall I am pretty pleased with the finished plane.

Gauge plate, or ground flat stock, is all O1, I think, and as the name implies, is ground to a closer tolerance than mild steel. In theory the edges should be perpendicular to the faces within the same tolerance, but some 1/2inch thick I bought last year from Cromwells, was out. They replaced without quibble, but I had already put some work in before I discovered the problem.
As I don't have the necessary kit (yet), I prefer to start from as flat a surface as I can. Proper engineers will no doubt have views.

Good luck with the projects.
 
A few years back I sweated a steel sole onto this brass casting. the steel was recycled from a sandvik hardpoint saw which worked out really well. I do remember cutting the mouth was a bit of a sod as it was so hard. Seem to remember using one of those mini disks in a dremell type tool. From memory the hardest part was getting the casting hot enough. I'm sure I followed the instructions in Jim Kingshott's book o n how to go about it.
Cheers, Richard
 
Thanks for all the replies chaps, I'm going to need a lot of help with this one and kudos Mr Arnold that's simply stunning

Good News they have arrived safe 'n' sound. So say Hello to Tom, Dick and Harry (previous owner called Tom).

bc 001.jpg

bc 002.jpg


Tom Thumb is the best of the trio with a sole that doesn't need much work, biggest issue is the lumpy frog.

The smoother sole has a big hollow in the mouth area.

The chariot's sole is shocking but luckily its the one with the smallest surface area (3.25" x 1.5") x so maybe it can be remedied with a lot of hard work. Biggest challenge will be keeping it square.

All 3 have good internal walls that won't take much work prior to filling.

I was jumping the gun above with my steps

Step 1. Flatten the soles, 1 metre float glass on standby. Belt sander might be used but as Jimi said " Make sure you don’t get it too hot or it case hardens the steel " I guess the same applies to bronze.

Step 2. Cut the mouths (eek)

Step 3. Sweating the soles.

Will definitely be giving Bristol Designs a call when I'm a bit further along. Fingers crossed they will still have irons and lever caps available. Not planning on any Norris type adjusters.
 

Attachments

  • bc 001.jpg
    bc 001.jpg
    134.7 KB · Views: 2,047
  • bc 002.jpg
    bc 002.jpg
    123.5 KB · Views: 2,047
Just a word about hardening - all copper based metals, bronze, brass and, er, copper; work - harden. That is to say you can't bend them too much before they start to get too stiff. This is remedied by heating them. To anneal yellow metals you heat them to red and cool them as quick as you like. The opposite to carbon steel in fact.

Since you have no bending to do this won't be an issue so forget everything I just said.

You won't work - harden it by working on its surface with belt or file, nor by sawing. But from my brief experience of cutting (sawing) phosphor bronze, it doesn't like to be cut too fast. I found that I had to go slower than I would have been able to with steel as it was really difficult to keep to the line. It seemed to demand gentle and steady work. So hand lapping your soles might be better than belt grinding.

I'll let you know if I have changed my mind when I have cut all the dovetails and the mouth in it. (hammer)
 
Well the news is Toby, drum roll please.

This thread will be shortly renamed Four little castings. Found another slightly larger chariot across the pond.

Mr P isn't my real name and it has absolutely no connection with I.Sorby. I'm the proud owner of a pallet full of maple Parquet flooring which I use to make my own Puzzles. So as much as I love my Scottish infill it doesn't see much action and this ugly chariot in the middle is my usual go to plane. The larger one on the left has just arrived and has a great mouth but the iron needs a fair bit of work before I know how good it is.

3 amigos.JPG


Anyway I digress, the chariot and thumb plane soles are sorted but the lumpy sole of the larger coffin is taking a lot more work than expected (P for Procrastination). So apologies for the delay I haven't forgotten this thread and I will update you when the new chariot is here and I've bought/decided on a dremel.
 

Attachments

  • 3 amigos.JPG
    3 amigos.JPG
    221.4 KB · Views: 1,667
Nice selection, was a bargain you got with your new chariot, but it I where you I'd replace that cut iron in it with one more suited (uncut single) :)
I egally await the comming news.

Thanks Carl
TT
 
Minor update, apologies busy with other things but mainly waiting for another chariot to arrive.

before.jpg

after.jpg


Well the big news I've sold the big one to Harry, so thought I would scan its sole before sending it to its new owner.

As you can see it's getting there but plenty of work left for Harry.
 

Attachments

  • before.jpg
    before.jpg
    146.9 KB · Views: 1,311
  • after.jpg
    after.jpg
    98.2 KB · Views: 1,311
Good news the big casting has arrived safe n sound and Harry has made a flying start and has even sorted the sole already :oops:

infill-casting-mkii-t82413.html

and my wider chariot has arrived from the states, my fault for the delay he made some cheap irons for me

http://www.ebay.co.uk/itm/Norris-type-c ... 27e80b9348]

four.jpg

fourr.JPG


I've also bought an old shoulder casting from England for a change. Advertised and looked like brass but I think it might be gun metal so I'm very happy.

Great shoulder casting thread here from Jimi
bootfair-brass-infill-t42501.html

So its full steam ahead now but still haven't got a dremmel type tool.

I was chatting to a member last week about a bronze Lie Neilson block plane he had used for 10 years and its still going strong so thinking maybe forget the steel soles ?

Or it that a bad idea ? Can they be added later if I change my mind or is it better to do it now before the mouths are cut ?
 

Attachments

  • four.jpg
    four.jpg
    146.4 KB · Views: 1,100
  • fourr.JPG
    fourr.JPG
    163.7 KB · Views: 1,100
Well Mr P...you've certainly got your work cut out there mate!!!

I am so looking forward to the WIP of these.

Remind me again...what are you going to use a Dremel for? I take it it's for tidying up the inside of the casting?

Those castings look as if they are particularly fine right from the sand...clearly a good founder. I don't have steel on the bottom of my brass shoulder...(the one you link to in your post) and I use it quite a lot and it doesn't seem to be wearing but then it's not exactly used every day either so I think if it were a smoother I might think about it but for a specialist plane...I wouldn't bother mate.

Cheers

Jimi
 
Thanks Jimi,

The dremel will be used mainly for cutting the mouths. Guess I could drill them and join the dots with files/hacksaw blade. That should be possible with the chariots but I want a really tight mouth on the thumb.

Float glass/sandpaper for the soles/sides.

Files for the internals.

How did you tackle yours ? Guess it was pre-axminster mill days.
 
Mr_P":2f4mnub5 said:
Thanks Jimi,

The dremel will be used mainly for cutting the mouths. Guess I could drill them and join the dots with files/hacksaw blade. That should be possible with the chariots but I want a really tight mouth on the thumb.

Float glass/sandpaper for the soles/sides.

Files for the internals.

How did you tackle yours ? Guess it was pre-axminster mill days.

I think if I remember correctly...I used a diamond burr on a Dremel to get the corners roughly square (my wife's a dental nurse so she gets old ones)....and I certainly remember cutting the mouth with about two tubs of those abrasive disc cutters...they snap easily!

If you want I can mill out the insides for you if you don't think that's cheating!!!?

Let me know

Jimi
 
Thanks again Jimi,

Think I'll concentrate my efforts on the new wider chariot and see how it goes before calling in the cavalry.

Cheers,
Carl
 
Mr_P":1nhdyrcd said:
Thanks again Jimi,

Think I'll concentrate my efforts on the new wider chariot and see how it goes before calling in the cavalry.

Cheers,
Carl

I somehow thought you might say that...it's always best to try to do the job as would have been done in the days before electrickery!!

Don't worry too much about getting it all square...it's the top that needs to be clean.

This was the inside of my chariot casting...

DSC_0367.JPG


As you can see...lots of irregularity down at the base inside...but you can bevel the bottom of the infill anyway...it's the top that needs to be accurate.

Overstuff even if it's not overstuffed...and then you can cut the infill back in line with the outer wall edge...

DSC_0464.JPG


...here is overhangs by half a mil or so.

The overhang rebate will not sit down on the metal unless you flatten and square the top of the front casting wall...

DSC_0580.JPG


The two can then be mated flush.

On the subject of cutting the mouth...back then nearly 4 years ago...I did not take pictures of the mouth cutting itself but I did of the iron cutting...

DSC_0606.JPG


So clearly I had done it that way...I thought I had! If you scribe a line and keep scribing it with a sharp needle file to create a "track" score...the abrasive discs will not deviate...and you can do the job by hand as shown. The entire length of the cutter was done this way....

You are very wise to start with the chariot!

This is what awaits you with the shoulder...

DSC_0556.JPG


:mrgreen: :mrgreen: :mrgreen:

Cheers mate!

Jimi
 
i cant help a great deal on this thread, but...

I have found that the quick release dremel cutting disk system was well worth the money, and the cutting disks seem to last much longer that the cheap ones I have had in the past. I had some angle steel to cut for my table saw, and i used the dremel rather than the angle grinder (i dont really like my grinder). On doing this, i actually wore one disk down to nothing- the other ones would have needed dozens to do the same cutting. http://www.ebay.co.uk/itm/DREMEL-SC690- ... 4854b8d416 was the kit that i got.
 
marcros":1l571n80 said:
i cant help a great deal on this thread, but...

I have found that the quick release dremel cutting disk system was well worth the money, and the cutting disks seem to last much longer that the cheap ones I have had in the past. I had some angle steel to cut for my table saw, and i used the dremel rather than the angle grinder (i dont really like my grinder). On doing this, i actually wore one disk down to nothing- the other ones would have needed dozens to do the same cutting. http://www.ebay.co.uk/itm/DREMEL-SC690- ... 4854b8d416 was the kit that i got.

This is a great find! I've ordered a pack because the original thin discs were quite effective...it's just the number you get through and the faffing about changing them that annoyed me. So if, as you say, these are more resilient....then that's a perfect combination.

Thanks for the tip marcros!

Also..Mr P...since you brought the whole casting infill stuff back into the present...I thought I would do a family portrait for you...

20140808_141248.jpg


I also wanted an excuse to try out this new product I received in the post this morning...

20140808_141314.jpg


It's Tru-Oil Wax...I never heard of it before but my missus said they had some at the gun shop so I ordered some online...(it's cheaper!).

It arrived in a day!

And it's rather nice...smooth...non-waxy and on par with the quality of their oil.

Have fun with the castings and looking out for that WIP!

Jimi
 
Back
Top