


Pekka Huhta
Established Member
I'm building a small toilet under the stairs, as we only have the bathroom in the upstairs. I'm in no hurry, and it's easy to just close the door and forget the project if I'm not in the mood. On the other hand as I'm not in a hurry I have decided to build the toilet just as I like. So it's far from practical building and much closer to some sort of art therapy project. :wink:
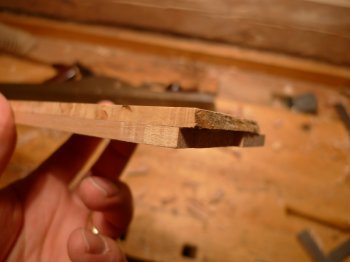
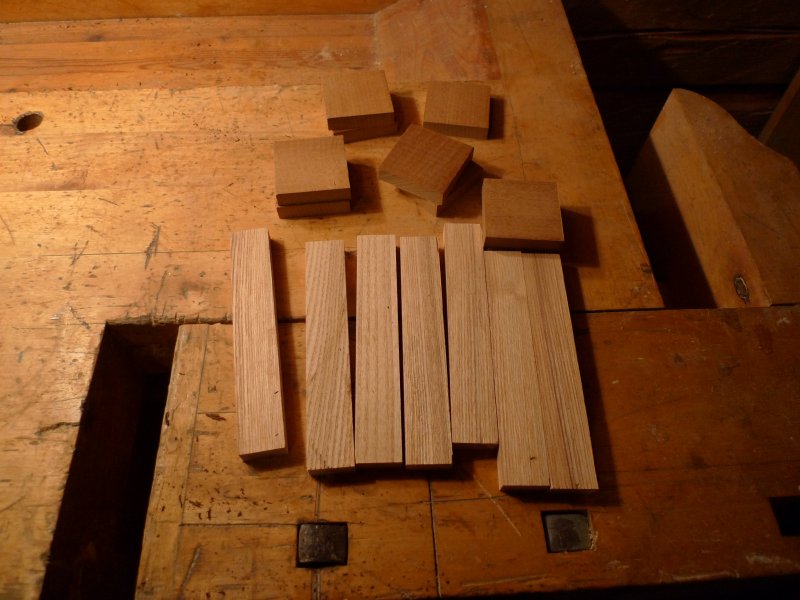
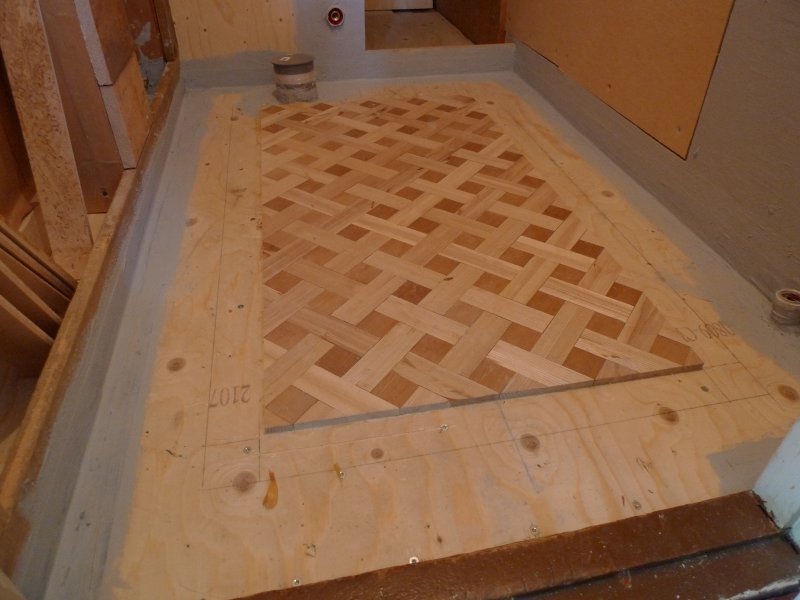
I hate it when I have piles of old offcuts from previous projects. Now I had plenty of short ash strips (about 1 m lengths of 32x25 mm) from my boatbuilding projects and some heat treated birch (11x46 mm from the floor of my bathroom). The offcuts seemed too small for anything practical, but there were plenty of them, so I decided to cut them into parquet. As the width of the ash strips was about half of the birch, I decided to make a basket weave pattern.


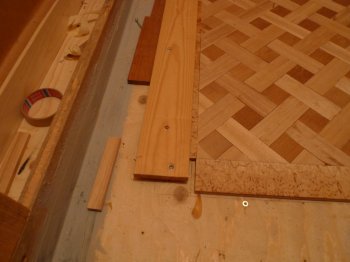
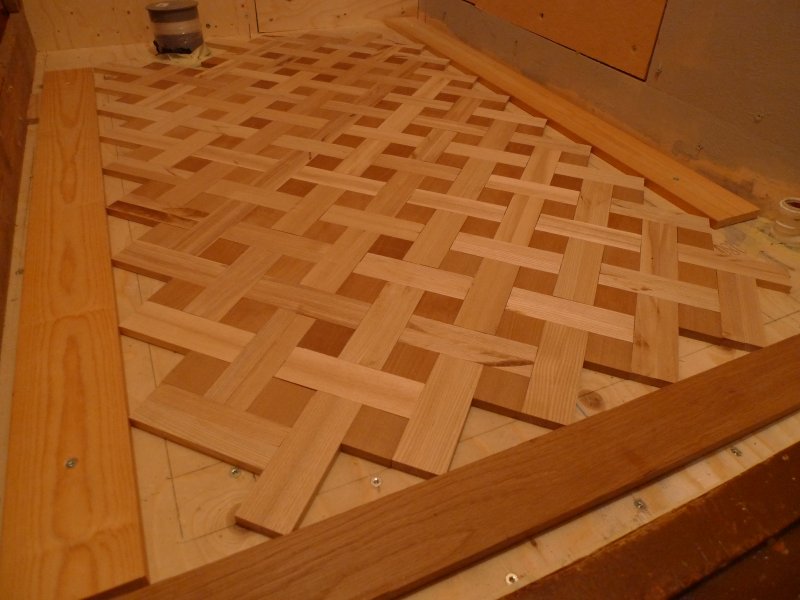
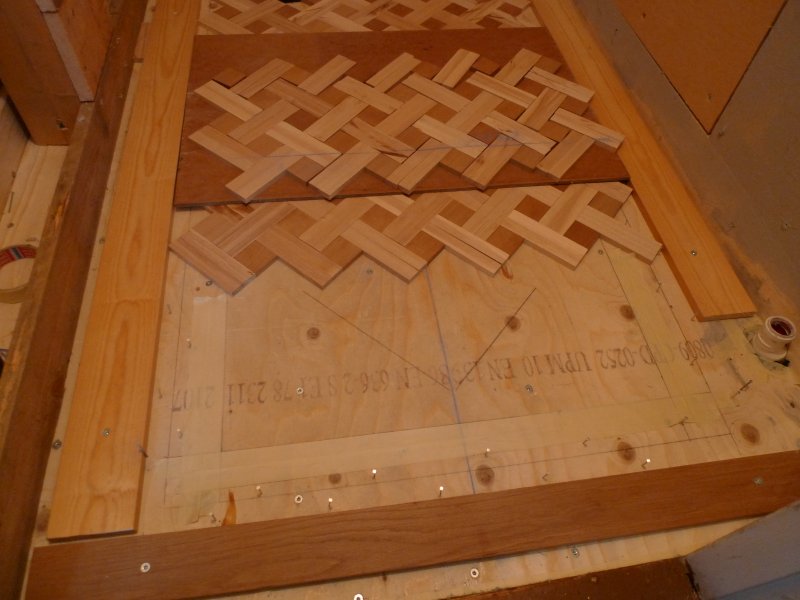
Next I dry assembled the pieces to the floor before starting to glue anything. I removed only part of the flooring at a time to a piece of hardboard, taped the edges of the pattern and glued the parts to the floor.


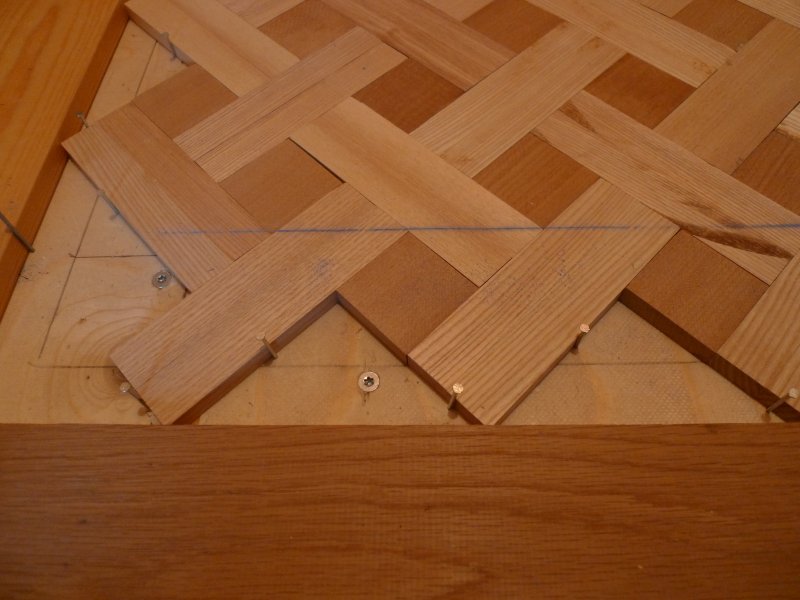
After the glue was dry, I used a circular saw to cut the pattern out. As I had taped the edges, it was easy to remove the excess length of the blocks as they were glued to the tape and not to the floor.

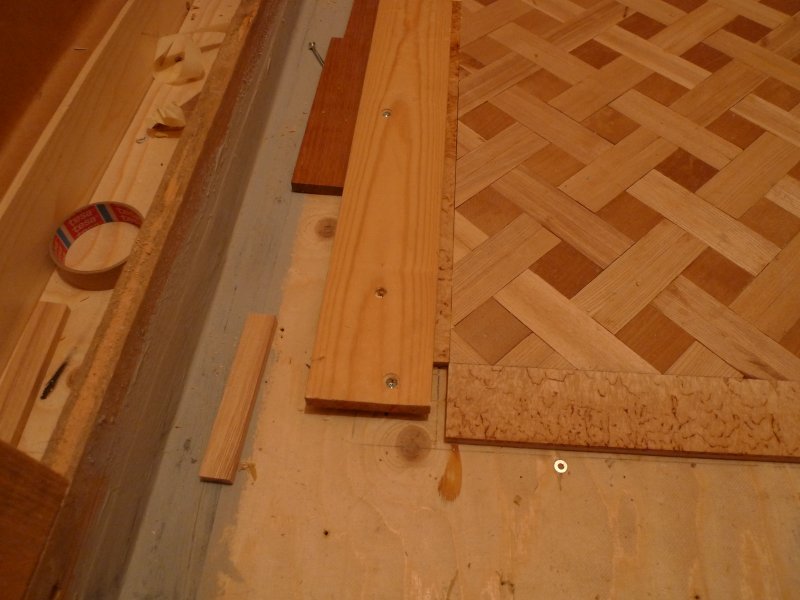
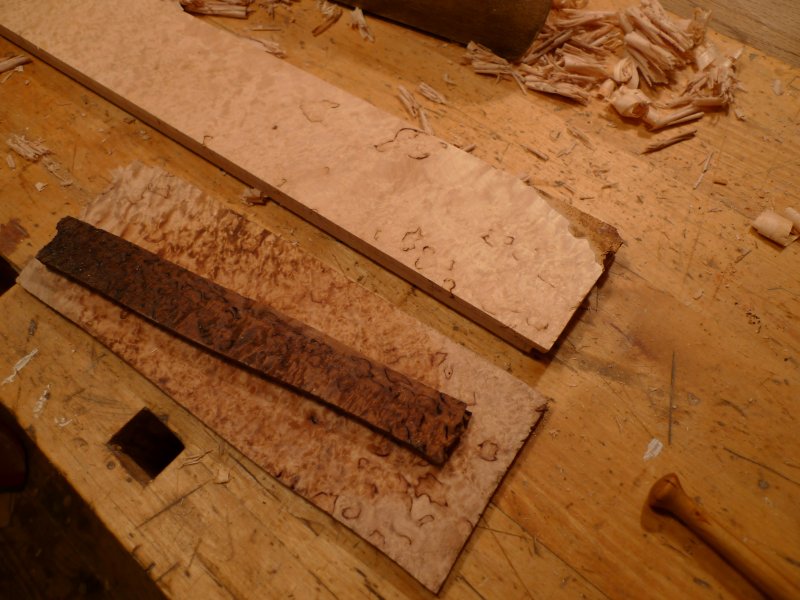
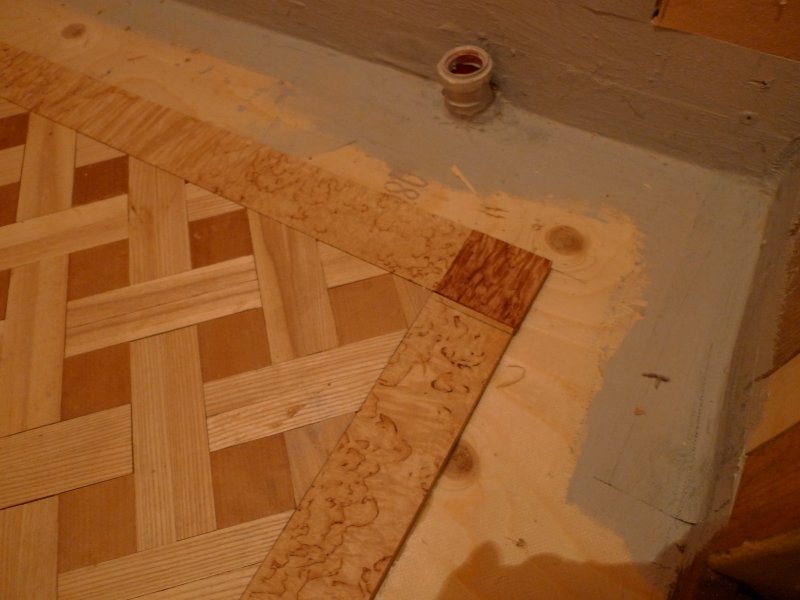
To build the framing I had some 8 mm thick carelian birch (or masur birch) planks, which I glued to a 5 mm birch base, cut the borders to size and glued them to the floor as well. Some of the borders got a bit twisted, so I needed to use some clamping to glue them down.
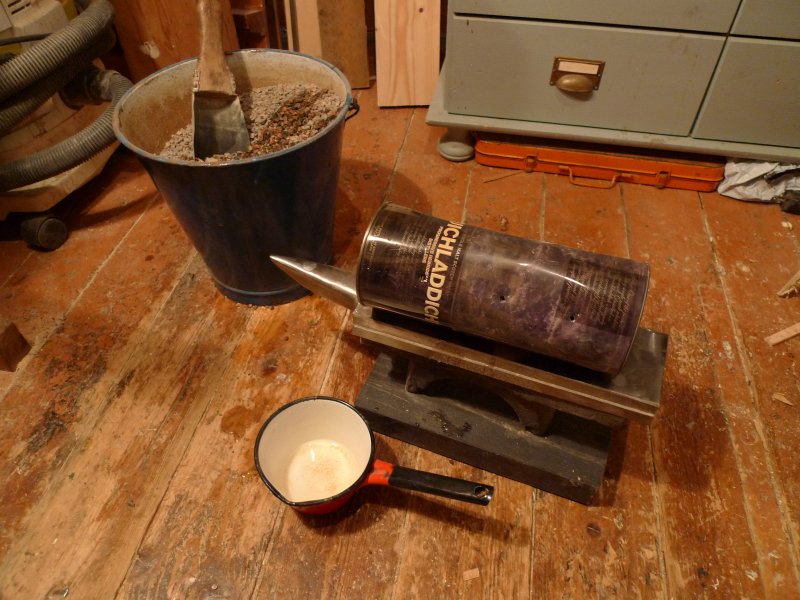
To the corners of the border I wanted something for a contrast. I ended up experimenting with heat treating my own carelian birch. I had a metal container (tahnks to enjoying some Bruichladdich :wink: ) which I filled with wet sand and pieces of birch and put the whole lot to my woodburning stove when the fire was almost completely out. The sand was wet to create steam to the system and varying the heat in the oven I ended up in different grades of heat treating from very slightly darkened to almost charred wood.


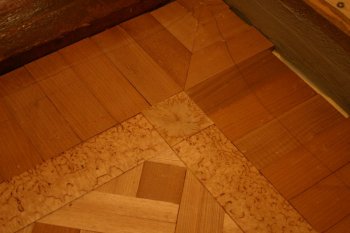
The corner looked pretty decent, but I was not sure how good contrast the heat treated carelian birch would give as the rest of the floor was heat treated as well. I was afraid thet they would just blend in to the heat treated squares of the basket weave pattern.

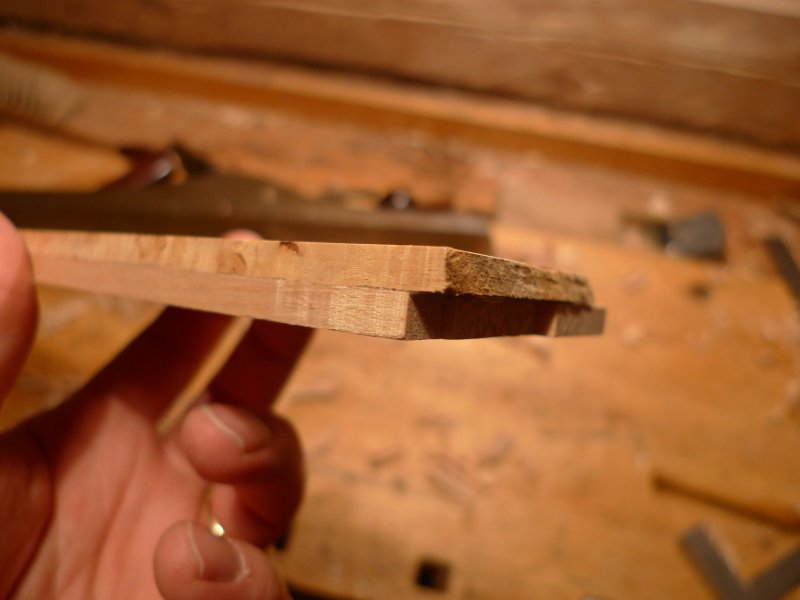
Finally I ended up cutting end grain "carelian suns" to the corners. They will soak lots of varnish in them and get pretty dark, and I think I like the pattern better than just a length of heat treated birch.
Finally I finished the outer borders with heat treated birch.
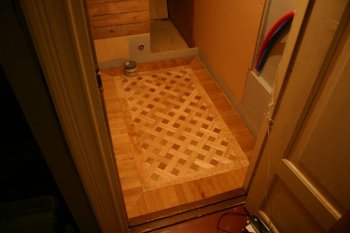
So now it is just a matter of sanding, filling and varnishing the parquet. I'm waiting for the varnishing a lot as the colours will deepen a lot and really lift the pattern out.
I was a fun project, and free as well. I had all the offcuts myself and my friend gave me a half-empty bucket of parquet glue for the project. And imagination doesn't cost anything
Pekka
I hate it when I have piles of old offcuts from previous projects. Now I had plenty of short ash strips (about 1 m lengths of 32x25 mm) from my boatbuilding projects and some heat treated birch (11x46 mm from the floor of my bathroom). The offcuts seemed too small for anything practical, but there were plenty of them, so I decided to cut them into parquet. As the width of the ash strips was about half of the birch, I decided to make a basket weave pattern.
Next I dry assembled the pieces to the floor before starting to glue anything. I removed only part of the flooring at a time to a piece of hardboard, taped the edges of the pattern and glued the parts to the floor.
After the glue was dry, I used a circular saw to cut the pattern out. As I had taped the edges, it was easy to remove the excess length of the blocks as they were glued to the tape and not to the floor.
To build the framing I had some 8 mm thick carelian birch (or masur birch) planks, which I glued to a 5 mm birch base, cut the borders to size and glued them to the floor as well. Some of the borders got a bit twisted, so I needed to use some clamping to glue them down.
To the corners of the border I wanted something for a contrast. I ended up experimenting with heat treating my own carelian birch. I had a metal container (tahnks to enjoying some Bruichladdich :wink: ) which I filled with wet sand and pieces of birch and put the whole lot to my woodburning stove when the fire was almost completely out. The sand was wet to create steam to the system and varying the heat in the oven I ended up in different grades of heat treating from very slightly darkened to almost charred wood.
The corner looked pretty decent, but I was not sure how good contrast the heat treated carelian birch would give as the rest of the floor was heat treated as well. I was afraid thet they would just blend in to the heat treated squares of the basket weave pattern.
Finally I ended up cutting end grain "carelian suns" to the corners. They will soak lots of varnish in them and get pretty dark, and I think I like the pattern better than just a length of heat treated birch.

Finally I finished the outer borders with heat treated birch.
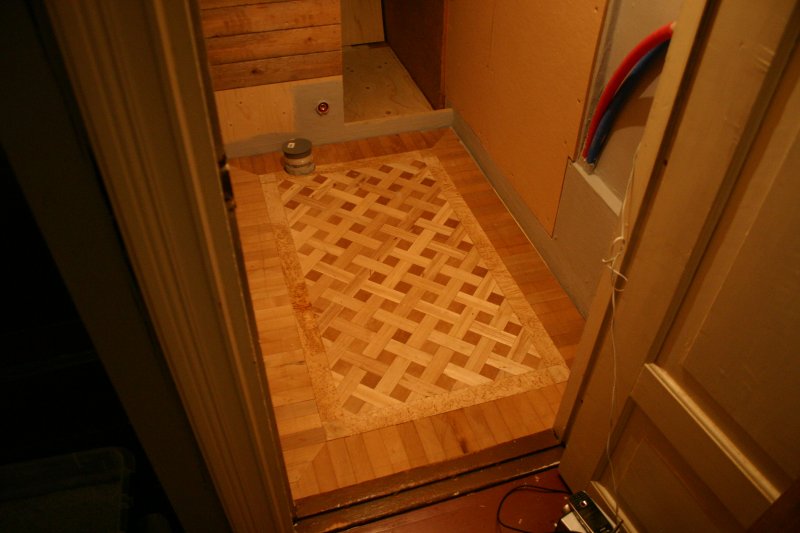
So now it is just a matter of sanding, filling and varnishing the parquet. I'm waiting for the varnishing a lot as the colours will deepen a lot and really lift the pattern out.
I was a fun project, and free as well. I had all the offcuts myself and my friend gave me a half-empty bucket of parquet glue for the project. And imagination doesn't cost anything
Pekka