Box spline jig for the table saw.

UKworkshop.co.uk

Help Support UKworkshop.co.uk:

This site may earn a commission from merchant affiliate links, including eBay, Amazon, and others.

manxnorton

Established Member
Joined
29 Jun 2016
Messages
313
Reaction score
1
Location
Newcastle
As I mentioned early on in my project thread, I spied the making of possible spline jig.
As this was initialy for picture frames, and never gets used.
So easy to dismantle things and rip for measures as its was screwed not glued.
8JiPDDy.jpg

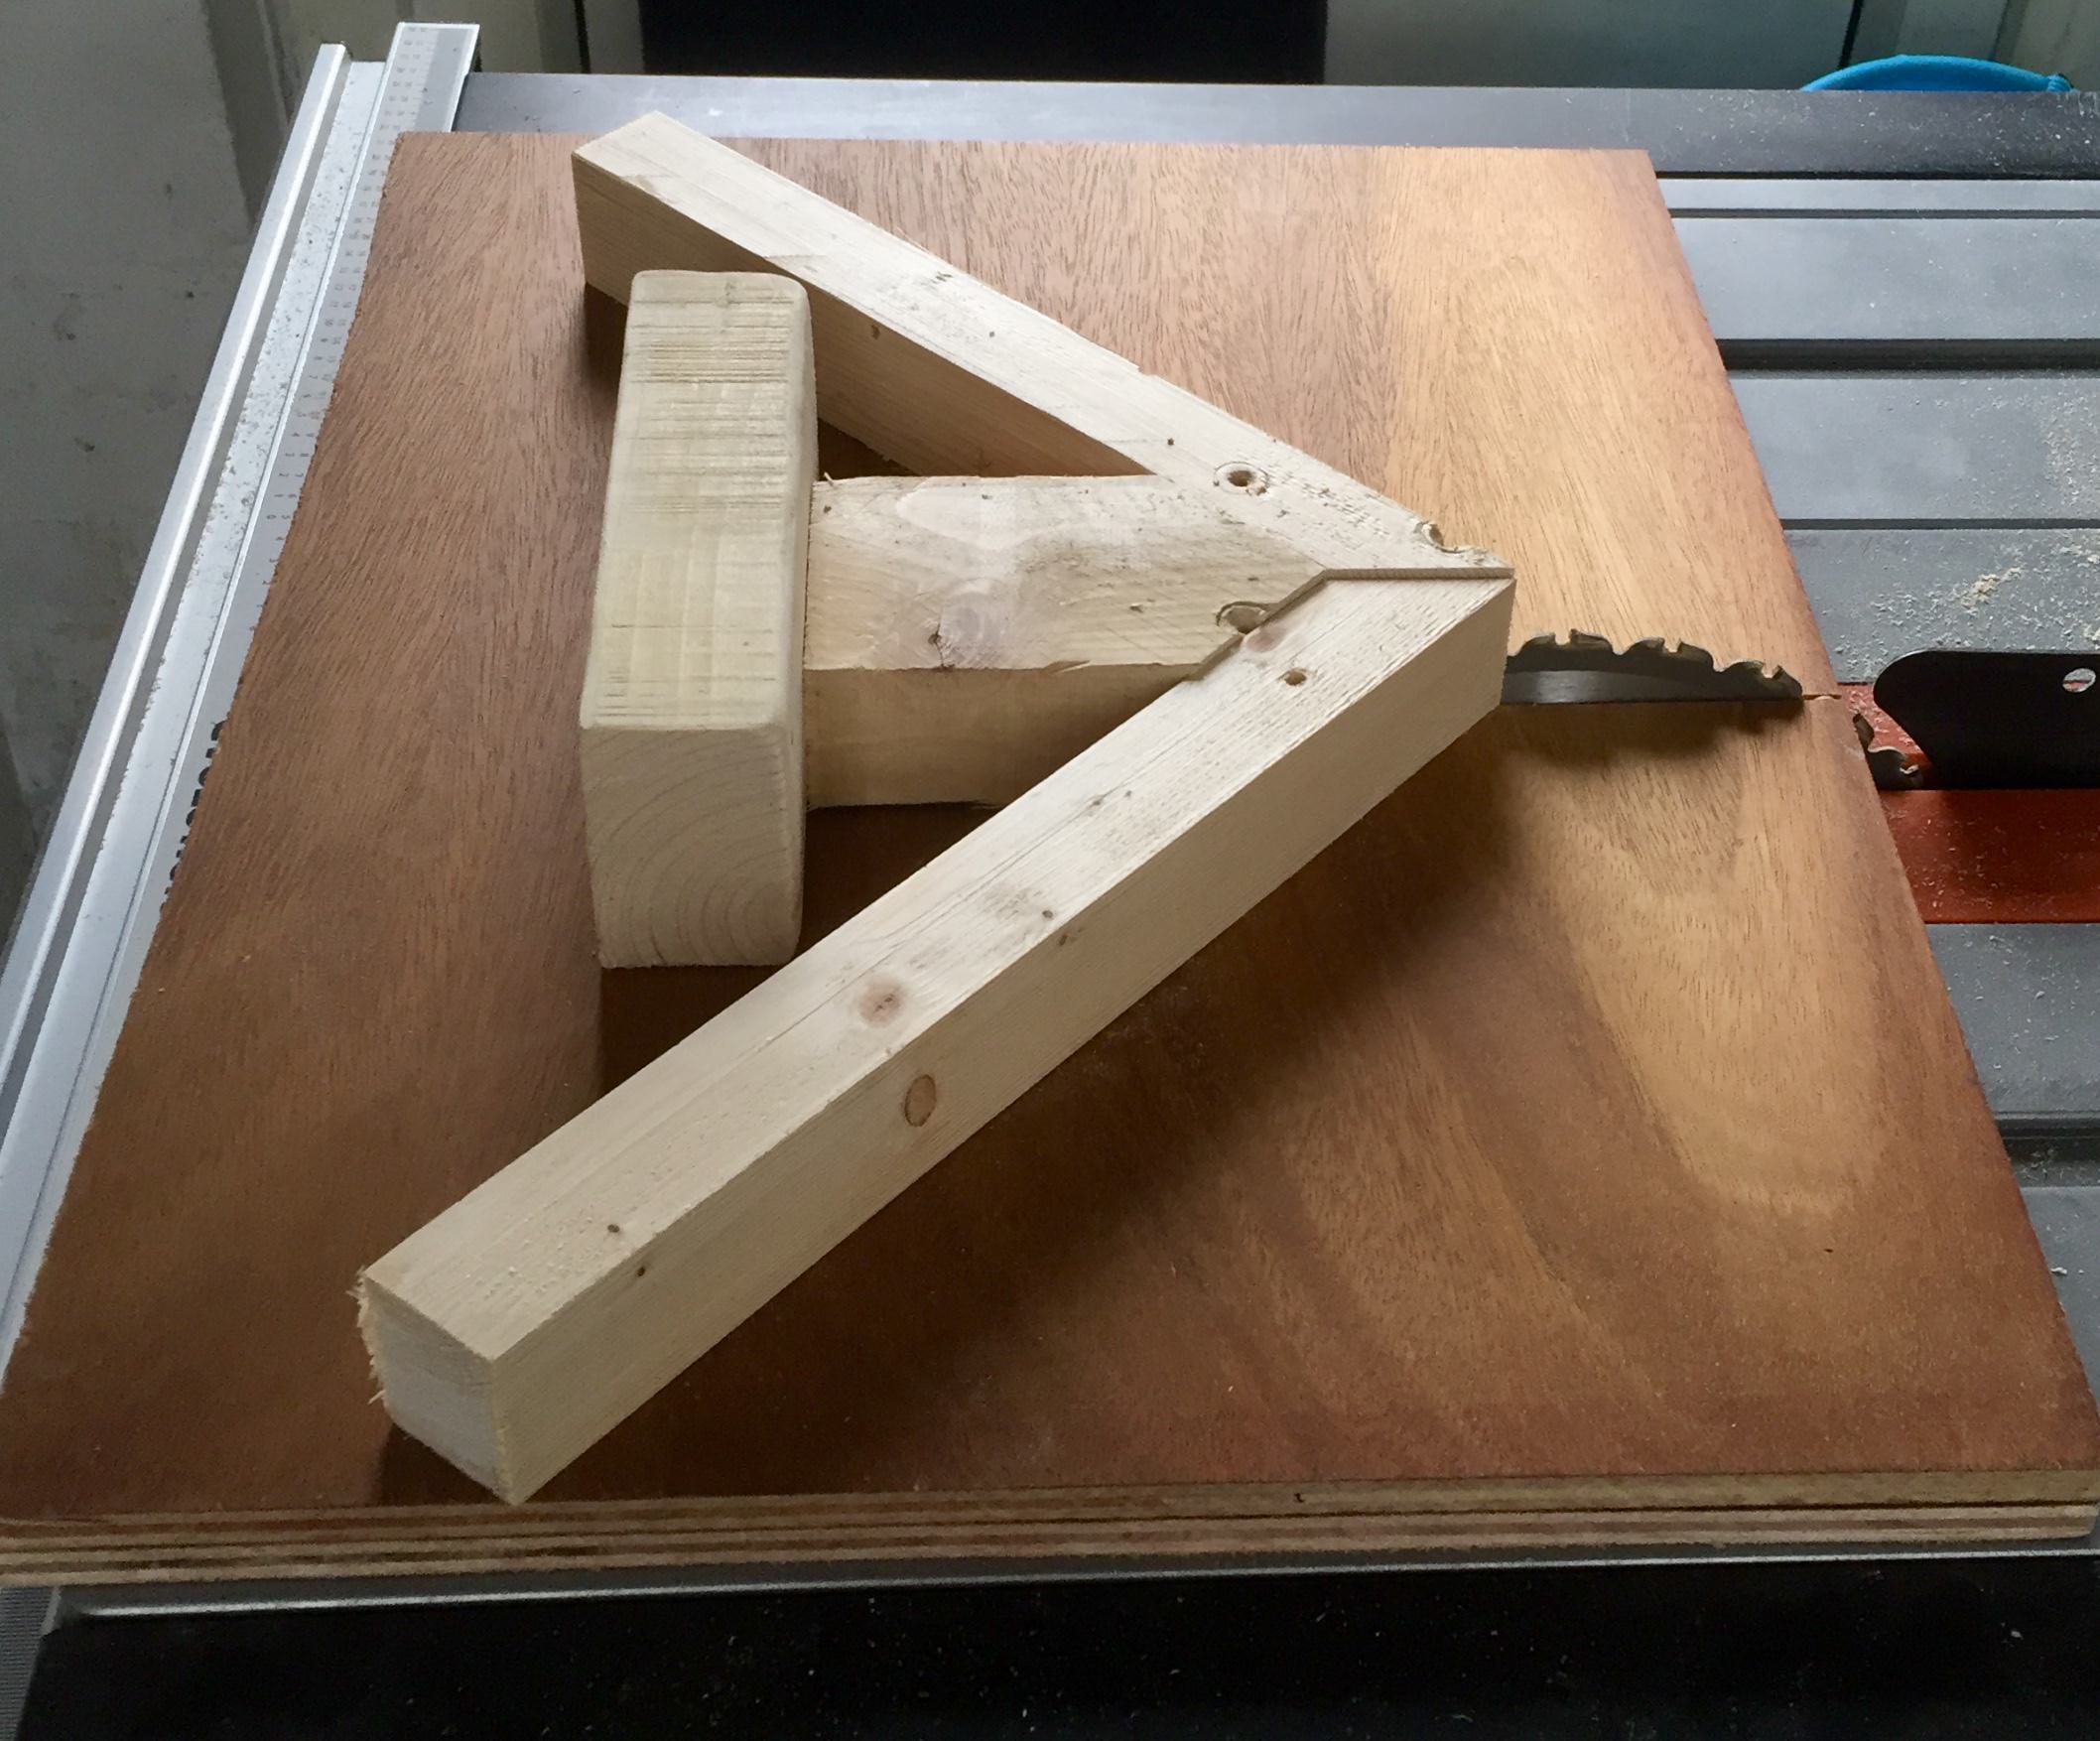
With a bit of fwd thinking (me thinking!!! :lol: :lol: ) it started to look like this.
vcfy1U4.jpg

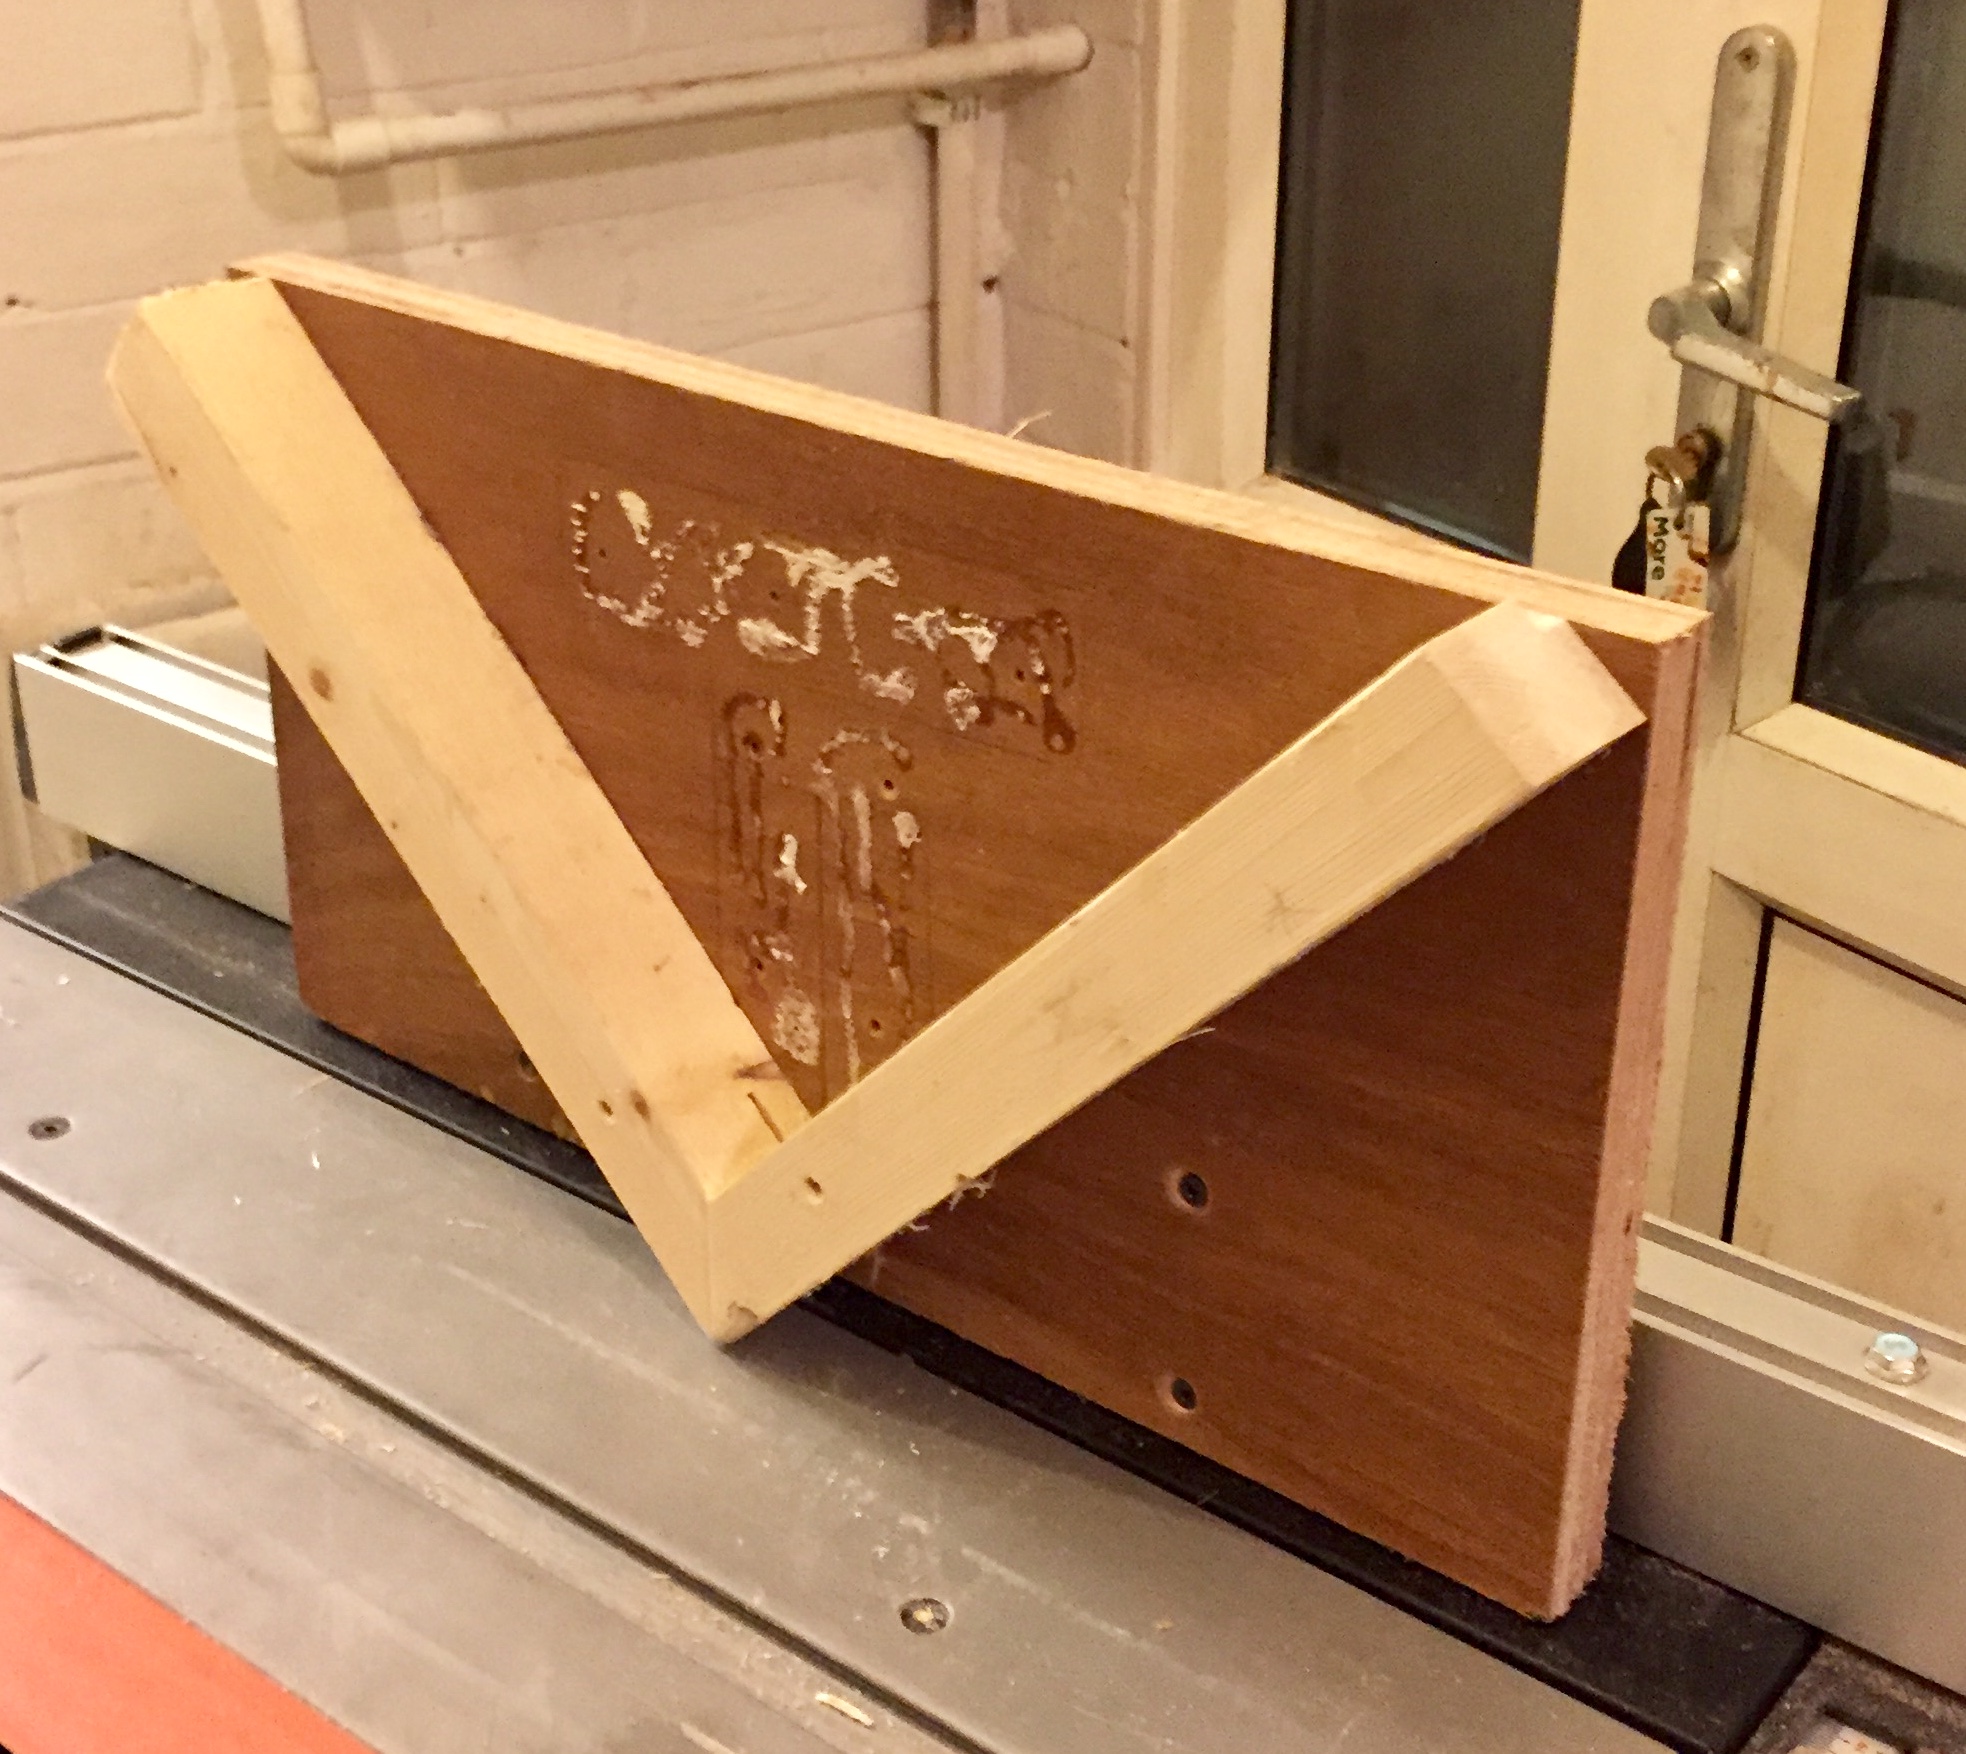
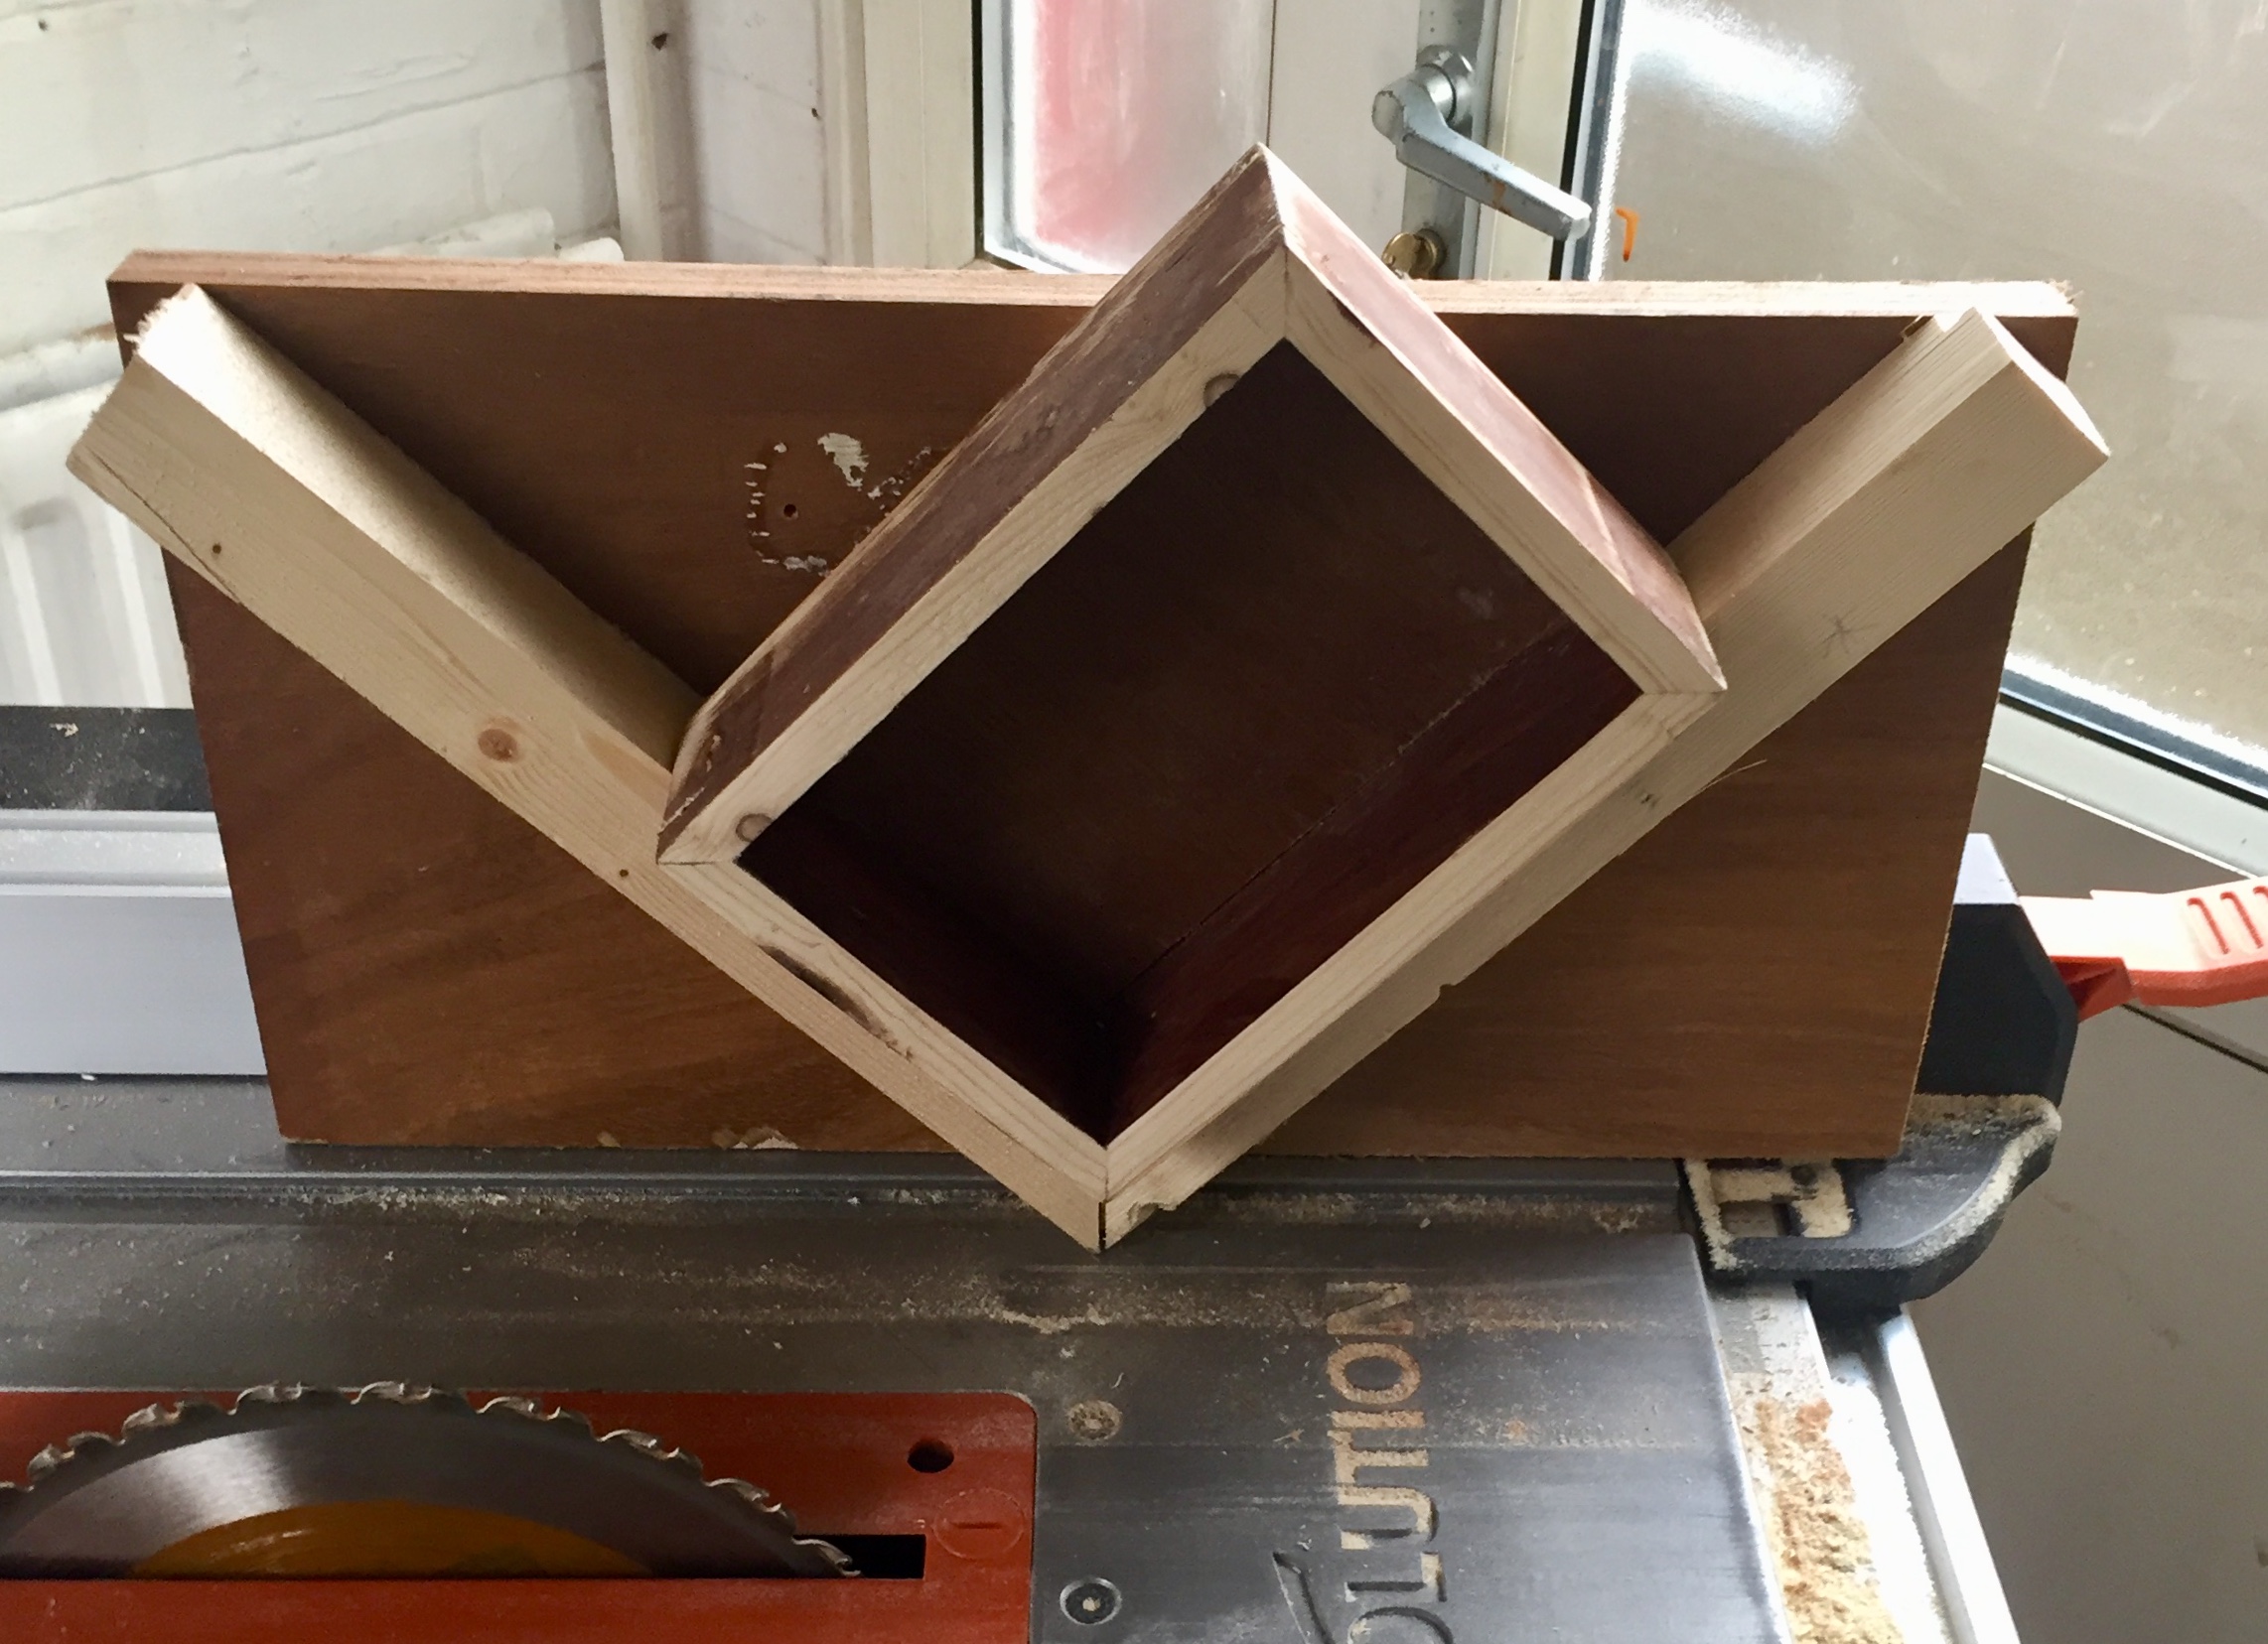
So with the spare plywood got to fashion a guide for the rip fence.
swp4fM7.jpg

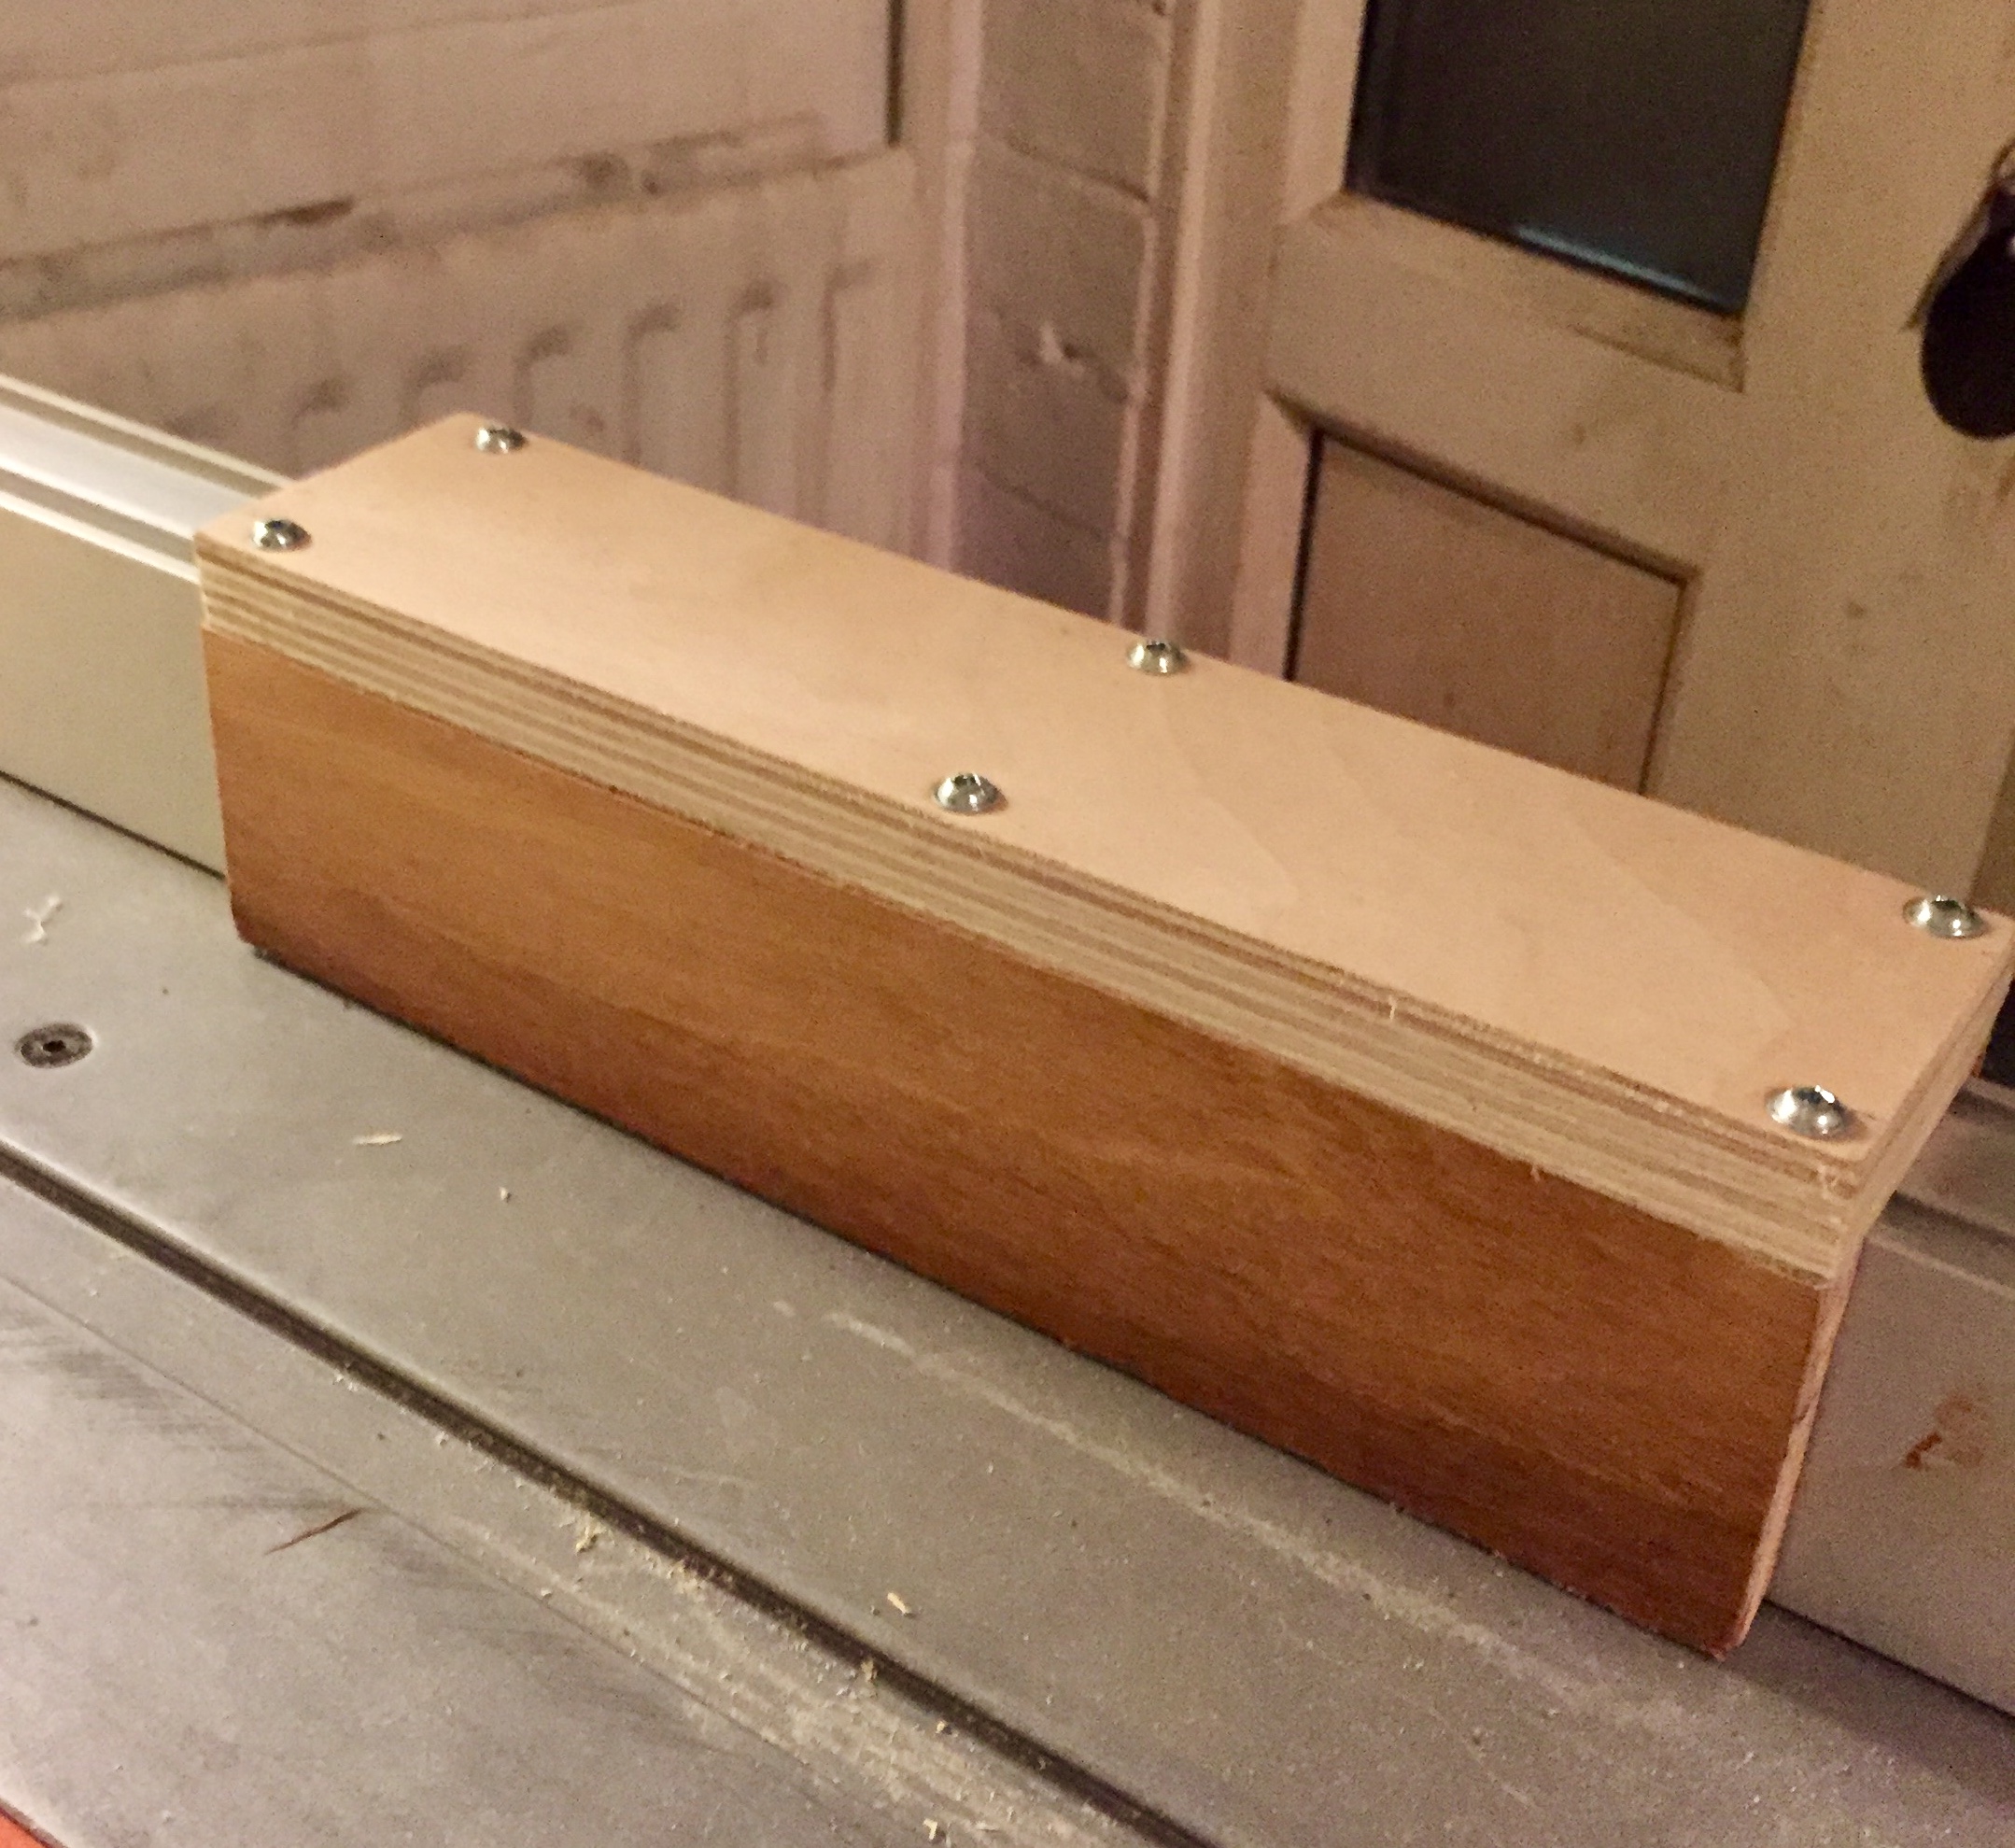
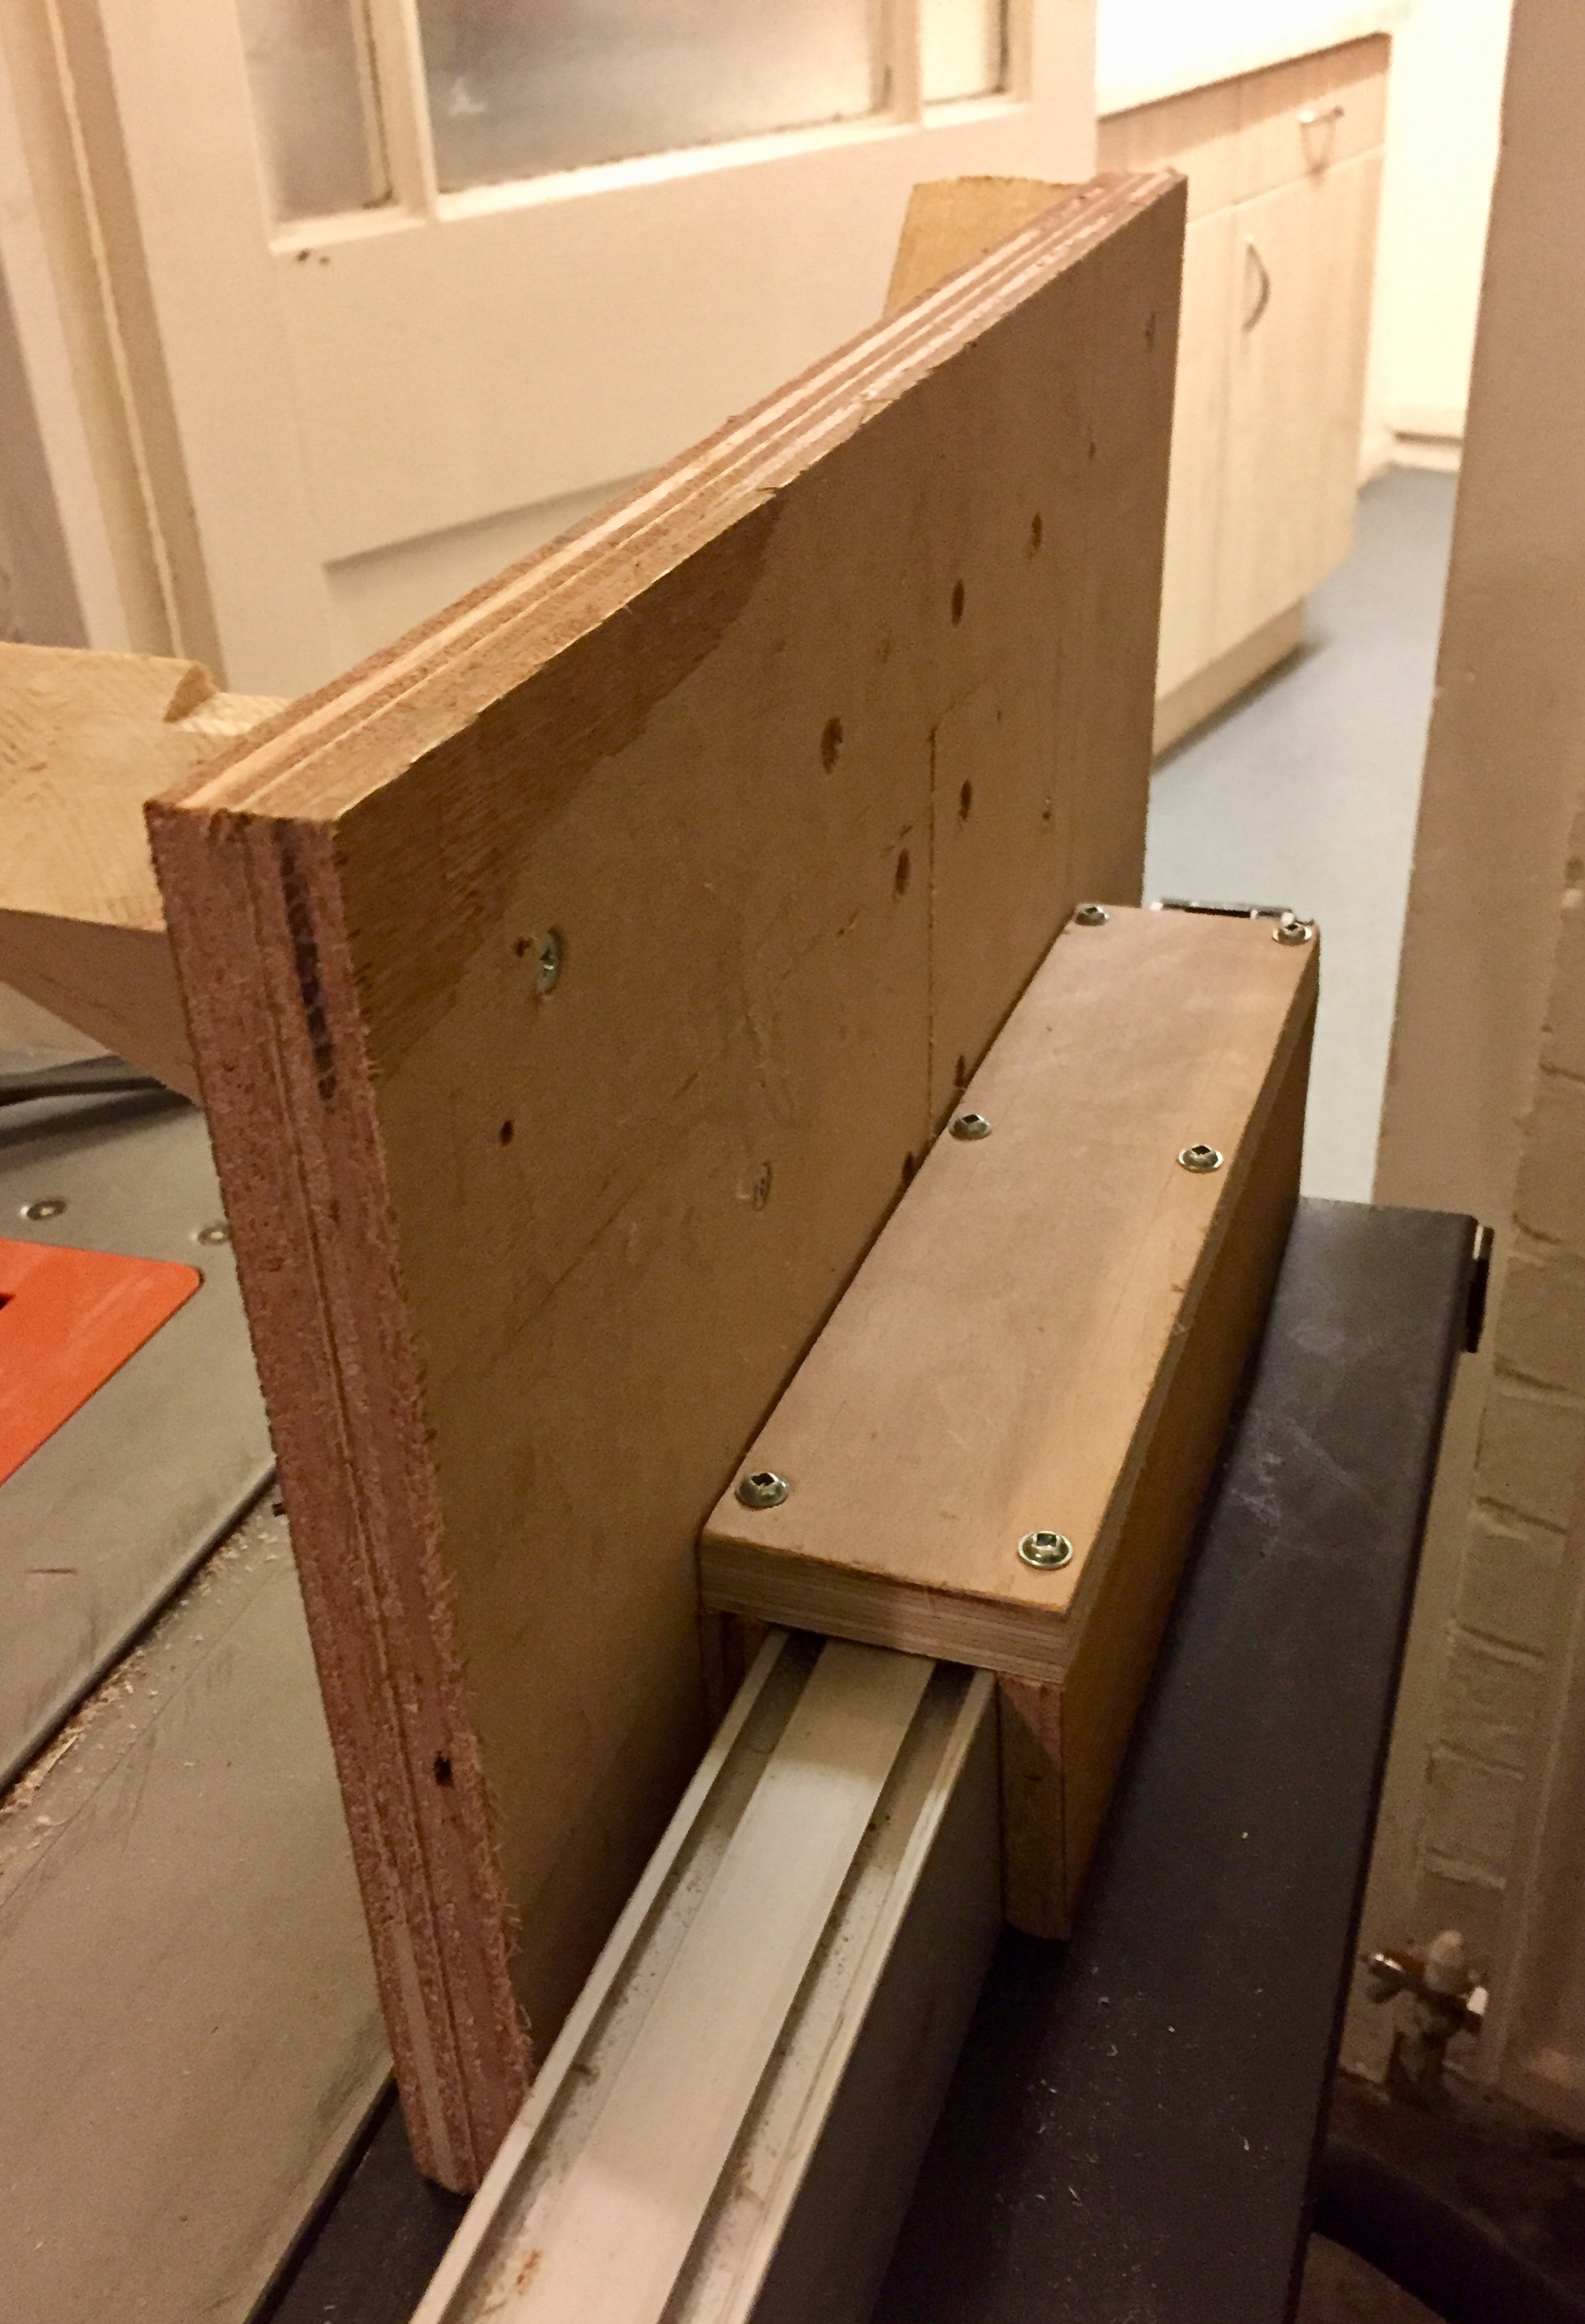
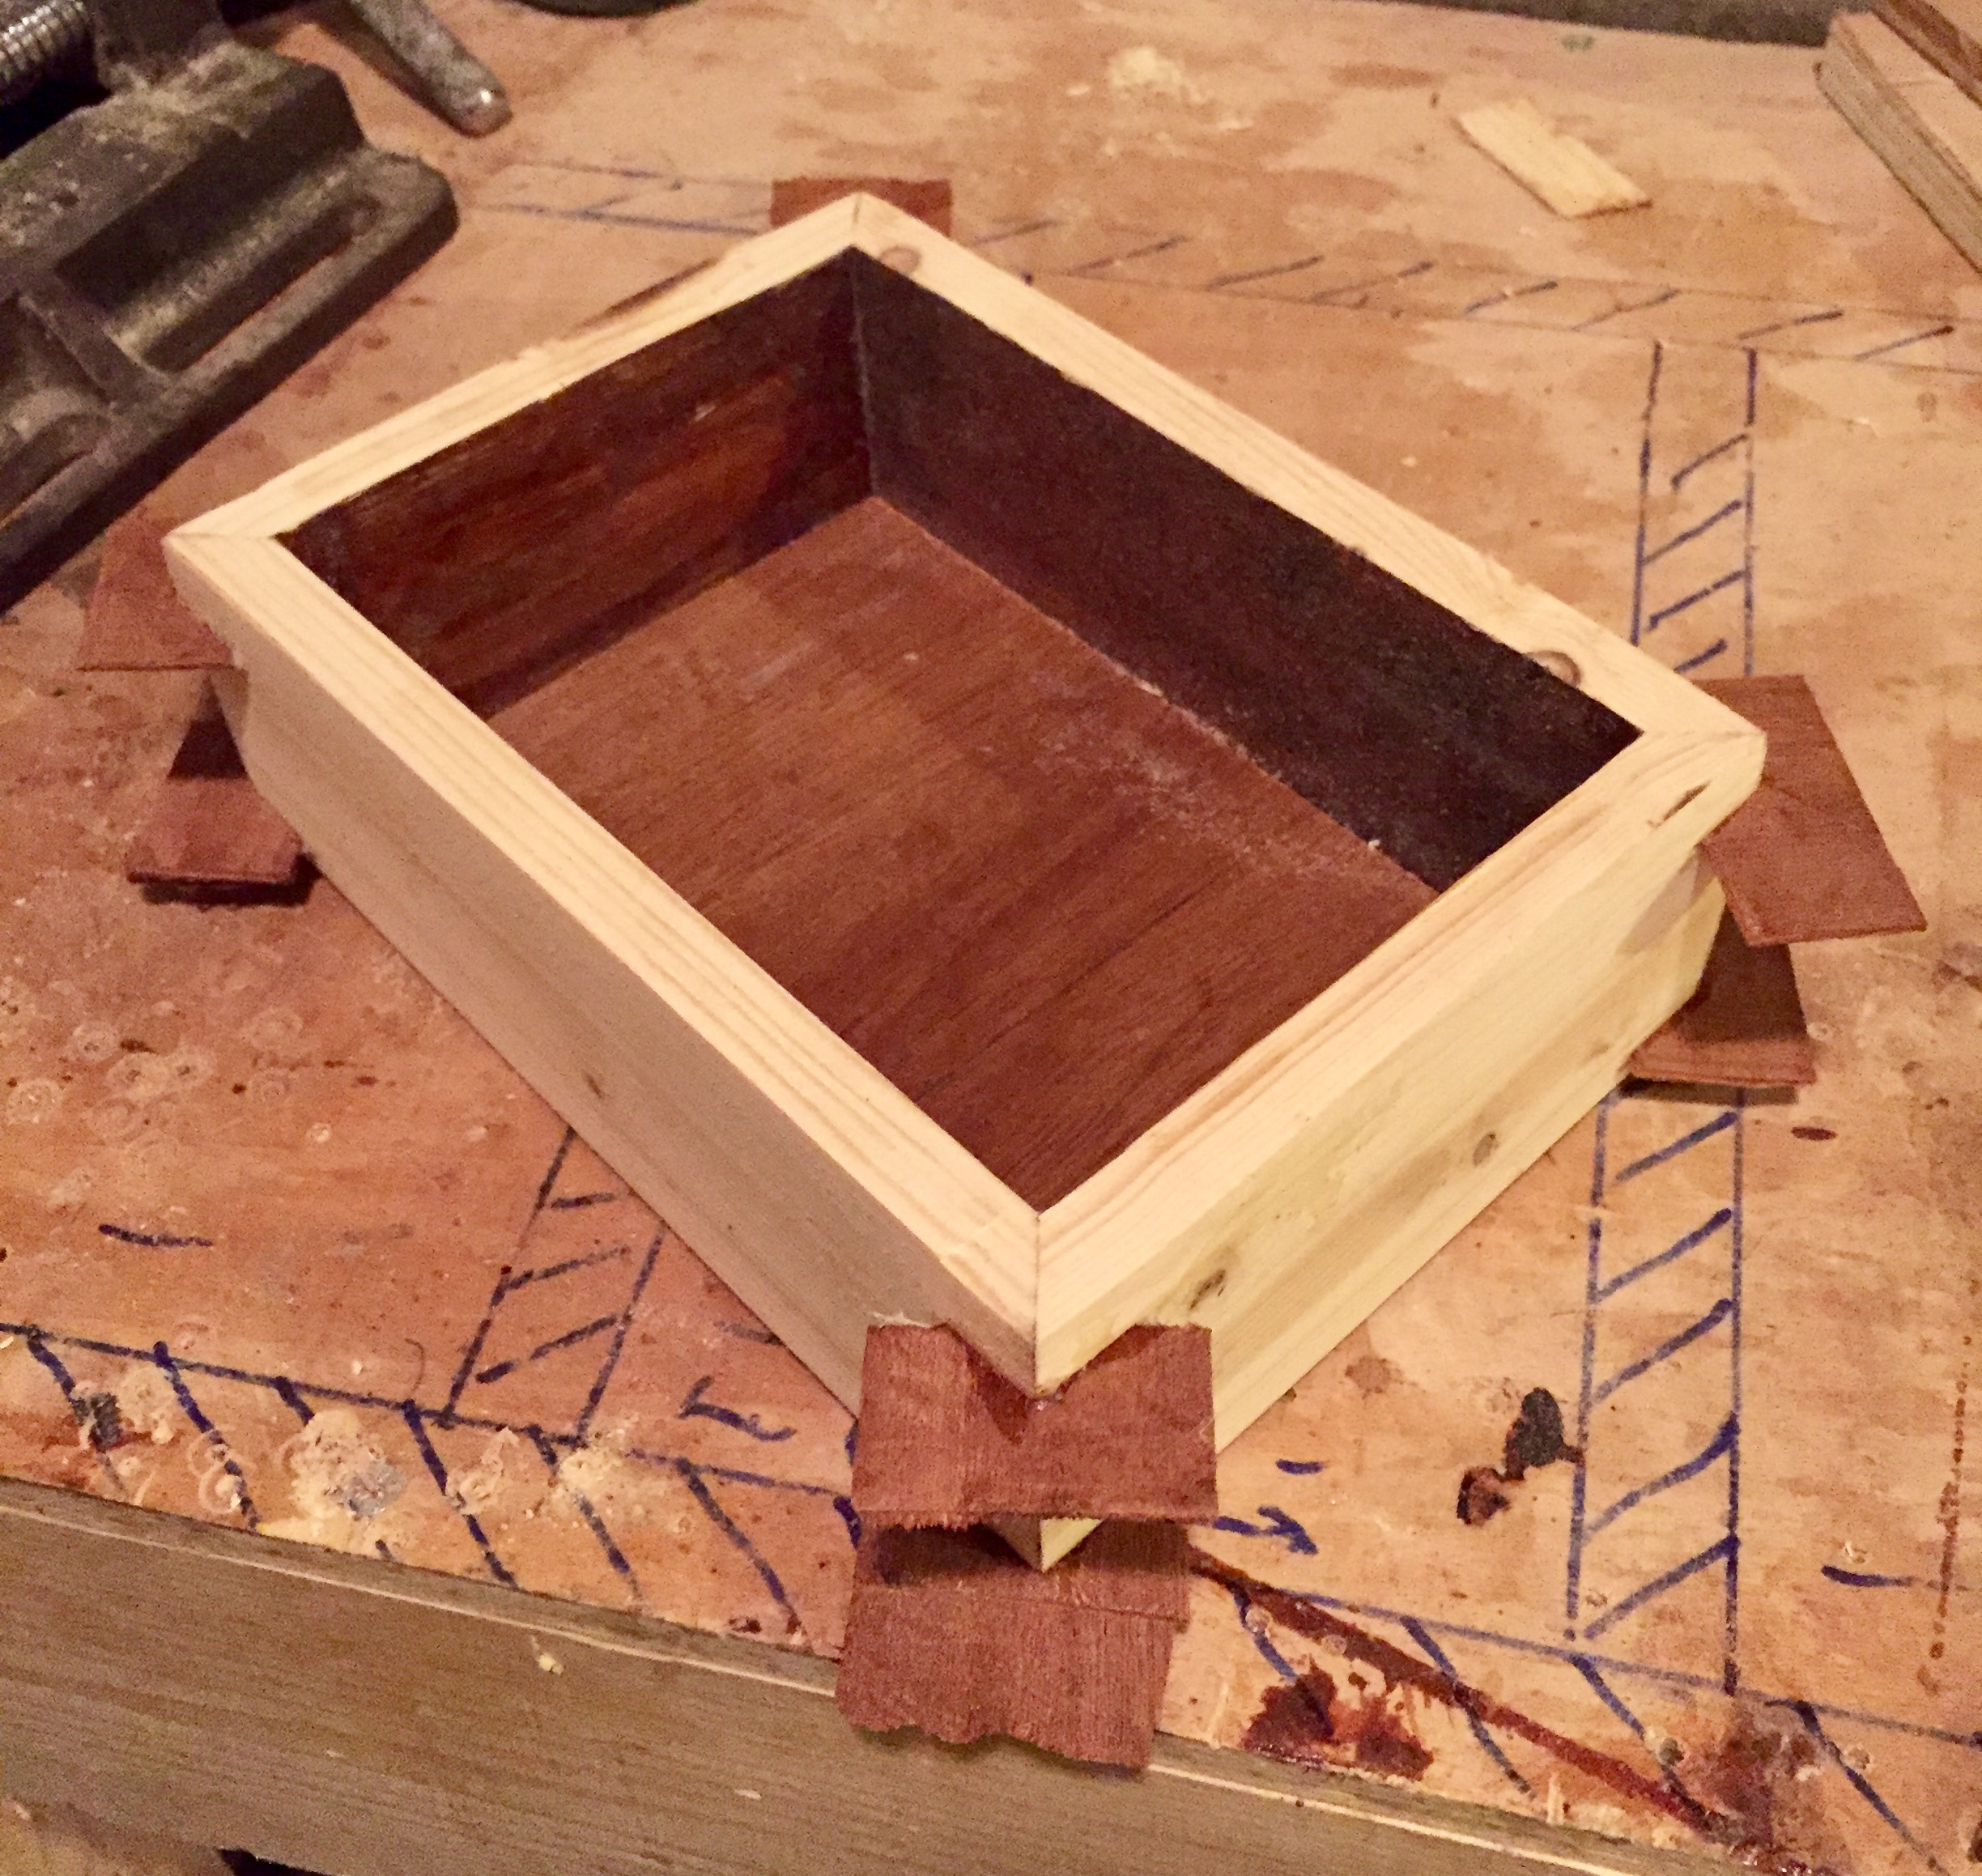
a great fit, and I put some wax to help aswell.
OTS89Ci.jpg

Apart from securing the box and final sanding and sealing it, works really well.
ygXRKEv.jpg

Got some hard wood stips left over.
dgDASQ9.jpg

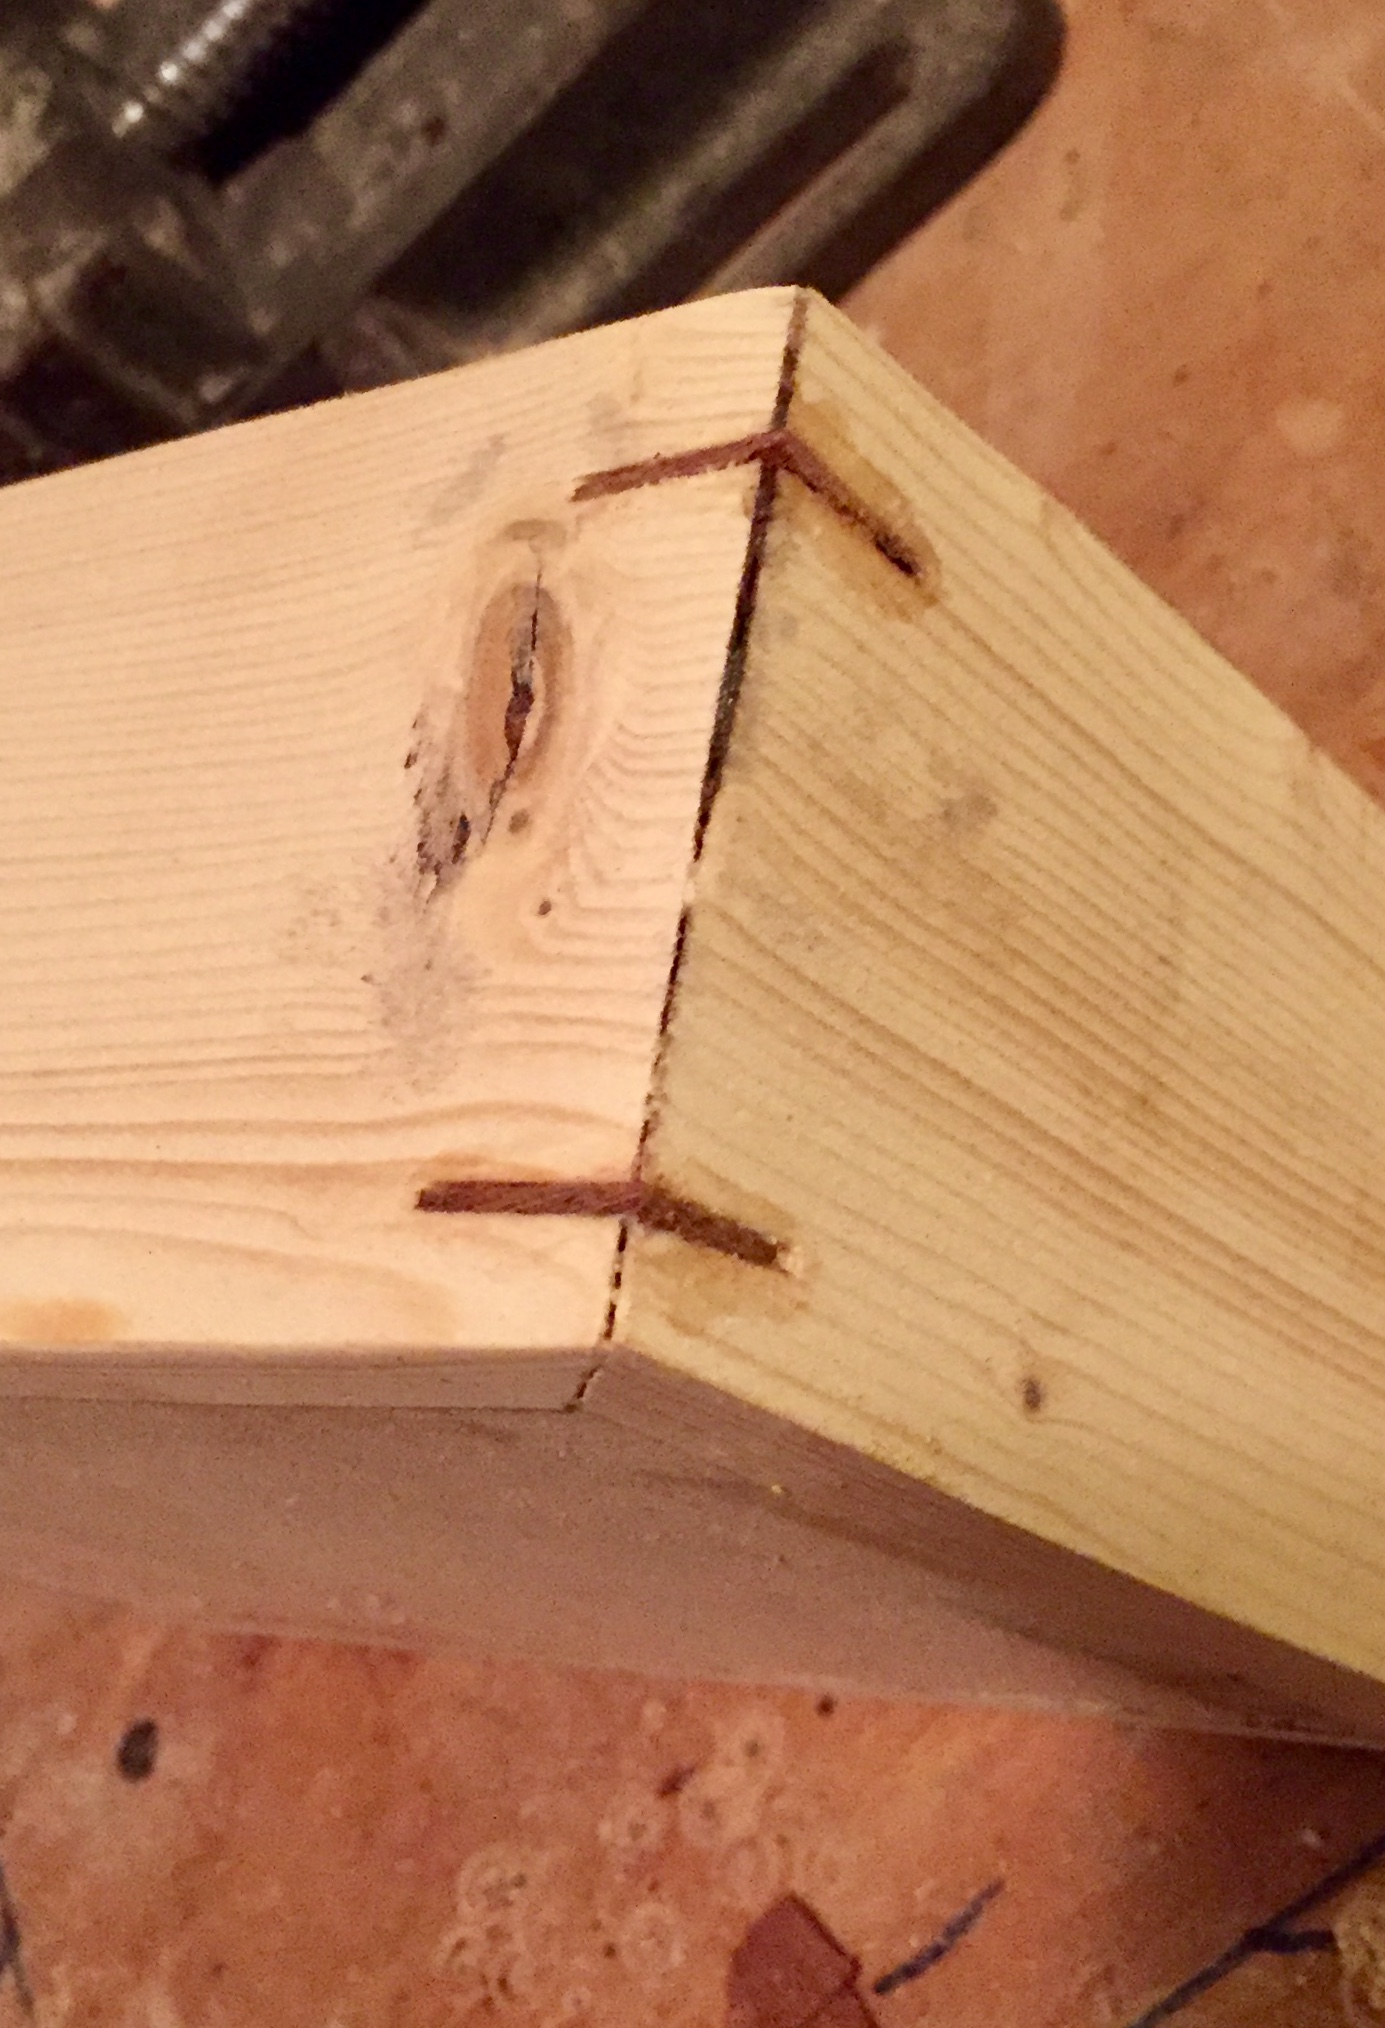
Pull saw to flush it.
rDRjpoD.jpg

All I need to do today (if I have time, as our lass is off today :shock: :cry: )
Thank for viewing.Bri
 
Hi Brian. Have a look at the direction of the grain in your splines. It should run at 90 degrees to the mitre otherwise it will add virtually no strength
Ian
 
Hornbeam":3px302h4 said:
Hi Brian. Have a look at the direction of the grain in your splines. It should run at 90 degrees to the mitre otherwise it will add virtually no strength
Ian

Hello Ian,
sorry ive got a 'bad brain' today.
Could you elaborate more to help me, its not sinking in.# :oops: thank buddy
Bri
 
I used to do them that way but you've got an unguarded table saw blade there. Much easier and safer to make splines with a slotting cutter on the router table with the added advantage of being able to make different thickness splines.

Turn each spline through 90deg- Rob
 
manxnorton":3d50ufys said:
Hornbeam":3d50ufys said:
Hi Brian. Have a look at the direction of the grain in your splines. It should run at 90 degrees to the mitre otherwise it will add virtually no strength
Ian

Hello Ian,
sorry ive got a 'bad brain' today.
Could you elaborate more to help me, its not sinking in.# :oops: thank buddy
Bri
You splines could crack along the same line as the mitred corner - the grain in the spline needs to run across the joint. Think how much weaker a piece of plywood would be if the grain in every layer ran the same way.
 
manxnorton":3s43qqkr said:
Hornbeam":3s43qqkr said:
Hi Brian. Have a look at the direction of the grain in your splines. It should run at 90 degrees to the mitre otherwise it will add virtually no strength
Ian

Hello Ian,
sorry ive got a 'bad brain' today.
Could you elaborate more to help me, its not sinking in.# :oops: thank buddy
Bri

The way you have it, the grain is inline with the mitre. ie it's weakest orientation. (it's easy to snap along the grain)

You want the grain running in the opposite direction.

spline-joint_mitered-spline2.jpg
 
Quote Woodbloke66 wrote.
I used to do them that way but you've got an unguarded table saw blade there. Much easier and safer to make splines with a slotting cutter on the router table with the added advantage of being able to make different thickness splines.

Turn each spline through 90deg- Rob
End of quote.

I would be interested to have you explain how a cutter in a router table in this application would be better gauarded than the blade of a table saw used for this application.
 
Using the router table has 2 benefits. You can easily change the thickness of the splines and you only have a relatively small amount of cutter exposed. The downside is that for narrow splines. the cutter is quite fragile and you have to do each spline in a couple of passes.
On the table saw you can cut 3.2mm splines in 1 pass but the area of exposed cutter is much greater and potentially less safe.
I do mine on the saw with a jig on the sliding table, which covers the blade
ian
 
powertools":2mbxilq0 said:
Quote Woodbloke66 wrote.
I used to do them that way but you've got an unguarded table saw blade there. Much easier and safer to make splines with a slotting cutter on the router table with the added advantage of being able to make different thickness splines.

Turn each spline through 90deg- Rob
End of quote.

I would be interested to have you explain how a cutter in a router table in this application would be better gauarded than the blade of a table saw used for this application.
An naked, unguarded table saw blade gives me the screaming willies :D but it's possible to have a reasonably safe slotting cutter in...

IMG_2571.jpg


...a router table, shown with the picture frame jig. It's not perfect, but you'd have to try very hard to get a bit of leakage from the digits - Rob
 

Attachments

  • IMG_2571.jpg
    IMG_2571.jpg
    228.9 KB · Views: 776
transatlantic":2jjkfre0 said:
Do you have a link to that router guard? Pricey?

Else I think I'll try to make one.

Nope, sorry; the guard came with the UJK fence from Ax, but as you say, it shouldn't be too difficult make - Rob
 
Thanks for the reply.
I can see that your set up is good for something the size of a picture frame but how would it work for a box of say 6 inches high with 4 equally spaced splines?
 
powertools":c8tv6kmp said:
Thanks for the reply.
I can see that your set up is good for something the size of a picture frame but how would it work for a box of say 6 inches high with 4 equally spaced splines?
I wouldn't make a box like that using splines. If I do something like that, then it's secret mitred (if I can be bothered and it's a 'special' :D ) or through dovetails ordinaires. That's the jig I use just for picture frames - Rob
 
powertools":1hvc3ftk said:
Thanks for the reply.
I can see that your set up is good for something the size of a picture frame but how would it work for a box of say 6 inches high with 4 equally spaced splines?

I do something similar with a slotting blade in a spindle moulder.
Spindle-Kerfing-01.jpg


Here's the box in a simple jig being run past the cutter,
Spindle-Kerfing-03.jpg


Here's the result,
Spindle-Kerfing-05.jpg


Cutting the Ebony keys, just as quick using a back saw
Spindle-Kerfing-07.jpg


Keys glued in place,
Spindle-Kerfing-06.jpg


You could do something similar with an arbor and a slot cutter in a router table, it would work fine but you wouldn't get quite as much elevation and you'd need to redesign the jig so that the workpiece reaches right to the very front edge.
Router-Cock-Up-01.jpg
 

Attachments

  • Spindle-Kerfing-01.jpg
    Spindle-Kerfing-01.jpg
    80.8 KB · Views: 288
  • Spindle-Kerfing-03.jpg
    Spindle-Kerfing-03.jpg
    92.1 KB · Views: 289
  • Spindle-Kerfing-05.jpg
    Spindle-Kerfing-05.jpg
    55.9 KB · Views: 288
  • Spindle-Kerfing-07.jpg
    Spindle-Kerfing-07.jpg
    85 KB · Views: 287
  • Spindle-Kerfing-06.jpg
    Spindle-Kerfing-06.jpg
    51.4 KB · Views: 288
  • Router-Cock-Up-01.jpg
    Router-Cock-Up-01.jpg
    86.9 KB · Views: 289
I didn't show the end result, here's the final box. I can batch these out in next to no time,

Simple-Box-01.jpg
 

Attachments

  • Simple-Box-01.jpg
    Simple-Box-01.jpg
    51.1 KB · Views: 288
custard":m9c2p20r said:
powertools":m9c2p20r said:
Thanks for the reply.
I can see that your set up is good for something the size of a picture frame but how would it work for a box of say 6 inches high with 4 equally spaced splines?

I do something similar with a slotting blade in a spindle moulder.


You could do something similar with an arbor and a slot cutter in a router table, it would work fine but you wouldn't get quite as much elevation and you'd need to redesign the jig so that the workpiece reaches right to the very front edge.

Great information and the finished box is really nice. But the spindle moulder, is the thing that piqued my main interest. Love the way that fence works. I think the last time I used and saw a spindle moulder was back in 97, it was a standard looking wadkin. No guards :shock: , no extraction, brake lever removed, etc. Yours looks like a work of art (in a good way)..yes, I'm a bit of a sad person/nerd.
 
As an alternative to visible splines, Mitres can be strengthened with an internal spline which runs across the mitre.
I have made this jig for use on the router table for cutting splines
20190227_185925.jpg
,
The mitre is first cut and then the piece is clamped to the cross cut sledge. The cross cut sledge angled portion is adjustable so the exact position of teh spline cane be varied.
Through cut splines are straightforward as the piece is run straight through.
For stopped splines the router bit has to be raised once the mitre has been positioned. I have teh jessem table and with the sledge in position it covers the raise/lower adjuster. Fortunately the mechanism is light enough that it can be turned by hand from underneath to raise the bit as required. Alternatively the piece can be turned over and a slotting cutter used instead
The picture shows a previously cut trial piece as a protective packer under the clamp foot. In this case the slot is 4mm X 4.5mm for a 4 X 8 spline in 9mm birch ply
 

Attachments

  • 20190227_185925.jpg
    20190227_185925.jpg
    1.8 MB · Views: 222
  • 20190227_185911.jpg
    20190227_185911.jpg
    1.9 MB · Views: 187
I used to cut key slots on my table saw with a jig and (sorry!) an unguarded blade but noticed that the tooth configuration of the blade left it's pattern in the base of the slot, entailing a little bit of fettling afterwards. I now use the same jig on my router table and get nice clean, square slots.

I only mention this because I found it incredibly frustrating until I resolved it but I have since noticed that hardly any of the box building books I have mention this fact. Hopefully I can save a beginner that frustration! Either ensure your saw blade is a flat toothed (ripping) blade or use the router table.
 
Back
Top