


Dodge
Established Member
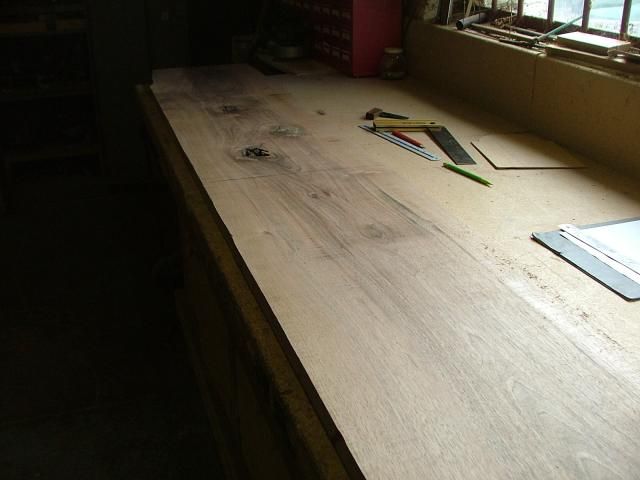
As asked by Marcros in my Burr Oak topped table WIP here is the WIP for the Walnut Bracket Clock I made last August for client to present to his father on his 70th Birthday. Over the years I have made several clocks like this and in various different timbers but this one was commissioned in European Walnut to tie in with other furniture that the clients father owned.
Anyway, quite unusually I actually start making these clocks with the front arch topped door and also the frame upon which the clock dial will be mounted.
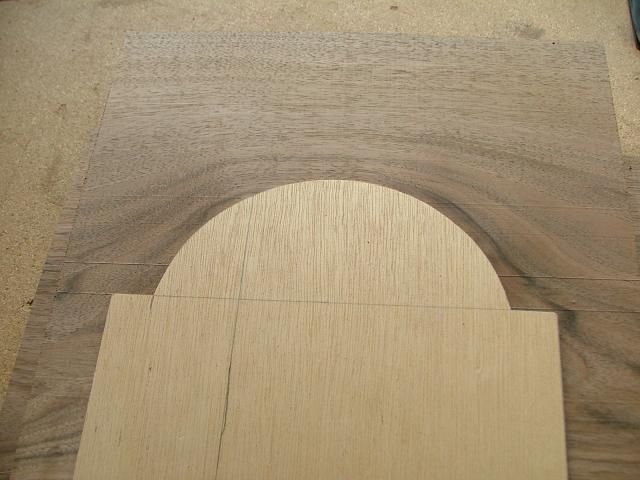
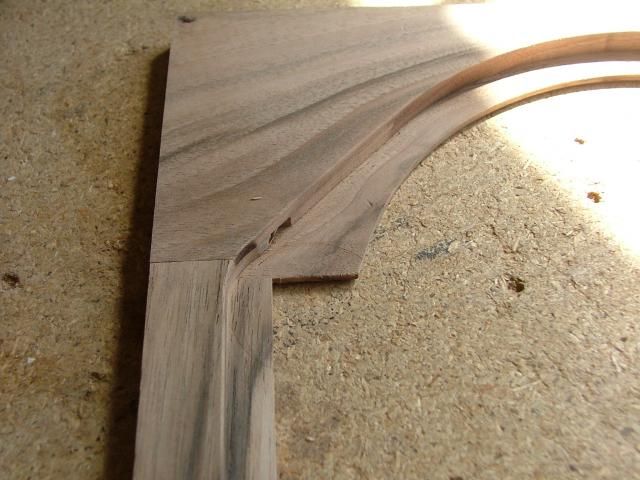
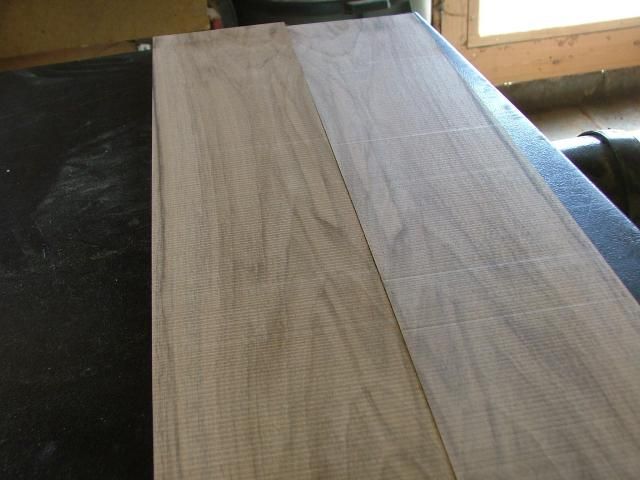
Having looked at my stock of timber I had a suitable board or two that actually had a fault in the centre which was where there was an open dead knot
Although traditionally the dead knot section would be cut out and discarded it is ideal for a project like this as the grain follows around the knot hole and can be used to follow around the arch of the clock door

A basic template from the top of the dial was made to align with the grain before marking out the best position
With this section marked the main components for the door frame were cut before being jointed -

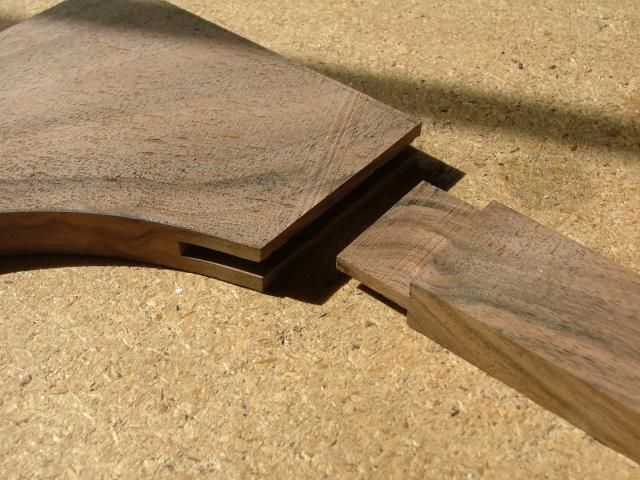
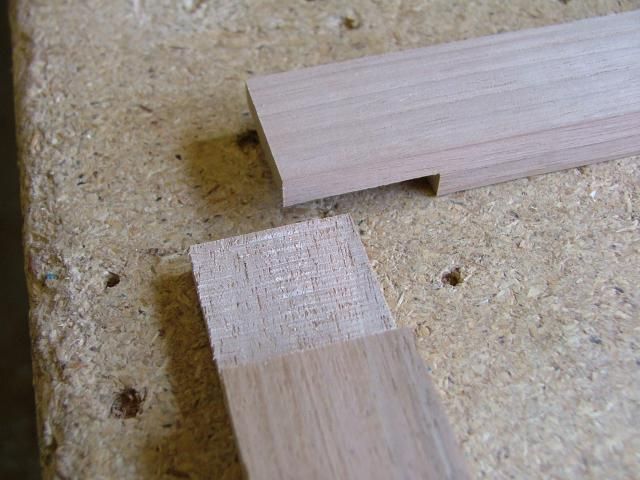
The curved top section was then bridle jointed into the side stiles
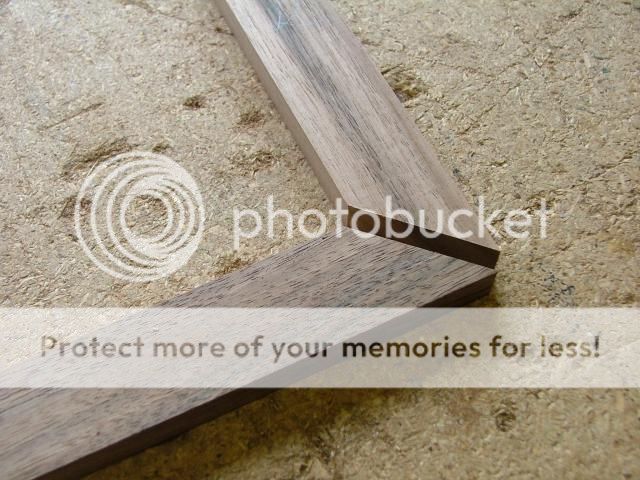
and the bottom of the side stiles mitred to the bottom rail
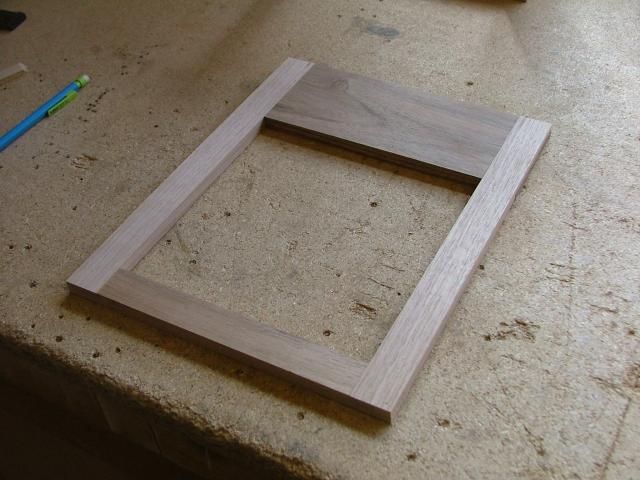
The door was then cramped up and left to dry
Once dry and the door frame was cleaned up and the rear rebated with a bearing guided cutter to provide the necessary rebate for the glass, the section around the step in the top rail cut back by hand making it easier to cut the glass when fitted later.
With the door now complete the inner frame was made in a similar manner but using half lap joints at the corners
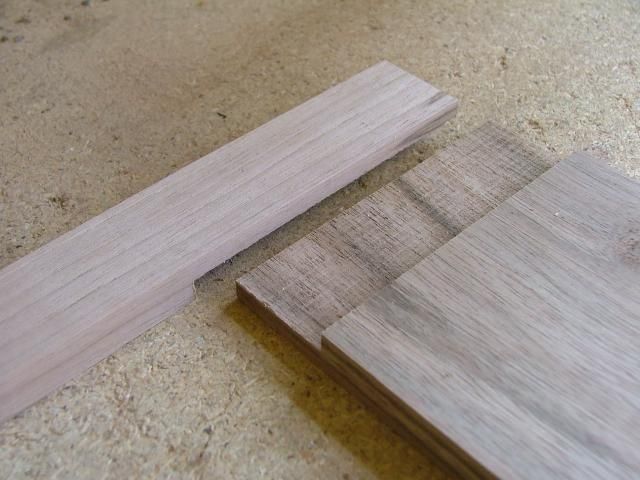
The frame was glued up and once dry cleaned up and put aside for later use.
The main carcase box of the clock can now be addressed and a single board was deep sawn on the bandsaw to give a pair of book-matched pieces to use for the sides of the clock
The sides were cut to length and the top and bottom pieces also made - The sides had a housing cut on the inner face at either end, and the corresponding tongues were cut onto the ends of the top and bottom sections, before assembly a groove was routed around the inner faces to accept the frame already made to accept the clock dial in due course.
An arch topped aperture was cut into one of the sides which in due course would be fitted with a brass sound fret. this was simply cut using the fret saw.
The carcase was then glued up, the inner frame helping to keep the whole assembly square - Once glued up it was left to dry
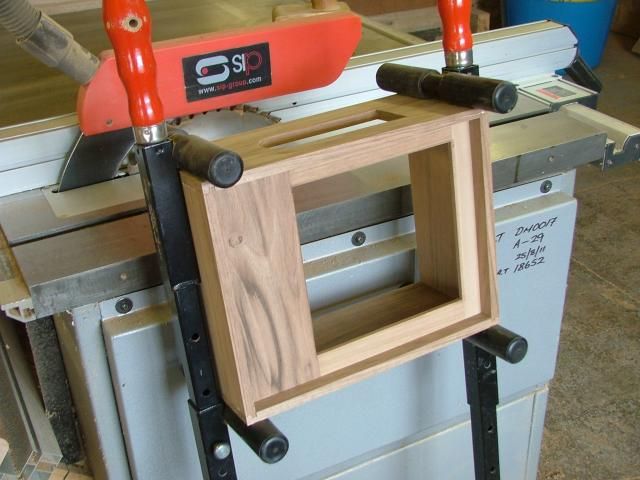
Once the carcase was dry it was removed from the cramps, and after cleaning up with a sharp block plane the door was offered up to ensure the fit was right, the door wanting to surface mount on the front oc the carcase box.

Anyway, quite unusually I actually start making these clocks with the front arch topped door and also the frame upon which the clock dial will be mounted.
Having looked at my stock of timber I had a suitable board or two that actually had a fault in the centre which was where there was an open dead knot

Although traditionally the dead knot section would be cut out and discarded it is ideal for a project like this as the grain follows around the knot hole and can be used to follow around the arch of the clock door

A basic template from the top of the dial was made to align with the grain before marking out the best position

With this section marked the main components for the door frame were cut before being jointed -

The curved top section was then bridle jointed into the side stiles

and the bottom of the side stiles mitred to the bottom rail

The door was then cramped up and left to dry
Once dry and the door frame was cleaned up and the rear rebated with a bearing guided cutter to provide the necessary rebate for the glass, the section around the step in the top rail cut back by hand making it easier to cut the glass when fitted later.

With the door now complete the inner frame was made in a similar manner but using half lap joints at the corners


The frame was glued up and once dry cleaned up and put aside for later use.

The main carcase box of the clock can now be addressed and a single board was deep sawn on the bandsaw to give a pair of book-matched pieces to use for the sides of the clock

The sides were cut to length and the top and bottom pieces also made - The sides had a housing cut on the inner face at either end, and the corresponding tongues were cut onto the ends of the top and bottom sections, before assembly a groove was routed around the inner faces to accept the frame already made to accept the clock dial in due course.
An arch topped aperture was cut into one of the sides which in due course would be fitted with a brass sound fret. this was simply cut using the fret saw.
The carcase was then glued up, the inner frame helping to keep the whole assembly square - Once glued up it was left to dry

Once the carcase was dry it was removed from the cramps, and after cleaning up with a sharp block plane the door was offered up to ensure the fit was right, the door wanting to surface mount on the front oc the carcase box.


