September Challenge ( Rules and requirements )

UKworkshop.co.uk

Help Support UKworkshop.co.uk:

This site may earn a commission from merchant affiliate links, including eBay, Amazon, and others.

Blister

Established Member
UKW Supporter
Joined
10 Nov 2006
Messages
7,470
Reaction score
450
Location
Boston Lincs
Septembers 2011 Challenge is to produce a Vase ( To hold flowers )

Our Judge for September will be Barry

( Rules /Requirements / Judges Criteria )

Item must be lathe turned and made of wood

Maximum of 12" height

Maximum of 6" diameter

Any wood type

No segmented work

Must be hollowed to a minimum of 80% of the finished height

Must be functional in use ( To hold flowers )

Does not need to hold water

Texturing, piercing, carving, burning, coloring all allowed

Barry our Judge will be looking for all the above and also the design element / Standard of finish

NO Critique or comments on any work until October Please, After the Judging and results.
Please state the wood type used if known and a little about the techniques applied when producing the Vase (this helps the judge)
The Judges decision is final.

Please post 3 images / photos of your work
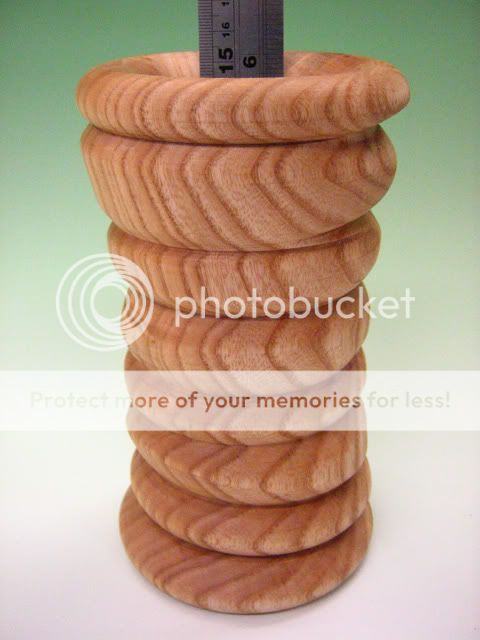
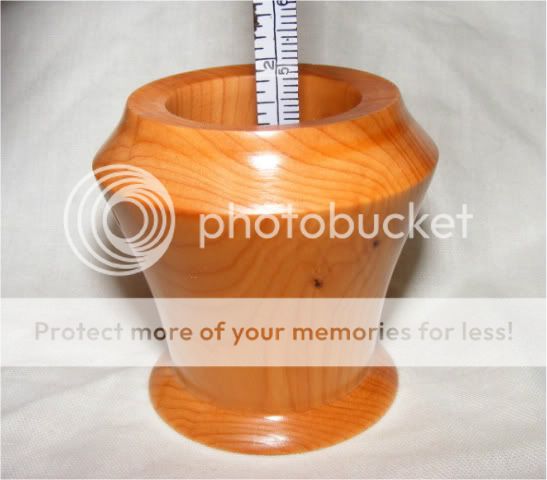
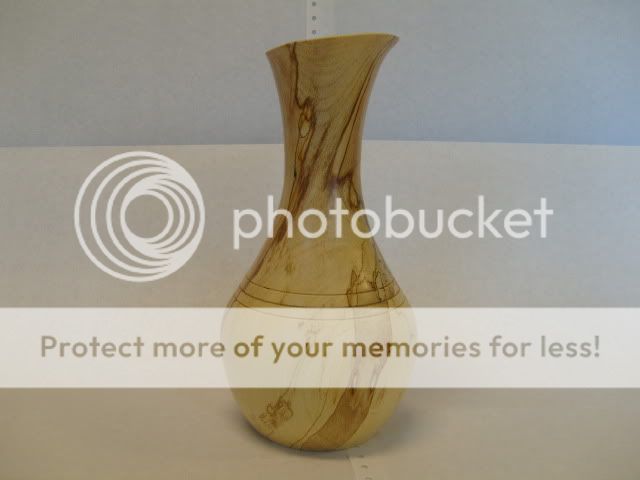
1 the vase in profile with a ruler or tape measure inside showing the hollowed depth
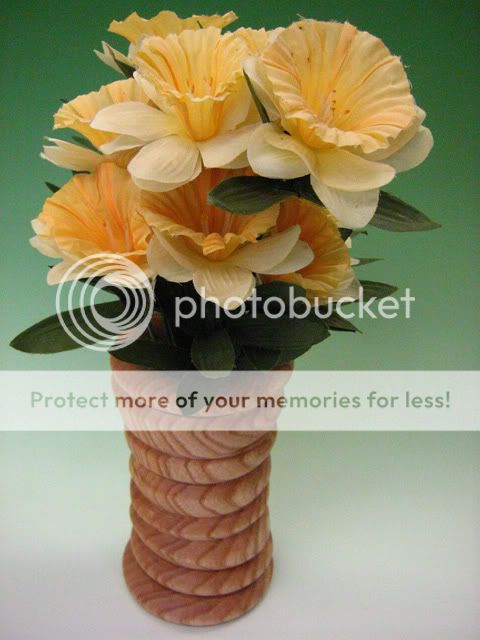
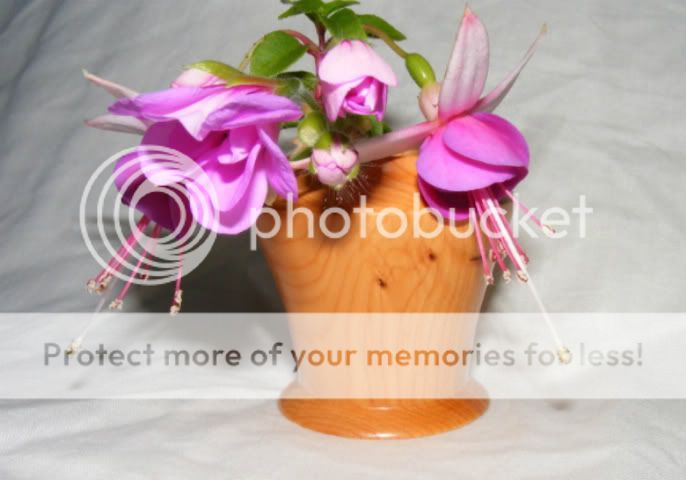
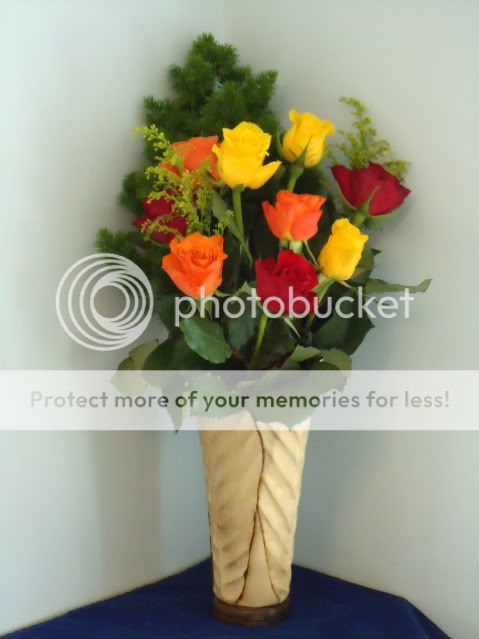
1 showing the vase with flowers in it
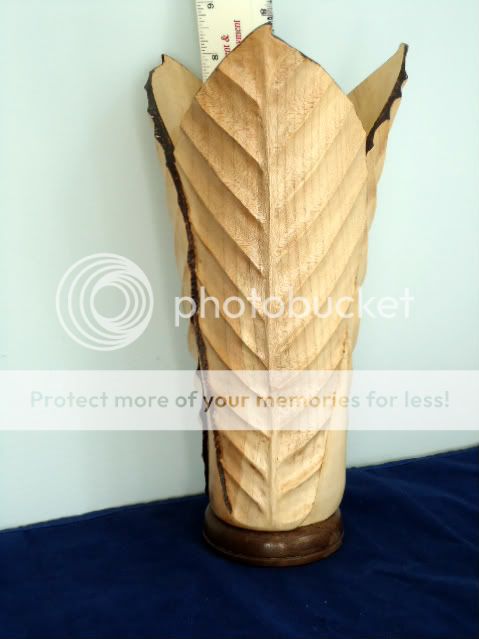
1 close up of any fine detail you would like the judge to see

Image size please use image size 640 x 480 0.3 mp, same as previous months

Please notify me your entries are ready by 10 pm on Sunday 25th after this time the thread will be locked

Entry’s to be uploaded from 10pm on 25th September up until 10pm on the 27th September after this time the thread will be locked for Judging

Results will be given on or before 30th September

Good luck everyone :mrgreen:
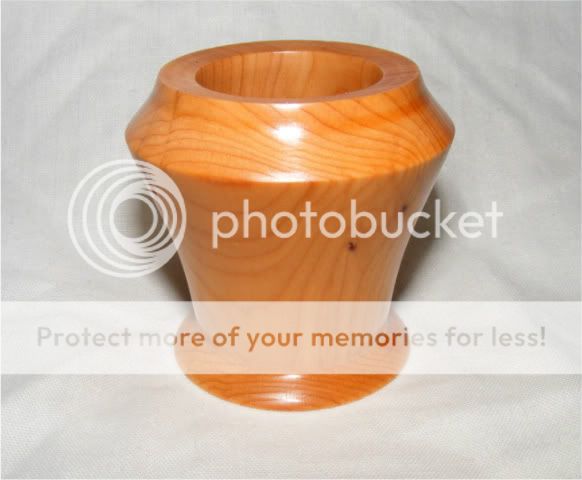
 
Well im sure your fed up of reading that I didn't get enough time etc etc blar blar. So ill save you the trouble and tell you this month was the opposite. I had plenty of time and even taken my time while turning this months entry.

Make from Ash and Oak this vase measures around 60mm wide and 6 inch tall. Its hollowed to around 5 inches.

First I cut the pieces and glued up. Once dry I cut them down at an angle on the bandsaw. Marked the centres and turned a spigot.
Mounted in OD jaws and tail centre and turned the shape using mainly a large gouge and skew. Bored a hole down the centre with a 30mm saw tooth bit and extension in the tail. Sanded on lathe down to 240 grit then sanding sealer, mahogany grain fill then friction polish and filly burned with a dry cloth. Parted off the spigot and sanded the base to remove the parting marks.
 

Attachments

  • Vase.jpg
    Vase.jpg
    97.4 KB · Views: 1,536
  • vaseDetail.jpg
    vaseDetail.jpg
    65.5 KB · Views: 1,536
  • Vasemesure.jpg
    Vasemesure.jpg
    56.3 KB · Views: 1,536
Another piece of manitoba maple burl. 6 3/4" high by 4 3/4" in diameteer with 1/4" walls and 1/2" thick bottom. Started between centers , turned a spigot and mounted it in the Stronghold chuck. Turned the outside with bowl gouge and the inside with my Oland tool. Sanded on the lathe and parted off. Finished with lacquer. The bottom I cleaned up with carving gouge. Thanks
 

Attachments

  • P1010773.JPG
    P1010773.JPG
    148.4 KB · Views: 1,518
  • P1010776.JPG
    P1010776.JPG
    161.5 KB · Views: 1,518
  • P1010786.JPG
    P1010786.JPG
    175.1 KB · Views: 1,518
This is my entry for September.

Its made of boxwood. 175mm high by 85mm wide. The internal dimension, which hopefully shows on the ruler is 157mm.

The wood was mounted on the screwchuck in the Versachuck and rough turned to shape. Reversed onto dovetail and hollowed out using the Kelton tool. The upper section was kept to 2mm as I needed to keep some strength after piercing. The bottom section was left with sufficient thickness to take the carving out. The outside was then finish turned and scraped to a finish. I didn't bother sanding at this stage.

Although the cut out shapes are random, the pattern is based on regular sections. The upper section was cut out using a fine burr in the airtool and then patterned with the same tool.

The bottom section was carved out with a large burr and the 'leaves' sanded smooth (not particularly flat but I like the slight variation that recalls but isn't an exact representation of a leaf) The inside was sanded before piercing but fortunately, the Kelton leaves a pretty good finish.

I contemplated colour but this one is for Eugene who prefers to see the wood!!

I like the fact that the stems of the flowers form their own pattern, shown through the piercings.

Finished with two brush coats of lacquer, wire wool and waxed.
 

Attachments

  • 100_2737.jpg
    100_2737.jpg
    47.2 KB · Views: 1,498
  • 100_2741.jpg
    100_2741.jpg
    47.3 KB · Views: 1,498
  • 100_2719.jpg
    100_2719.jpg
    65.1 KB · Views: 1,498
OK,

Apologies I dont have all the required photos, of a ruler/tape, and flowesr etc. I was supposed to do them last night, but i did a craftshow on sat/sunday and the vase sold, so hope that doesn't get me disqualified this month.

10 inch high, x 4 .5 inch widest point.

Was turned In two parts, to allow hollowing of bulb section with standard tools. The upper part was spigotted and hollowed most of the way before glue up to the hollowed base, then completed, and outside finished.

Sanded and paste waxed.

S7003659.jpg


S7003658.jpg
 
Some seriously spalted something, possibly hazel or birch, rescued from the firewood pile. turned entirely on a 4in faceplate and hollowed with spindle gouge and a half round scraper, down to the handle :!: - brings me out in a cold sweat just thinking about it :shock:
About 170mm tall, hollowed to a depth of 136mm (80% exactly :) ),about 95mm at the widest point and finished with copious amounts cellulose sanding sealer and a quick soft waxing on the outside to give it a shine.
I like it, hope you do too :D
vase withflowers.JPG


vase.jpg


vasewithruler.JPG
 

Attachments

  • vase withflowers.JPG
    vase withflowers.JPG
    191.3 KB · Views: 1,469
  • vase.jpg
    vase.jpg
    213.8 KB · Views: 1,469
  • vasewithruler.JPG
    vasewithruler.JPG
    220.4 KB · Views: 1,469
This represents the latest in my "carving" odyssey and is inspired by the central leaf of a horse chestnut tree and how they could combine to present a "natural" vase.

This vase pre carving was a 150mm diameter at the top falling to 70mm at the foot and height of 230mm. Finished height on foot 245mm

it was hollowed using a central forstner hole to 90% finished depth and opened using Rolly Munro tool and finished with shear scraper. Finished depth 215mm

I then cut from paper a leaf template and marked the outlines onto the wood. I marked on where the central vein would be and proceeded to carve away the leaf shapes and setting in the overlap. I used Typhoon burrs, cutting the curve upto the veins to more accurately reflect a leaf construction. I then Pyro'd the edges for definition and to emphasis the overlap creating the shadow.

Having carved it I made the foot from a piece of Black Walnut.

It was finished using a sanding sealer and microcrystalline wax on the outer and internally finished with Hard Wax Oil to make it water resistant and therefore "fit for purpose"

DSC01831.jpg


DSC01818.jpg


DSC01795.jpg
 
First captive ring turning I have tried.

Zebrano offcut I picked up, tools used were spindle gouge, parting tool and half round scraper.

It is 171mm tall 63mm in diameter and hollowed to 110mm - you can't see it but I used a bit of 22mm copper pipe fluted out to fit in the vase so it can hold water if required.

Finished with BLO then a friction polish and then wax.

SeptComp - vase (5).JPG

SeptComp - vase (3).JPG

SeptComp - vase (1).JPG
 

Attachments

  • SeptComp - vase (1).JPG
    SeptComp - vase (1).JPG
    148.1 KB · Views: 1,434
  • SeptComp - vase (3).JPG
    SeptComp - vase (3).JPG
    231.7 KB · Views: 1,434
  • SeptComp - vase (5).JPG
    SeptComp - vase (5).JPG
    36.9 KB · Views: 1,435
Piece of ash 7" tall 4" dia hollowed to 6" finished with mineral oil and beeswax. Spigot was turned between centres, then continued offset turning between centres finally put into chuck for hollowing and finishing.

VaseSeptComp3.jpg


VaseSeptComp.jpg


VaseSeptComp2.jpg


Dave
 
Here is my entry. Its a nice piece of sycamore i got from a tree surgeon 3 months so its still a wee bit wet but no cracks or warping so far.

Started of between centre's rough turned the outside with a and made a tenon. Gripped tenon with my chuck and used a 5/8" bowl gouge to do pretty much everything from there.

It is 150mm high and 120mm deep largest diameter is 132mm. Sanded to 400 grit and finshed with friction polish.

This was my second try at this seeing as i forgot to do the simple maths of the depth but is spot on 80%.

Found it a wee bit difficult getting to that depth but a great learning experience and thats what i am after.

Good luck everyone.
 

Attachments

  • Image00004.jpg
    Image00004.jpg
    91 KB · Views: 1,344
  • Image00002.jpg
    Image00002.jpg
    89.9 KB · Views: 1,344
  • Image00001.jpg
    Image00001.jpg
    111.2 KB · Views: 1,344
This was definitely a case of "let the wood decide".

A piece of cherry crotch which decided its top and bottom would be the reverse of the normal vase shape because of the way the crotch fell. It's actually a good shape upside down as well!
Two of the "petals" are exactly as turned because of the position of the crotch and the third (tallest one) was shaped with an Arbortech to blend in with the other two.

It's 23cm tall at its highest point and hollowed down to 21.5cm with walls of 3mm. Roughed round between centres then mounted on shark jaws where it stayed till it was parted. The outside was shaped first with bowl gouge and scrapers then the inside hollowed with a Rolly and Woodcut then shear scraped. Sanded to death then the outside polished using the Chestnut buffing system, the inside with Renaissance wax.

I took ages on getting the finish on the inside to as good a standard as the outside and spent more time on this part than anything else.

As it is tulip shaped I thought it would be ideal to put tulips in but as they are out of season I've used some wooden ones, nothing in the rules to say the flowers have to be real!

A drinking glass fits nicely inside so in the spring it will be used for real flowers.
chrryvs_04.JPG

chrryvs_03.JPG

chrryvs_08.JPG
 

Attachments

  • chrryvs_04.JPG
    chrryvs_04.JPG
    33.5 KB · Views: 1,345
  • chrryvs_03.JPG
    chrryvs_03.JPG
    22.9 KB · Views: 1,344
  • chrryvs_08.JPG
    chrryvs_08.JPG
    34.5 KB · Views: 1,344
Last minute call means I've to dash out the door and won't be back before 2200 tomorrow, so it's quick pics and no flowers I am afraid.

Thanks to Johnny.t I got to play with an RS 230kt for the first time - which went well.

Given the decoration notes I thought I would try something in that vein, but that didn't go well. Theory was to texture a raised band, fill with green acrylic then a quick level with the skew to give a coloured pattern. The problem was that I left the vase on the lathe overnight for the acrylic to dry and the was obviously movement leading to uneven finish on one side - I photographed the 'bad side'. Something I will do again but with a better understanding of risks!

Vase is 202mm high, 132mm diameter and hollowed out to 170mm as illustrated.

Wood is a log of sycamore from the garden, with partial spalting.

SS and WW22 for the finish.

6186289649_6a1775eb9b_o.jpg


6186814122_d56b8fa236_o.jpg


6186289339_a0612750da_o.jpg
 
Here is my vase for this month`s challenge.

Height 6", width 3 1/2 "
Timber : Ash
The colouring is Chestnut spirit stain and the band around the top has been pyro`ed.
Finished with cellulose lacquer.

Ian
vasex.jpg

vase1.jpg

vase2.jpg
 

Attachments

  • vasex.jpg
    vasex.jpg
    191.6 KB · Views: 1,263
  • vase1.jpg
    vase1.jpg
    146.8 KB · Views: 1,262
  • vase2.jpg
    vase2.jpg
    206.8 KB · Views: 1,262
I didn't have much time this month so I thought I'd go for a bud vase but something a bit different. I ended up using a similar system to my platter and doing some off-centre turning using lead weights as counterbalances.

Turning is a sycamore form drilled/hollowed to deeper than 80%. Off-centre turning was done at approx 450 rpm and was fairly noisy!
Tools used - roughing gouge, spindle gouge, parting tools, small bowl gouge, drill bits, long spindle gouge for hollowing, shear scraper for neatening up edge and hollowing.
Sanded to 800, buffed with white only, MC wax.

R0012689.jpg

R0012690-Edit.jpg

I've added a side image showing how the ruler doesn't start at the edge, but it was all I could find
R0012694.jpg
 

Attachments

  • R0012689.jpg
    R0012689.jpg
    206.1 KB · Views: 1,237
  • R0012690-Edit.jpg
    R0012690-Edit.jpg
    92.5 KB · Views: 1,236
  • R0012694.jpg
    R0012694.jpg
    141.3 KB · Views: 1,236
Ok so some of you will know, I only acquired a WORKING lathe hrs before the deadline this month. So after freeing the rusted drivecentre from the headstock... I was left with an hour or so... and no 'vase' sized wood to turn.
desperate as I was to not miss out on another point from my goal of 12 in the year..... I only have this to enter!

I took my inspiration from my favorite actress... Tinkerbell! This is my Pixy vase as it's so tiny.
I have however found a use for it.... it fits nicely on the tray when bought breakfast in bed with a flowery something in it and doesn't take up too much room!! (come on you can't blame me for trying :lol: )

Material Yew
Height 5 cm
Max Width 5 cm
Hollowed to 4.2 cm

I turned a spigot, mounted on my patriot chuck, hollowed with a spindle gouge as I have no hollowing tools, then shaped the outside, finished with 1 coat of friction polish and parted off.
It's no work of art, or technically challenging.... But it's a point for a month that I wouldn't have had :D :D

DSCF9079.jpg

DSCF9083.jpg

DSCF9093.jpg
 
My vase: Ash from my own tree [felled a couple of years ago] 'seasoned' in the garden.

I had to turn off quite a bit to remove the cracks, hence it's only approx. 7 3/8 " tall, 4 1/2 " at the widest point. Hollowed with Sorby hollowmaster so maybe just as well it isn't taller.

Finished with three or four coats of 50:50 sanding sealer:celulose to stabilise between turning sessions and for final sanding, then two buffed coats of danish oil [inside and out] followed by two buffed coats of microcrystalline wax.

P1070895k.jpg


P1070889k.jpg


P1070887k.jpg
 

Attachments

  • P1070887k.jpg
    P1070887k.jpg
    52.4 KB · Views: 326
  • P1070889k.jpg
    P1070889k.jpg
    86.9 KB · Views: 326
  • P1070895k.jpg
    P1070895k.jpg
    45.5 KB · Views: 327

Latest posts

Back
Top