You are using an out of date browser. It may not display this or other websites correctly.
You should upgrade or use an alternative browser.
You should upgrade or use an alternative browser.
Post a photo of the last thing you made
- Thread starter DTR
- Start date


Help Support UKworkshop.co.uk:
This site may earn a commission from merchant affiliate
links, including eBay, Amazon, and others.
thetyreman
Established Member
very nice memzey! that's going to last a lifetime
John15
Established Member
Congratulations Memzey. A very attractive cabinet.
John
John
thetyreman
Established Member
This is the first piece I actually designed as well as made myself, a custom size TV corner cabinet for one of my mothers friends, she hasn't seen it yet, hopefully she'll like it, the front apron at the bottom is actually dovetailed, if I made it again I'd just use a simpler mortice and tenon joint, otherwise very happy with how it turned out. It's made to match her exsisting cream painted with oak top furniture in the room. The american white oak top is finished with tung oil, and the rest is laminated redwood painted with eggshell paint.
Attachments


monkeybiter
Established Member
That looks smart and it suits that space.
custard
Established Member
thetyreman":1zahd6al said:This is the first piece I actually designed as well as made myself, a custom size TV corner cabinet for one of my mothers friends, she hasn't seen it yet, hopefully she'll like it, the front apron at the bottom is actually dovetailed, if I made it again I'd just use a simpler mortice and tenon joint, otherwise very happy with how it turned out. It's made to match her exsisting cream painted with oak top furniture in the room. The american white oak top is finished with tung oil, and the rest is laminated redwood painted with eggshell paint.
I'm sure she'll be thrilled, and so should you be. That's a tidy job. In particular I really like the care you put into jointing up the boards for the top. You chose flat sawn boards that peter out to rift sawn on both edges. That's given cathedral grain in the board centres for interest and vitality, but straight grain towards the edges for invisible and harmonious jointing. When you see jointed tops that have clashing grain along the joint line it just looks careless. So well done!
=D>
The decision on wether or not to extend the sides out at the back above the skirting board (so as to but up against the wall) is always tricky. It may get moved in the future to a location with a different height skirting board, and in any event the gripper track underneath the carpet will always tip furniture forwards by a few degrees. So on balance I think you've called this right. If it were to sit on an engineered wooden floor with an upstand then there's a counter argument, but in this situation I get your logic.
thetyreman
Established Member
that skirting in our house really is weird from the 1930s, it's 1 and a half inches thick, this isn't its final resting place,
I'll take another picture in her kitchen tomorrow, should hopefully make more sense in context, thanks for the praise, I really appreciate it. I didn't realise that you could make space and scribe the skirting shape into the back edges, learning something new all the time...
I'll take another picture in her kitchen tomorrow, should hopefully make more sense in context, thanks for the praise, I really appreciate it. I didn't realise that you could make space and scribe the skirting shape into the back edges, learning something new all the time...
Ttrees
Iroko loco!
That is one sheweet cabinet Memzey 8)
custard":cwuf6rr2 said:It's great to see people actually making real furniture...
:?: :?: :?:
Maybe imaginary furniture isn't comfortable?
thetyreman
Established Member

rafezetter
Troll Hunter
That's a lovely looking corner unit Thetyreman and obviously built to last.
Memzey that medicine cabinet is a beaut - blind dovetails and you say that's your first time using that technique in a piece (or did you "cheat" and use a DT jig? heh and even if you did, saved you the headache right?)
The way you talked at Richard's meet last month, you claimed to be a basic hacker, not so my friend, that is quality work, I'm honestly envious.
memzey
Established Member
Thanks for the kind words everyone and nice to hear from you Rafe. To confirm: no DT jigs were molested in the making of the cabinet. All dovetails were cut by these oafish hands. Just to clarify as well, they are the first dovetails I've used on a project but not the first I've cut at all. I'd been practicing through and lap dovetails for quite a while before feeling ready to incorporate them into a project. To say that the very first practice ones I cut were gappy and ugly would be an understatement!
rafezetter
Troll Hunter
memzey":2ke7zxdh said:Thanks for the kind words everyone and nice to hear from you Rafe. To confirm: no DT jigs were molested in the making of the cabinet. All dovetails were cut by these oafish hands. Just to clarify as well, they are the first dovetails I've used on a project but not the first I've cut at all. I'd been practicing through and lap dovetails for quite a while before feeling ready to incorporate them into a project. To say that the very first practice ones I cut were gappy and ugly would be an understatement!
I'd still say those were excellent quality, about as "professional" as it gets - I was sure you had done DT's before, but I doubt you did hundreds; but it certainly looks as though you had, even close up; and blind DT's must be much trickier to get bang on.
*cough* I'll let you off the base DT second from the front, left side
")
I do have a question though - what's going on with the rail above the drawer where it meets the sides? I can't quite make out what you've done there.
I noticed you bailed on the invisible hinge ideas, next time eh?
memzey
Established Member
Hey Rafe. The fixed shelf is a simple (but oafishly executed) through housing. Should have been the easiest joint in this project but easily the messiest I made. I probably got cocky as these joints I know I can make and there is no doubt a lesson for me here. As for letting me off: mate there's a lot more than that dodgey dt going on here! Mrs. memzey likes it but I can see it's riddled with flaws I will not make again. To me each project is like a bellwether letting me know how I'm doing. The errors are still present but less obvious and more liveable as I go from extremely oafish to less so with time and practice. Still I am awestruck by much of the work posted on these boards and know I am not even close to replicating most of it. I might let you all in to the chaos with a wip thread next time if I'm feeling confident and the shed is tidy!
_lotusbleu
Member
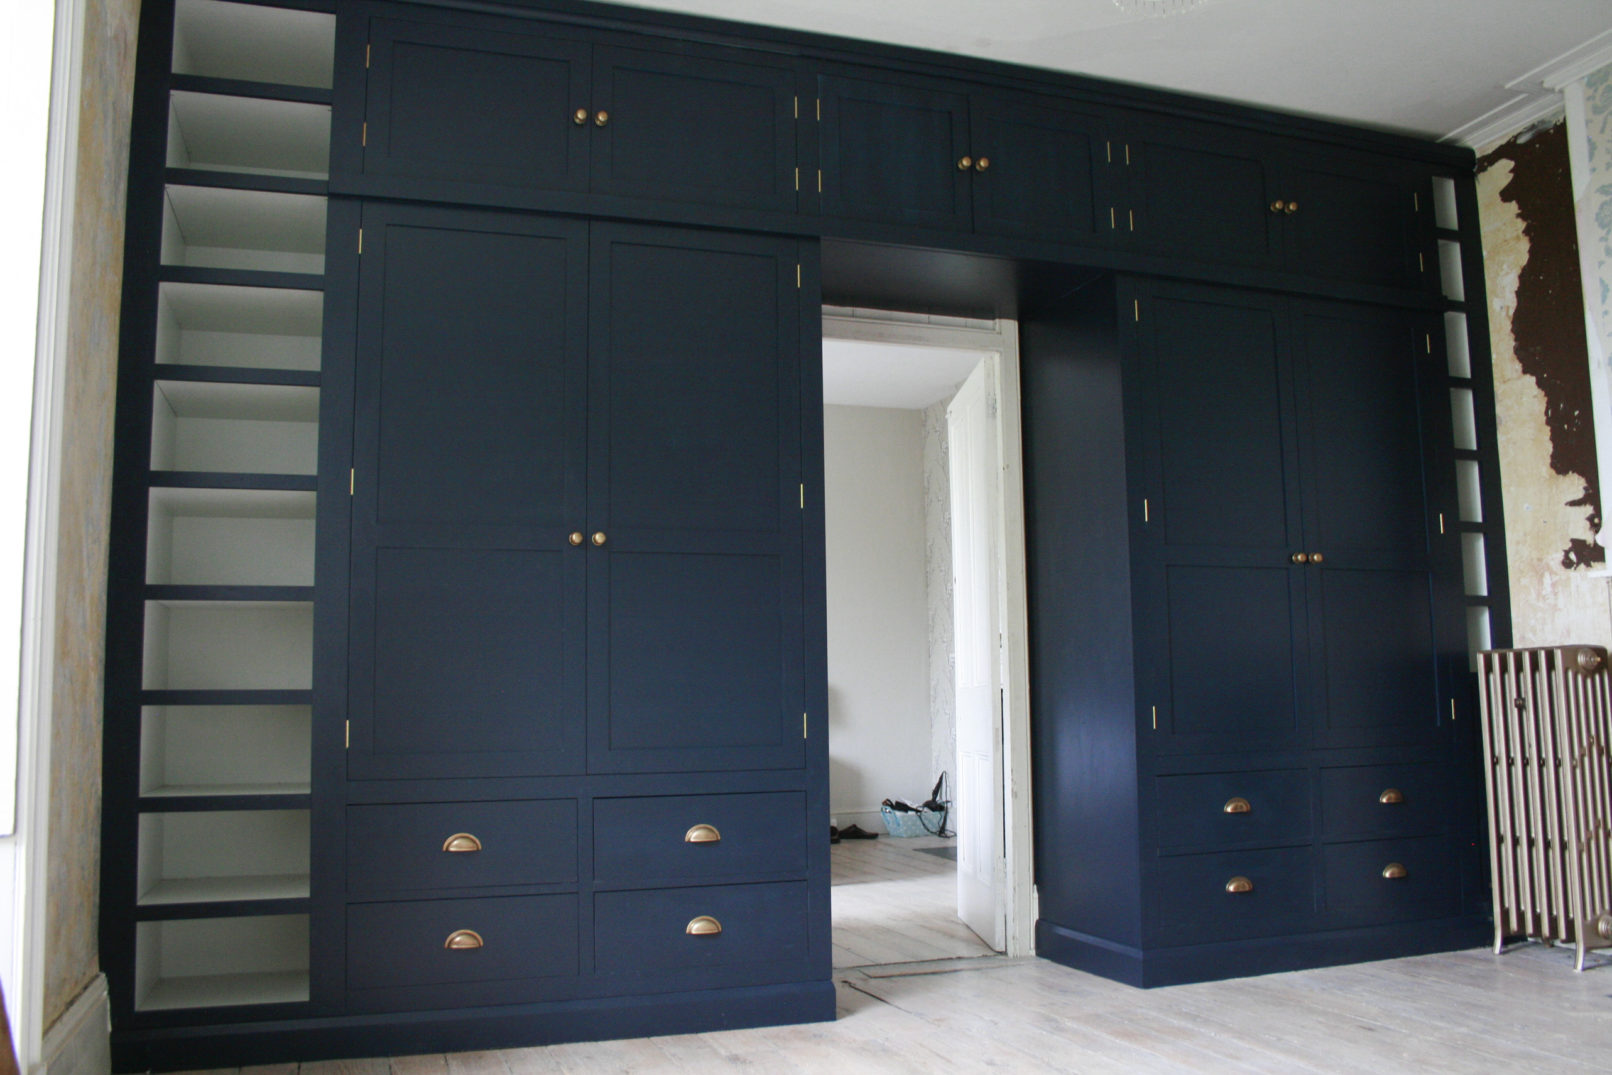
I recently finished this built in wardrobe. All birch ply & tulip.
Sorry about the size of the picture! Struggled to figure out how to upload it.
custard
Established Member
The cabinetry looks first rate, in particular the drawer pulls and brass hingeing work really well with that colour. However, the exposed inch or two of T&G and jamb above the doorway looks a bit unfinished. I think you can just get away with the coving running in over the cabinetry provided the scribing elsewhere is neatly done, but add in that T&G/jamb and it tips the visual balance from "built in" to "sort of fitted".
Not being rude by the way, just my honest opinion.
Not being rude by the way, just my honest opinion.
monkeybiter
Established Member
Maybe a broad flattish architrave in the same colour as the very smart looking wardrobe all around this side of the door jamb would sort that out. [Décor not really being my forte]
cowfoot
Established Member
Get that thing covered up before the painters arrive!
Nice job.
Nice job.
I've just completed a simple but chunky hall table. It's made from sweet chestnut, with the top and shelf being one piece boards. I also managed to cut the drawer fronts out from a single board to get a perfect (to me) grain match with the front panel with the use of multi tool and Japanese saw. It's finished with two coats on English tint Fiddes hard wax oil and waxed with their light brown supreme wax. Joinery is with dominoes and the dovetails were cut with a router and jig (I enjoy using machines and power tools more than hand tools hence this approach).
I took these pictures at night time with indoor lights hence the poor shadow and colour spread.


I took these pictures at night time with indoor lights hence the poor shadow and colour spread.
Attachments
Similar threads
- Replies
- 640
- Views
- 48K
- Replies
- 44
- Views
- 3K