Plane Makers...something to float yer boat??

UKworkshop.co.uk

Help Support UKworkshop.co.uk:

This site may earn a commission from merchant affiliate links, including eBay, Amazon, and others.
The idea of strapping two floats together to avoid distortion is potentially brilliant! It might not work, but if it does - bingo!

Mind if I offer a couple of thoughts? It might pay to wire the two floats together far more thoroughly - one thing about metals with internal stresses is that if they want to move, they will, and it'll take quite a bit of restraint to stop them. Then, after quenching (which is when the internal stresses will develop) the floats will be soaked in quenchant, which will need removing before tempering. Taking the bindings off to clean them will allow any internal stresses to relieve as much as they can - the floats will move! Thus, don't unwire after heating and quenching; clean them up either by flashing the oil off with a flame or (preferable, perhaps) flush the oil off with a solvent, and allow to dry. Then temper in the kiln for as long as possible, and allow to cool in the kiln once the power is turned off. The extended time at tempering temperature may not be enough for a full, proper stress relief, but the longer it's held, the more it'll help.

Good luck!
 
Some very helpful tips there CC...as always...and each makes perfect sense...supported by the thoughts of Mr Cain too.

I did think of more binding....indeed if you watch Noel Liogier's excellent rasp making video...I think they prevent distortion by using huge clamp carriers....but they are water quenched....I anticipate oil quenched tool steel to be less but still significant.

Unfortunately....I thought all this after muck spreading...so rather than start again...I'll try this and see how we go.

Tempering will be at 500 until cold...I will just stick it back in the cooling kiln.

This should give me around RC50....if the gods are playing ball.

I hope the muck will stay around till last but I don't see it surviving quenching...but it should come out relatively clean....that's the plan!

Jimi
 
I think a dry run without the floats would be advisable to ensure the temperature is stable and doesn't fluctuate wildly due to controller instability :)
PID controllers can be tricky to tune. The "D" function could be turned off on a loop like this and that would make it easier to get it adjusted for good control.
 
Some really useful posts there guys so I will take them one at a time.

Richard...regarding PID tuning. I have the spec sheet and as you say...this can be rather tricky. Today I intend to try the auto-tune facility first to see how that copes with the slow lag of the kiln element...when I hardened the irons I've done (successfully)...I did it manually using the brain as a lag predictor and even using my poor processor( :mrgreen: ), I managed to keep the range between about +/- 5 degrees around the 800C mark...so that leads me to think that I can get this box of tricks to do at least as well....(maybe! :oops: )...we shall see. Thanks for the tip on the "D Function"...I will read that bit again now.

Woodpig...I was trying to locate some stainless foil either 304 or 321 but to no avail. Aaron mentioned Turco Anti-scale being a brand name possibly available in the UK and I have found something called Knufoil too but neither seem to be available commercially...I'm still hunting! Anyone with any suggestions here..perhaps knife makers....shout out. This seems to be a very illusive product.

Stewie....superb link mate...and I like the guy's style...lots of great tips there and I love his warning...I have bookmarked that link. But he gets extensive scaling...I wonder how much sharper they would be without the decarburization which is obviously going to occur in the open kiln?

Oh...and thanks mate...you have now got me thinking about rasps! Cheers! :wink:

Jimi
 
These work well on wood as well.

89750%2089760%20Color%20Photo%20300.jpg


Can't lay my hands on one at the moment but they're used in car body repair shops.

http://www.kenteurope.com/uk/shop/viewf ... &type=Auto
 
The problem with stainless foil, as far as I understand is that it slows you down too much. You must plunge it quickly in oil, and first peeling of the foil takes too much time. And dunking everything, foil and all into the oil, makes the transition for the steel too slow. Stanless foil is for air quenced steels.
 
AH...ok then...so I won't bother looking any further for it...I was wondering how it would affect quenching.

I'll stick to the clay.Borax for now and hope it sticks too!! :mrgreen:

Off to test the PID.

Cheers mate

Jim
 
Corneel":3lser0vz said:
Stanless foil is for air quenced steels.

No, not really. It's used on all kinds of steels. See the FAQ:

http://www.precisionbrand.com/FaqDetail ... egoryid=10

Plenty of knife makers use it as it's not difficult to get the blade out of the wrap if required.
The end of the "packet" is just snipped off and the blade slipped out.

But read the FAQ, quenching it in the wrap prevents scaling and if tightly wrapped before heating won't prevent fairly rapid quenching.
The best way though is to actually try it in your application before dismissing it.
It could save you an awful lot of clean up and it's not that expensive to give it a try.
 
woodpig":1lmt0c7j said:
Corneel":1lmt0c7j said:
Stanless foil is for air quenced steels.

No, not really. It's used on all kinds of steels. See the FAQ:

http://www.precisionbrand.com/FaqDetail ... egoryid=10

Plenty of knife makers use it as it's not difficult to get the blade out of the wrap if required.
The end of the "packet" is just snipped off and the blade slipped out.

But read the FAQ, quenching it in the wrap prevents scaling and if tightly wrapped before heating won't prevent fairly rapid quenching.
The best way though is to actually try it in your application before dismissing it.
It could save you an awful lot of clean up and it's not that expensive to give it a try.

If I could find any I would!

So far I have to by a roll at £75...or import it from Canada or Finland....not exactly a cheap "consumable"....

I am most surprised at this and I am going in search of the knife makers to see what's afoot!

Jimi
 
Sorry guys...I've been rather busy of late with various projects I'm working on to cope with replacing the physical tasks I currently do such as hacksawing as it is getting more and more difficult to do these things healthwise.

So...where did we leave it...oh yes...the PID and the decarburisation issues.

Well...since I was unable to locate a suitable supply of stainless foil without remortgaging the house...I went for the dirty route...quite literally!!!

20141031_195442-001.jpg


Ok!!! I'm never gonna make a potter so Clarice Cliff can rest easy in her grave....but it was all worth it in the end...read on!

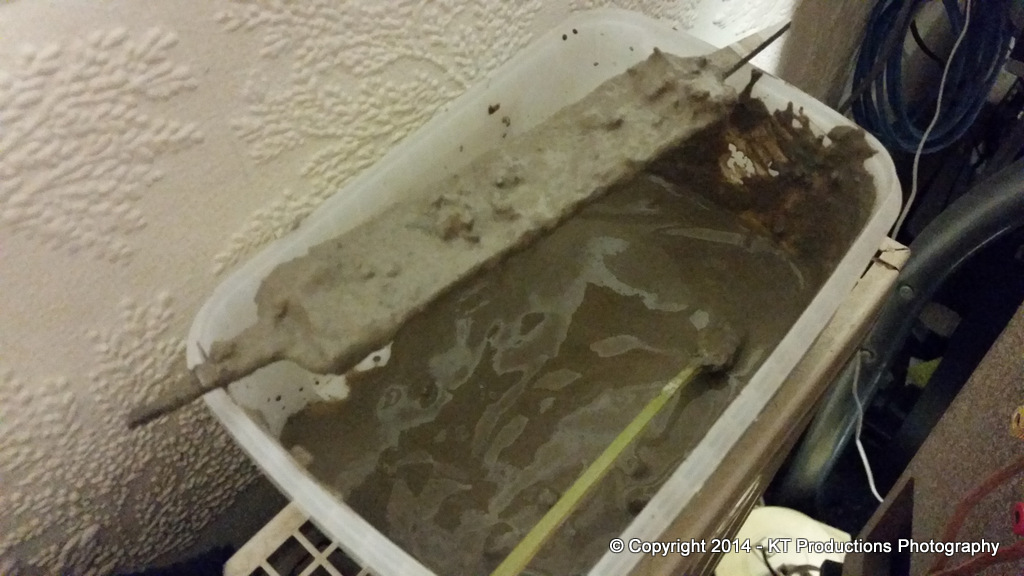
This concoction which can only be described as "MUD" is seen drying here after a couple of slight "errors" on my part....not the least of which is that I am now the proud owner of most of the country's fire clay supply!! :oops:

This stuff is so cheap that when I ordered some on eBay...I didn't look at the quantity and it was only when the truck pulled up at my house with a hoist did I realise that £20 get you an AWFUL LOT of the stuff. So anyone who wants a bag...feel free to just pay me the postage!! :mrgreen:

Quite the opposite occurred with the Borax...where I seem to have bought the purest scientific version of DAZ I could find! :oops:

But...never mind...the worst thing was convincing Annie that all this was in the aid of science and I needed to use the kitchen as I was just making a very special cake!! :? 8)

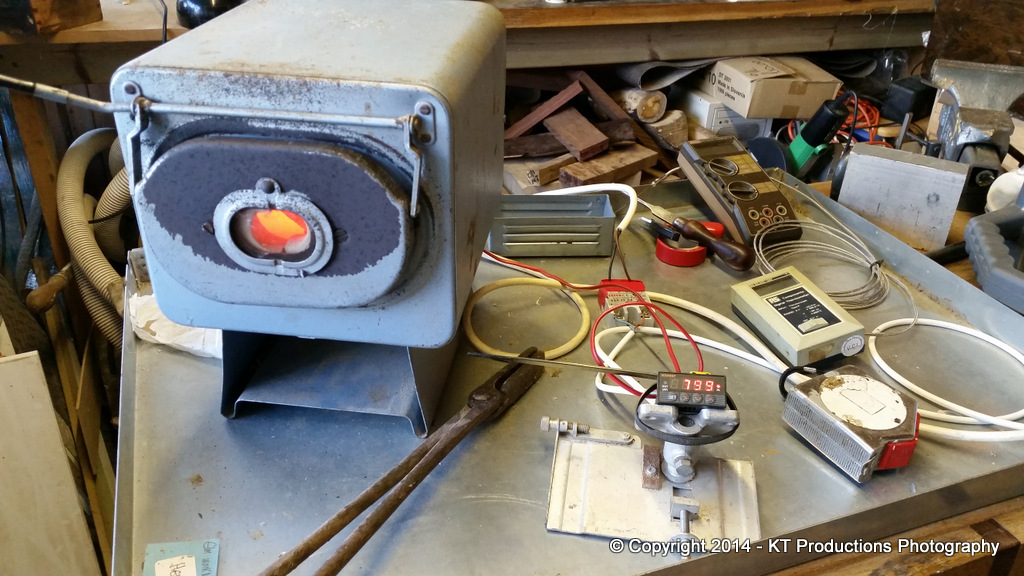
So...to the PID or "accurate temperature control thingy" to make it more understandable....

20141108_085439.jpg


Well give the Chinese their due..they make some cunning electrickery for very few dollars...it was amazingly easy to tune...not too much fiddling with the "d" variable thankfully...and it taught itself what 800 degrees celsius was and stayed there.

It stayed there within ONE DEGREE either side...so you can't wish for better than that. And the solid state relay (SSR) didn't even blink. Well...actually it DID blink...quite a bit...as it switched on and off frantically trying to keep up with the commands it was being sent but it performed effortlessly! So much so that I am building this into a box with a socket to keep my heater accurate for when I'm not using the kiln. I am actually considering using the kiln AS the heater...such was the toastiness of the workshop during and for many hours, AFTER this hardening malarky! :mrgreen:

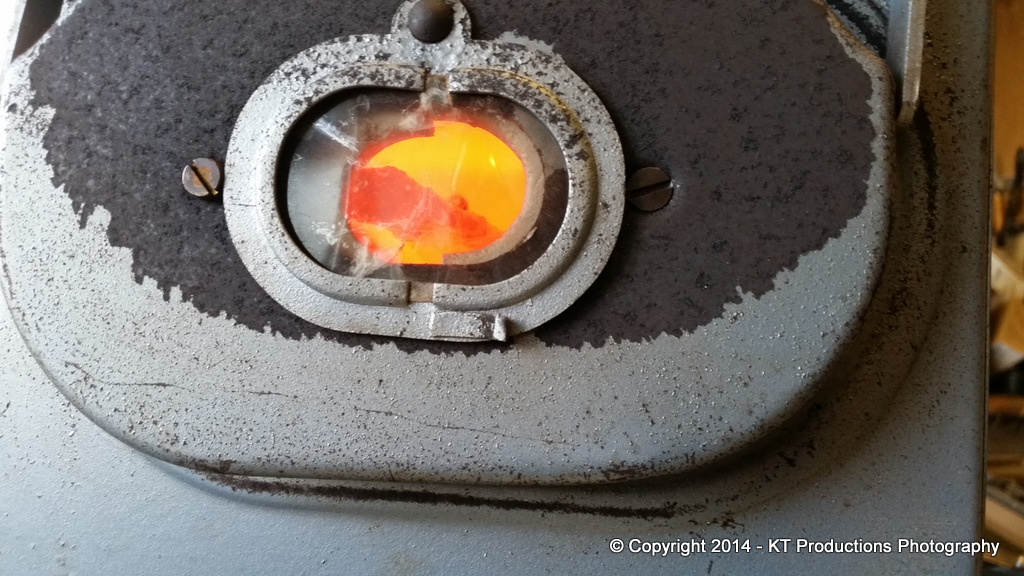
Armed with this total confidence temperature-wise....I popped the "cake" into the oven...(gas mark 10 for 15 minutes!)....

20141108_085450.jpg


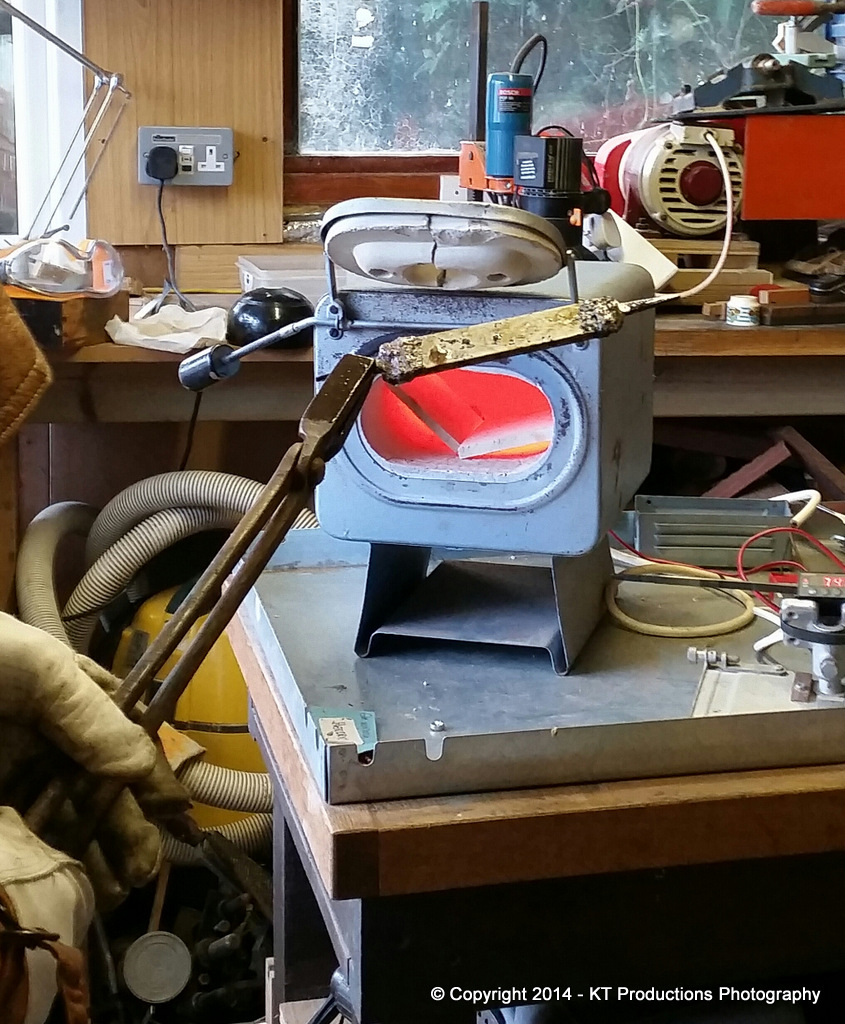
...where upon...in very short shrift...the fire clay lived up to it's name and looked like Hades itself! :mrgreen:

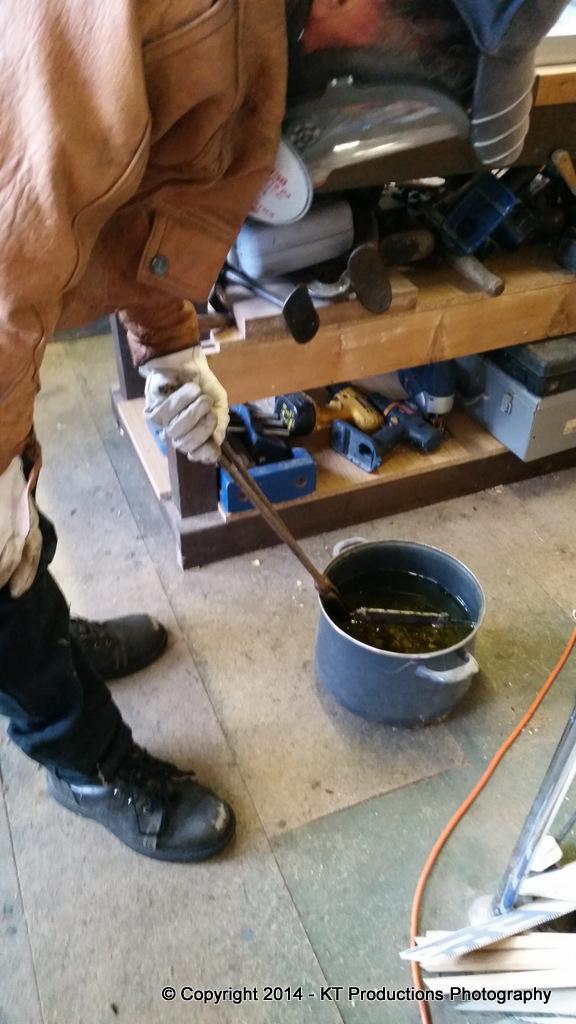
After 15 minutes of cooking...I opened the door to the kiln...suitably attired in my "DIY PPE" which protected any part of my body I should have preferred not to be singed.....and with Annie standing by with a fire extinguisher...dunked it in the vegetable oil.

I have to say...since the last time I did this my recollection of the reaction of plunging a lump of steel at nigh on 1000 degrees into cold liquid was not quite as vivid as this attempt!! :shock:

20141108_091558.jpg


I guess the fire clay made it more....um...explosive!!

This "after" shot makes it look as if I'm calm...this is because it was a little after the "missing" picture. Missing because Annie was frantically trying to remember how to get the seal off the fire extinguisher!!! :mrgreen:

Ok...it wasn't quite "dangerous" but it was...um...surprising. The fire clay doesn't like being subjected to that much shock so it left the steel it was adhering to...with a bit of...shall we say...kinetic energy! :lol:

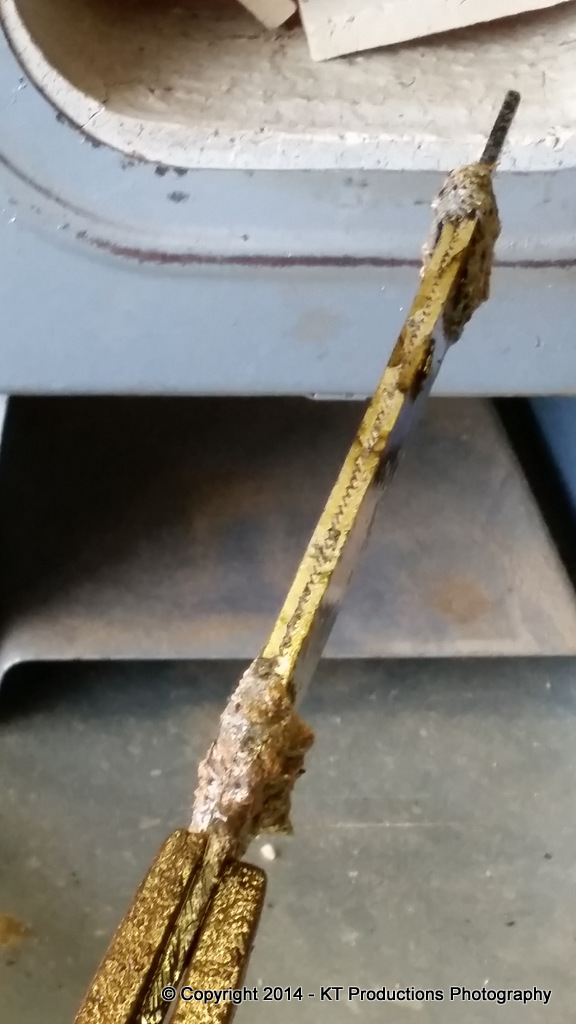
Which was handy because it saved me from chipping it all off afterwards...the only bits left were the ones the reinforcement of the wires....

20141108_092131.jpg


But was all this preparation a success though!? Darn right it was! 8)

As can be seen...no warpage (?)....no separation of the wires...and no decarburization!! Success indeed! :wink:

Armed with this renewed confidence I then made my mistake. Instead of calmly cleaning off the oil and tempering it....I put it back in the kiln...at the prescribed higher tempering temperature and shut the door.

Ordinarily for plane irons I would shove it in the domestic oven after the family roast...which is off and cooling. This...is BELOW the flashpoint of vegetable oil.

UNFORTUNATELY.....500C ISN'T! :shock:

20141108_091643-1.jpg


By this time...Annie had retired scratching her head...to the house...and taking the fire extinguisher with her!!

I will say that blowing on flaming steel frantically does eventually work however! #-o

Sadly...burnt vegetable oil on metal...as every housewife knows..stains rather badly...

20141108_103545.jpg


.....which is rather a shame...but they are prototypes and these things happen! :oops:

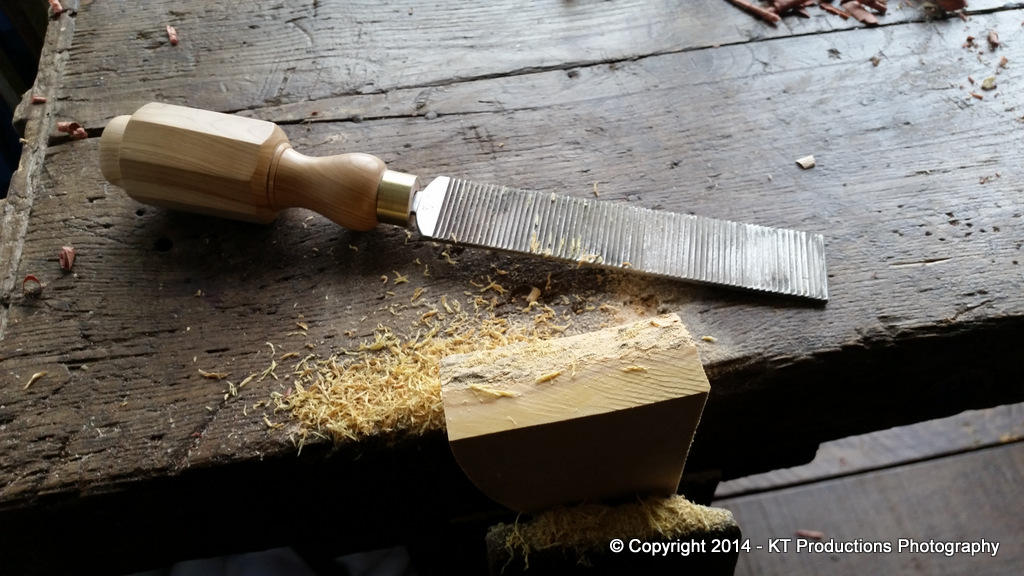
So to the long awaited testing.

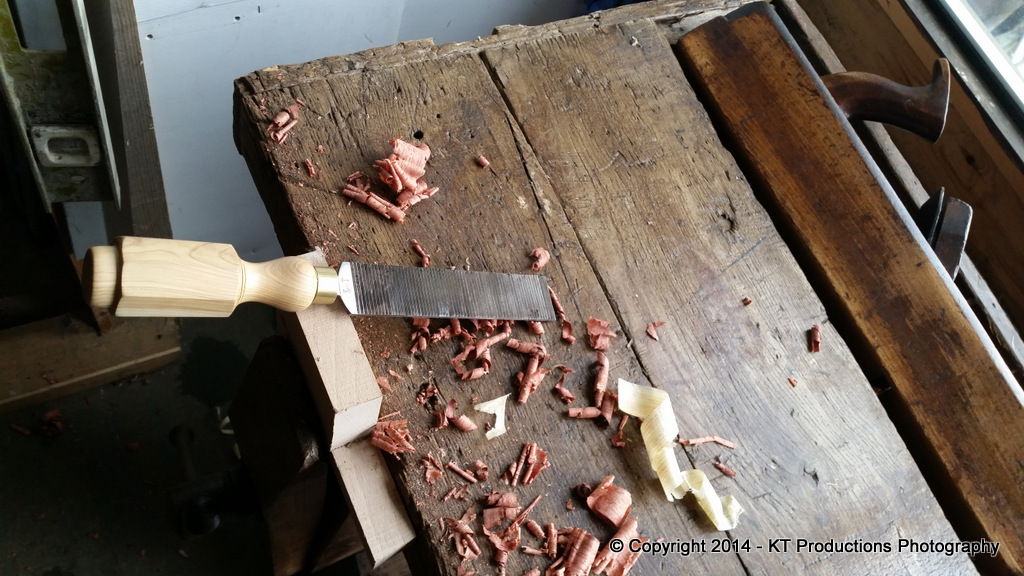
I grabbed the nearest spare handle I could find which I just knew I had a use for when I made it all those years ago from some scrap lilac from MAC Timbers.

20141108_110859.jpg


...bit of beech...clamped to my new bench (more on that later!)....and off we go...

20141108_111310.jpg


SUCCESS!!! :mrgreen:

Then on to a "bit of boxwood"....(close your eyes if you don't like to see rare breeds being sacrificed in the name of science!!!)....

20141108_113728.jpg


Success again. (you may get the impression here that I am just a tad pleased after all this "theory"!!)

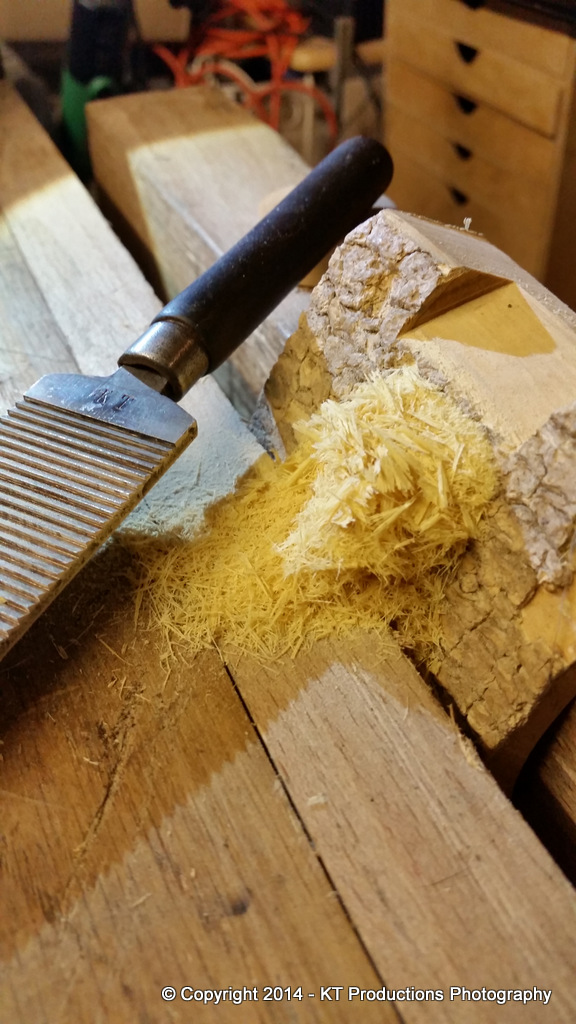
The great thing is you can hog the stock off really fast but if you lay off the pressure to a gently stroking action...the surface (left in the above picture) becomes really smooth.

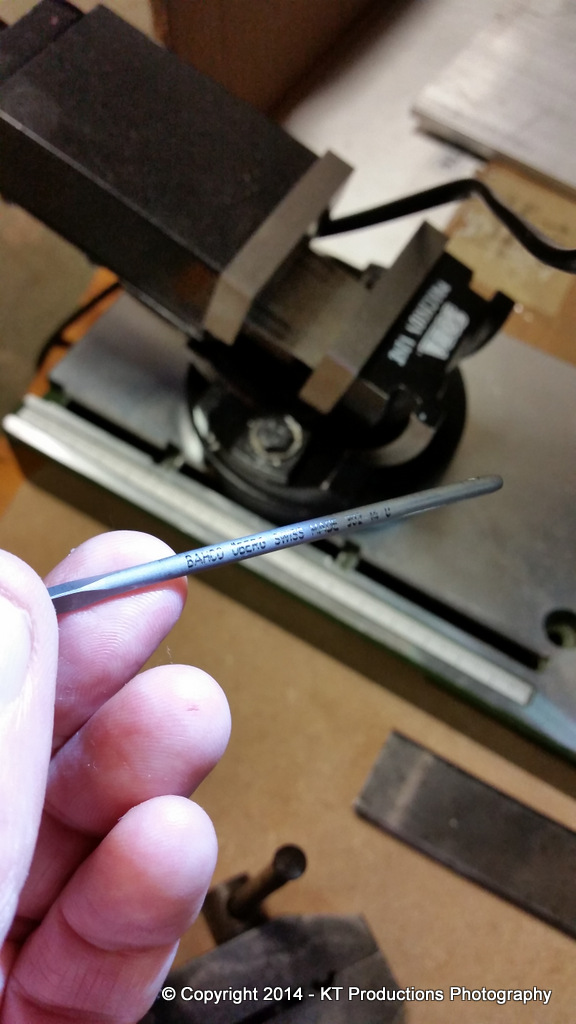
So...I guess I ought to sharpen it!! :mrgreen:

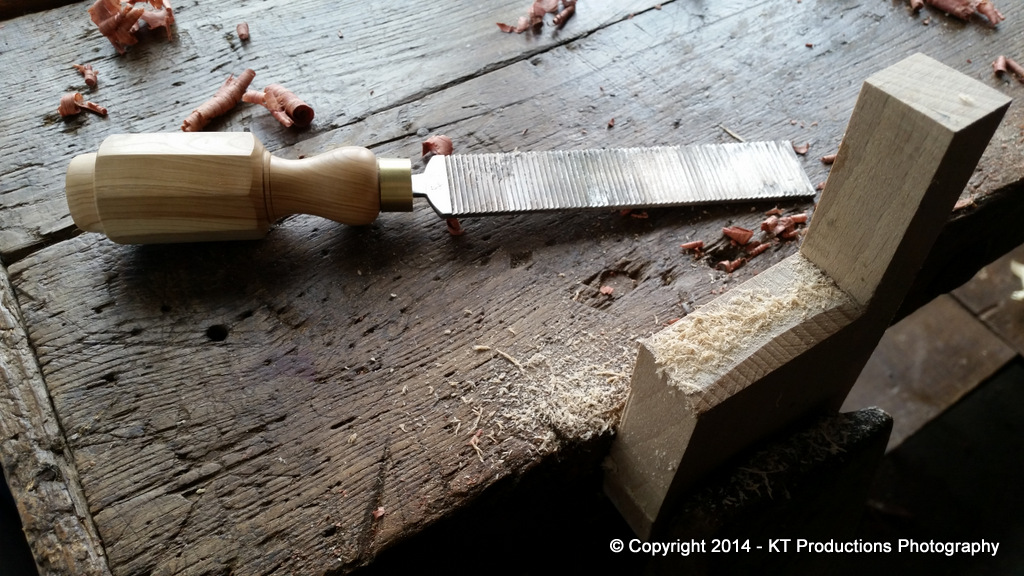
Using Switzerland's "nearly finest (without going overdrawn) steel....a BAHCO "SWISS MADE" (as opposed to no name "SWISS CHEESE") three-square needle file...

20141117_191251.jpg


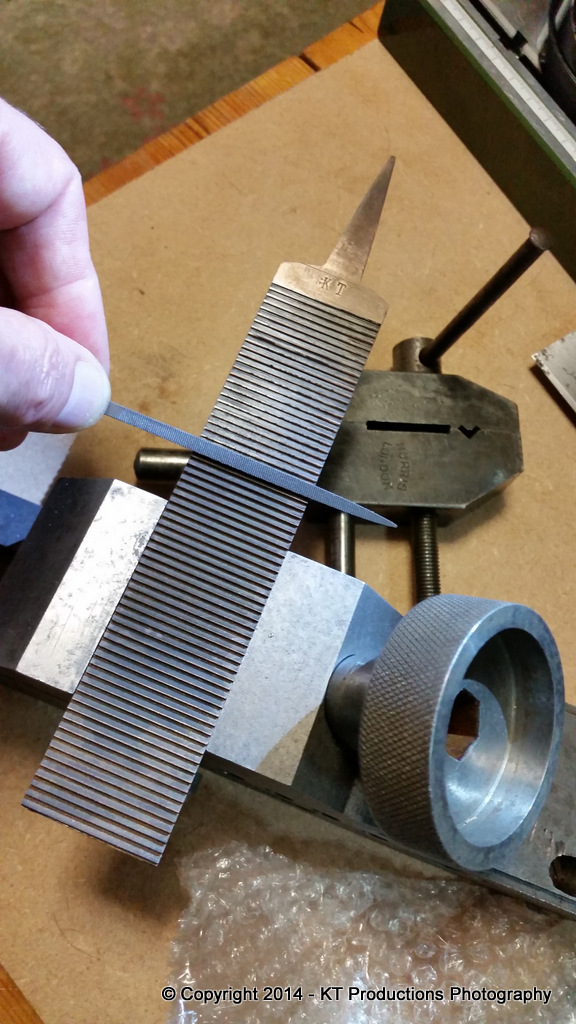
...I set about the job in the same way as you would tickle a saw...for effectively that is what a float is...a rather large kerfed "saw".

20141117_191211.jpg


Technical note here...I don't actually file like this...but I had to hold the camera with the other hand! :mrgreen:

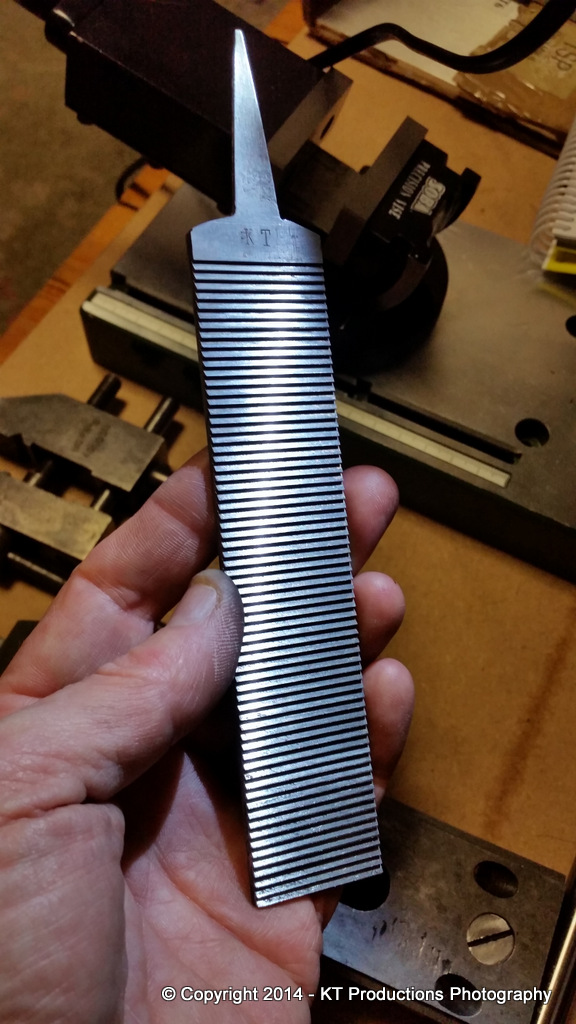
After a surprisingly short time (one episode of "Murder She Wrote")....it was done....

20141117_213854.jpg


So...now to test the real thing....did it work?

20141117_232858.jpg


...hell yes....and this is across the grain English boxwood!

20141117_233432.jpg


I'm rather glad that Toby "coerced" me into making one of these things and I've ordered one of Matthew's finest Holtzapffel style handles just to celebrate! 8)

To say that it's been a "learning experience" is probably an understatement. I had to scrape to the bottom of the grey cells to remember metalwork, metallurgy, chemistry, electronics, woodworking and bravery....not to mention testing of sanity but it was fun.

Would I do it again...

NO! But feel free to copy or avoid any of this experience at your leisure!

Now...Toby...your findings? :wink:

Cheers

Jimi

DISCLAIMER: THERE ARE POTENTIALLY DANGEROUS TECHNIQUES INVOLVED IN THIS PROJECT WHICH COULD RESULT IN INJURY. DO NOT TRY ANYTHING I HAVE DESCRIBED UNLESS YOU ARE TOTALLY CONFIDENT YOU CAN DO SO SAFELY OR ARE CLINICALLY INSANE. REMEMBER...THERE IS NO MORE IMPORTANT SAFETY ITEMS THAN WEARING SAFETY GLASSES! CONSIDER YOURSELF WELL AND TRULY WARNED!!
 
Nicely done Jimi, they look the dogs dangly bits.

Pete
 
Cheers Pete...a bit chuffed is an understatement...probably cheaper to buy one though! :mrgreen:

Yes Corneel...it seems the trick of mating them opposing each other solved the problem and surprisingly..the wire held and didn't melt either..which I thought it might.

No idea what the wire is made of and I was thinking of using stainless wire to be sure but it was just a bit of wire stripped from some armoured cable..the galvanized stuff.

That's the bit that I am most pleased about...the "eureka moment"!

Jimi
 
jimi43":1tk4ekqx said:
No idea what the wire is made of and I was thinking of using stainless wire to be sure but it was just a bit of wire stripped from some armoured cable..the galvanized stuff.
Jimi

"SWA" = Steel Wire Armoured cable. So as likely to melt as the floats themselves.

Nice job. Quenching can get quite exciting can't it ?
 
Back
Top