Infill Smoothing Plane Project

UKworkshop.co.uk

Help Support UKworkshop.co.uk:

This site may earn a commission from merchant affiliate links, including eBay, Amazon, and others.
rxh":2f53vb8x said:
Thanks for your kind comments Jim.

That's a very impressive piece of wood you have there - I bet it would be difficult to work. I have some mahogany from an old desk that might do but I haven't cut into it or planed it yet. I think mahogany should be stable as it was commonly used for making cameras and scientific instruments. I've also got some yew somewhere -it is pretty wild looking stuff but I don't know how stable it would be.

I've now made the frog block and cut out a rectangle that is intended to become the cap iron.

Mahogany was commonly used by user-made infill makers...but not considered the highest quality. Yew would be a nightmare because of the opposing grain...I love the wood but it is also fairly soft.

Rosewood (the real Brazilian Rio stuff) was the highest quality used...sometimes you find boxwood.

I think that the amount of time you are going to spend making the handle and infills...(and you will!)...I would get a nice exotic for it...check out Bill Carter's website for some examples!

Cheers and if you need any tips on the infill part let me know.

Jim
 
Thanks for the suggestions Jim and the offer of tips. I think I'll widen the search for infill wood, possibly from suppliers of turning blanks.

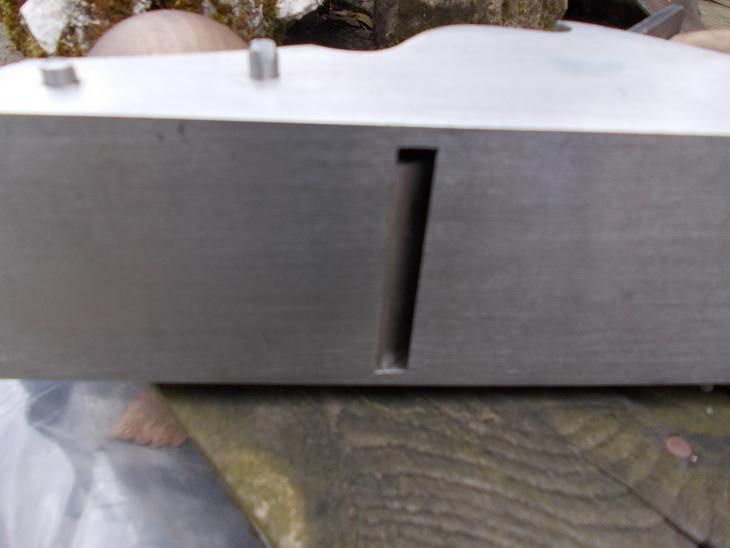
I made a start on the mouth tonight. I decided to remove most of the waste by milling but I'll need to finish it by filing.
 

Attachments

  • 2013-04-17 21.17.02C.jpg
    2013-04-17 21.17.02C.jpg
    119 KB · Views: 2,033
  • 2013-04-17 20.30.21C.jpg
    2013-04-17 20.30.21C.jpg
    143.9 KB · Views: 2,033
  • 2013-04-17 20.28.46C.jpg
    2013-04-17 20.28.46C.jpg
    157.7 KB · Views: 2,033
No problems rxh...happy to help.

Just be careful with that mouth...it's the critical bit...I'll let Richard give you tips here as he is the oily stuff expert but in my experience...the transition from the frog...the part of the rear mouth that forms part of the frog...the rear infill angle and the iron thickness are all precision angles...

Jim
 
Forgive me if this is a silly question, but why is it that dovetailed steel is the preferred method of construction for infills? I would have thought that investment casting in steel or bell-metal (bronze), would deliver just as well.

I understand why this would be the best method for a modern day hobbyist, given it doesn't require a furnace of 1300+ or 950+ degrees; but the preference seems to also include the original infills, the sources I've read simply state that the dovetailed ones are superior, but don't explain why: hence the question.
 
I think it’s a good question, Jelly. No doubt some knowledgeable readers will post replies.

A quotation from Jim Kingshott’s book, Making & Modifying Woodworking Tools: “Because all the plane’s body is made from plate material free of the latent stress inherent in a casting, the plane stays very true. It is also possible to work to much closer tolerances with this method of construction.”
 
On woodnet there was a group project for making a casting. The guy who did the work was familiar with pattern making and casting metal, but even he had tremendous troubles to make a good one. First he had voids, then he had troubles with shrinkage in critical spots. In the end he had to do some creative hammering and grinding to get usable castings for a small smoother.
 
Oh well if you will mill it .... [-( :D

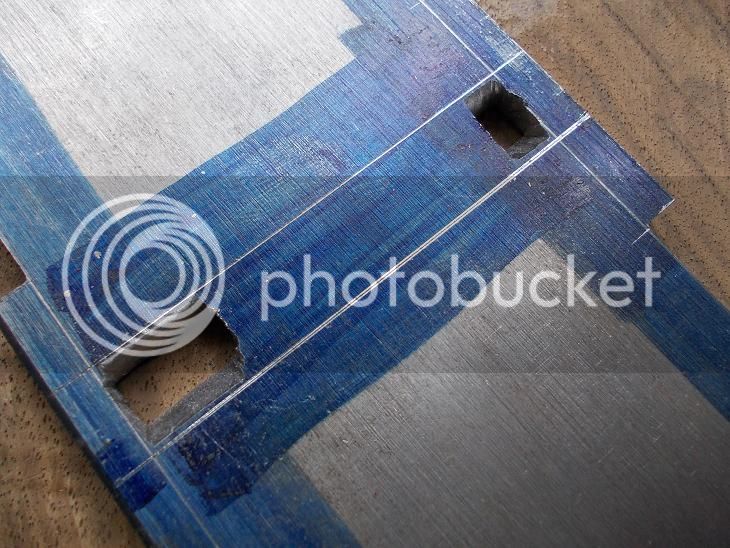
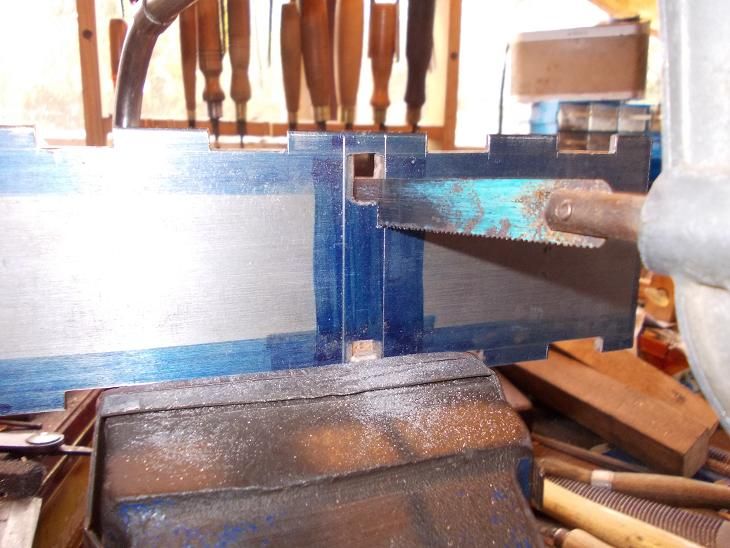
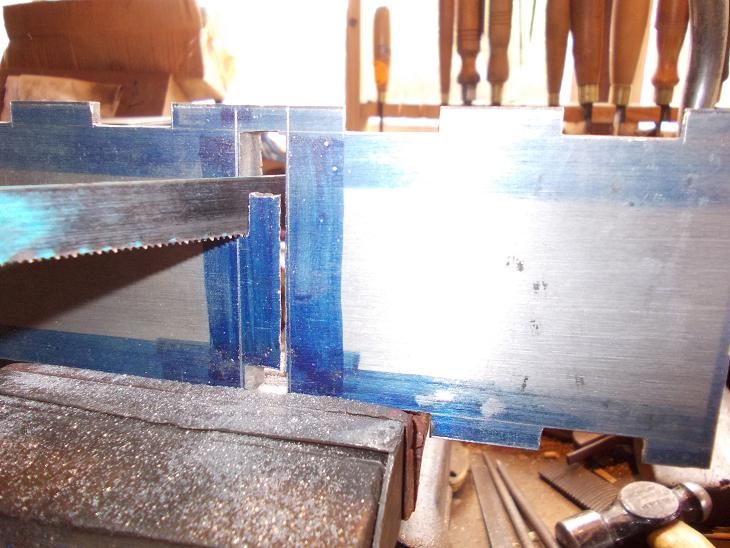
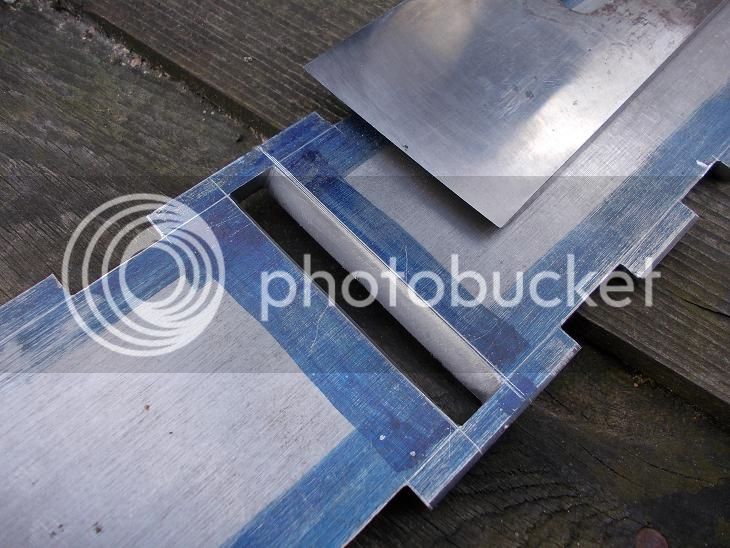
I spent an hour or two (or three) yesterday drilling and filing the latest one:


I know this looks a fright but the scribed lines are short of the finished mouth by quite a bit; this allows for initial drilling off - centring, re filing with the frog block attached whether that is over or under, filing it flush, mistakes with the sawing out and just general belt and braces.

Also I would like to point out that the scribed lines at the sides of the mouth should eventually be filed right through and perhaps more. The last thing you want is to have put it all together and find that the corners of the iron get dinged on protruding sides every time you put it back in after sharpening beautifully.

What angle of pitch have you decided on?
 
Richard, I decided to do the milling to save some time and give my poor elbow a bit of a rest :) . I used new cutters, took light cuts and stopped frequently to clear swarf, lubricate and see where I was up to. Even so, I was rather afraid of going to far and I stopped short of the intended finished size. Thanks for the tip about the mouth width. I am making the angle 50 degrees.
 
Being afraid of going too far with the mouth width is a healthy fear. Final scribed lines are very vunerable to wayward hack saws:


So when the mouth is cut to those lines, it is just to establish its basic shape and position;


You can't really judge it with the iron until you have the frog block on with the right (correct) angle to give a good reference past the bevel of the iron.
In the almost finished plane I have striven for this; the iron just passes the front of the mouth but there is no gap.


Hopefully the gap will open enough with lapping - I've been using a 70 degree escape angle which should be enough I think although I have never read of a recommended angle.

Edited to add for Jelly - I'd hate to try to do this with a casting. I'm sure it is possible but when you make each individual component, there is the opportunity to do the best you can with each ... or screw it all up equally of course ... :)
 
Jelly":kgz1zpsz said:
Forgive me if this is a silly question, but why is it that dovetailed steel is the preferred method of construction for infills? I would have thought that investment casting in steel or bell-metal (bronze), would deliver just as well.

I understand why this would be the best method for a modern day hobbyist, given it doesn't require a furnace of 1300+ or 950+ degrees; but the preference seems to also include the original infills, the sources I've read simply state that the dovetailed ones are superior, but don't explain why: hence the question.

A lot of original infills would have been made on a very small scale (think of Bill Carter's shed!) or as one-offs by their users

Trying to think myself back into the mindset of a late 19th century woodworker who really wanted a fine infill plane, I'd probably favour the method I could get on and do on my own. Dovetailing together flat pieces of steel needs the minimum investment in tools and materials, whereas buying a casting from a foundry or tool merchant would have been expensive. (Also, it needs some understanding of the details of castings, as the Work mag project has shown.)

Finding some bits of flat steel (possibly even cadged as offcuts?) would be cheaper. Castings straight from the foundry need hours spent filing, so the time difference may not have been huge.

Also, have a look at this page http://www.infill-planes.com/what-is-an-infill-plane/ which makes it clear just how hard it was to find a foundry able to make good cast bodies in the C19th.
 
The frog block was fitted this weekend, slightly overlapping the slope at the back of the mouth. I opened the ends of the rivet holes with a taper reamer to give the rivets space to expand into (an ordinary countersink has too wide an angle leading to a risk of cracks appearing in the rivets). I then filed the frog block sloping edge down to size, getting the correct angle by sighting the file against a guide made from a bock of aluminium alloy and a magnet. The front edge of the mouth will need more filing later to suit the blade.
 

Attachments

  • 2013-04-21 16.54.47C.jpg
    2013-04-21 16.54.47C.jpg
    230 KB · Views: 2,280
  • 2013-04-21 16.53.20C.jpg
    2013-04-21 16.53.20C.jpg
    216.3 KB · Views: 2,280
  • 2013-04-21 09.25.36C.jpg
    2013-04-21 09.25.36C.jpg
    150.3 KB · Views: 2,280
  • 2013-04-20 17.52.03C.jpg
    2013-04-20 17.52.03C.jpg
    213.1 KB · Views: 2,280
Just a word about the peining ... and this might be the most important tip.

When you have peined the tails; moved their corners well and truly into the filed arises of the pins, the plane is together and will not come apart again so the peining of the pins is just to fill in and become flush. It is not necessary to pein the pins fully until you have the infills in.

This is as well because for some reason, it is peining the pins that will push the tops of the sides over inwards far more than peining the tails. I don't know why this should be but that is what happens. If you are not careful and over eager when peining up the pins you will end up with a shell so out of square that it is impossible to get it back. Even with the form in, even if that form is incompressible, it is possible to put so much tension into it that when you take the form out, it will spring inwards.

The shell I made for Jim is a case in point. As I was going to send him the finished shell, I didn't have the option of leaving the pins unfinished so I did them up very carefully with a piece of square section steel tube as a form that I moved along for every pin. And it still tuned out a little bit inward leaning. So I sent him the tube section to push in to give him a square plane and to help with getting the infills in.

Much better to do this closing up onto the finished infills rather than mess around trying to get them in after.
 
Richard, thanks very much for the tip. I would have fallen into that trap without your warning.
 
Last weekend, with some trepidation, I took hammers and punches to my carefully filed metal work. I think I had made things difficult for myself by filing the arrises in the pins a bit too deep and I found it hard to drive the steel right into the corners. A rounded punch turned out to be the best tool for doing this. The result is not perfect but not too bad - I got better with practice.

Since I wanted to get the rather brutal hammering process over with I made spacer tubes and screw jacks to keep the sides apart while peining the pins - as they were already a good fit not much hammering was needed. These jacks and spacers will stay in place until I am ready to fit the infills.

The next task will be to file chamfers on the sides. Today I obtained a nice piece of quarter sawn padauk that looks promising for the infills.
 

Attachments

  • IMG_0844C.jpg
    IMG_0844C.jpg
    201.3 KB · Views: 2,116
  • IMG_0843C.jpg
    IMG_0843C.jpg
    230.7 KB · Views: 2,116
  • IMG_0842C.jpg
    IMG_0842C.jpg
    181.5 KB · Views: 2,116
  • IMG_0841C.jpg
    IMG_0841C.jpg
    226.9 KB · Views: 2,116
  • IMG_0840C.jpg
    IMG_0840C.jpg
    217.5 KB · Views: 2,116
  • 2013-04-28 13.48.20C.jpg
    2013-04-28 13.48.20C.jpg
    222.5 KB · Views: 2,116
I don't come here often at the moment as time is used up looking at the heavens but I come to this thread (and a few others) because it is simply delightful to watch!

Bravo mate!

=D> =D> =D>

Jim

PS Richard...I promise to get the panel finished soon!!! :mrgreen:
 
Wow, wow, wow ..I am seriously impressed.

I've got the infil making bug thanks to you & Richard T.

...why didn't you mill the dovetails too with the sheet on it's edge? (more stoopid questions may follow)

Togs
 
Adam, Jim and Togs, thanks for your kind comments.
Adam and Togs, it's nice to see that some others fancy having a go at infill making. Richard and Jims' threads, tips and encouragement have been very helpful to me.
Togs, it's not a daft question about the milling. Istarted milling out the waste but stopped because of fear of going too far by careless machining. Removing the waste by drilling, hacksaw cuts and filing didn't take all that long.
I have very limited internet access at the moment but should be able to post longer messages next week.
 
Back
Top