Inghamish box...DUN...and Re-visited

UKworkshop.co.uk

Help Support UKworkshop.co.uk:

This site may earn a commission from merchant affiliate links, including eBay, Amazon, and others.

woodbloke

Established Member
Joined
13 Apr 2006
Messages
11,770
Reaction score
1
Location
Salisbury, UK
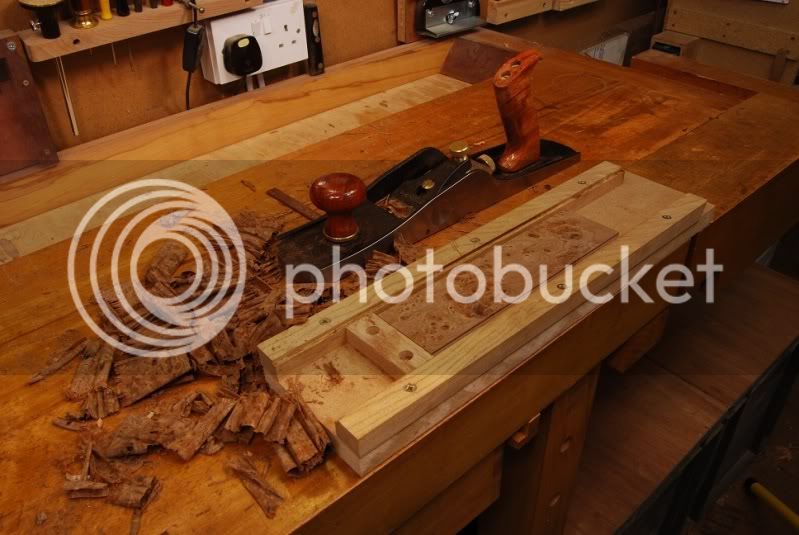
This is the start of a small box in the style of one's developed by Robert Ingham. I've just finished sawing the material for it:

001SMALL-15.jpg


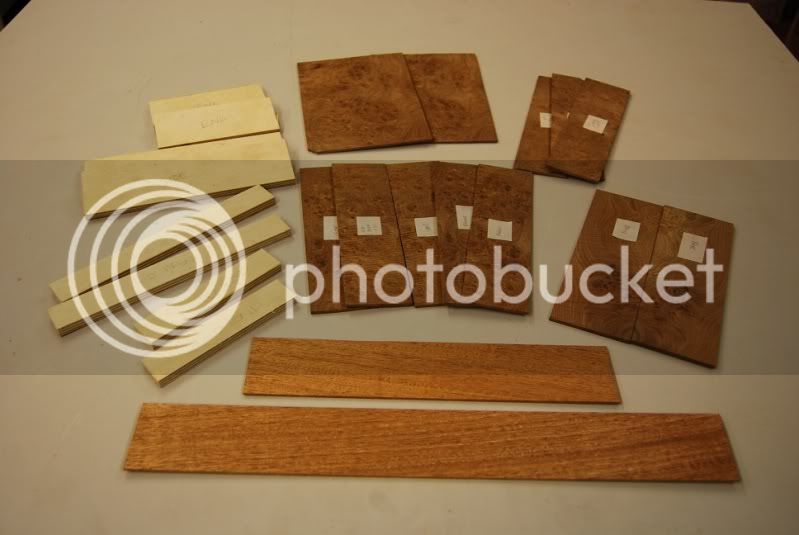
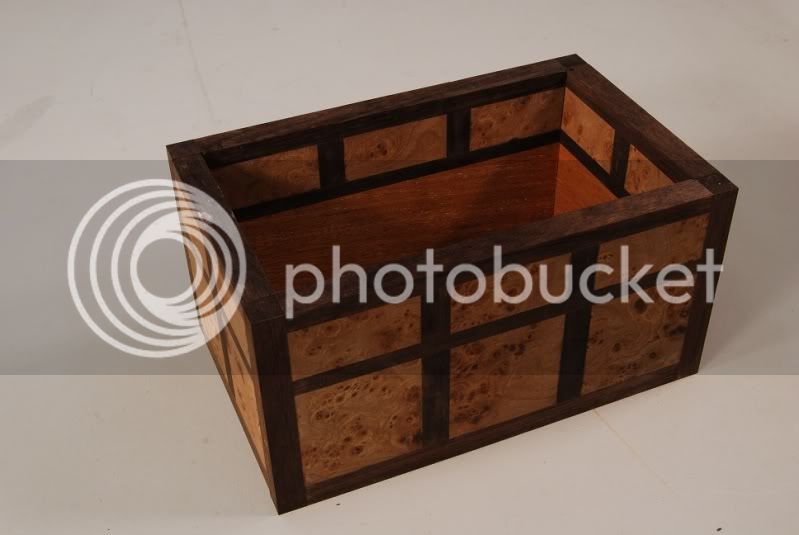
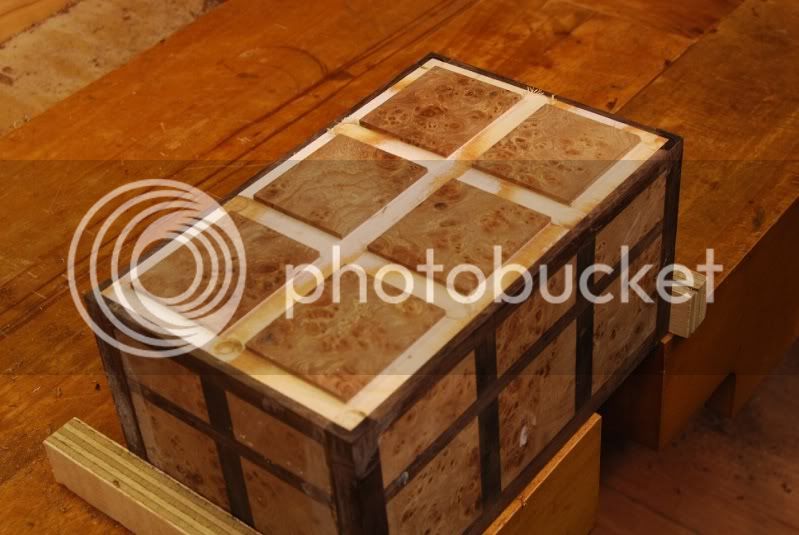
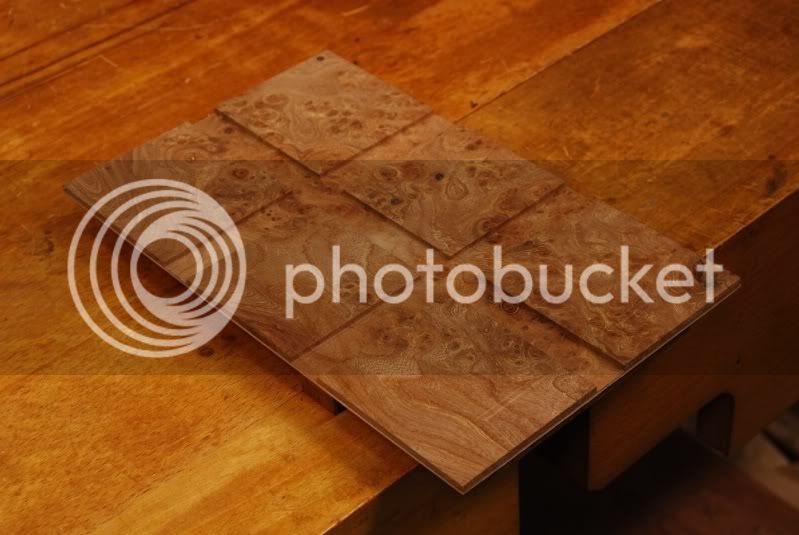
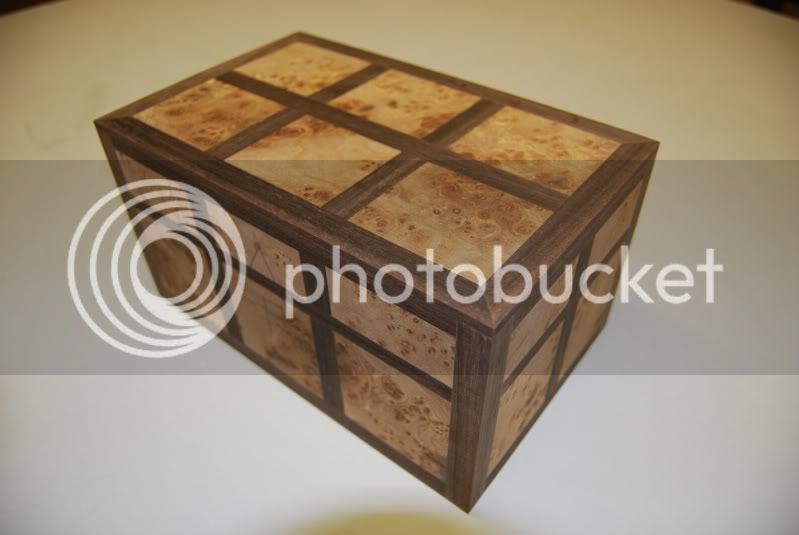
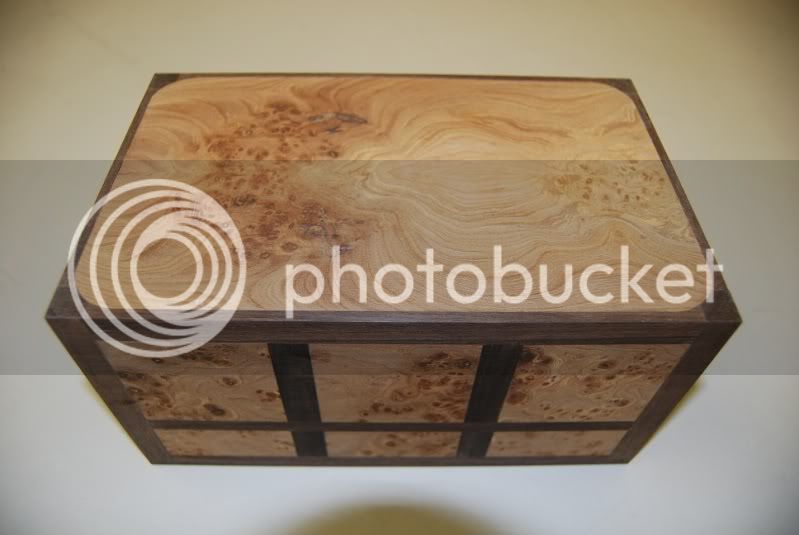
The carcass timber is going to be 9mm birch ply, with 3mm burr elm veneers over the top and on the inside of the lid. Each segment of the box will be made from squares of burr elm with African Ebony in between. The mahogany is the balancer veneer inside the box...it's not going to be seen. The burr elm bookmatched panel will be on the underside of the base. Difficult to describe, but it will be a much smaller version of:

RI%2Bbox.jpg


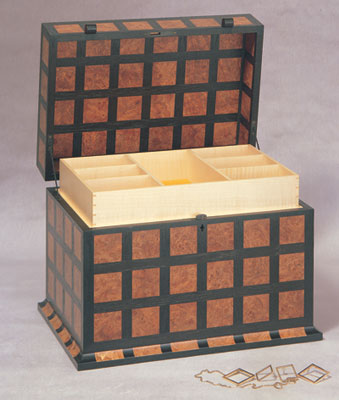
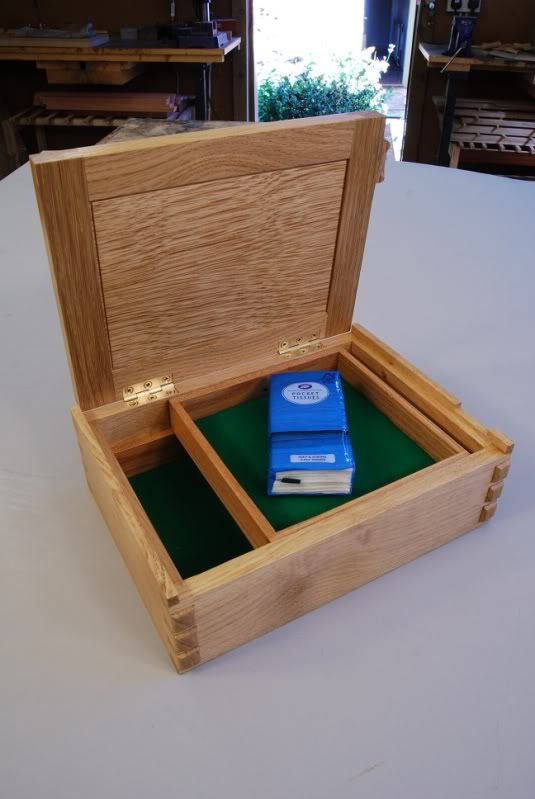
...this sort of thing, with only 3 large squares (front) an 3 oblongs (lid) panels at the front. It's going to be a fairly complex build :shock: - Rob
 
Looks good Rob, I'm assuming you have cut your own veneer? Where did you purchase this lump of burr from? or is it just a turning blank?
 
mtr1":oinuki02 said:
Looks good Rob, I'm assuming you have cut your own veneer? Where did you purchase this lump of burr from? or is it just a turning blank?
The veneers were easy to cut on the bandsaw and the burr elm was bought at Yandles a couple of years ago...I think it was a turning blank, but far too nice for the spinny side :p - Rob
 
Ian":2d4ghjo2 said:
I look forward to seeing the build.

Cheers

Ian

me too -- there's a lot of things going on here and I look forward to learning!
 
A little bit more has been done on this one, bearing in mind that it's still cold in the 'shop. The slightly warmer weather a couple of weeks ago enabled me to get the veneering done without too much of a problem and today:

LevellingcomponentsSMALL.jpg


each of the pieces has gone into the first jig which levels everything to a consistent 14mm. The next thing to do will be to cut each of the pieces into squares and rectangles, then use the 'shute to get them true before gluing in the next jig - Rob
 
I like that jig Rob. I was going to ask you how you square up the parts as I've had great difficulty in the past with that kind of thing.
 
dh7892":38dv0nbo said:
I like that jig Rob. I was going to ask you how you square up the parts as I've had great difficulty in the past with that kind of thing.
All I intend to do is to use the shooting board with my LN No9. The pieces are really too small to square up safely on a table saw and fence, which is the other way of doing it. The learning process here for me is quite a steep one and even RI admits that this sort of checker board assembly presents a real challenge. The actual design is fairly minimalist, but it's the building of the component parts that's going to be a bit tricky 8-[
Once each of the bits has been made square, there needs to be a 4mm deep groove made in each joining part for a ply tongue - Rob
 
Little bit of an update on this one:

13BoxtogetherSMALL.jpg


The sides have been finished with a small rebate cut (around a mm) to make sure that all the corner posts are the same thickness. The four sides are just assembled dry, no glue yet. The top and the centre ebony section (once the lid's been cut off) will have more 3mm thick inlay applied on top of the box and the underside of the lid to bring the thickness up to 12mm, with the corners mitred so there won't be any end grain showing. The lid will have a burr elm veneered panel inset in a rebate with further divisions of 12mm ebony across it to line up with the sides of the box...in theory [-o< The mahogany will be completely covered by the lining which will be in birds eye maple, kindly donated to the cause by Waka :wink: :-" - Rob
 
Looking very nice Rob. I like the thicknessing jig and have made a mental note to file that one away. Could perhaps the sides be squared up on a router table?
 
RogerM":1210ypcb said:
Could perhaps the sides be squared up on a router table?
They could, I suppose if a jig of some sort were made, but it's just as easy to square them up using the shooting board, both pairs can then be shot in so that they're exactly equal in length - Rob
 
Further progress on this project:

15CompleteSMALL.jpg


The top has been fitted dry and the grooves for the ebony inlay made, using the sides of the box as a ref for the router fence. Once that's been done, I took out the lid and:

16GroovingtheundersideSMALL.jpg


flipped it over to groove the underside to match the inside of the box. The grooves have been in-filled with ebony this afternoon. The base has also been routed, glued and fitted this morning. The rebate round the outside of the lid will be filled with more ebony mitred at the corners to cover the end grain of the corner posts. The thin strip in the middle will have the same sort of treatment, once the box and lid have been separated. Comments, as ever, very welcome - Rob
 
The lid has now gone in and all the black inlay has been applied to the top:

005SMALL-6.jpg


It's had it's first provisional sanding with 180g Abranet and there's a little bit of tear out in the closest corner which ought to come out with further sanding later on.

The base doesn't look too bad either:

007SMALL-4.jpg


The next job is to cut it in half and then fit more ebony to the saw lines to bring the total thickness back up to 12mm. Comments welcome as ever - Rob
 
Back
Top