Book case in Cherry veneered with Ash

UKworkshop.co.uk

Help Support UKworkshop.co.uk:

This site may earn a commission from merchant affiliate links, including eBay, Amazon, and others.

filsgreen

Established Member
Joined
21 Feb 2006
Messages
685
Reaction score
1
Location
Litherland, Merseyside
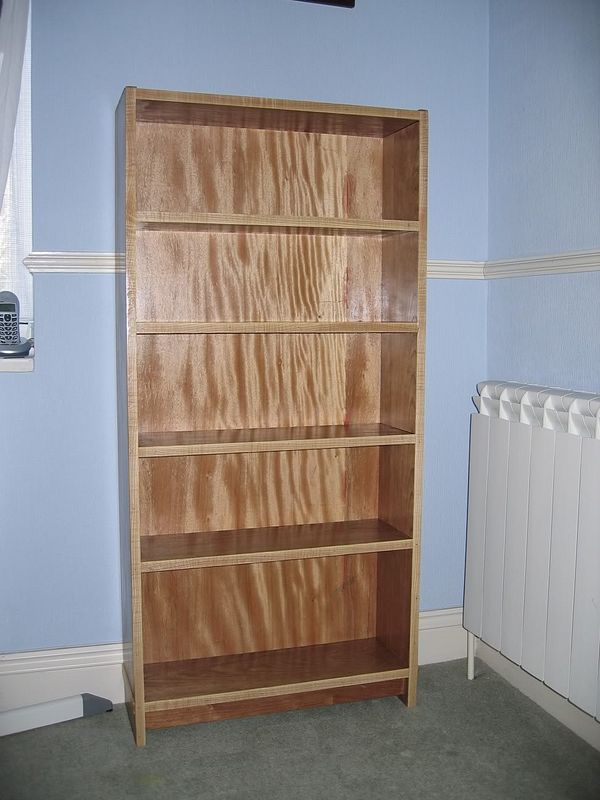
Decided to put the sheet of 8 x 4 Cherry veneered MDF to use today by making a bookcase. I had it cut to 4 x 4 x 2 and to minimise wastage I made it 48" high 24" wide. The sides would be 8" and the shelves a little over 7". It would mainly be used for paperbacks.

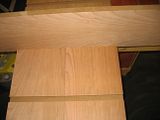
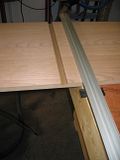
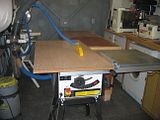
Here is the base and first shelf routed.


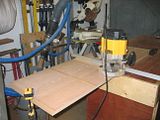
This was the first time I had used my DW 625, I was made up with the power. No problem routing out 10mm deep with a 13mm Wealdon cutter. Spot the little mistake? The only trouble with the router was dust extraction. I linked it to a earlex vac but there was still tons of dust


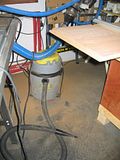
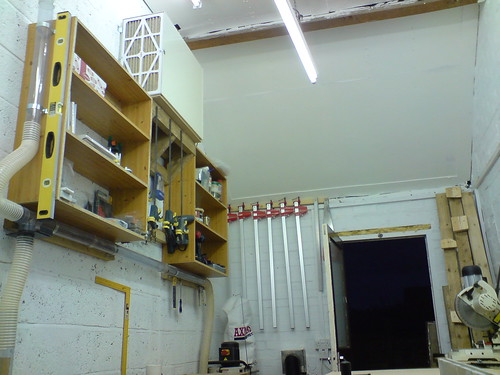
I had this going full blast.


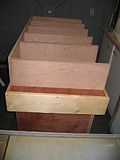
Once all the shelf recesses were done I sanded with 240 grit


I then routed a rebate to accept a 6mm plywood back for the bookcase.


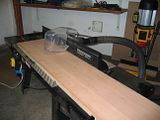
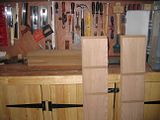
Time to make the shelves.


Pieces ready to assemble.


Assembling it was hard as the work bench was 24" wide, the same as the bookcase. Not much room for manoeuvre.


Finally got it all clamped up, not without a struggle though!


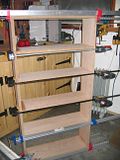
So that was where I got to at 16:30, just as Pick of the Pops was ending. I have made a design fault in that I never left a space at the base of the bookcase for a decorative stringer. To overcome this I am going to put a hardwood base on it. The veneer is going to be Utile, would it better if I made the base and the veneer out of Ash? Any comments would be appreciated.

Phil
 
Looks like a good start.

Here is a picture of a veneered MDF CD cabinet I made some years ago with a base along the lines of what you are describing. I've done bookcases in the same way.

3188856184_2e15f9544c.jpg


How are you planning to lip the edges of the MDF? The one in the picture is just oak glued and pinned to the MDF.

Cheers, Ed
 
Looking good, interesting and great WIP. Just out of interest whats that you have on the right hand side of the bench in the last photo, standing on end and open?
 
I don't know how to do that Tom, this is the size in Photobucket. Do you know?

Thanks Nola, that is my light box. I have it on for about an hour each time I am in the shed.

Thanks Ed, I was going to just glue the strips as i don't want to see the pins.

Phil

Edited original post to thumbnail photo's Tom, best I could do.
 
filsgreen":2xwpqhmn said:
I was going to just glue the strips as i don't want to see the pins.

I know what you mean. I used 18 gauge pins in an air nailer which leave a tiny hole that I then filled with an appropriately coloured wax. Done this way they disappear virtually, but it depends a bit on the wood - they might be more visible in cherry as its not such a bold grain as oak.

I should say that I haven't used this technique for some years as I tend to work mainly in solid wood these days, but in the past I've had good results applying lipping in that way. Leave it slightly oversize and then trim flush with the veneer after.

Cheers, Ed
 
Looks like a good day's work to me - you should have this one finished in no time!! :D :wink:
 
Don't know about that Olly, all I did today was take the clamps off :oops: . I'll get a good go at it next weekend.

Ed, all I have is an Arrow electric nail gun and it doesn't fire the pins all the way. You have to finish off with a punch which obviously leaves a mark. As I say, I'll think about it when I have more time.

Phil
 
Well here is the finished item.

BelfasttripFeb2009022.jpg


As usual loads of mistakes and areas where it can be improved.

Don't use MDF, Don't pin veneer to the mdf, it looks rubbish. Make sure you remove all glue from exposed surface, varnish doesn't cover it. Use biscuits for the shelves rather than routing out grooves. Don't leave saw marks on the veneer. Don't use cheap plywood for the backing.

Phil

PS. The he main thing is that my wife likes it, warts and all. :D
 
Are you sure that back panel is a sheet of "cheap ply"??? :shock: It looks absolutely beautiful! What type of varnish did you use?

Only thinking missing is some shots of the sides! :wink:
 
In general looks pretty good, except the right hand side of the back panel, have you had to joint it and are there some marking/glue lines?
 
filsgreen":38fr1op8 said:
Don't use MDF, Don't pin veneer to the mdf, it looks rubbish. Make sure you remove all glue from exposed surface, varnish doesn't cover it. Use biscuits for the shelves rather than routing out grooves. Don't leave saw marks on the veneer. Don't use cheap plywood for the backing.

Phil

PS. The he main thing is that my wife likes it, warts and all. :D

Looks good and if your SWMBO likes it then what else matters :lol:

I hate using veneered MDF, I always seem to blow through the veneer when sanding, just got to show this stuff a sander :(

That DW625 is a beauty isn't it?

regards

Brian
 
Looks goods nice job all around.


Your Air filter is doing no good there, it needs to have free space behind it. They only work by circulating the air which means the port on the back should have space behind it and for best results (as the instructions say) be pointed at a wall a little way away to blow the air onto and get air circulation to bring the dusty air to the filter. If yours isn't clogged with dust after making that bookcase then it isn't working as I made an almost identical bookcase out of MDF with a painted finish and when done the front of the filter was completely MDF dust coloured.

Theres a good picture somewhere, could have been in the manual actually that shows the correct placing.
 
Chems":28s4k3fz said:
Your Air filter is doing no good there, it needs to have free space behind it.
Just thinking the exact same thing myself.
Neil
 
OPJ, it was a sheet of Malaysian ply which cost £25. I used Ronseal "Trade" gloss varnish.

Ironballs, the apparent join is in the production and the pink marks were already there, and this was the better side!

Brian, The 625 is great, much better than the 615 I was used to. Mind you Wealden cutters helped as well. I did sand away a very small part of the side when I was sending the edge of the Ash veneer.

Chems, thanks for the advice on the air filter, there is a small gap behind it and although it does work, judging by the amount of dust on the exterior filter, it will probably work better when I move it further away from the wall. Do you think 6" would be enough?

Phil
 
Probably doesn't need to be much, but maybe a little more as your trying to bounce the air off a wall back into free air, you can direct the air left or right with the vane on the back. I've mounted mine right in the middle for maximum circulation and it does a real good job.

Is there anyway you can fix to the roof? Even stand it on its end on a shelf like dangerousdave has done with his here:

3063327857_cdf77f0cf5.jpg
 
Back
Top