The UKW Infill Project

UKworkshop.co.uk

Help Support UKworkshop.co.uk:

This site may earn a commission from merchant affiliate links, including eBay, Amazon, and others.
Richard...thanks for the confirmation...and that beautiful photograph of an equally beautiful plane!!!

That is more stunning that I remember if that is possible and you have made my mind up without question as to what infill stock to use...that is true eye-candy!

Ok...the reason your one doesn't go black from the steel is that is isn't steel!! :roll:

If I were to coat the steel plane of Richard's with a barrier of some kind...say varnish or epoxy...do you think that would prevent the staining which Peter quite rightly mentions might happen? Any ideas on this?

I have a solution for the screws....stainless or bronze (yes!)....and I am really wondering if a WARD iron would also be the cutter of choice too...I do so love WARD irons!

Douglas and I had a play with his various irons from Lie Nielsen and we reckon that a 5mm iron would be just about spot on...even 4mm would work...so if I make one from 01 tool steel then that would be the other option....with a 3mm cap iron.

I love the shape of that handle on your Norris mate...would there be any chance of you tracing the profile...that is just perfect!

Owing to staff holidays...I have to stand in at the hotel for more shifts than I would ideally like this week but I should have time to rough out the handle with some mahogany and get an infill sorted for the front by the end of the week. I may have a design for a lever cap by then and there will be no adjuster on this plane...you have tipped the balance of my mind and I am firm on this.

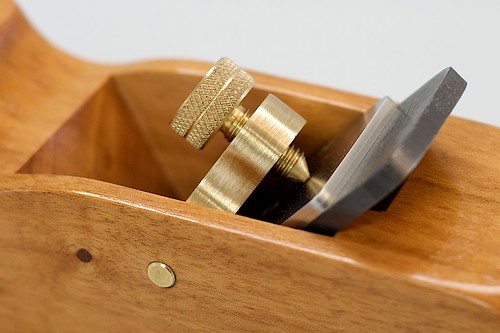
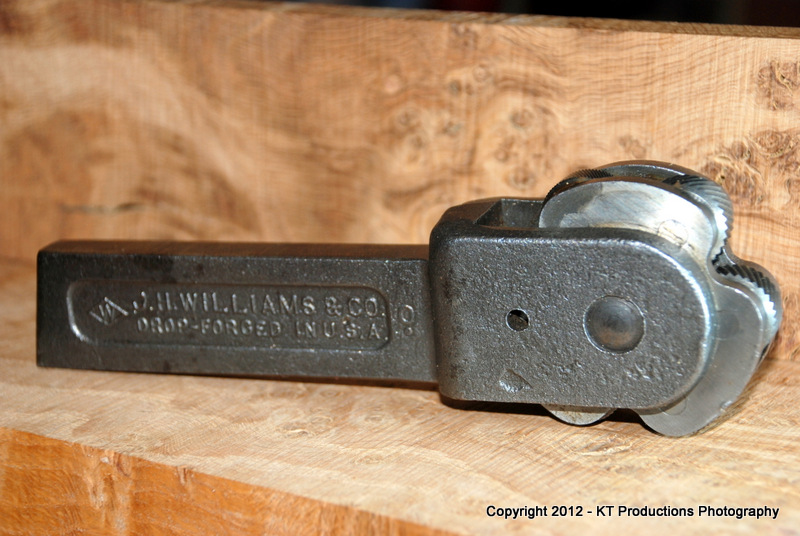
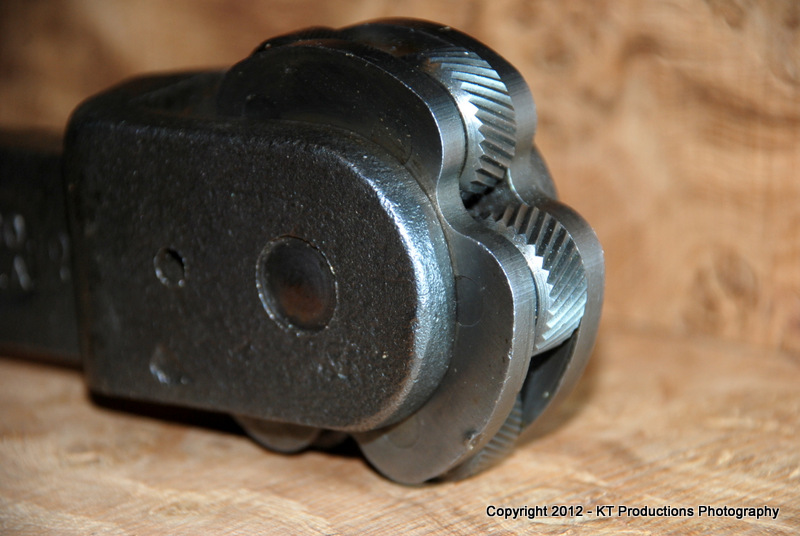
I probably will cut a square threaded knob and also an ACME one...I can do the square on the lathe...that will be fun! AND...I found a most beautiful knurling tool on FleaBay this week.....
DSC_2815.JPG


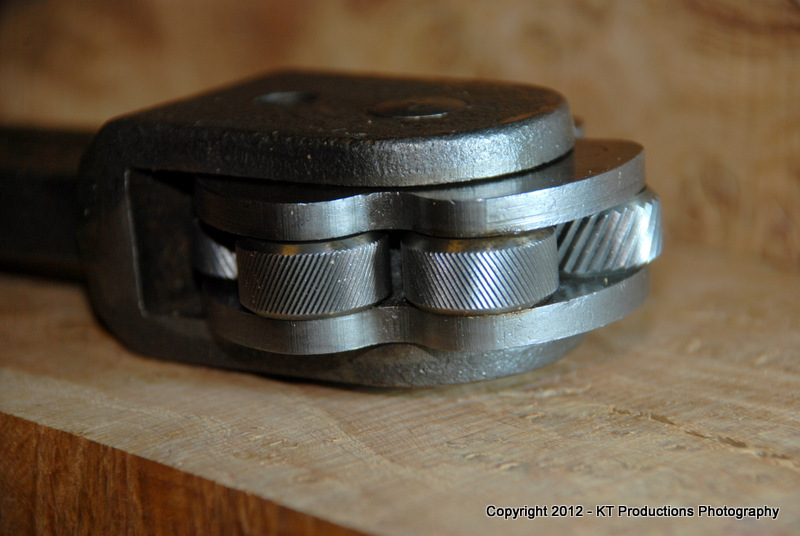
I don't know if I am going to cut my own knurl of sorts by hand (read lathe) or whether I'm going to use a knurling tool straight....but this has a beautiful set of gnashers...typical American engineering...over engineered and stunningly made....
DSC_2816.JPG


This is the Cadillac of knurling tools for sure!
DSC_2817.JPG


Anyway...more on that aspect of the build as we progress. The 1" brass round is currently being whittled into a knob blank...so I will photograph that progression this week...along with my attempt at square type threads!

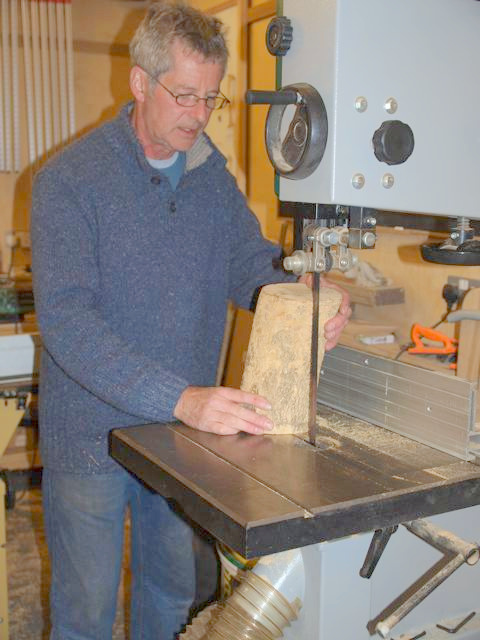
I will leave you all tonight...particularly those amongst you from Health and Safety with this picture of Douglas cutting up a little log of box....
boxcut1.jpg


Now...far be it from me to suggest that he has lost his marbles...let alone nearly his fingers but even I...the crazy loon of the cave would not have attempted this cut...but I have to say...all the normal precautions were taken...flattened bottom...slow cut...keen thin kerf blade....half a million in insurance....first aid trained accomplice standing by with a DSLR and a box of plasters.... :mrgreen: :mrgreen:

Yup...I think it was safe enough! :shock:

More on the "cutting day"...as I get them.

Jim
 
Starting to look very impressive Jimi, makes me want to get the old lathe at school running properly as she hasn't seen any action for at least 6 years before I arrived so totaling 8 now.

I think Bandsaw cuts like that are probably safer than some of the regular ones, as you are so brown trouser you don't get complacent and end up making the most controlled cuts of your life!
 
jimi43":2xsmhav4 said:
I don't know if I am going to cut my own knurl of sorts by hand (read lathe) or whether I'm going to use a knurling tool straight....but this has a beautiful set of gnashers...typical American engineering...over engineered and stunningly made....

DSC_2816.JPG


This is the Cadillac of knurling tools for sure!

There are TWO distinct types of knurling tool; one type (cheaper) relies on the lathe's toolpost (and compound rest) to drive the knurling. Since knurling is mainly a cold forging process, the forces involved are high, and a smaller lathe may not be rigid enough to handle them well.

This is your Cadillac, which would be fine in a large industrial lathe.

The "other kind" puts the pressure on by having the 2 wheels opposite each other, so all the force is taken directly by the screw that draws them together, which puts MUCH less force on the lathe.

http://brassandtool.com/Metal-Cutting.html

http://www.hemingwaykits.com/acatalog/K ... _Tool.html

BugBear
 
I have to agree with BB here.
I have a double wheel clamping type (which I bought from RDGTools or Chronos?).
I can just about manage 20mm brass rod on my tiny Unimat with that.

Rod
 
bugbear":25ofb38c said:
jimi43":25ofb38c said:
I don't know if I am going to cut my own knurl of sorts by hand (read lathe) or whether I'm going to use a knurling tool straight....but this has a beautiful set of gnashers...typical American engineering...over engineered and stunningly made....

DSC_2816.JPG


This is the Cadillac of knurling tools for sure!

There are TWO distinct types of knurling tool; one type (cheaper) relies on the lathe's toolpost (and compound rest) to drive the knurling. Since knurling is mainly a cold forging process, the forces involved are high, and a smaller lathe may not be rigid enough to handle them well.

This is your Cadillac, which would be fine in a large industrial lathe.

The "other kind" puts the pressure on by having the 2 wheels opposite each other, so all the force is taken directly by the screw that draws them together, which puts MUCH less force on the lathe.

http://brassandtool.com/Metal-Cutting.html

http://www.hemingwaykits.com/acatalog/K ... _Tool.html

BugBear

Spot on BB/Rod...as discussed before on another thread. I have tried this type of knurl on my new lathe and it works fine...not a vast amount of pressure needed just the first..."smack in" to establish a clean primary cut and then take it easy.....

I'll put some pictures up of a test I did earlier sometime today. I am more worried about bearing damage but that's more of a discussion for another forum.

In actual fact...I will probably be cutting the grip pattern (similar but not copying Karl) in the end.

Jim
 
A small tip with knurling, used by some fine instrument and machine-tool makers - use a diamond pattern knurl for knobs that will be pulled and pushed, and a straight knurl for knobs that will be turned (like the finger-grips on lever cap screws).

Obviously, the world will not stop turning if someone uses a diamond pattern knurl on a lever cap screw, but I just thought I'd mention it for those who like to have things 'right'.
 
Here's one I made;

4557780267_d47de8465e.jpg


The force of applying the knurling is huge and I've found the best way to do it is to apply the knurl while the fat bit of the screw is still attached to the bar stock it is being made from (3/4" I think in this case) so there is something substantial to push against. As a further precaution I have also done it with a tailstock centre in a suitable centre hole at the other end of the workpiece to give some support to push against.

I have found knurling to be hugely frustrating and got varying results for what I thought were the same parameters / conditions - I think you just have to have a go and see what works on your lathe.

Ed

EDIT - I remembered writing how I do a thumbscrew in this old thread here post486164.html?hilit=lathe#p486164 Not saying my way is right, but it's generated reasonable results for me.
 
Hi Ed

Great information mate...and I have the stock between the chuck and tailstock centre to minimise lateral pressure on the headstock....well...as much as possible.

I have a Chronos one but to be honest...the quality of the Chinese one versus this American jobbie is like chalk and cheese...

I am at present trawling through he various designs both ancient and modern...something to think about when the nights are too cold!

Cheers

Jim
 
Hi jim I'm more than happy to post you a copy of the handle shape, but i was wondering if i could scan it, and send it in a file to you? I'm not sure about how this effects the scale. I'm sure that by coating the inside of the infill should stop any staining of the oak. I tend to find that the black marks only occur when there is any moisture about, so unless you intend to work in the rain, I don't think it will give you to much trouble!. I have never found a better iron than a Ward, and It's worth noting that all of the early planes by dear old Thomas seem to be fitted with them
025-3.jpg
 
Hi Richard

Thanks mate...a quick squiggle around it in pencil will do...and you your panel if you have time.

That is just the perfect shape!

Not sure how you are going to get that lump in the scanner!! :mrgreen:

Jim
 
Hi, Richard

You could cut it in half and put it on your scanner :shock: :wink:

Pete
 
richarnold":217gerex said:
Hi jim I'm more than happy to post you a copy of the handle shape, but i was wondering if i could scan it, and send it in a file to you? I'm not sure about how this effects the scale. I'm sure that by coating the inside of the infill should stop any staining of the oak. I tend to find that the black marks only occur when there is any moisture about, so unless you intend to work in the rain, I don't think it will give you to much trouble!. I have never found a better iron than a Ward, and It's worth noting that all of the early planes by dear old Thomas seem to be fitted with them
025-3.jpg

Put the camera a fair way away from the plane to reduce perspective effects (say 8-10 feet) then use optical zoo to magnify the handle - this also reduces barrel distortion, which is an issue with wide angle lenses.

The plane needs to be "square on" to the camera (ideally), but a REALLY good way to make sure any glitches can be post correct is to put a piece of squared paper (graph paper) behind the plane.

Any photographic "glitches" will effect the paper AND the plane, and the photo can be tweaked until the squares are ... square.

The squares also provide a scale, although since the paper is a different distance, this would need to be accounted for. if the camera-object distance is high, the difference in scale is minimal.

BugBear
 
So that Handle has influenced three planes to my knowledge - Bill Carter's jointer in Yew, my panel in Walnut and now Jimi's.

Any more we don't know about Richard? :)
 
Not that i know of Richard!!!, but you never know. mind you ,it's only gained showbiz status in the last year or so. I have posted a full size drawing of the handle, and it's position on the body, so hopefuly this will arrive tomorrow Jim. I forgot to add to the drawing that the thickness of the handle is 1 3/32 of an inch. Hope this helps, Richard.
 
richarnold":1xf85t0t said:
Not that i know of Richard!!!, but you never know. mind you ,it's only gained showbiz status in the last year or so. I have posted a full size drawing of the handle, and it's position on the body, so hopefuly this will arrive tomorrow Jim. I forgot to add to the drawing that the thickness of the handle is 1 3/32 of an inch. Hope this helps, Richard.

You're a star Richard!! Thank you so much for that...I think the plane will need an agent soon!

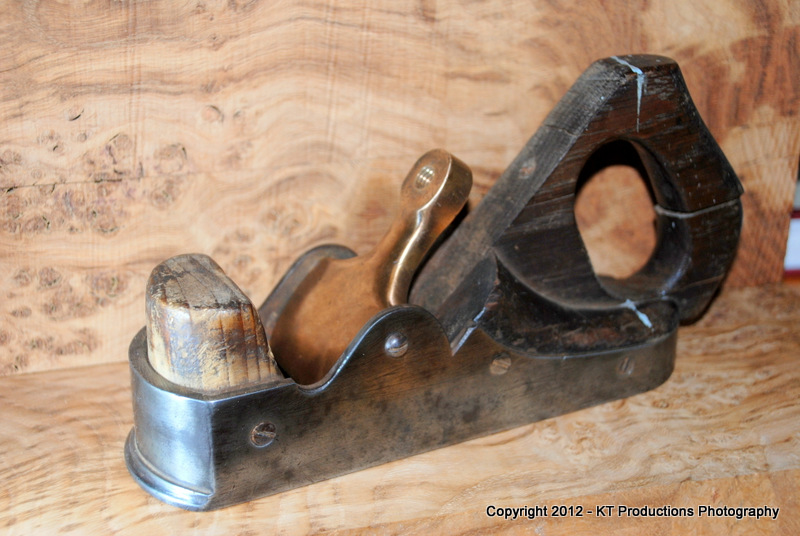
By the way..I happened upon this little Scottish smoother today...

DSC_2826.JPG


I bought this on FleaBay for a song...all the bits that need restoration on it are right up there in the "practice for Richard's" category...to give me a chance to make sure that I get his perfect....

I guess you can see now how nervous I am! :lol:

I will make that restoration another thread entirely...watch this space over the coming days!

Cheers again mate

Jim
 
Hi, Jim

Nice plane, just needs a buff with the Renaissance wax :shock:

Pete
 
jimi43":3icxyhg4 said:
richarnold":3icxyhg4 said:
Not that i know of Richard!!!, but you never know. mind you ,it's only gained showbiz status in the last year or so. I have posted a full size drawing of the handle, and it's position on the body, so hopefuly this will arrive tomorrow Jim. I forgot to add to the drawing that the thickness of the handle is 1 3/32 of an inch. Hope this helps, Richard.

You're a star Richard!! Thank you so much for that...I think the plane will need an agent soon!

By the way..I happened upon this little Scottish smoother today...

DSC_2826.JPG


I bought this on FleaBay for a song...all the bits that need restoration on it are right up there in the "practice for Richard's" category...to give me a chance to make sure that I get his perfect....

I guess you can see now how nervous I am! :lol:

I will make that restoration another thread entirely...watch this space over the coming days!

Cheers again mate

Jim

Oh Jim, that's a shame. How come you took that one under your wing but didn't buy this far more deserving case of plane abuse - a fine example of stuffing till it canna take any more! :lol: :lol:

$(KGrHqZ,!jQE+)p(dpV)BQPnv8gp!!~~60_58.JPG
 
Out of the zone of the magical wax Peter...which is just as well!

Andy...I did see that monstrosity.....I don't wish to discuss it in decent company!! :mrgreen:

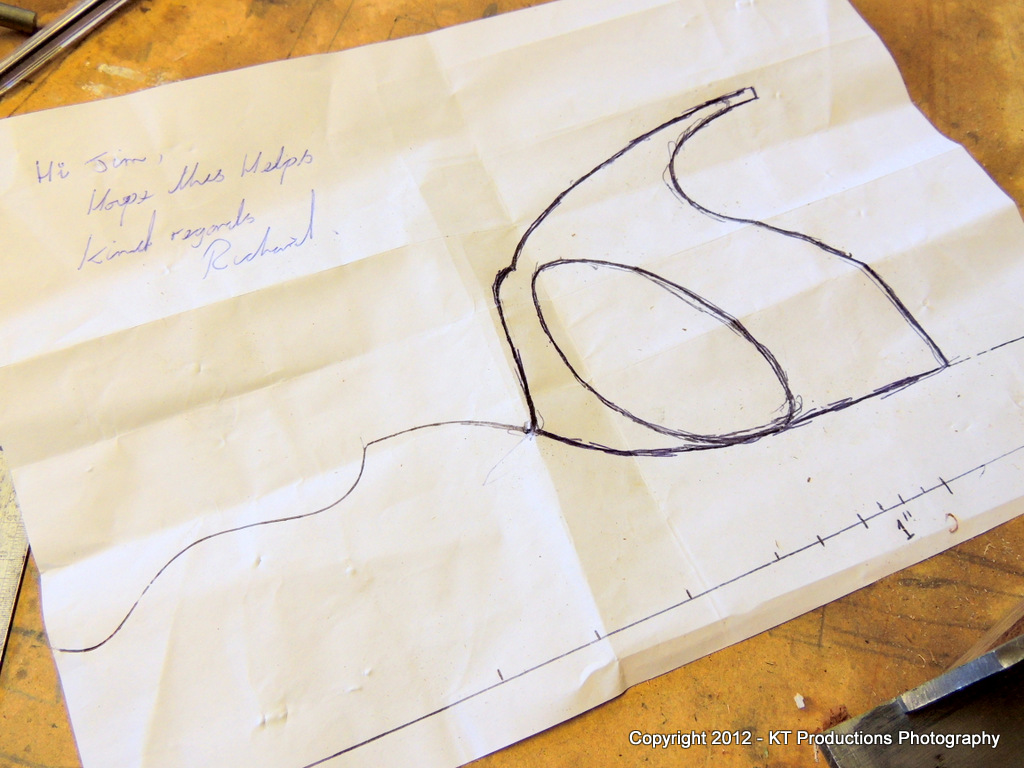
The gauge stock arrived today...so irons and cap irons are on the cards...also I received a letter from RichardA which contained a beautiful outline of the model Norris handle!

How you got that here in that time Richard is beyond me but many thanks indeed!

Off to work...grrrrrrrr :cry:

Jim
 
Today was the first day I was not either at work...(even though I am supposed to be retired! :roll: ), visiting family or working on tuning the lathe and milling machine in readiness for building the metal bits of this plane.

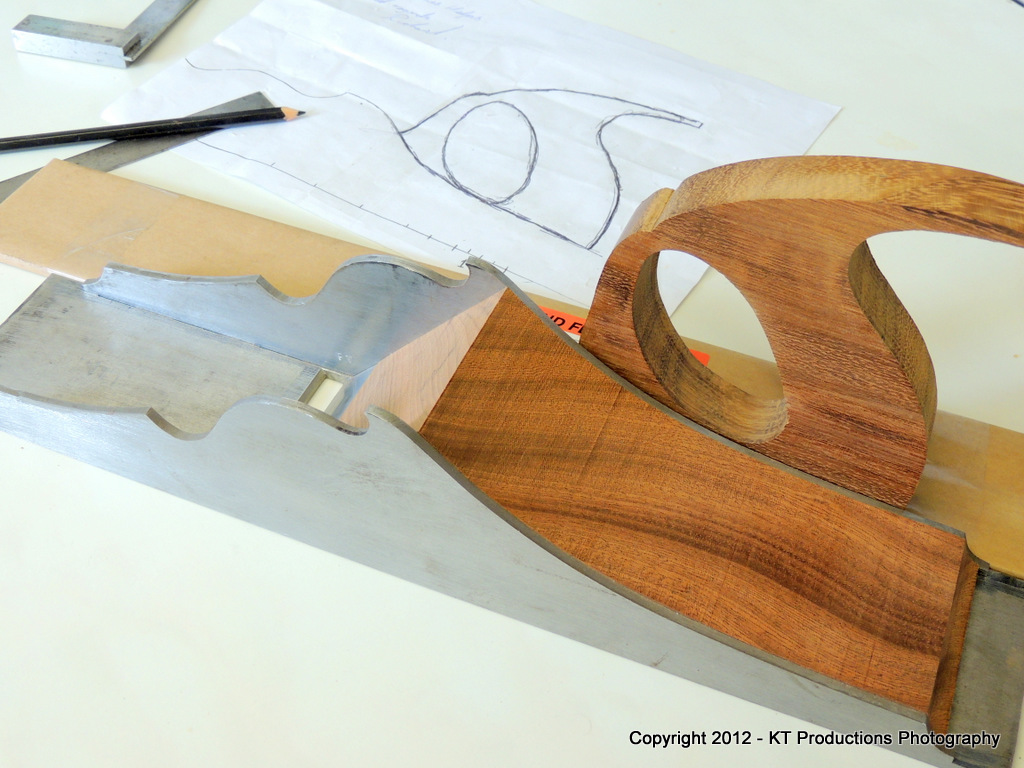
So...having received the tracing of the, now famous Norris from Richard.....

DSCN0161.JPG


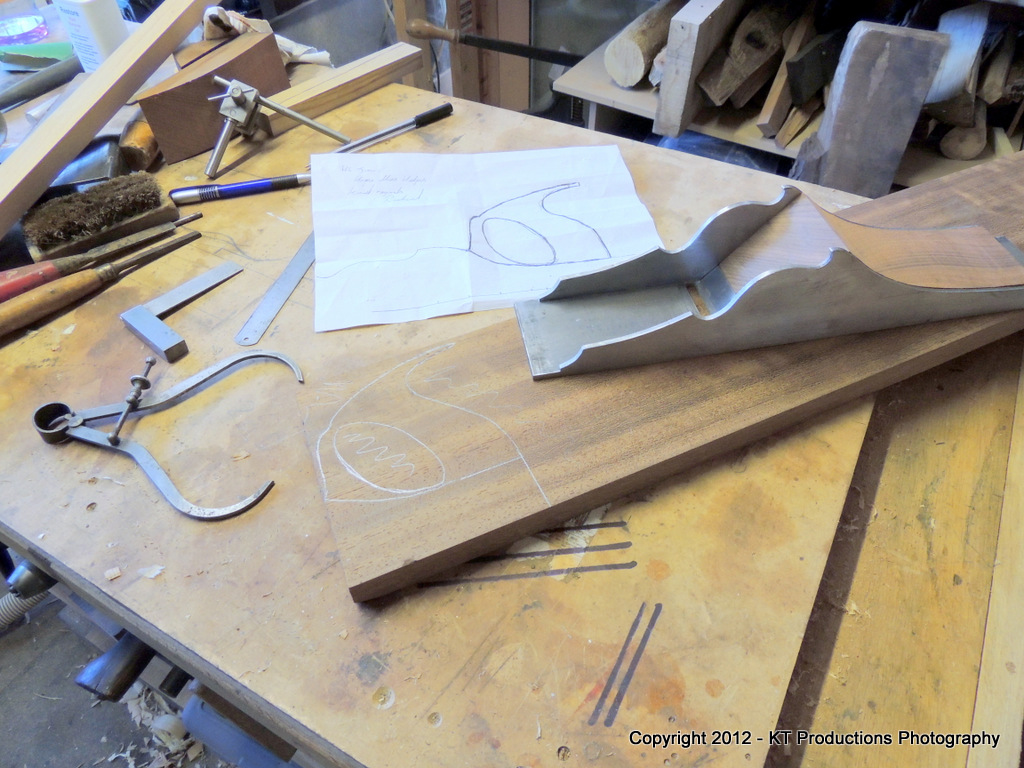
...I decided to make a test handle today..again from mahogany.

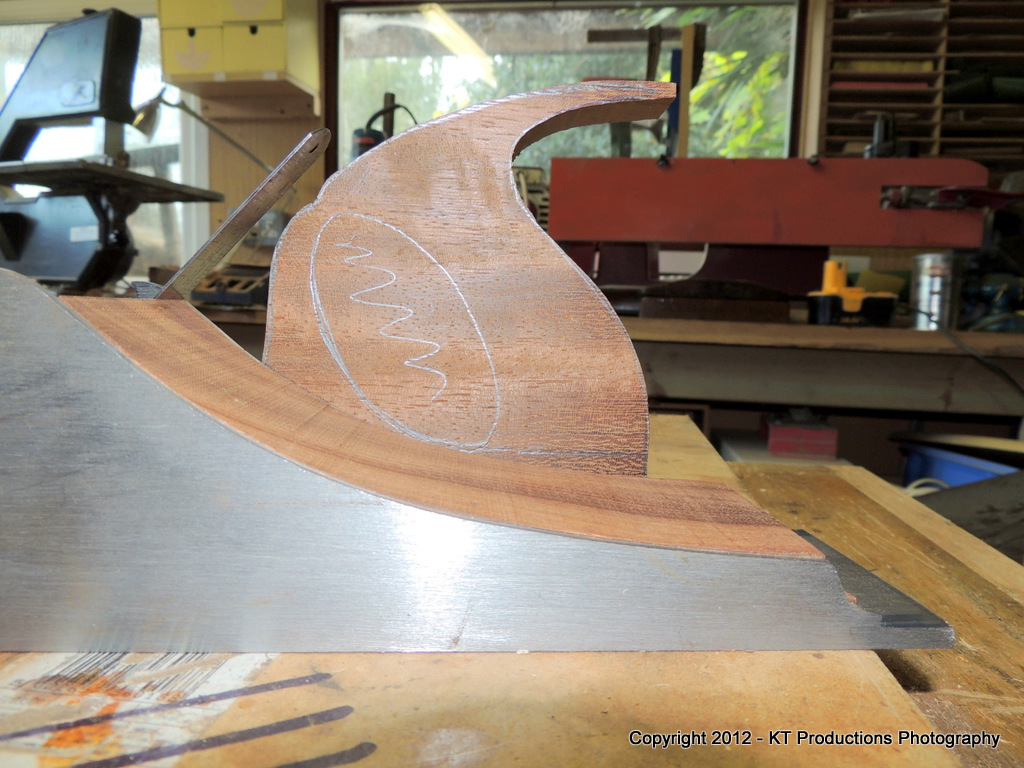
Richard...this tracing was invaluable mate...not only for the shape but the subtle angle of the handle relative to the infill base.

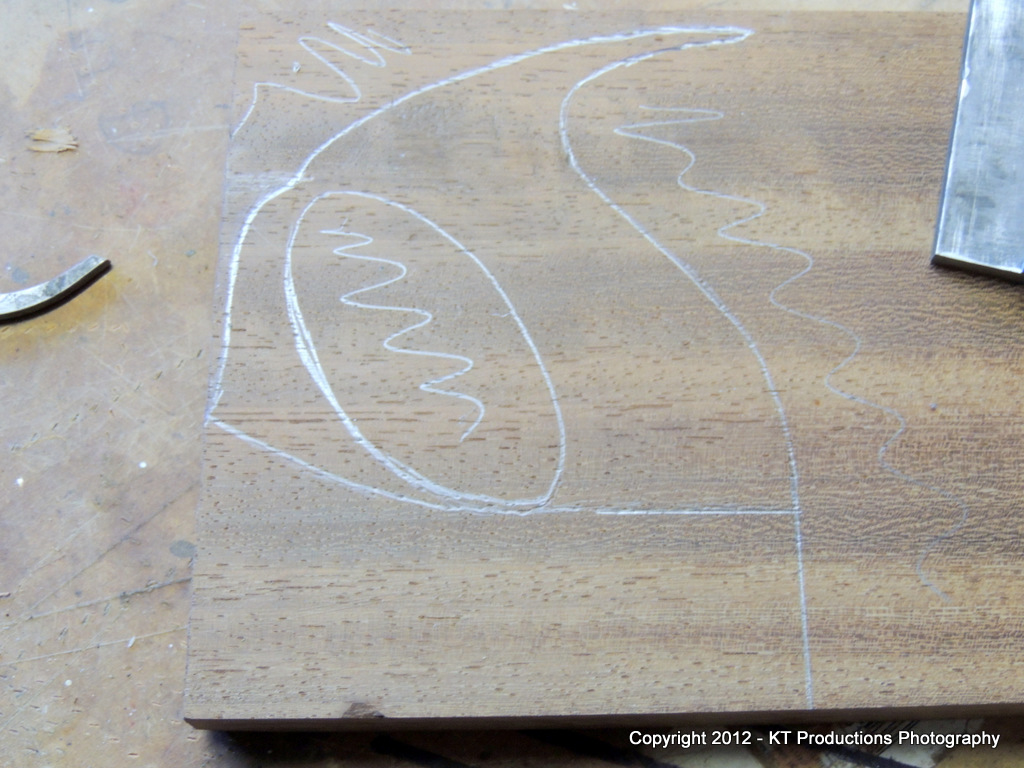
So...first to trace it out....

DSCN0159.JPG


That worked ok....

DSCN0160.JPG


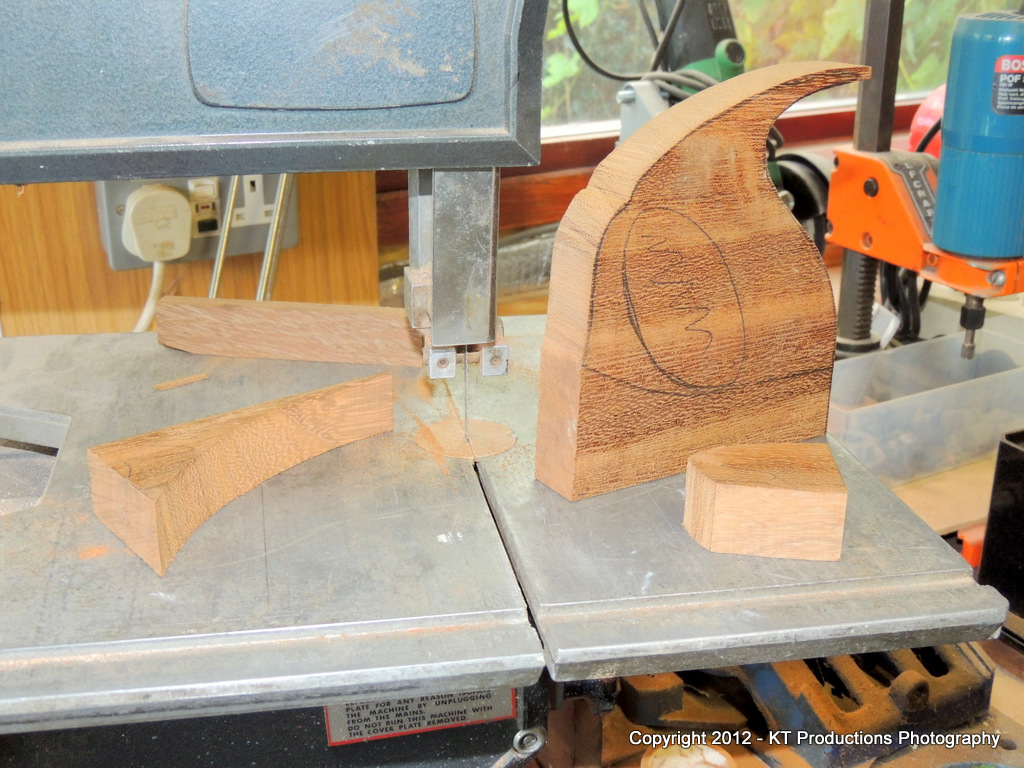
Back again to the Burgess three-wheeler bandsaw...with the Tuff Saw blade made short work of cutting the outside....

DSCN0173.JPG


As you can see...this little saw is perfect for cuts like this with tight turns and sweeping curves....

DSCN0170.JPG


....really beautiful shape this handle....Mr Norris knew what he was doing and I think this sets him apart from the rest.

Now the difficult bit and the bit I hate the most...inside cuts with no lead in....

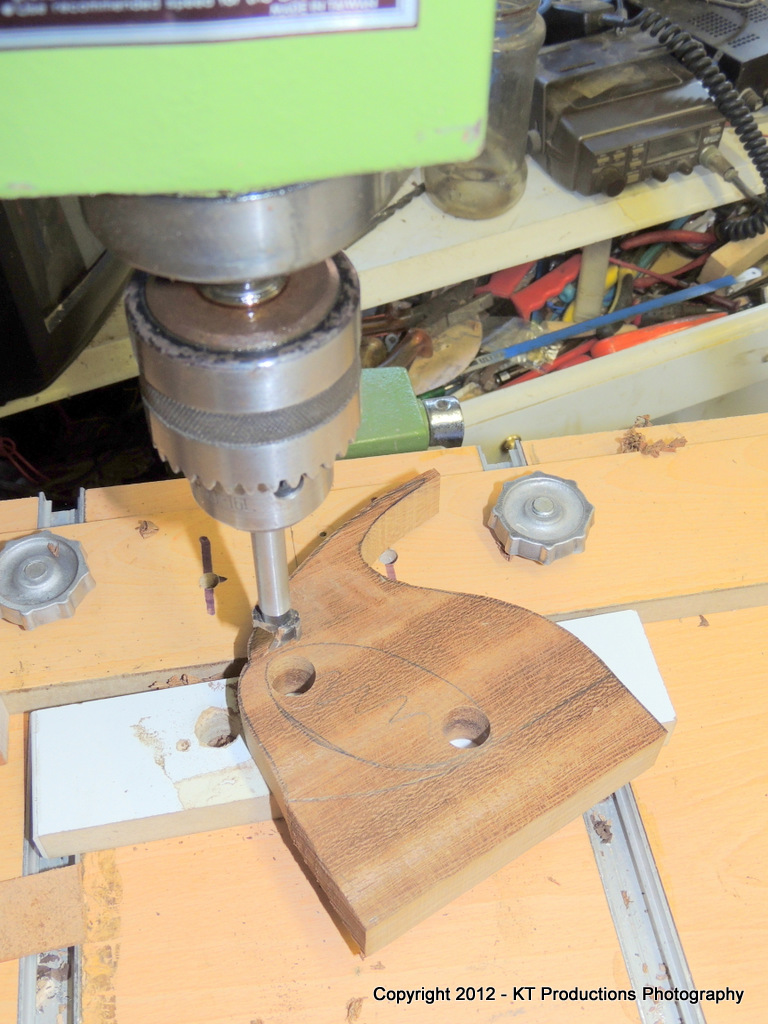
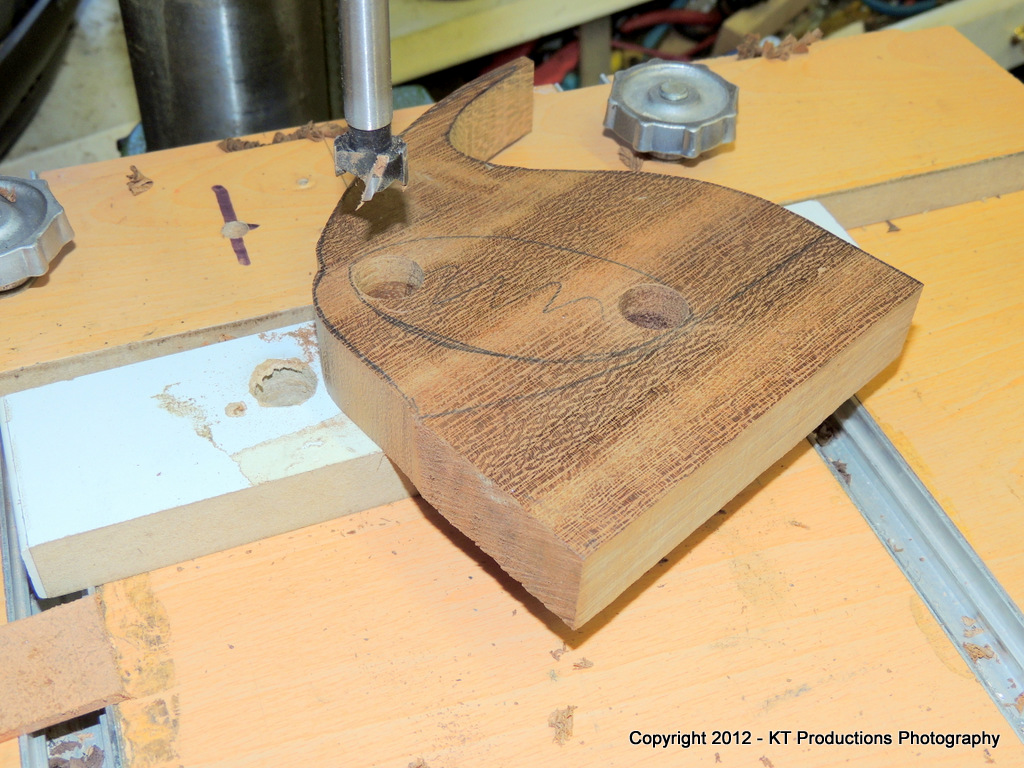
First...using a Forstner bit of the appropriate size to give the difficult outer acute turns the best finish....I drilled two holes...

DSCN0176.JPG


A tip here for those of you not using one of these bits before...set the depth so that the spike just comes through the other side and then turn it over and use the exposed hole to cut the other way to avoid splitting out....

DSCN0174.JPG


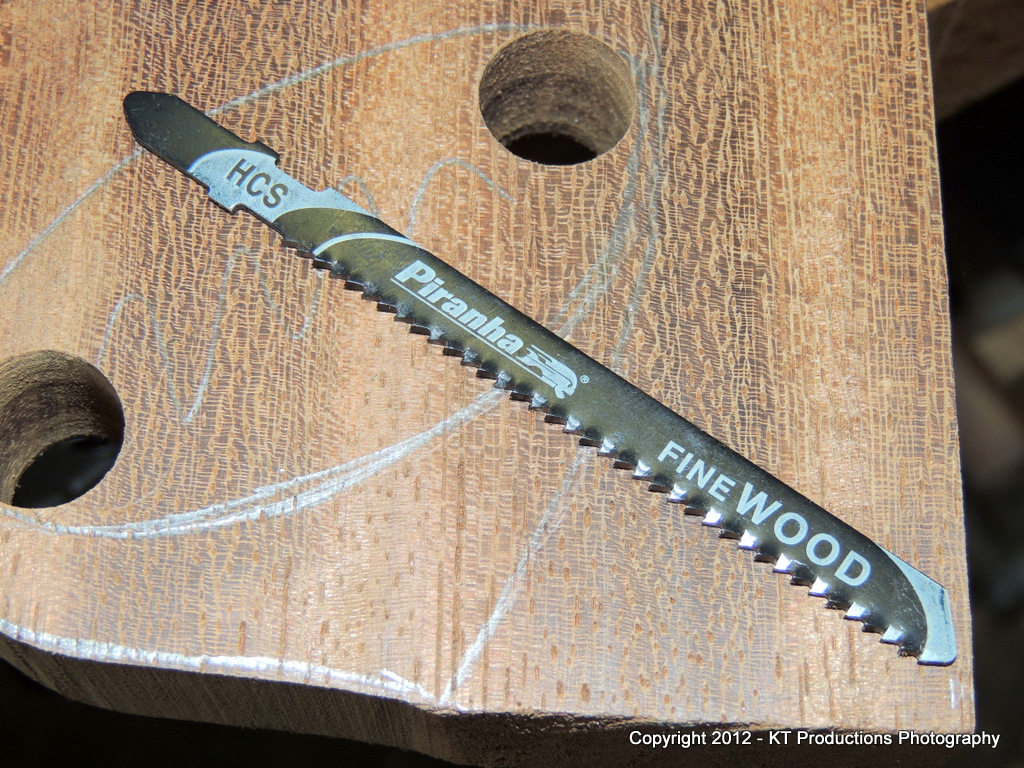
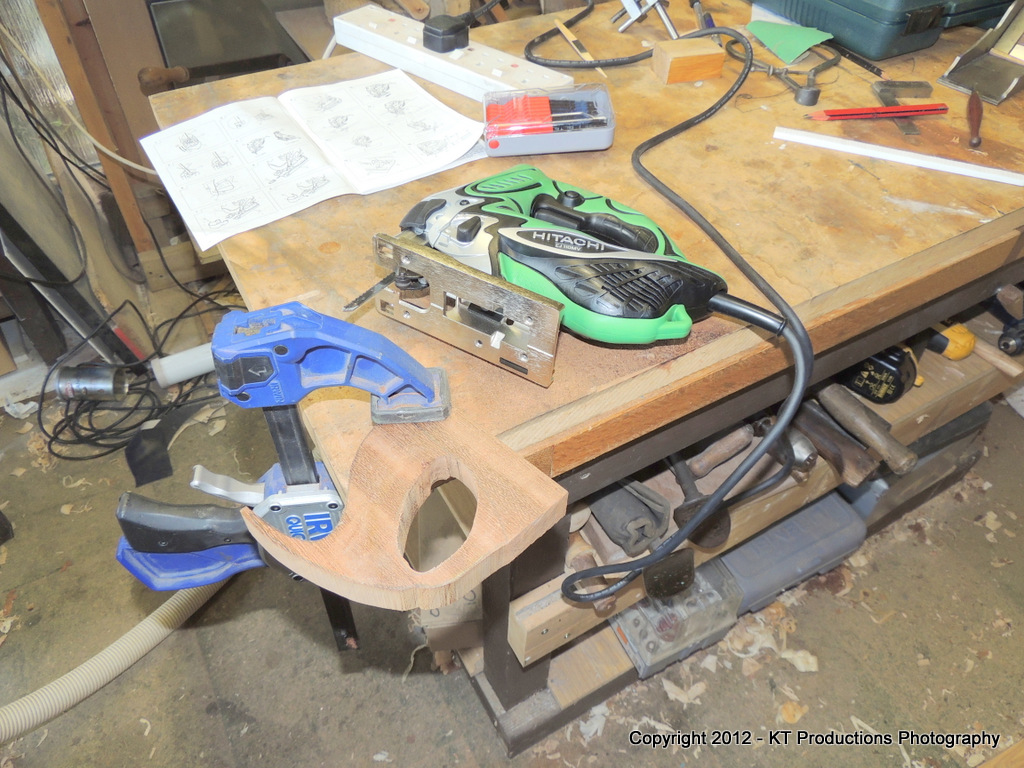
Now for why I hate cutting large holes...the jigsaw! Bloody horrible things and when I do the real handle I will use a fretsaw but for now a rough and ready way of doing it...using the finest blade I have...

DSCN0178.JPG


Cheap rubbish from "a shed"...I really must get some decent ones some day!

DSCN0179.JPG


YUCK!!!

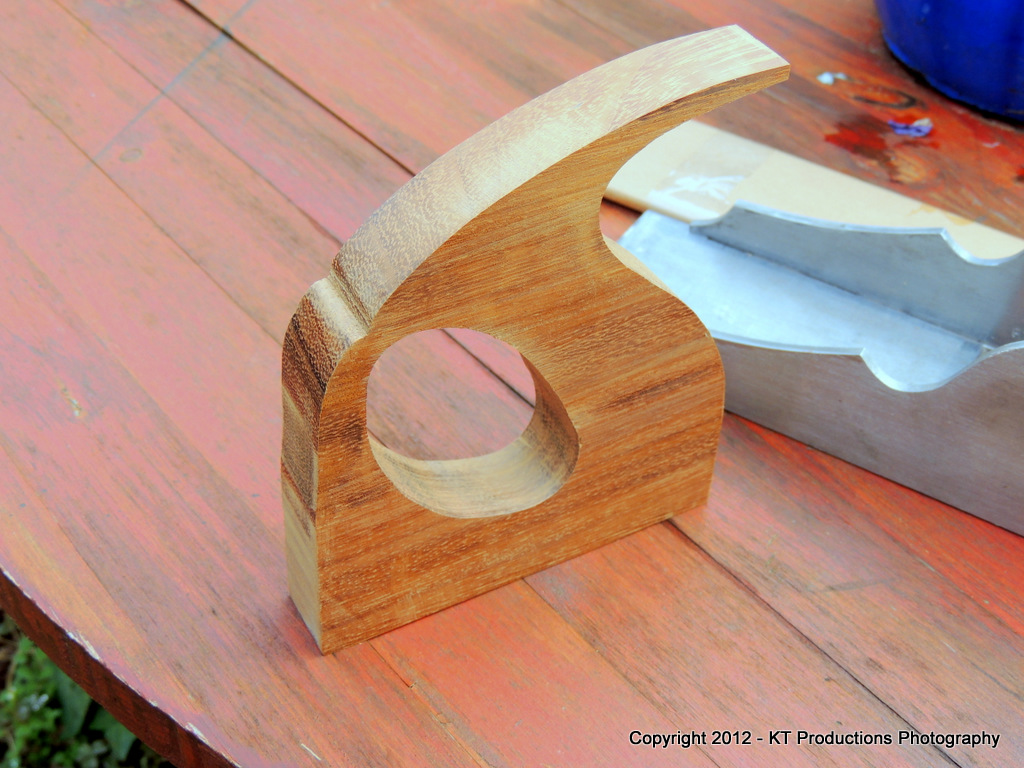
Couple of sanding drums on the drill press later (camera not around for obvious reasons!!)......

DSCN0181.JPG


I need to change the drum and smooth it out later but we're nearly there....

DSCN0195.JPG


I have to cut the mortice this afternoon but note how the base has been slightly adjusted to make the handle lie at the right angle....

DSCN0196.JPG


...a small but important tweak to ensure it sits right later.

I have ordered a handle maker's rasp from Noel at Logier as I have used one during the passaround and was really impressed.

This one has a safe side and I shall report how it performs on the remaining handle shaping when I receive it.

This is really coming along now....

DSCN0199.JPG


....and truly a joint effort from quite a number of people here on the forum....

Jim
 

Latest posts

Back
Top