Say Hello to Alex....

UKworkshop.co.uk

Help Support UKworkshop.co.uk:

This site may earn a commission from merchant affiliate links, including eBay, Amazon, and others.
jimi43":39y8i3qb said:
However....Norris' iron is thicker than the QS...the QS being 3.40mm and Norris...a manly 4.54mm :shock:
Of course you could always fit a slightly thicker Lie-Nielsen No.6/7 iron at 3.55mm thick, or modify a No.8 iron at 4.70mm thick to make the mouth really tight...

I'll get me coat.

Cheers, Vann.
 
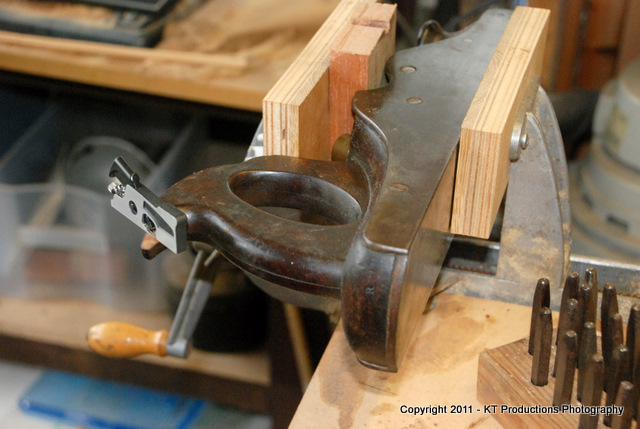
OK....anyone who is a religious collector who wants to put these old workhorses in a cabinet covered in dust and rust...look away now...we are about to get the tools out!

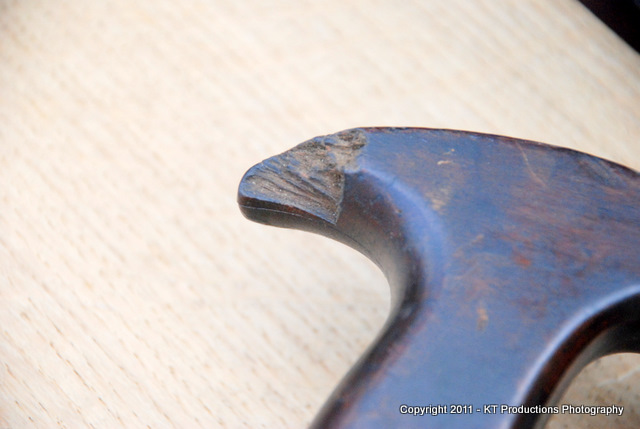
Remember the chip...

DSC_0323.JPG


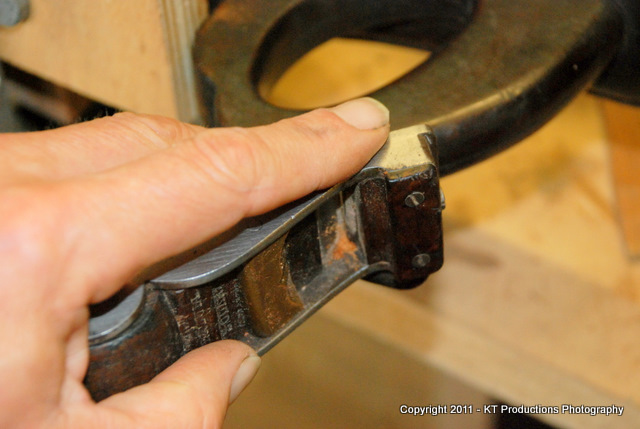
We need to get this sorted as it is most uncomfortable...and it shouldn't be...this is a comfortable handle in all other respects...

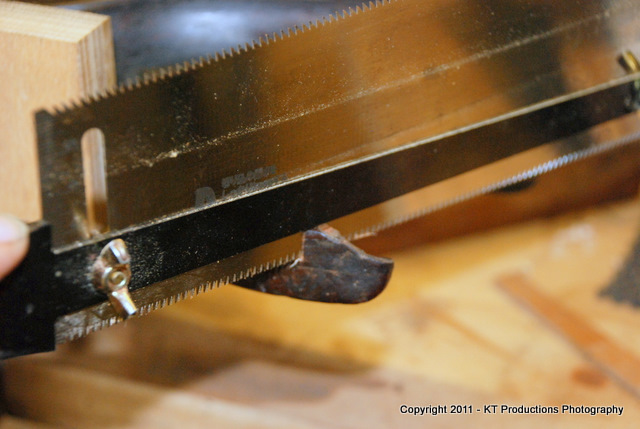
So...some modern and old tools will be used to fix this...interestingly....

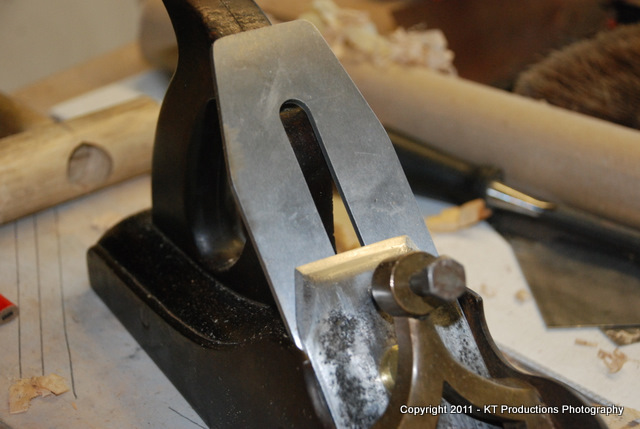
First my Japanese saw...with the depth stop...an excellent invention...

DSC_0342.JPG


This prevents the cut being too deep but isn't foolproof to the micron so I left it a tad high...with the intention of cleaning it up afterwards...along with the saw marks...

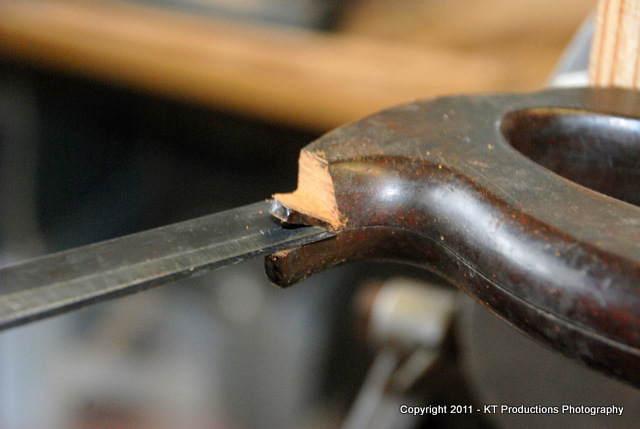
So a quick tap with a supersharp Japanese chisel (God I love those things)....

DSC_0346.JPG


....and the waste was gone...

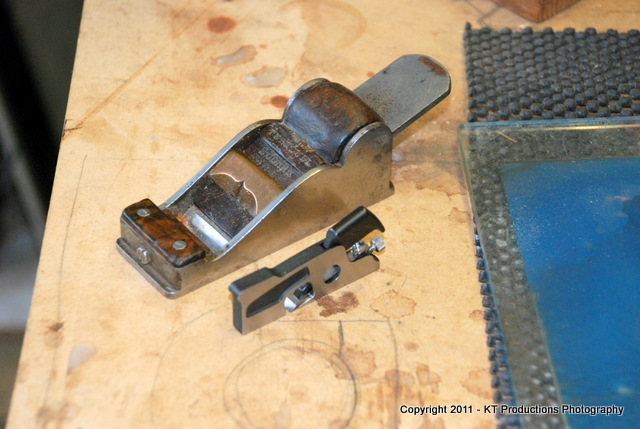
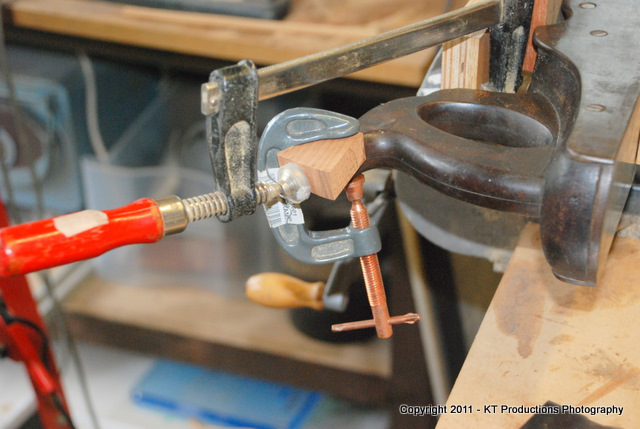
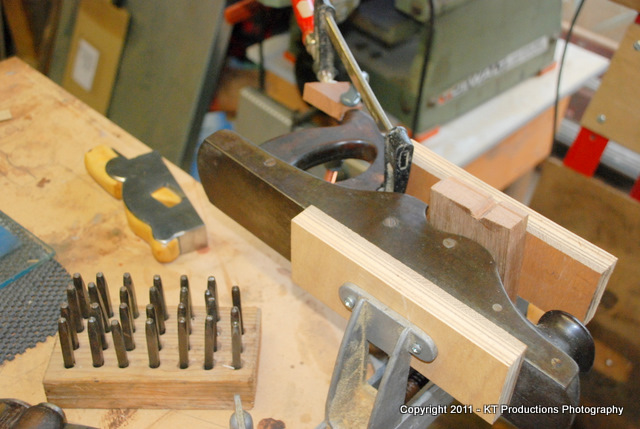
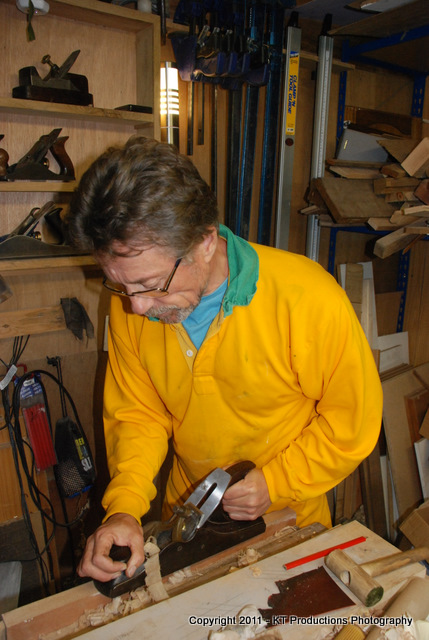
Now....to clean up the edge and corner...two wonderful planes...first...Isaac...who may be as old if not older than Alex...and the beautiful little piece of engineering that is the Veritas micro shoulder plane.

DSC_0349.JPG


The Veritas was a gift from my dear buddy..Pedder...thanks mate! You don't use it much but when you do...there is little else you can use in the situation!

DSC_0348.JPG


Once the corner was clean..the overhang was taken out by Isaac...

DSC_0350.JPG


Between the two of them...a very clean corner was created for the new stock to butt to.

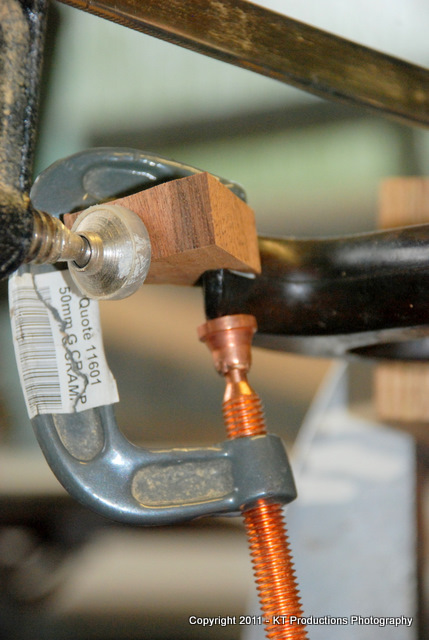
So...a quick rummage through the offcut box to find the right colour of mahogany..with the right grain and cut it up to fit...

DSC_0351.JPG


Very Heath Robinson but critical to clamp in two directions to prevent slide and creep...(I hope!)

DSC_0355.JPG


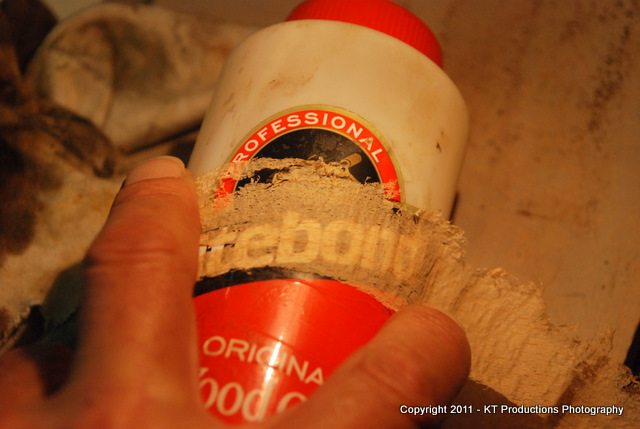
Remember to check underneath! I have done something like this before and completely forgotten to check all around!

DSC_0353.JPG


So...the important bit with Titebond Original...leave it 24 hours!

See you all tomorrow!

Jim
Nice job! What are the punches for?
 
Scouse....I can give you the name of the dye people...that's the key. This stuff is super economical because you only need a tiny bit and some meths....and you can blend it to whatever shade of brown you want using red and yellow combinations.

I promise I won't wear the Smurf outfit again guys...promise! (Maybe! :mrgreen: )

Anyways....I guess you guys want to know how it shaves now?

Well...the brilliant Matthew from Workshop Heaven did his normal trick of zapping off my QS iron super swiftly so it arrived today...just in time for the test!

DSC_0379.JPG


So this is going to be a double test...how does the QS T10 steel work...and also...how good is it sitting in a holder 150 years older and two continents apart?

DSC_0380.JPG


It certainly doesn't look out of place with the QS iron being a meaty beast....really well finished. Nothing a bit of rust won't improve!

I honed it on some WSH scary sharp grits down to 0.3microns (the white one!)...added a cap so let's see how some ice cold steel works in Alex! (doh!) :oops:

Enter the Smurf for the test...

DSC_0378.JPG


OK...some beech....

DSC_0374.JPG


This cut was with no pressure at all....just the weight of the plane....

DSC_0377.JPG


I guess once I get the sole totally flat...nah! I think I will leave this just as it is!
I wish you lived closer. I would send you a turned brass/knurled knob to silver-solder on that screw!
 
Last edited:

Latest posts

Back
Top