I'll need something to put my tools in...

UKworkshop.co.uk

Help Support UKworkshop.co.uk:

This site may earn a commission from merchant affiliate links, including eBay, Amazon, and others.
devonwoody":1dxsu8nb said:
Dan I know nothing about climbing but that piece of wood could split looking at the grain direction and appearance.

John I know almost nothing about wood so you could well be right! With three screws in at least it shouldn't fall off in my hands, if it shows signs of a split I guess i'll make another one.
In the spirit of finding out at least something about wood, what is it about the appearance that makes you think it might split?

Thick Mike - if you take that to it's logical conclusion then I might as well walk around the back of the cliff up the path to the top!
It's not always about the destination, it's about how you get there. Wise words for climbing *and* woodworking I suppose!
 
Just had in the past a piece of wood split along the grain(I was building boats around 40 years ago, not professionaly) and I got that feeling again seeing yours. Wait and see if anyone else follows up, but bear in mind I have no idea what or how you are using the piece and there might not be any stress to timber involved.
 
I'd be very surprised if that split with 3 screws in it. If you can generate that much power off a mono you don't need to train :lol:
Looks an absolute monster of a route! I bimble around the 6c/7a mark mainly, training and bouldering bore me so I seem to have plateau'd around there! Done E2/E3 in the slate quarries though, one of my favouite places to climb.
 
devonwoody":1cpqp7n6 said:
Dan it was a pleasure to meet both you and your father last weekend although there was some regret seeing your truck dissapear into the blue when you drove up the road on its way to its new home. My woodwork started 15 years ago (after years of DIY) and each item installed over that time gave me much pleasure and made a lovely retirement pastime for both myself and my wife, (we were both invited to Australia three times to visit the woodwork community there , in fact one visit was arranged for a 6 month stay)
So you can expect there is some regret, and even a few weeks ago I still got requests to spare another tissue box, that time to our local physiotherapy dept.
I hope you have as much enjoyment from your hobby that we enjoyed and I am certain members here will help with any guidance requested by you as also myself, please take care and work safely.

John

Devonwoody

Lovely post there John. Hope you enjoy your rather less noisy woodwork from now on.

Dan, great build, enjoy.
 
Noel":3lf9fqny said:
devonwoody":3lf9fqny said:
Dan it was a pleasure to meet both you and your father last weekend although there was some regret seeing your truck dissapear into the blue when you drove up the road on its way to its new home. My woodwork started 15 years ago (after years of DIY) and each item installed over that time gave me much pleasure and made a lovely retirement pastime for both myself and my wife, (we were both invited to Australia three times to visit the woodwork community there , in fact one visit was arranged for a 6 month stay)
So you can expect there is some regret, and even a few weeks ago I still got requests to spare another tissue box, that time to our local physiotherapy dept.
I hope you have as much enjoyment from your hobby that we enjoyed and I am certain members here will help with any guidance requested by you as also myself, please take care and work safely.

John

Devonwoody


Dan, great build, enjoy.

Lovely post there John. Hope you enjoy your rather less noisy woodwork from now on.

Thanks and to Beau on Dartmoor who I visited yesterday (and nearly had to swim home) who also had a super workshop in a barn. Beau helped me with by preparing 5 short boards for 12 more of my boxes..

Dan, I now think I see the function of that climbing accessory, you screw it to a flat surface and the hole is to put your finger in to maintain a hold when going along a flat underside surface =D>

(OK or whatever)
 
That's pretty much it john, I've put it on my 40 degree overhanging training wall and currently wedged it so the finger pocket is only about 20 degrees overhanging, as I get stronger i'll take the wedges out to make it harder.

I finally pulled my finger out with the soffits this weekend, after weeks of faffing around doing one board at a time I tried to get into more of a mass production frame of mind.
I finished drilling all the holes, then did all the sanding before laying them all out to varnish in one hit. It seemed to make things go a lot faster, I soon had six boards all smooth and varnished:


Rather than buy plastic push-in vents for the holes, I'm using left over bug mesh from when I did the bottom edge of the cladding. I'm sure it's only a few quid in reality but it made me feel better about using up stuff that would otherwise just languish in a cupboard until thrown away.


Hopefully that will do the trick.

Then it was a simple matter of screwing the boards in place as they had already been sized to fit. There are a couple of small gaps between the fascia and the soffit where everything isn't perfectly straight, i'll have to try and plug them with something unobtrusive otherwise it kind of negates the point of all the bug mesh!
In retrospect I should have fitted the soffits before the fascias so that I could then have pulled in the gaps with screws, but at the time it seemed more important to have something to screw a gutter to...


Sorry about the terrible picture, my battered phone is really starting to suffer in sunlight!

Next on the list is windows, I know this is a terrible attitude to take but since they are on a very sheltered side of the building, and have suffered no water ingress throughout the winter despite only having a ply panel nailed on the *inside*, then I'm not getting too hung up on how I seal them up. I'm going to do what I think will work (with a lot of info stolen from Fitzroy's fab build) and I'm sure it would be sub par for the north side of a Hebridean outhouse, but I'm willing to risk it.
Also, I don't know any better way to do it than what I have planned, I'm sure it will be fine!
 
Then you have time to do those furniture jobs you are keen to get going on.

Nice work and shed.

PS Ask beau to send you a photograph of his bench he made to finish up your shed. Its a beauty.
 
I have a window!
Despite spending most of the hours of daylight in my teenage years either in bed or behind closed curtains furiously surfing the interwebs, I'm not actually allergic to sunlight so I decided it was time to let some into my workshop.
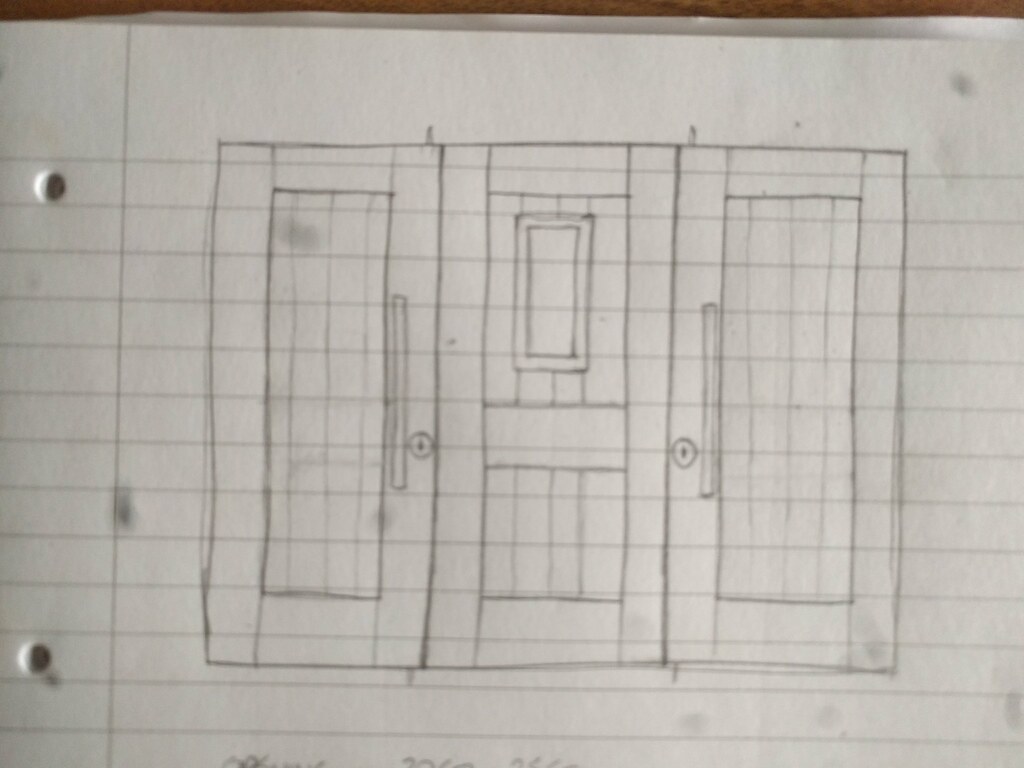
Now, if you google something to the tune of 'timber window frame section' all you get is drawings of complicated machine cut sections and over-engineered opening window frames. There is not one picture of a basic, fixed window frame section that I could find. Ok, so no pictures, then it must be so simple that nobody even *needs* a picture, right?
It was with this foolhardy frame of mind that I decided to crack on and make the thing from first principles. Well if it's true that you learn from your mistakes, then I had a university course in wooden window building this weekend, I've ended up with a window but there is a lot that I will do differently on the next one.

First things first, I knocked up a quick and dirty cross cut sled for the table saw, I did get one (several actually) with the machinery from John but it had all sorts of clever clear acrylic protective covers on meaning I couldn't load a piece of wood end-on to cut box joints.


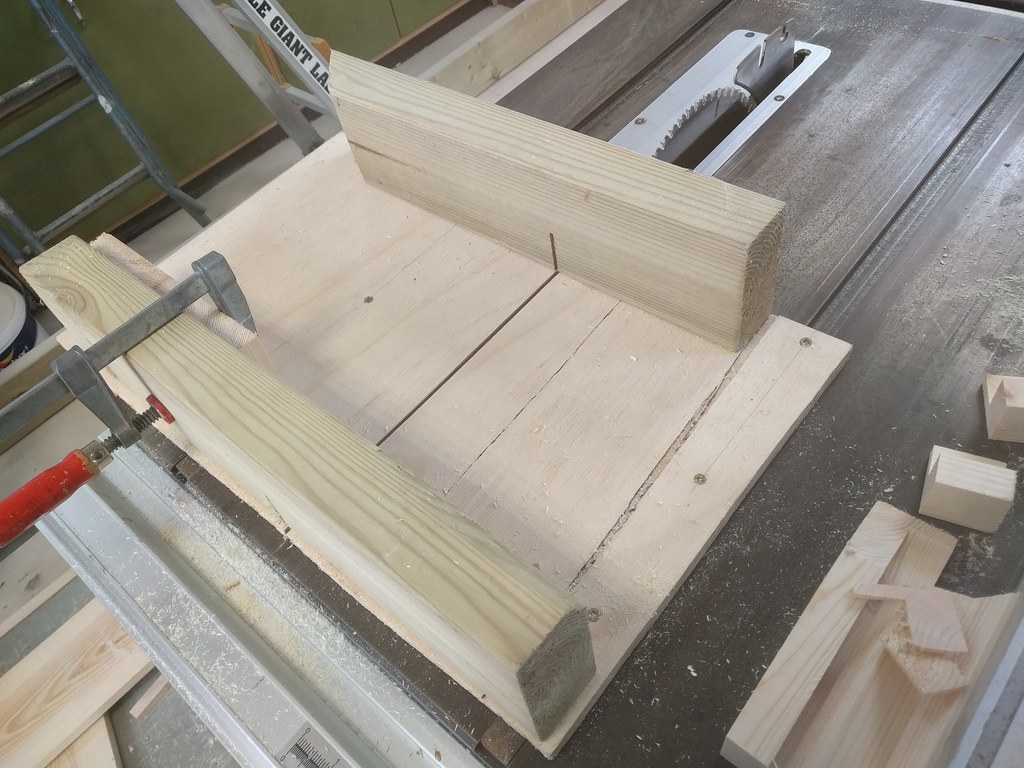
I suppose that technically this is the first proper jig that I have made. Ah well, they can only get better from here on in right?

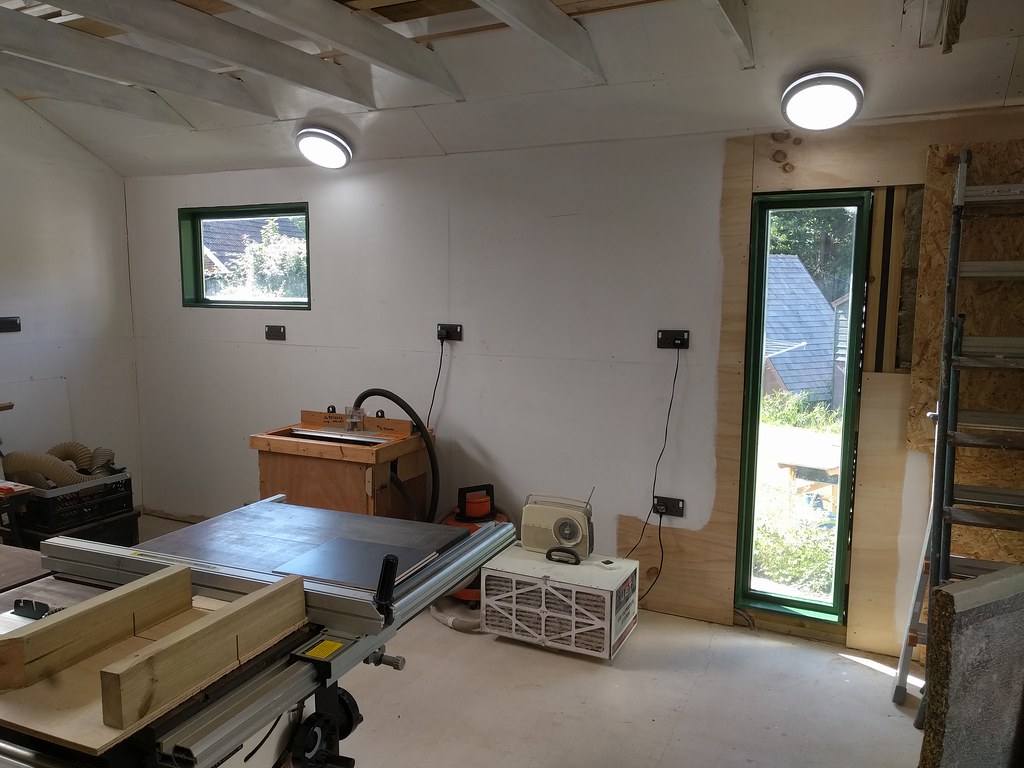
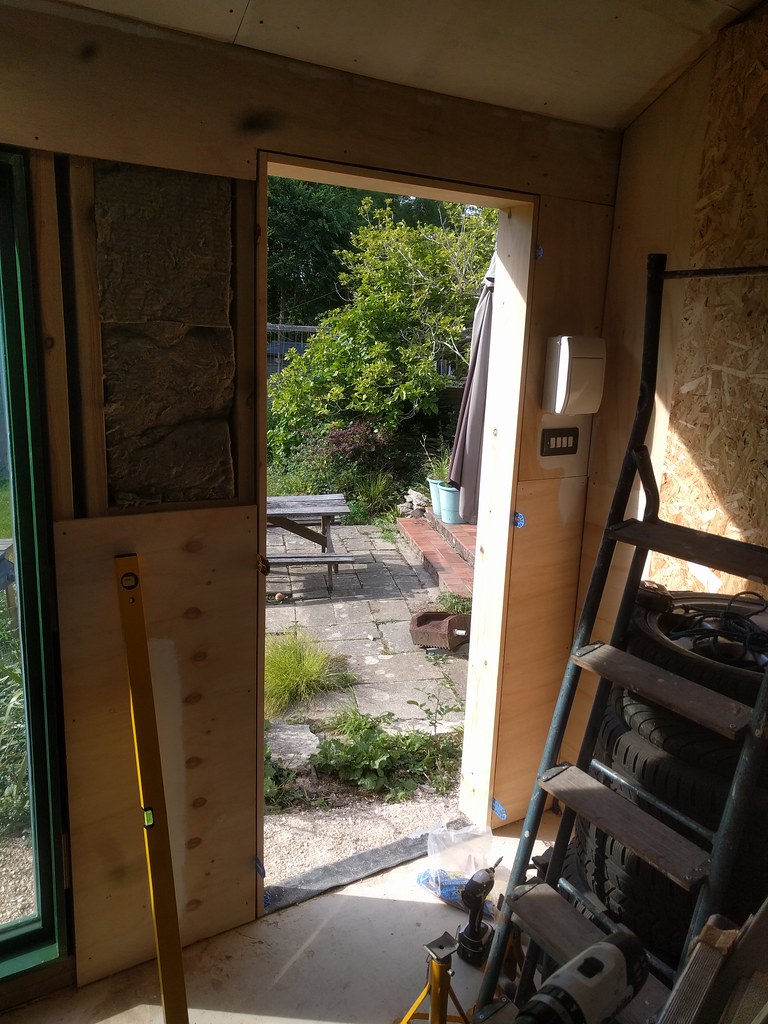
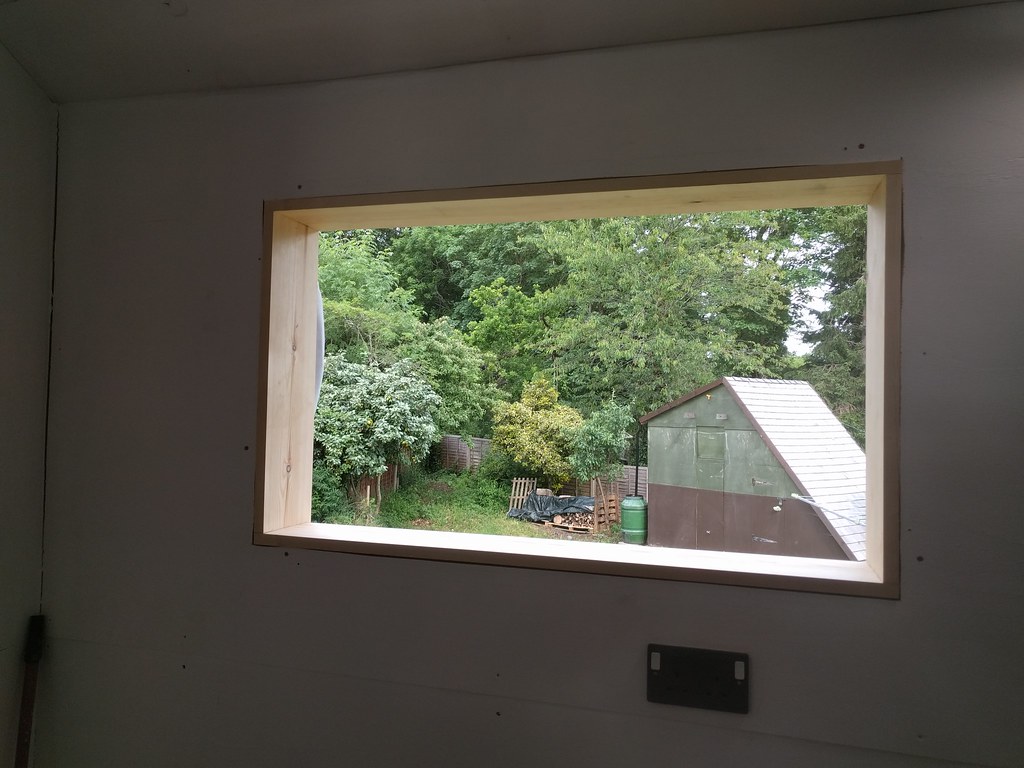
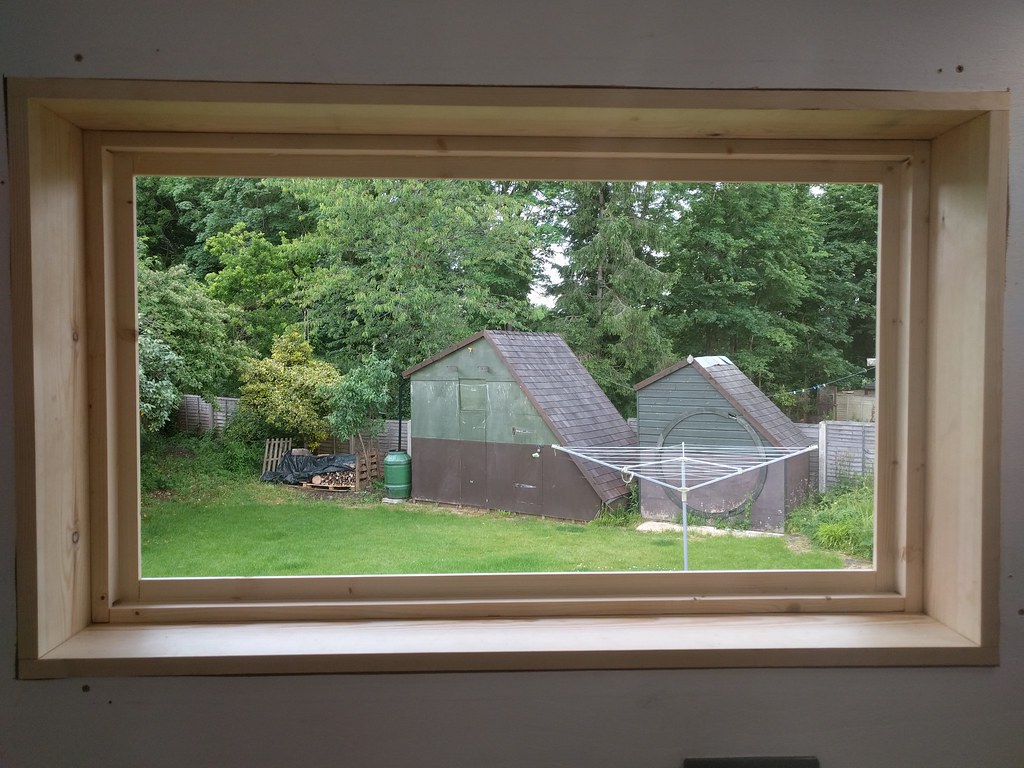
Is 'jigsaw' a verb? I hope so, because I jigsawed the internal trim panel to reveal my opening:


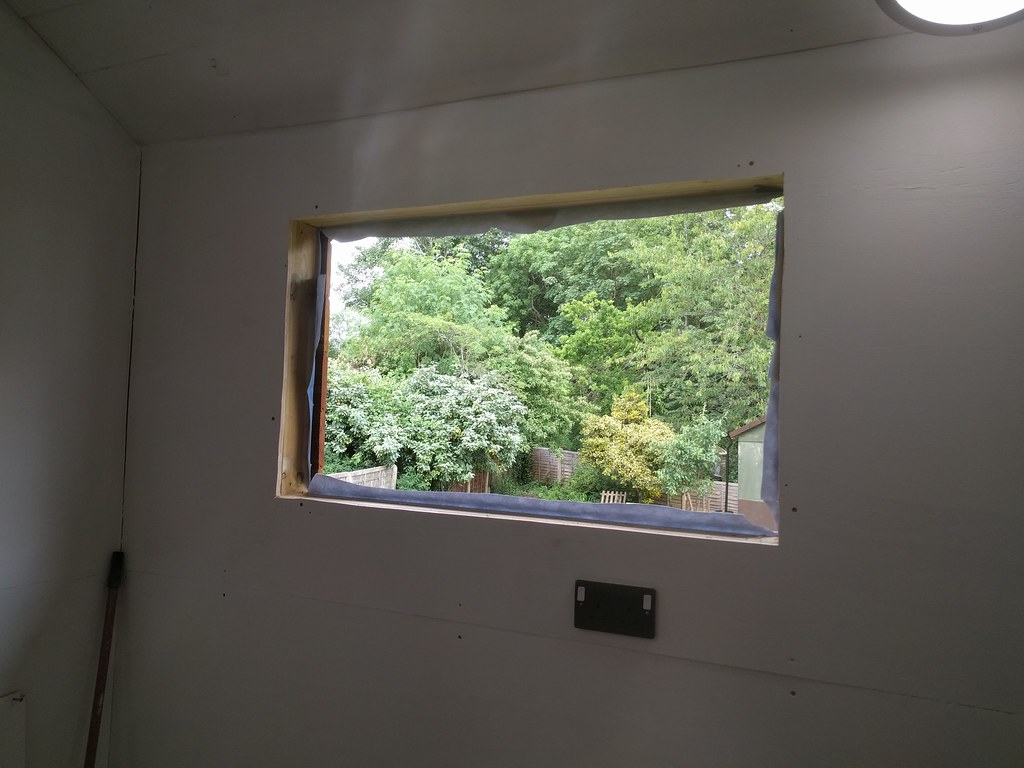
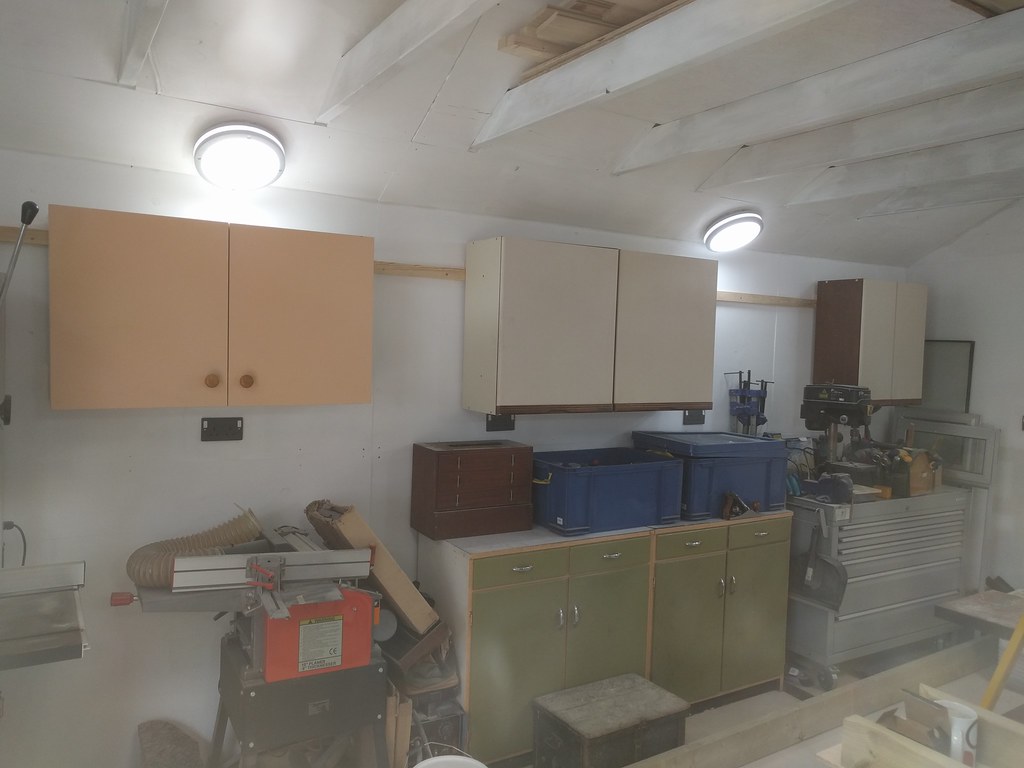
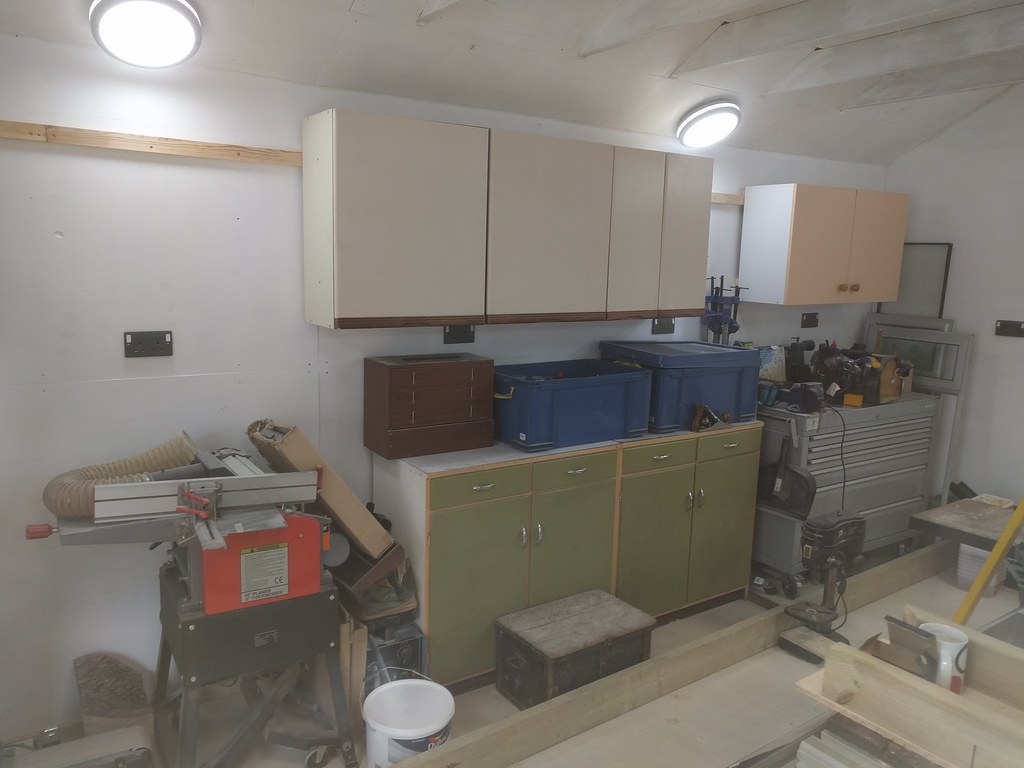
It's nice to see a bit of the outside world, until now the workshop was very well lit but completely closed off from outside, it already feels very different even with just this tiny window.

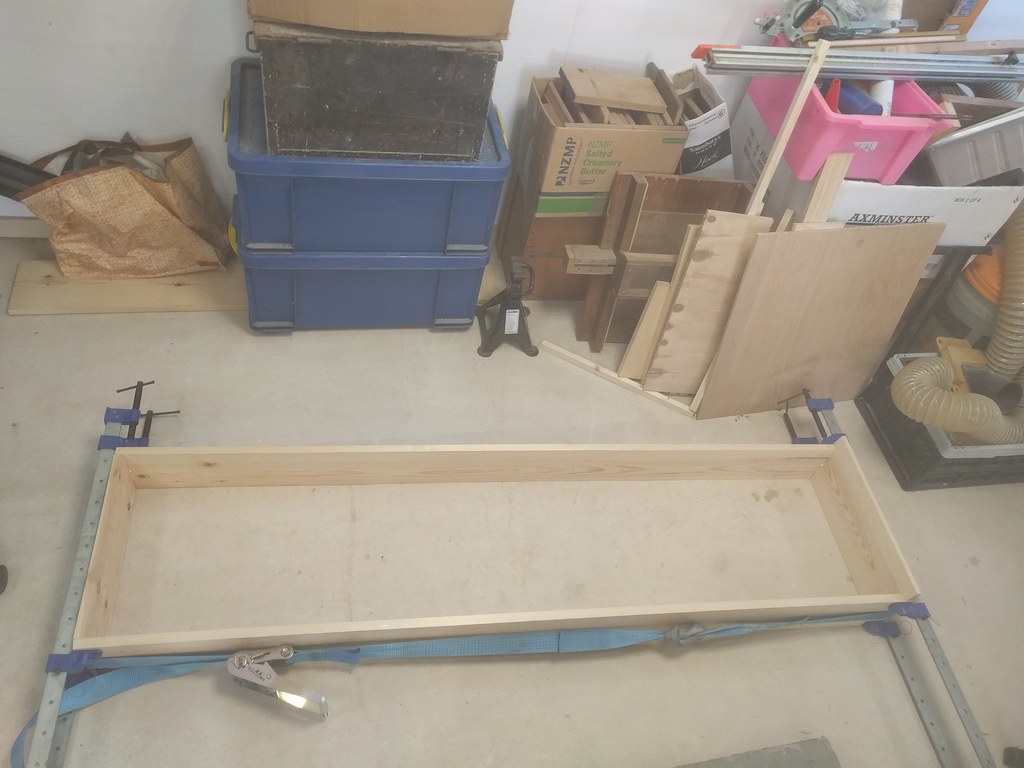
Forgive me for my sins, but I used off the shelf, sized timber for the frame, it all looked reasonably straight so I didn't even get the planer/thicknesser out once. I made a box jointed frame from 20mm planks and made the first of many errors.


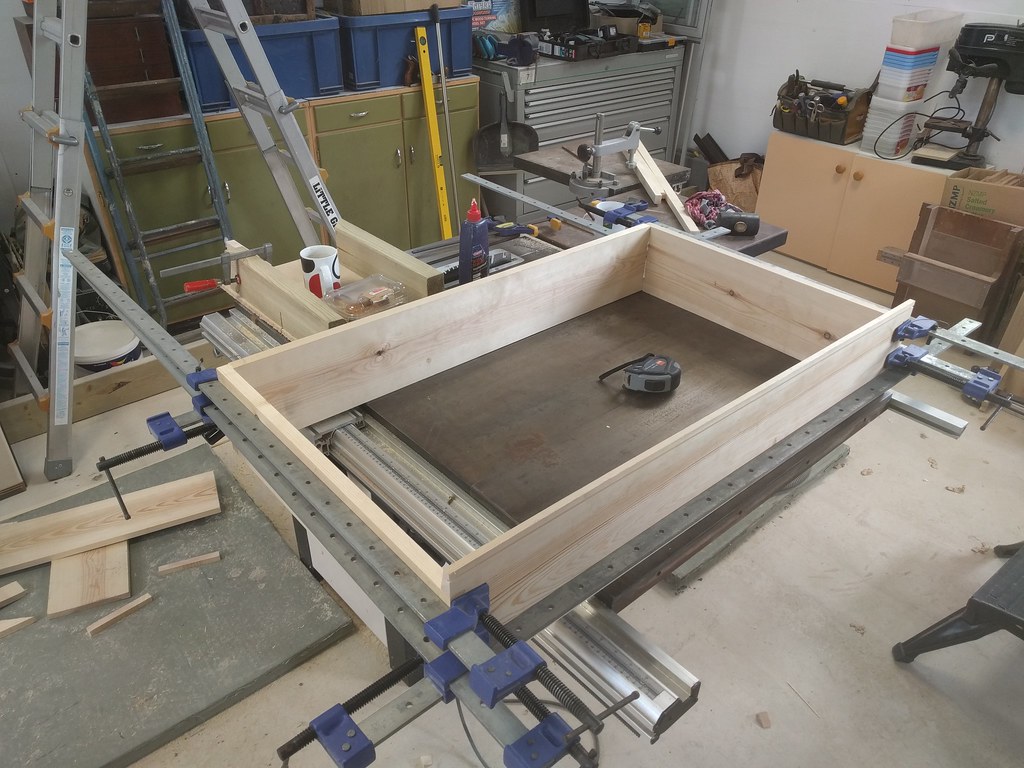
To avoid adjusting my stop on the cross cut sled too many times, I cut the joints on the top and bottom lengths from one side, and figured I could cut the joints on the left and right lengths from the other side at the same time. This would have worked had the width of the planks been exactly divisible by the width of the joints, which of course it wasn't, I missed by a couple of mm


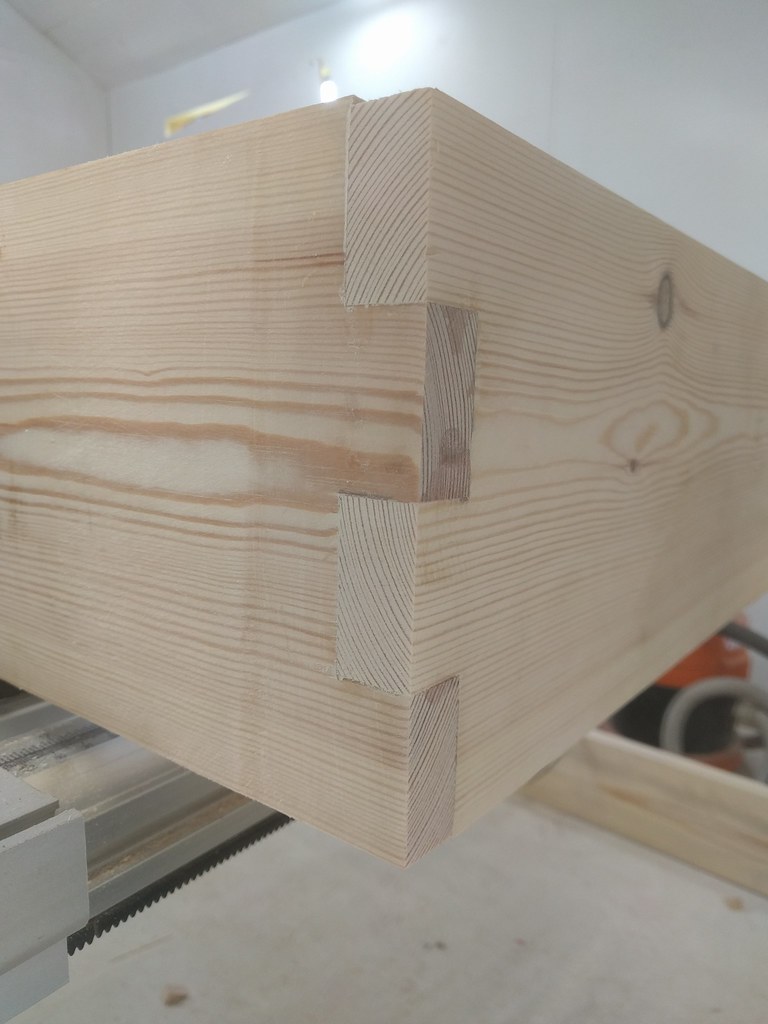
(You can see the mismatch at the top)

Then I had a bit of a moment, a little bit of a peek into the reason for hanging out in dusty man-sheds, a tiny 'oh so THATS what it's all about' moment.
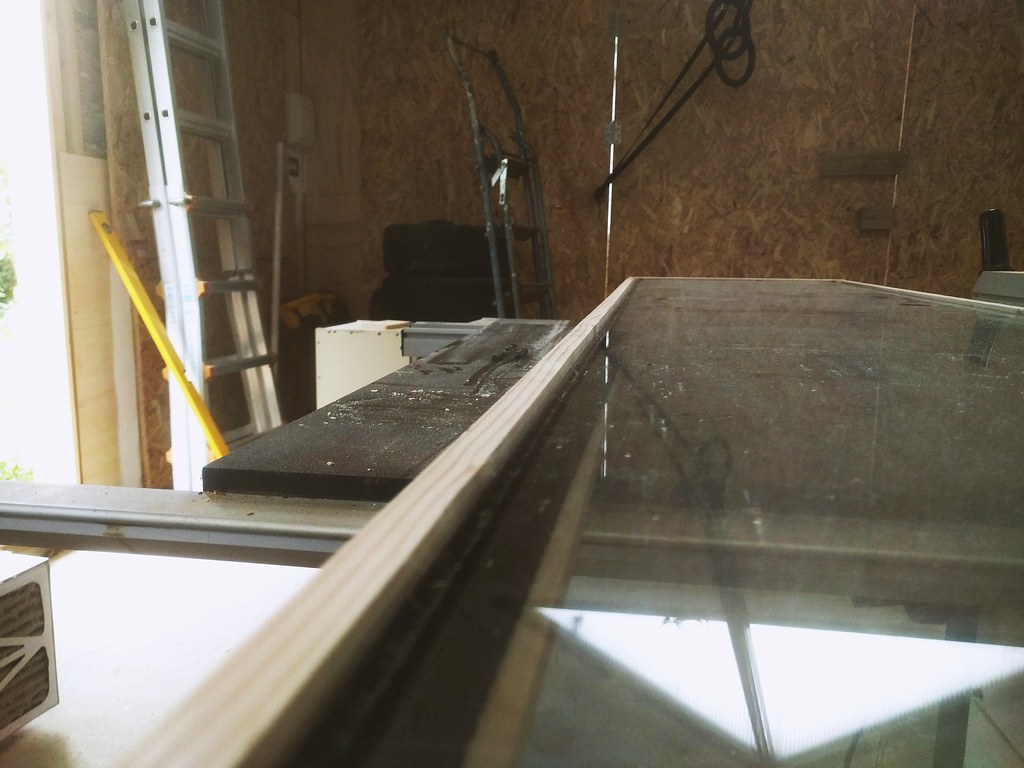
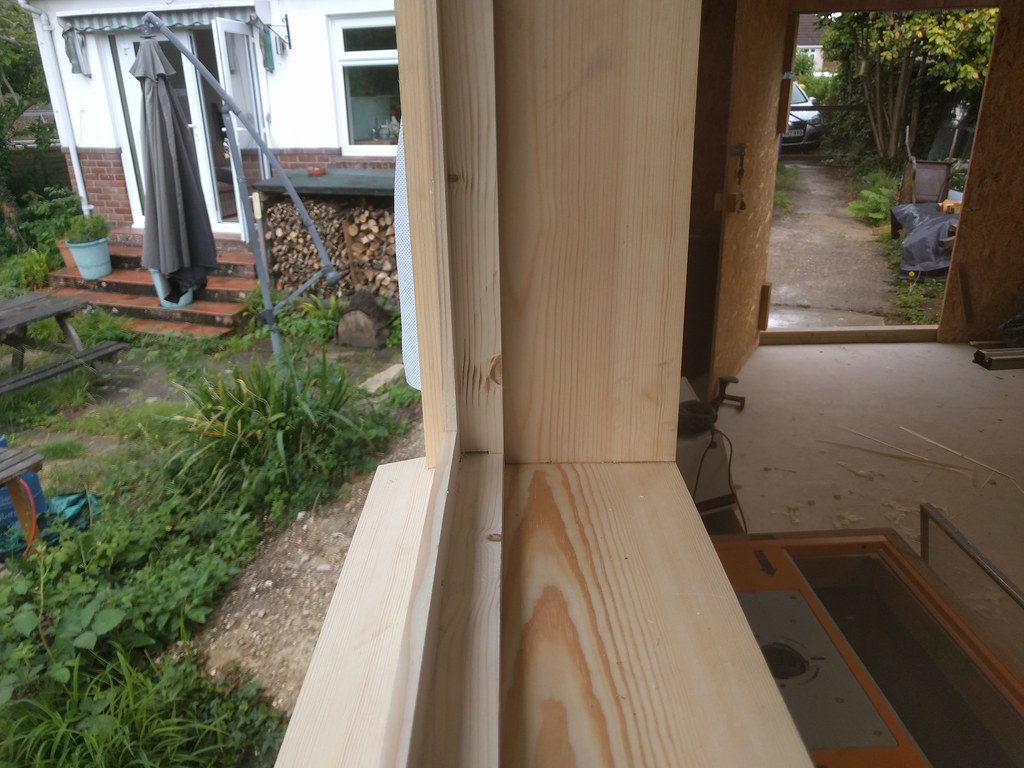
I started to plane down the two proud sides from my jointing error, and at first I got a corner like this:


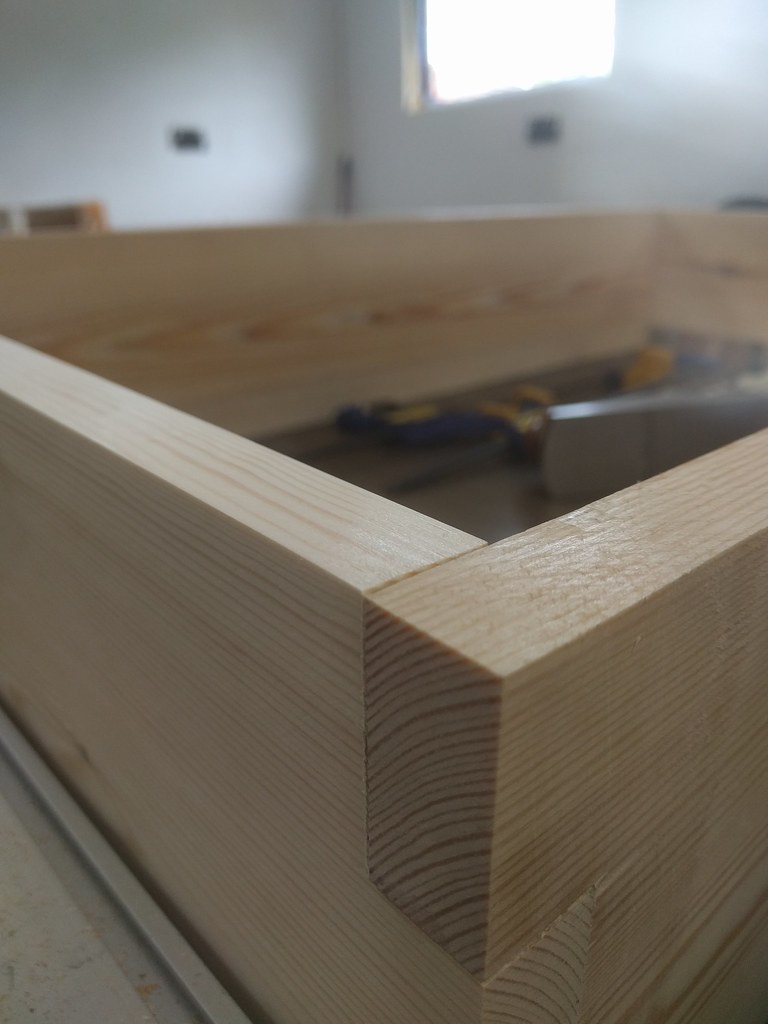
Which I thought, yeah that's ok, it'll be hidden behind trim anyway.
Then I moved onto another corner and ended up with this:


And the little lightbulb went on. It's just so... right! Nobody will ever see it once the window is finished, but I know it's there and I can be proud of it. The day I can make something where every joint looks like that is something to really aspire to. I'm definitely not at the stage of making every part the best it can be before moving on to the next, but it's something to aim for.

Anyway, back to the mistakes.


I built this frame 5mm smaller than the opening, as I understand it you make it smaller so you can set it in square and level and screw it in place then fill the gaps with your favourite gap filling material. Well 5mm is not enough. Not even close when the opening is defined by 2x4 stud work put together with a nail gun. It fit but only with persuasion. it looks great but I'm guessing it will be only a matter of time before two different materials have an argument about the relative merits of expansion and contraction and I end up with a shonky frame. I've not addressed it yet but I guess making the opening bigger might be a little easier than making the frame smaller, I'm sure it will be fine.

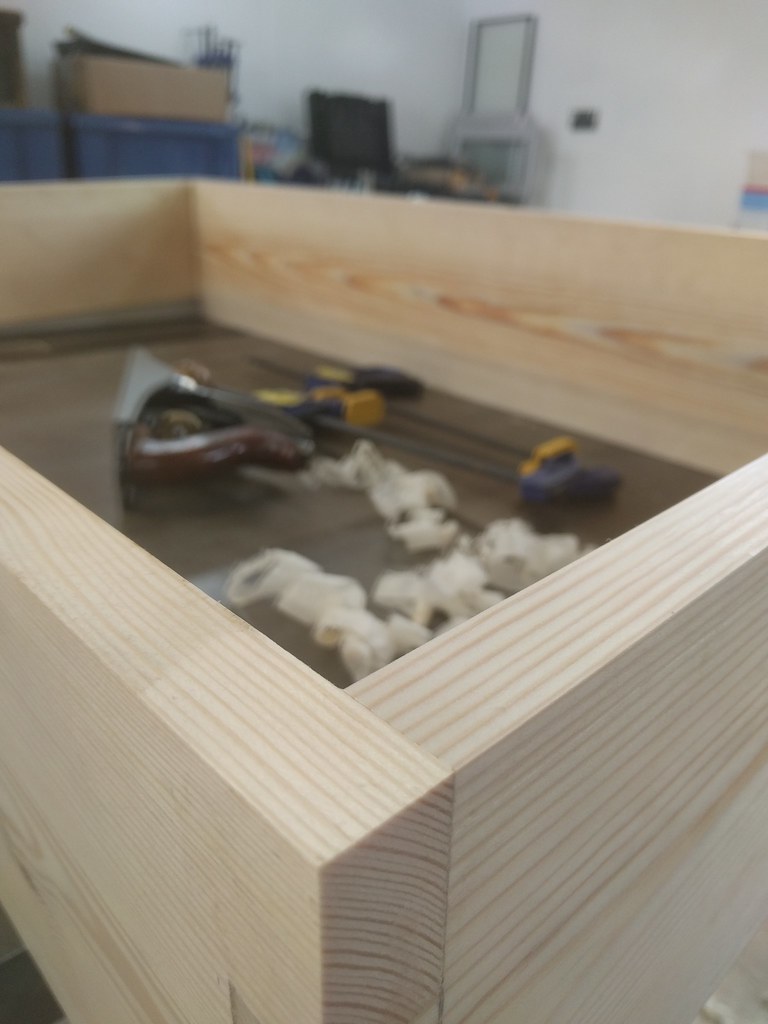
I then used 43x33 PAR to make the inner frame to hold the glass, and again I made a lot of mistakes. I did a kind of open mortice and tenon joint which ended up spreading open once I put it into the outer frame, I'm guessing these inner bits should have been measured and made along with the outer frame instead of trying to fit them in afterwards?


(You can see its a bit gappy on the outside)

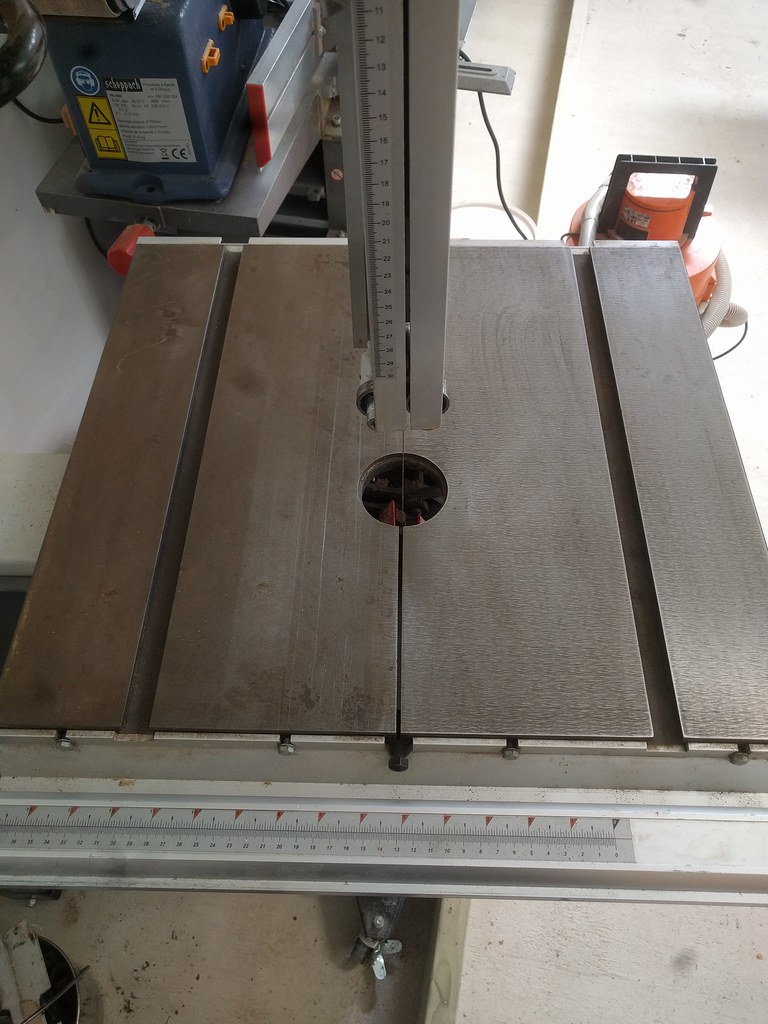
I cut the rebate for the glass on the table saw, the process went well but the result wasn't ideal, the remaining material to hold the glass is a little, er, thin, I really should have started with much larger stock.


It leaves me with tiny thin pieces to try and nail in to secure the glass too, not ideal and not super secure either. I might glue more wood front and back before painting to thicken the whole thing up.

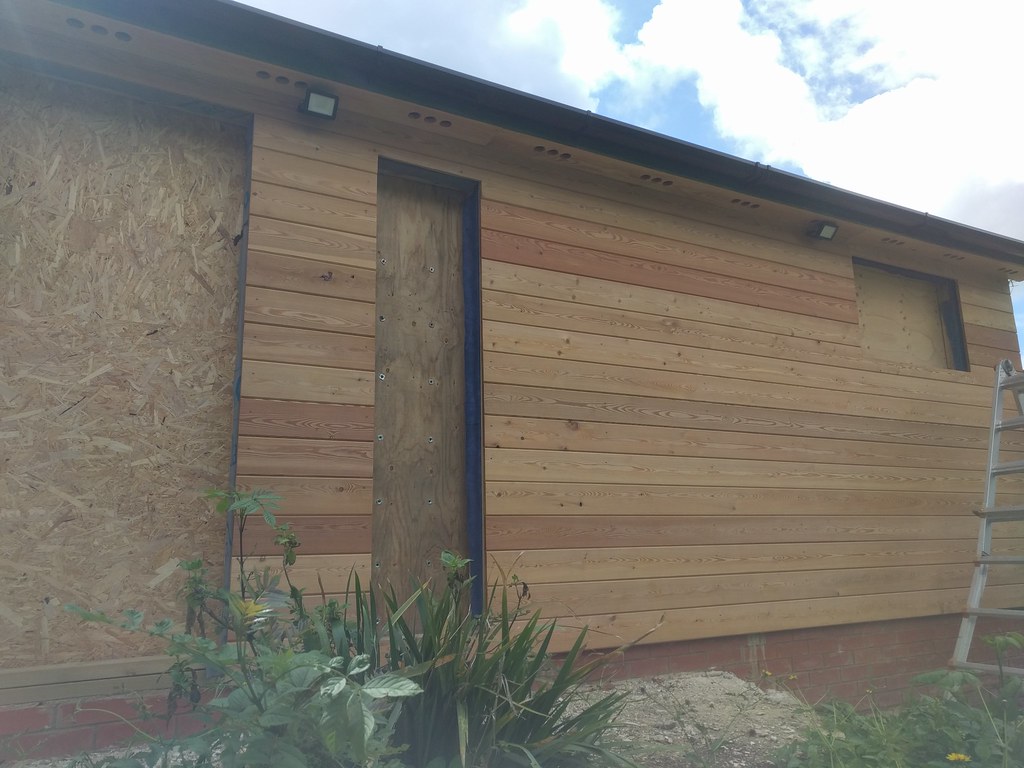
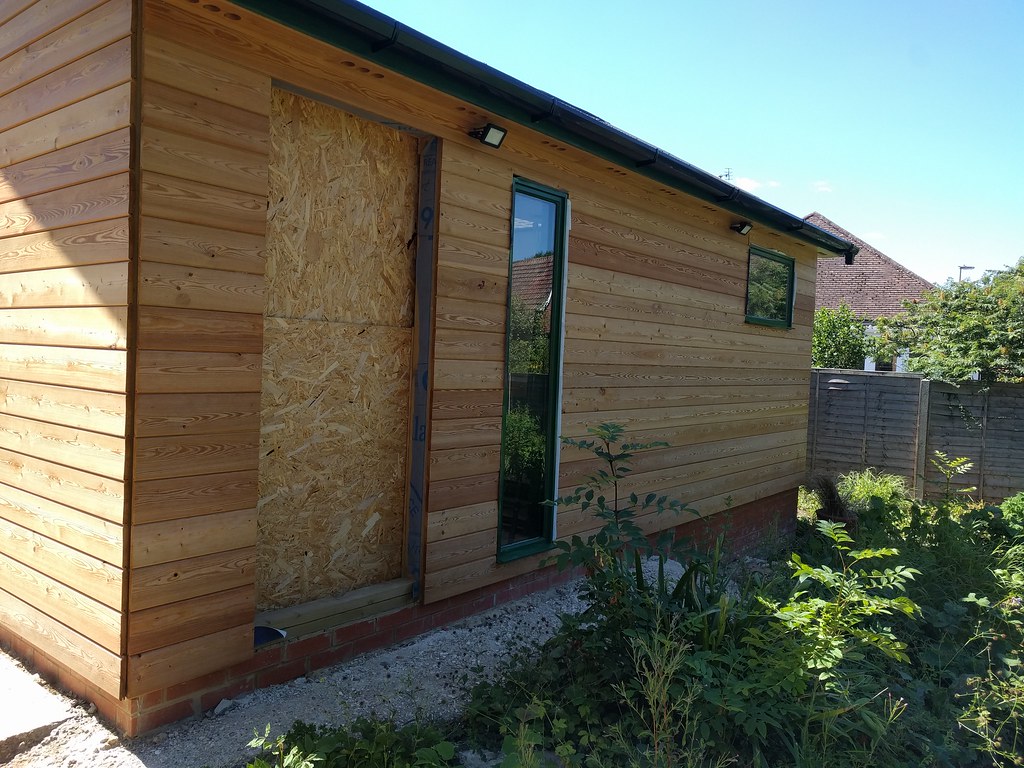
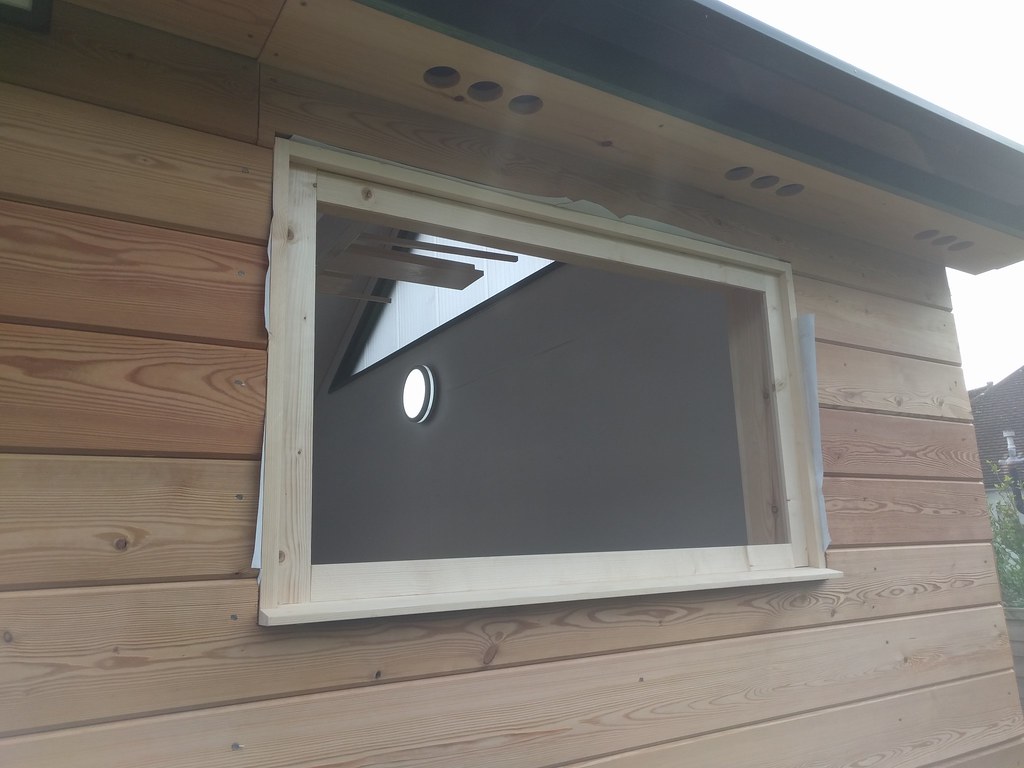
I pooped the glass in temporarily, overall I'm happy that it looks at least vaguely like a window should, it's more than I had hoped for!


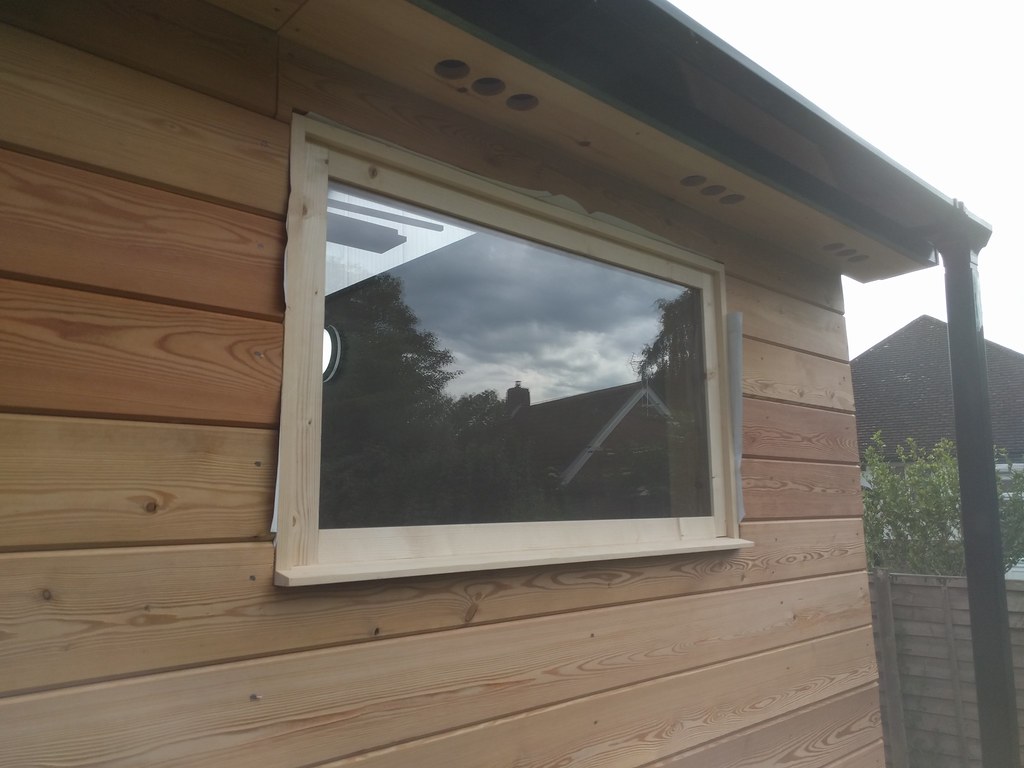
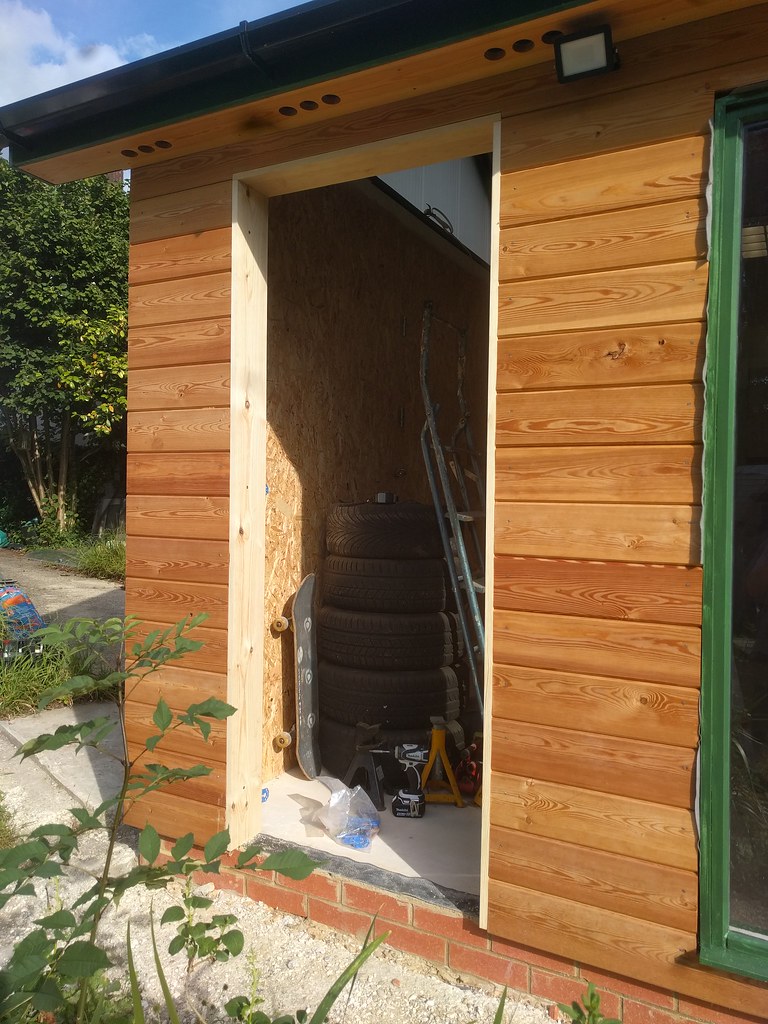
I was going to leave the outer frame proud of the cladding on the outside and leave it like that, but the total depth of my wall is such that I decided to put it flush to the cladding and then i'll put a trim piece around to hide the gap. Due to fitting the cladding before fitting window frames, the cladding didn't butt up perfectly to the frame anyway, so a trim piece will look a lot neater.

It all needs taking down and painting now, which I will wait to do until I have made the other (hopefully much improved) frame.

 
Been there, feel your pain, the devil's in the detail and that's really hard to workout until you have a go at making one. Looking good though.

F.
 
Dan it sure looks a lot tidier than mine. (when dividing wood, take into account saw kerf lost)?

I would have put both the timbers through the P/T on edge at the same time til they were equal.
 
I didn't get much done this weekend, I was too busy going out and enjoying myself, but hey, there's no rush!
I started to cut the pieces for the taller window (and even used the planer this time!) but didn't get all that far, I'm off to the wonderful West Country this coming weekend so I won't get that finished for a couple of weeks.

I did manage something though, I had a bunch of donated cupboard units kicking about the place and generally getting in the way, so I thought I should do something about mounting them and making the place look a little tidier. The intention is to tidy/repaint them eventually for a more uniform look, possibly modify them when I know exactly what I want to store in them. I'd have to get seriously bored to bother building bespoke cupboard units so this random selection will do for me for a good while.
All I did was to make a French cleat the length of the wall, screw a length on the back of the cupboards (along with spacers so they sit level front to back) and hang 'em up. I did manage to mess even this simple task up though, I had a width of plank that I wanted to rip into 4 lengths of cleat, so I enthusiastically set my table saw to 45 degrees, found the middle and ran it through. At this point I stopped and allowed logic to enter my life, if I want 4 pieces with a bevel on one edge of each, the first cut should be a vertical cut, then use an angled cut to split those two pieces. Ah well, 2 unnecessary cuts later (and a bit of kindling) I had my cleats.


Of course the best thing about cleats is they stop me from making further costly mistakes, when I realise I don't want the cupboards where I've put them, it is but the work of a moment to re-arrange!

 
Dan I think something went wrong with my first attempt at French Cleats, you need to think outside of the box with those.
 
Hey, long time no post, things have been going on, but slower than I'd like, as per usual!

I've made window frame number 2, I won't go into too much detail with this one as it's the same as the previous, just with less mistakes.
I found a method of clamping the glue up when I realised my clamps were too short:


Seemed to work ok.

The only real error I made on this frame was using the thickness measurement of the glass from the previous frame to work out the rebate I needed, when in fact this piece of glass was considerably thicker. In the end it worked out ok as I could just use a larger trim piece to hold the pane in which is actually a better solution.
Yeah not much space for a trim piece here:


Sitting it in place went a lot smoother this time


Then after a few coats of paint it looks like this:


The green paint I am using is a pain in the backside, it's really rubbish, not nice to use and doesn't cover well, but i'm kind of stuck with it now so I have to continue using it on all the frames. I thought I might use the linseed varnish on the outside trim pieces that I am still to fit, less things to paint green but should still look nice.

Didn't get much done this weekend as I need to order some timber for the side door and frame, and every time I had some time free, the shops were shut. So I decided to try and change the blade on the bandsaw, it came with a large resawing blade fitted but had a much narrower blade supplied with it. As I have the table saw and don't work much with raw wood, I couldn't see me doing much resawing on the bandsaw so I reckoned the smaller blade would get more use.
The changing of the blade was relatively issue-free, the setting up of the guides took a little longer because I was a little stumped when I found this underneath:


The left hand bearing and rear thrust bearing were stuck solid and the blade had been wearing a slot in the thrust bearing.
I've never used a bandsaw before so a bit of time with the (terrible) instructions and more time on the (infinitely more useful) youtube and I learned that this wasn't quite right!
I got it sorted eventually, the left hand bearing was stuck because it had no washer on the rear, and the rear thrust bearing was overlapping the blade way too much so the blade was crossing the inner bush.
After figuring out all the adjustment, a bit of grease, and then figuring out I could replace one of each pair of side bearings with a bush to accommodate the much thinner blade, and I was done.

The initial switch-on was a tense affair and I thought it wasn't working correctly because it sounded completely different, but that must have been the extra friction caused by the stuck lower bearings, it now runs considerably quieter and the thin blade seems to cut lovely curves!

I should really have checked all this before I first used the machine so i've no idea how long it had been running a bit off, but no harm done as it seems to be running great now.
The only puzzler for me now is the blade tension, the saw has a visual aid, a big red arrow that points at some arbitrary markings inside the case, but I have no reference of how to calibrate it or how tight I should be running, any hints? Also the machine has a big lever to quickly release tension from the top wheel, should I be releasing this between uses to avoid stretching the blade?
 
Hi. Dan, No idea about that bearing, I assume it is a back of a blade that rubs on the face of the bearing that has cut its way into the front face of the bearing.

Regards setting the tension of your new set up, use scrap wood until you are satisfied that you have tension and bearing set ups are to your satisfaction, it can be time consuming and a loss of valueable timber otherwise.

I hardly ever used the narrow blade but it did resaw OK when used many moons ago.


BTWI note that the side tables are not propped. most probably OK unless any timber placed on the outside (right) most probably will cause unbalance and topple over?
It did wobble at my end referring to tablesaw.(The sliding table might be counter balancing?)
 
Hi Dan. Excellent WIP and what a fantastic man-cave. I recommend getting Steve Maskery's DVDs on setting up told (definitely the bandsaw one at least) which should help you to get the best out of your kit. In terms of the lever...I think the idea is to release it if you are going to not use the saw fora some time to avoid flattening the tyres on the wheels. Personally, I never do, but that isn't to say I shouldn't. Also, the red arrow-thing is arbitrary and when I had an Axminster bandsaw (which I think that is), I found it too wobbly to be of much use. There is a technique I've been shown about how far you can deflect the blade under tension, but I think it probably more down to trial and error.

All the best for the rest of the build...I look forward to seeing it.
 
Dan, there is an observation window in the top compartment to see where the blade is situated on the top wheel, for larger blades centralise the blade. (equal empty rim either side) Spin the wheel by hand with cupboard open until satisfied blade is central.
For smaller blades I have no experience because I mainly used the BS for resaw jobs.

PS I never let the bearings touch as mentioned above .
 
It's nearly time to build a door, something I am both nervous and excited about but it should be a good learning experience either way.
I went into the loft to get some more wood down to build the outer frame, and good old past-me had got there already and labelled everything up!


What a helpful fella.
I made 3 sides of the frame this time unlike the windows as the threshold would be a different timber which I was going to fit afterwards. I'm getting the hang of these simple box joints, had this up in no time and it was impressively square:


I then did something potentially wasteful but I can't see a way around it, I want a bespoke profile on the threshold for both this and the the front doors, so I bought a massive bit of sapele which I will turn mostly to sawdust to get what I want. I suppose I could build the threshold in pieces to save wood but my thinking is a one-piece item would last better. Oh well, the money's spent now:


I'm a bit scared to start chopping into it to be honest...

I couldn't cut the threshold until I know how thick my doors are going to be and that depends on the result of a meeting between the planer/thicknesser and the timber that was yet to arrive, so with some time to kill I did a couple of odd jobs instead.
I gave the bandsaw table a clean, it had picked up some surface blemishes in it's previous life so I thought it would probably operate more smoothly with a, er, smoother table. Flawless logic at least.
Here's a half and half, it wasn't that bad really but it's lovely and shiny now:


I did the same for the sliding cross cut extension table on the table saw, I forgot to take a picture but that thing had had a somewhat harder life, once I got the rust off, it revealed a series of sharp gouges, all roughly parallel, as if someone had gone at the surface with a chisel. It doesn't affect it's use but i've no idea why it's ended up with gashes like that on it.

With still more time on my hands, I decided to fit the hanging rail that will carry the bifold part of my triple front doors. I checked and re-checked the length of the rail, the doors need to be very precise sizes, the middle one must be wider than the end door by half the thickness of the door, plus 23mm, plus the hinge offset to make sure the mechanism works correctly. I can't make the rail over length because it would intrude on the space above the third door, where I hope to have shoot bolts. After many repeat measurings, I went for it with a circular saw above my head, with the riving blade removed, to cut a channel for the rail. Do not try that at home kids.
Half an hour of chiselling later and I had a channel to fit the rail into. This would have been so, so easy if I had done it at the construction stage, but hey ho.


It's still proud of the frame because there is an outer wood frame to go on yet, it should sit flush when that extra frame is in place. I'm happy to announce that it's very sturdy, in fact it makes quite a good swing.

The timber for the doors has arrived now so I can get cracking, one last decision to make, I have enough t+g to make the front doors, but only if at least one of them has a lock rail bacause I have lots of short bits but not enough long bits. I've looked into buying a little bit more of the t+g but no response so far. So the question is, which of these three images do you prefer:


Hi Dan, I do not recall or recognise those scratches you mention but my thinking is that they could be caused by a jig running across the top of the table surface,, perhaps screws coming through the bottom of a sled or that mitre jig I used? Could even be the mitre INCA gauge?
Sorry about the rust, I did get condensation before my new roof on workshop you saw. But as you mention the scratches do not affect the level of table top operation. (Keep them clean and free from build up?)
 

Latest posts

Back
Top