Dave's Wooden Stuff

UKworkshop.co.uk

Help Support UKworkshop.co.uk:

This site may earn a commission from merchant affiliate links, including eBay, Amazon, and others.
..... and as well as being 3 times over projected cost, takes 4 times longer than planned, AND the aeroplane weighs double the original estimates!!!!!

=D>

Lovely mate, but as a matter of (serious) interest, did you rough the fuselage blank out first with a band saw or scroll saw, or was it all by hand?

AES
 
Thanks chaps :)

AES":2tz11sw2 said:
did you rough the fuselage blank out first with a band saw or scroll saw, or was it all by hand?

Roughed out on a bandsaw, as per the photo. Then smoothed with a plane, nose shaped with a rasp and tail shaped with a spokeshave. Finally all edges were softened with a bit of sandpaper.

Incidentally, my treadle lathe is in bits so I had make the round bits for the rotor spindles on SWMBO's Coronet. Did you know they put electric motors on wood lathes now? What a novelty! It might just catch on.....
 
AES":260fo7bd said:
..... and as well as being 3 times over projected cost, takes 4 times longer than planned, AND the aeroplane weighs double the original estimates
AES

Did not happen as there was no meddling civil servants involved continually altering the spec.
 
@lurker:

QUOTE: Did not happen as there was no meddling civil servants involved continually altering the spec. UNQUOTE:

Not quite true mate. Not as bad as some of the later projects ("Mother Riley's Cardboard Aircraft", or Nimrod anyone?), but the Seaking was originally a Sikorsky, USA design (the S61), and was originally built for UK under licence by Westland in Yeovil. By all accounts (I wasn't involved in any way) it wasn't too bad or muddled a project compared to many, but as time went on and more and more "Brit Mil" wants were built in there was some civil service AND MOD meddling - with the inevitable results.

For what it was/is though, and with the original design getting on for, what, 50 years old now? (I can't be bothered to look it up, sorry) it's an excellent machine and has saved many lives around the coasts of UK, never mind all the military lives saved and other "scrapes" got out of in The Falklands, etc, etc, etc.

And Dave's built a very nice model of it too (why can't we have 5 rotor blades Dave? :D )

AES

(P.S. my original was only a "funny" - ALL new aircraft are overweight, over budget, and late)!
 
I like the helicopter, looks really good !!! What brand yellow paint did you use ? I tried some yellow oil based dulux on white primer/undercoat and it took 4 coats to cover-even then it wasn't 100%

Coley
 
Thanks for the kind words, everyone (including the comments about going over-schedule, which it very nearly did....... :lol: )

Out of interest, are the ASR Sea Kings still going now that it's been privatised?

ColeyS1":1kczjwfc said:
I like the helicopter, looks really good !!! What brand yellow paint did you use ? I tried some yellow oil based dulux on white primer/undercoat and it took 4 coats to cover-even then it wasn't 100%

Coley

Thanks Coley :D The paint is Humbrol Acrylic, as usually associated with plastic kits. I was sceptical at first but I'm impressed with the finish. I did give it three coats just to make sure
 
In this post-brexit, pre-Trump world, imports to the UK have become a bit chaotic. Left with no alternative, I have decided to secure my own imports with a new venture into shipping:

F78F3D04-A9E4-496C-9E7E-BB05092E5A52.jpg


BB1C4F30-ECFB-463C-870C-F16CDF3A025E.jpg


C07F4C16-A27B-410B-8563-ECEB846E02DD.jpg


D188DE6F-3CE7-425C-BEC4-70201EF2BF17.jpg


F9A5B4B1-C606-4D45-857D-0E537ED4274B.jpg


FB60C58A-5257-42F7-A9ED-447003FC9FFA.jpg


109E8694-31F9-4E83-AF1B-D17682D56D4C.jpg


EB3214ED-6A0B-45FD-8B23-143EA6D635DD.jpg
 
Very nice work DTR. Some little sailor will be very pleased to find that in his stocking tomorrow morning.

=D>

As a very-much newbie, I'm still going up a steep learning curve, so I have 2 questions if you don't mind:

Before joining this Forum I'd never even seen a router plane before, so can I ask what are the advantages & benefits please (apart from the obvious ones of much less/nil noise, and a smaller distribution of the shavings & dust around the shop)? I have a power router, but, for example, could I use a hand router to round off the edges of solid pieces of toys in a nice regular fashion, aside from the obvious hand router use for "milling" out slots?

Did you use acrylics for the paint finish? Spray or brush? I've had quite a lot of problems with getting a smooth and even colour paint coating and have found the % age of water used to thin the paint (artists acrylics in tube in my case) very critical - too thin and it hardly covers in less that 5 or 6 coats and produces runs at the drop of a hat, just a bit too thick and it gets lumpy. (Within the next few days I'll be posting a little tractor & trailer combo I made for a Xmas pressie and sprayed with a Badger 350 airbrush and you'll see just what I mean).

Thanks for any tips in advance, meantime happy Christmas to you and yours.

AES
 
Lovely job again. Trivial cost of materials + proper woodworking (accurate cutting, deep ripping, curves) = seasonal happiness! :ho2
 
You and the missus are both very gifted designers, it's really hard to produce children's products that have charm, play-value, and integrity; yet you two seem to get it right time after time.

=D>
 
Thank you chaps, you are far too kind :oops: Hope everyone had a good Christmas :ho2

AES":3c30tnuo said:
Before joining this Forum I'd never even seen a router plane before, so can I ask what are the advantages & benefits please (apart from the obvious ones of much less/nil noise, and a smaller distribution of the shavings & dust around the shop)? I have a power router, but, for example, could I use a hand router to round off the edges of solid pieces of toys in a nice regular fashion, aside from the obvious hand router use for "milling" out slots?

I don't feel anywhere near qualified to answer that, but I'll have a go. For me the advantages of hand tools in general are, like you say, far less noise and mess. And to a fair degree, the space savings too. But in the right hands an electric router is a far more versatile tool than a router plane (I don't have the right hands..... or an electric router!). I only use my router plane for levelling the bottoms of roughly sawn or chopped housings (and sometimes tenon cheeks). For rounding outside edges I use either a hand plane or a spokeshave, followed by sandpaper.

AES":3c30tnuo said:
Did you use acrylics for the paint finish? Spray or brush? I've had quite a lot of problems with getting a smooth and even colour paint coating and have found the % age of water used to thin the paint (artists acrylics in tube in my case) very critical - too thin and it hardly covers in less that 5 or 6 coats and produces runs at the drop of a hat, just a bit too thick and it gets lumpy. (Within the next few days I'll be posting a little tractor & trailer combo I made for a Xmas pressie and sprayed with a Badger 350 airbrush and you'll see just what I mean).

I cheated by using pre-mixed Humbrol acrylics, brushed on. I find that the results are a bit of a mixed bag; the first coat always looks naff but it looks better by the third coat. A spray would be better. I've suggested to Doris that we get a compressor, so we'll see.......

I look forward to seeing your latest creation; my customer's favourite word is tractor!! :mrgreen:
 
Thanks a lot for those comments DTR, very useful.

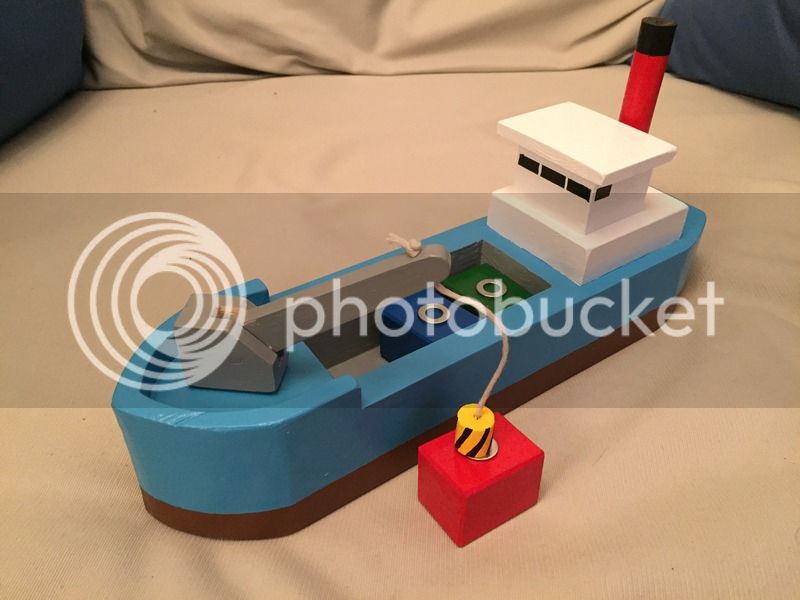
Not having been in UK for yonks I didn't know that Humbrol make acrylics too. Their enamels are (were) very good but may not be child proof (the customer for the tractor - which I'll post soon, promise) has just turned 2 so I didn't want to take any chances with someone else's little bloke poisoning himself!

If you do go to a compressor may I suggest you get one of the "silent-er" ones (diaphragm ideally), and also, one with an on/off switch (would you believe on mine you have to pull the plug out of the socket every time! - we don't have switched sockets here).

Also, re an airbrush, the cheapo Humbrol/Airfix air brushes that used to be available in UK are quite good within limits (although they're known as "droplet distributors" by the experts). I have one which, PROVIDED you get the thinning down right - trial and error, are quite good enough for an overall coat of single colour or clear acrylic varnish after colouring. But if you can stretch to it, I'd recommend a single action outside mix brush as an ideal cost/utility compromise between the real top end artists (dual action/internal mix) brushes and the above droplet distributor. I have a Badger 350 which is excellent, but others such as Paasche and DeVilbiss make them too and I believe are equally good. I read somewhere that there's some new Japanese stuff available too.

Not sure about price, but I think my Badger costs about a hundred quid these days. If you use it enough, well worth the investment IMO.

Lastly, make sure the hose from the compressor to the brush is the bigger-bore jobbie, flexible plastic/neoprene inside and cotton braided outside, and with a moisture trap. And ideally but not essential, with a pressure regulator valve on the compressor too. In my experience, unless you're spraying really big toys/models, a reservoir tank is just not necessary.

Googling around some of the specialist model maker Forums and kit suppliers will soon put you right.

Thanks again for your comments and I hope the above is of some help/interest.

Happy New Year

AES
 
For DTR and anyone else who may be interested, the tractor referred to above now appears under the thread heading "Tractor and Trailer" in the Scroll Saws section.

AES
 
Wow, lots of good info there. It's definitely something I'll have to look into in the new year. Thanks AES! :D
 
At the weekend my parents' towel rail inexplicably broke off the wall for no reason*. The rail itself survived but the brackets are knackered, so I'm making some new ones from an oak offcut.

509ECF35-B55C-408B-AEF0-7ECE50C2220A.jpg


Laying out the design:

30D3EB8A-E44E-452E-8D6C-64C5F03D13B3.jpg


Boring holes for the rail with the cordless drill:

3832F39A-8397-4467-B55D-7891F8890F7C.jpg


An angry man wearing a flat-cap:

1DEE9AA4-85D2-4697-A6E4-00C732EA1482.jpg


Wasting out:

9482021F-959C-4524-BE97-CA2F9892C599.jpg


F069AE21-F746-4DA6-BCFE-B24A617F7288.jpg


Chopping the waste with a gouge:

161130E6-1066-48C6-AA10-62A9BC7B6705.jpg


I had to borrow SWMBO's carving vice for the next bit. Curves smoothed then chamfers added with a spokeshave, courtesy of BM101 (thanks again):

85FAC45D-43AC-4E5E-8F0A-146BADC42179.jpg


To get the screw holes all in the same place, I used this stunningly sophisticated jig:

6250F427-39CA-42F7-977F-C8E1B64BF36C.jpg


And now just awaiting a coat of oil:

CC8971DC-7CD4-49D6-A20C-6B5B48B1FD52.jpg


*I'll try to make this one a bit more 8-year-old proof. Just as a precaution ;)
 
Back
Top