2012 January Challenge ( Post Pictures HERE)

UKworkshop.co.uk

Help Support UKworkshop.co.uk:

This site may earn a commission from merchant affiliate links, including eBay, Amazon, and others.
Status
Not open for further replies.
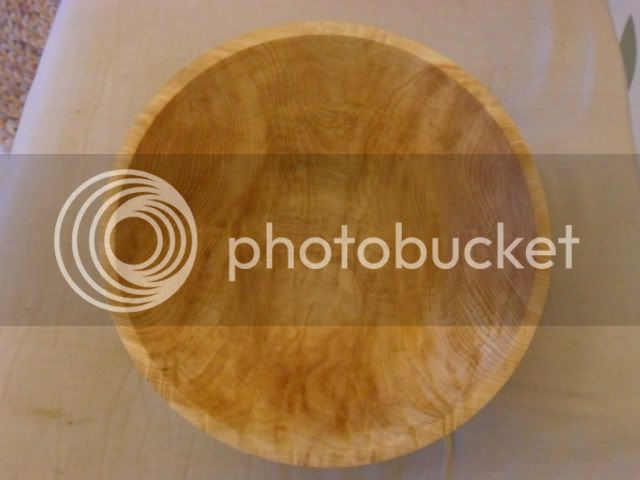
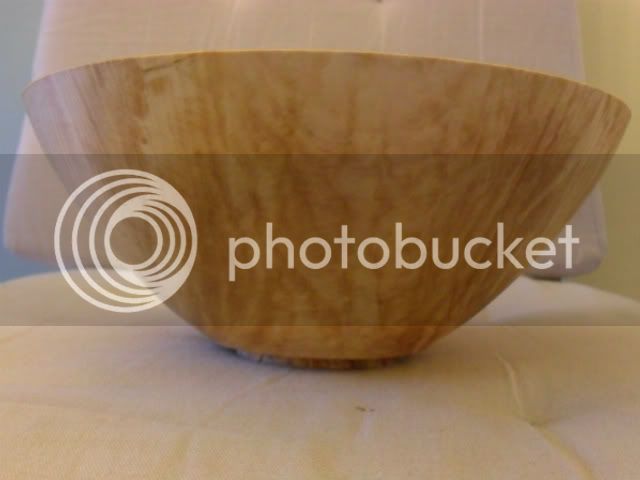
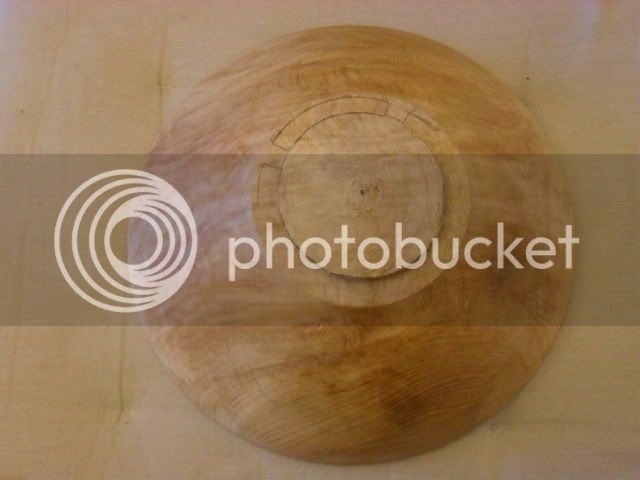
My bowl was turned from a beech blank using a faceplate ring to shape the foot and outside shape. I then turned it around and hollowed it out.

I used a bowl gouge for almost all but I used a parting tool to create the foots inside lip.

The bowls dimensions are: 6½ inch diameter, 1½ inch deep and just over 1¾ inch tall.

The bowl was finished by sanding up to 600 and then applying chestnut friction polish.
 

Attachments

  • 13278236118403.jpg
    13278236118403.jpg
    208.3 KB · Views: 2,530
  • 13278236038422.jpg
    13278236038422.jpg
    188.3 KB · Views: 2,530
  • 13278235952591.jpg
    13278235952591.jpg
    215.3 KB · Views: 2,530
Hi All,
Here's my first ever bowl and my first ever entry - so once the judging is completed, I would really appreciate some C&C's !

Horse chestnut turned green with my 3/8" bowl gouge on a screw-chuck then reversed chucked for hollowing. Air-dried till I could wait no longer. Back on chuck using pencil markings, (Still visible on photos) and trued up, shaped and completed using same gouge as it's all I've got .

Outside had to be 'completed' on same chucking, as I have not yet braved making extensions for the new Cole Jaws.

Sanded with abranet 150 down to 500, then couple of coats of teak oil.

Diameter 210mm. Height 70mm. Thickness 7mm.

2012-01-top.jpg


2012-01-side.jpg


2012-01-bottom.jpg


Please advise whether I should remove the foot, reduce it, or just clean it up.
 
Here's my January entry. It was a blank I bought a while ago when I had my smaller lathe... before I figured out the max diameter and couldn't use it, so thought I'ld turn it for this months challenge.

It is Yew, It measure 150mm diameter and 70mm deep. So still not huge but big enough.
It is my most challenging piece that I have turned to date.

It has a large crack in the side, a patch of Bur and a large rotten patch as well! I took my time, was careful and It paid off.
I didn't go for a complex design as I just couldn't bring my self to take too much of the wood off.

I started it on a faceplate for the outside and the recess (recess again because I could waste the wood on a spigot to turn off) tried filling the crack but it didn't work (think because I used medium ca as had no thin and it didn't soak in)
Then put it on my K10 chuck and hollowed.
I used a mixture of a superflute bowl gauge with a standard grind, a small spindle gauge, and a sorby small multi head scraper. A variety due to all the different obstacles in this piece of wood!
Sanded with JFlex from 280-400, a coat of sanding sealer, and 2 coats of friction polish
 

Attachments

  • IMG_0054.JPG
    IMG_0054.JPG
    86 KB · Views: 2,487
  • IMG_0057.JPG
    IMG_0057.JPG
    80.4 KB · Views: 2,487
  • IMG_0058.JPG
    IMG_0058.JPG
    75.8 KB · Views: 2,487
Here's my entry. It was originally going to be a test piece for something similar but I'm pleased with how it turned out and didn't have time to explore further.

Wood: unknown
Finish: Chestnut finishing oil buffed with a bristle brush after 3 weeks for the oil to cure.
Size: 18cm diameter, height 4.5cm

R0012854.jpg

R0012856-Edit.jpg

R0012858.jpg
 

Attachments

  • R0012854.jpg
    R0012854.jpg
    73.5 KB · Views: 2,477
  • R0012856-Edit.jpg
    R0012856-Edit.jpg
    113.4 KB · Views: 2,477
  • R0012858.jpg
    R0012858.jpg
    138.8 KB · Views: 2,477
size 180mm x 60mm, wall thickness 3mm

wood London Plane - seemed obvious from the spec!

forstner to the upper face to mount, lower turned but foot left as a spigot - centre marked

reversed to spigot

jamb chuck turned from profile guage, non-slip sheet and tail stock to spigot; foot turned and last bit finished by hand

tools - 5/8ths bowl gouge & large skew...

finish - power sanded 240-600, cellulose SS, WW22 using lathe mounted mops

6783131613_b839e07e78_z.jpg

6783132665_6846b1c61e_z.jpg

6783132217_5e84b29460_z.jpg
 
My bowl is 7 1/2 inches in diameter and 6 inches tall and made from Elm.

Mostly done with my 3/8 bowl gouge for the undercut i used my undercutting scraper. It was quite a large piece of elm so it was held by my face plate and centre till i got it round and not vibrating all over the place.

The intention was to have it looking like a punch bowl hence the largish foot, 2 coatis of sanding sealer then i used my 1/4 gouge to get a final cut this let me start at 150 grit continuing to 400 then 5 coats Boiled Linseed Oil using 0000 steel wool in between each coat. Took me around 2 days to do the finish as the oil just seemed to evaporate in the the wood even after the sanding sealer, maybe the sanding still took a lot of it back off.
 

Attachments

  • Image00003.jpg
    Image00003.jpg
    85.8 KB · Views: 2,462
  • Image00002.jpg
    Image00002.jpg
    68.4 KB · Views: 2,462
  • Image00001.jpg
    Image00001.jpg
    64.2 KB · Views: 2,462
My entry for this month is made from Beech and is approx 6 inches diameter and 2.5 inches deep.

I mounthed the blank using a screwchuck and did the outside profile (using 3/8 bowl gouge) and recess on the bottom (using the gouge and parting tool).
Remounted using my 4 jaw chuck, drilled a central hole to the depth I wanted the bowl to be and then removed and shaped the inside of the bowl (using the gouge).

Sanded through the grits 120, 180, 240, 320 and then sealed using two coats of malamine laquer followed by a very brief buff with burnishing cream so as to not end up too glossy.

Good luck to everyone

Andy
 

Attachments

  • jan-bowl-bottom.gif
    jan-bowl-bottom.gif
    223.4 KB · Views: 2,444
  • jan-bowl-side.jpg
    jan-bowl-side.jpg
    233.8 KB · Views: 2,444
  • jan-bowl-top.jpg
    jan-bowl-top.jpg
    237.3 KB · Views: 2,444
Here's my bid;
Brazillian Mahogony, turned between centres to form spigot then held in chuck. Shaped with spindle gouge and hollowed with bowl gouge and undercut with Sorby Hollowmaster. Foot turned concave, bead detail formed with 1/2" skew.

Outside finished with 50% ss followed by neat ss, inside with melamine laquer for fluids requirement, then Microcrystalline x2.

P1080199 - Copyk.jpg

P1080196 - Copyk.jpg

P1080192 - Copyk.jpg
 

Attachments

  • P1080192 - Copyk.jpg
    P1080192 - Copyk.jpg
    185.4 KB · Views: 2,444
  • P1080196 - Copyk.jpg
    P1080196 - Copyk.jpg
    177.6 KB · Views: 2,444
  • P1080199 - Copyk.jpg
    P1080199 - Copyk.jpg
    189.3 KB · Views: 2,444
Status
Not open for further replies.

Latest posts

Back
Top