kirkpoore1
Established Member
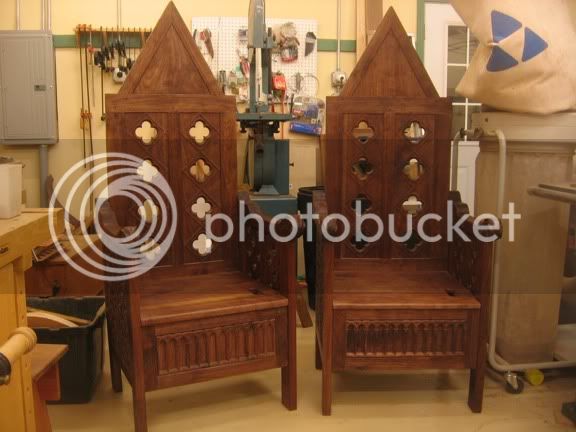
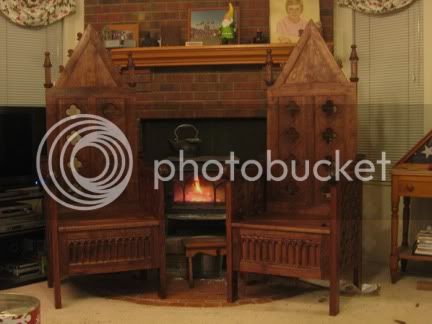
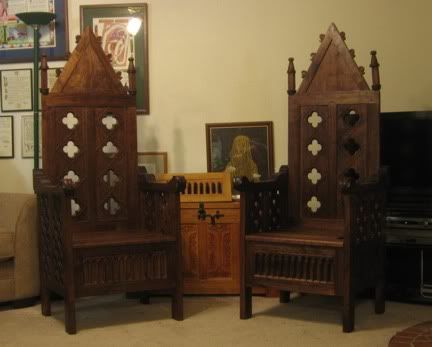
Since I’ve been hanging around for a few weeks, I guess it’s time to post an example of the stuff I make. I belong to a medieval recreation group (or re-creation, depending on how hard core you are), and as a result most of my projects are medieval furniture. Usually they’re portable, since most people want something they can take to a weekend event. So now I’m working on a pair of portable thrones for a group covering the southeast US. These are based on medieval box chairs, with 14th century ornamentation. The wood is black walnut, with panel-frame construction and finished with Tried and True Varnish Oil. Each throne will have 5 pieces, with all but the seat joined by bed rail hardware to allow disassembly for transport. I actually started working on these back in October, and am about half finished.
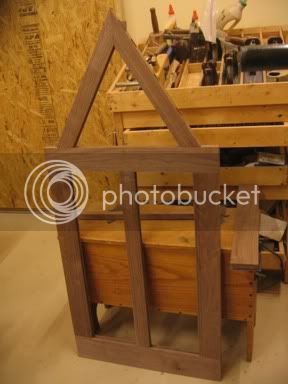
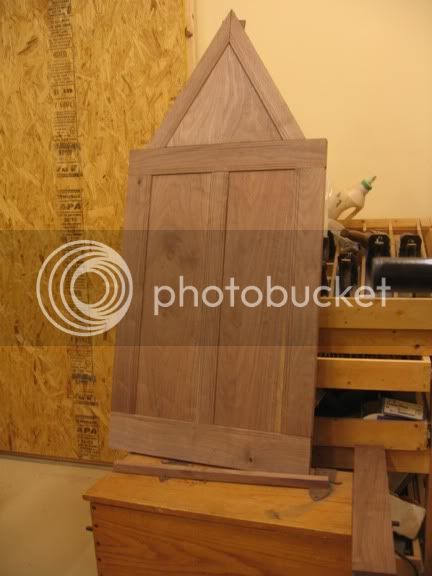
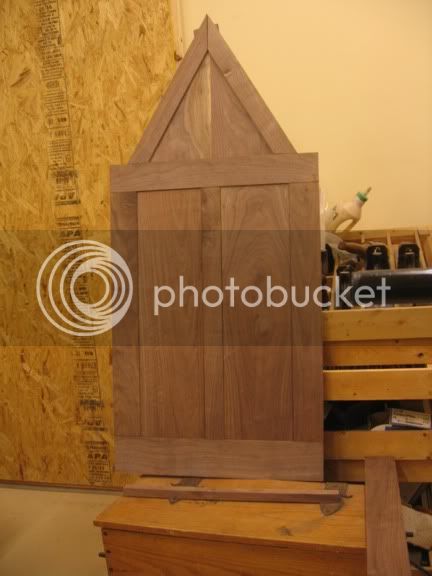
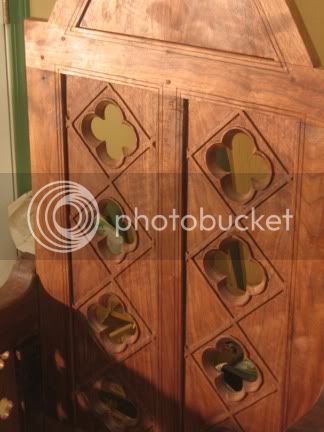
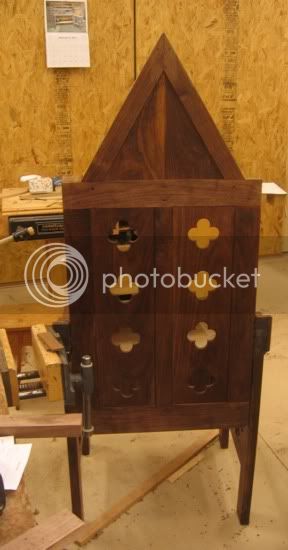
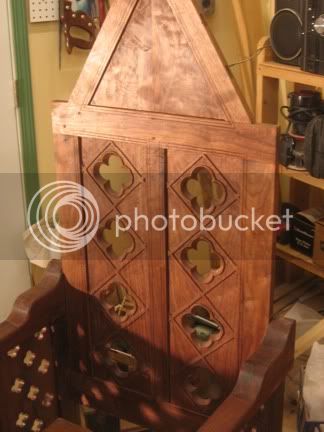
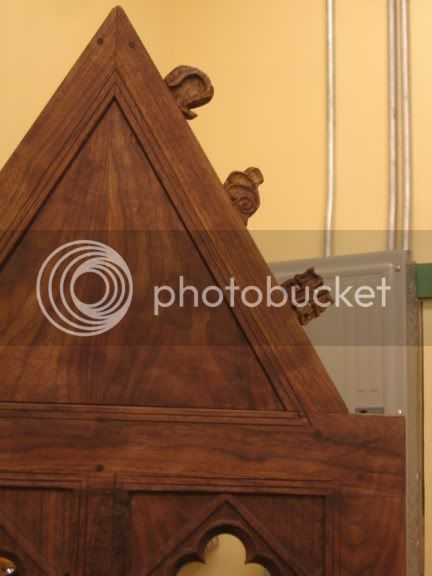
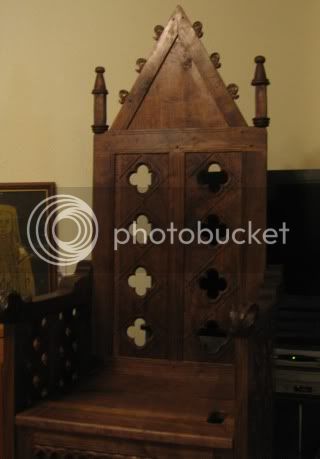
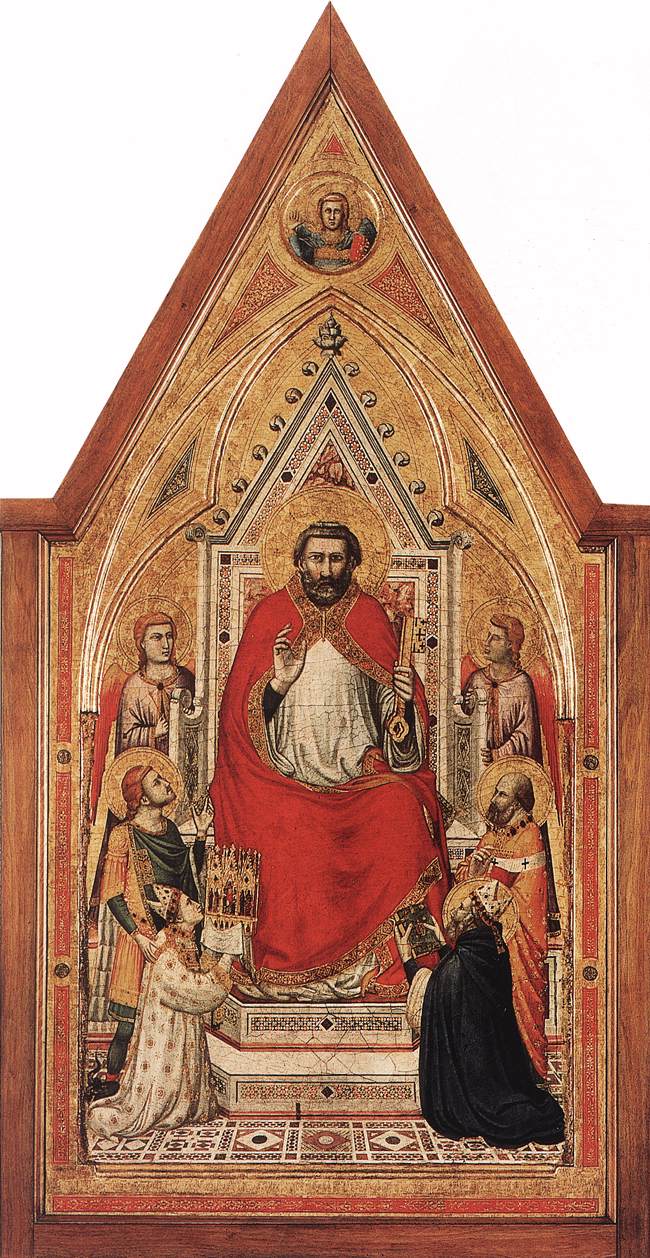
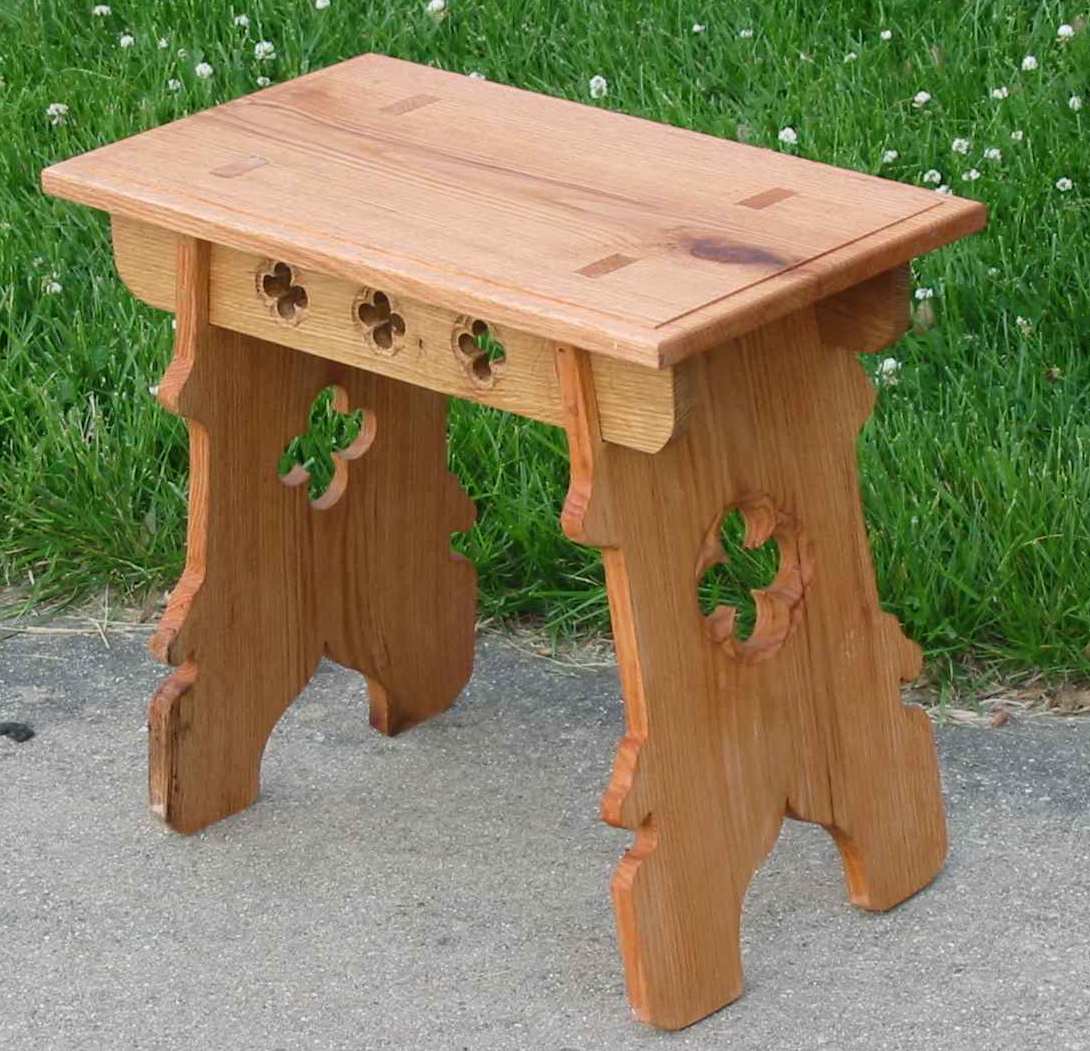
Although box chairs are more of a 15th-16th century style, it will have a 14th century pointed back like this one:
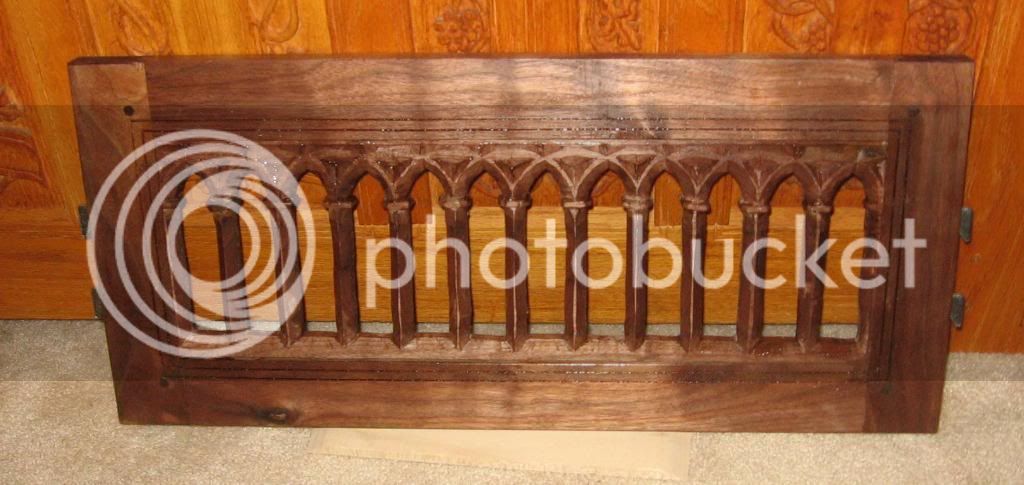
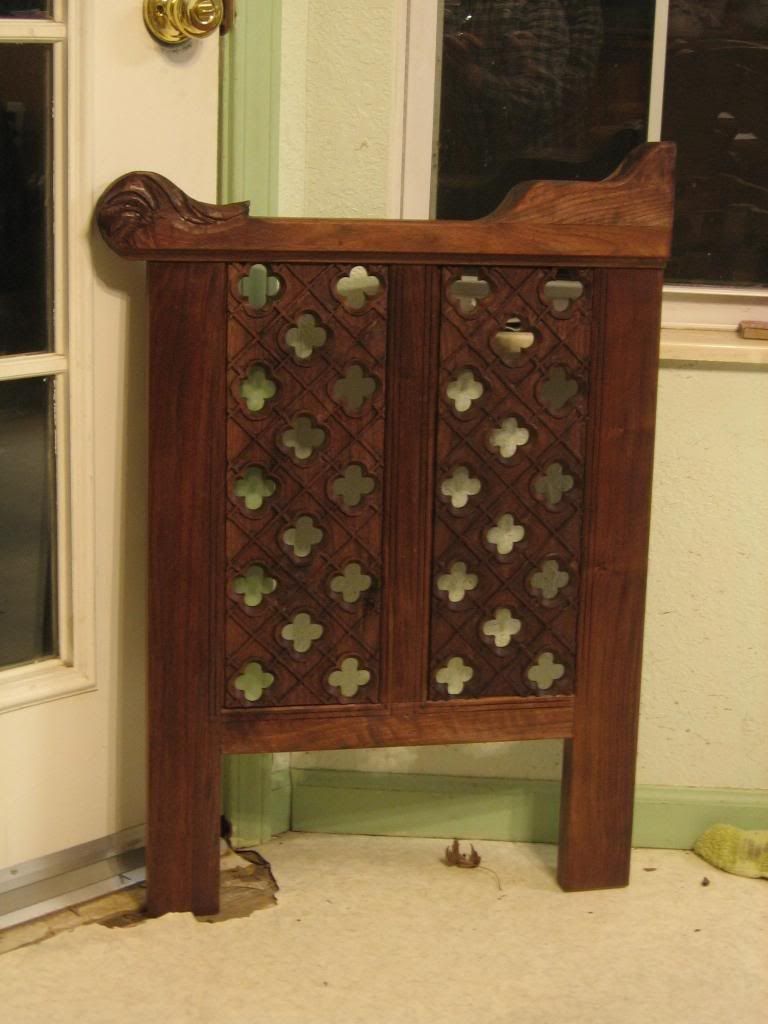
All the panels will be carved and use repeating patterns, so I figured some practice was in order to ensure I got things right. I started on the front panels (kickplates) first, because they would be the easiest and let me get the bugs worked out:
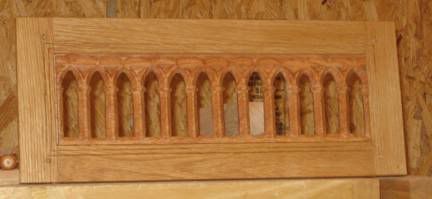
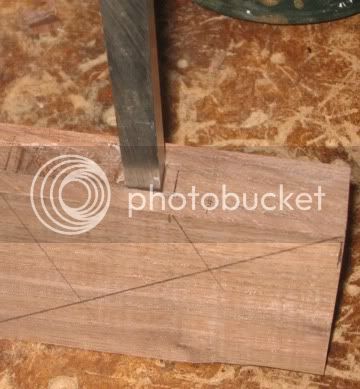
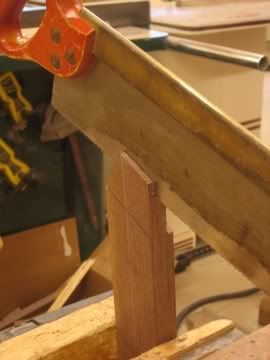
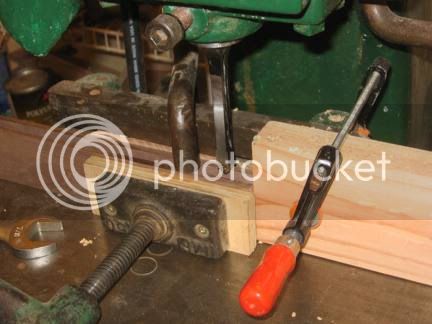
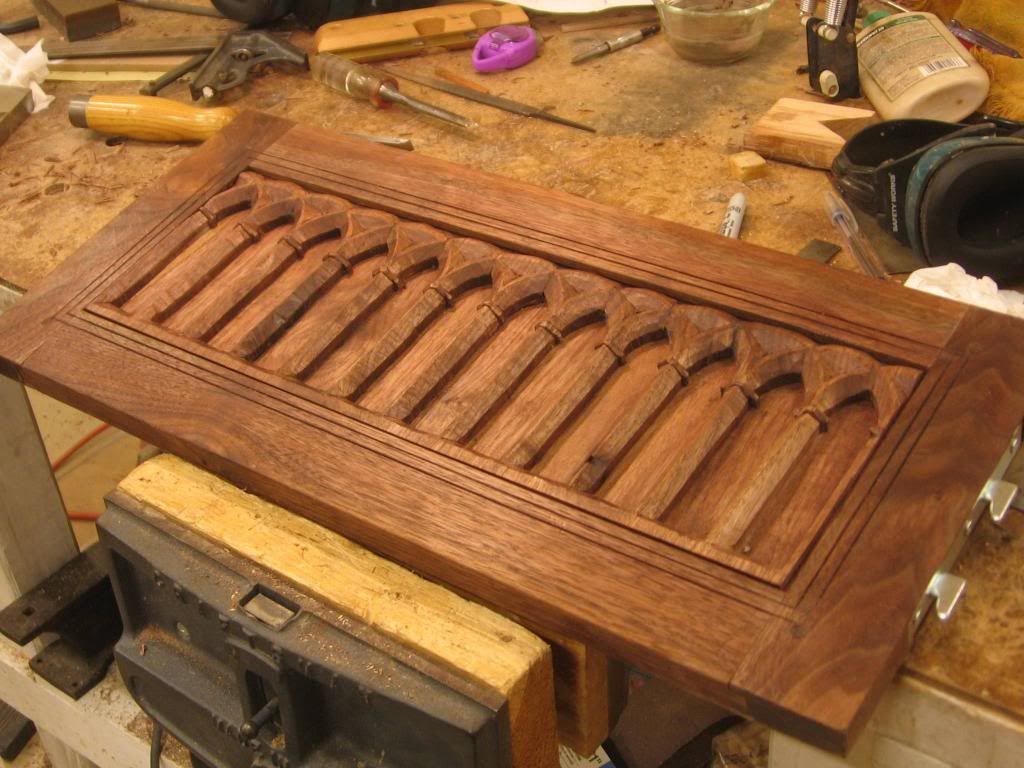
This test panel was made from some red oak scrap laying around. I used a scroll saw to make the cutouts, then overlaid a pattern to clean up the openings with the router, and put a bevel on the columns with the router. The rest was hand carved. I used a scratch stock for the lines around the panel, and the frame is mortise & tenons. Here’s the frame being mortised:
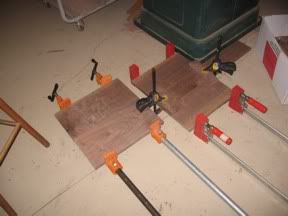
And the dry fitted frames themselves, showing the haunched joint:

Here’s the first of the real panels:
It was actually easier to carve it in the (dry-fitted) frame, because so much open space left it hard to hold and vulnerable to breaking.
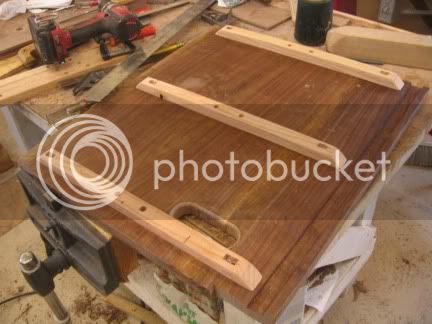
Here’s the assembled panel:
Since this will carried around, I’m concerned that the columns would be eventually broken out by rough treatment. I therefore glued on a secondary panel in the back of the carved panel. Here is the second kickplate, with the back panel in place:
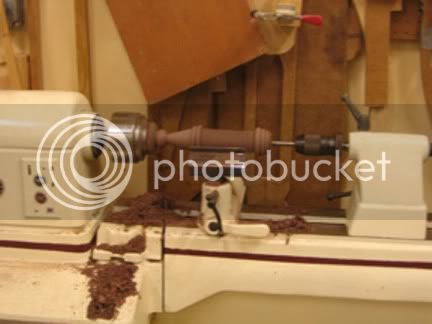
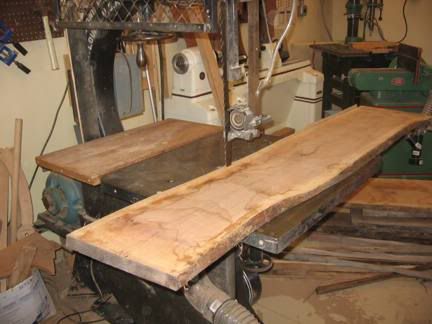
On to the sides. First, since I was using rough cut, air dried planks, I had to trim one edge mostly straight, then run it through the jointer (planer) to get a final straightening, then through the table saw to get to final width, and finally through the planer (thicknesser). Here’s one plank on the bandsaw getting one edge straightened:
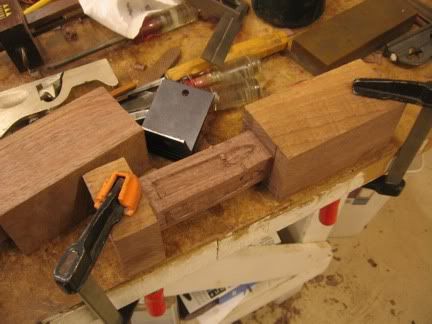
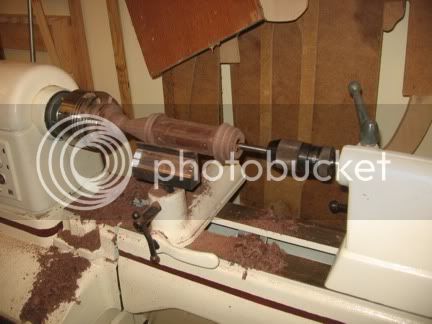
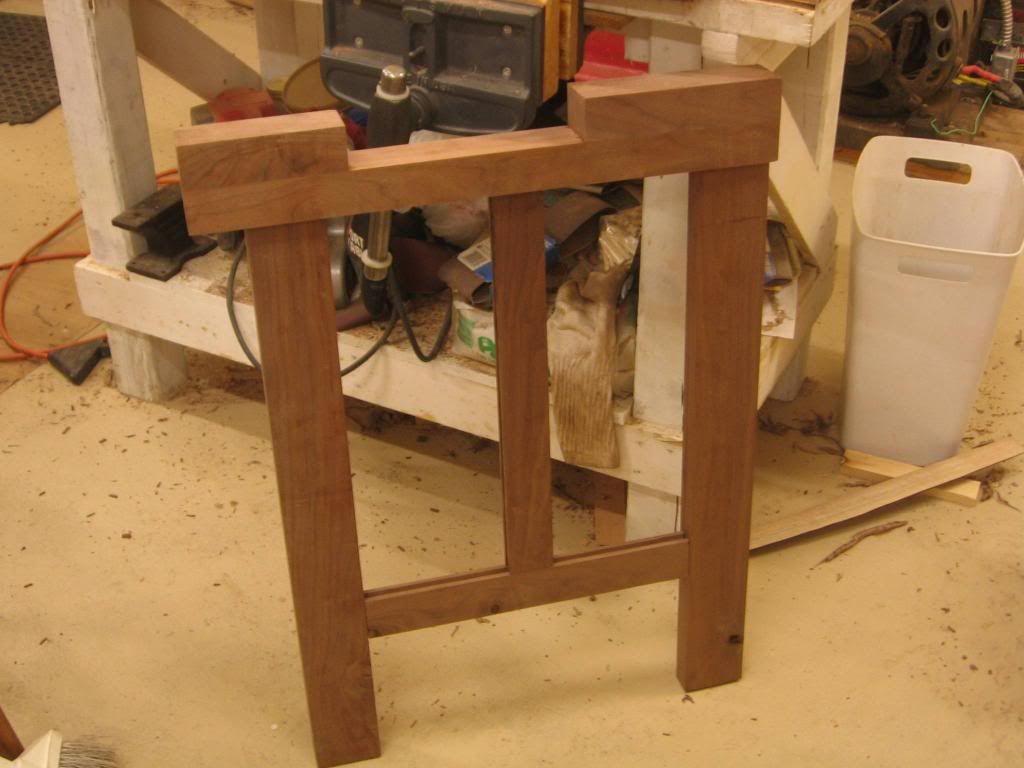
Here’s one arm frame being test-fitted. The arms are built up of several pieces of walnut, since I didn’t have any wood wide and thick enough. One more piece needs to be glued to the back of the arm (on the right):
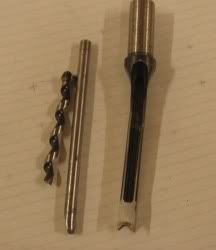
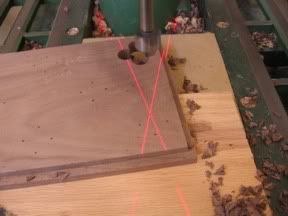
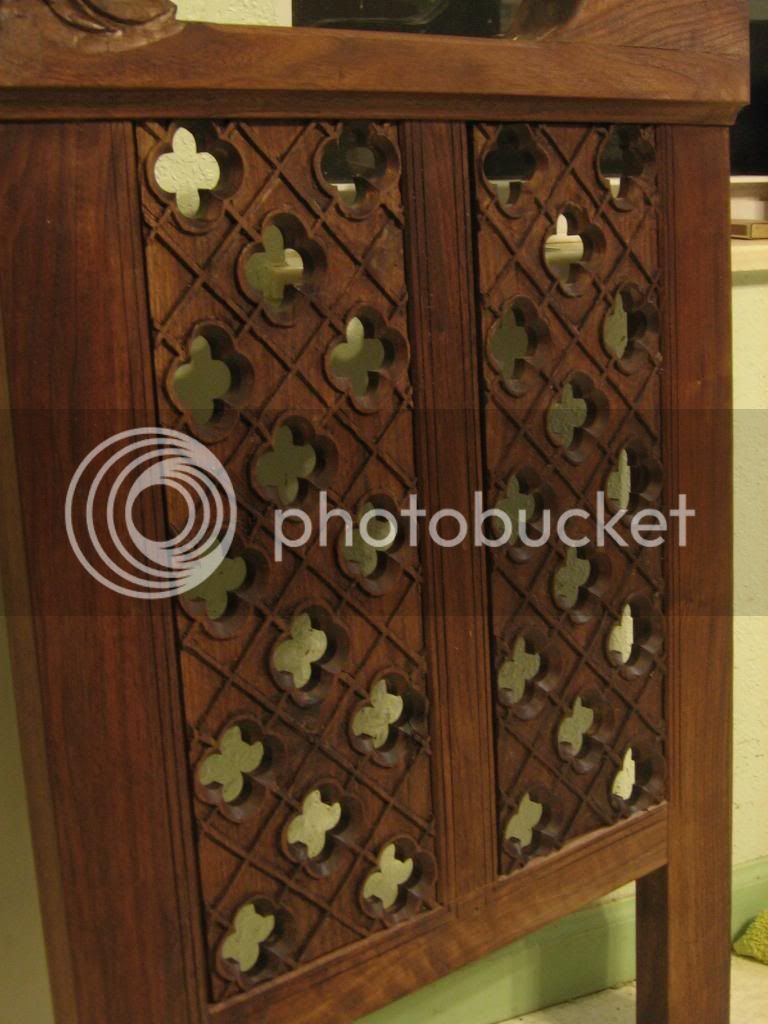
On to the panels. The panels are carved with a repeating pattern of quatrefoils. I started by marking the pattern, then drilling out the holes in the quatrefoils:
Next, I used the router to get rid of most of the background down about an eighth of an inch:
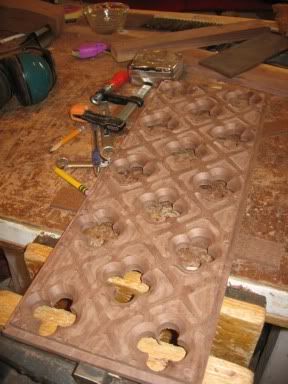
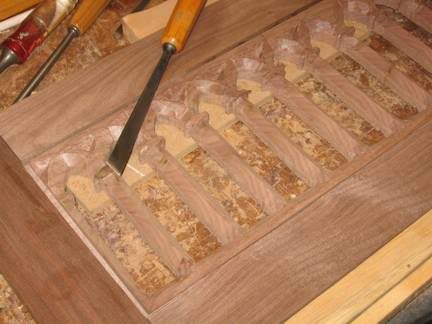
After that came the hand carving, getting into the corners, straightening the lines, and cleaning up mistakes:
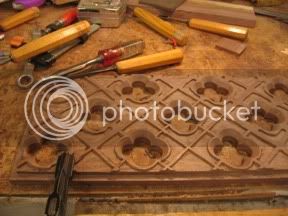
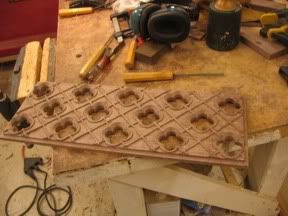
Each panel took about 3 hours from start to finish.
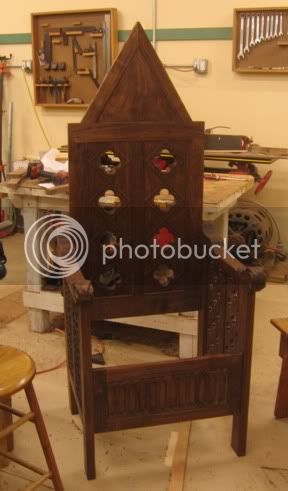
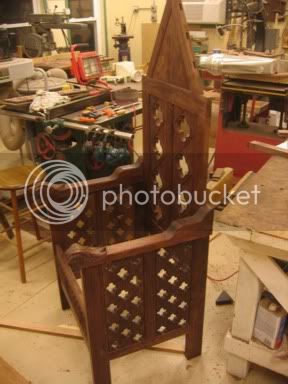
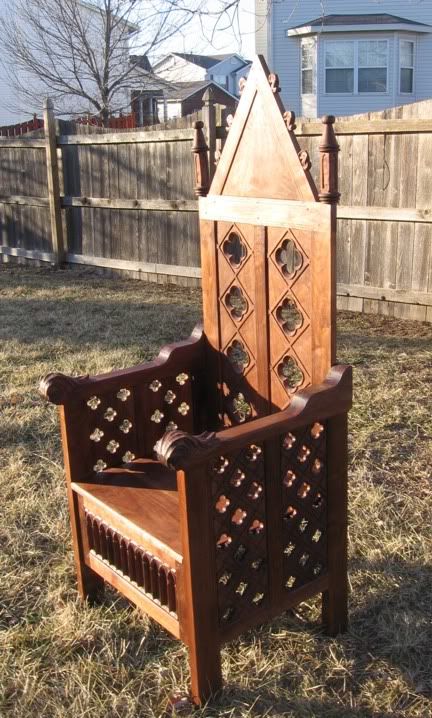
There are four of these panels per chair:

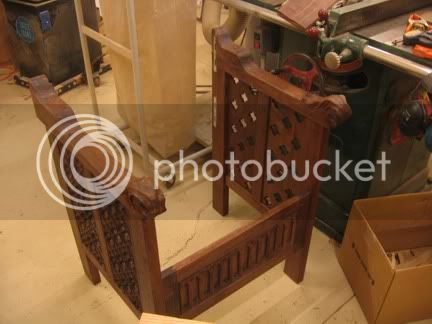
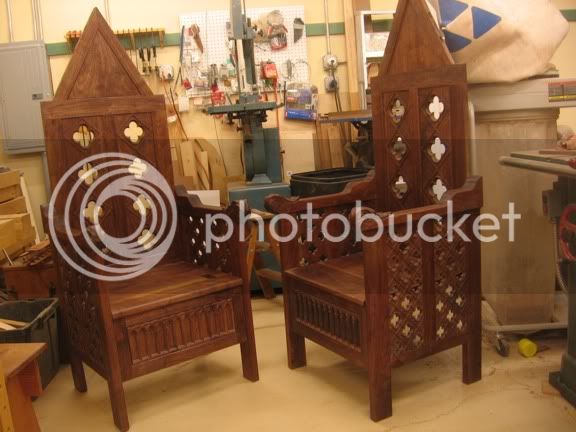
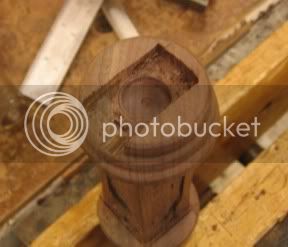
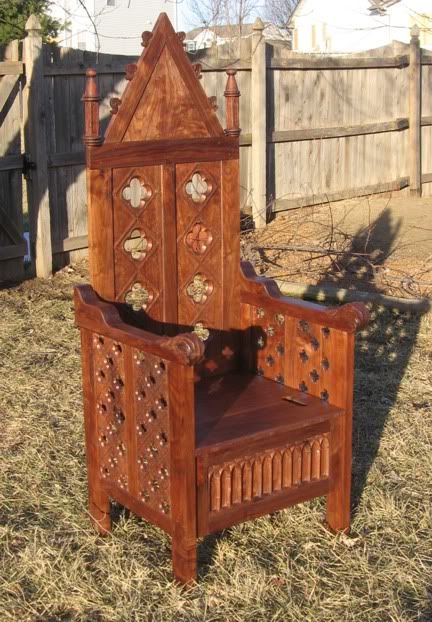
I carved the ends of the arms in a quasi-acanthus pattern. I’m not really happy with this. I can do some pretty decent relief carving, but my carving in the round just ain’t great. So, I didn’t get a closeup—sorry. So after the panels were done, I put a coat of finish on everything, then assembled. Here you go:
All four sides are done except for adding more coats of the varnish oil and attaching the actual bed rail hardware.
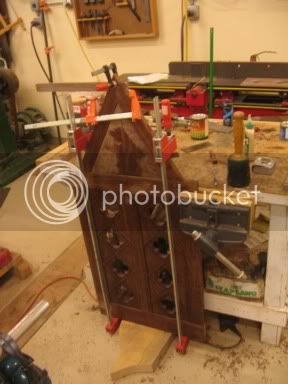
I’m starting on the backs now, with some prototype frames for the top, pointed part of the back. The first attempt failed, so it’s on to a second plan tonight. I get both Thursday and Friday off of work, so I expect to make good progress those days (except when I’m cleaning the house for our New Year’s party). So more pictures in a few days.
Kirk
Although box chairs are more of a 15th-16th century style, it will have a 14th century pointed back like this one:
All the panels will be carved and use repeating patterns, so I figured some practice was in order to ensure I got things right. I started on the front panels (kickplates) first, because they would be the easiest and let me get the bugs worked out:
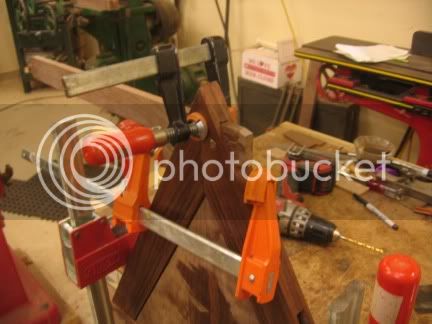
This test panel was made from some red oak scrap laying around. I used a scroll saw to make the cutouts, then overlaid a pattern to clean up the openings with the router, and put a bevel on the columns with the router. The rest was hand carved. I used a scratch stock for the lines around the panel, and the frame is mortise & tenons. Here’s the frame being mortised:
And the dry fitted frames themselves, showing the haunched joint:
Here’s the first of the real panels:
It was actually easier to carve it in the (dry-fitted) frame, because so much open space left it hard to hold and vulnerable to breaking.
Here’s the assembled panel:
Since this will carried around, I’m concerned that the columns would be eventually broken out by rough treatment. I therefore glued on a secondary panel in the back of the carved panel. Here is the second kickplate, with the back panel in place:
On to the sides. First, since I was using rough cut, air dried planks, I had to trim one edge mostly straight, then run it through the jointer (planer) to get a final straightening, then through the table saw to get to final width, and finally through the planer (thicknesser). Here’s one plank on the bandsaw getting one edge straightened:
Here’s one arm frame being test-fitted. The arms are built up of several pieces of walnut, since I didn’t have any wood wide and thick enough. One more piece needs to be glued to the back of the arm (on the right):
On to the panels. The panels are carved with a repeating pattern of quatrefoils. I started by marking the pattern, then drilling out the holes in the quatrefoils:
Next, I used the router to get rid of most of the background down about an eighth of an inch:
After that came the hand carving, getting into the corners, straightening the lines, and cleaning up mistakes:
Each panel took about 3 hours from start to finish.
There are four of these panels per chair:
I carved the ends of the arms in a quasi-acanthus pattern. I’m not really happy with this. I can do some pretty decent relief carving, but my carving in the round just ain’t great. So, I didn’t get a closeup—sorry. So after the panels were done, I put a coat of finish on everything, then assembled. Here you go:
All four sides are done except for adding more coats of the varnish oil and attaching the actual bed rail hardware.
I’m starting on the backs now, with some prototype frames for the top, pointed part of the back. The first attempt failed, so it’s on to a second plan tonight. I get both Thursday and Friday off of work, so I expect to make good progress those days (except when I’m cleaning the house for our New Year’s party). So more pictures in a few days.
Kirk
")