WIP - Pirate's (ish) Chest

UKworkshop.co.uk

Help Support UKworkshop.co.uk:

This site may earn a commission from merchant affiliate links, including eBay, Amazon, and others.

pjm699

Established Member
Joined
18 Feb 2011
Messages
89
Reaction score
11
Location
Southampton
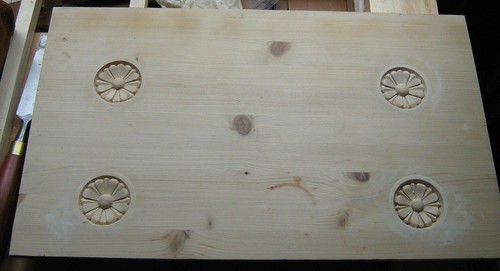
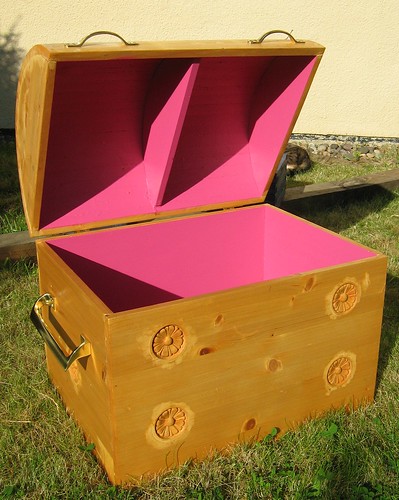
I decided that my niece (3) could have a chest this year for keeping all her other wooden toys in.

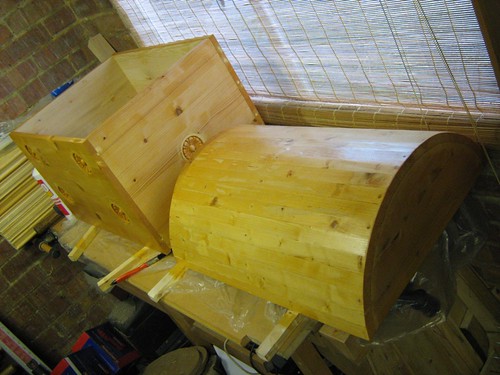
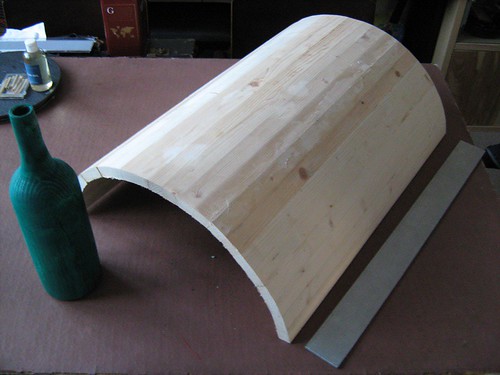
Having made the lid, thanks to forum folk, I have the lid straightened - although having been on holiday for a week, a hot garage increased the twist in the wood quite a lot.
5726990630_f9b855e8fe.jpg


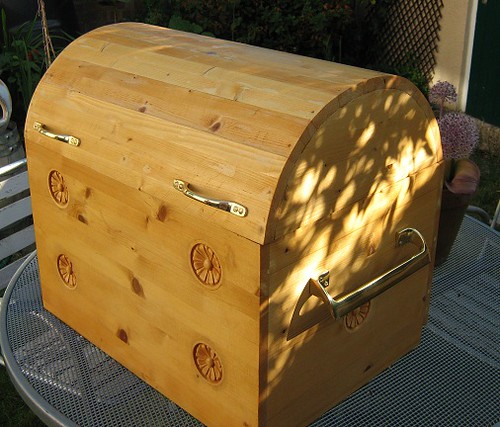
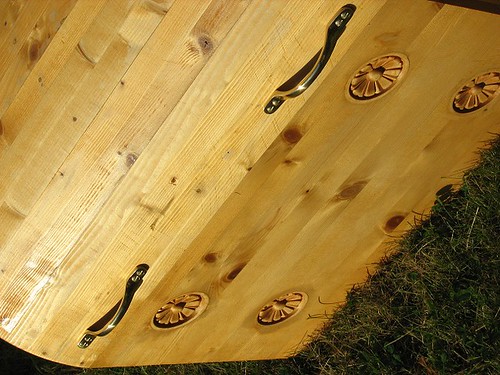
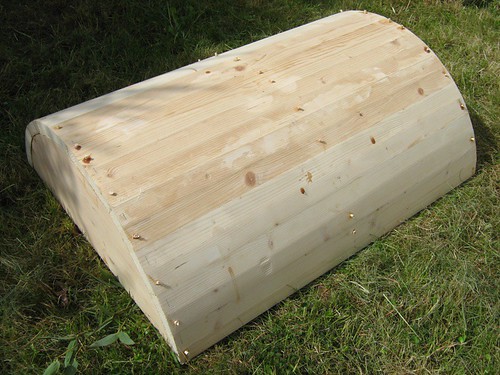
I put the ends on quickly and pegged them through the top - sadly my cutting of the ends was not as good as I had wished so now it will be a painted chest!
5726434013_11376b8349.jpg
 
Whilst the top was doing it's thing, I turned to the box (complicated curved bit made first and then the simpler box can be made to fit!)
I wanted it to be pretty as well as functional so I decided to set in some flowers that I had bought for 25p each when the local B&Q was remodelled.
The following required latex gloves and welding gauntlets as there was no way to guard the cutter on the second job as the workpiece has to be lowered onto the cutter with it spinning - generally not recommended but I could not think of a way round it!
5726434125_f30129e785.jpg


One pass at 2mm (with a guard) and onto the fret saw to remove most of the unwanted material to within a few mm of finished size and then cutter to height and some very careful working, hands flat on the deck opposite the cutter and making very small movements - not ideal but the only way I could do it!
5726991316_efdc431bfa.jpg


Then some more fun with a BIG drill bit and trying not to wobble too much to keep the holes as round as possible.
5726991508_fe7ce9c9b3.jpg


More glueing up and off to do the housework - it seems to be full of sawdust for some reason!
5726434911_c857323c8d.jpg
 
Nice work pjm, dont see anything wrong with the ends tho', would be a shame to paint it but thats just my opinion, maybe you could get someone arty to paint it to look like wood with ironwork on it too-the kind of thing you see at theme parks kinda style, someone who painted 'sets' for a theatre would make an amazing job on that ?
cant wait to see the finished article, think I will add a pirate chest to my evergrowing list of tu-its :D
 
looking good if i had to cut out the flowers i would have used a hole saw drill in to a scrap piece of mdf then take out the pilot bit used the mdf with hole in then drilled through hope that makes sense
 
Making progress - still!
Backs of insets chiselled off and filled- this is why I was unsure about oiling the chest - the oil I assume will make the filler stand out a bit!

5726435069_c7bba09fce.jpg


The first end glued up, I could have done both ends but a couple of my sash clamps appear to have vanished somewhere, it must be time for another tidy!

5726992226_960b60b21b.jpg


Other end to be glued up and then another moment of truth - will it all match up
 
And another step - taking encouragement from Barkwindjammer, I have oiled the chest - it looks really nice with the exception of some small areas where I did not clear the filler properly - thankfully three year olds are not too discerning!

5735820233_ff0fcd2c5f.jpg


Sadly when I trued the lid (with reference to a previous post I made) I did not do more checks that the ends of the lid were square - they were before I took the twist out of the lid but due to the heat there was a big correction to make and when I happily glued the ends of the lid on, I made a lid with a slightly diamond shaped footprint - a little jiggery pokery however and reference to xy mosian's 7* rule I will put a couple of tiny spacers under the front of the lid when it is assembled to hide the error.

Couple more coats of oil, handles and hinges and we will be ready to roll!
 
pjm699":1xa4pjkf said:
a little jiggery pokery however and reference to xy mosian's 7* rule I will put a couple of tiny spacers under the front of the lid when it is assembled to hide the error.

Now that is looking good. Of course a suitable 'shadow gap' would do the same as spacers. Rebate the top of the box a little.
xy
 
More oil applied it looks the same but more so - I shall spare you the image - I am a little scared of rebating the lid at this juncture so I have decided to stick with the spacer idea thank you XY- but I don't have an easy way of doing the rebate - I do however have a couple of tiny axle pegs from the lovely people at Woodworkscraft supplies which will not look out of place. I will drill a couple of holes and glue in the pegs so that there is just the head (dome visible) it will give me the shadow / gap and a bit of breathing space.

Just one more coat of oil, hardware is ready to go on and a grand hand-over on Saturday!
 
Well, hardware is on, it looks alright although the twist / overlaps are a bit annoying (put it down to experience!) at the sides although the small overlap at the front throws a small shadow without me having to rebate.

5742436692_58ae3fa61b.jpg


This I think is the best shot (above)- the oil seems to have polarising properties and the filler shows a little more if you look at the panels obliquely rather than head on. when I re-oil it in a couple of months, I'll sand it back again on the front panel and try to get rid of those marks!

I think now that the side handles should have been a fraction higher - the finished product as Corset also has found, seems to be rather larger than the sketchup model would have suggested.

5741884391_cf2b5f1c8d.jpg


Not particularly lovely hinges but they are not too plain and they will be at the back so all good there. I ran out of nice brass screws so the bzp pozi ones will stand in until I can sneak some others in.

5741884229_c139f18692.jpg


Well, you have to try and be arty don't you!


WARNING, those of a nervous disposition should scroll back up now!


5741884053_15a7e9bdce.jpg


Well it is for a three-year-old girl

I like the inside - sadly the sun shows up my failure to sand back all the filler properly - but all in all I am not too displeased with the end result - I have at least learned a bit (don't ever make anything with a vaulted lid again!)

Thank you to those who have offered guidance and words of encouragement - it makes a big difference knowing I can post all kinds of daft questions and friendly help will be forthcoming.

I hope you have enjoyed the WIP and if nothing else that it has provided some entertainment, regards pjm699
 
Well done pjm thats really looking grand :D -even the inside :shock: :D , your wee niece will be over the moon with that, it is said that the act of giving holds the greatest satisfaction of all :wink:

Once its 'grubbied up' a bit with tiny sticky hands, has been used as a home for ladybirds, worms and the odd dead bird etc it will have that 'aged' look to it. Like it a lot m8.

Your project throws up something interesting though, the question has been raised on here before-how do you tell if you have cleaned up glue when its damn near invisible ?-maybe you have found one solution, is it possible that a digi camera can 'see' what we can't with the naked eye?, I thought about buying one of those ultra-violet lamps (the battery kind that sour faced shopkeepers use), shortly I will be facing the nail-biter bit on a project-staining :?
 
Back
Top