Racers":mit818ke said:
...........Even having a Norris style adjuster in use it a bit of a faff, a minute turn of the adjuster makes a big difference not heppled by the high angle, its sloppy and has loads of backlash, the lateral adjustment is very touchy probably because of the short shaft.
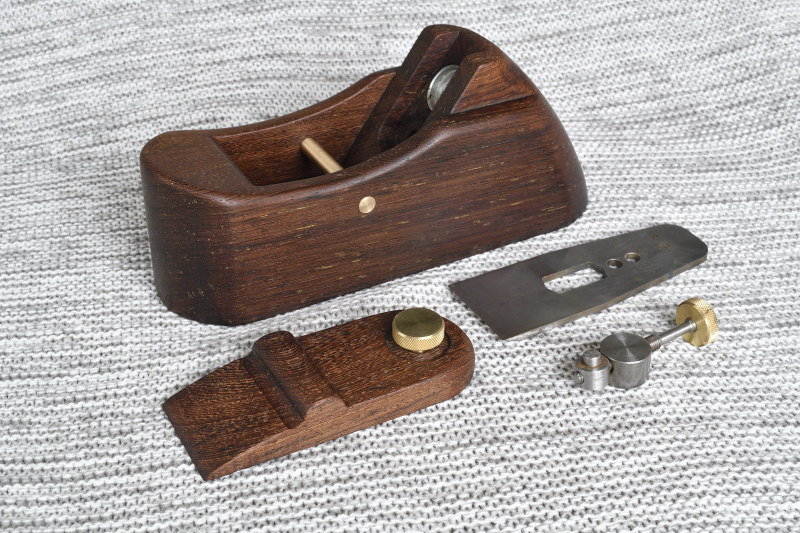
If I made another (if more like when) I will use a snecked iron and wedge.
The grove on the wedge keeps it in place well but I made it slightly deeper and ran out of length on the clamp screw requiring me to recess round it......
Nice little pane, Pete, & I think we've arrived independently at similar conclusions.
")
I encountered the same problem (barely enough thread on the wedge screw), as I mentioned previously. I ended up making another, slightly longer screw, which is easy if you have the gear, but not so easy if you don't.
I agree wholeheartedly with your comments on the adjuster, it's definitely no precision instrument. Mine does have a bit of backlash, but I didn't think it was excessive, maybe you've got one that is at the extreme end of the tolerance limits? I think your suggestion is correct, that the short shaft exacerbates both the resistance & the coarseness of the lateral adjustment. In my review I questioned the need for an adjuster at all in a basic kit like this - you'd be better off if they included a nice little brass-headed hammer instead, I reckon. :wink:
I'm nt a great fan of the Norris style adjuster, I fell out of love with them very quickly after a (late model) A5 came into my hands. It has a fundamental flaw, which is the tendency to slew the blade more as you advance it, if you have the lateral adjuster to either side of dead-centre (as you almost always do!). Mine also has the habit of increasing the cut slightly as the lever-cap screw is tightened, which is not a big deal. Apparently, this is a common idiosyncrasy of the type.
As predicted, you've beaten me by a country mile. My build is proceeding at a fraction of the pace, partly because I have other matters competing for time, & partly because I'm taking the opportunity to muck about with a few things this time round, since I don't have to stick to the script.
Because I wanted a rear handle on my re-make, I neded a new, longer shaft. In doing that, I got to thinking (a dangerous occupation, best avoided!), and decided to try something different. Instead of the LH/RH thread combination of the current shaft, I made both threads RH. This means the distance the travelling spigot moves per turn is the difference of the two thread pitches instead of the sum. This gives you a much finer control, but the trade-off is you need more thread to get the same range of movement.
I made a new shaft with what I calculated was the necessary extra amount of thread:
And using a mock-up of a handle, figured out the position for the pivot-point so my range of movement will give enough blade exposure as it wears, before moving to the next spigot hole in the blade:
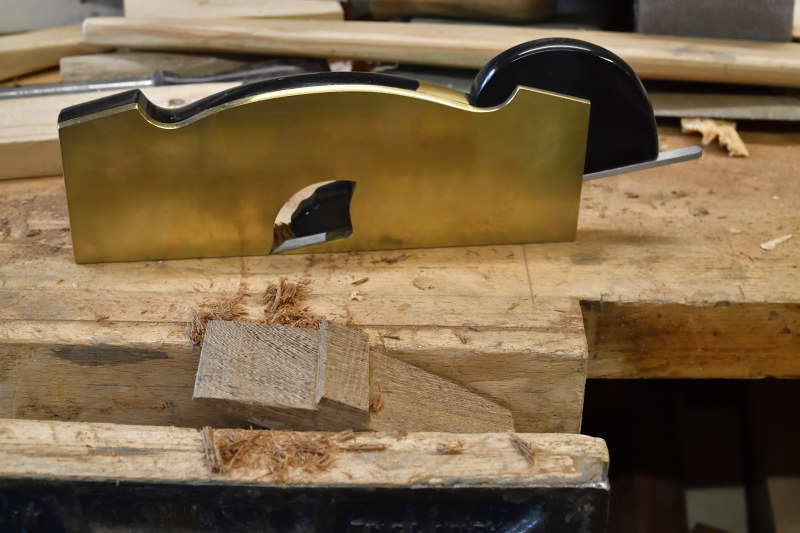
It's going to be a bit tight, but I think there's enough overlap. The slot in the bed has to be even longer because I've added a cap-iron, utilising the hole in the blade meant for the lever-cap screw in a block plane (for which this blade is actually made). I'm going to have to be very careful setting the LC, so the blade assembly will actually slide in far enough before it drops into position.
I've got as far as dry-fitting the stuffing:
Still to do: glue & rivet the stuffing in, make & fit a lever-cap, clean up & finish woodwork & metal, lap sole, & fettle. Unless it rains (unlikely) & I get a full day or two in the shed, It'll be at least another week before I make any shavings......
Cheers,


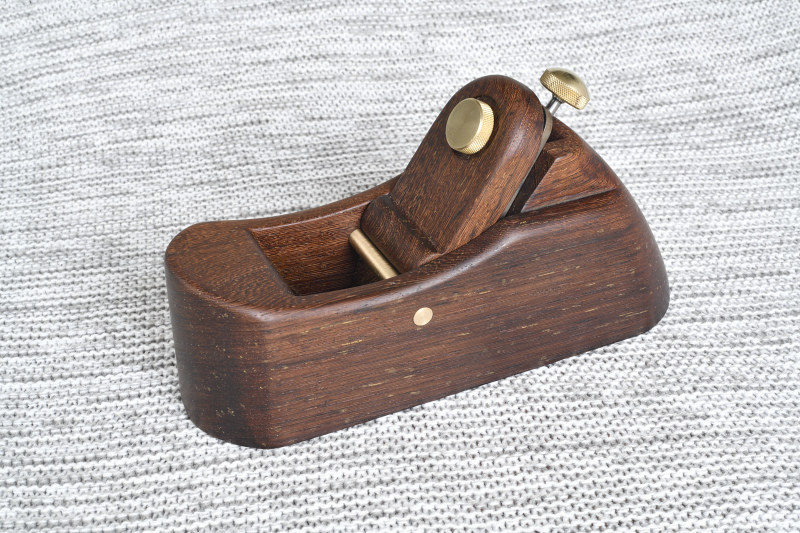
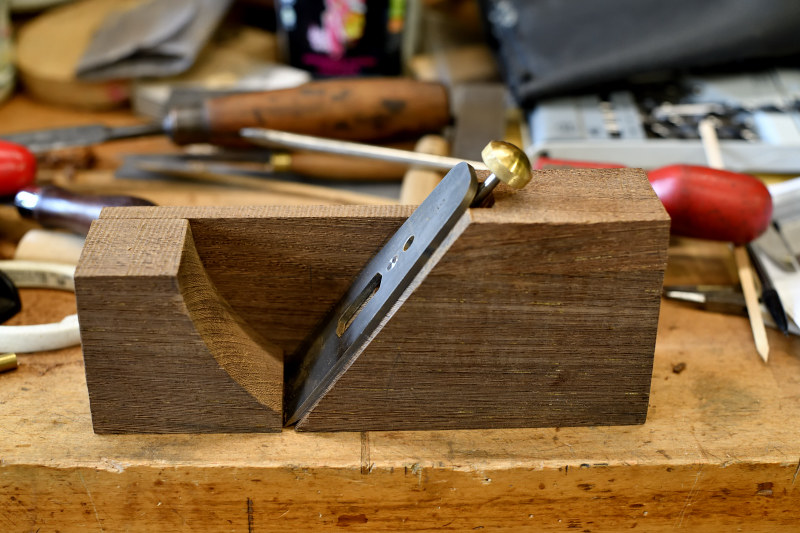 Wenge plane by Racers, on Flickr
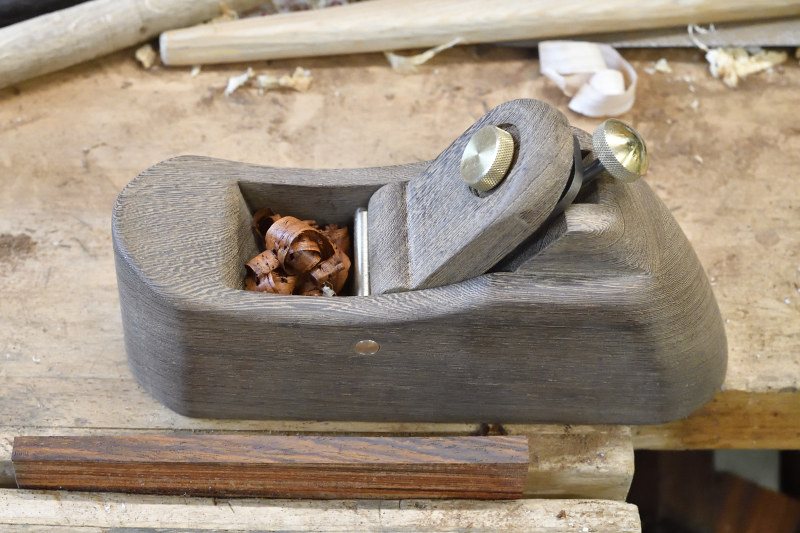