Turning Time in 2009

UKworkshop.co.uk

Help Support UKworkshop.co.uk:

This site may earn a commission from merchant affiliate links, including eBay, Amazon, and others.
duncanh":y1wdm9re said:
Chas - I've noticed that a lot of these bowls still have the pith in. Was the wood dry when turned so you're not worried about movement and cracking, or was it wet and there's still a possibility of movement and cracking?

Duncan

They were all rough turned 'green' in November 2008, dried using my normal regiem of wrapping the outer and leaving on top of cupboards in my conservatory.

They were all below 8% on the 8th Jan. when finishing started, four had short star splits requiring CA fixing during final turning, two had short splits (max 1 mm wide) needing filling with dust and CA.
 
Chas, when you were turning those Bowls were they mounted in a chuck or did you work them from a faceplate and then form your chucking point. If this sounds stupid sorry . Or perhaps a woodscrew.

REgards Boysie.
 
Eugene, all rough blanks were mounted on an 8mm screw chuck (homemade but similar to Axminsters version).

Outside formed and a 70mm chucking socket formed in base.

Blank reversed on socket and hollowed out.

Put aside to dry.

To turn and finish remounted on socket, (well spalted wood does not distort a great deal whilst drying in my experience)

Reverse mount in Longworth Chuck with tailstock support to remove socket and finish base.

___
 
__________
__________ A Morning at Play._____________click on images for larger view

_________ ___

____________Spalted Beech (90mm)______Spalted Beech & Laburnum (157mm)
 
Chas,

All very nice, :D but you are rubbing the fact that I still have to go to work, leaving the spinney things in the shop at home. :twisted: :roll: :wink:
 
Still plenty of time Dave, it took me 11 yrs. of retirement before I found the spinny bug.
 
__________
__________ More offcuts out of the way._____________click on images for larger view

_________ ___

____________Spalted Beech (90mm)______Spalted Beech & Cedar of Lebanon (90mm)
 
Again,very nice pieces,and fantastic figuring :D
Somewhat darker than all the spalted beech I've had,but quite beautiful nevertheless.
Was the cedar of Lebanon just in the offcuts bin,or have you worked your way through the pile of beech ?

Andrew
 
PowerTool":ha9z9h6f said:
Again,very nice pieces,and fantastic figuring :D
Somewhat darker than all the spalted beech I've had,but quite beautiful nevertheless.
Was the cedar of Lebanon just in the offcuts bin,or have you worked your way through the pile of beech ?

Andrew

Hi Andrew, yes it looks as though the Beech from the main trunk wood has spalted with much darker colouring, some in fact I think may be spoilt with a dirty grey/black stain, totally different to the pale spalting on the branch wood, and no I have not used up the Beech, if fact I have hardly dented the pile yet.
The Cedar was a small piece that has been under the bench since 2005.
 
__________
__________This mornings Pottering.__________click on images for larger view

_________ ___

_______________Spalted Beech_____________(160mm D X 110mm H)
 
__________
__________ Yesterday evenings playtime._____________click on images for larger view

_________ ___

_______________Spalted Beech ____________________(200mm)


_________ ___

_______________Spalted Beech ____________________(177mm)
 
Chas,
All the pieces on this thread look superb, could i ask what your finishing technique is for these pieces.
 
johnny.t.":39cbq99o said:
.......
What do you use for sanding(tool, grits etc)?

Hi 
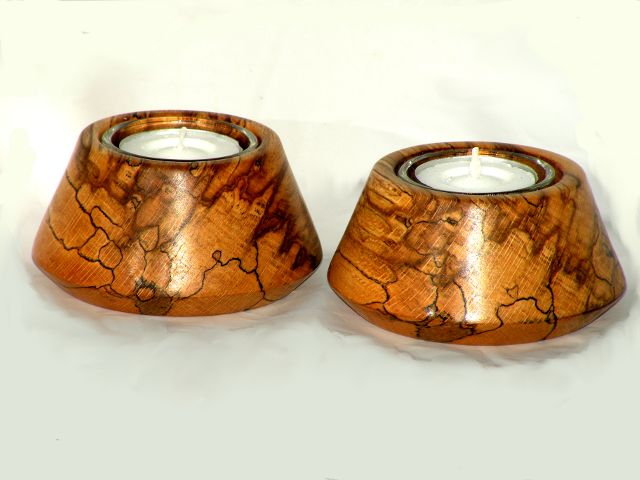
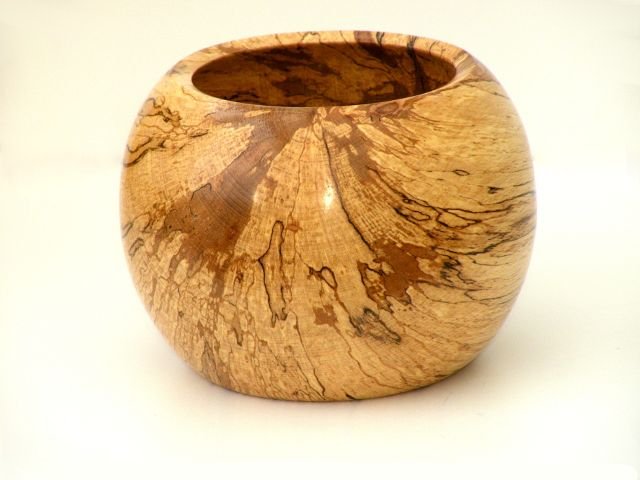
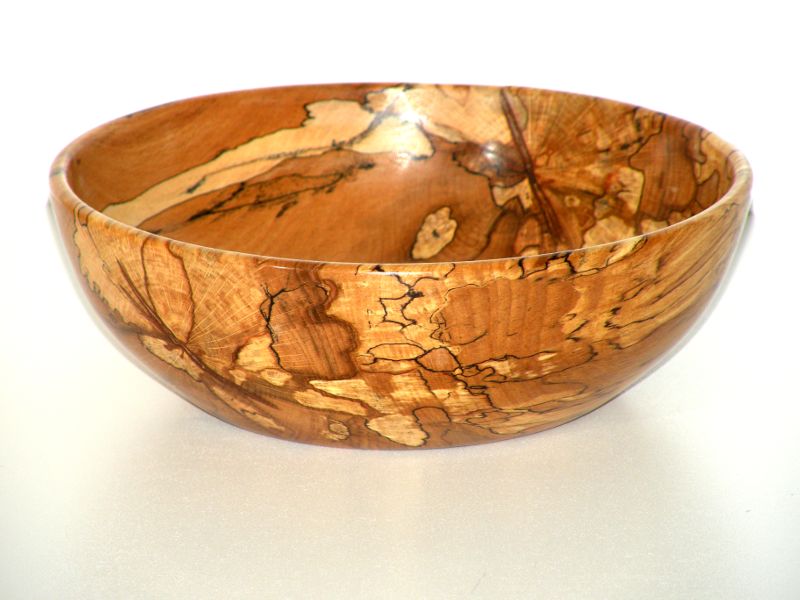
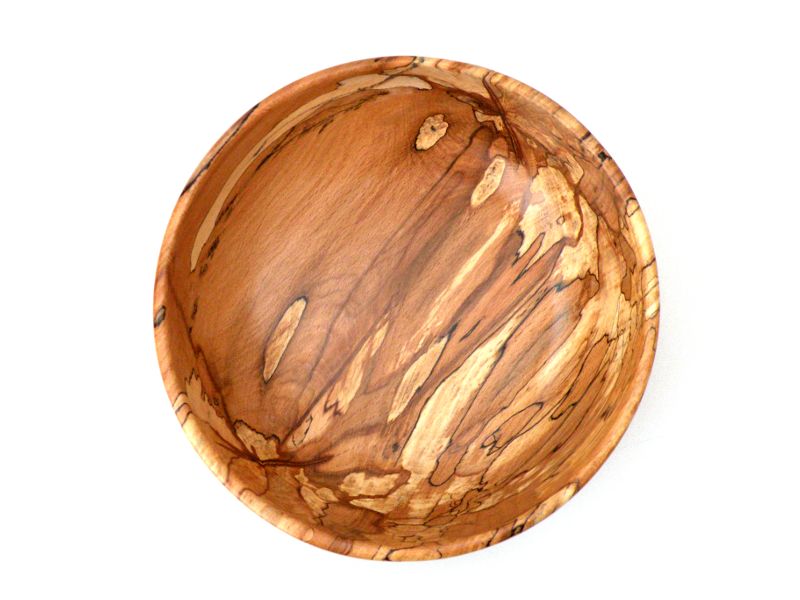
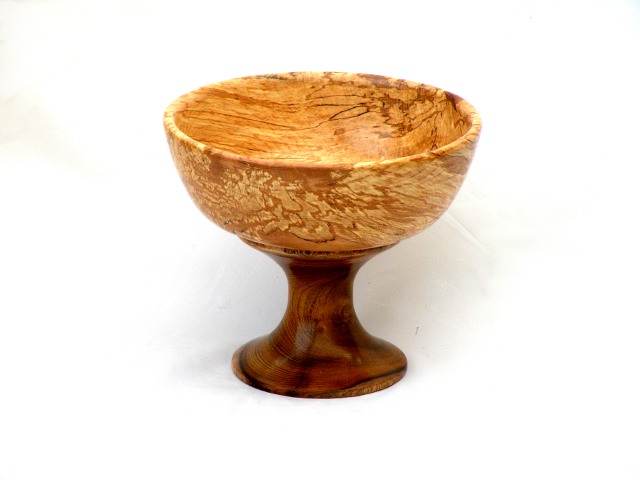
Johnny, don't believe everything you see in the pictures, especially with the spalted bits, look a little closer and there are usually a few blemishes*.

As with most turners I have managed to reduce the amount of sanding needed as my turning tool use has improved, and in particular with the soft spalted wood develope a shear cutting technique that does not tear the fibres so much.

Never the less as far as using abrasives are concerned I will admit to resorting to starting with 80 grit if I can't get a tool cut to work.

As far as abrasive types used I have four sets and I can't tell you which of the first three I am most likely to start with.

1. Cloth backed Oxide abrasive, J-Flex (good on dry wood but clogs fairly easily on wet) and Rhino Brand (Preferred, I think Hegner may now stock this but can only see velcro backed on their site)
2. Abranet (excellent for feedback on heat generated, it hurts :lol: ) Works very well with wet wood be it from normal moisture or sealers.
3. Grip-A-Disc Rotary Sanding Discs.
4. Nyweb

So dependant on how well the tool work has gone I tend to just reach for whichever seems the most appropriate for the piece, I guess it's just a feeling for what's required based on having turned a few pieces now.
If something isn't working or clogging too much I switch around products, and I'll admit to doing a final shaping or blending.
Finish sanding is always done with the Grip-A Disc system (friction driven, hardly ever drill driven) to remove any radial score marks that I have generated by misuse of the hand abrasive.
I rarely go below 320 grit on the wood types I use, I do have 400 and 600 grit to hand for the occasional use on harder close grained woods.
Nyweb is used to denib and blend any sealer build up that comes from poor application *.

The bulk of my output is just finished with Woodwax22, my main customers preferred finish, melamine lacquer, finishing oil or food safe oil all get the occasional outing dependant on any special usage requirements for the piece.

On the spalted pieces I invariably soak well with diluted sealer as and when it seems appropriate during the final turning and throughout the sanding process to avoid causing cavities in the softer parts.

*I'm hoping to improve in these areas in the near future by developing a buffing routine, invariably there are radial streaks visible in lathe mounted final polishing.

James B":39cbq99o said:
.........All the pieces on this thread look superb, could i ask what your finishing technique is for these pieces.

James, having said all the above if you want to get down to my minimalist approach to the bulk of my output have a look at this Old Thread what you see of finishing (sealer and wax) takes all of 2 minutes. If you get the sealer too thick, I.E. applied undiluted then be careful in the burnishing stage or you will get build up streaks, if this happens blend down with a little thinners on a rag or Nyweb.
 
Very nice Chas :D
Love the colours of the second piece.
Re- the sanding, i use some old sanding disc paper which is 60 grit on some of the stubborn pieces. :shock:
 
Paul.J":2qmnmh9f said:
....Re- the sanding, i use some old sanding disc paper which is 60 grit on some of the stubborn pieces. :shock:

So, it's just a "Multi Faceted Turning Gouge" usually supplied in variable widths :lol: :lol:
 
CHJ":1vewspp7 said:
there are radial streaks visible in lathe mounted final polishing.

Its not just me then :lol: ,although people never notice them,I guess we always see the minor imperfections in what we've made ourselves, I've been looking at turned items in our house that we had before I started turning, which looked great but now under close inspection I find myself thinking 'how did they dare leave it like that and sell it'! For example we have a zebrano clock from a local turner which looked perfect to me at the time, now I see tool marks,tear out and sanding tracks all round the edge!!

Must say surprised to hear you don't go below 320, I always go down to 600 as I can see fine marks left from the 400! Mind you I only hand sand so maybe a rotating head sanding thingy is in order. You say you use a friction driven sanding system, are you talking about something along the lines of the overpriced sorby velcro sanding arbour on a stick? Which could obviously be replicated for very little money.

Cheers JT
 
Back
Top