Three unusual doors.

UKworkshop.co.uk

Help Support UKworkshop.co.uk:

This site may earn a commission from merchant affiliate links, including eBay, Amazon, and others.
SteveF":dffl36kr said:
re-read twice as was fascinated
so interesting to see the way you worked around board widths
the rebate that you will wedge in the spandrel looked interesting
will that be a green wedge or dried?
only out of curiosity if it will dry and fall out

Steve

It will be a sliver of seasoned oak. The rebates are getting on for 4 inches long/ deep, so there isn't much danger of it coming loose, but nonetheless I'll probably put a dab of glue on it. I could always pin through from the inside if I felt there was any danger of the tongue coming loose, but as well as shrinking, green oak inevitably twists as it dries, and this will trap that piece as tight as you like. This is a subject in itself, as my theory is that most ancient joints were designed to counteract twisting ahead of any other priority.
 
Very good thread. I like the fact that you show it warts and all. Excellent work. Thanks for taking the trouble to do this.
 
I'll try and post the construction of the inner front door as I go, rather than after the fact. Just a reminder of what I am trying to achieve:

XnXhwcI.jpg


As with the porch door, I had to start with the spandrels forming the four-centred arch at the door head. I used the other half of this piece of wood, from which the others were cut (it's 250 x 100 in section):

clSyc22.jpg


I cut out the rough outer shape, cleaned up the top edges, and glued on another piece to make up the corner:

kCuhO9z.jpg


Then the damn great long tenons to the top and outer edges. This took the best part of a day, because I had overlooked pegging the posts and beam that form the door opening, and the posts had twisted. Not only did I have to peg them (a real struggle because of the mis-aligned holes), but the year-old mortises were no longer parallel and square, so lots of offering up and adjusting ensued:

gOlzoB4.jpg


ugf9JVk.jpg


Note the shaped mortise to the one on the floor, allowing the spandrel to rotate into position with the other spandrel already in place (like this, on the outer door):

KJegdde.jpg


Now, this door is going to be 71mm thick, which with an allowance for a draft seal means a curved rebate 75 x 25. That is not easy, however well equipped your workshop. Here is how I started:

1Jf2ZL5.jpg


After chiseling away as much as I could I then screwed on a template, and with a frightening cutter sticking 3 inches up out of the middle of an unguarded router table, I carefully (and extremely slowly) shaped the rebate. Not carefully enough:

Tagxk3q.jpg


That happened both sides. It is a fundamental design flaw with the piece, as the cross-grain (well, 45 degree grain) tapers to near zero. I had no option but cut it away to something solid, and glue in a long-grain patch:

oFDY655.jpg


blsWgqw.jpg


That's another day ticked off.

Today, I cleaned up and shaped the patches, shaped the outer face of the curve (the downstand against which the door shuts), used the scratchstock to scrape a 2mm curved groove for the seal, and trimmed off the bottom ends. Another 5 hours work. The scratching of the grooves took over an hour each. I'm well into 3 days work with just the door heads.........and who here would allow for that in pricing up a job like this?

I drilled out the peg holes in the tenons, but with only 40mm tenons the pegs can't be draw-bored, particularly into 45 degree grain. Then offered up the spandrels and marked up for a final trim and sand tomorrow:

ipjr633.jpg


MjK82bp.jpg


The corner patches came out really rather well, and I have seen similar repairs to spandrels in ancient buildings:

2jwsWxc.jpg


I then headed off to Thorogood Timber to pick up some more oak for the doors, a dresser in the kitchen, and a couple of other bits around the house. Hopefully I'll be able to get some time on this tomorrow.
 
MikeG.":3gjhynux said:
Now, this door is going to be 71mm thick, which with an allowance for a draft seal means a curved rebate 75 x 25. That is not easy, however well equipped your workshop.

Fascinating stuff!

Instead of forming the curved rebate from the solid, couldn't two pieces have been glued together to deliver the rebate that way?
 
Possibly, custard, but this is green timber which doesn't glue well (that is, as it shrinks and twists it would have a chance of breaking the glue line apart). I would have had to do it out of seasoned timber, and seasoned 3" oak isn't easy to find, nor is it cheap. More importantly, I get a kick out of making things the way they would have been made 700 years ago, albeit I am quite happy to use electrickery to help me do it. It really gives an insight into those brilliant carpenters who did all this all over the country without the benefit of power tools.
 
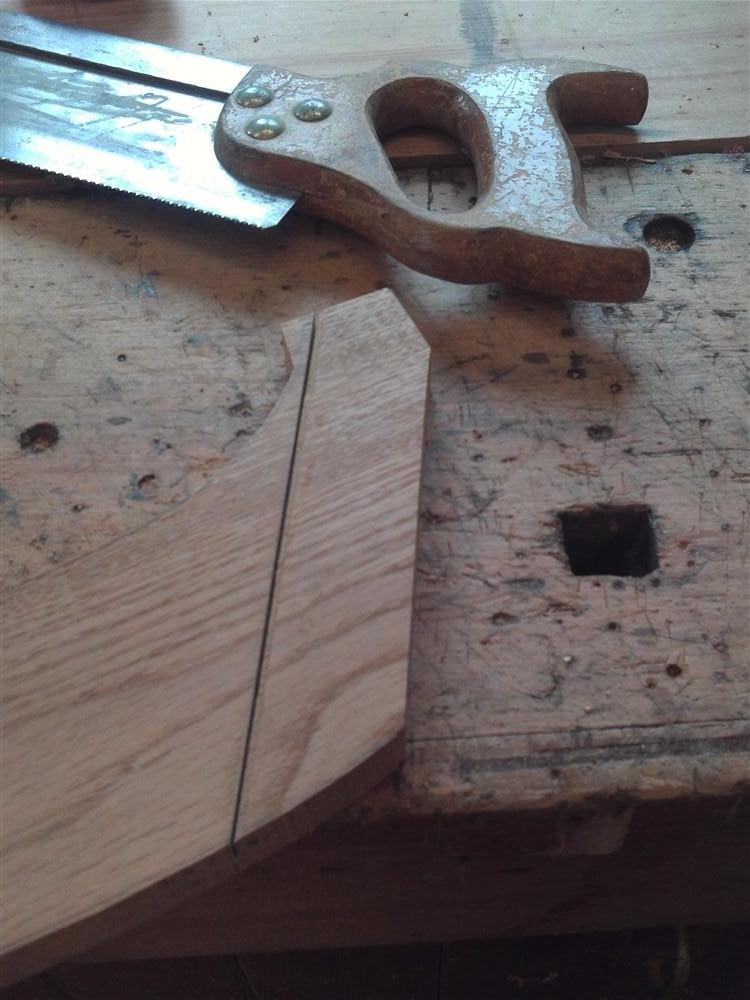
Documenting a day of underachievement. Well, half a day. I do have to earn a living now and then.

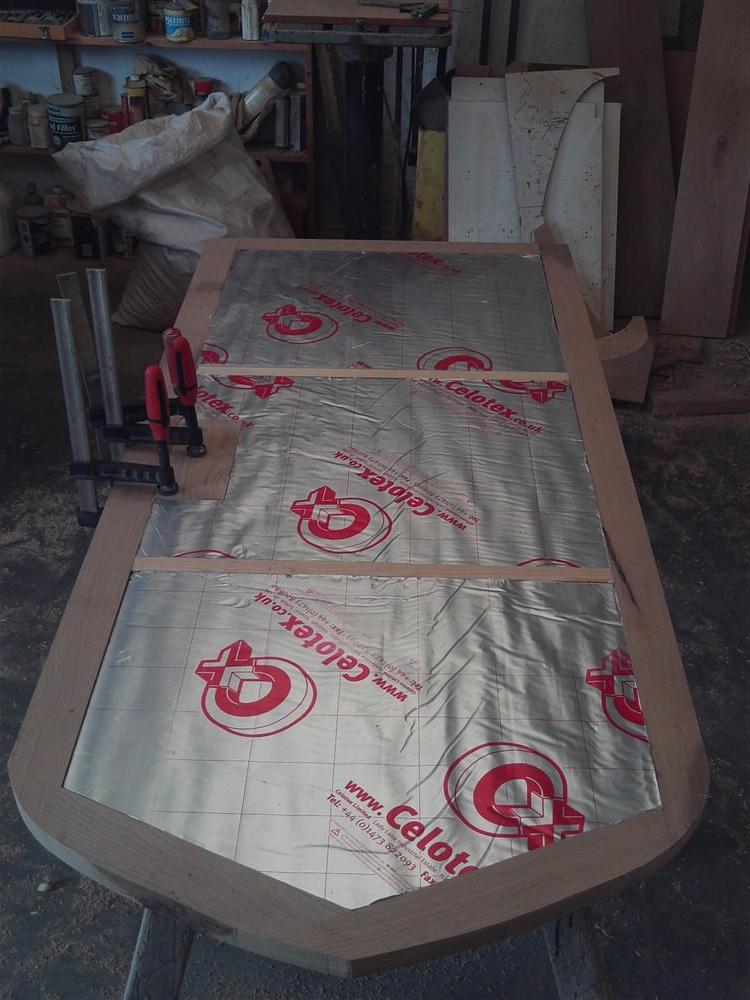
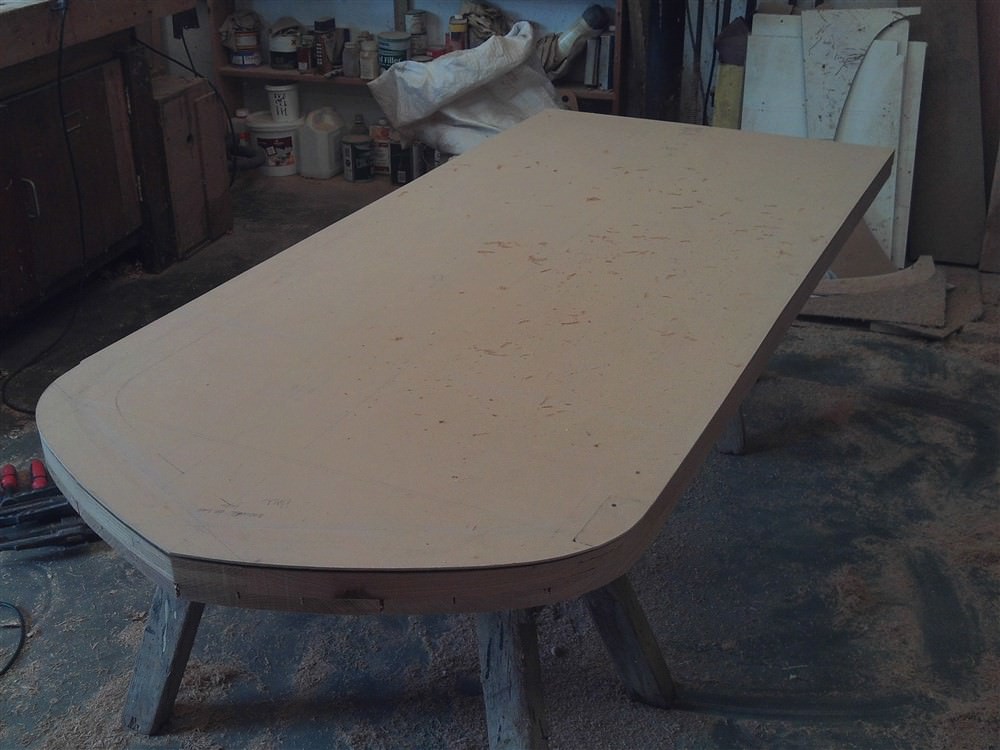
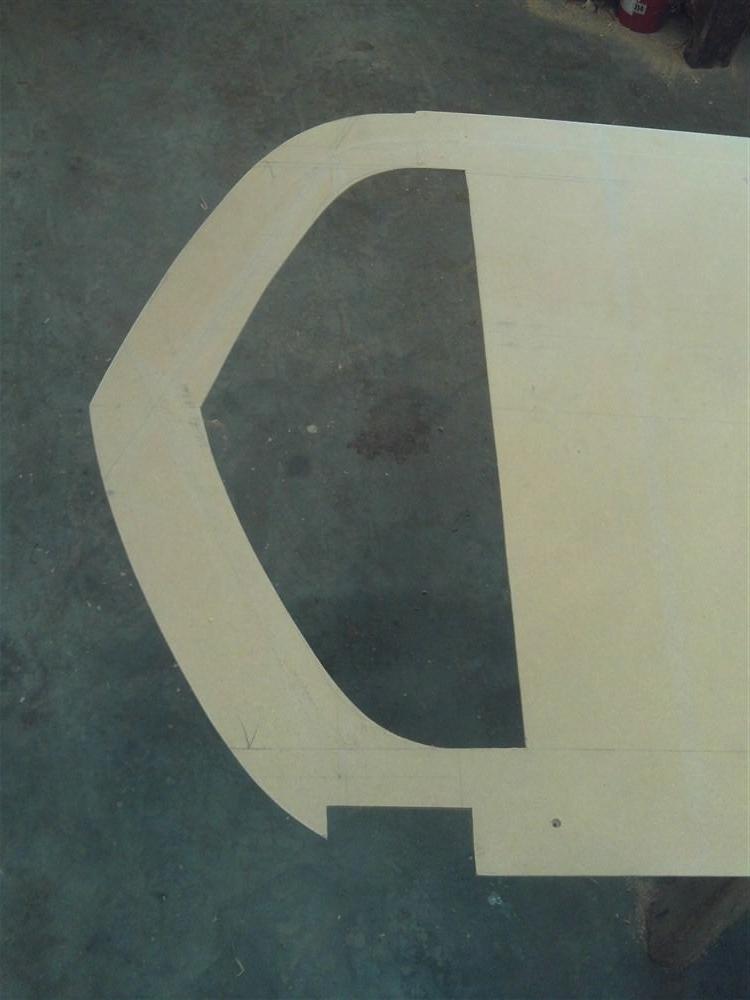
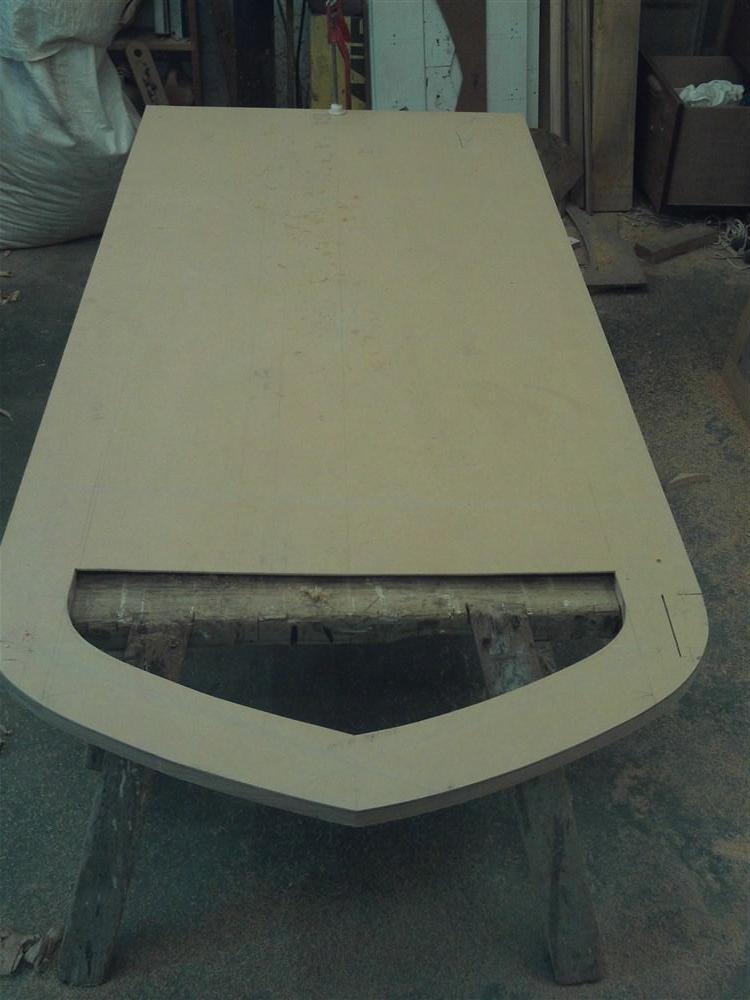
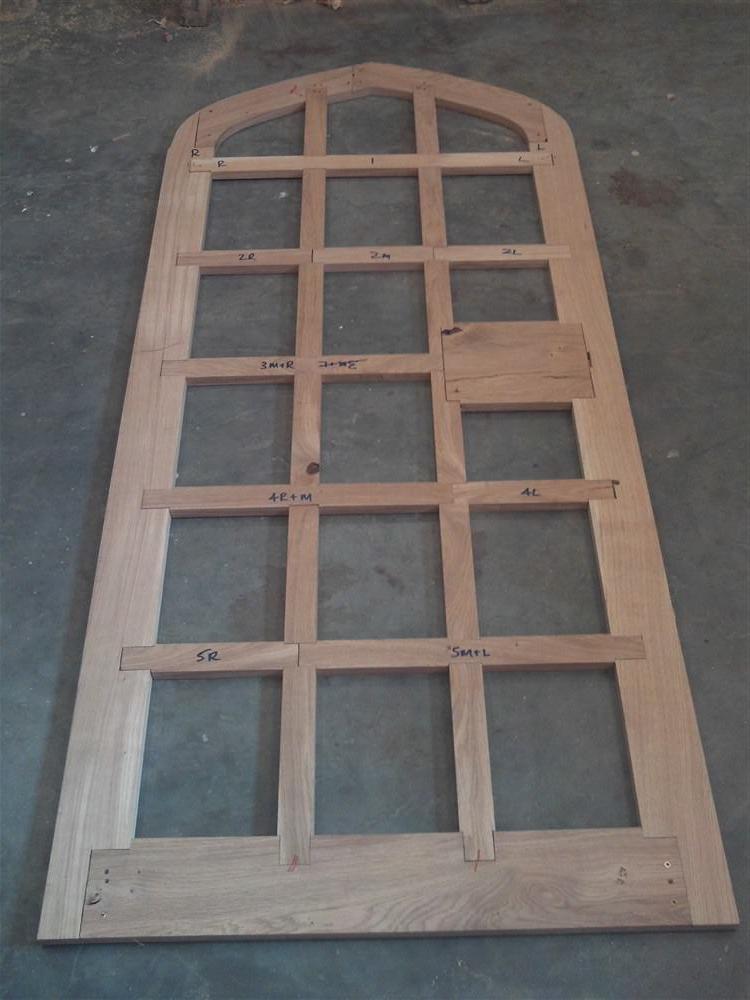
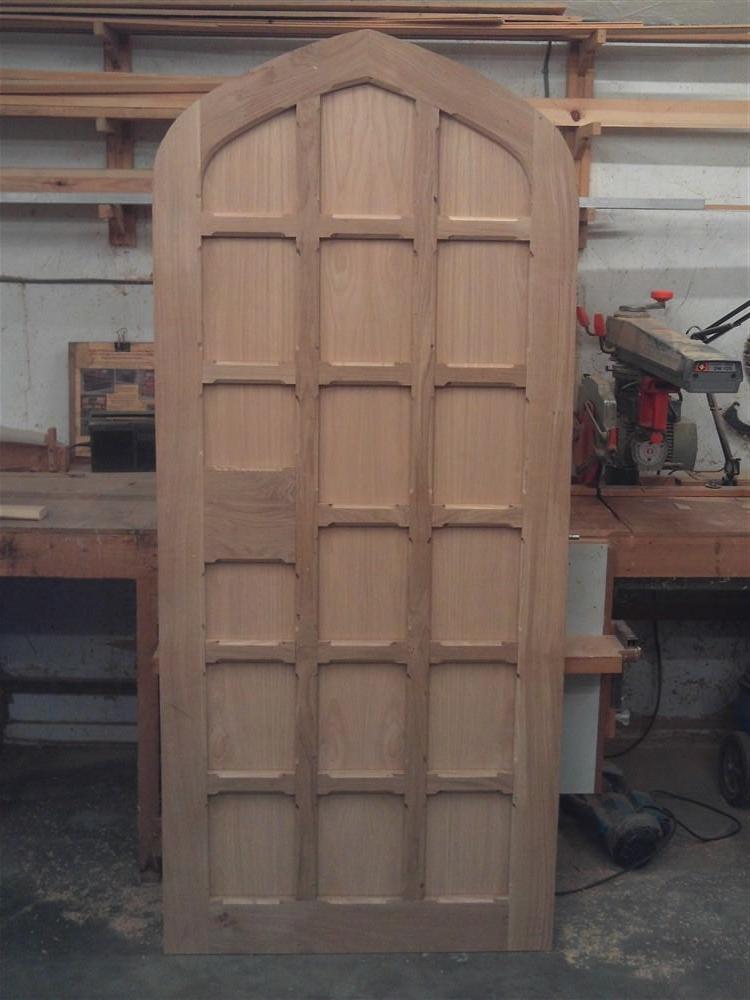
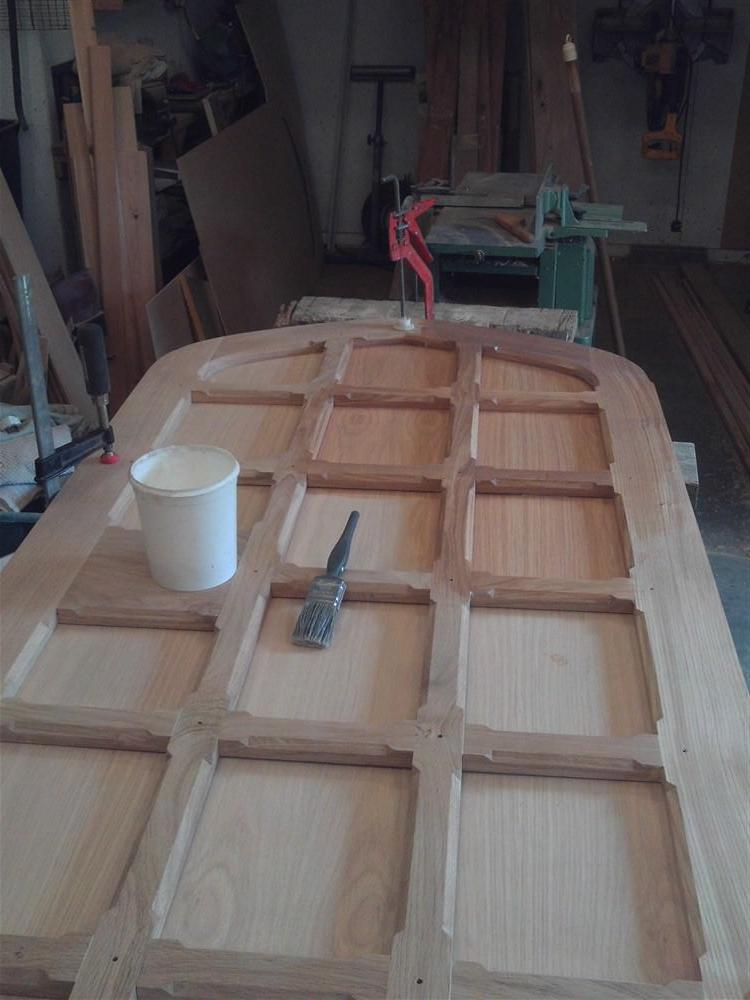
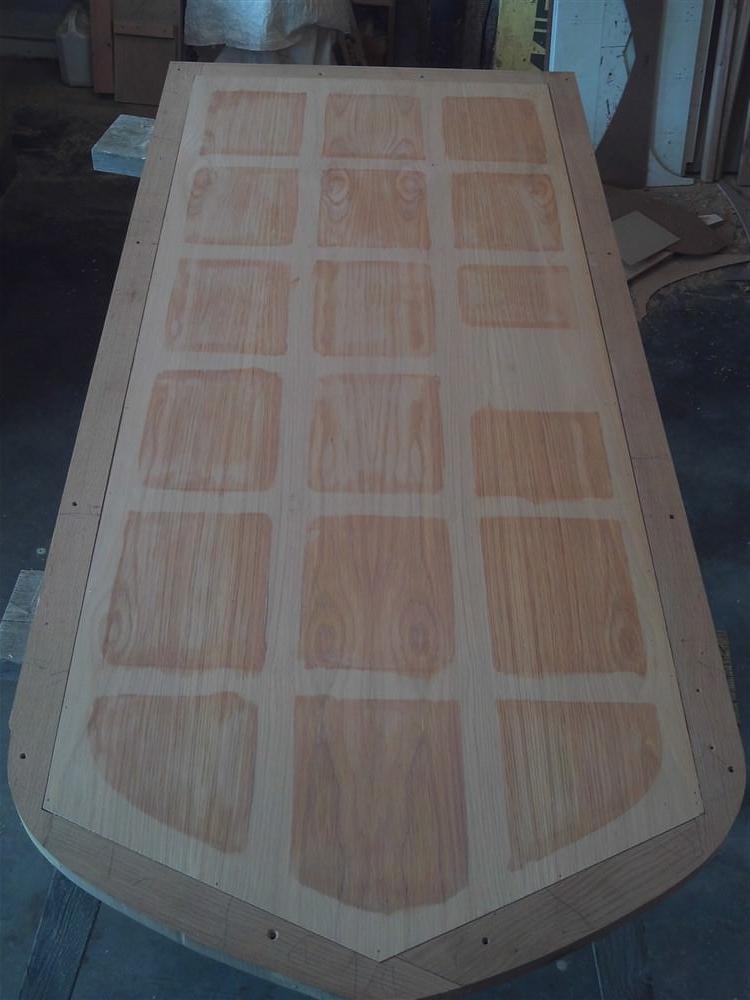
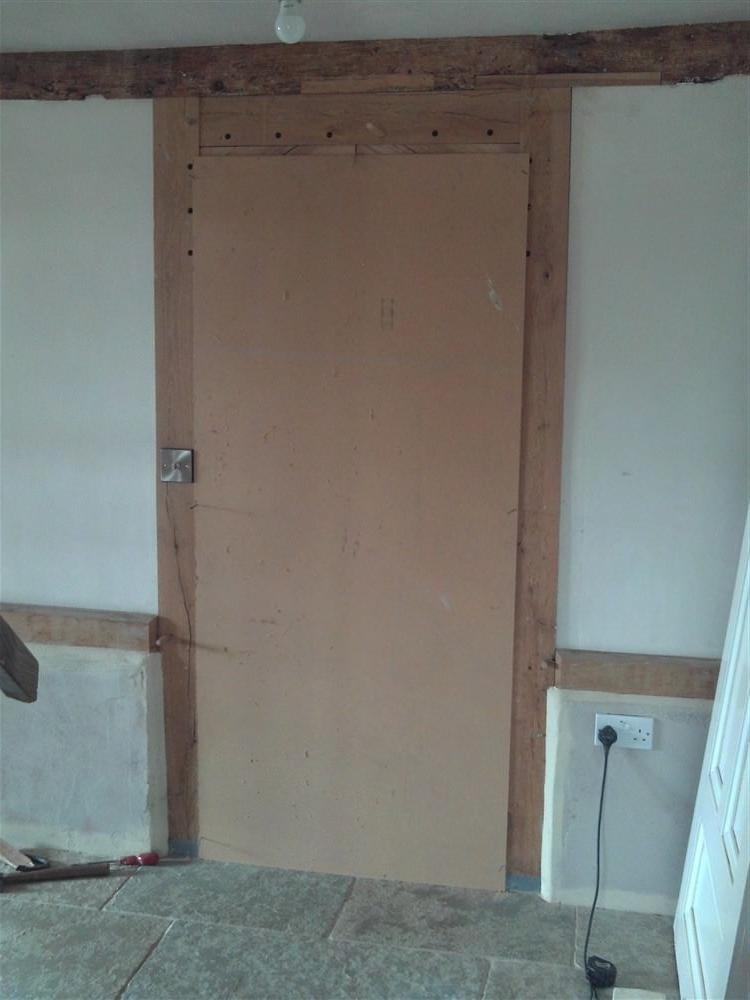
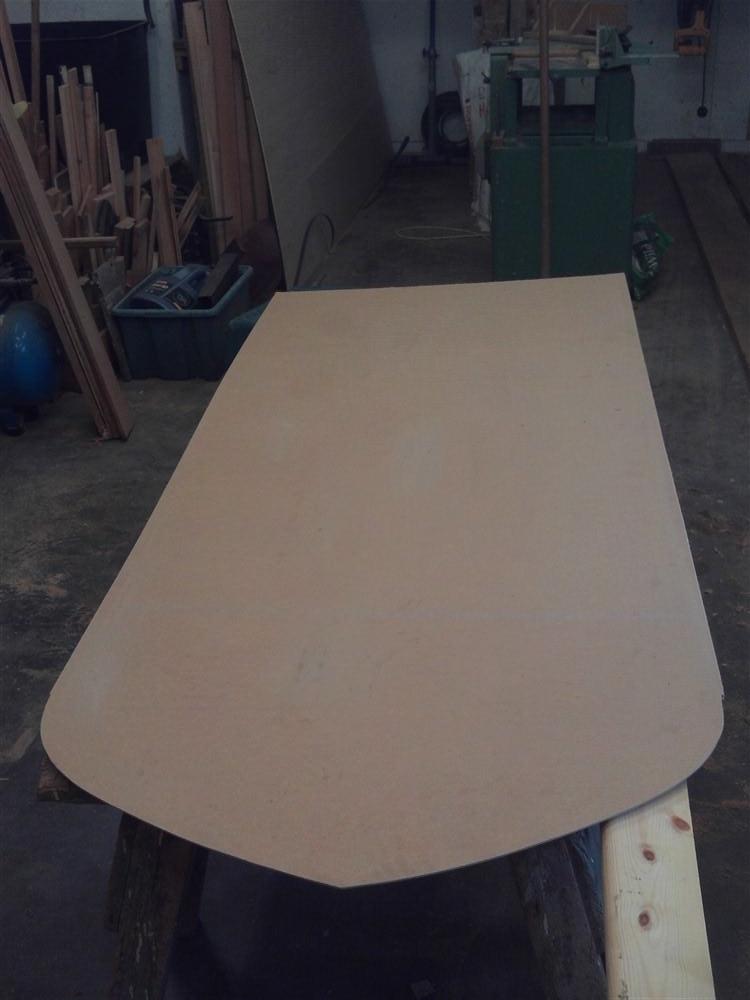
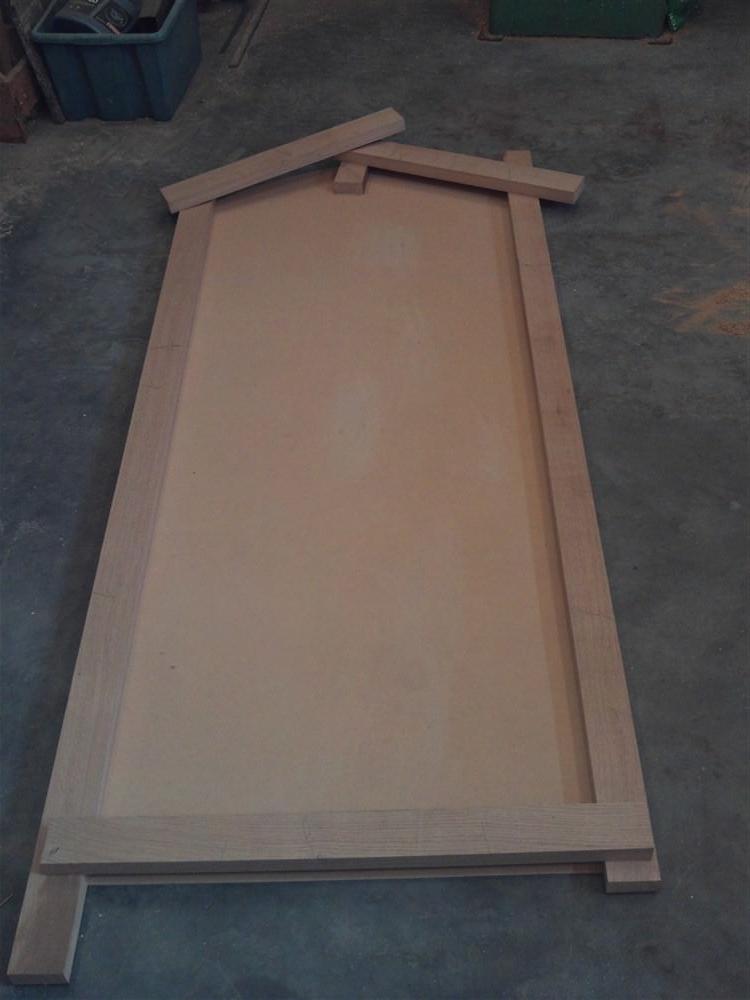
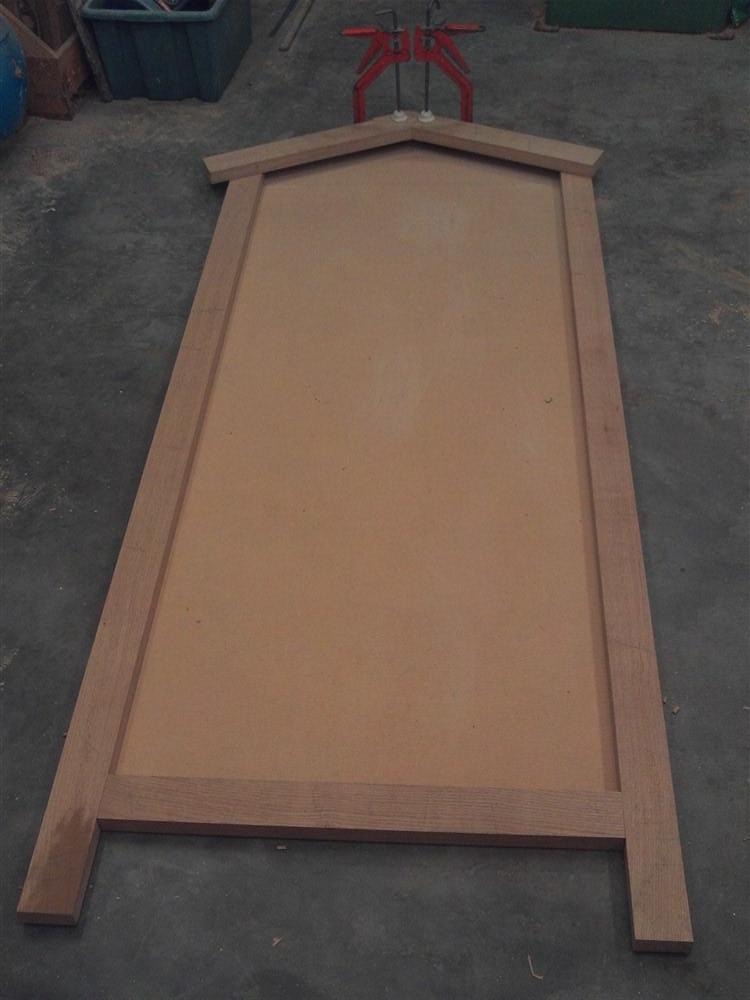
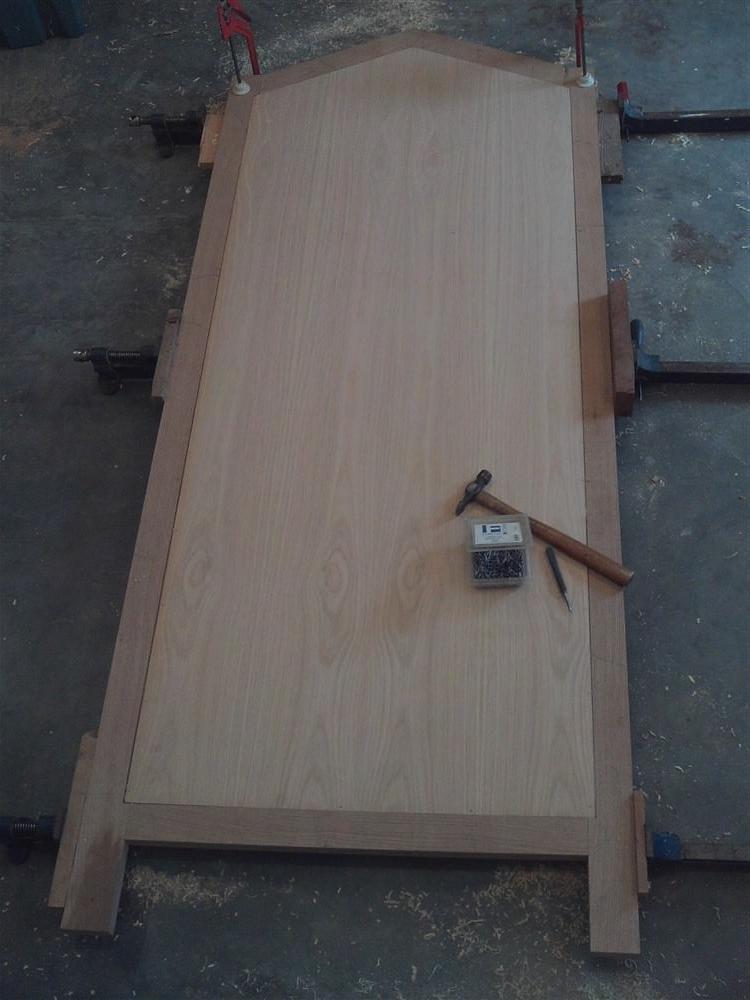
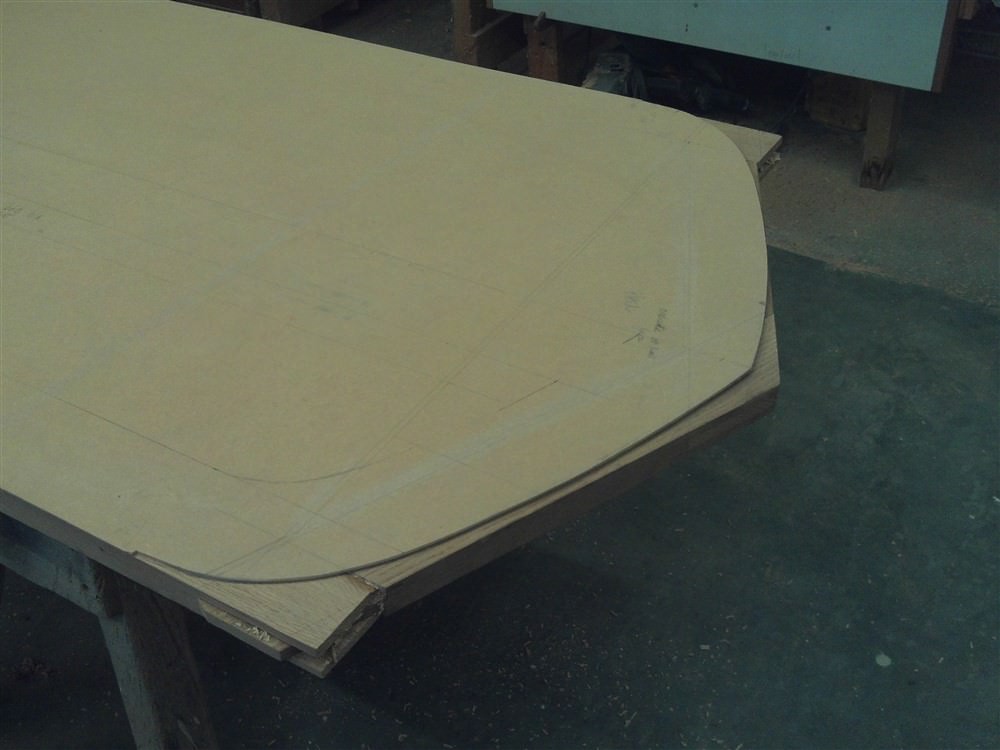
This door incorporates a sheet of 6mm oak faced ply, and when I bought it, it came sandwiched between a sheet of cardboard and a sheet of 3mm MDF. That was a bonus, because I wanted the MDF. This door is nearly 3 inches thick, and will weigh an absolute ton. I don't want to be standing it in place, adjusting, trying again, adjusting, and so on. I want it right first time, so, I made a template. Marking it up:

qPh3vcN.jpg


dtHEu0O.jpg


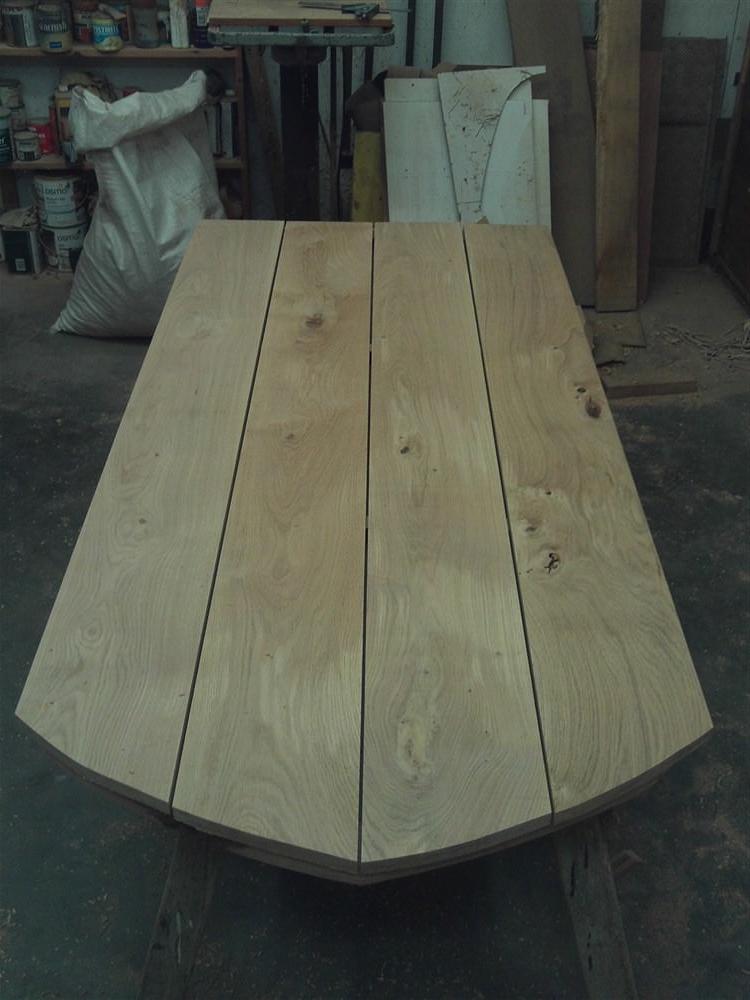
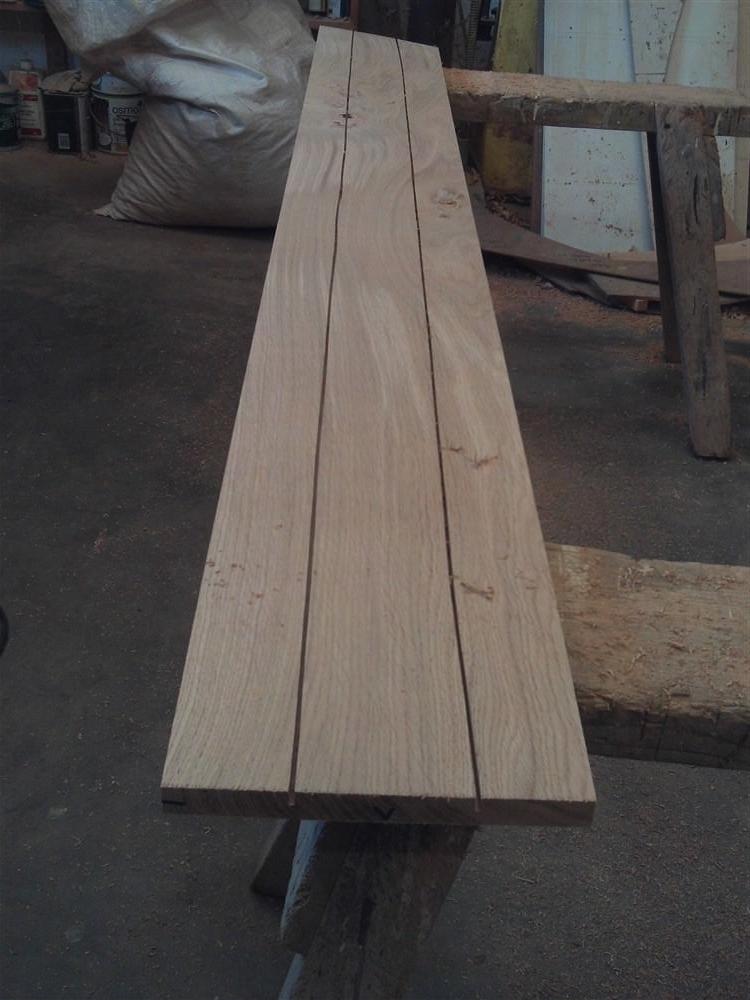
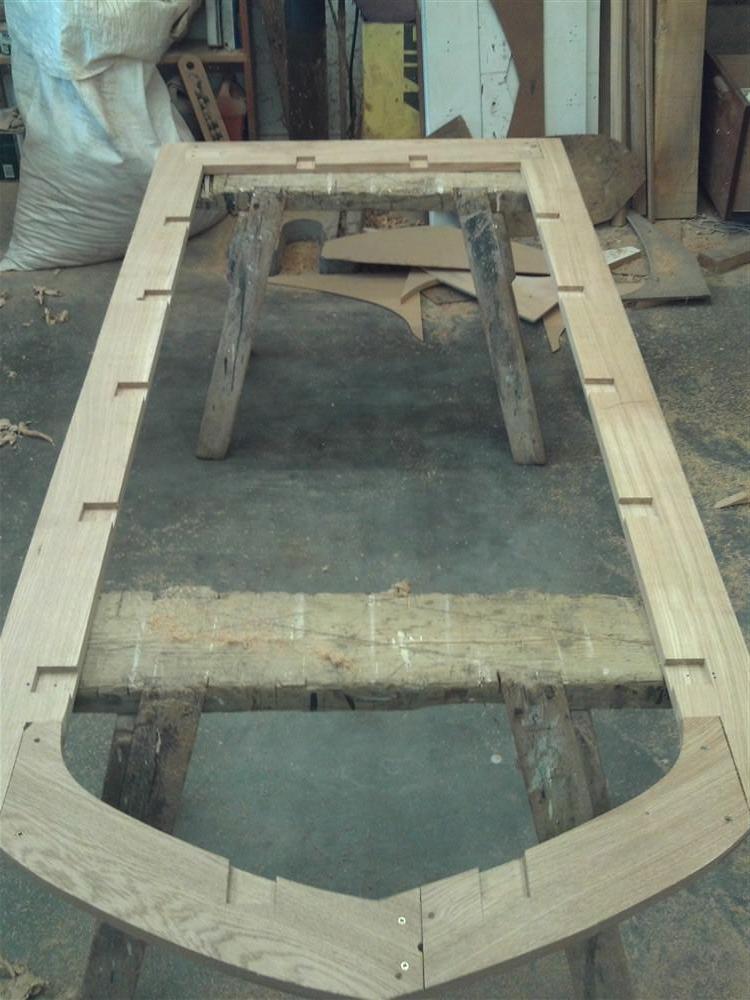
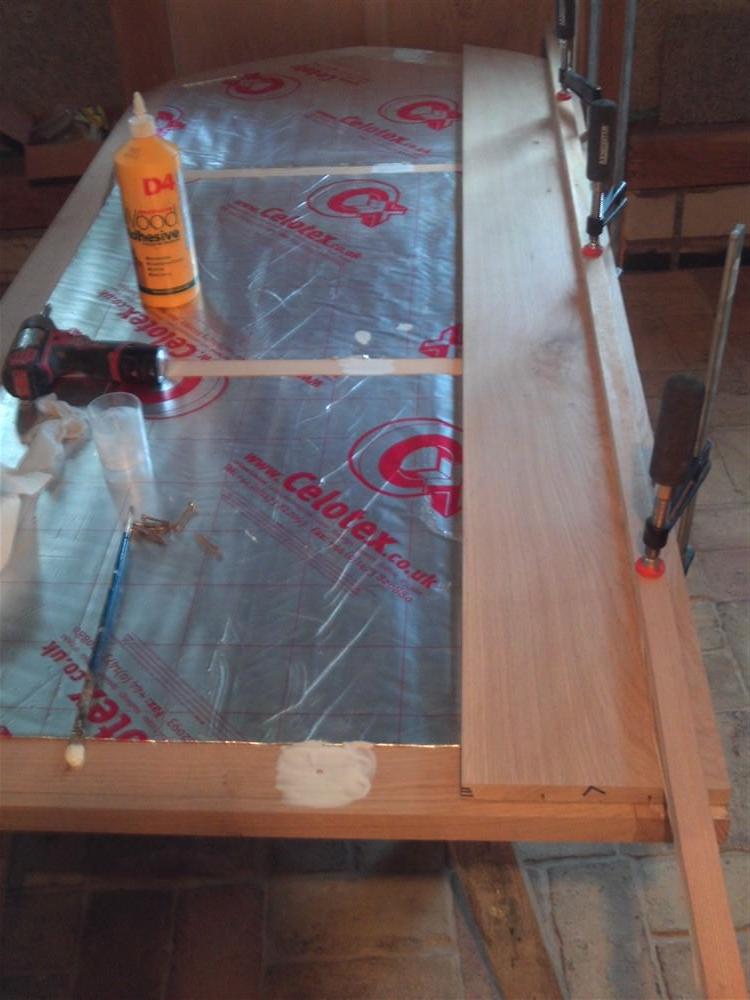
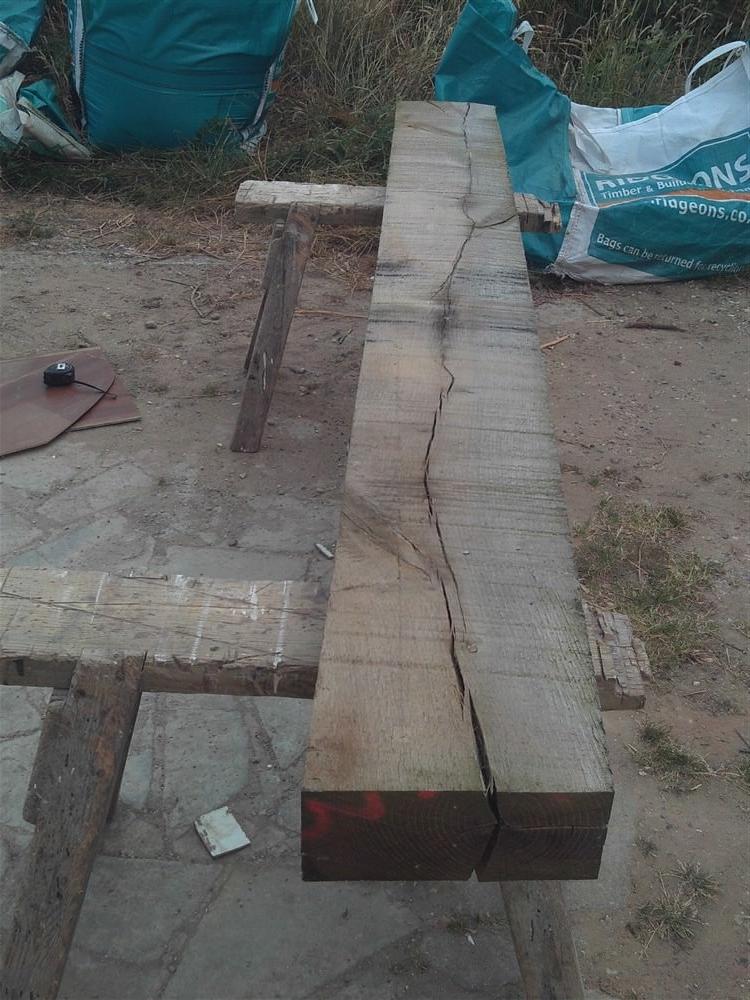
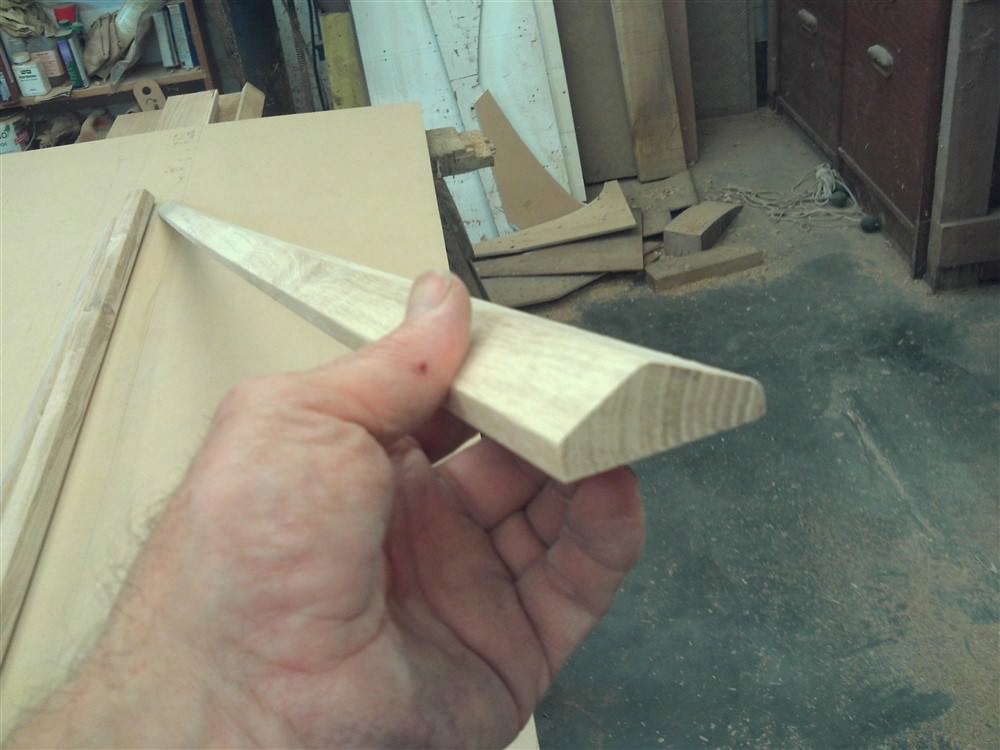
I thought I should start with the centre of the three layers to this door. This needs to be 31mm thick, to accommodate the insulation (25mm) and the ply (6mm). I had an old plank of oak which was 36mm thick.....perfect!

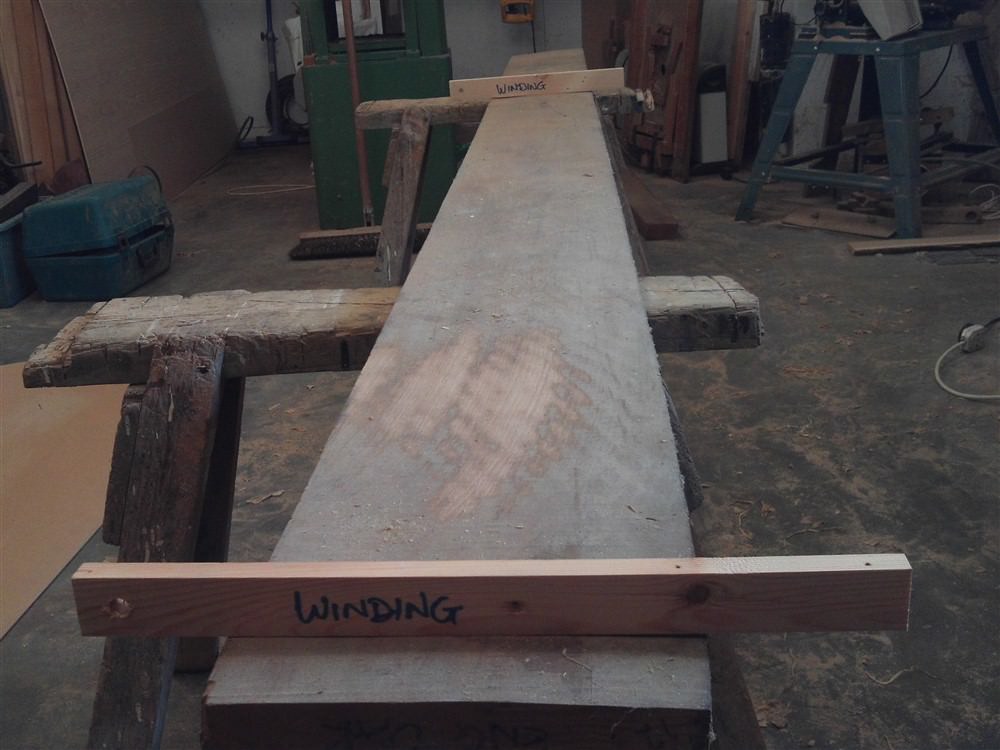
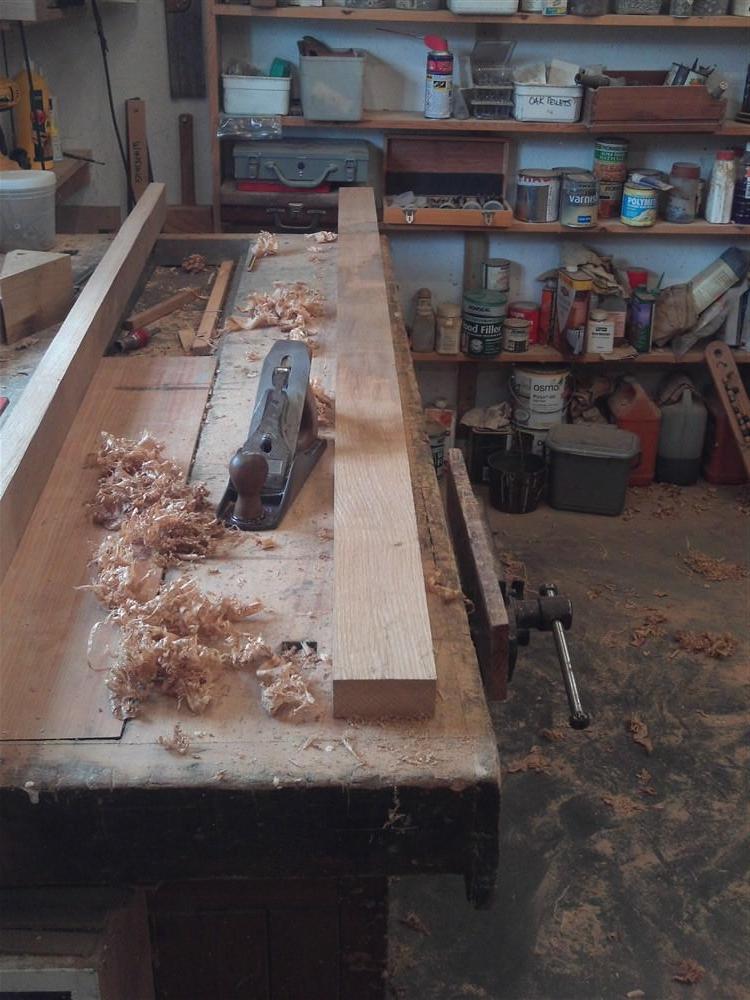
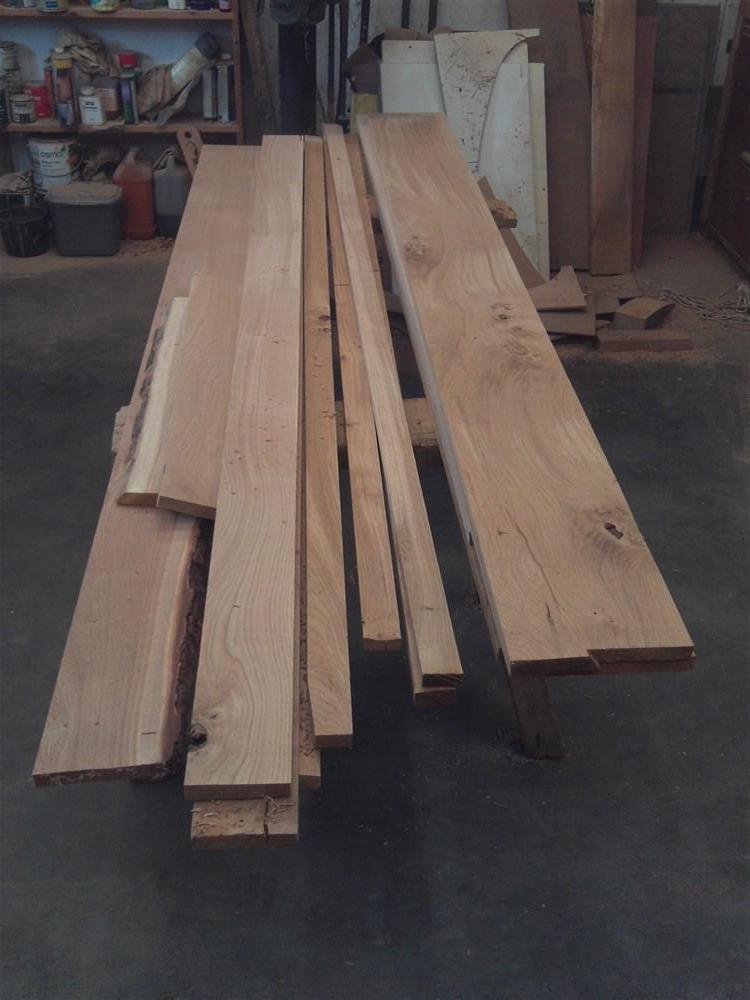
Let me walk you through preparing the stock. Jump ahead if this is old hat. Here is what I started with:

L1kwVA7.jpg


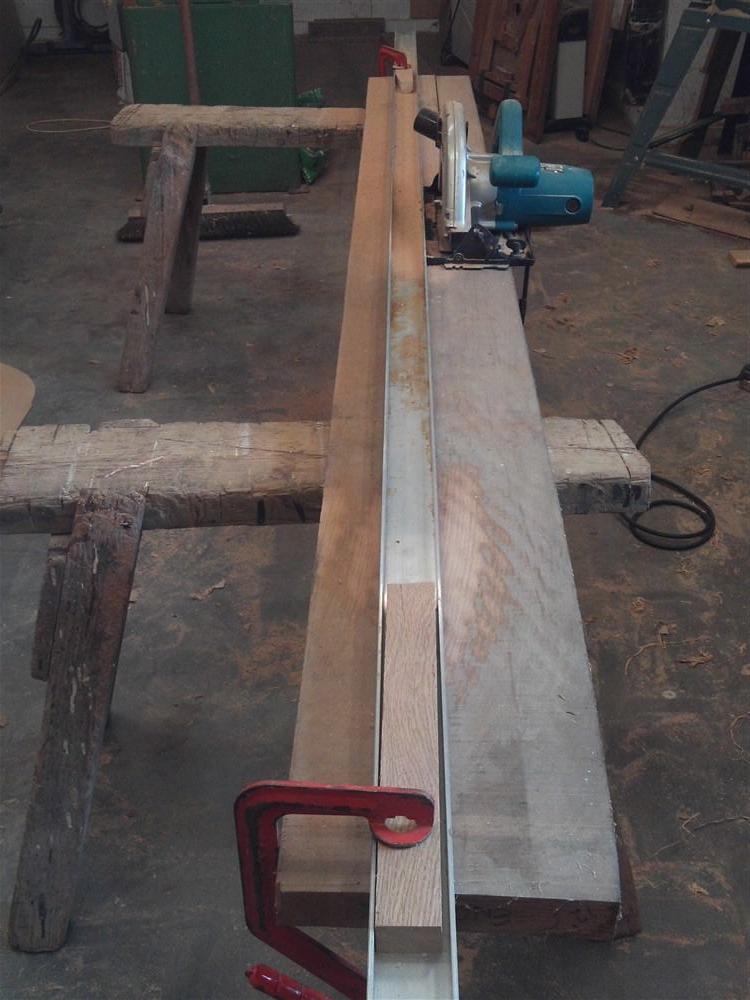
I used the winding sticks to determine that although there was a good couple of metres of the board which was pretty straight, it was twisted, and twisted enough that I wouldn't be able to plane it up as a whole, but I'd have to do it in individual pieces (I wanted bits approx 70mm wide). So, I sliced it up first:

vLzvBSr.jpg


This gave me three pieces about 2200 long, all with a twist. Out with the plane, and the winding sticks:

YOAuNNk.jpg


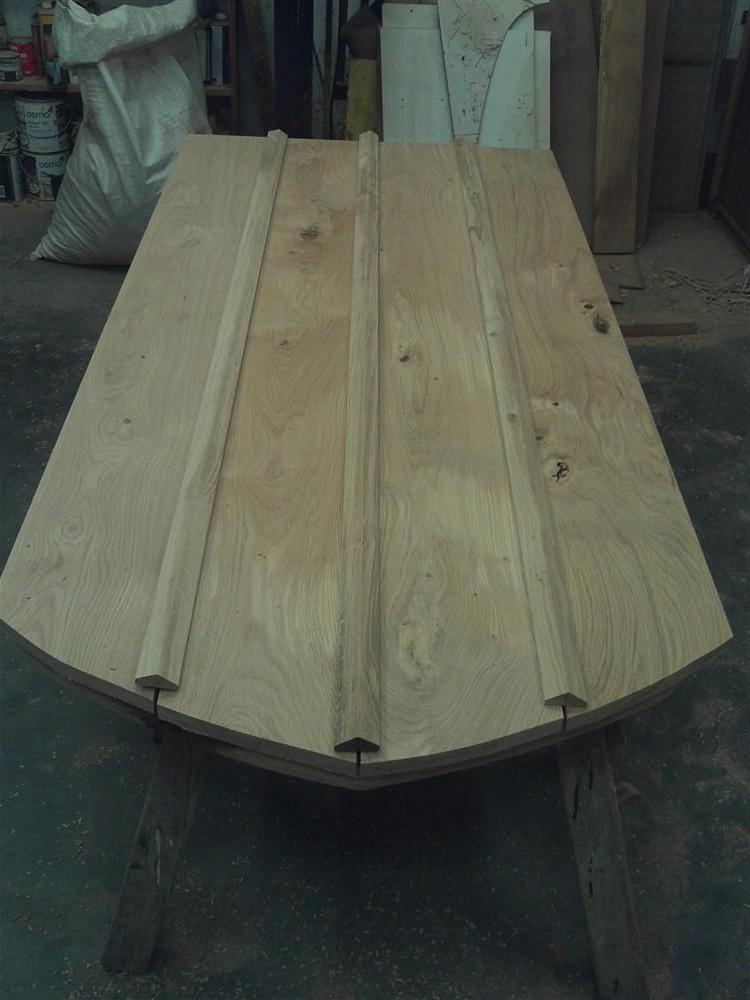
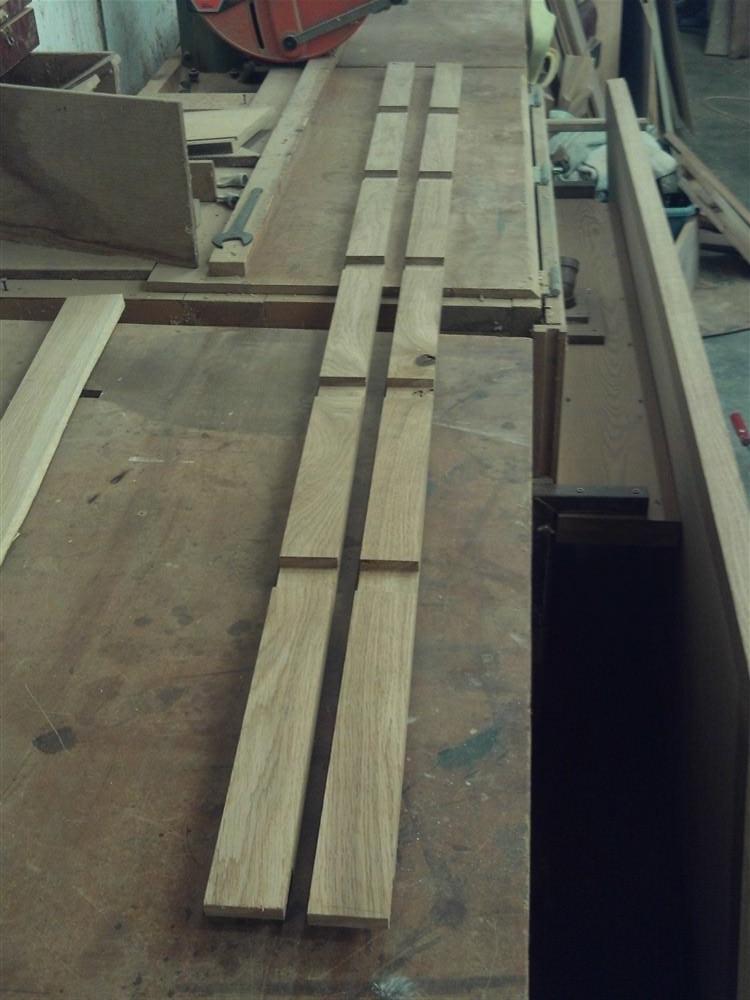
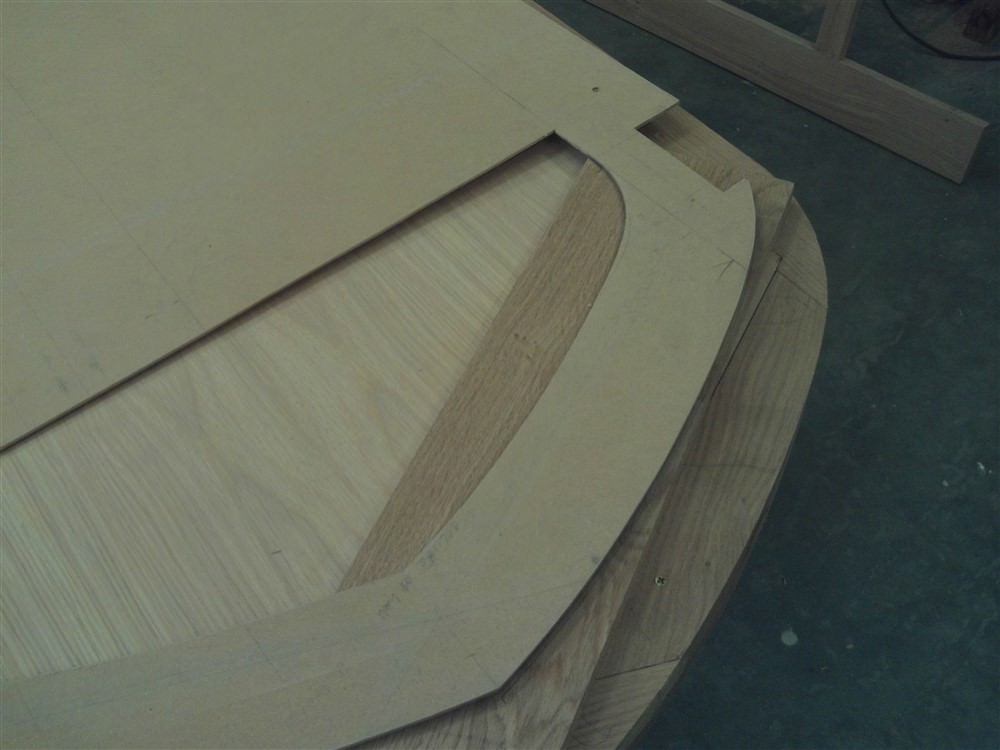
This is merely to flatten one face enough to pass the board through the thicknesser part of the P/T. Neither face will be seen in the finished door.......this is a very unusual door, I say again...........so it wasn't imperative to get each face perfect. As it turned out, there was just enough thickness to allow the entirety of both faces to be properly planed. The shorter pieces were cut 3 or 4 inches over-length and planed up as per the longer ones, only it is a much simpler process with short bits of wood. The shorter you can cut the wood, the less planing you have to do to get the twist out. Here are all the bits dropped roughly in place over the template:

5t1MFuM.jpg


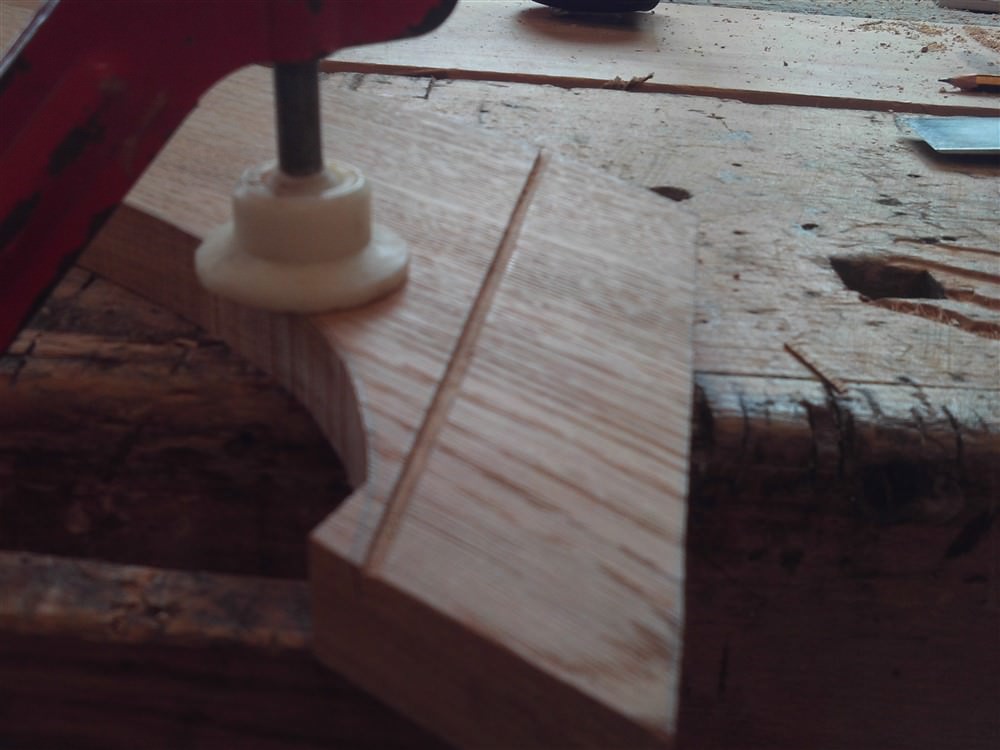
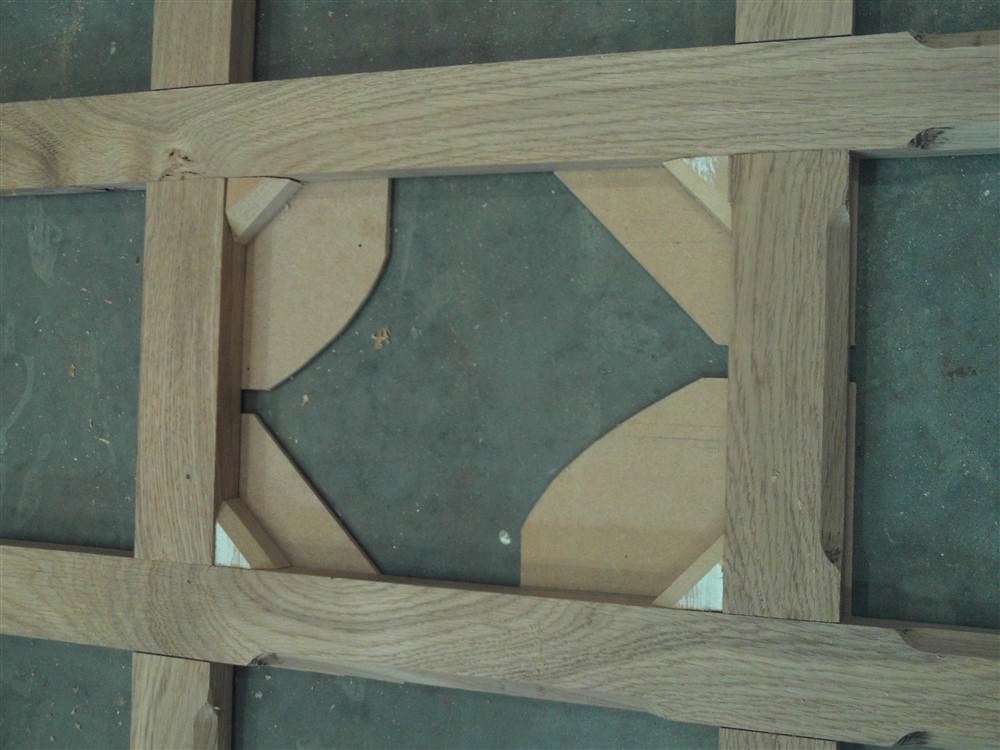
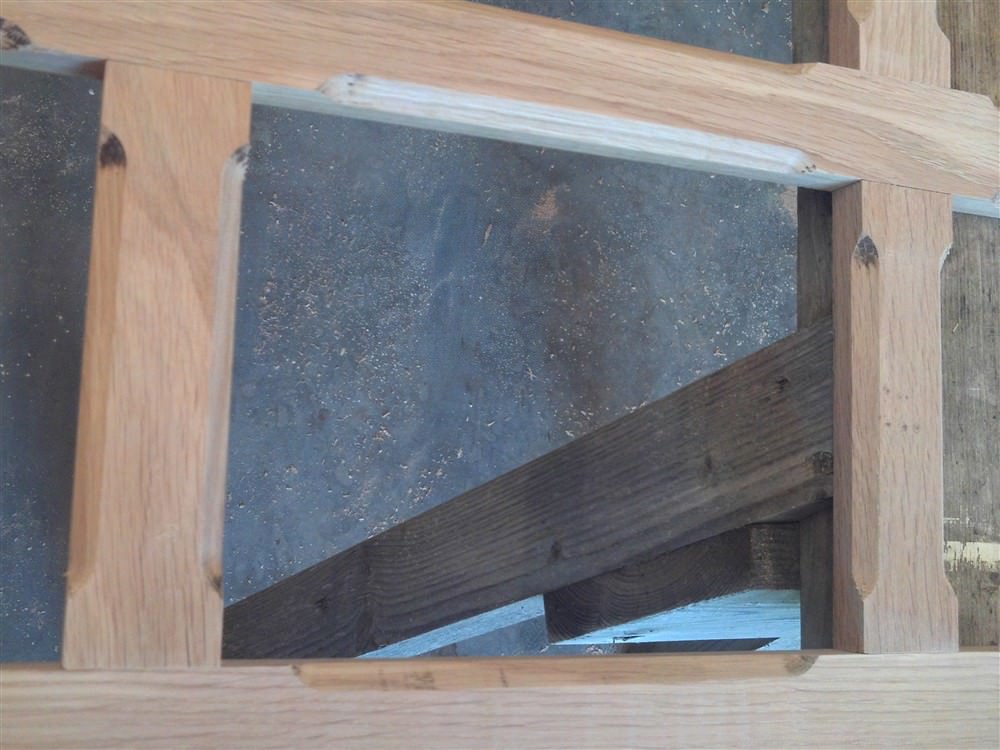
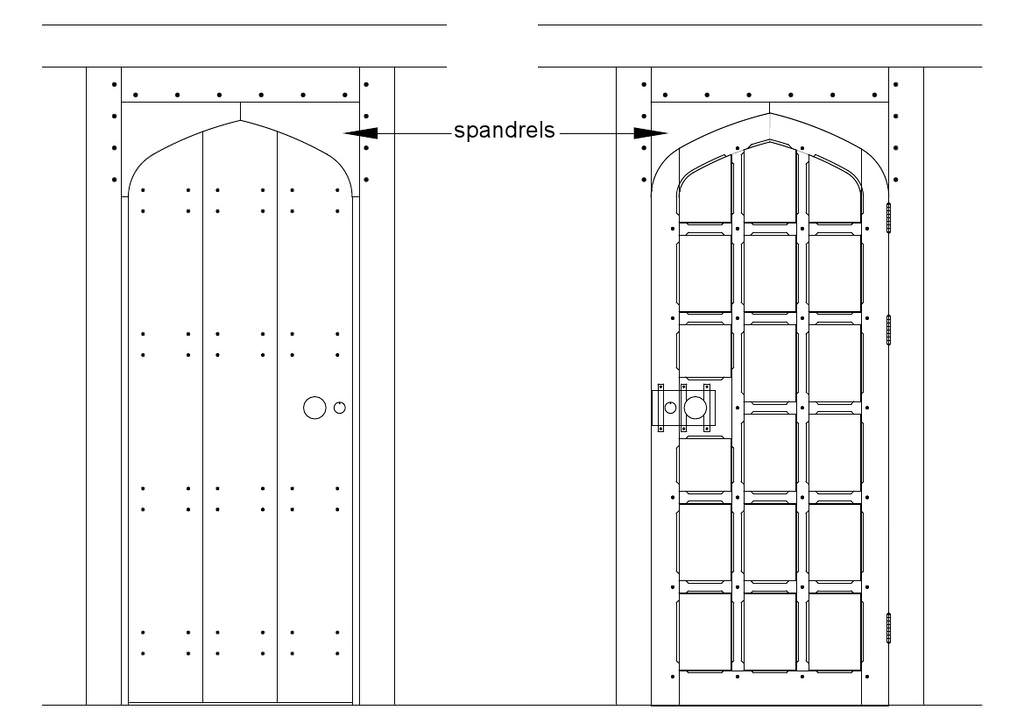
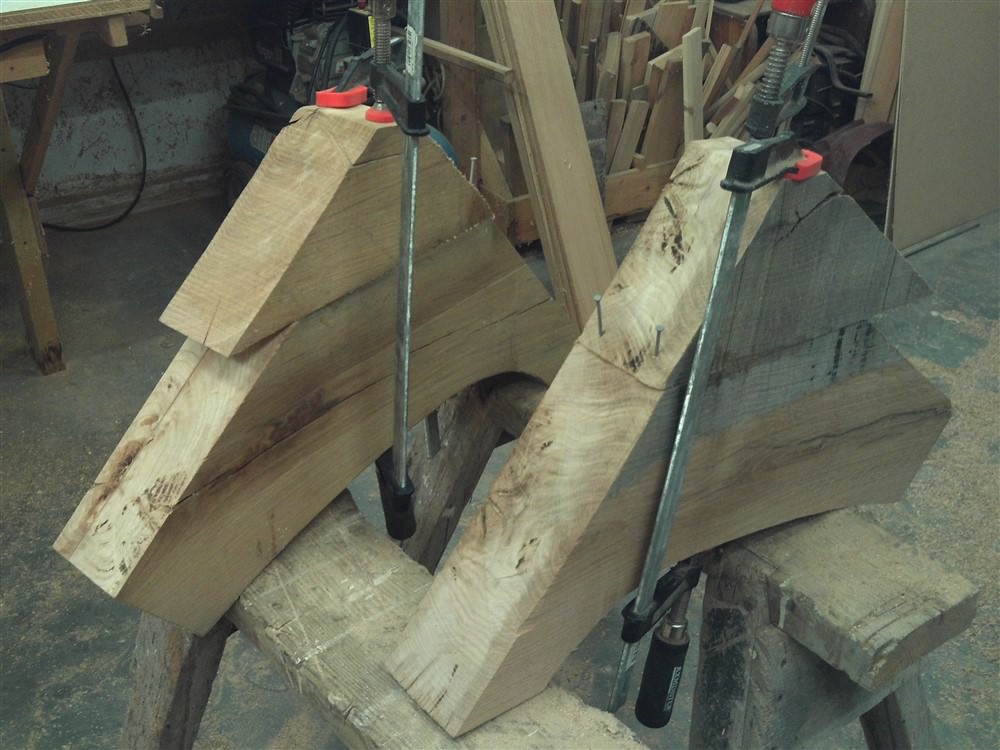
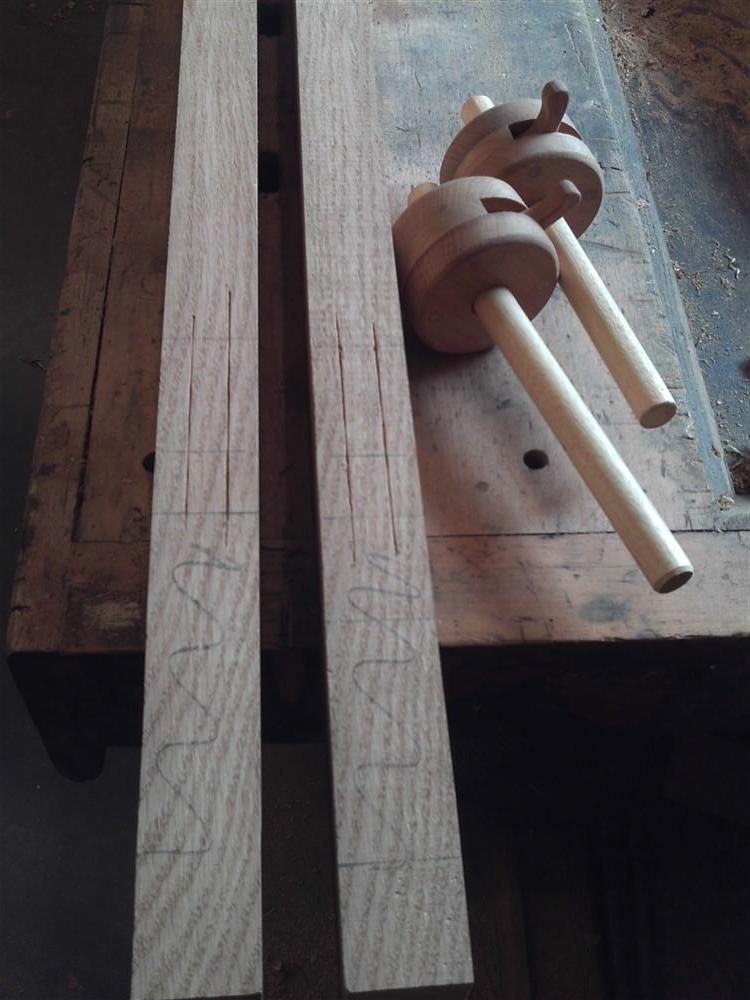
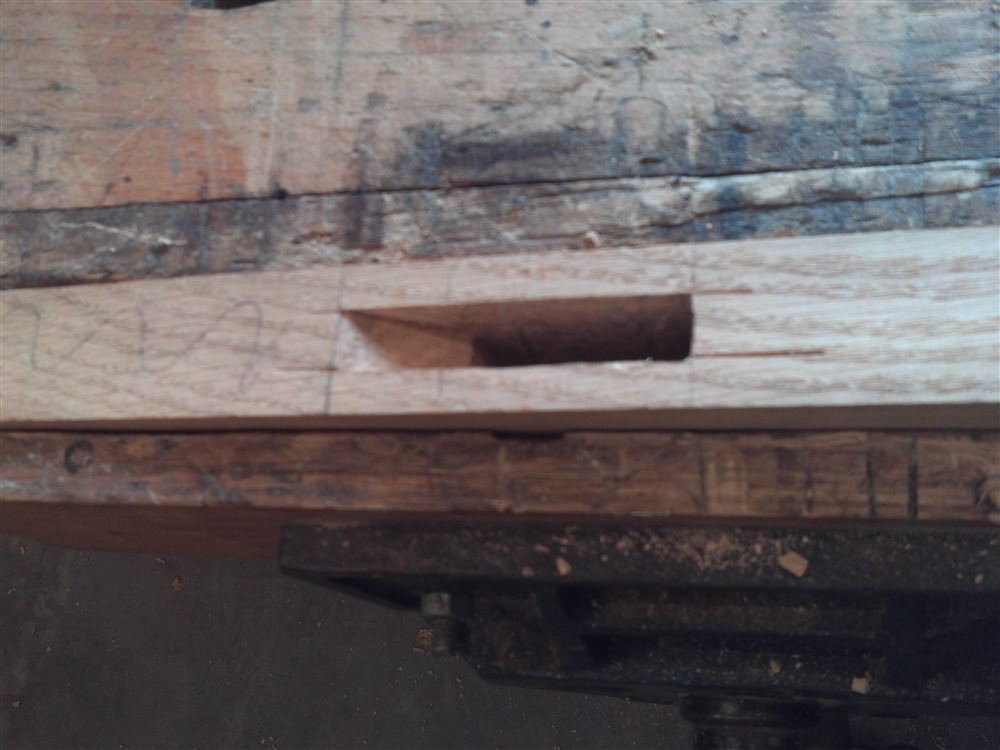
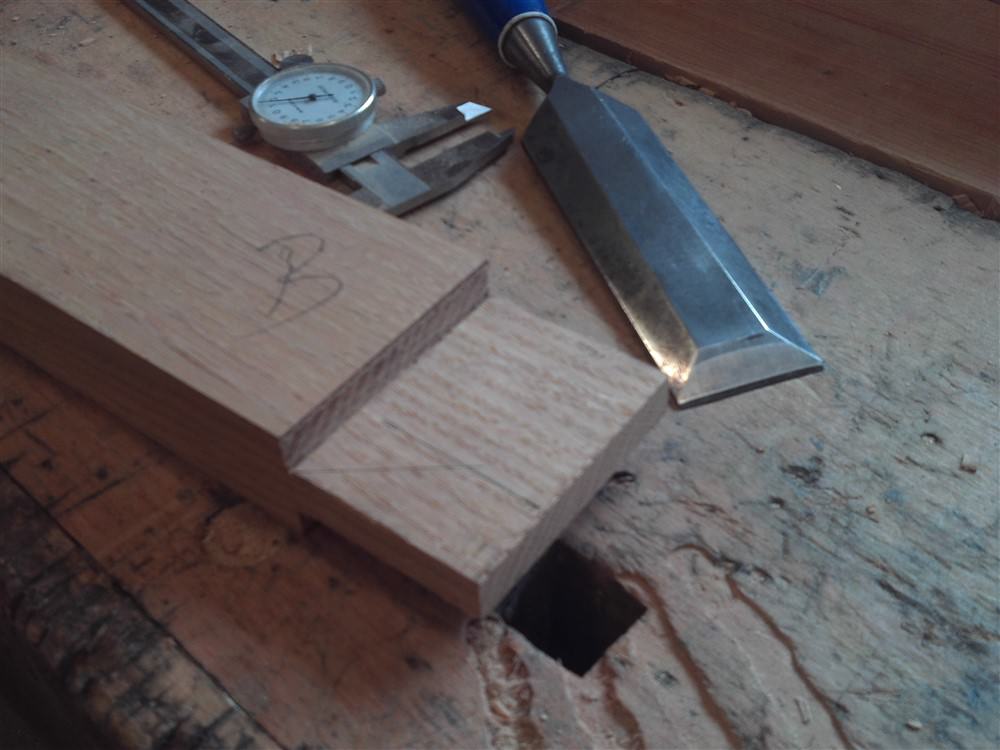
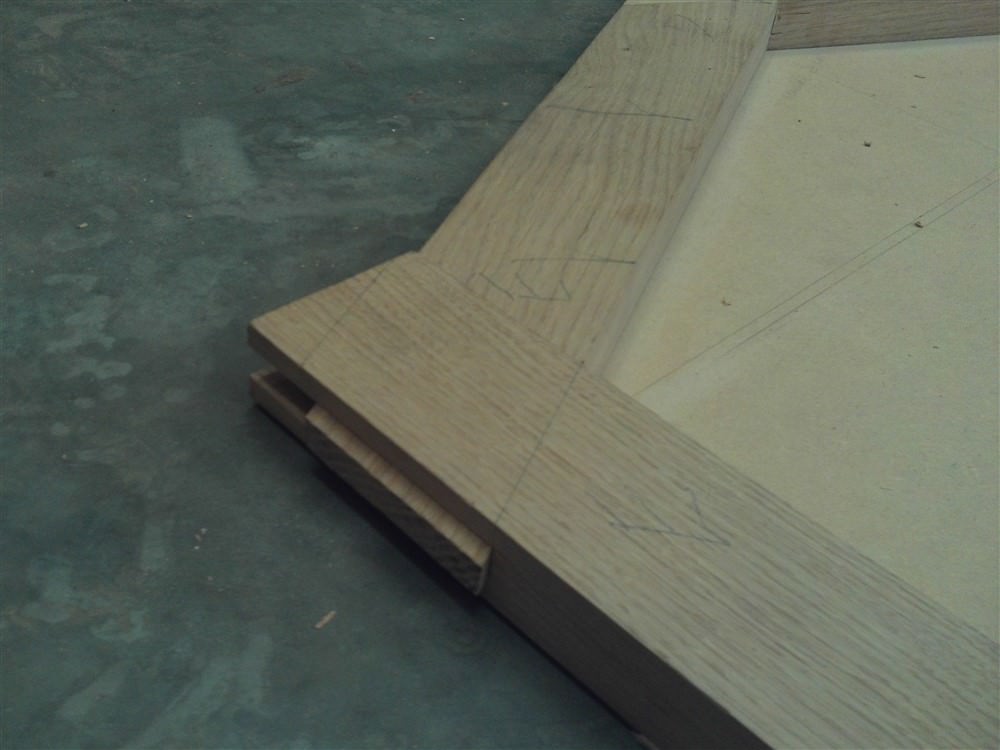
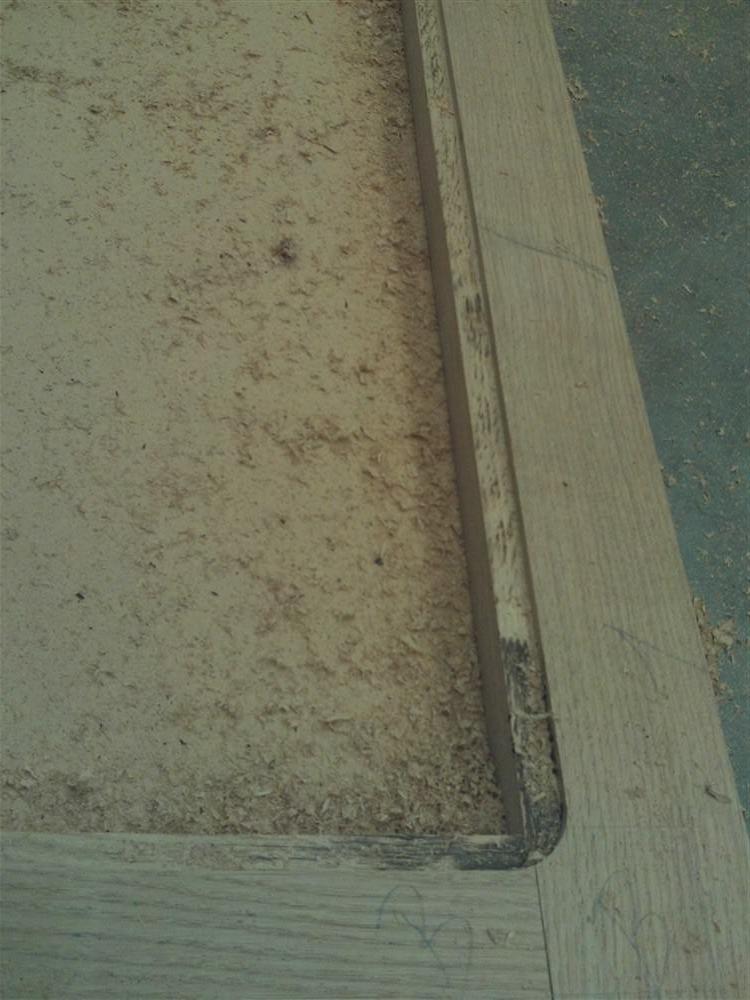
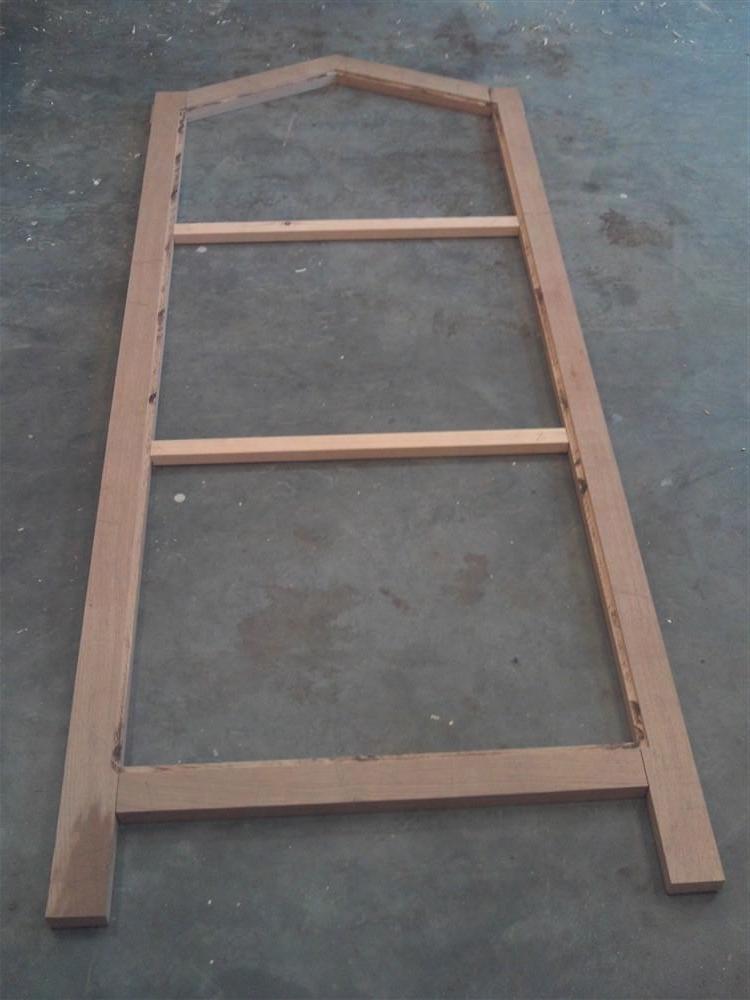
As I am sure you know by now, I love proper joints. These are a pair of mortise and tenons (with a small haunch) at the bottom corners of the door. This frame is NOT holding the door square, so there is no need for a through tenon, or wedges:

gFs06qg.jpg


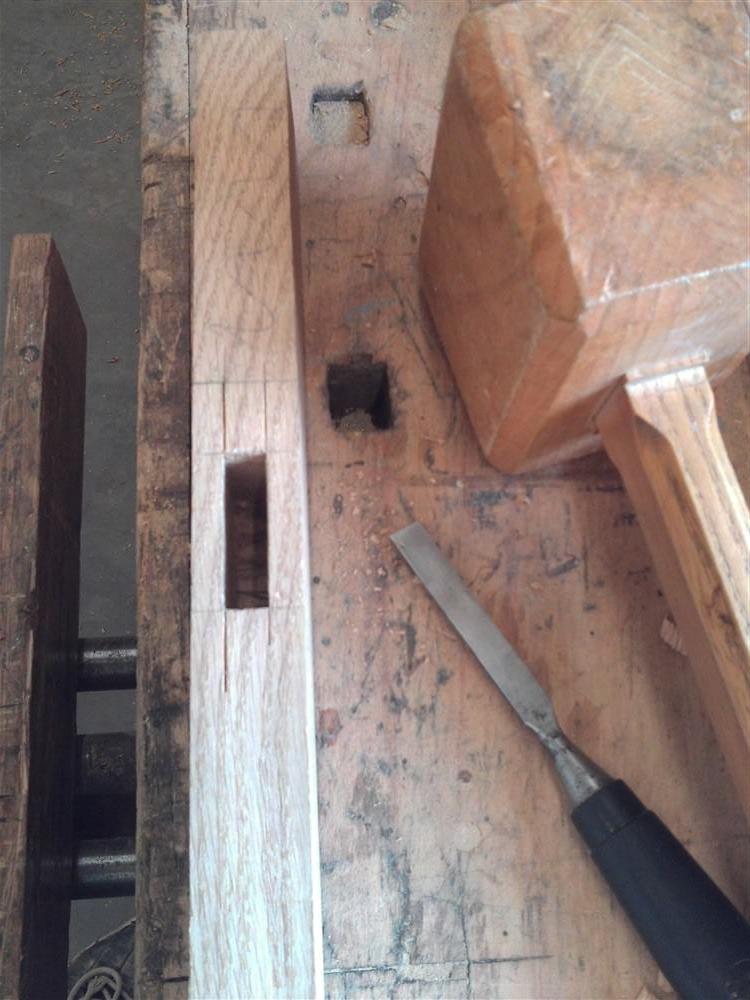
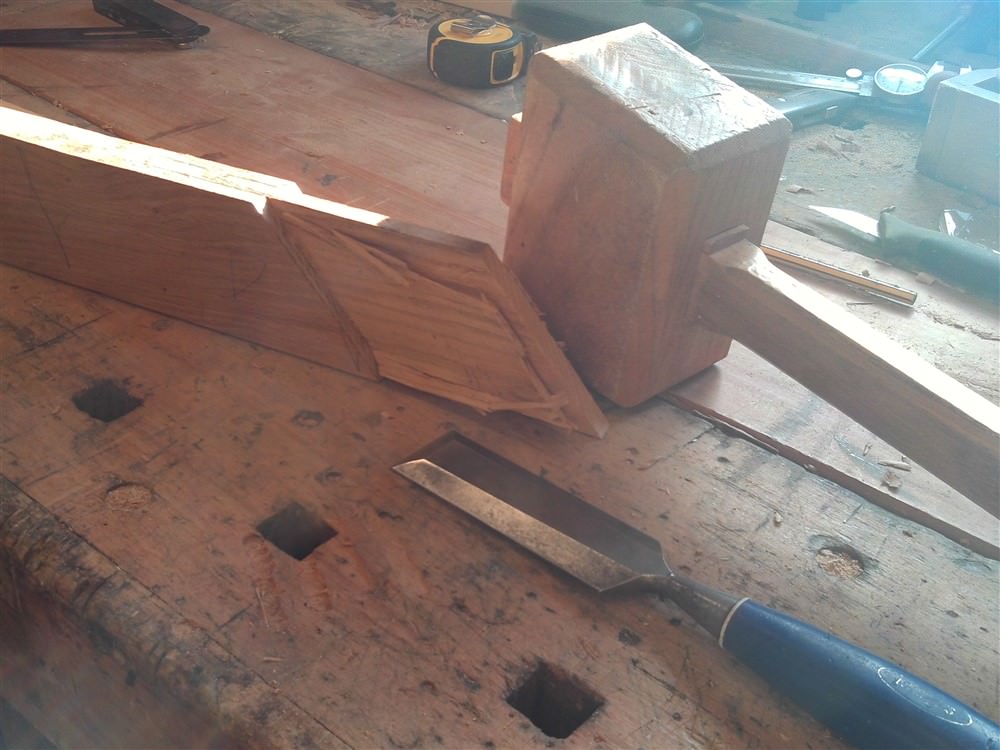
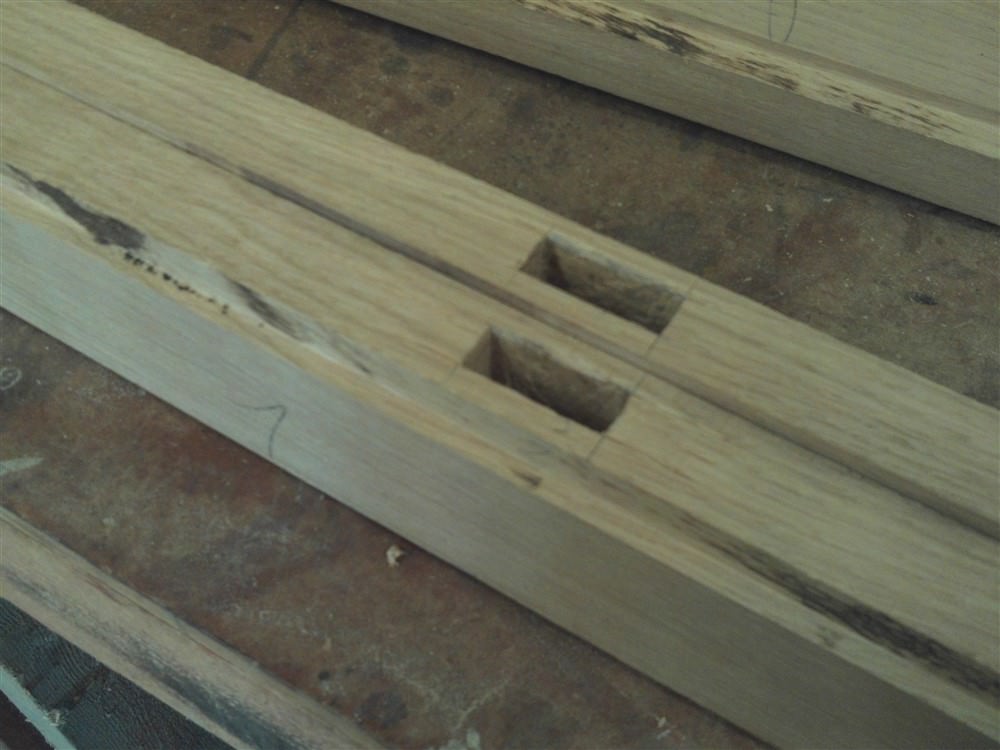
A 12mm mortise, chopped out with a bevel edge bench chisel (because that's all I have, or need):

G2q4dAv.jpg


With a quick haunch, for resistance to twisting):
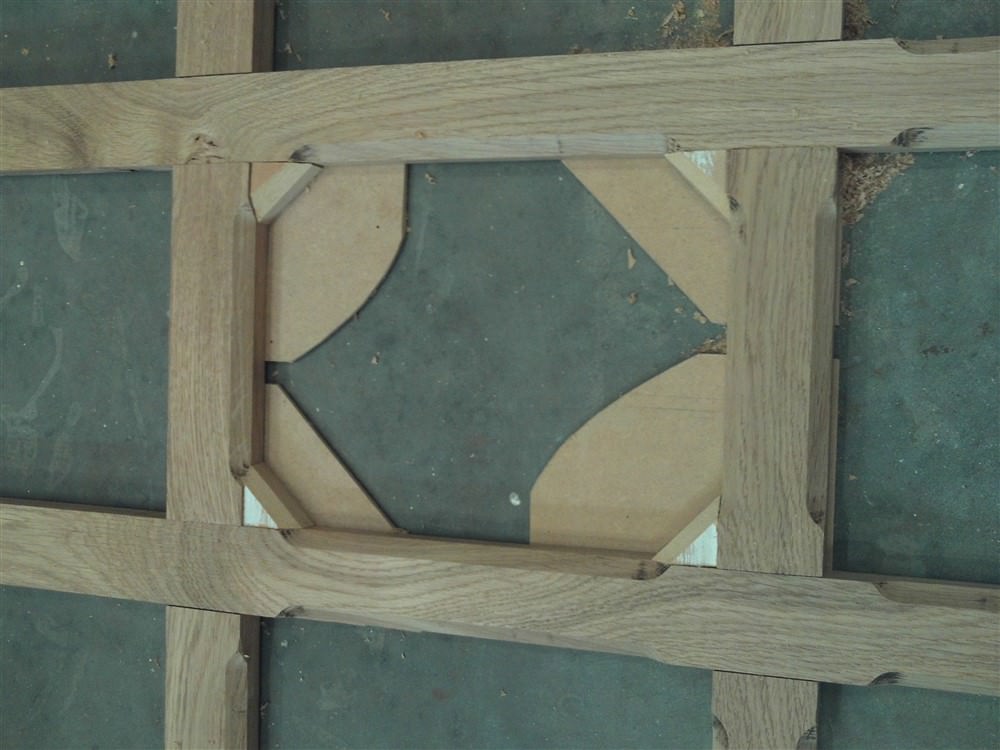
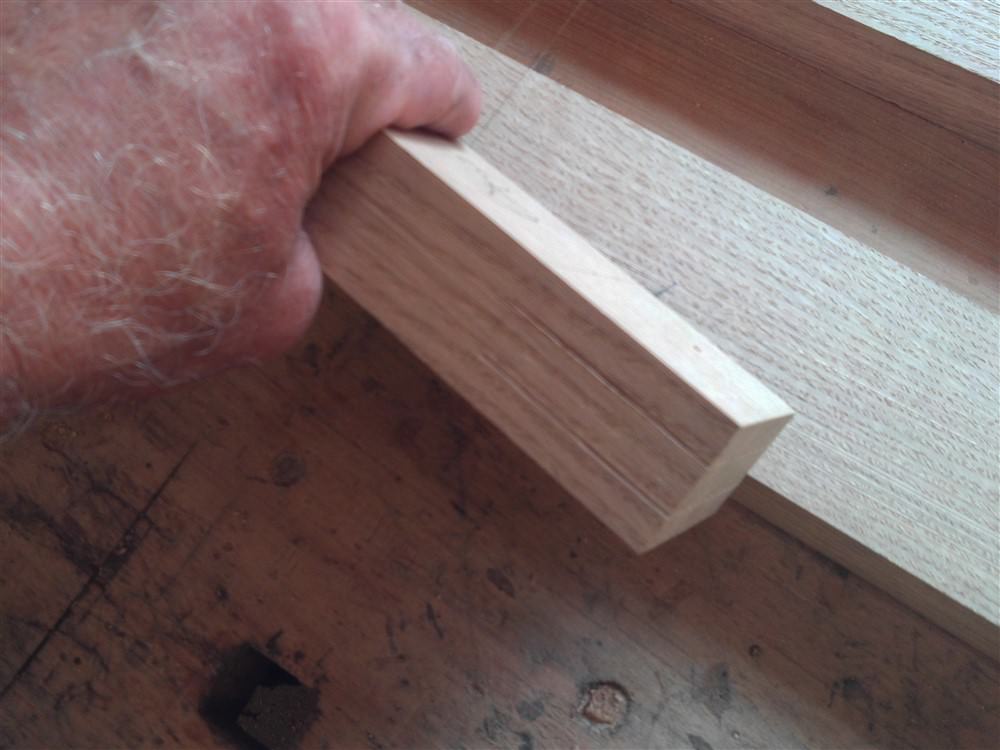
akkIdei.jpg


Tenon marked out:

JhkGrWB.jpg


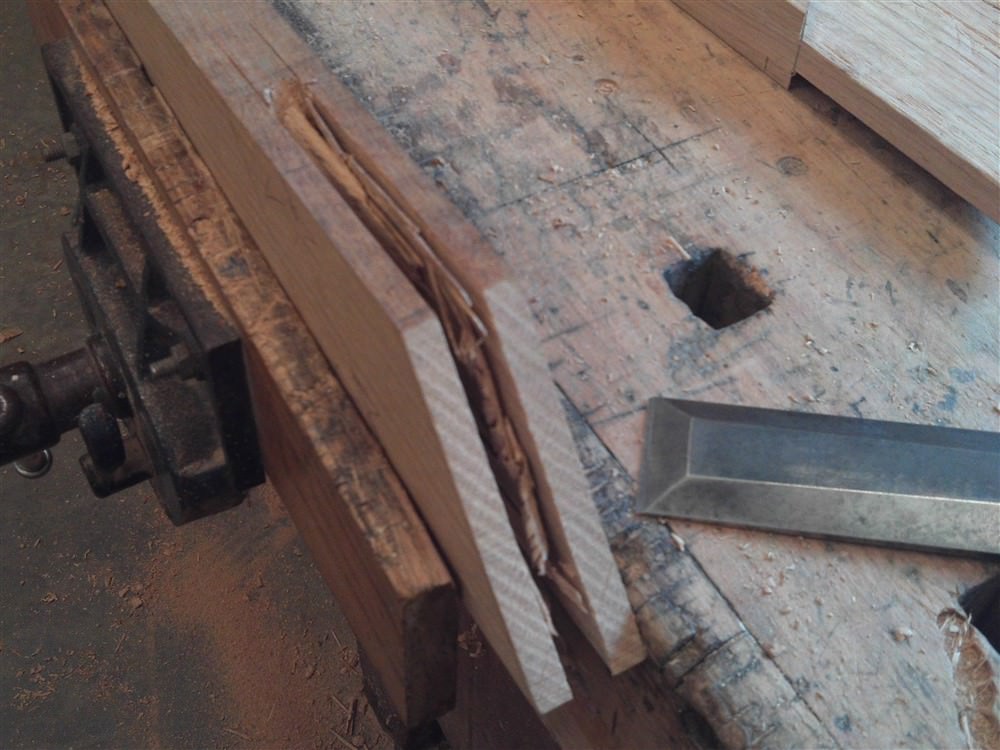
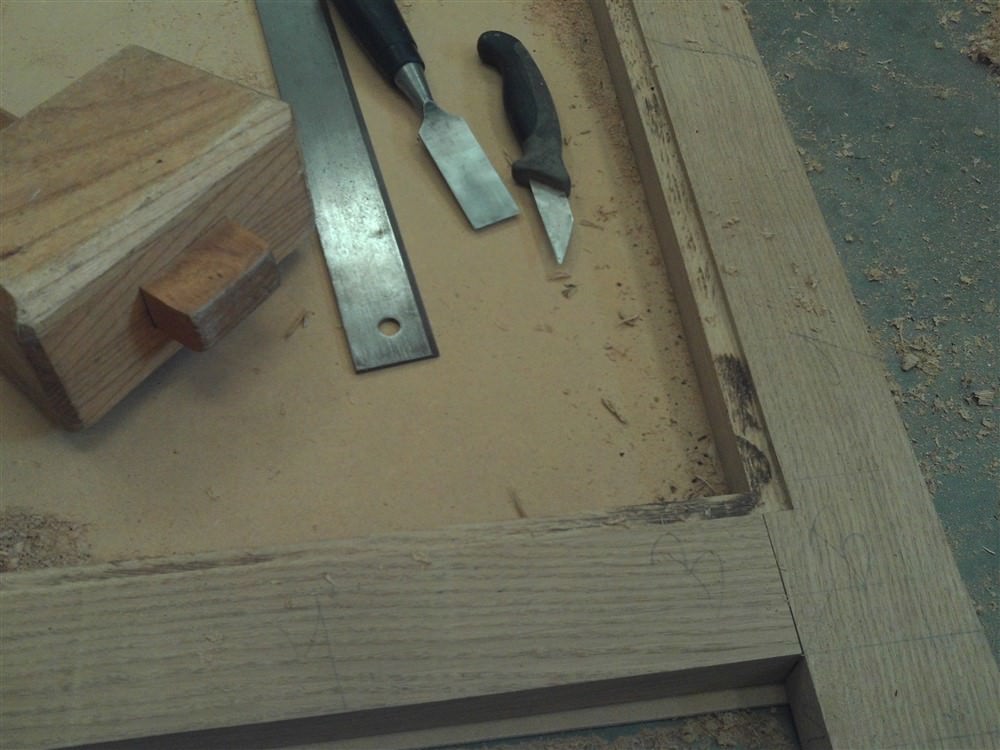
Shoulders cut with a knife just to provide a guide for the tenon saw (I didn't need to go to this trouble because, as I said, the faces of this frame will never be seen........but I've looked forward to making this door for a long time, and I was rather savouring it):

D7el043.jpg


HIhYG0i.jpg


3qgQDzy.jpg


You can see I sawed the faces of the tenons, then pared to the line with a 1-1/2" chisel.

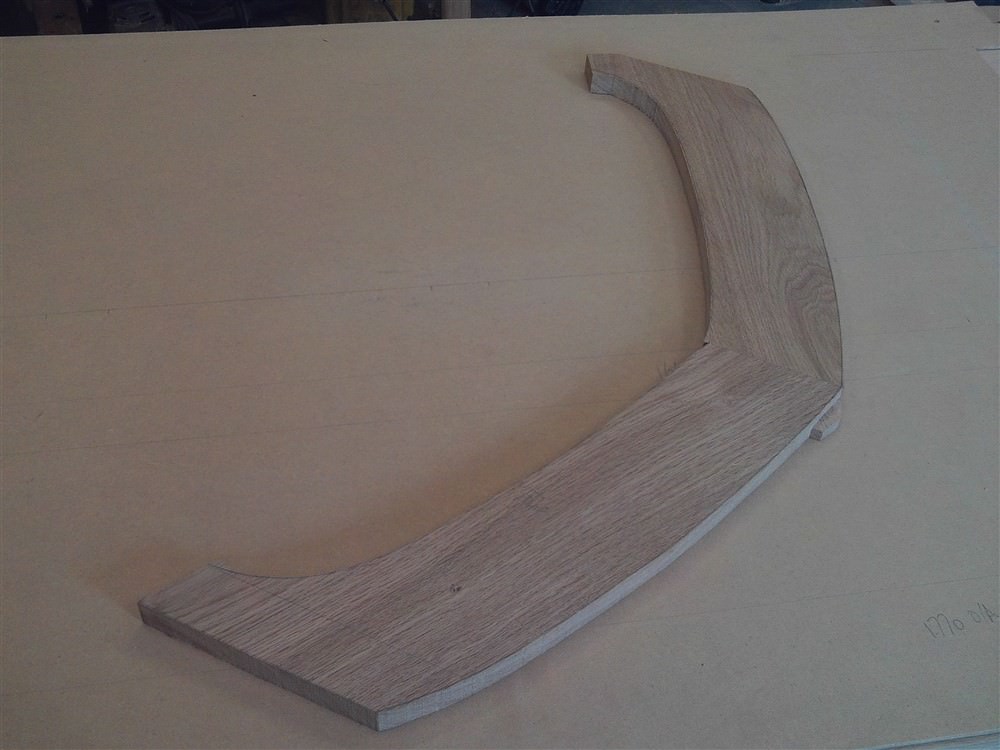
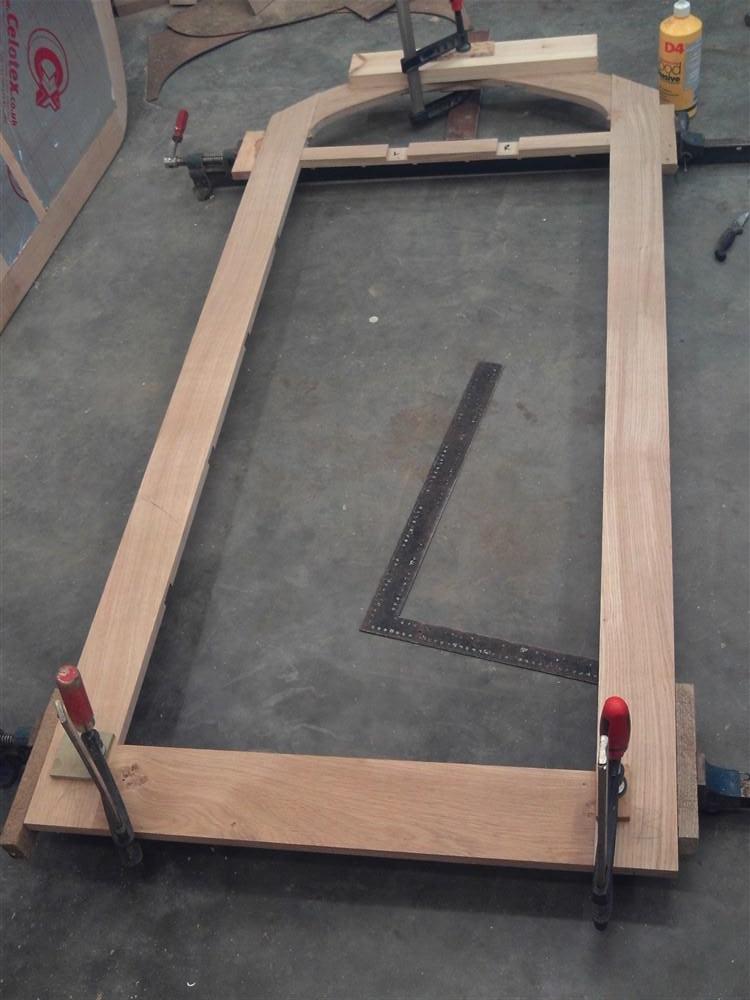
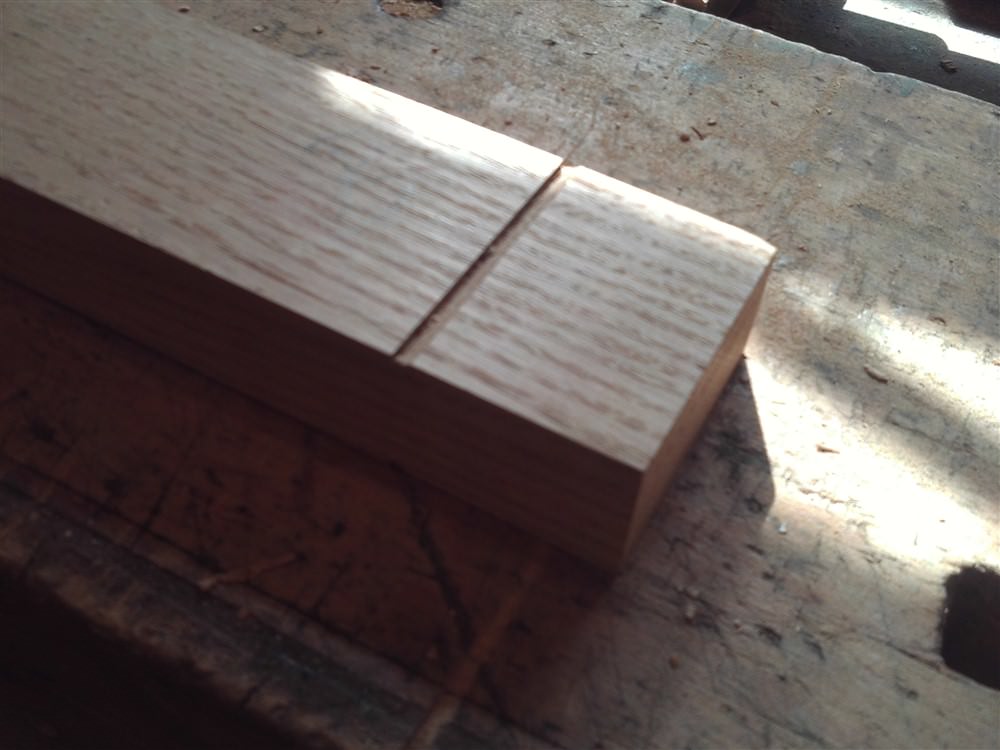
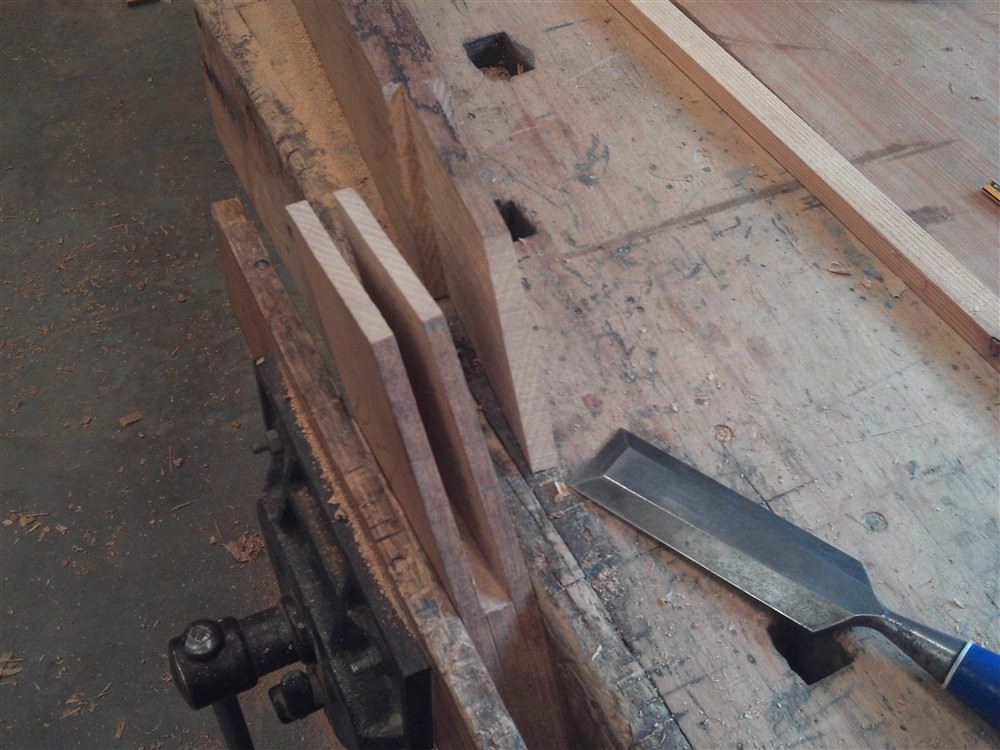
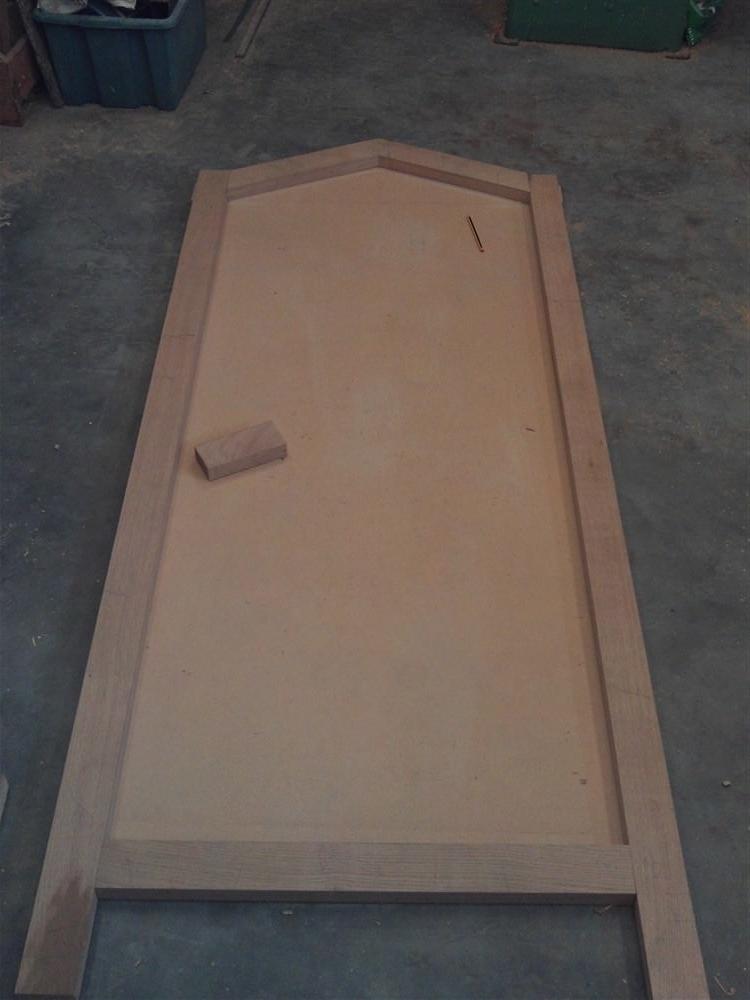
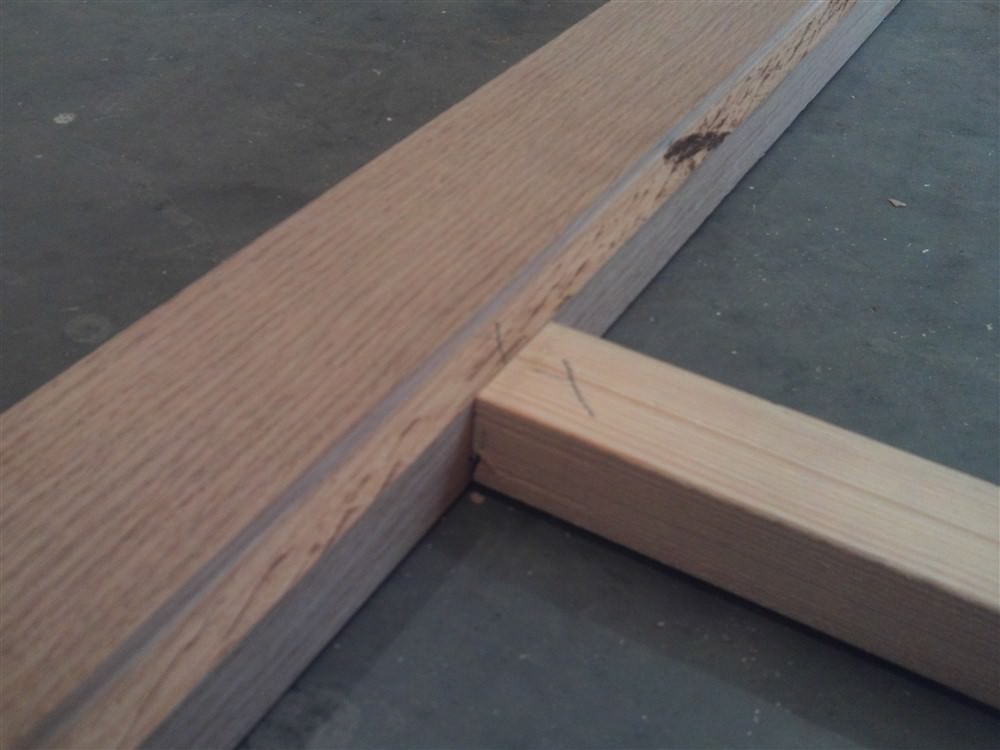
It slipped together first time. That's what you get when your stock is properly prepared:

Tnhznxf.jpg


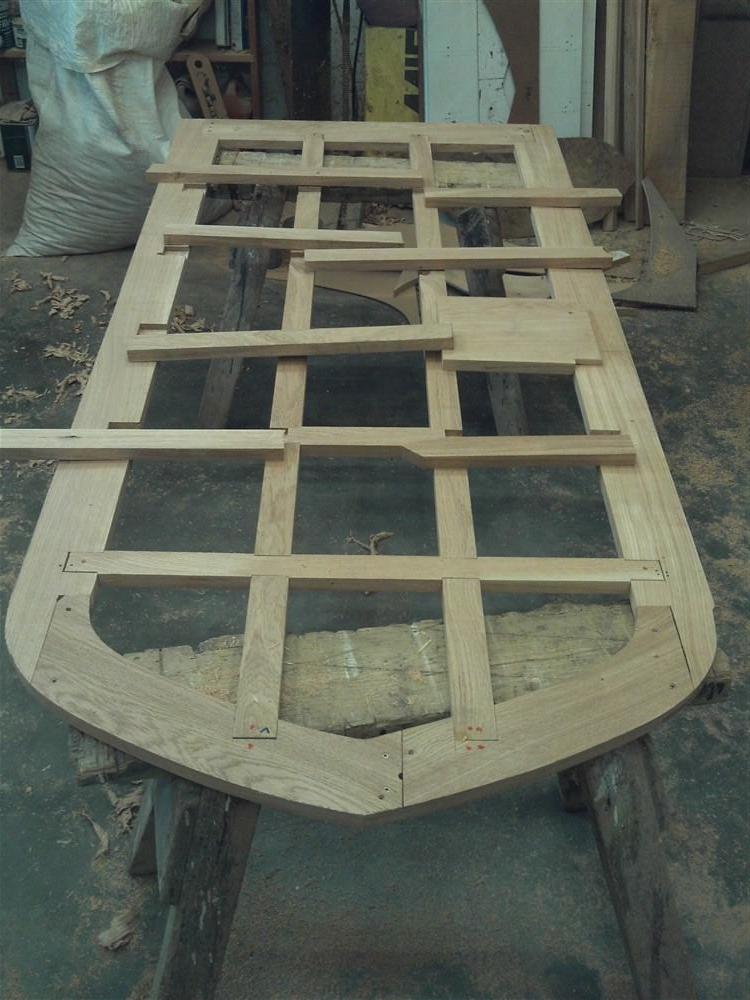
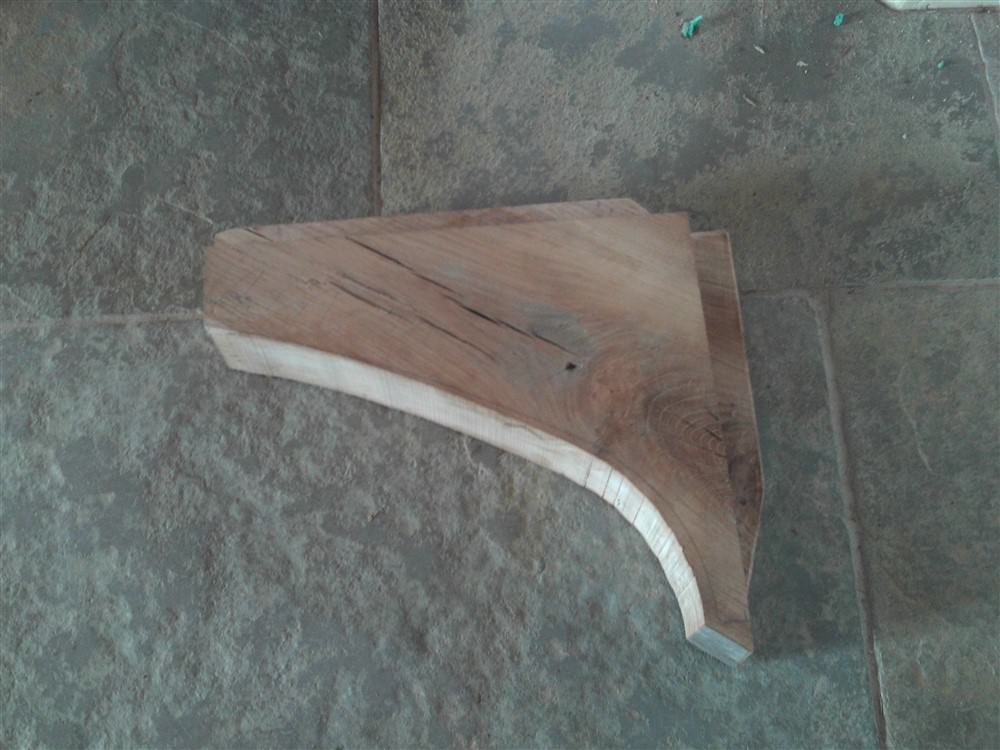
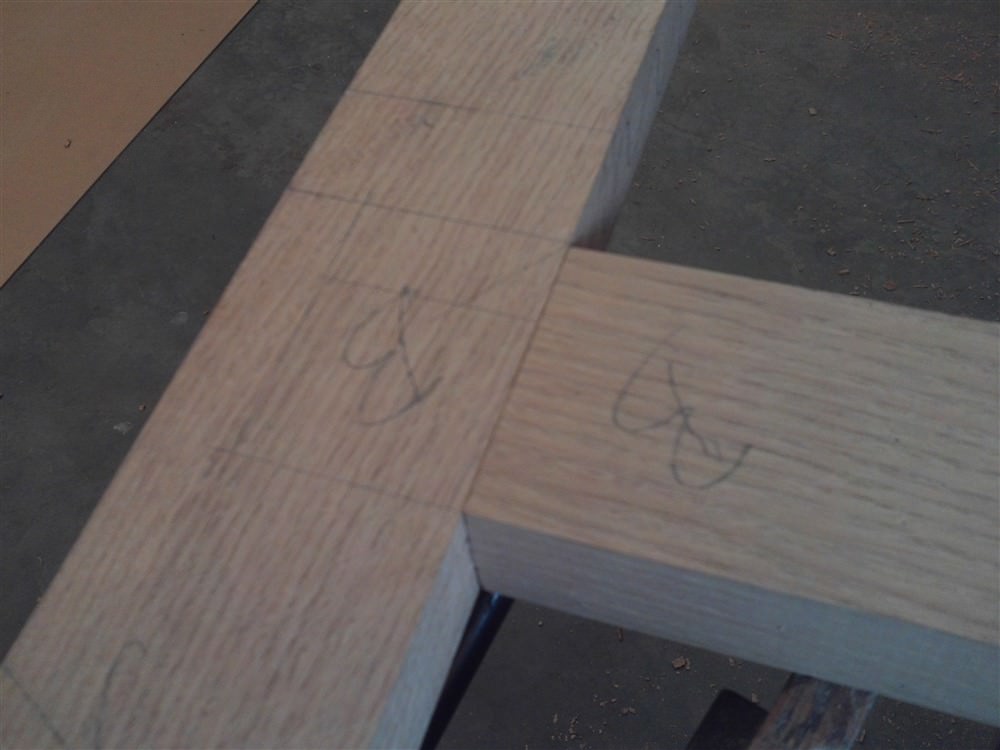
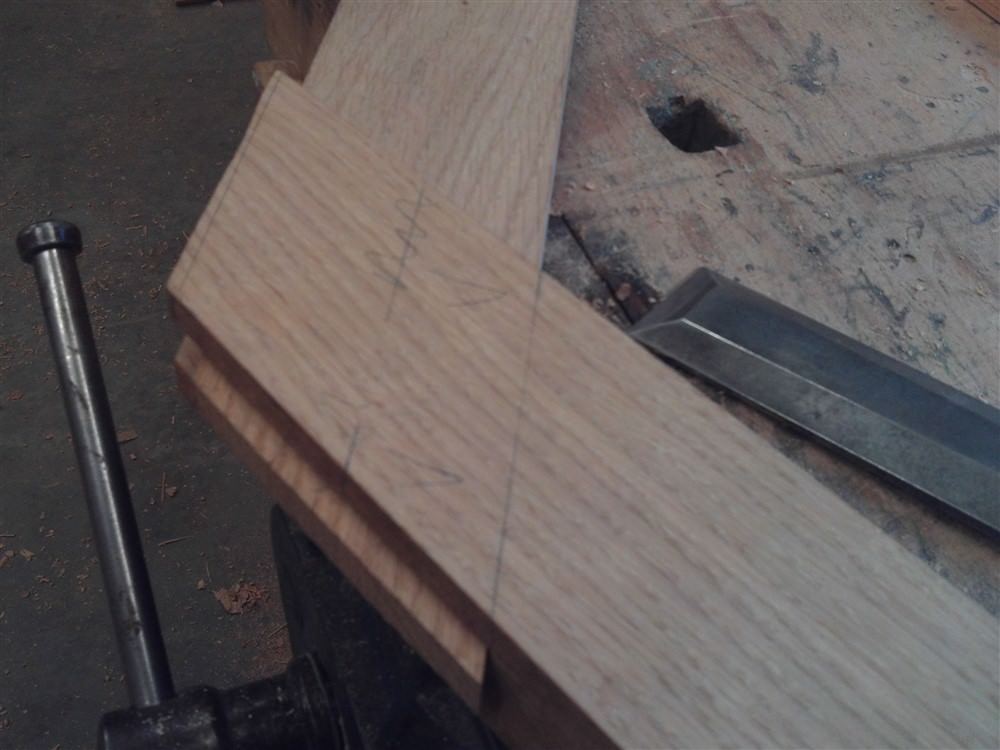
So that's the bottom rail dealt with, dry fitted and offered up to the template to aid marking out the top pieces:

nNDhkmg.jpg


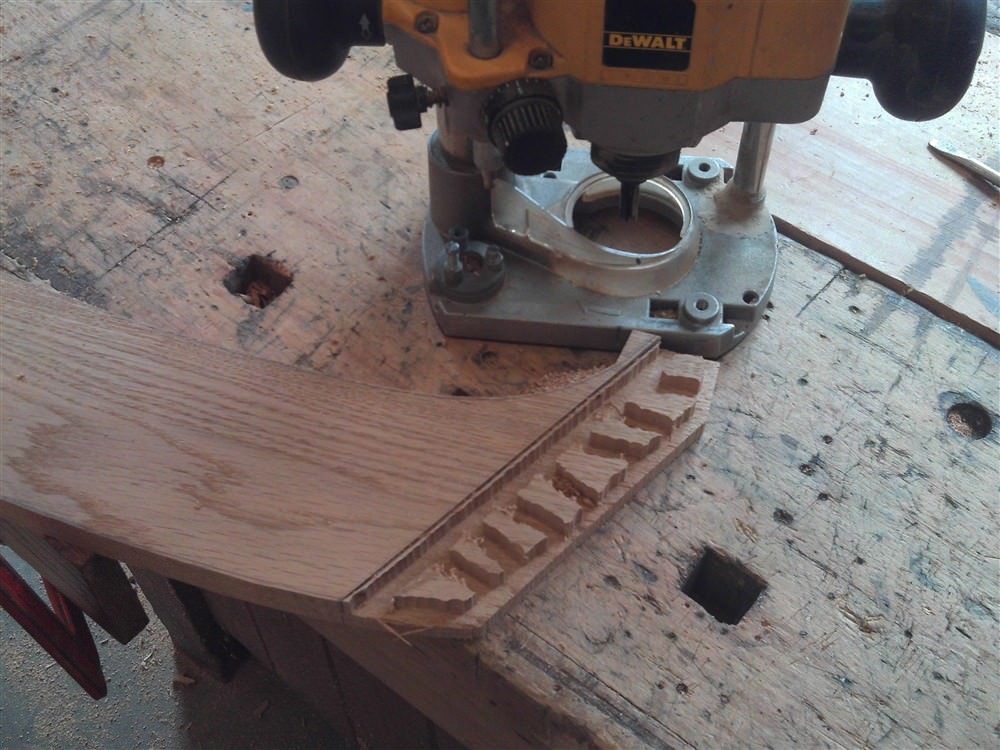
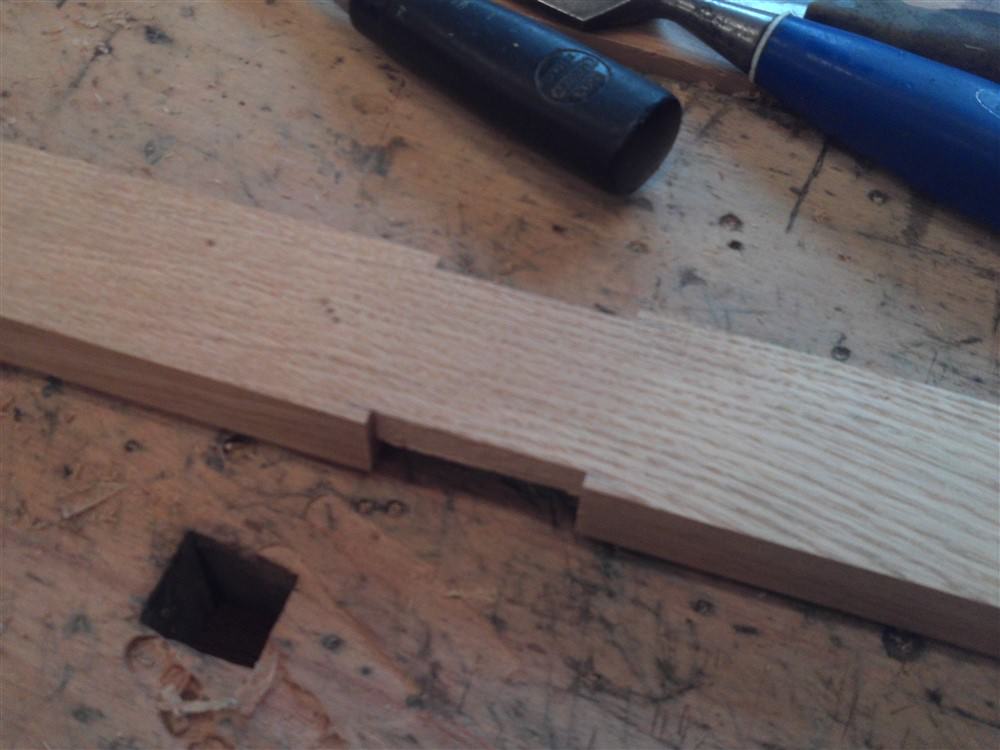
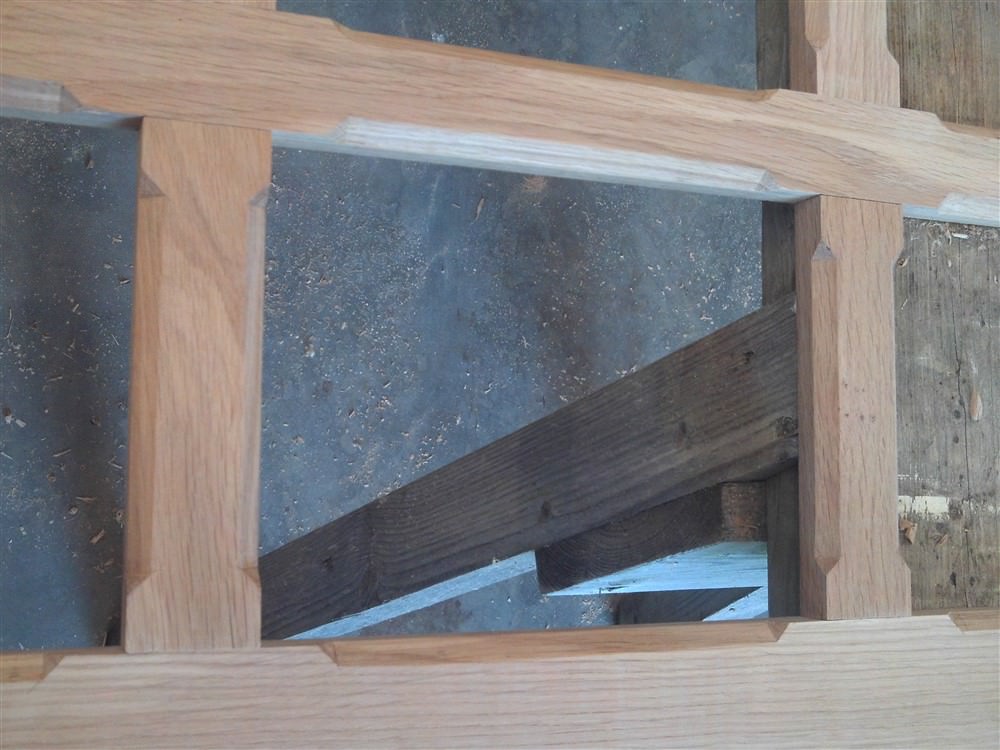
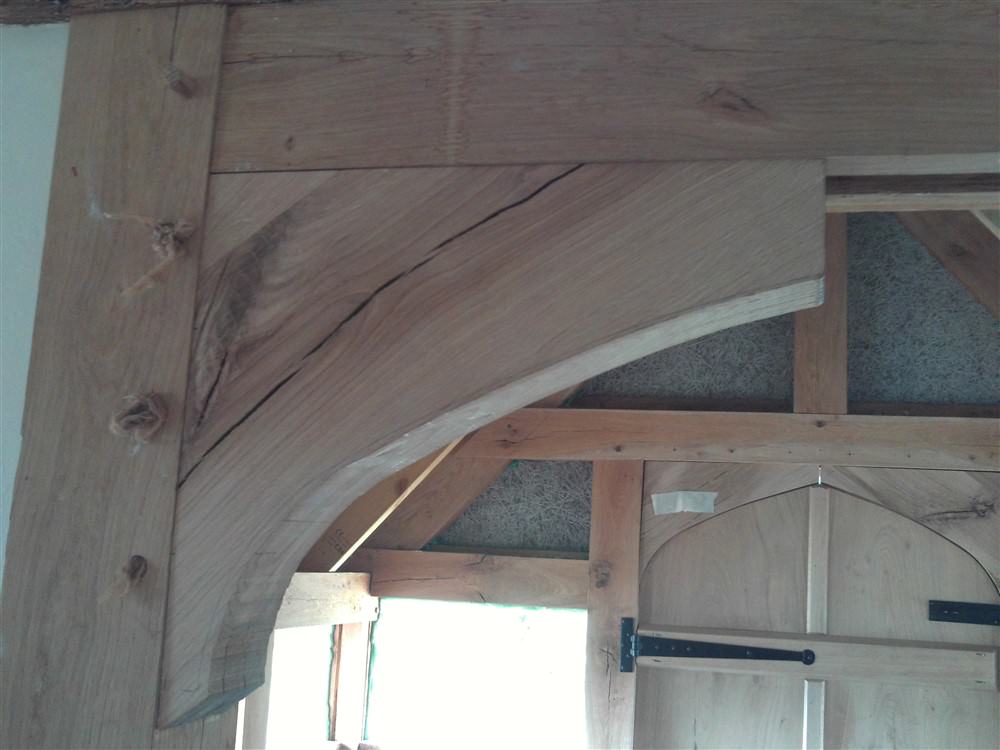
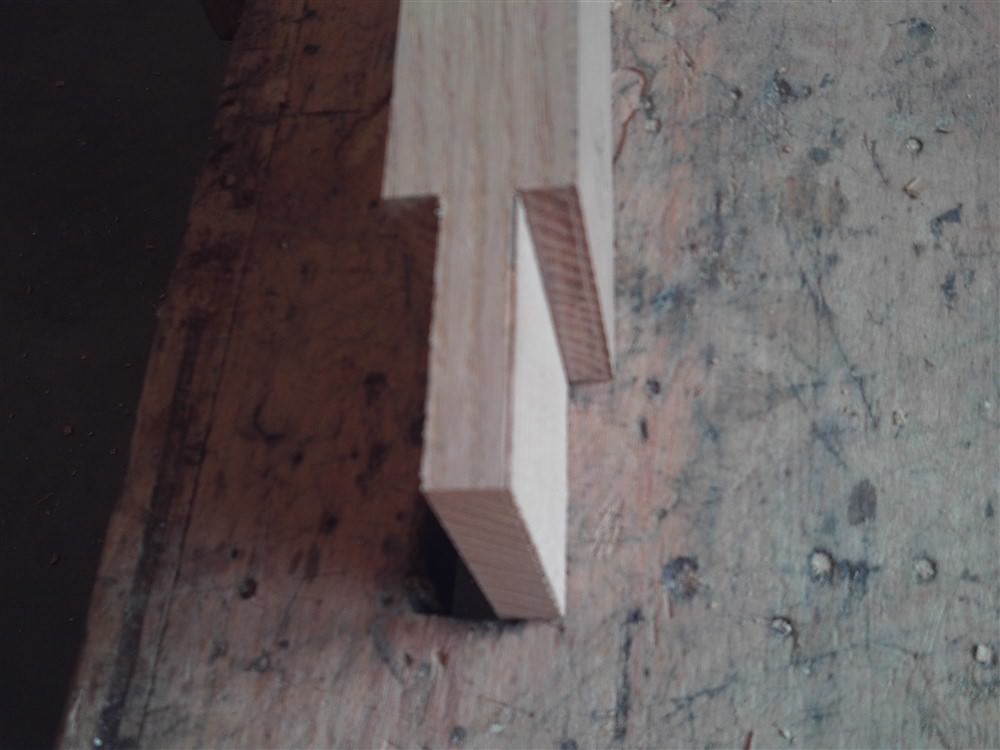
This is the middle joint of the upper two pieces. It will be a long bridle joint, and it needs to be neat because it will be at eye level prominently in the edge of the door. Bridle joints, often taught as one of the first joins you learn, are actually a damned difficult joint to get spot on. Anyway, the shoulders as before, knife then tenon saw:

u57tD13.jpg


I roughed off the waste with a handsaw, then cleaned up with the big chisel as always:

16V7sWM.jpg


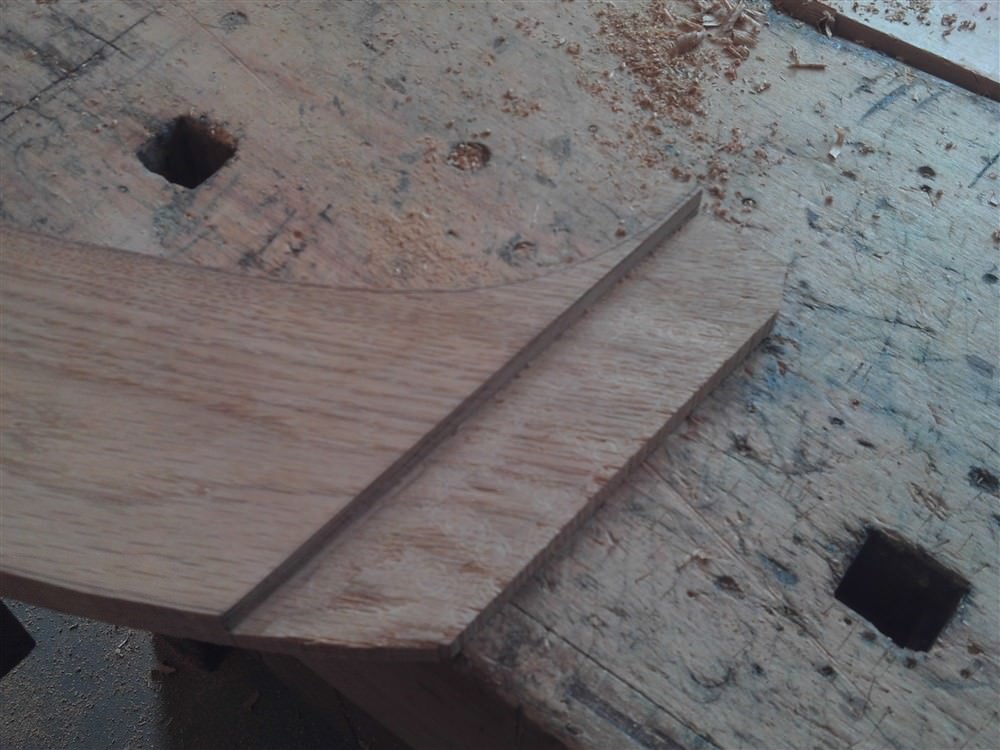
Same principle but t'other way around with the female part of the joint. I drilled a hole near the inner shoulder/ face of the joint, sawed down to it, then cleaned up with the chisel (you know how sometimes you get the sharpening absolutely bang-on, and the tool is like a razor......well, that happened, and it makes this job a joy):

XQpW1rP.jpg


wBLUNVY.jpg


97Lj0Ca.jpg


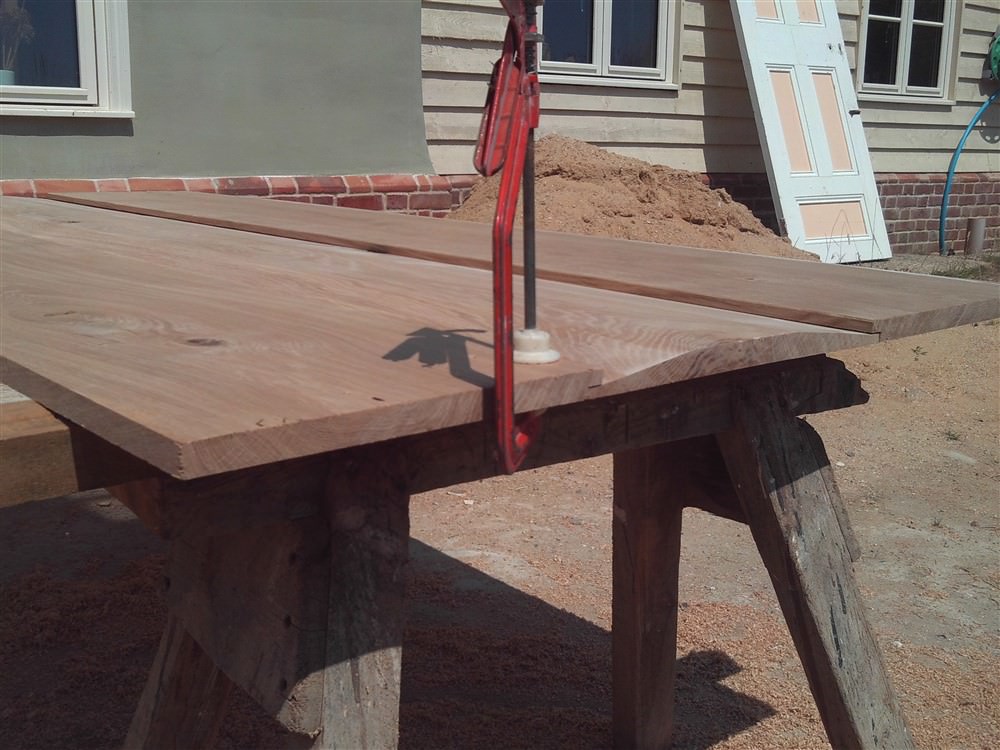
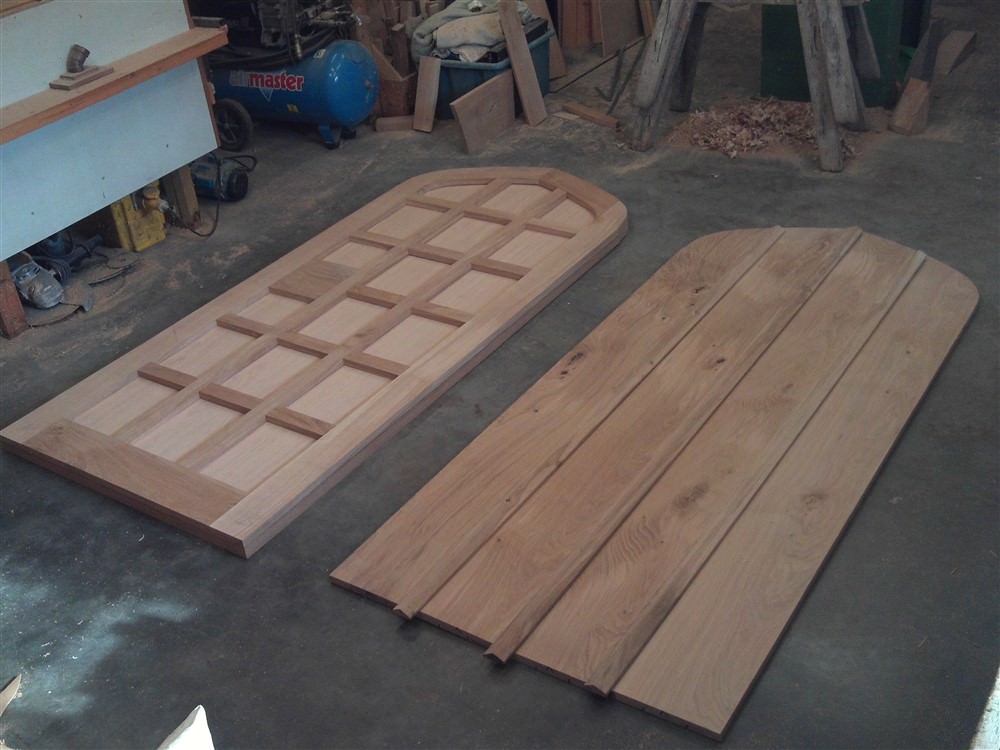
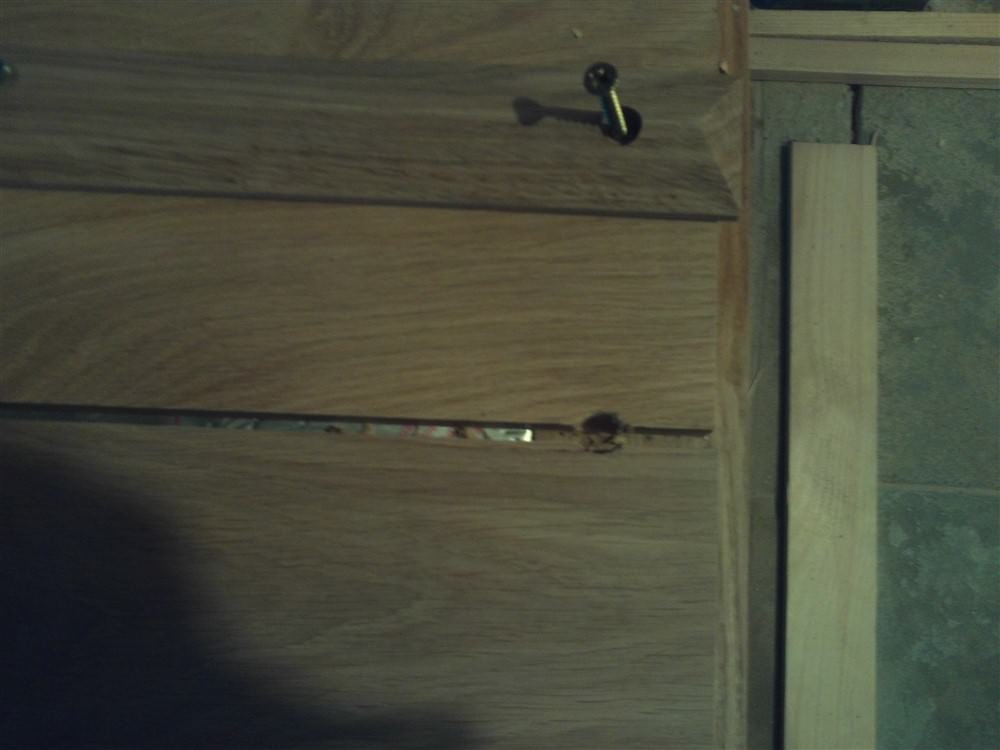
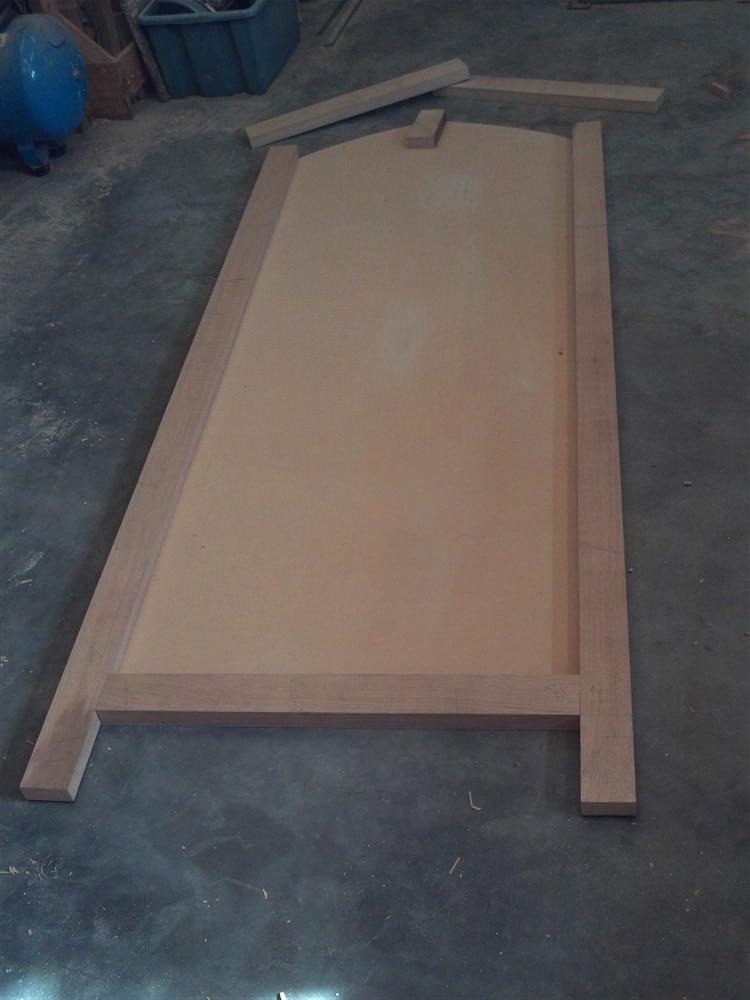
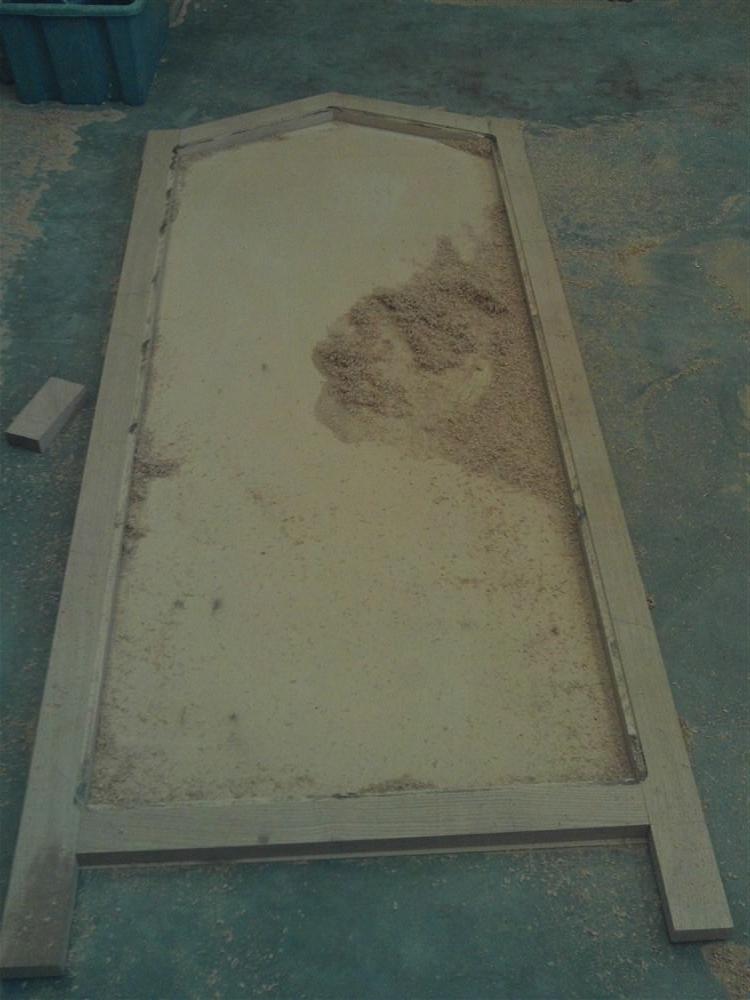
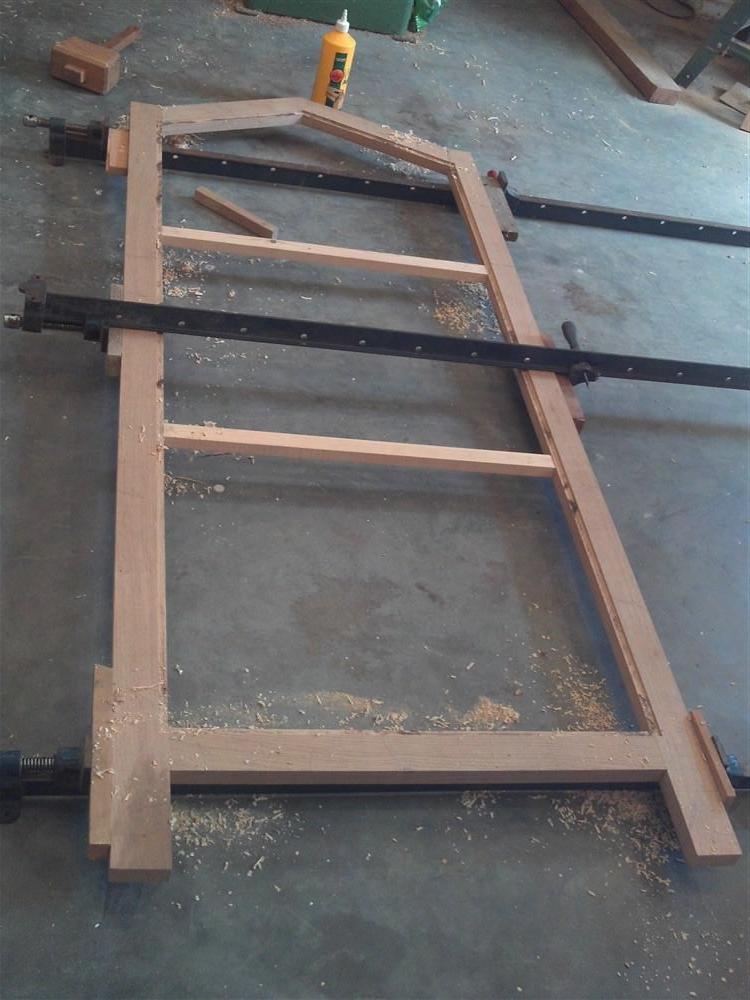
I glued it all up, and that's it for the day. Like I said.......something of an underachiement:

jTQxV7N.jpg
 
Distractions, distractions. I can't seem get a clear run at this door. Amongst other things, I spent half an hour today trapped on my roof after kicking the ladder away accidentally. Anyway.......

To finish the inner frame I made a couple more bridle joints:

CT6jGmT.jpg


Then whilst the whole thing was together in a dry fit, I ran around the inside of the frame with a bearing guided cutter to create a rebate for some 6mm oak-faced ply, the secret to this door:

YrkRgYr.jpg


KRcvBx4.jpg


I squared up the corners:

016dfpa.jpg


4yHkdHe.jpg


The burning is because I was on my knees, and with the polished floor I couldn't get enough of a grip to move fast enough to keep the router moving at sufficient speed.

Having established the thickness, I now wanted to put in a couple of softwood cross members, so I chopped out four mortises (you people with magic joint-making machine just don't know the pleasure and skills you are missing out on):

T1tyfOj.jpg


Gy219gw.jpg


zolYrja.jpg


Time to glue it all up. The only glue I've got at the moment has a 10 minute open time. Apart from that it's great glue, but 10 minutes, even for only 6 joints (I did the top bridle joints in a second phase), means you have to have absolutely everything ready to go:

tPgnAPv.jpg


I then cut out then glued and pinned in place the veneered ply:

75DcqsA.jpg


I had planned to do a 3 board door, as per the drawings, but unfortunately, my friend with the large planer thicknesser was away, and with a door width of 835 I needed 3 boards of about 275 wide. My thicknesser maximum is 260. So, I had the choice of waiting for my mate to return, or changing the design. I was eager to get on with things, so I decided to do a 4 boarded door instead. This still worked OK with the boards I'd got, so I spent hours and hours ripping the timber to width, flattening a face, then thicknessing:

Tl1hrpY.jpg


RQBHdYG.jpg


Whilst making shavings, I planed up 3 cover strips:

RhrDS2K.jpg


I then marked up the frame using the template:

gyXPcfN.jpg


.......and roughed off the waste with a jigsaw. Useless thing sometimes has a use... :)

Here are the boards cut slightly over-size. Note the 5mm gap between each one:

KvSbr1N.jpg


And finally for today, with the cover mouldings sitting roughly in place:

K1PP2hL.jpg


My original intention had been to do a shaped middle board like the loo door:

apR6AY5.jpg


J2jiQ0h.jpg


That idea had been dismissed even before the change to 4 boards, because it wouldn't have been possible to have a properly fitting draft seal with that shape.
 
I forgot to post this photo last time, showing the relief cuts to the back of the boards. These help prevent the board attempting to cup:

y2AnfJP.jpg


I insulated the frame with 25mm Celotex:

ELHru8c.jpg


Then with the boards screwed in place from the other side of the frame, temporarily, I put the template in place and with a flush trim cutter I trimmed the 2 layers to their final shape:

YOT8pI7.jpg


Time to get on with the other side. This is all going to be half-laps. Once I had set out one of the long pieces and one of the cross pieces, it was just a question of lots of knife cuts, lots of plunge routing, and lots of cleaning up with a chisel:

BWHjl9W.jpg


Here is the more complex top piece (template first):

uHg5CQS.jpg


5ZPhKCG.jpg


AA6HTgT.jpg


The shape is another one of those nasty tapers-to-zero bits, but the difference this time is that it is a glued joint in seasoned timber, so I have every chance of success. I wont trim the last bit until after the joint is made. This the the knife cut establishing the visible line of the joint:

ntYn2hS.jpg


My photos are getting worse. I have no idea why. On the short simple joints I would do the entire cut with a chisel, but for this long diagonal cut I ran the tenon saw along the knife line:

fs6FHaj.jpg


Then plunged the router repeatedly:

xEXUUbR.jpg


Then cleaned up with a chisel:

OZZ1MLc.jpg
The piece is oversized, so the fluffy edges are irrelevant.

Finally, it was time to glue up the outer frame:

ygDEGoD.jpg
 
Fascinating blend of old appearance and modern, insulated construction. Your house is going to look fantastic!
How much more work do you have planned, or is it one of those projects that never really ends?
 
I'm 4 years in already, Andy, and there is at least another year to go, albeit much more part time than it was at first. Then I've a series of other outbuildings to do, and a conservatory. I can't see me running out of work here for the next 5 years or so.
 
The frame had been glued up overnight. First job today was to clean up , and properly shape the top. Of major concern were the tapering-to-zero corners of the top curve. I cut away at these incredibly carefully, until I was within sanding distance for a small drum sander, and then finally the trimming router following the template:

k5EojFM.jpg


QJO27II.jpg


All the half laps on the frame were already in place:

eJ8MPNa.jpg


So now it was a question of filling in the gaps. The horizontals would be in a variety of lengths, using up scraps:

9uf6Dkf.jpg


To avoid having too big a gap open up if the timber shrinks, I put a shoulder on each horizontal joint. This made for rather a tiresome chore of endless marking and cutting of tiny bits, but I hope it will be worthwhile:

nSu8lEH.jpg


Eventually it all went together:

OUnHw9I.jpg


My wife came out to check on progress, so I lined both sides up for her to see what we would be getting:

Muz3Lys.jpg


Having glued up the "portcullis", as it was immediately dubbed (I screwed it temporarily too, as I didn't want to wait), I moved on to chamfering. I made up some corner blocks, screwed temporarily in place under the frame, then ran around each frame with the router:

ohaSI29.jpg


9UapIPF.jpg


That took a while! I had to flip the door for each frame, unscrew each block, reposition, screw in place, flip back over, rout, then repeat 14 times......

Getting there:

Z7mhq3g.jpg
 
Really like the chamfered effect and how much it lifts the design. There is quite a contrast between the last photo and the earlier one with the two doors laid on the floor.

Martin.
 
Yep, quite agree. Chamfers are much misunderstood, and too often ignored, when they can make a huge difference to the look of a piece of furniture (or a door). What looked heavy and plain, even a bit imposing, beforehand, now looks much lighter and more subtle. I'm cleaning them up by hand at the moment.
 
The first job the following day was to clean up all of the routed chamfers. This was three and a half hours with a 1" chisel......sharpened twice. There is lots of delicate paring, and some scraping, and it changed the chamfers from this:

c1k0QF3.jpg


.......to this:

KV0wl7k.jpg


I put a couple of locating pins into the main frame of the door, sticking up into the "portcullis" frame so as to locate it in exactly the right place:

iAVNTBx.jpg


This was to enable me to apply the first coat of ()water-based) lacquer, and then remove the frame. My thinking here was that the glue-up was going to be very long and complex, and I couldn't afford to under-glue as there is no mechanical fixing at all holding the "portcullis" face onto the door. Therefore there would be squeeze-out, and without pre-finishing like this, cleaning up would be a pig of a job:

tHMRRPY.jpg


9TL5B3c.jpg


Then, a change of venue. I took everything in to the house, and set up in the porch. For those just coming to this for the first time this is because a 3 inch oak door would be a nightmare to try to move from the workshop to the house. I did the boarded side first, because they are fixed with screws through the door from the other side. The outer boards are glued and screwed to their outer edge, so that there is a solid edge to the door. The inner 2 boards are glued and screwed in the middle, and there are movement gaps of 7 to 9mm between each of the boards:

z96rXTk.jpg


X4XP22u.jpg


upMeAhk.jpg


The last photo shows the cover strip drilled for later plugging, and about to be screwed over the gap between two boards. There is a big hole where the screw passes through the board, again, to allow for movement. This is on the outer (unstable) side of the door, so no chances with movement even though it is inside the enclosed porch.

Then, (following day) deep breath............another curse that I only have a 10 minute glue available.......flip the door over, and begin a glue-up against the clock:

ILQEd7Z.jpg


You can imagine why there were no photos during the process. The clean-up of squeeze out took ages, with lots of changes of (warm) water, taking the cauls (is that the right word?) off in sequence to give access all around the panels, and finally a bit of careful scraping as the glue got slightly ahead of me. It's the worst clean up I can remember, with miles of edges to deal with. Worse than a bookcase.

I then toddled off to buy some hinges and handles whilst the glue dried, then spent the afternoon sorting everything out and hanging the door. The shavings on the floor are from angling the leading edge, which the trimming cutter obviously left square. I had to offer it up twice and adjust, but it was so, so close to right first time. The door is so thick that it stood up easily on edge, unsupported:

YU9tzhz.jpg


Finally, in place:

U5jRZBf.jpg


ntiyJVu.jpg


DXXGeyv.jpg


gAioGAP.jpg


I can't tell you how pleased I am with this. It's the very best bit of the whole 4 year project in my view. I love it!
 
Back
Top