


Mr T
Established Member
Hi
Those of you that attended the Celebration of Craftsmanship and Design in Cheltenham will have seen our sideboard made in cooperation with the marquetarian Christine Meyer-Eaglestone.
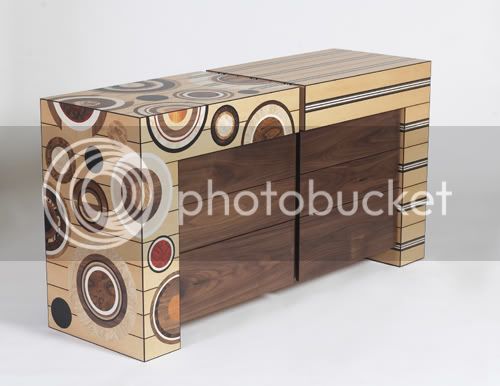
I thought some may like to see some of the making process.
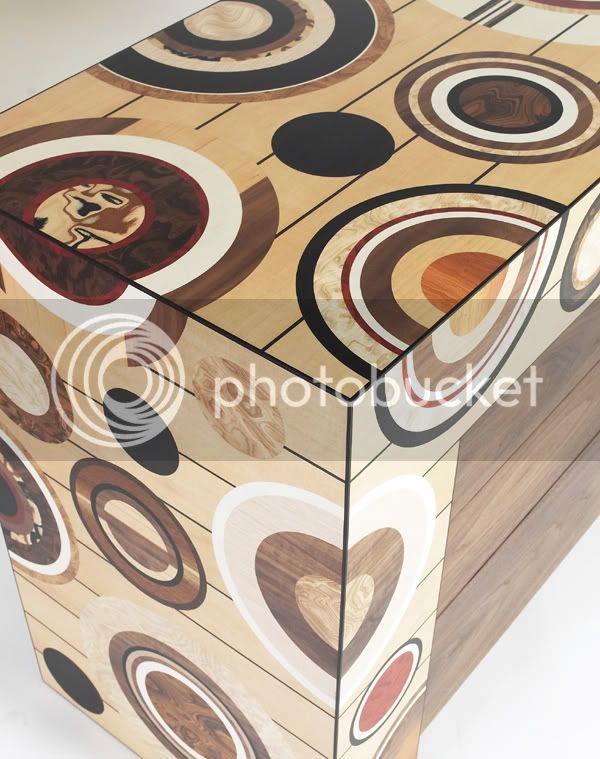
Christine trained in fine art and came to marquetry after attending a cabinet making course at leeds College of Art. All her work is completely hand cut. Unfortunately she did not take any pictures of the making process. However I know that she layed out the panels on a 3.6 long sheet. She started by creating the ebony and maple stripes, working from a reference edge at the top of the sheet. It was important to lay out the panels as one so that the stripes were aligned on assembly. After laying the strips she cut in the concentric circles using various templates, I know some of the circles are CD sized. On completion the whole lot was stuck to 18mm MRMDF using cascamite. A black stained poplar was used as a balancer.
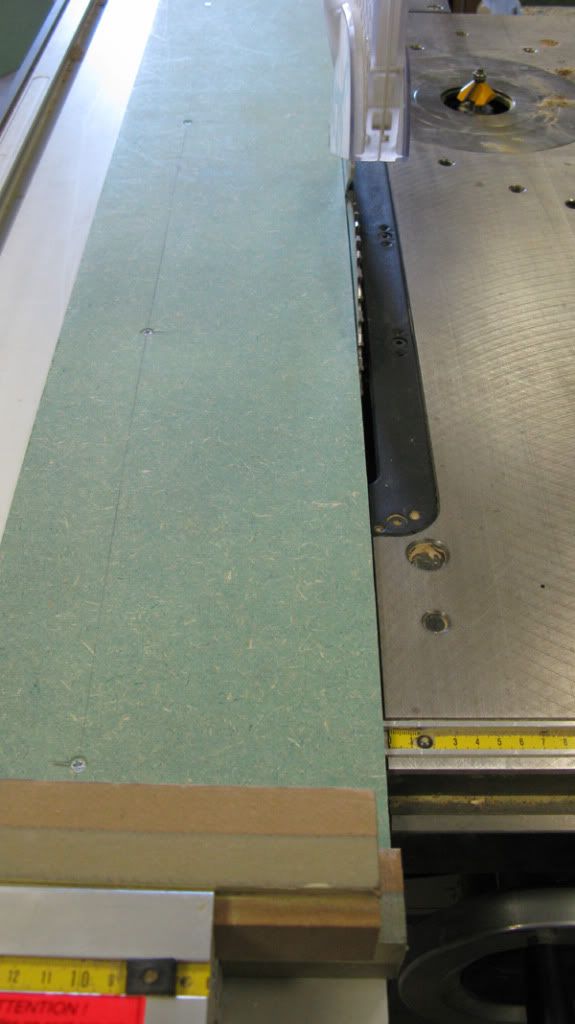
The panels were brought to our workshop. We cut them into sections along preset lines. There was much measuring and checking for square before thcut was made. I started by cutting a reference edge along one of Christine's preset lines. I used a false bed on the sliding table, the edge of the bed lining up with the line of the saw cut. The preset line on the panel could be lined up with the edge of the bed as a reference.
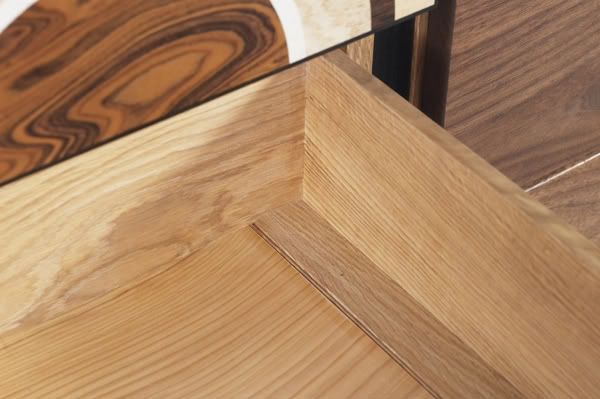
Once a refence edge has been created the other dimensions could be cut. The inside edges of the front and back "L" pieces had to be treated differently. We made up and L shaped template and used a bearing guided cutter on the router table to cut to shape.
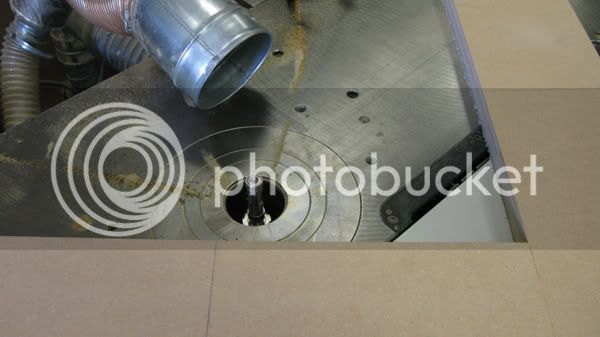
After cutting to shape the mitre was created using the spindle moulder tilted to 45 degrees. SAgain the inside edges of the L pieces was different, I used a 45 degree cutter on the router table running against the L shaped template. I did not have large enough cutter so a small edge was left for cleaning up with a block plane.
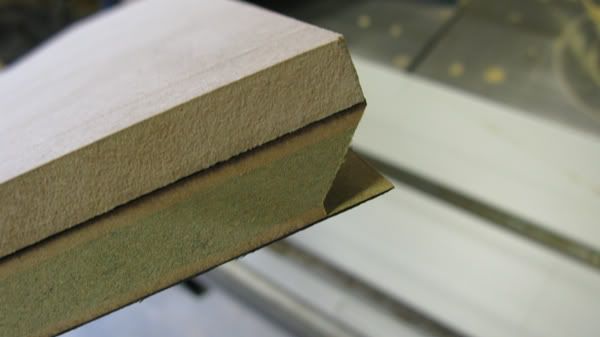
The router could not get right into the corner of the L so this was cleaned up with a chisel.
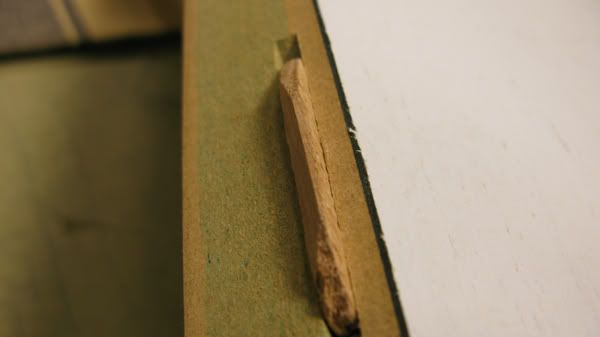
All edges were biscuited for size 10.
I thought long and hard about gluing up, I would have prefered to do it in stages but decided in the end this was not possible. To aid fitting the mitres together I cut a chamfer on the edges of the biscuits.
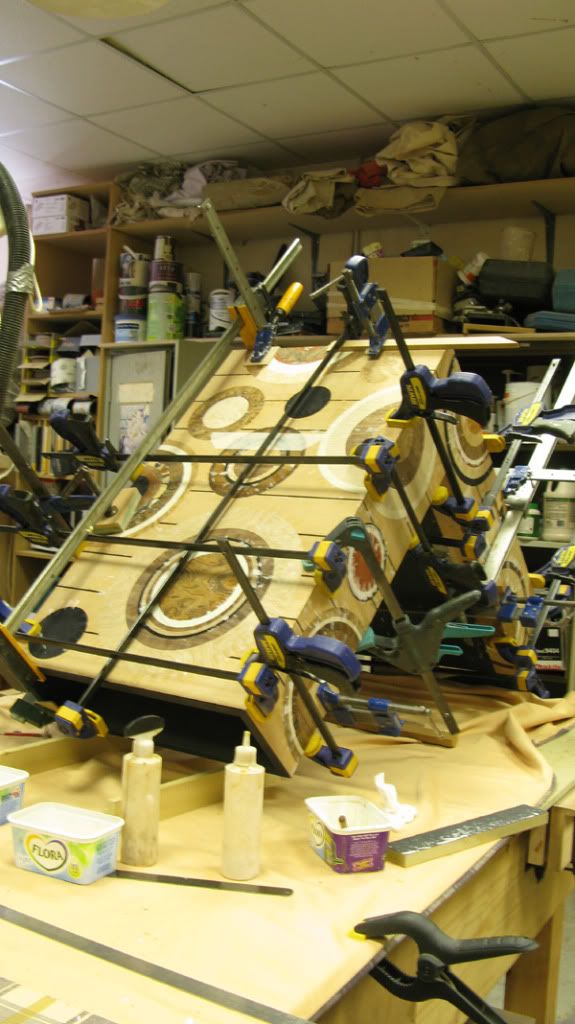
After assembly the edges were given a 3.4 mm rebate to receive ebony stringing. The L's then went back to Christine for her to fit the stringing, clean up and arrange for finishing.
The drawers run in a veneered MDF carcase with an ebony veneered central divider which extends up to seperate the two L's. I arranged to construction of the carcase so that the maple veneered back panel and the oak veneered bottom were continues (ie not mdf edges showing).
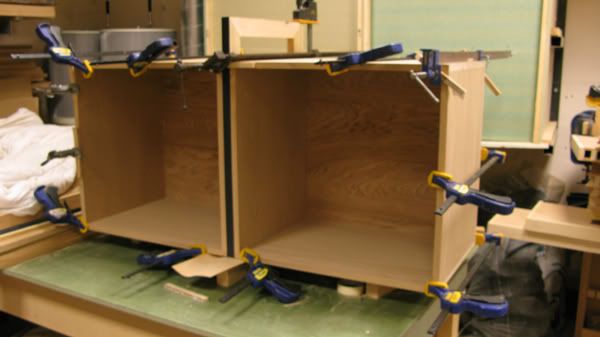
The oak drawers have hand cut dovetails and cedar of Lebanon bottoms fitted to oak slips. They run on Blum runners with Tipon push to open (Sorry Rob!)
The L's are attached to the carcase by bolts through the carcase sides into captive threads on the inside faces of the L's. A template was used to drill for the bolt and captive thread holes. The threads were fitted in over size holes. Initially the threads were glued in with a dab of Araldite on the ends just the fix them and seal the ends. The threads were positioned while gluing by locating them on the bolts through the template.
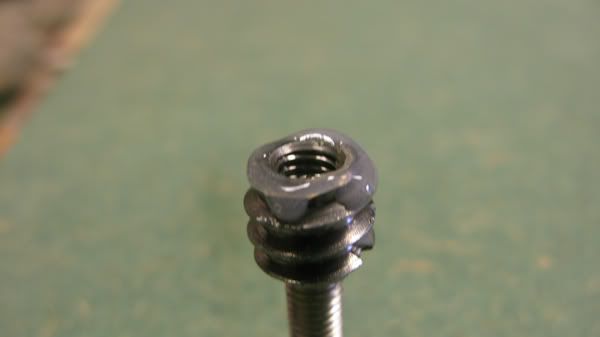
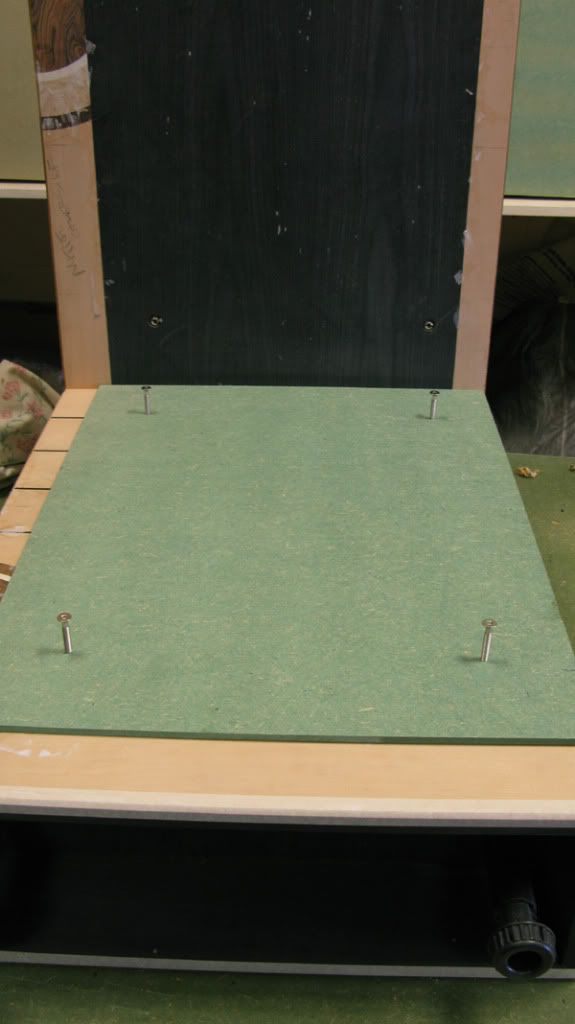
Once set the template was removed and the threads fixed fully using West System. This method allowed the threads to be glued without them being filled with glue.
When Christine brought the L's back from the finishers we were ready for assembly and were well pleased with the result!
The sideboard will also be shown at the NCFM [urlhttp://www.northernfurniture.org.uk/][/url] exhibition in Leyburn from 12th-23rd September and also on the NCFM stand at the Liverpool Design show http://www.liverpooldesignfestival.com/ 7th-9th October.
Everything seems to have a name nowadays, originally we thought of Circles and Stripes, but I favour Raindrops and Pyjamas!
Chris
Those of you that attended the Celebration of Craftsmanship and Design in Cheltenham will have seen our sideboard made in cooperation with the marquetarian Christine Meyer-Eaglestone.
I thought some may like to see some of the making process.
Christine trained in fine art and came to marquetry after attending a cabinet making course at leeds College of Art. All her work is completely hand cut. Unfortunately she did not take any pictures of the making process. However I know that she layed out the panels on a 3.6 long sheet. She started by creating the ebony and maple stripes, working from a reference edge at the top of the sheet. It was important to lay out the panels as one so that the stripes were aligned on assembly. After laying the strips she cut in the concentric circles using various templates, I know some of the circles are CD sized. On completion the whole lot was stuck to 18mm MRMDF using cascamite. A black stained poplar was used as a balancer.
The panels were brought to our workshop. We cut them into sections along preset lines. There was much measuring and checking for square before thcut was made. I started by cutting a reference edge along one of Christine's preset lines. I used a false bed on the sliding table, the edge of the bed lining up with the line of the saw cut. The preset line on the panel could be lined up with the edge of the bed as a reference.
Once a refence edge has been created the other dimensions could be cut. The inside edges of the front and back "L" pieces had to be treated differently. We made up and L shaped template and used a bearing guided cutter on the router table to cut to shape.
After cutting to shape the mitre was created using the spindle moulder tilted to 45 degrees. SAgain the inside edges of the L pieces was different, I used a 45 degree cutter on the router table running against the L shaped template. I did not have large enough cutter so a small edge was left for cleaning up with a block plane.
The router could not get right into the corner of the L so this was cleaned up with a chisel.
All edges were biscuited for size 10.
I thought long and hard about gluing up, I would have prefered to do it in stages but decided in the end this was not possible. To aid fitting the mitres together I cut a chamfer on the edges of the biscuits.
After assembly the edges were given a 3.4 mm rebate to receive ebony stringing. The L's then went back to Christine for her to fit the stringing, clean up and arrange for finishing.
The drawers run in a veneered MDF carcase with an ebony veneered central divider which extends up to seperate the two L's. I arranged to construction of the carcase so that the maple veneered back panel and the oak veneered bottom were continues (ie not mdf edges showing).
The oak drawers have hand cut dovetails and cedar of Lebanon bottoms fitted to oak slips. They run on Blum runners with Tipon push to open (Sorry Rob!)
The L's are attached to the carcase by bolts through the carcase sides into captive threads on the inside faces of the L's. A template was used to drill for the bolt and captive thread holes. The threads were fitted in over size holes. Initially the threads were glued in with a dab of Araldite on the ends just the fix them and seal the ends. The threads were positioned while gluing by locating them on the bolts through the template.
Once set the template was removed and the threads fixed fully using West System. This method allowed the threads to be glued without them being filled with glue.
When Christine brought the L's back from the finishers we were ready for assembly and were well pleased with the result!
The sideboard will also be shown at the NCFM [urlhttp://www.northernfurniture.org.uk/][/url] exhibition in Leyburn from 12th-23rd September and also on the NCFM stand at the Liverpool Design show http://www.liverpooldesignfestival.com/ 7th-9th October.
Everything seems to have a name nowadays, originally we thought of Circles and Stripes, but I favour Raindrops and Pyjamas!
Chris
