Since it's been nearly 3 years since my last update, I thought I'd move into a new thread.
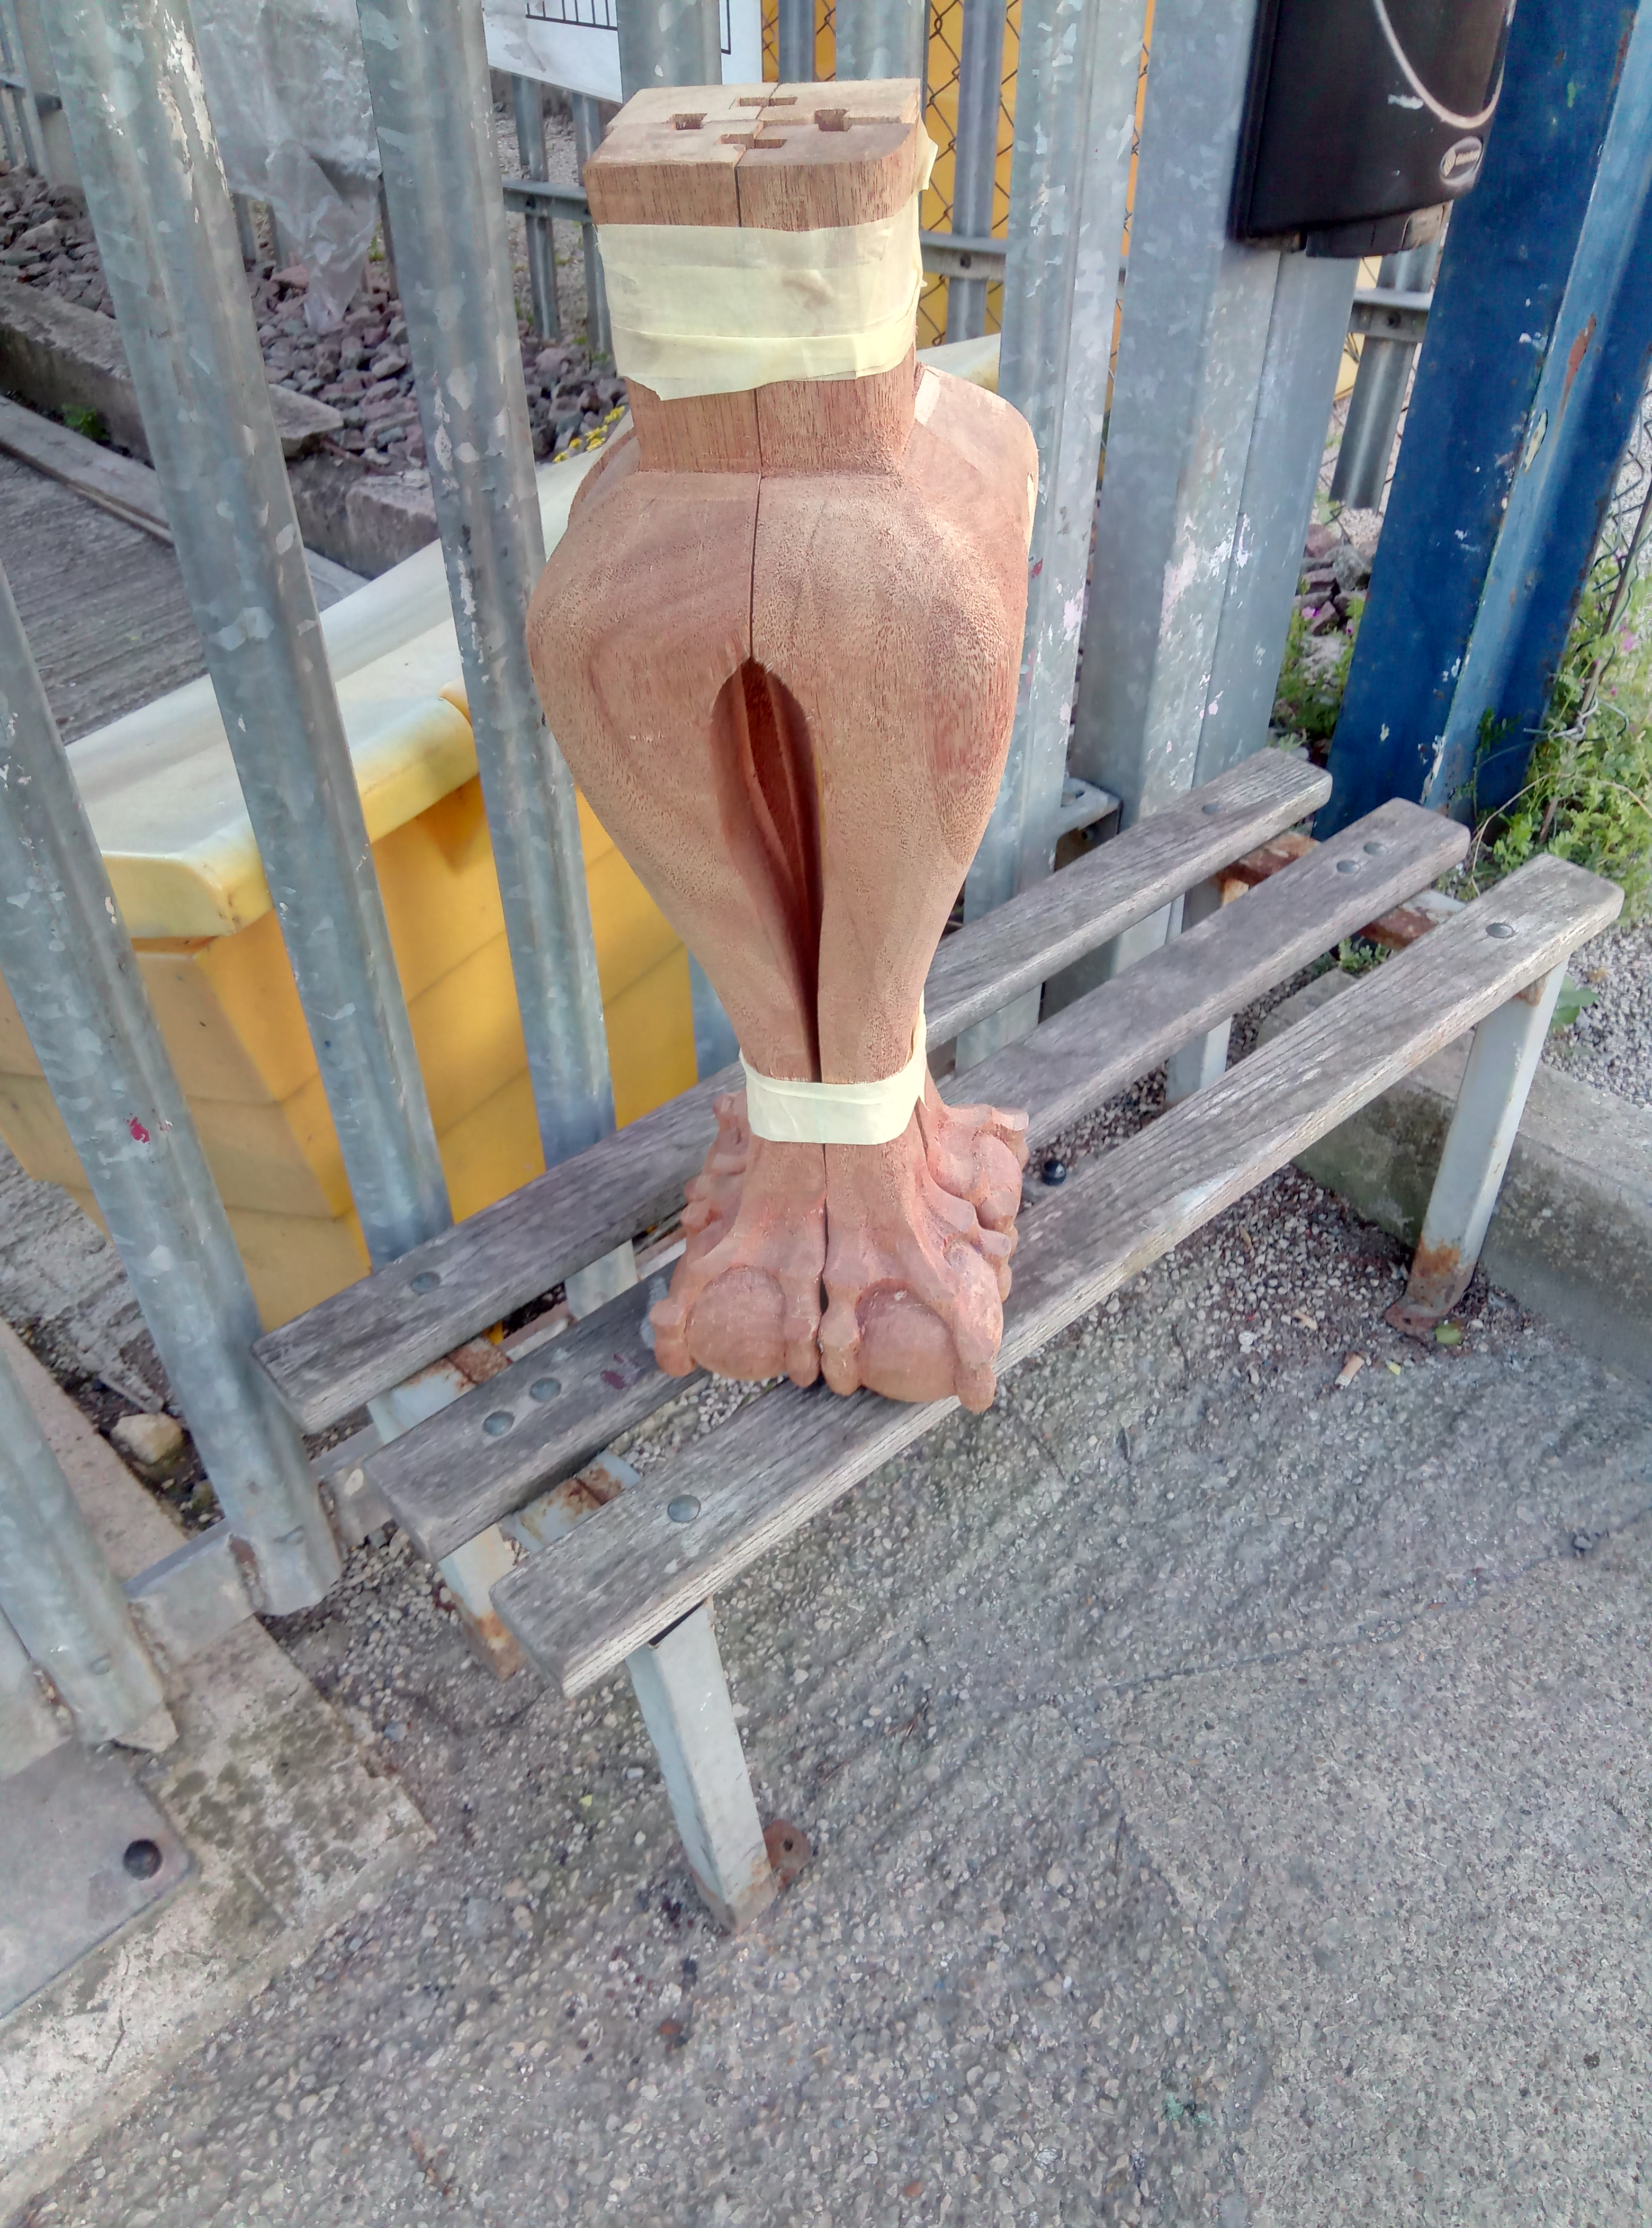
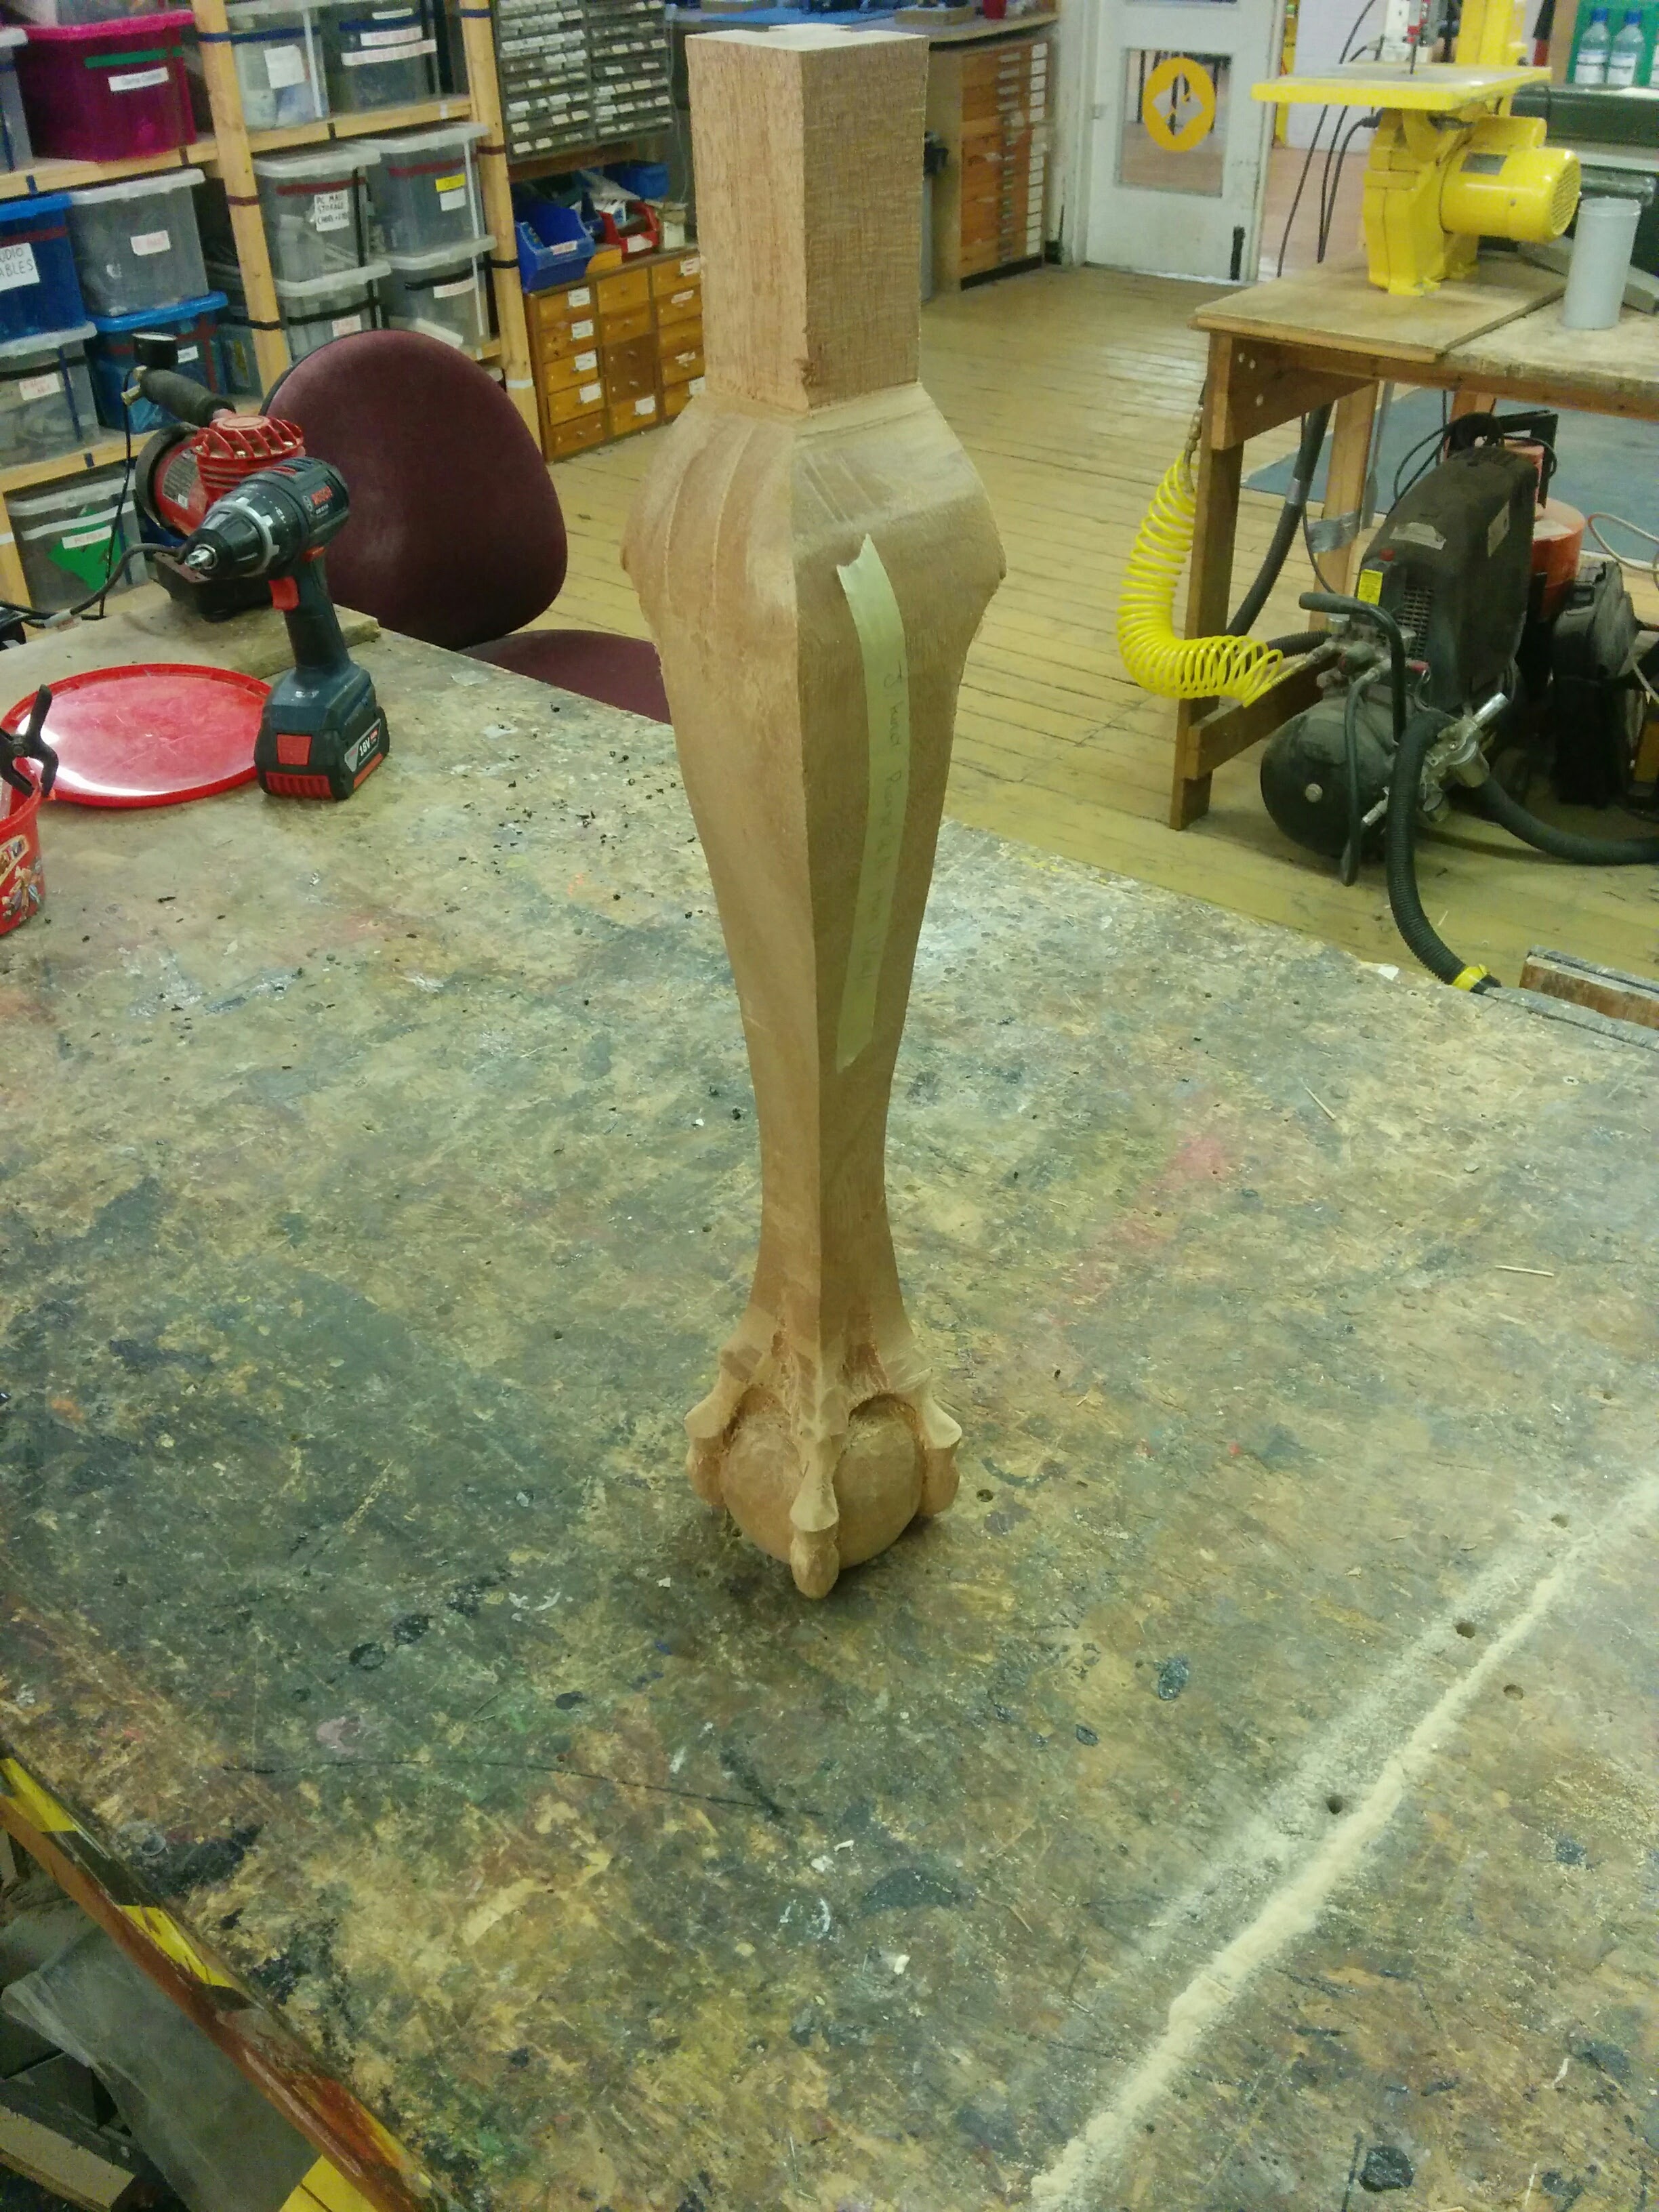
The legs are almost complete, and can't really be finished until I've completed the stretchers in order to shape knee blocks.
Carving complete:
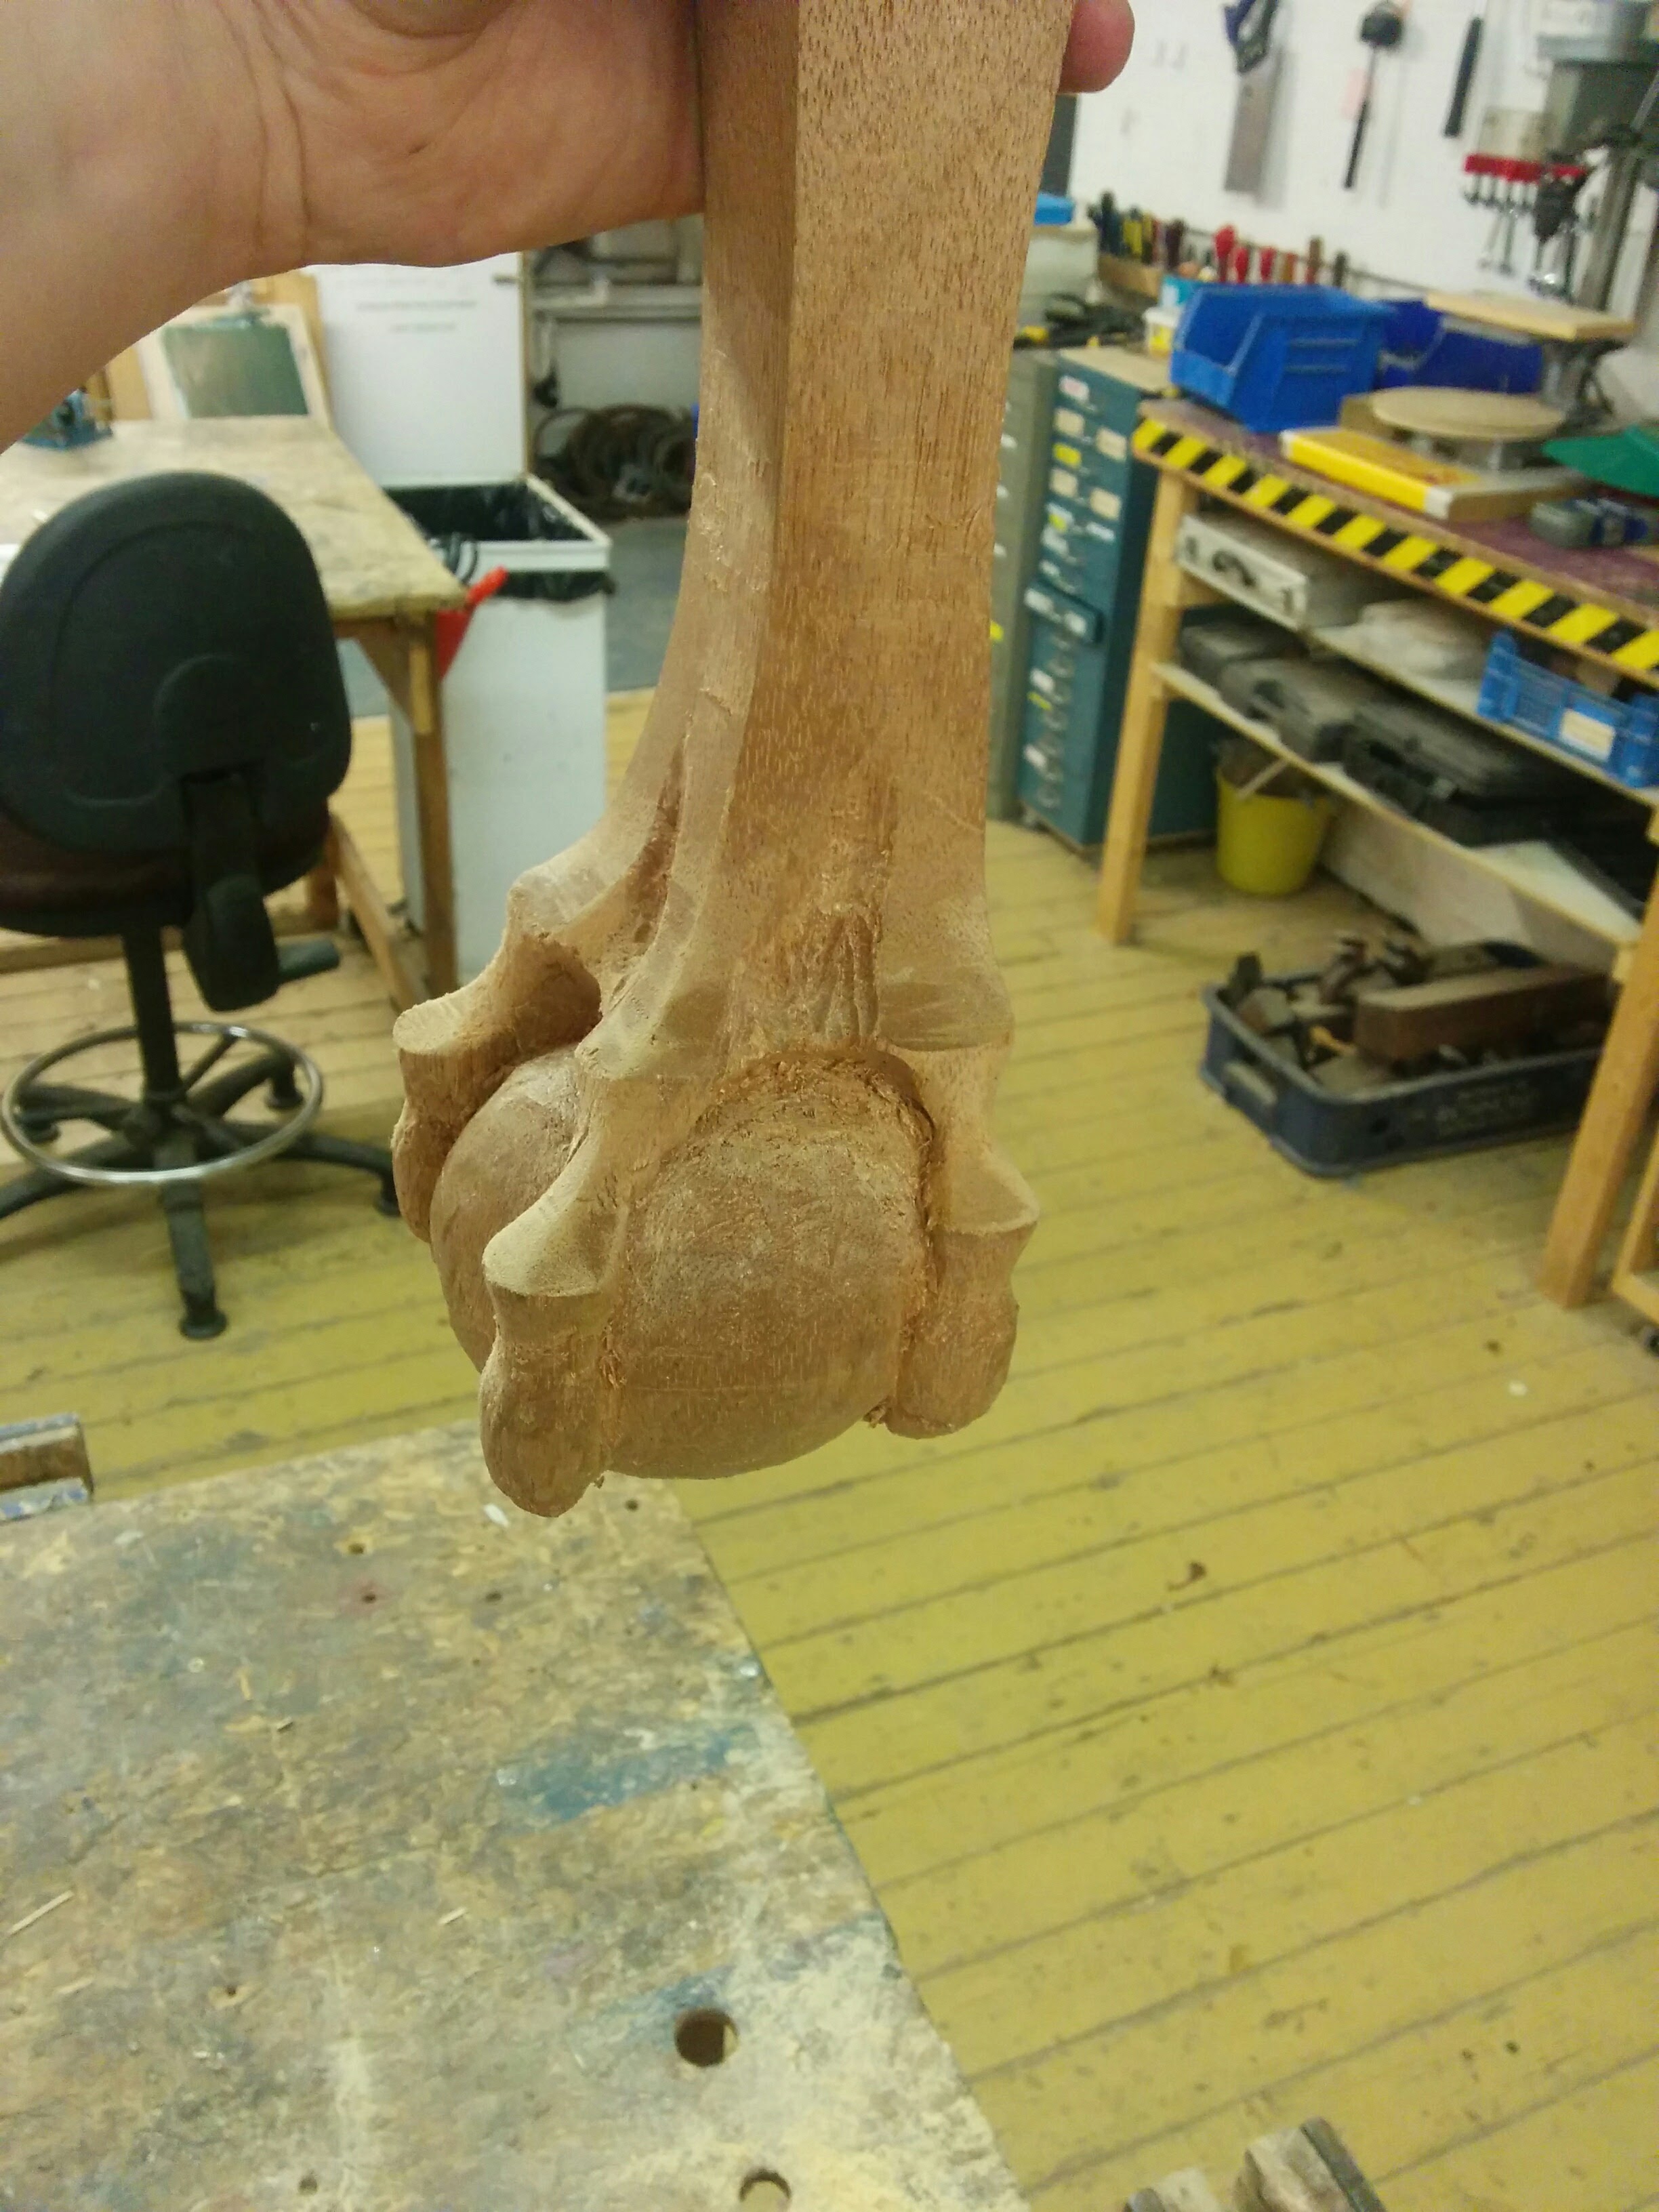
Refined with sanding, homebrew rifflers and a Swann-Morton scalpel:
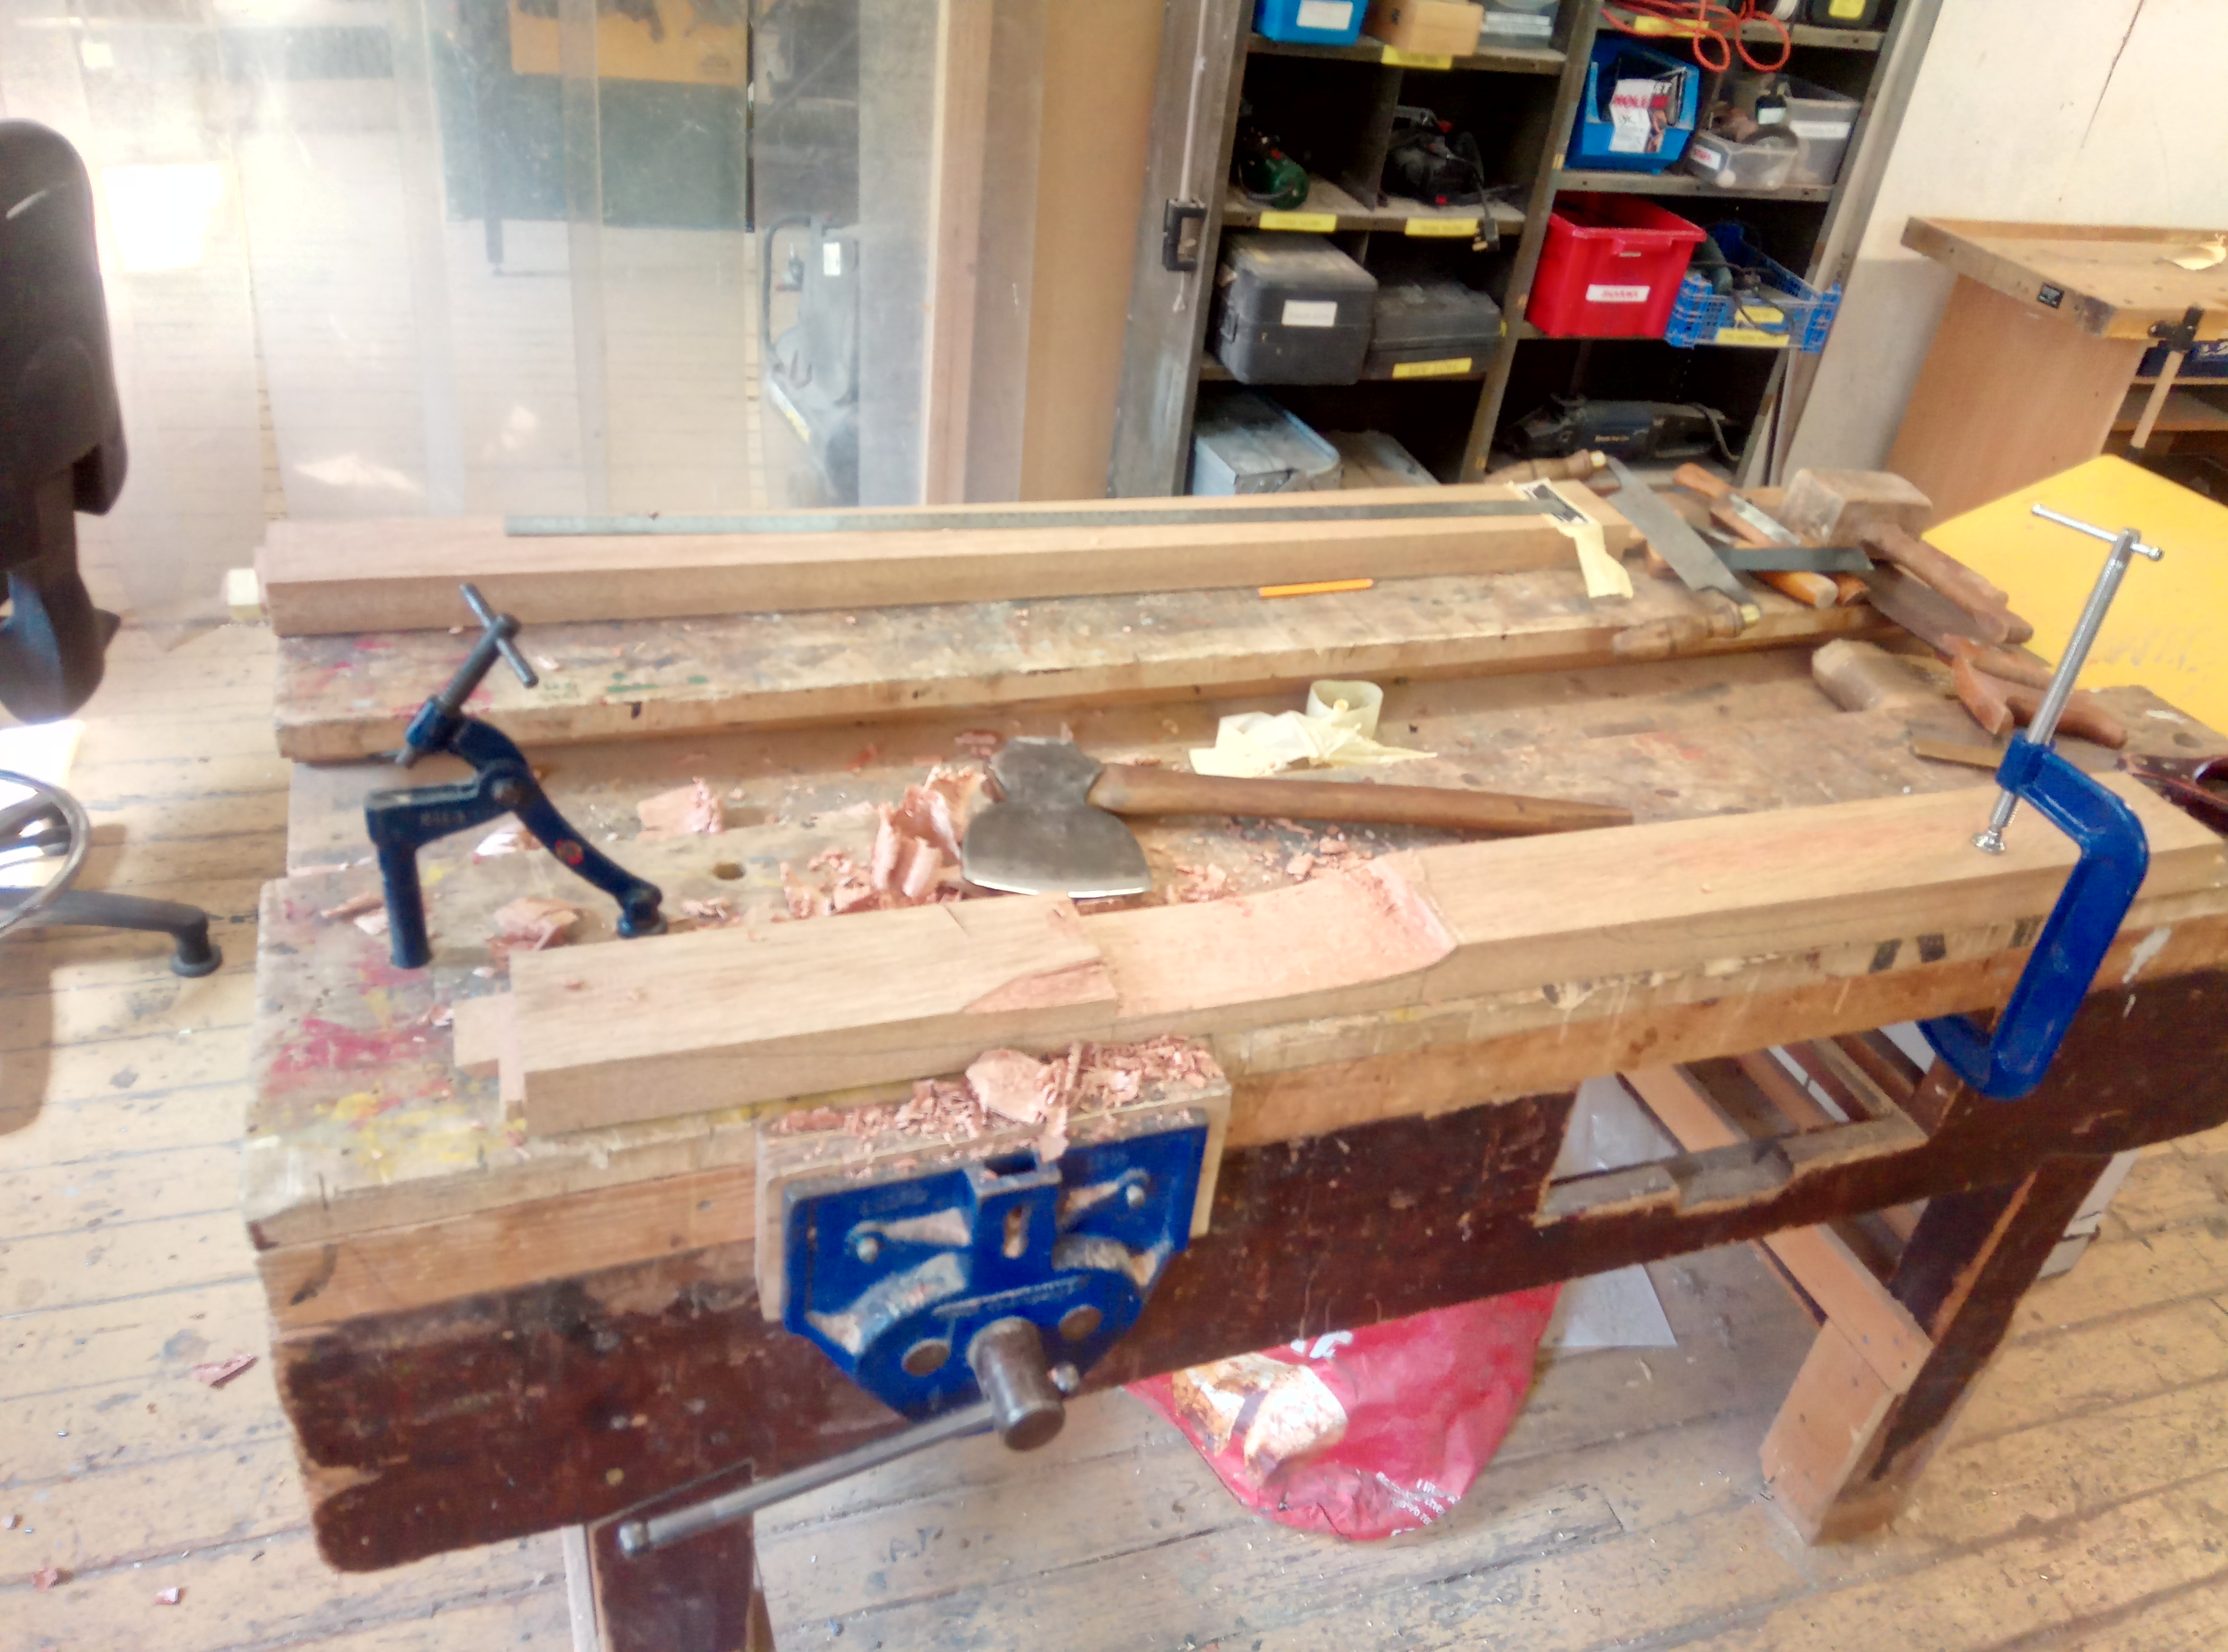
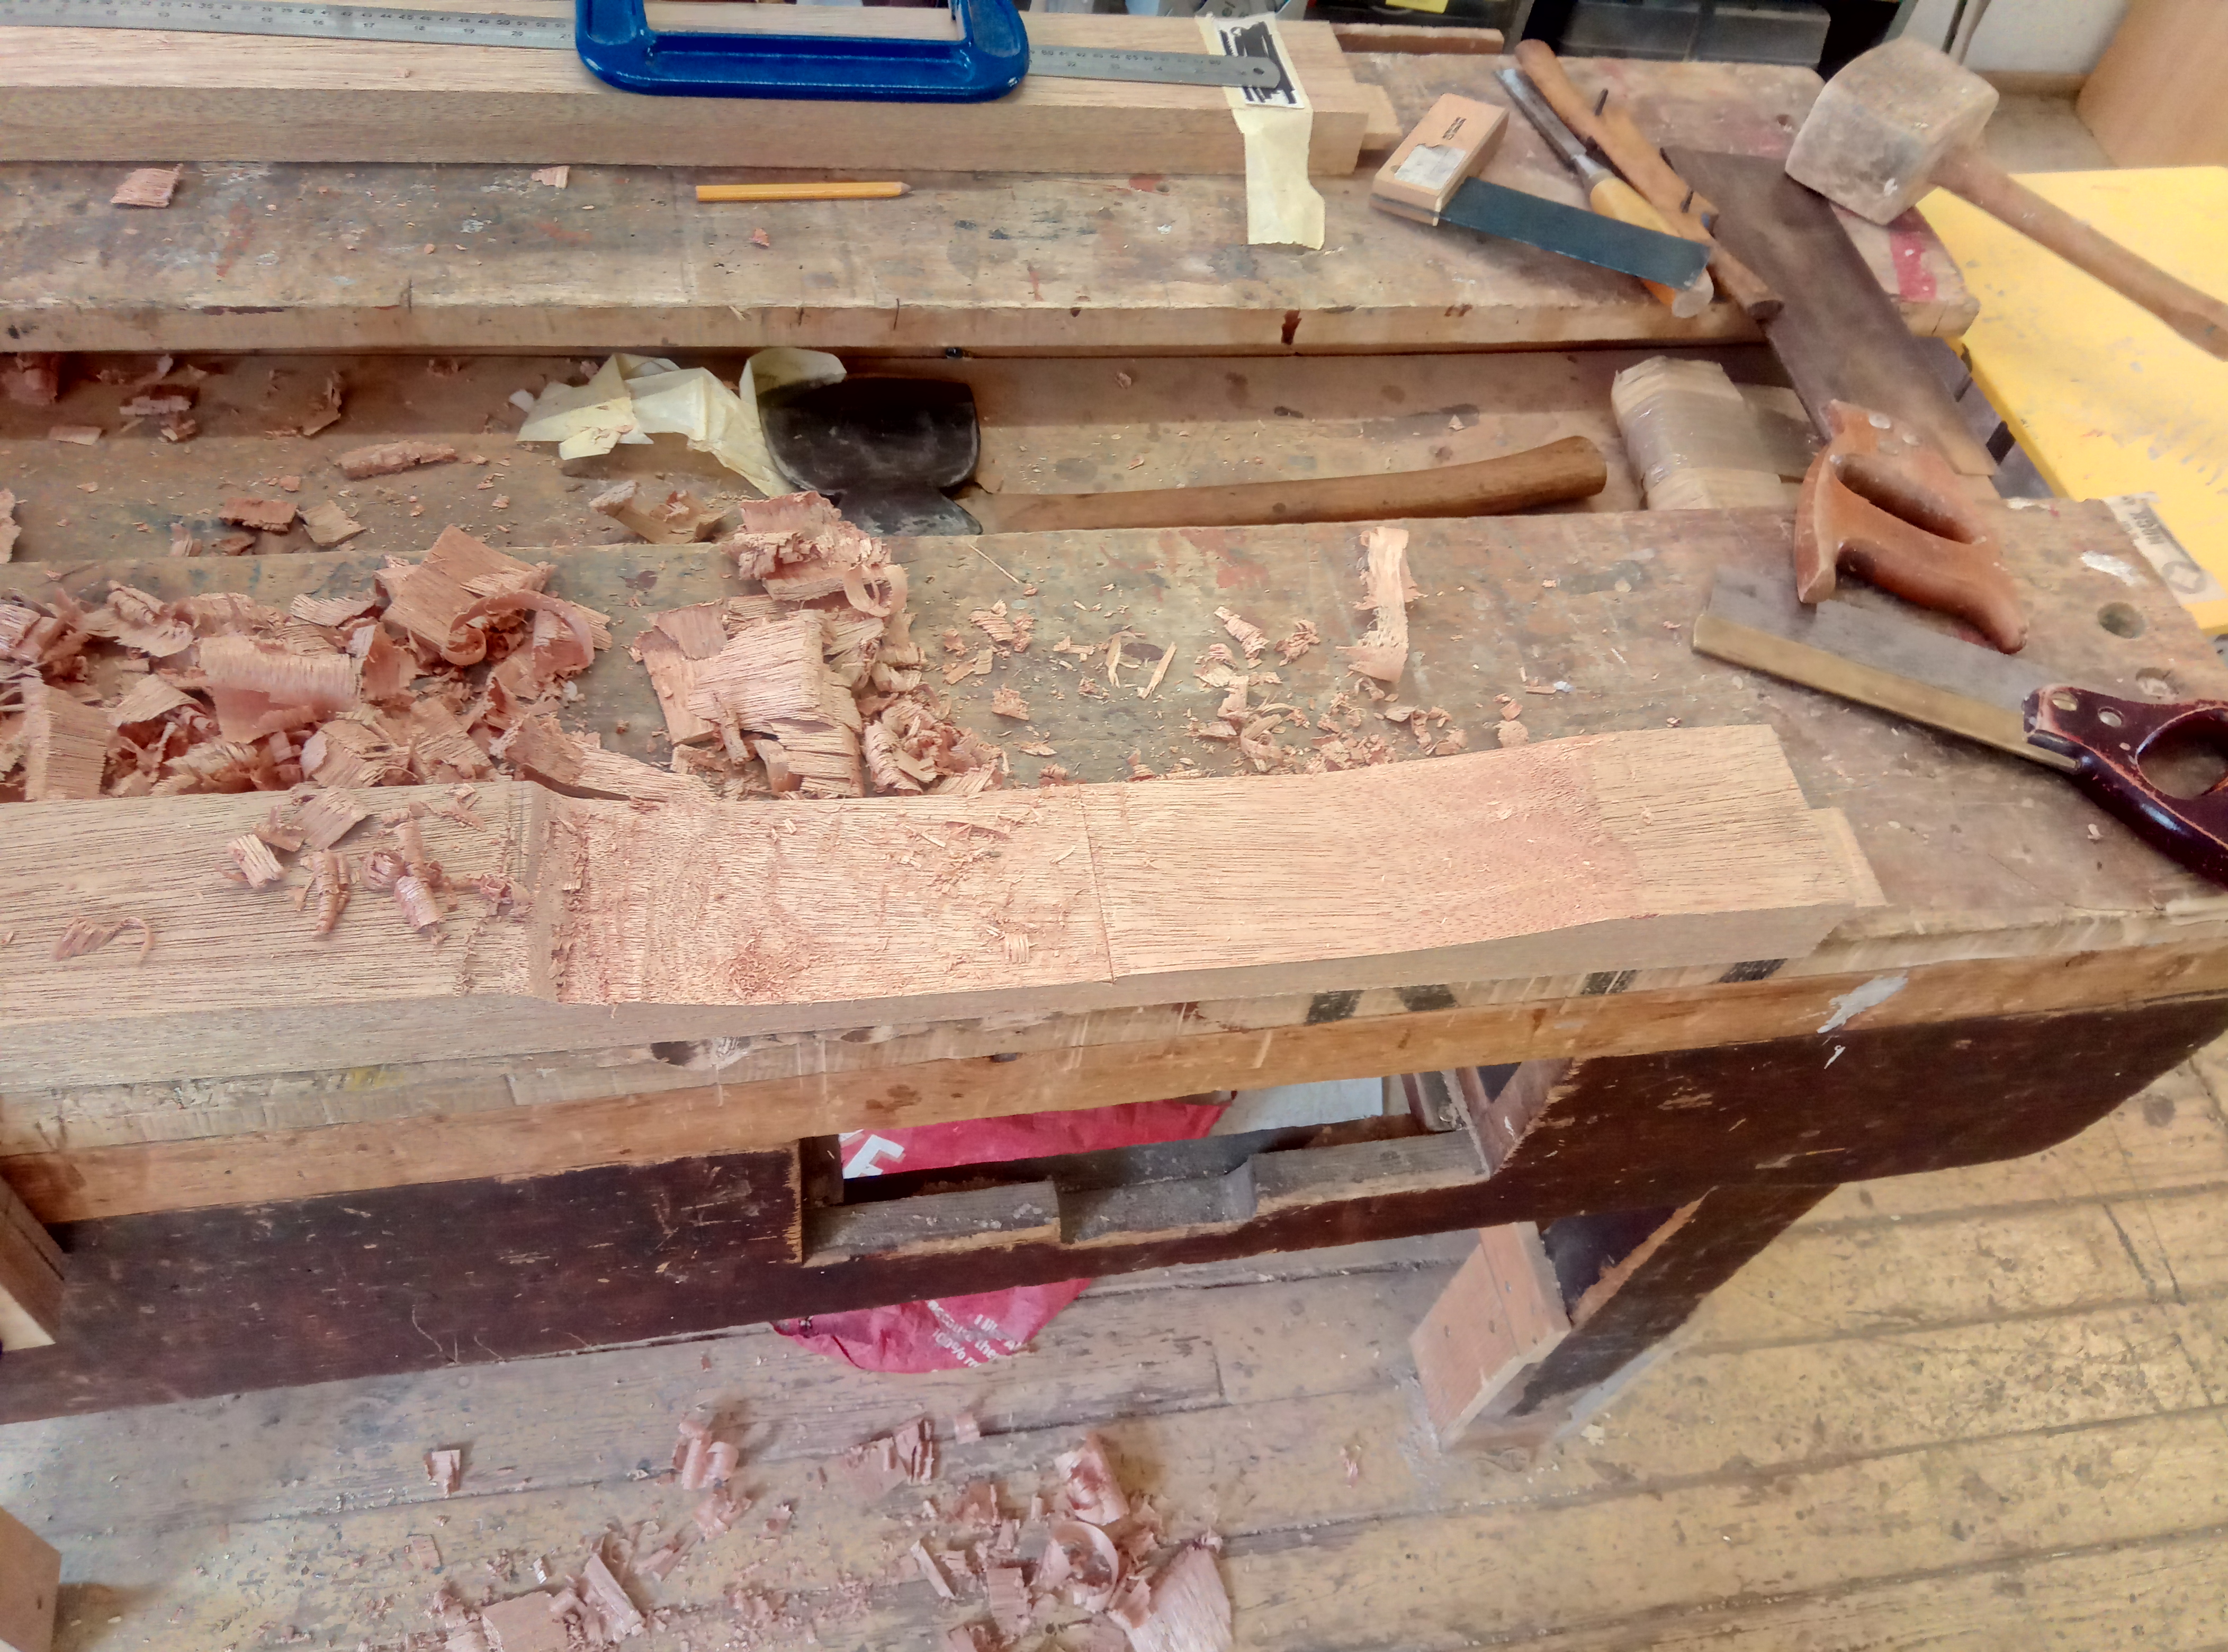
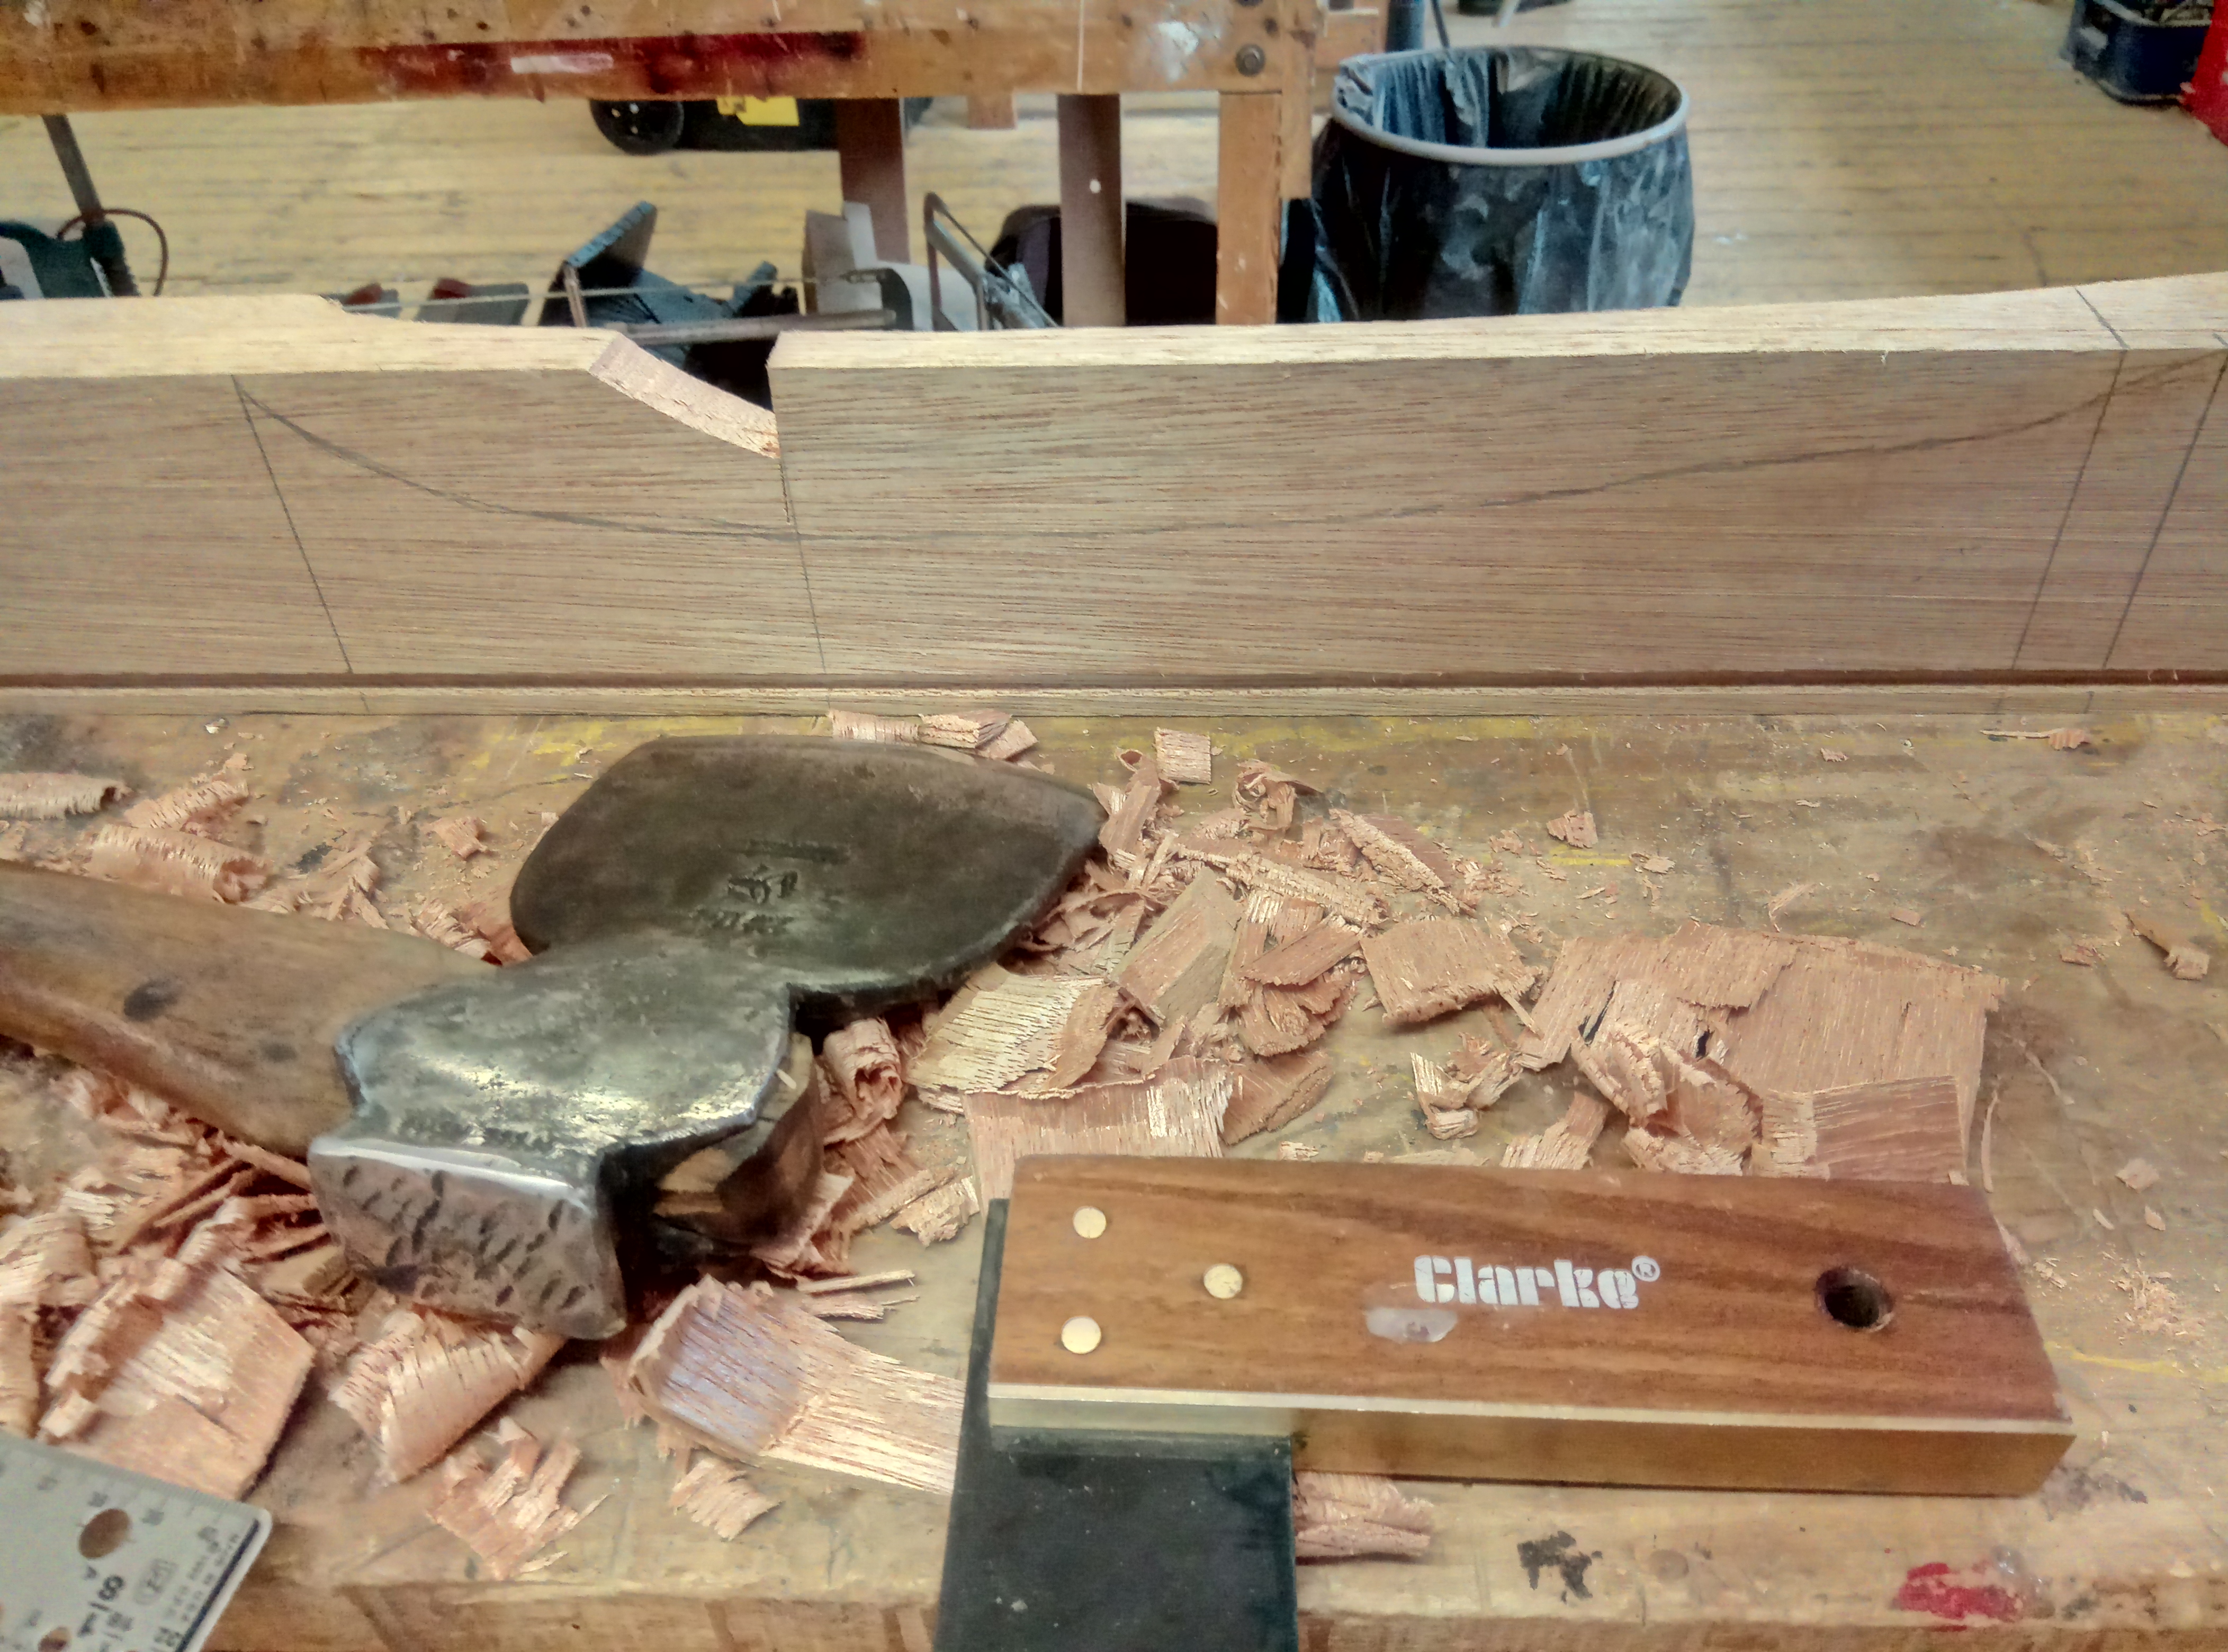
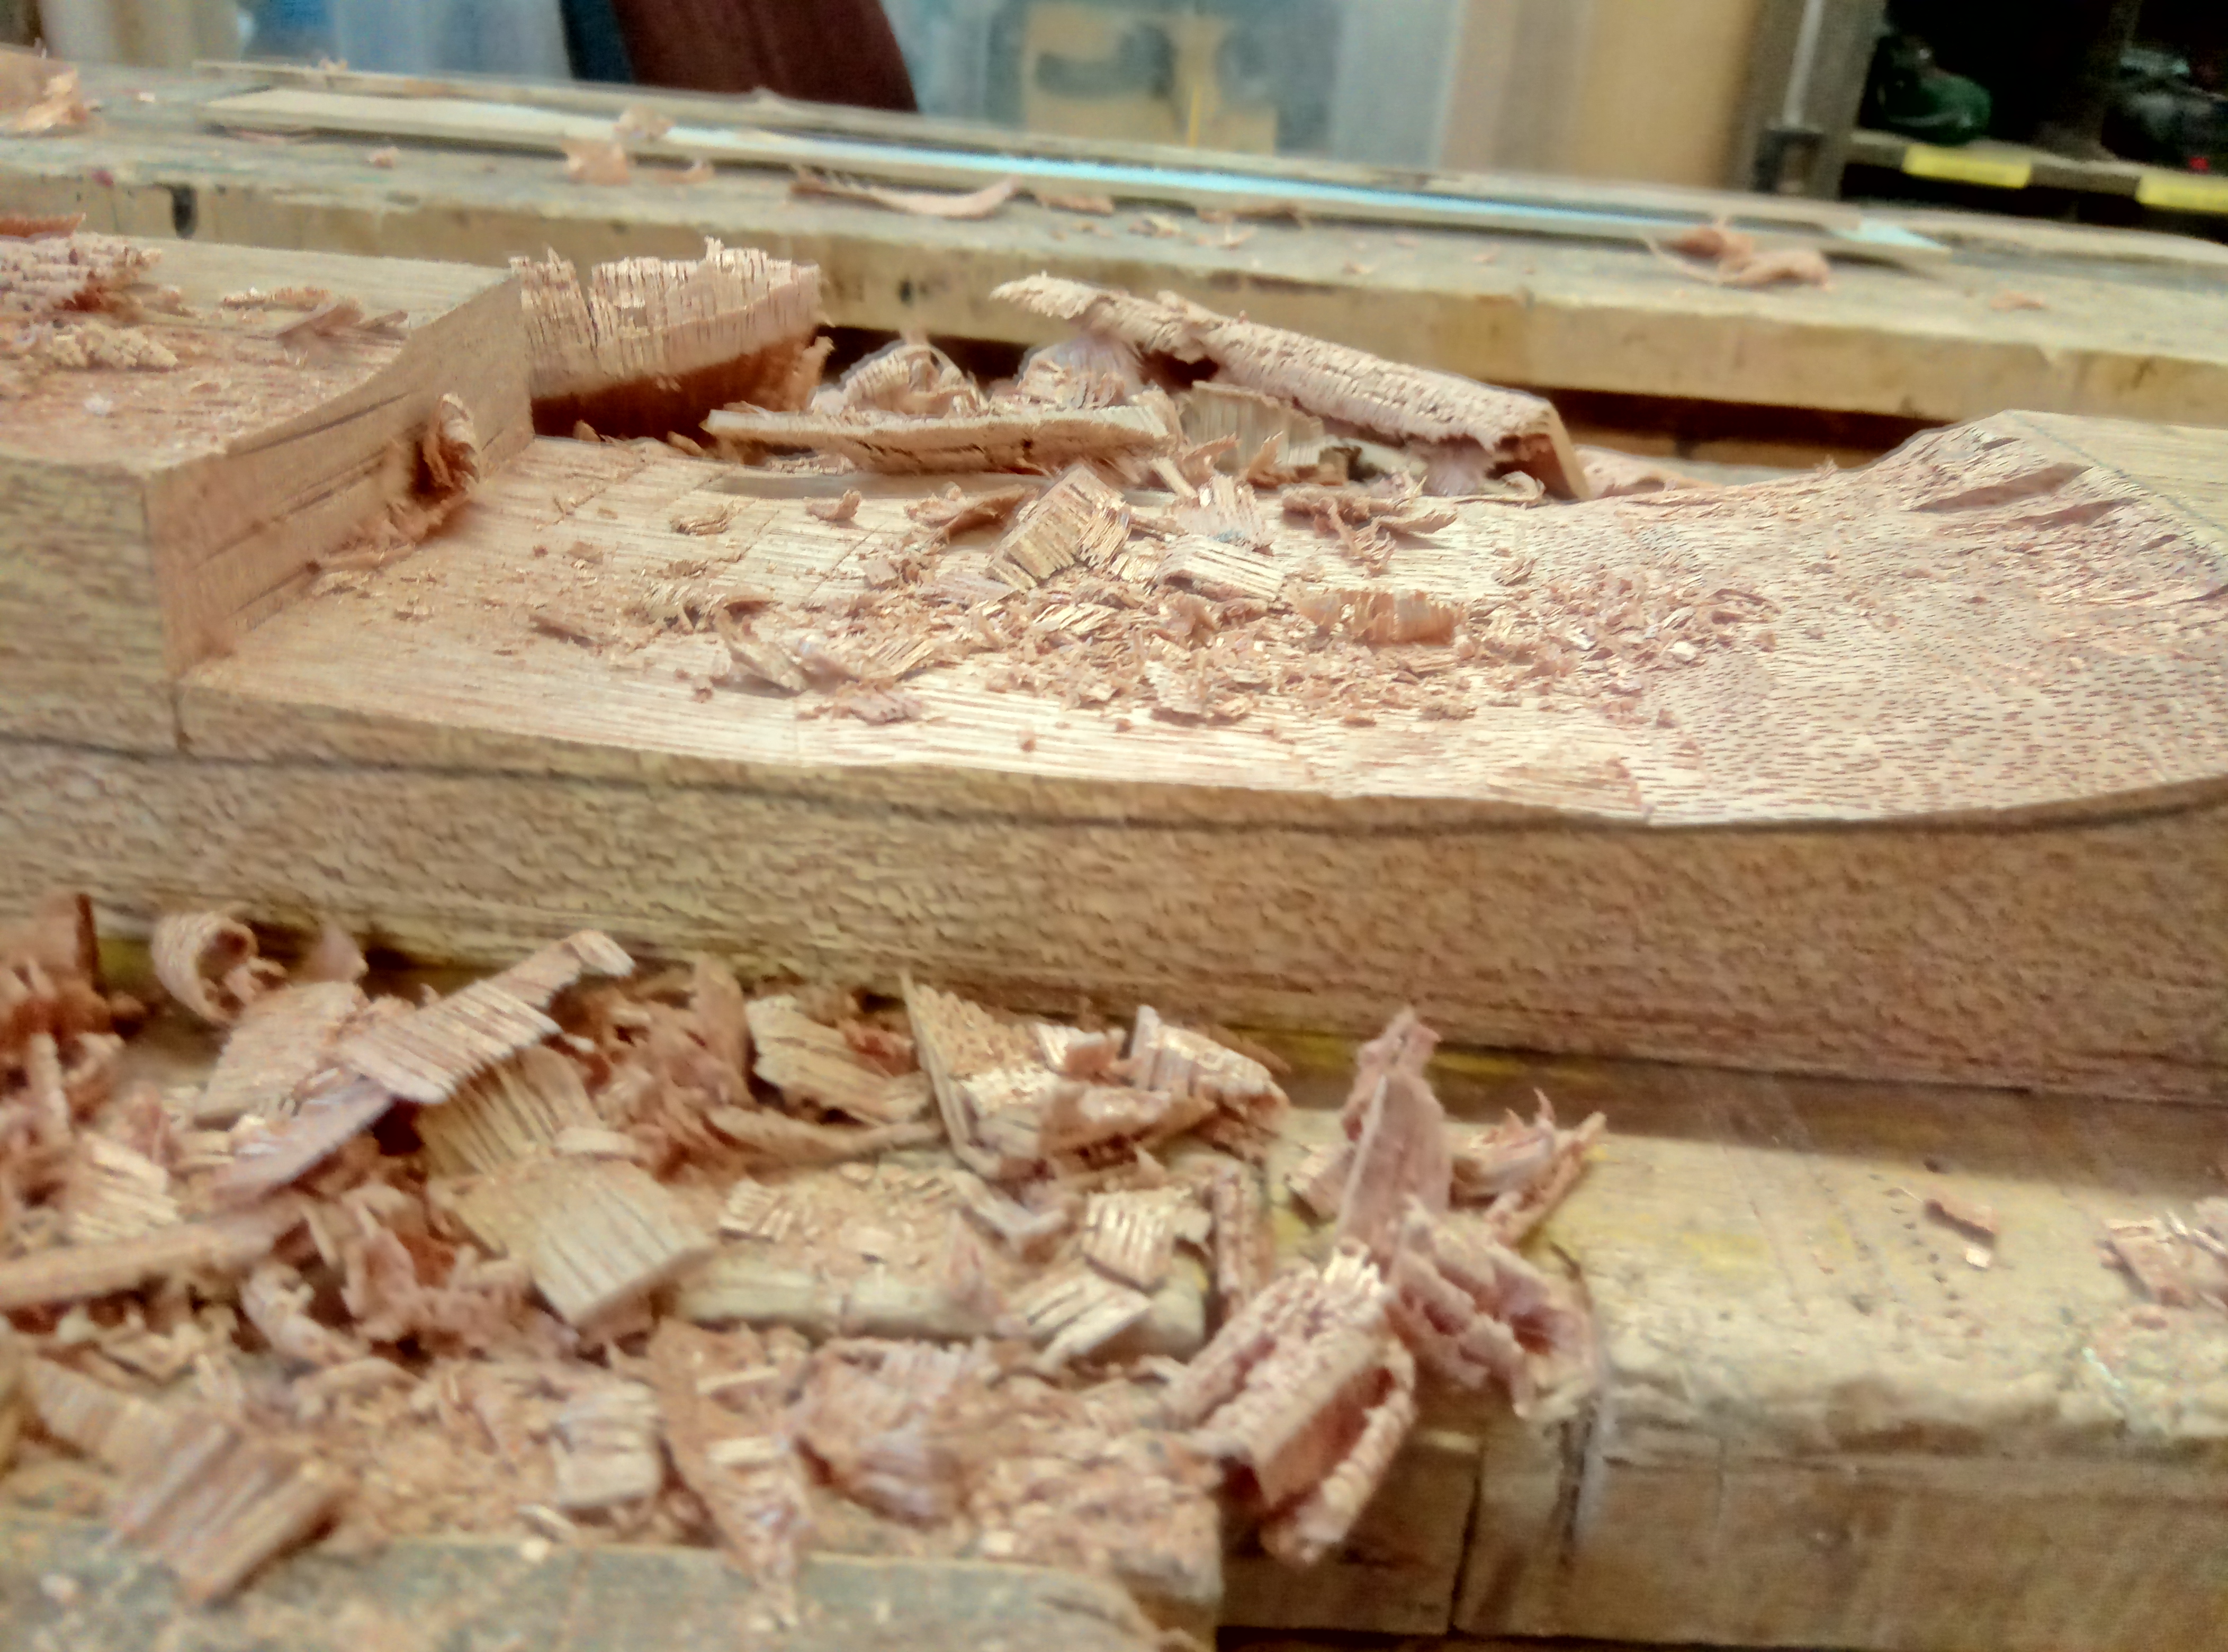
Which takes us to the stretchers, the bandsaw I'd used previously is still out of commission, so sawing the curves was out of the option. So this weekend, I finally got the bit between my teeth to actually move the project on, and decided that I'd hog the bulk of the waste out with an axe.
It was initially hard work, and I felt my technique was quite inaccurate; even though I was already vaguely confident using an axe for hewing and chopping out the waste of large tennons and notches
However, my first instinct was to choke up on the axe, and rapidly take loads of small, energy sapping but ineffective blows controlled by my dominant hand. Not great technique, the hand took a bit of a beating as a result, and the pecking motion which allowed me to make a sane rate of material removal, whilst using the axe with my hand right up at the top of the haft, actually caused a lot of the inaccuracy.
When I twigged what the fix was to doing it well, it felt very intimidating to strike the first blow. I'd realised I wasn't cutting effectively, and reticently concluded I wasn't applying sufficient force....
So it took a couple of minutes of convincing from my internal monologue before I built up the confidence to take reasonable two-handed swings. That was game changing: the material removal rate went up, but so did my accuracy and I rapidly felt able to control the position of the blows and start to actually turn the axe in the cut to take curved cuts close to finished size.
First stretcher - 1½hrs to rough out, 1hrs to fair the curves to the line, 2½hrs total.
Second stretcher - 20mins to rough out, 25(ish) minutes to fair the curves to the line, ¾hr total.
It's a bit of a photo essay from here on out folks...
Initially I marked out the rough curve I wanted on the front of the stretcher, identified the deepest point, drew a line to saw to and cut down to the profile depth.
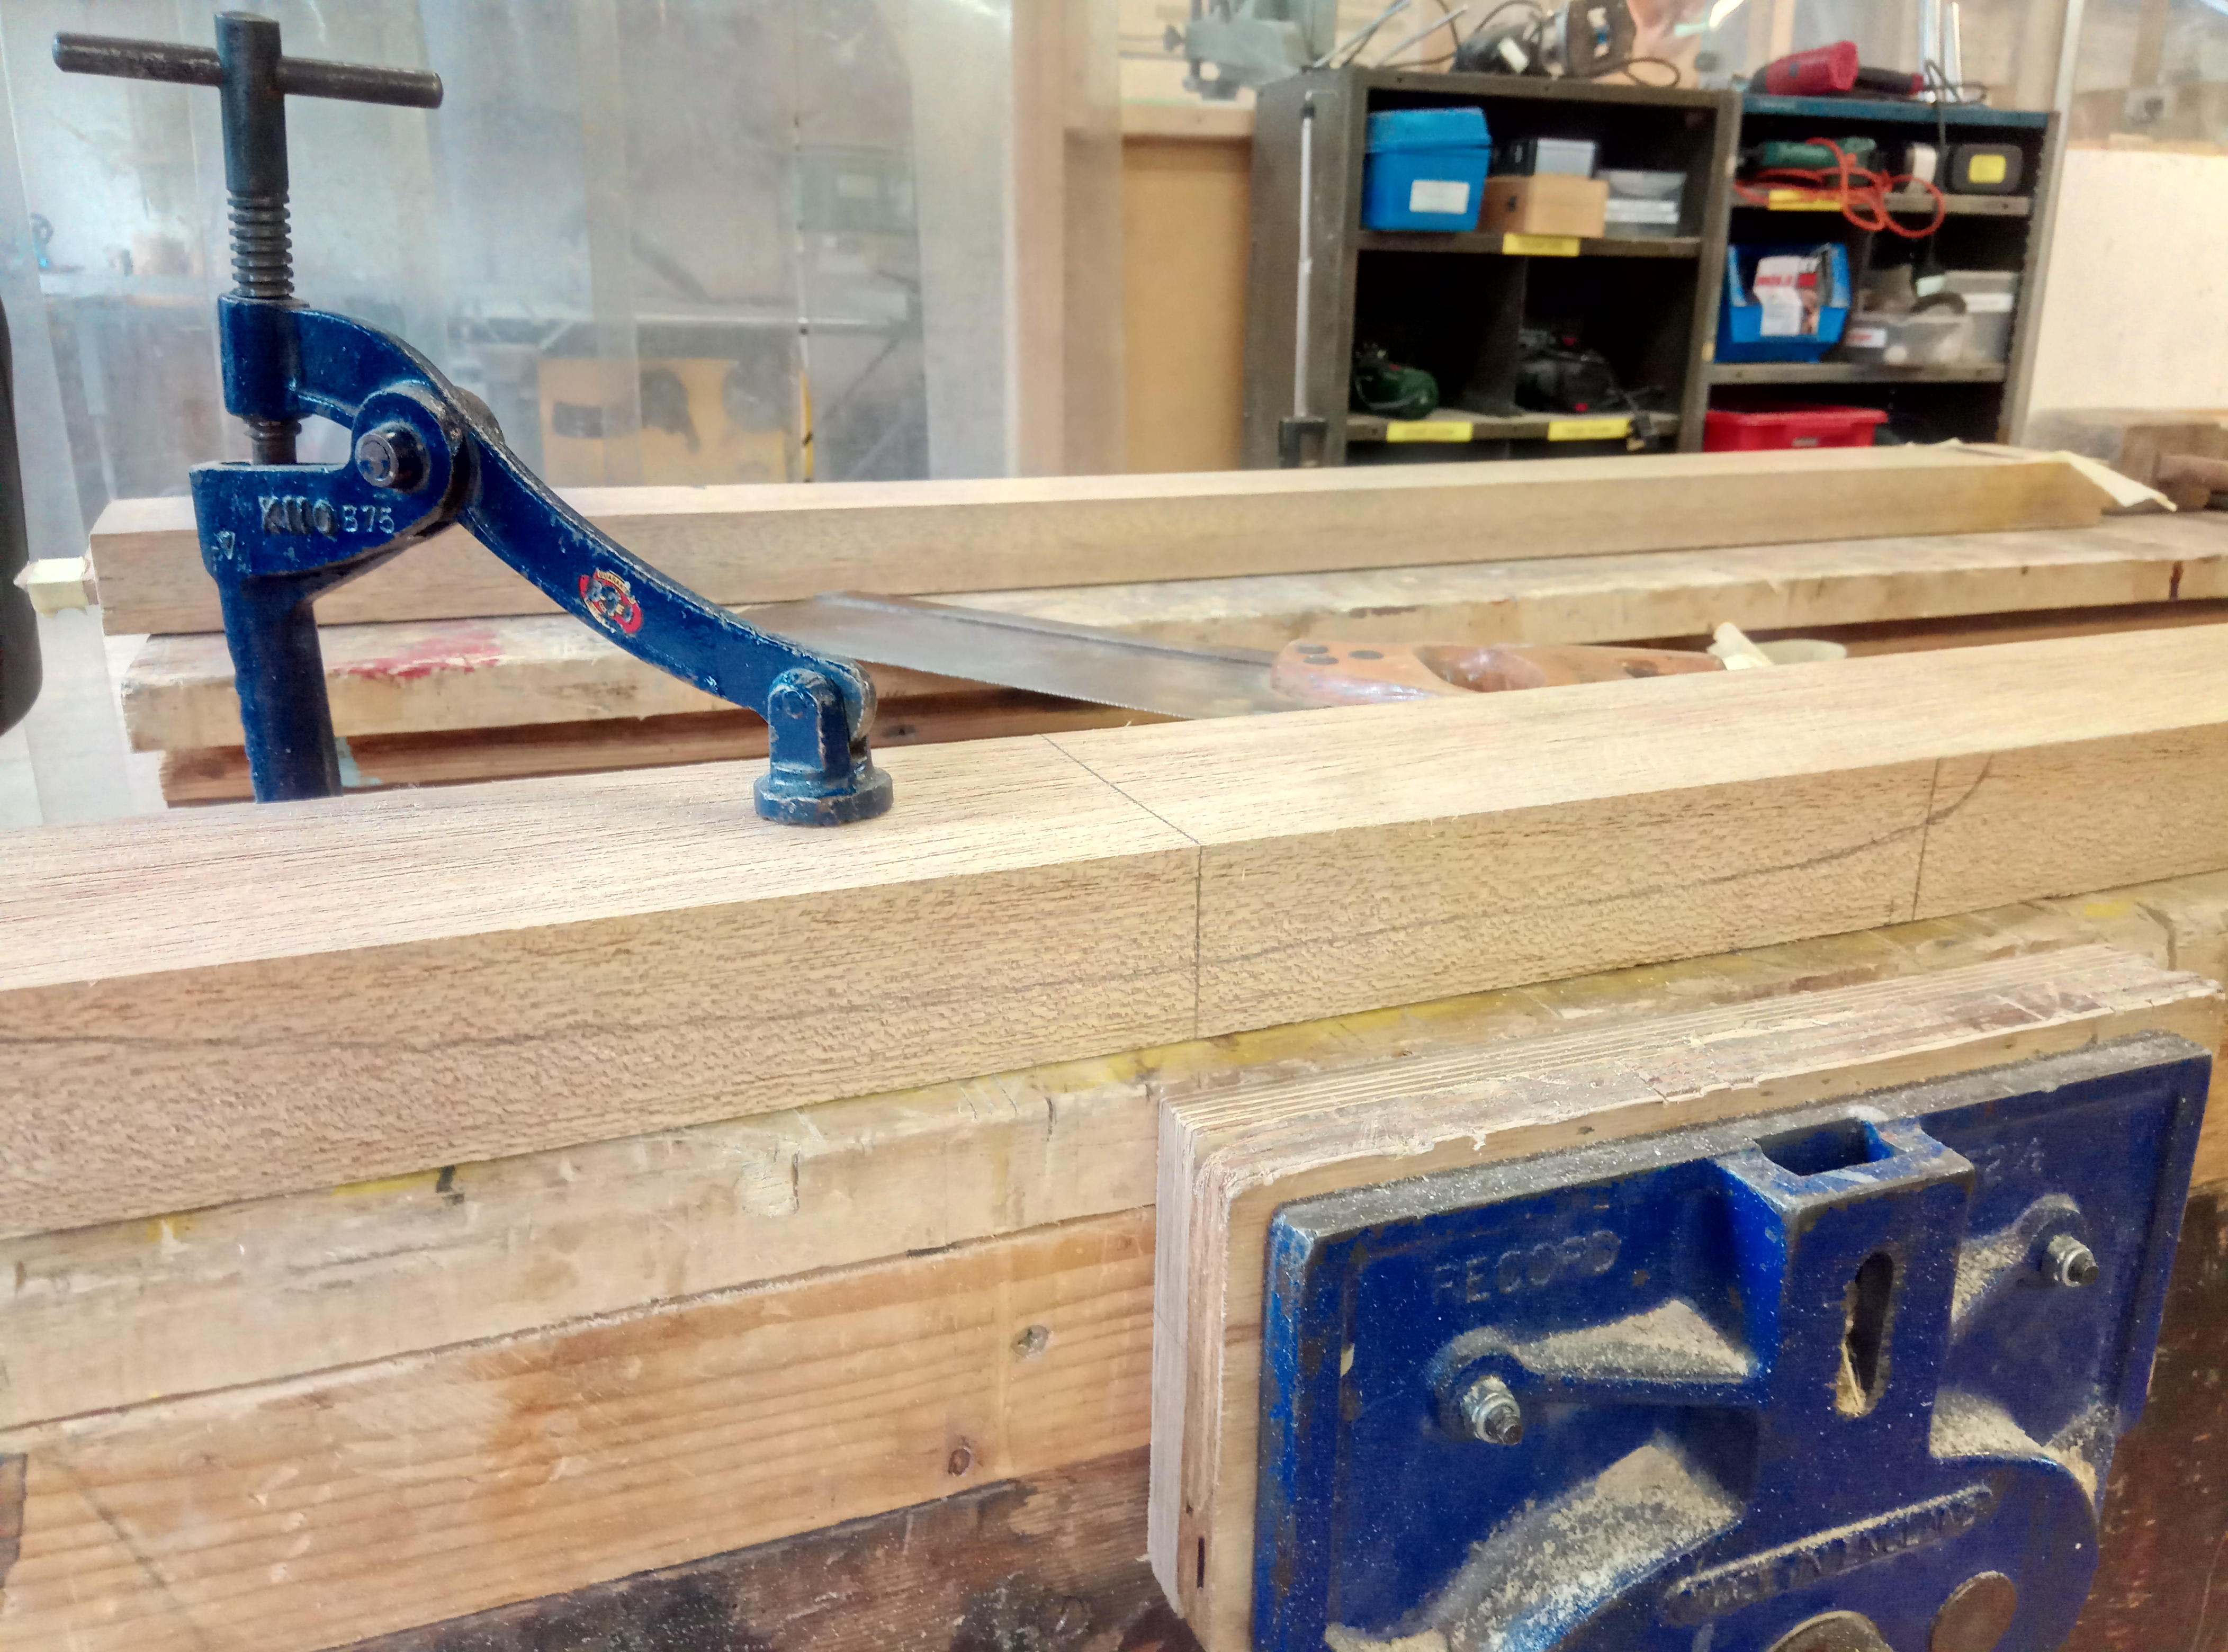
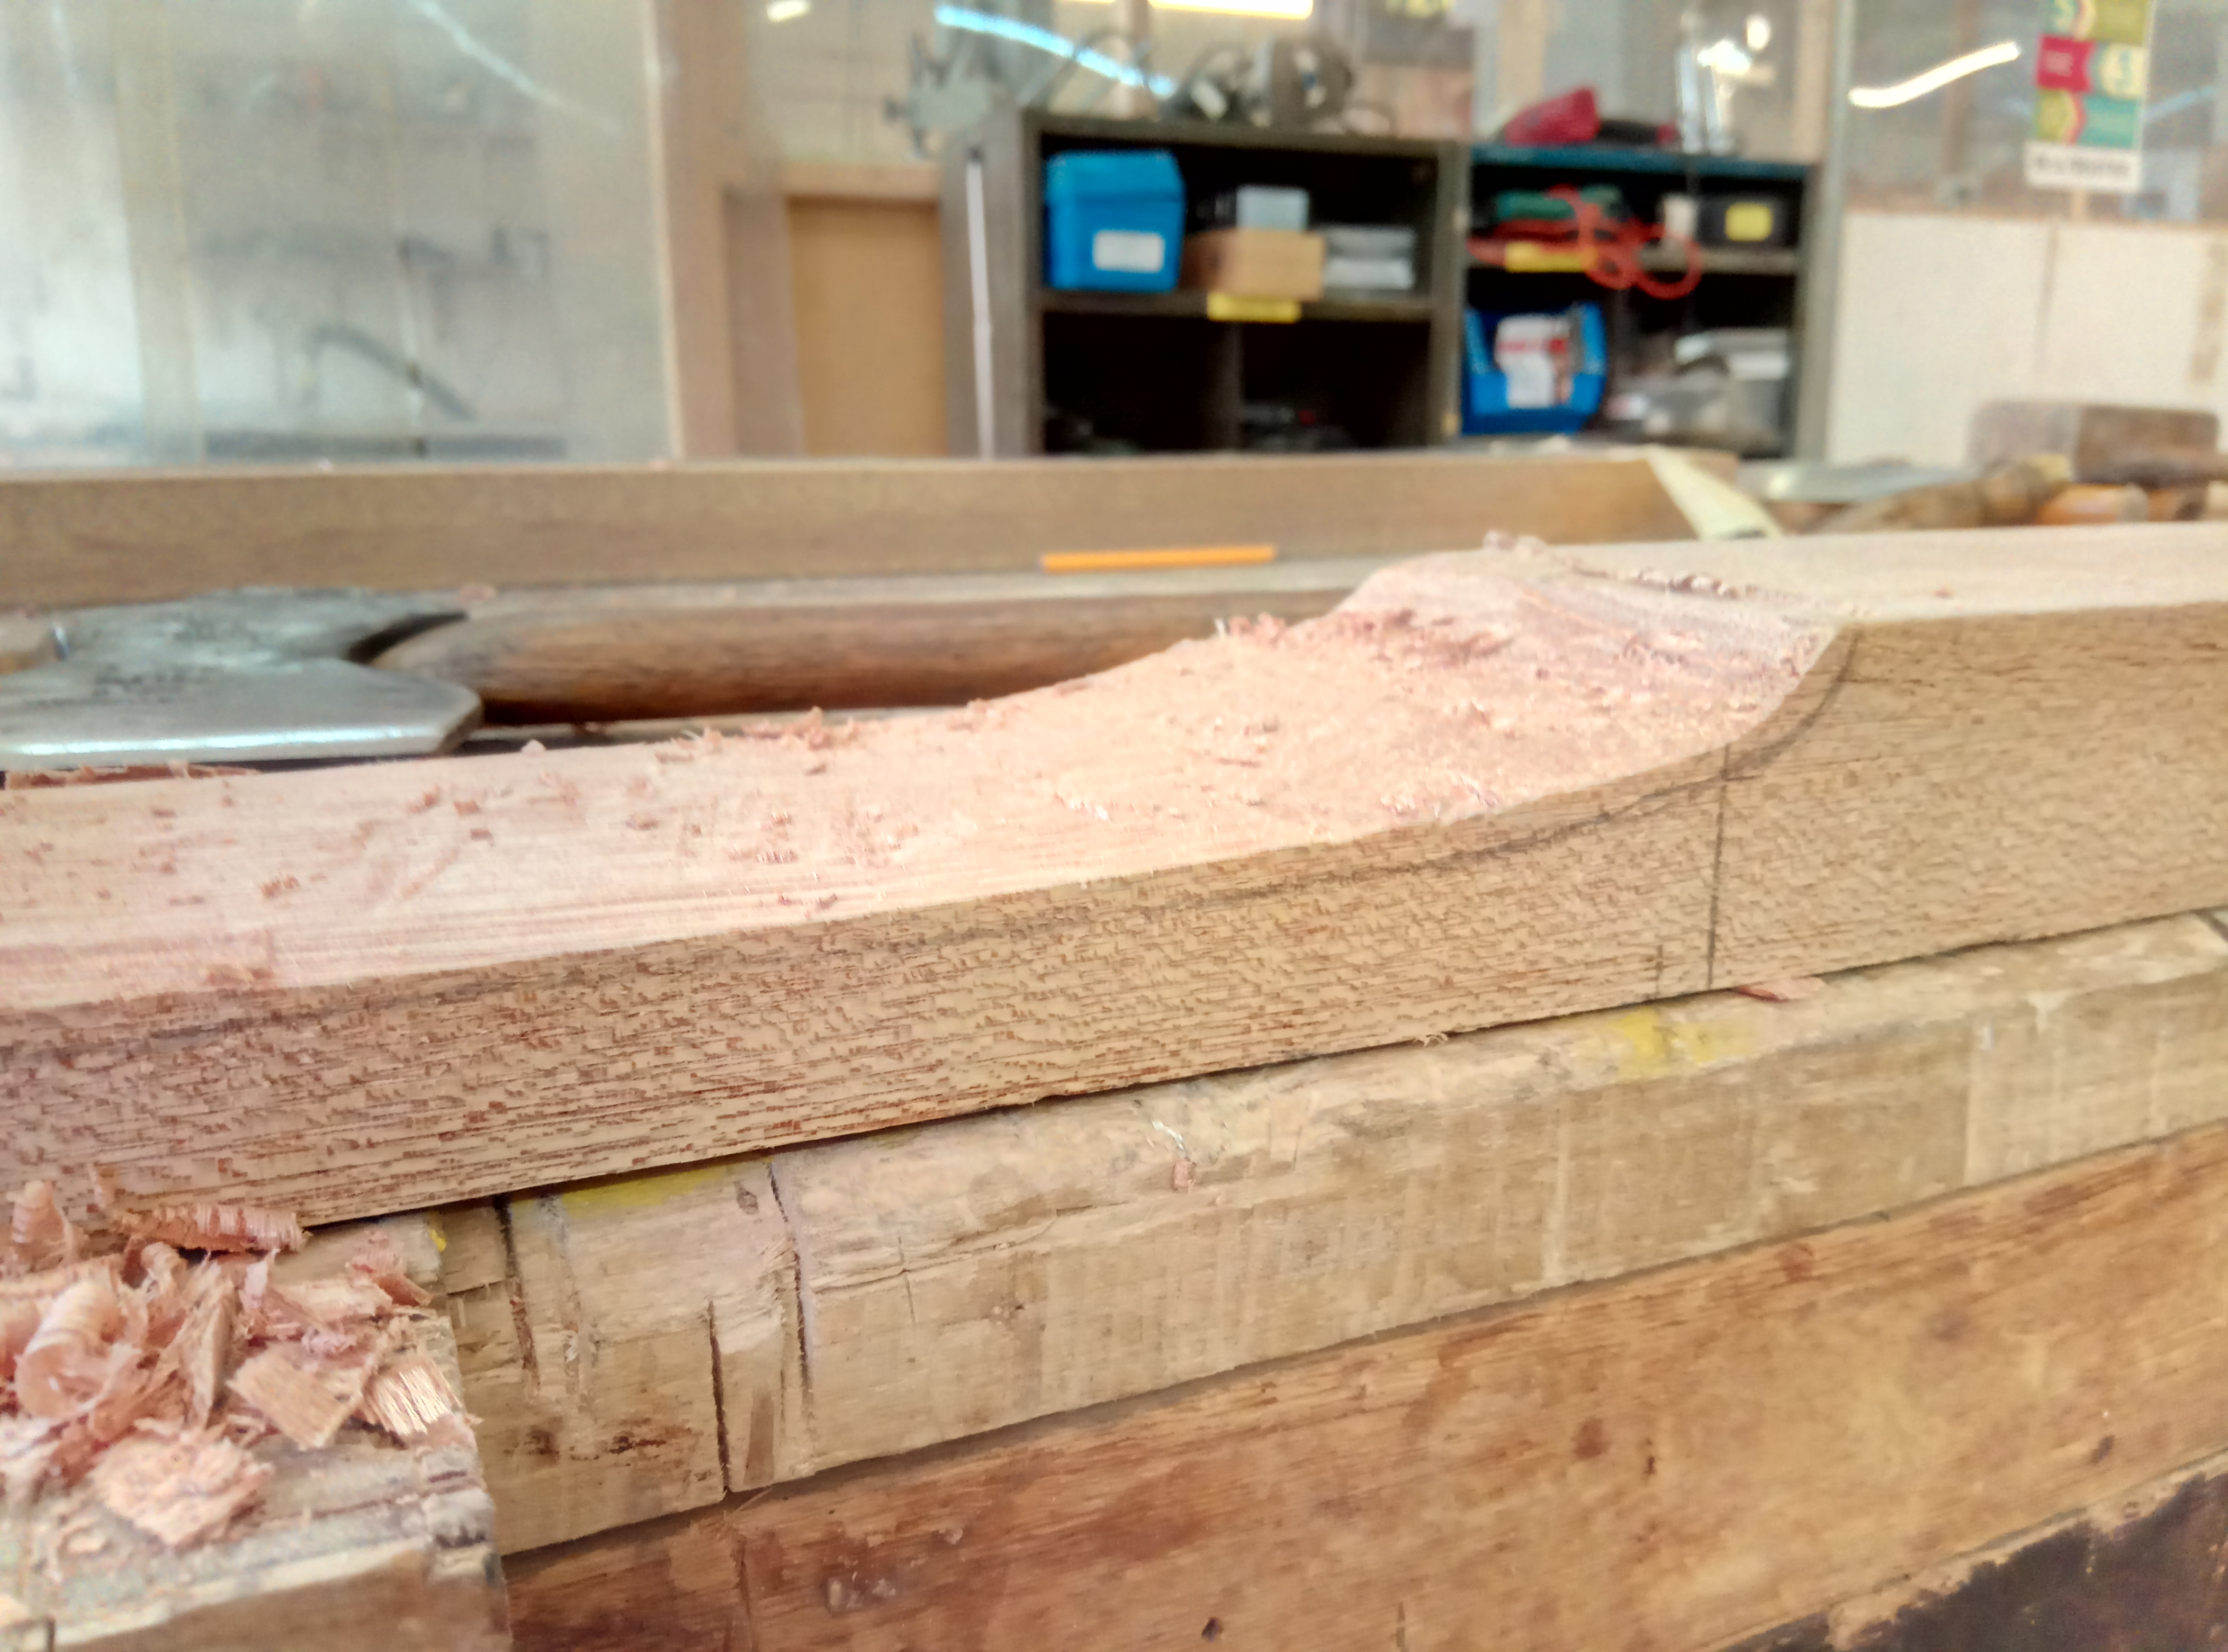
From there, I could start chopping toward that cut with the axe, without worrying about the split's propagating to anywhere I didn't want them to go.
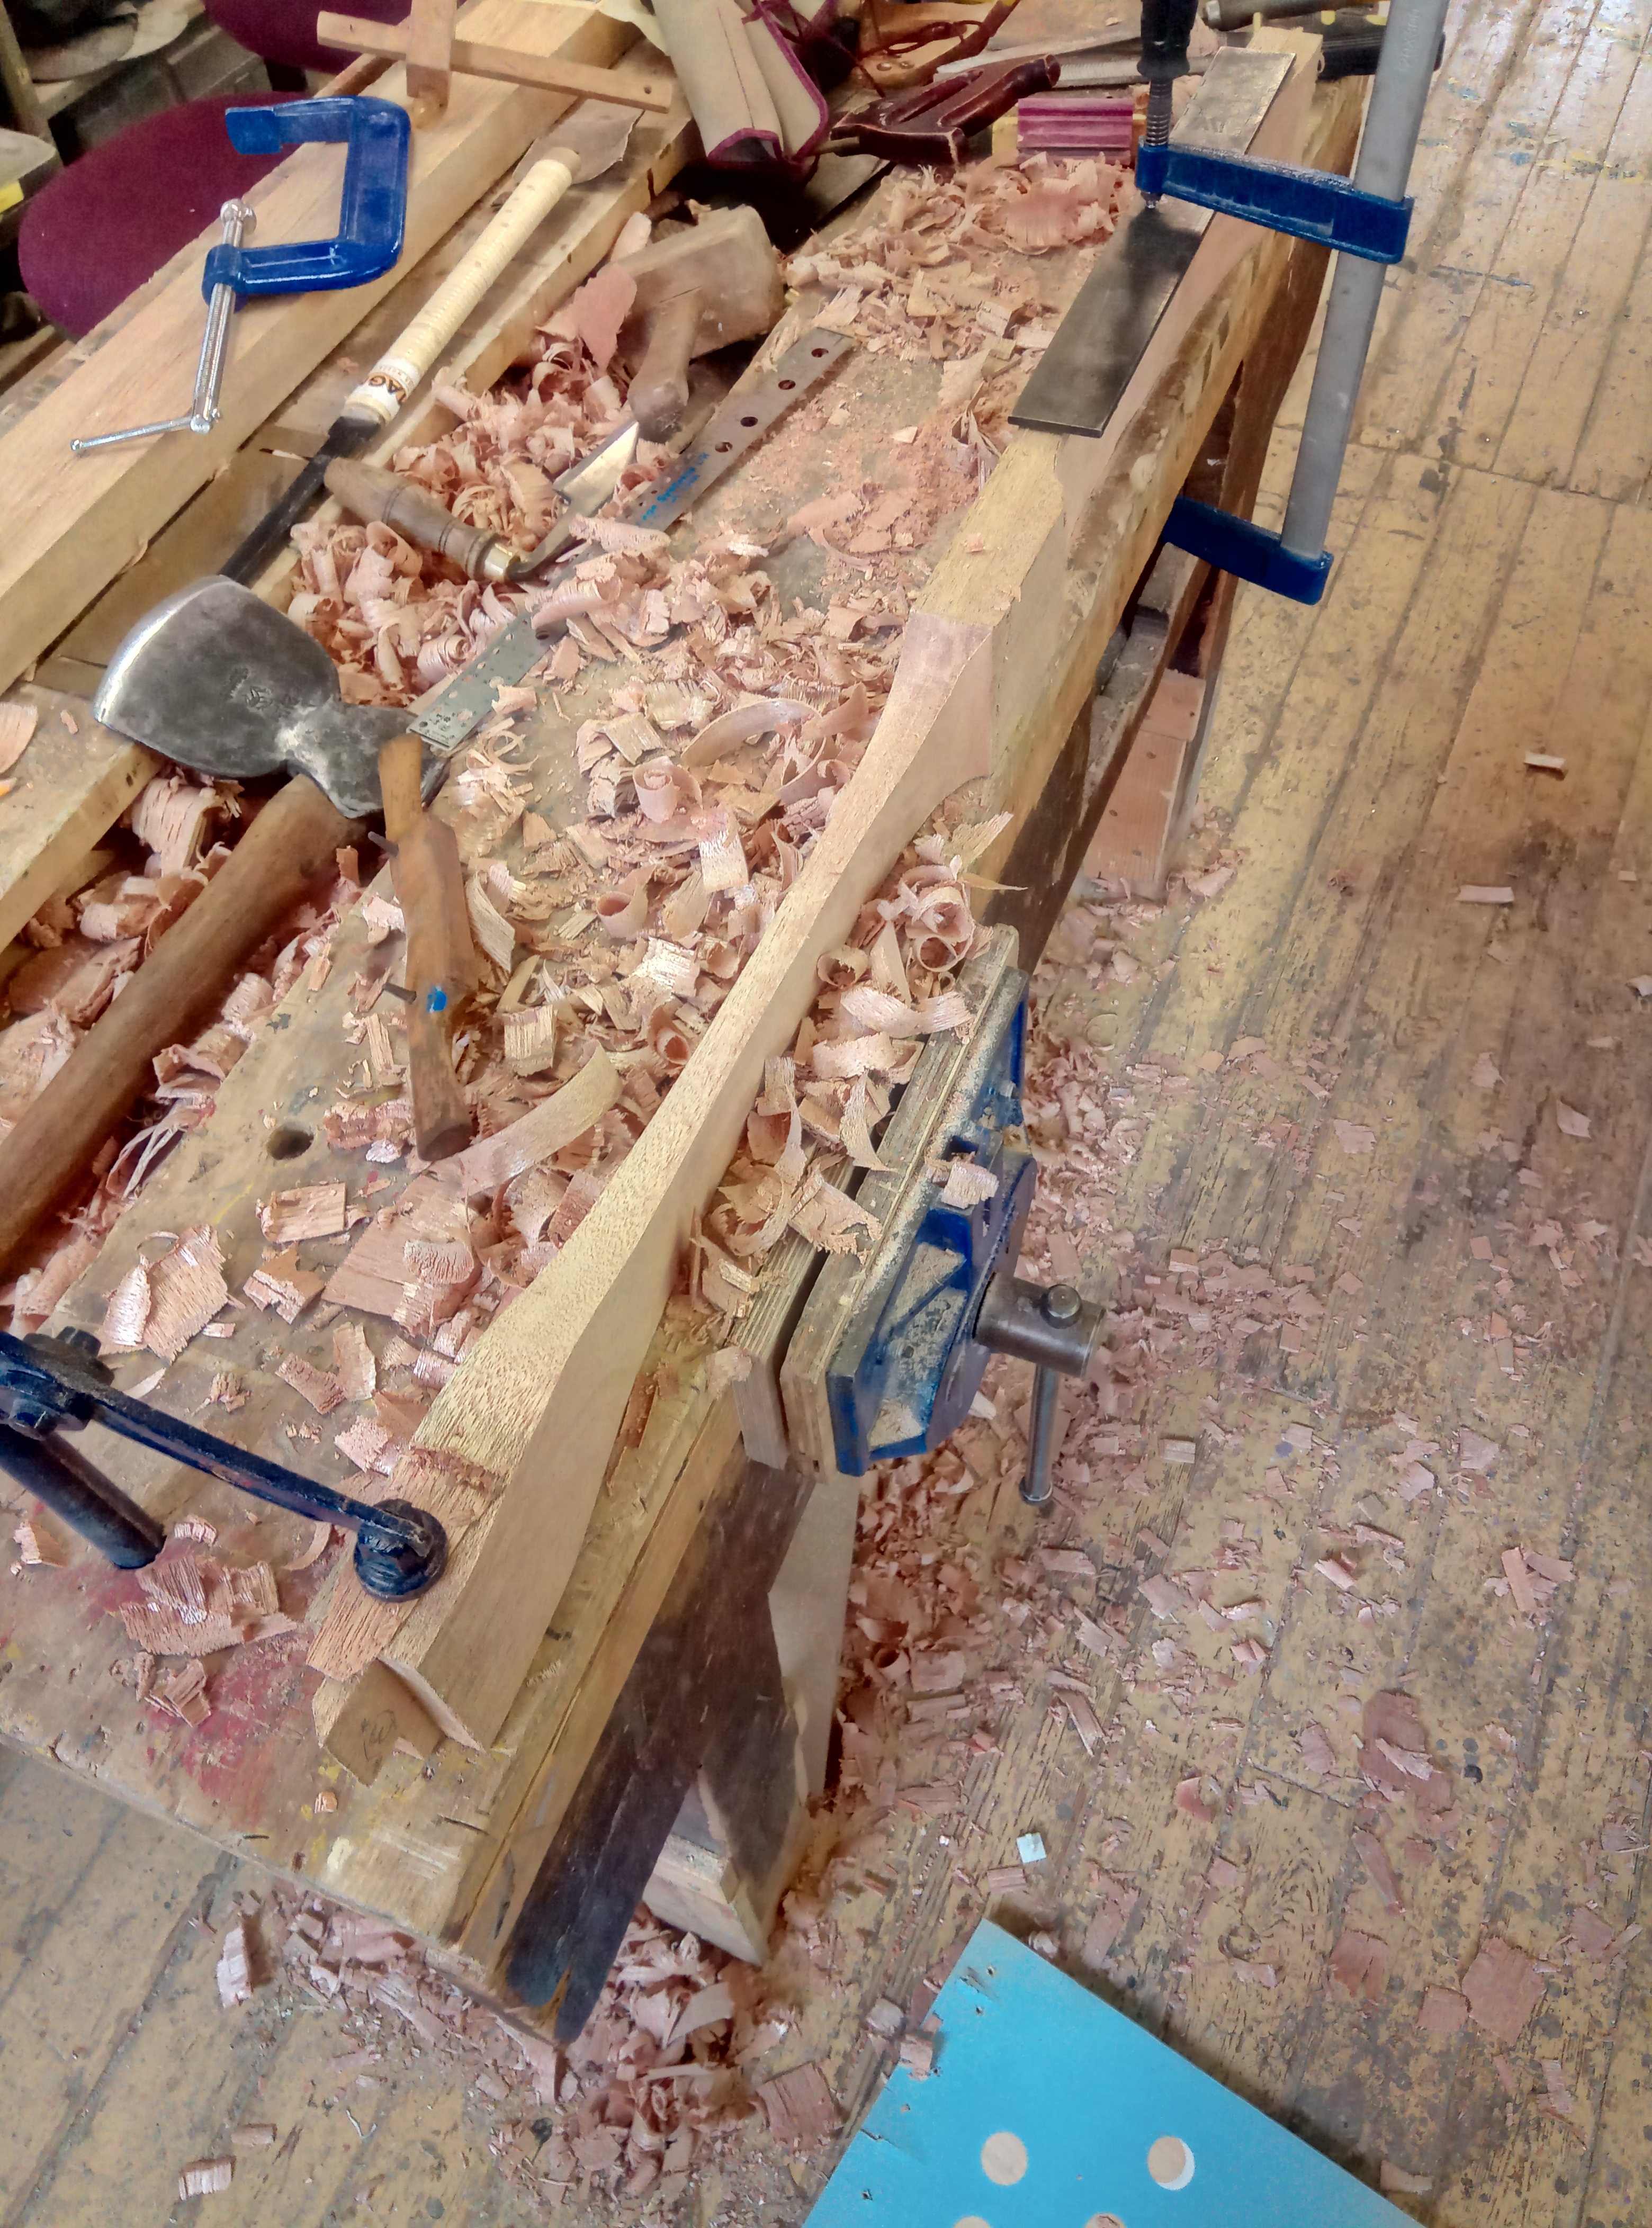
I didn't have the confidence to get all that close to the line though, which left a lot of waste to take off with the spokeshave.
Shaping with a spokeshave, went pretty smoothly (pun almost intended), but took an age due to the amount of material to come off.
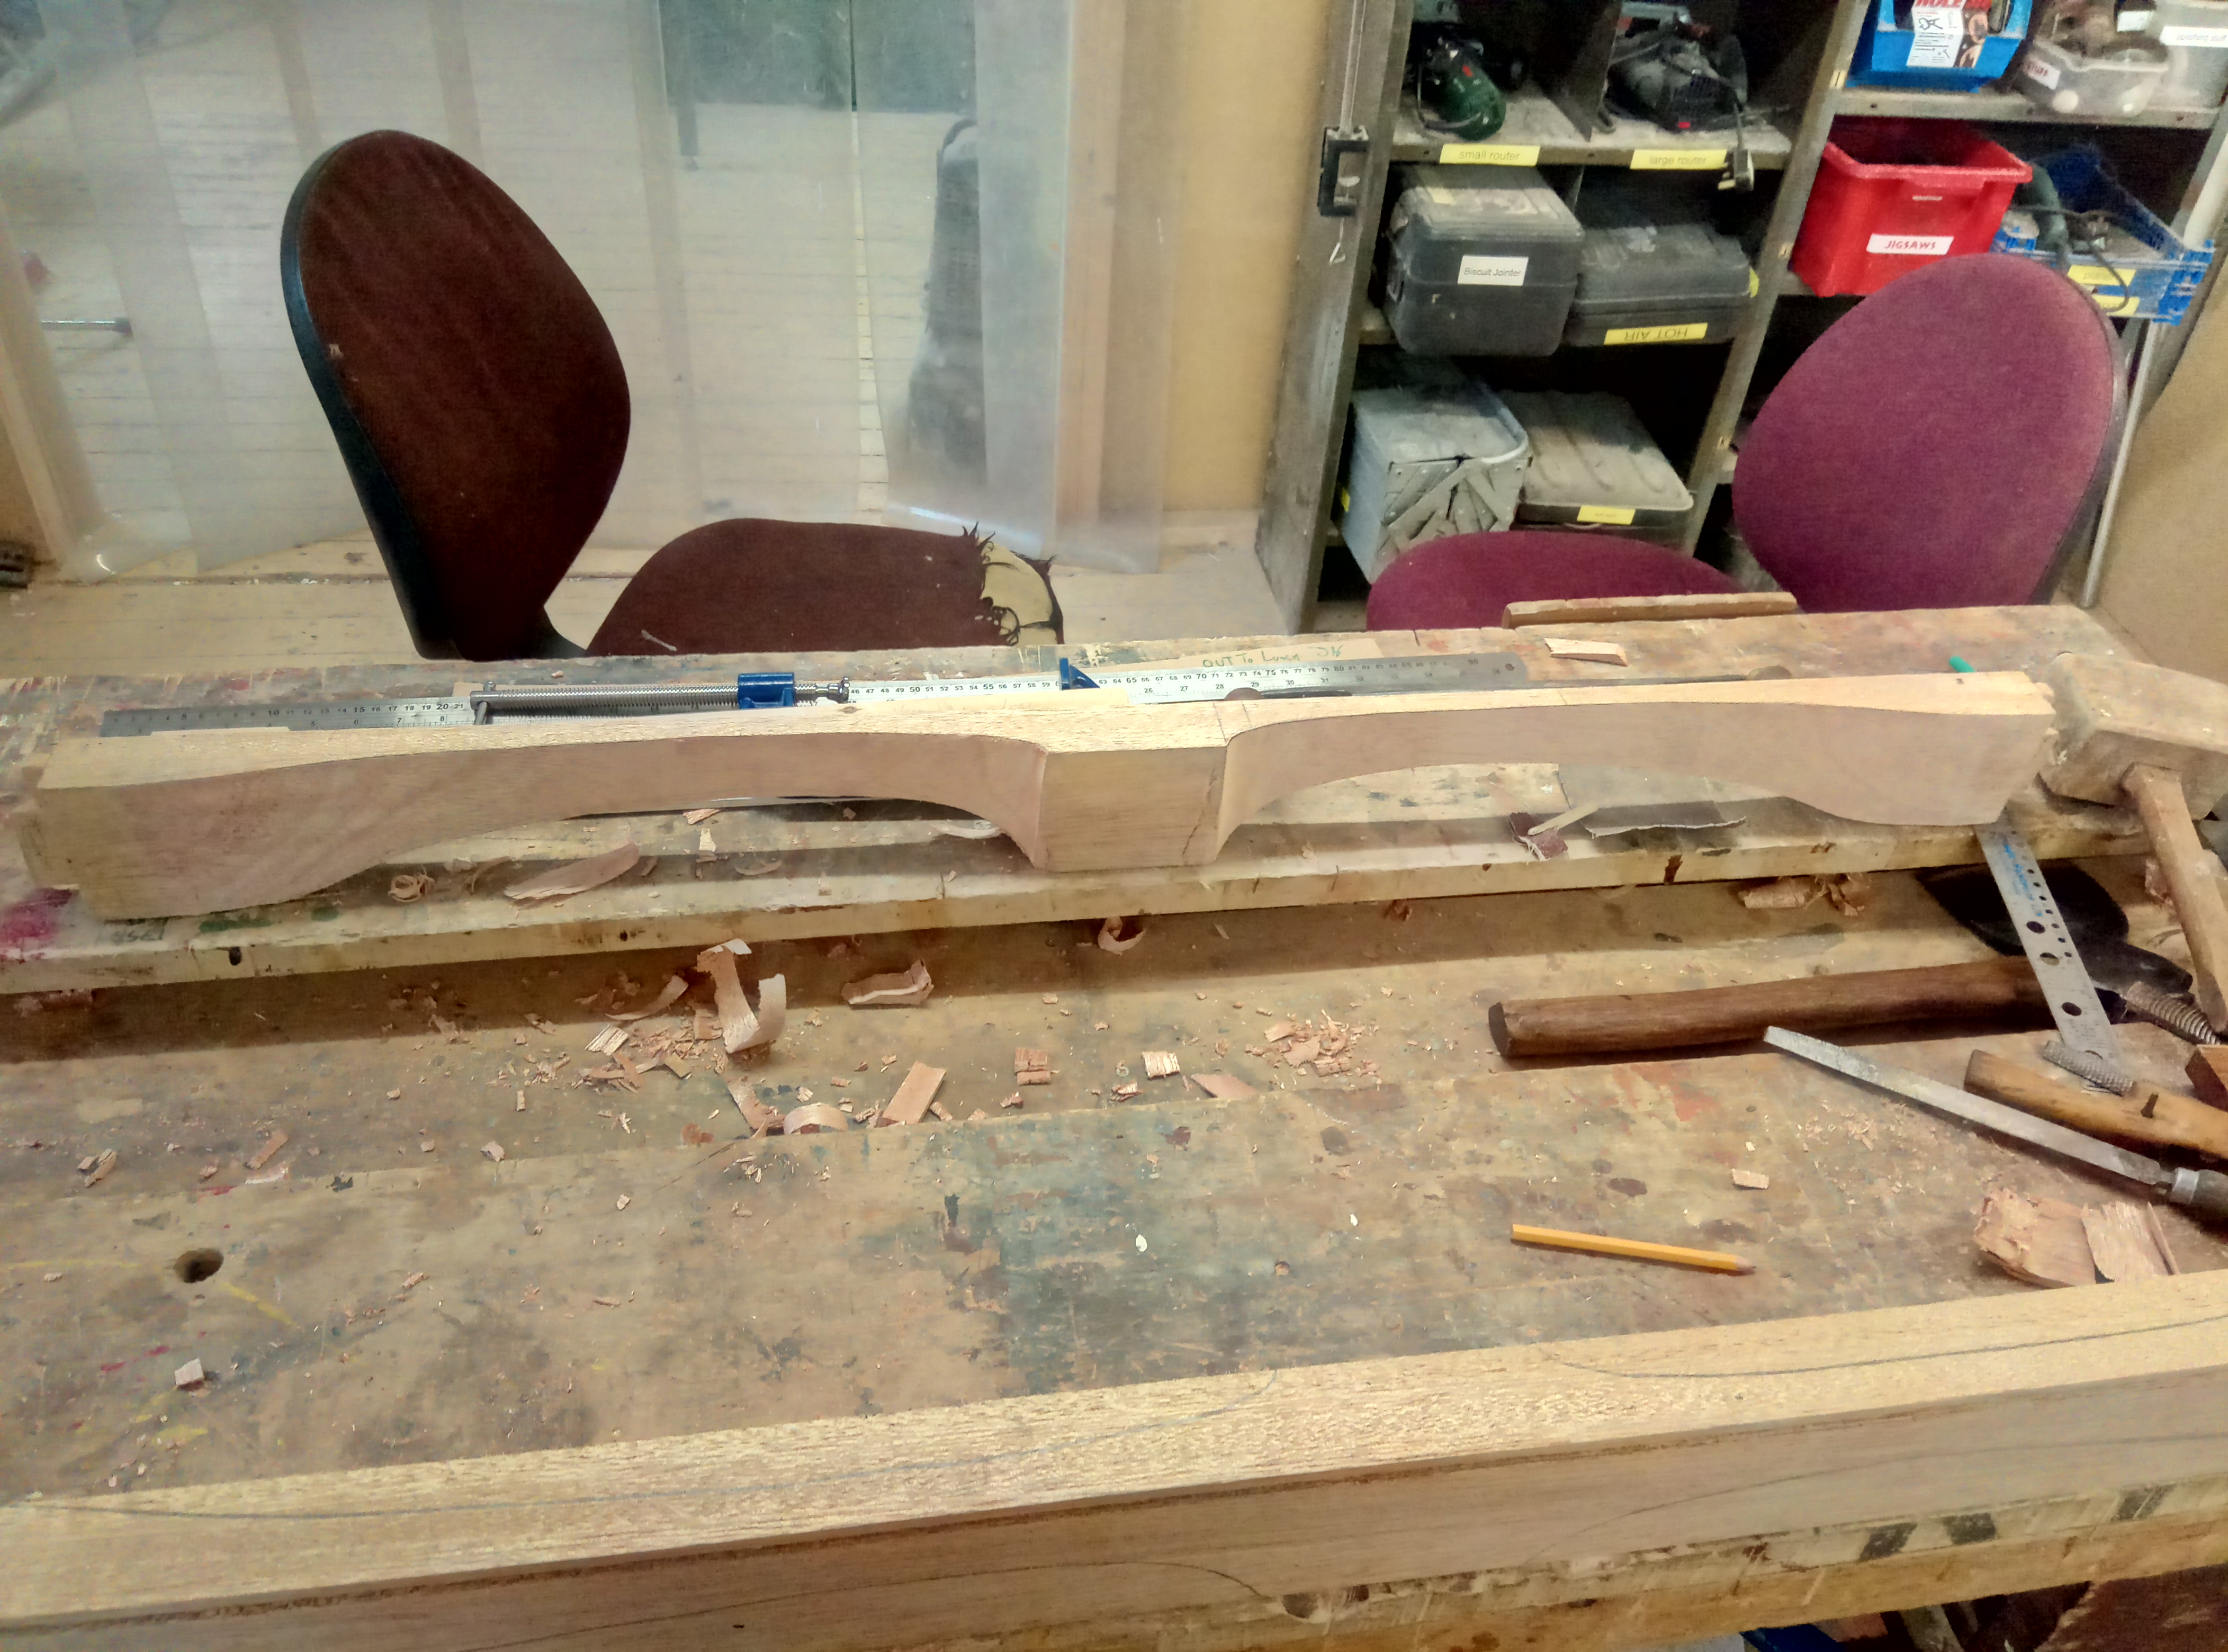
But soon enough I had a profile I was happy with, and was able to use it to scribe lines, and saw a template in ply on the baby bandsaw, to use for the other three curves to cut.
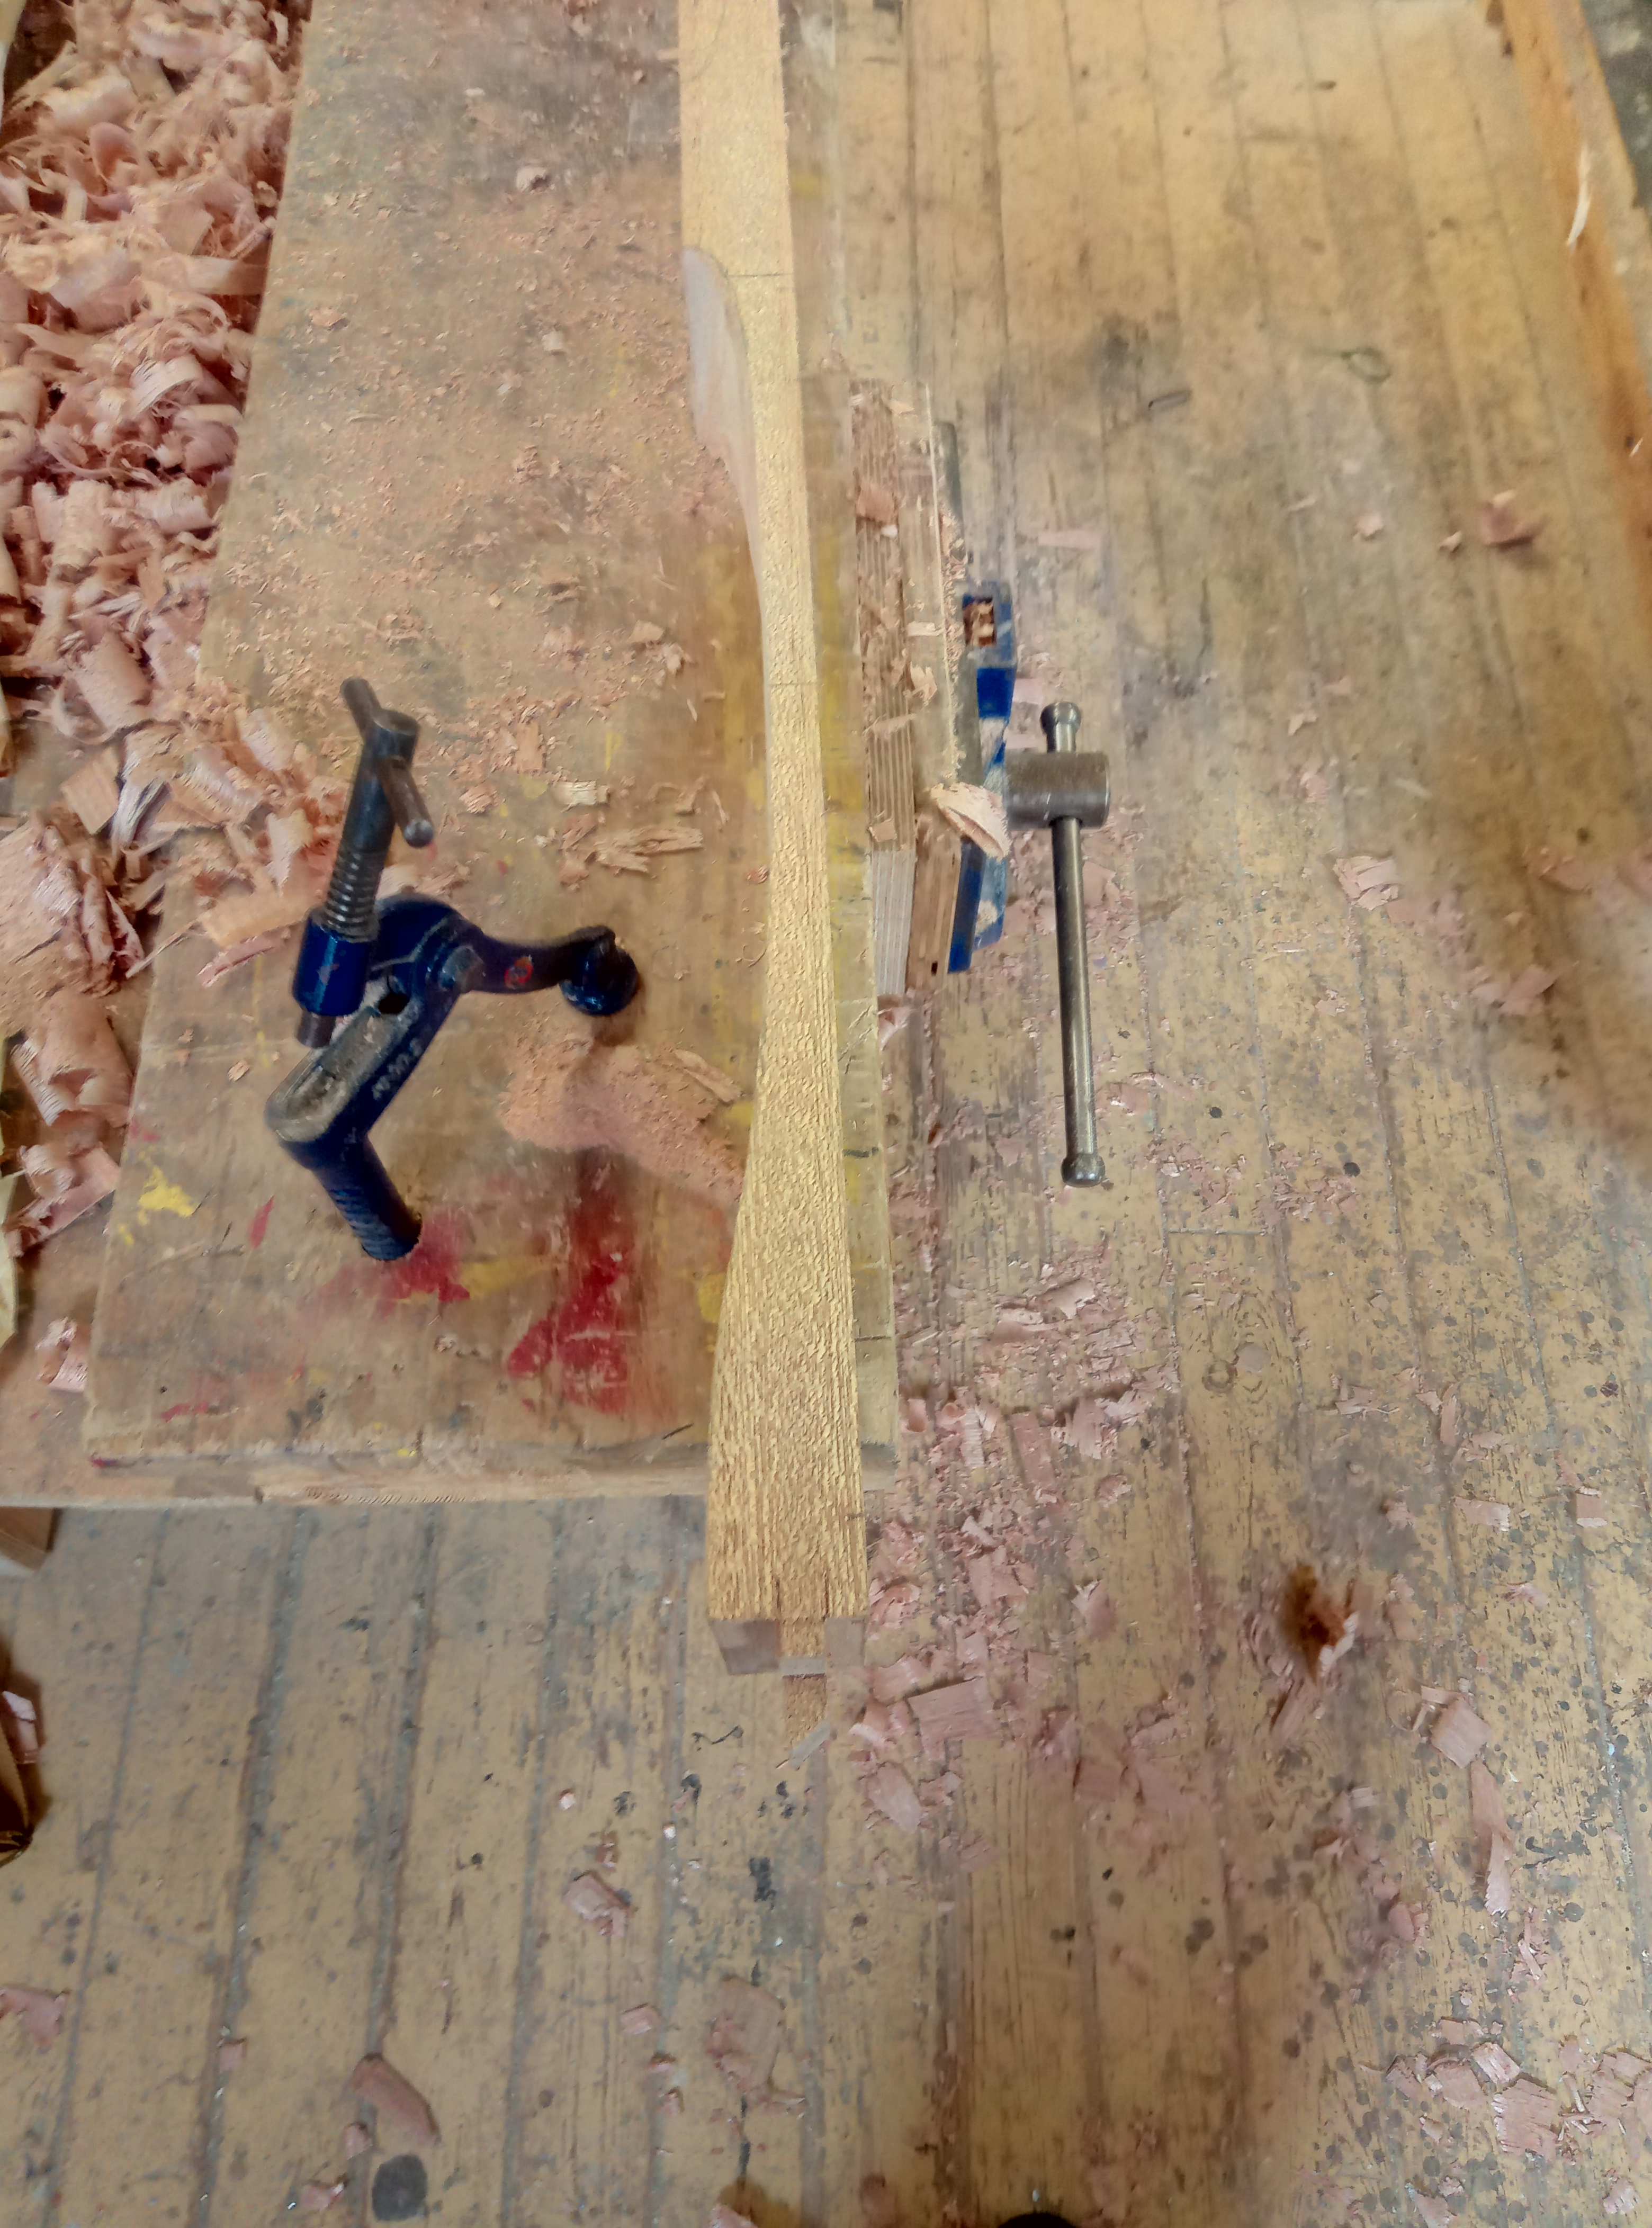
That took me on to the curvature in the other plane, where the process was much the same, but the work easier, due to less material.
Didn't take much with the spokeshave to have it take shape before my eyes.
Et Voilà! The finished article.
Going on to stretcher number two, I had started to really get comfortable with the axe, and develop a bit more of a workflow, so it went much quicker.
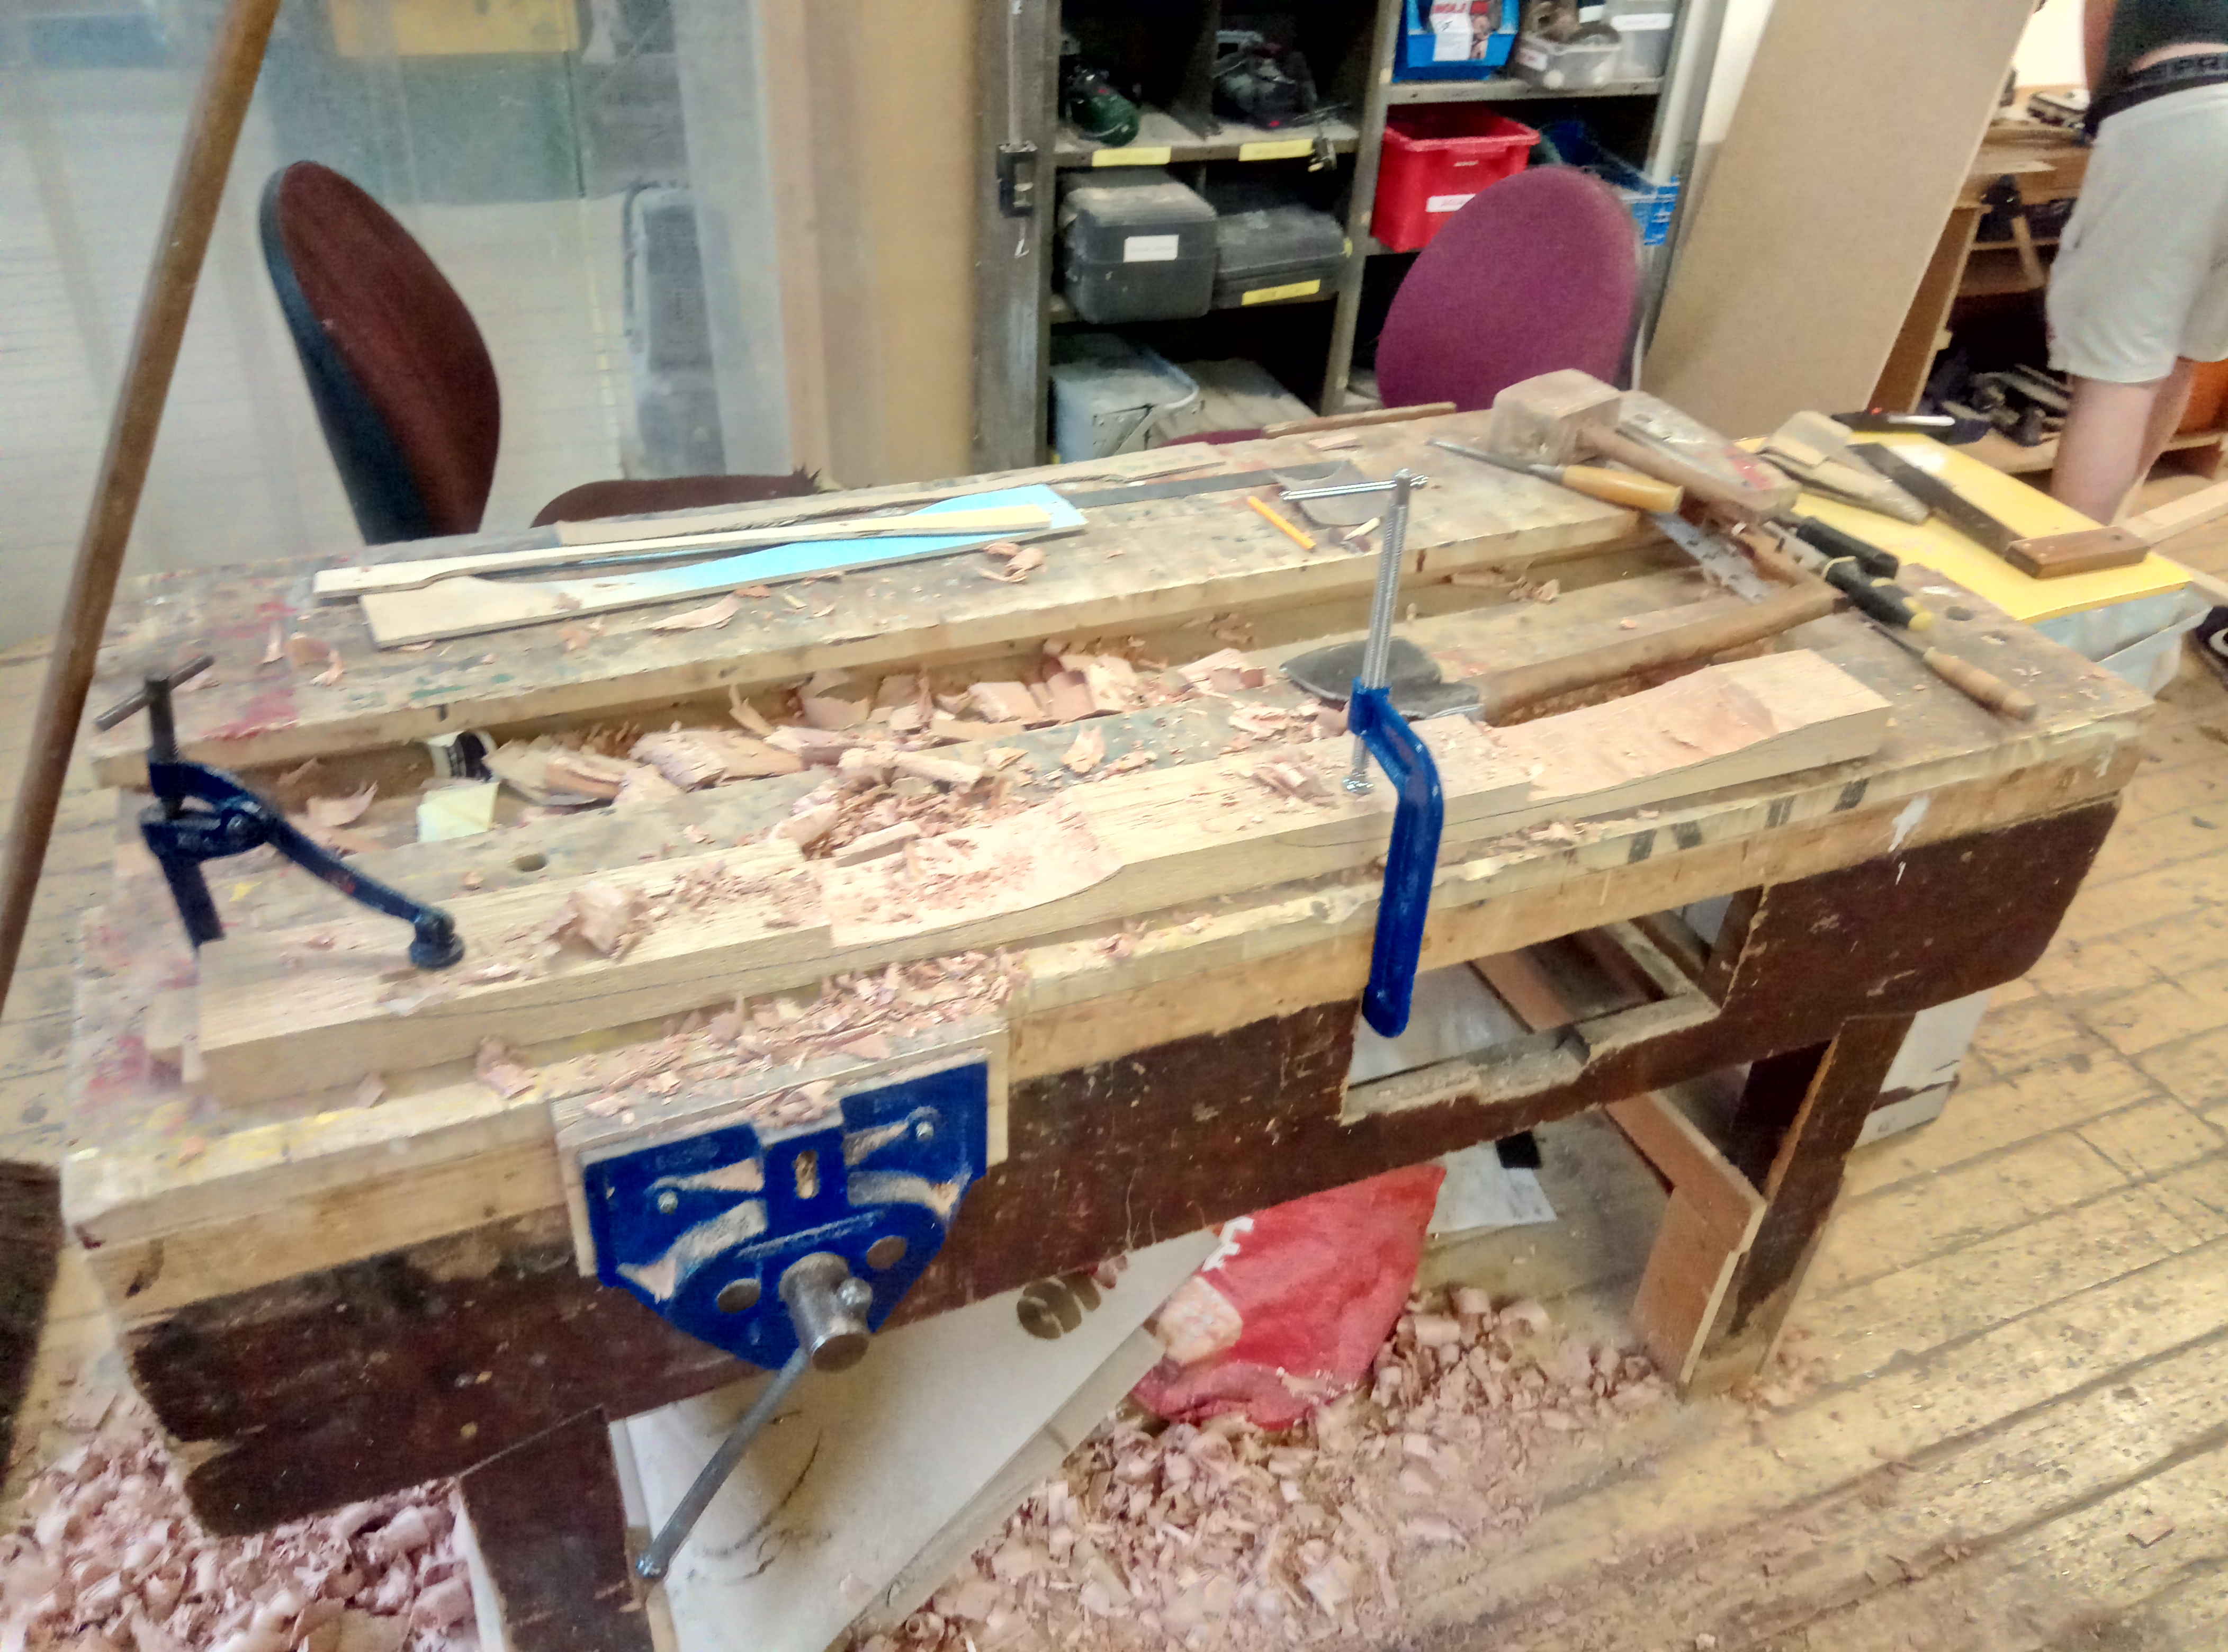
And getting much closer to the line, which sped up subsequent steps.
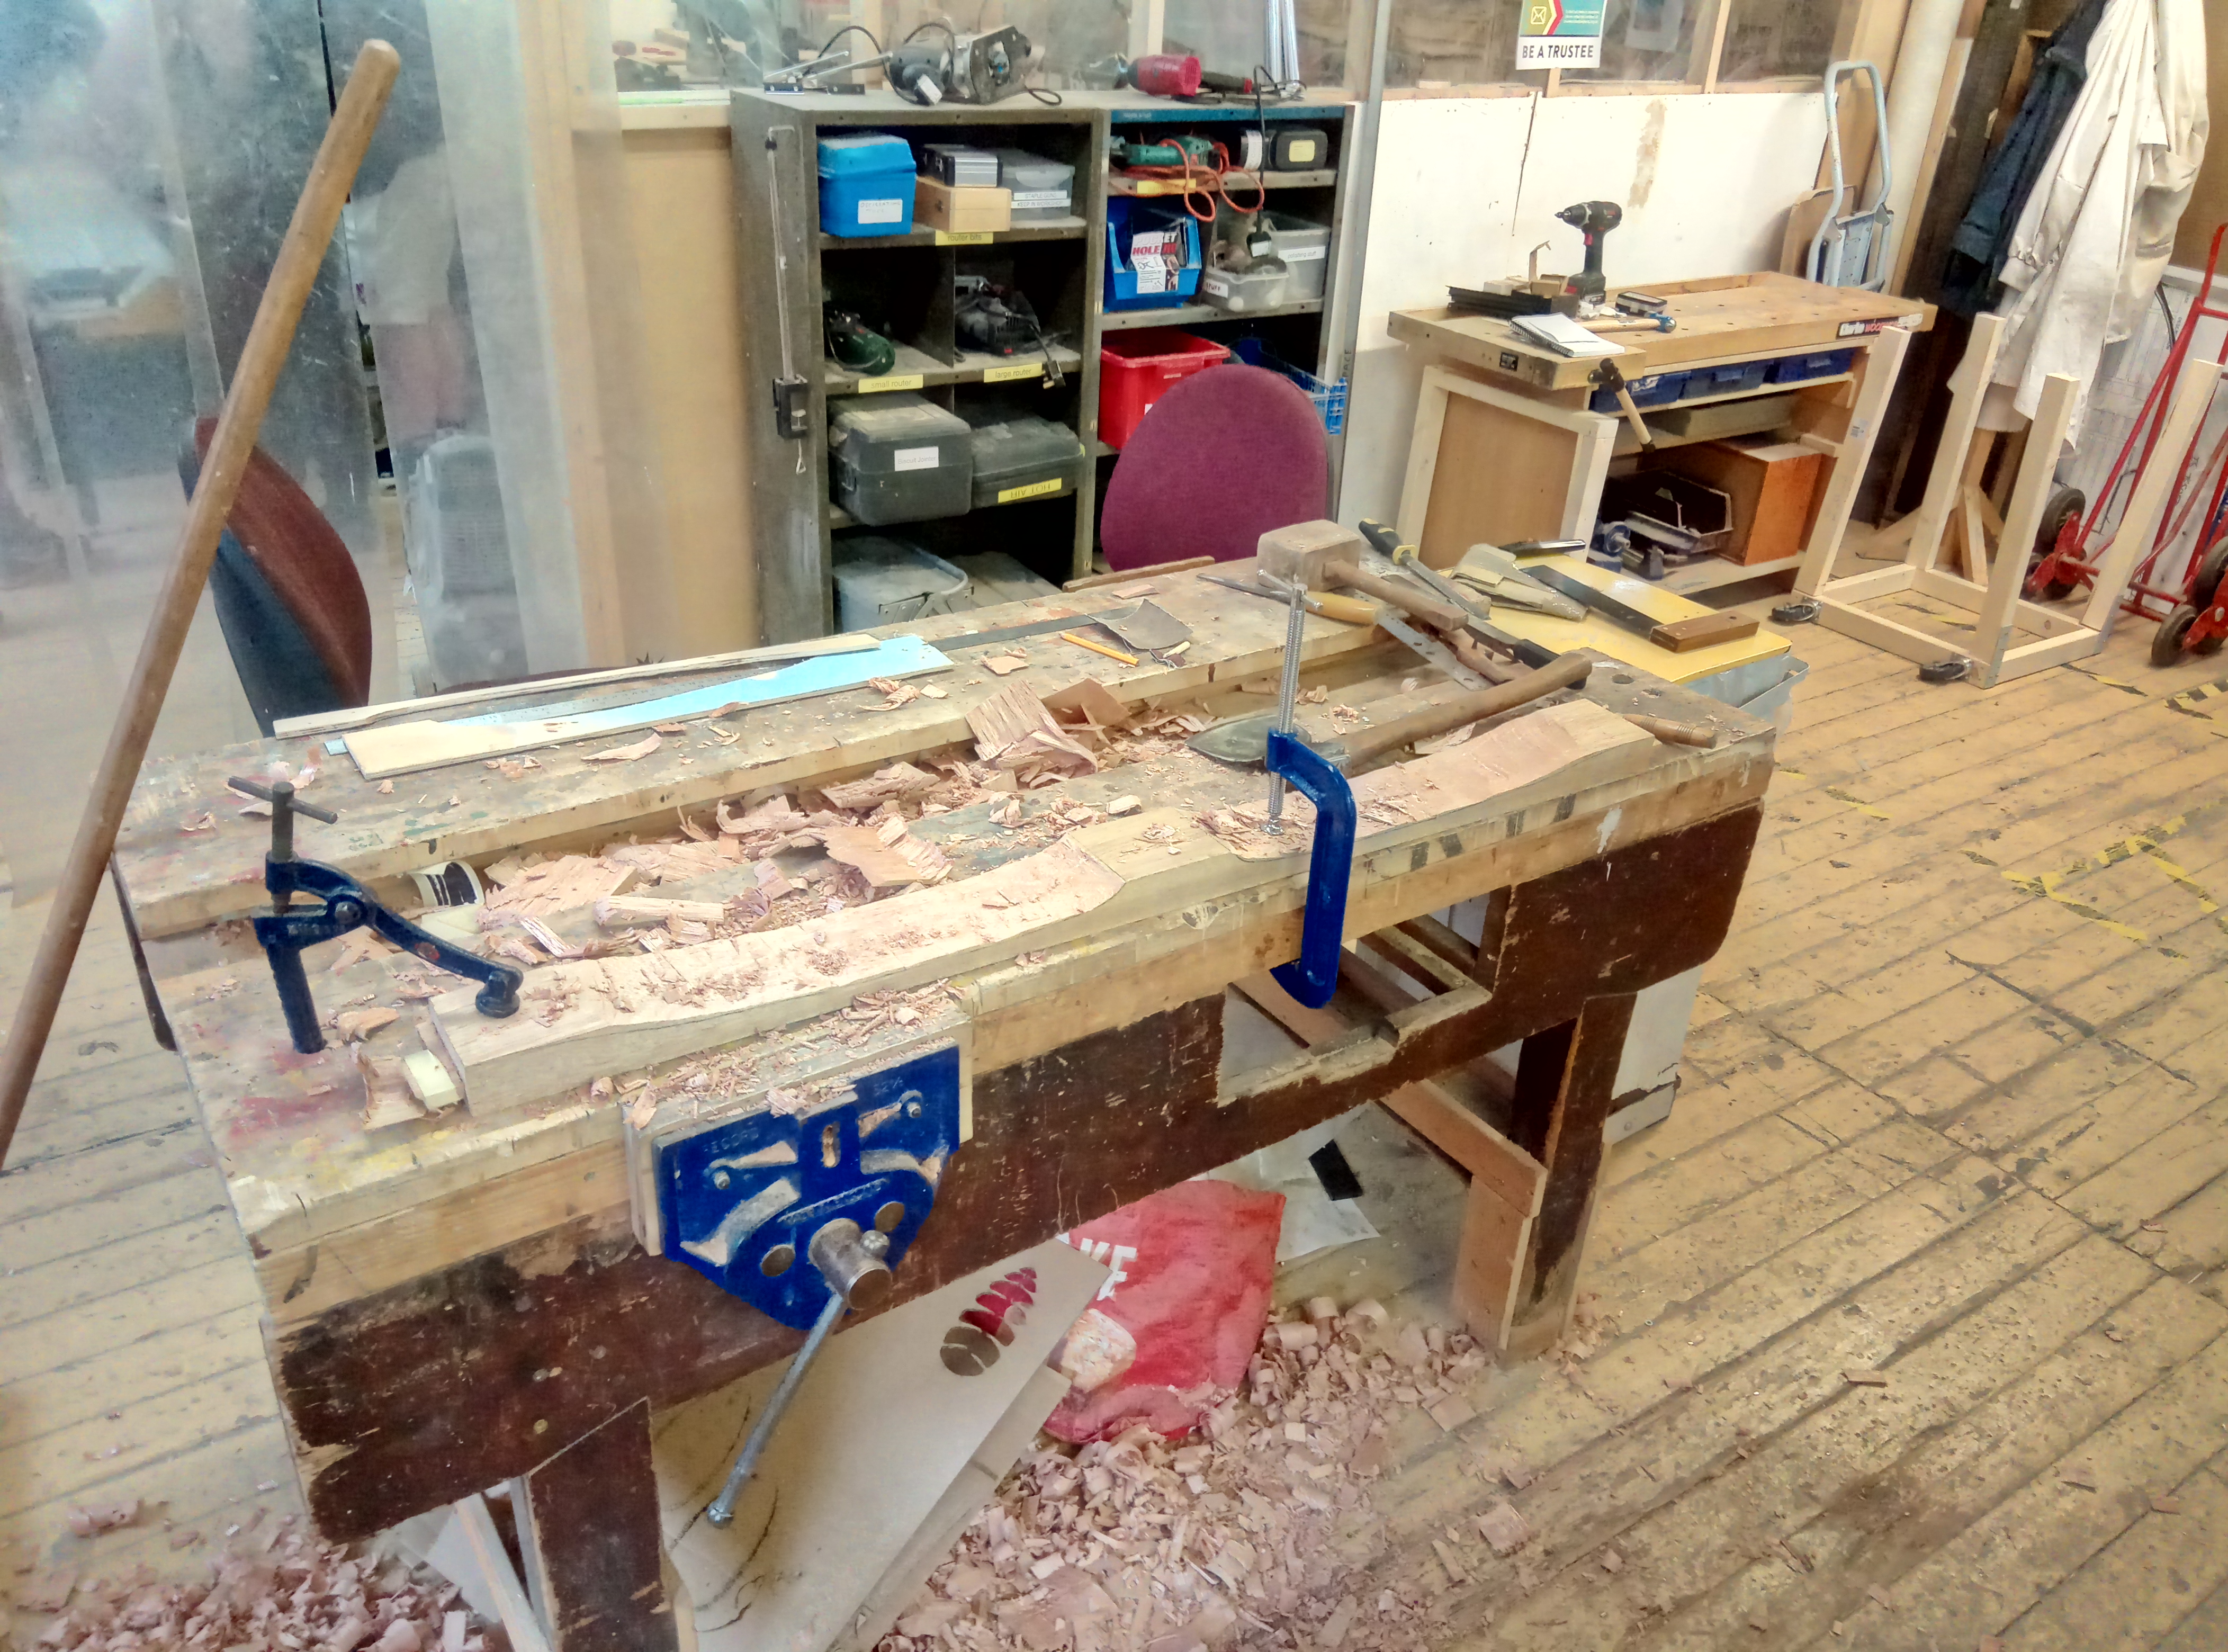
There was also a fringe benefit, to using an axe... The chips are so broad and thick that they're ideal shims for protecting finished surfaces from clamps.
I'm now at the point where those long stretchers are "done" with shaping, and will need the surfaces which are being relief carved in the centre, and the joint with the knee-blocks planed, which I'll be doing immediately before doing those steps and not before; which of course means the short stretcher and knee-blocks need to be done next.
I'm planning to put a bead on the edge of the curve with the scratch-stock, and am in two minds about whether to carve a rope-moulding into it. From what I know about the period, it the bead would very-much be in-keeping; but I'm not so sure about the rope moulding, I've seen period examples which represent the "fancy" end of the range of furniture out there with that kind of detailing, but not many.
Maybe if I do want to do that, I should accept that the project is beginning to move into being a reproduction, of a period reproduction of a 16th century french style... I do have a very nice giltwood card table from the period, so it would be in-keeping with that and give me more latitude to play with Marquetry and Intarsia/Inlay on the table top, and letting in relief carvings in contrasting wood (I have loads of sycamore and birch, which are both lovely and light coloured, and rather easier to carve than Meranti).
I also still haven't got round to choosing the material for the top, but am leaning towards buying some more Meranti, so that it will match as closely as possible, other options are:
The legs are almost complete, and can't really be finished until I've completed the stretchers in order to shape knee blocks.
Carving complete:
Refined with sanding, homebrew rifflers and a Swann-Morton scalpel:
Which takes us to the stretchers, the bandsaw I'd used previously is still out of commission, so sawing the curves was out of the option. So this weekend, I finally got the bit between my teeth to actually move the project on, and decided that I'd hog the bulk of the waste out with an axe.
It was initially hard work, and I felt my technique was quite inaccurate; even though I was already vaguely confident using an axe for hewing and chopping out the waste of large tennons and notches
However, my first instinct was to choke up on the axe, and rapidly take loads of small, energy sapping but ineffective blows controlled by my dominant hand. Not great technique, the hand took a bit of a beating as a result, and the pecking motion which allowed me to make a sane rate of material removal, whilst using the axe with my hand right up at the top of the haft, actually caused a lot of the inaccuracy.
When I twigged what the fix was to doing it well, it felt very intimidating to strike the first blow. I'd realised I wasn't cutting effectively, and reticently concluded I wasn't applying sufficient force....
So it took a couple of minutes of convincing from my internal monologue before I built up the confidence to take reasonable two-handed swings. That was game changing: the material removal rate went up, but so did my accuracy and I rapidly felt able to control the position of the blows and start to actually turn the axe in the cut to take curved cuts close to finished size.
First stretcher - 1½hrs to rough out, 1hrs to fair the curves to the line, 2½hrs total.
Second stretcher - 20mins to rough out, 25(ish) minutes to fair the curves to the line, ¾hr total.
It's a bit of a photo essay from here on out folks...
Initially I marked out the rough curve I wanted on the front of the stretcher, identified the deepest point, drew a line to saw to and cut down to the profile depth.
From there, I could start chopping toward that cut with the axe, without worrying about the split's propagating to anywhere I didn't want them to go.
I didn't have the confidence to get all that close to the line though, which left a lot of waste to take off with the spokeshave.
Shaping with a spokeshave, went pretty smoothly (pun almost intended), but took an age due to the amount of material to come off.
But soon enough I had a profile I was happy with, and was able to use it to scribe lines, and saw a template in ply on the baby bandsaw, to use for the other three curves to cut.
That took me on to the curvature in the other plane, where the process was much the same, but the work easier, due to less material.
Didn't take much with the spokeshave to have it take shape before my eyes.
Et Voilà! The finished article.
Going on to stretcher number two, I had started to really get comfortable with the axe, and develop a bit more of a workflow, so it went much quicker.
And getting much closer to the line, which sped up subsequent steps.
There was also a fringe benefit, to using an axe... The chips are so broad and thick that they're ideal shims for protecting finished surfaces from clamps.
I'm now at the point where those long stretchers are "done" with shaping, and will need the surfaces which are being relief carved in the centre, and the joint with the knee-blocks planed, which I'll be doing immediately before doing those steps and not before; which of course means the short stretcher and knee-blocks need to be done next.
I'm planning to put a bead on the edge of the curve with the scratch-stock, and am in two minds about whether to carve a rope-moulding into it. From what I know about the period, it the bead would very-much be in-keeping; but I'm not so sure about the rope moulding, I've seen period examples which represent the "fancy" end of the range of furniture out there with that kind of detailing, but not many.
Maybe if I do want to do that, I should accept that the project is beginning to move into being a reproduction, of a period reproduction of a 16th century french style... I do have a very nice giltwood card table from the period, so it would be in-keeping with that and give me more latitude to play with Marquetry and Intarsia/Inlay on the table top, and letting in relief carvings in contrasting wood (I have loads of sycamore and birch, which are both lovely and light coloured, and rather easier to carve than Meranti).
I also still haven't got round to choosing the material for the top, but am leaning towards buying some more Meranti, so that it will match as closely as possible, other options are:
- Resaw the top in the solid from a slab of Mahogany.
- Which I really don't want to use for this, it seems like I'd be better using it for another project which uses the skills I'm building doing this one... only more refined.
- Resawing and book-matching a 1¾" plank of walnut
- Which feels like a waste if I'm thinking of going in the heavily inlaid, giltwood direction.
 .
.