The (almost) no plans bench build

UKworkshop.co.uk

Help Support UKworkshop.co.uk:

This site may earn a commission from merchant affiliate links, including eBay, Amazon, and others.
memzey":27tpmpkc said:
phil.p":27tpmpkc said:
My thinking on this is that if you have a flush vice you can space anything as far out as you wish, but if your vice isn't flush you can't bring the work any closer to the bench than the rear face of the vice.
Yep that was my thought as well when I fitted my vice. Whatever works for the user though as I can see pros and cons either way. Since I finished my bench I haven’t once wished the vice was proud but that's down to how I work. Paul Sellers always has a proud vice and he has probably forgotten more about woodwork than I will ever know!

Ok, ok, I'm coming back round to the idea of a flush rear jaw! It's not the easiest thing to achieve though, bearing in mind my aprons are roughly 60mm thick. So I either mont behind the apron, like this...

vice%20mouting.jpg


In which case I lose 60mm of vice capacity - no big deal, the 52 1/2 has a large enough opening. Or alternatively, I cut a recess in the front of the apron and sink the rear jaw into that and lose two of the vice mounting points (as Paul Sellars does). I think I would prefer the rear jaw to have a sacrificial liner rather than use the actual apron, so quite a bit of extra work there whichever way I mount it.

Time for some head scratching...
 
MikeG.":2k7morz0 said:
You don't need to lose 60mm. You can rout out of the back of your skirt.
If I routed out the back of the apron, would the apron need to remain removable - the back jaw of the vice would be sandwiched between apron and top? Just thinking about any future need to remove it.

This would be a possibility, although I had intended to glue the apron to the top.

Simon
 
I routed out a housing for the fixed jaw of my vice in the front of the bench and then covered the jaw with leather. It has worked extremely well in the past year and a half, with no damage to the stuff it has held, while remaining easy to remove in case maintenance is required. I’ve got some pics of the process - let me see if I can share them again here.
 
memzey":387bud4r said:
I routed out a housing for the fixed jaw of my vice in the front of the bench and then covered the jaw with leather. It has worked extremely well in the past year and a half, with no damage to the stuff it has held, while remaining easy to remove in case maintenance is required. I’ve got some pics of the process - let me see if I can share them again here.

I could do this, but two of the mounting vice points would be within the thickness of the apron, therefore unusable. This would then require the rear jaw to be screwed into the apron (as Paul Sellars does). I don't think two coach screw heads poking through the leather would be good... I could recess it more and add a wooden facing though.
 
if you don't want to expose the rear jaw the best option is to install it on the inside of the apron. As suggested above, routing out some of the apron to avoid losing the full 60mm and you can use all 4 anchor points.

Assuming you do not have a very early 52 1/2 the housing for the half-nut is removable from underneath so you can entirely dismantle all the moving parts without having to ever remove the rear jaw once it has been installed.
 
nabs":3qss43ha said:
if you don't want to expose the rear jaw the best option is to install it on the inside of the apron. As suggested above, routing out some of the apron to avoid losing the full 60mm and you can use all 4 anchor points.

Assuming you do not have a very early 52 1/2 the housing for the half-nut is removable from underneath so you can entirely dismantle all the moving parts without having to ever remove the rear jaw once it has been installed.

The half-nut is definitely removable on mine so I’ll look at this option. I'm going to dismantle the vice to clean it up anyway. Will have a play once it’s apart.

Next decision, coach screws or coach bolts right through the top? I think through-bolting would be safer in soft pine...

Thanks for all the input
Simon
 
per the manufactures of the vice (c.f Planecraft), "unless the bench top is very thin coach screws are quite satisfactory"

I used them and my bench top is around 2'' thick - there is no way the rear carriage can move because the face is up against the inside of the apron.
Here is what C J Hampton have to say about fitting the vice:
-7VPpIdW_pwIfgS63Q_WOgQXkN0SER1GGg8jwv4c7GMK2x1ziR6k_mOqE3E=w2400
 
Thanks Nabs, very helpful.

I’ve stripped and cleaned the vice, horrible job, absolutely coated with grease and crud. Everything’s in good working order though. Don’t think I’ll bother to repaint it, I quite like the well-used look!

cleanedvice.jpg


Not looking forward to re-tensioning the QR spring - had to replace a broken one on my 52 and as I recall it was a pig of a job.

Cheers
Simon
 
Had a chance to do a little more. Having decided to go back to my original idea and have a flush fitted vice, I set about preparing the inner apron to fit it.

I must admit, I found this the most challenging part of the build so far. Would have been much easier on a single thickness apron.

As the inner aprons weren’t glued to main outer aprons yet, I decided to cut out to the full depth for the rear jaw. I figured there would just about be enough room to get a socket in to tighten the coach screws if I did this.

I cut this with a jigsaw and refined the shape a little with a rasp and chisels.

vice%20cutout.jpg


I then marked the positions for the vice bars, screw and quick-release bar and drilled the holes for these. - Note to self, invest in a decent set of Forstner bits!

I decided that the softwood used for the apron was simply too soft to be practical as the rear jaw, so set about installing a hardwood insert.

First I routed out a 14mm deep recess.

jaw_recess.jpg


Made a very simple little jig to do this.

recessjig.jpg


I cut a piece of ash to fit - such a pleasure to cut and plane a little bit of hardwood after all this pine! Rather than screw this straight into the apron, I decided to fit some threaded M6 inserts that I had left over from my MFT build. I can then screw the jaw on using machine screws. This makes it easier to change the jaw if necessary, and opens up the possibility of accessory jaws. I made a little plywood drilling template to aid drilling mounting holes for any future jaws I might make.

inserts.jpg


insertfitted.jpg


ashjaw.jpg


I glued and screwed the inner aprons in position and set about drilling apron dog holes. My only 19mm drill bits were either a rather tired Forstner or a very aggressive Wood Beaver. So I chucked up the Forstner in the drill press and drilled a hole in a piece of scrap. I then clamped this to the apron and used as a guide for the Wood Beaver to aid drilling reasonably straight.

drillguide.jpg


A little bit annoyed with myself here, as I drilled columns of four dog holes, three would have been much better - had I drawn scale plans I would have noticed before any wood was drilled. I marked up for the usual diagonal array of holes, but decided not to drill them - I don’t think I’ll need them. If I do I can add them later. I also routed a small chamfer on each hole.

I then glued in the centre bearer and dominoed some wings to this to take screws for the top. This has made a huge difference to the stiffness of the bench.

base.jpg


I’m really enjoying working without any definite plans, but it certainly doesn’t save any time. Lots of my time in the workshop I’d describe as thinking time rather than building time.

So onwards to the top...

Time: 63hrs

Apologies for the long post

Simon
 
Had a couple of days at home to work on the bench.

Started by planing and glueing up the staves for the split-top. I decided to do this in smallish sections to make machining easier.

topquarter.jpg


I drilled the dog holes on the drill press before assembling. The hole spacing is a bit 'interesting', as the legs are so wide and I didn't wat to position holes above the vice. I think they'll provide enough clamping options though.

I used a few dominoes to aid alignment, but only where I could be sure there was no chance of wanting to drill a dog or holdfast hole. After squaring the two slabs, they were glued up into one big slab. there was a slight twist in this when it came out of the clamps. I did think of running it over the planer, but thought better of it - even with the aid of roller stands...

bigslab.jpg


15 minutes with a hand plane saw it flattened, I then gave it a pass through the thicknesser to make sure it was parallel. The Jet handled this without breaking a sweat - unlike my extractor unit which blocked half way through. Fortunately the slab was fine...

I had to make a cutout to take the rear vice jaw - i did this with the router.

jawrecess2.jpg


I then reassembled the vice with the rear jaw behind the apron and measured up for the packer between vice and top. The 52 1/2 is running lovely and smooth, but I'l wait until I've oiled the bench before lubricating with PTFE.

vice_fitted.jpg


I cut the two-inch thick packer on the bandsaw from an offcut of the leg timber.

bandsaw.jpg


I then screwed and glued the packer to the top, then it was time to fit the front half of the split top at last. I used 60mm M10 coach screws for this set in over sized holes. The top is also glued to the apron. This should force any expansion into the void in the middle, as long as I leave a little wiggle room round the removable centre section.

screws.JPG


Once the glue had dried, I planed the front apron flush with the top. This was fun! heavy seven-foot long continuous shavings. This thing is solid, not a hint of movement anywhere which was a relief. Ended up planing left handed to go with the grain - this was easier than turning the bench around and, once I got used to it, not too difficult.

planeapron.jpg

frontdone.jpg


So onwards to the back half. I'm hoping another couple of days should see the construction done. I don't need to buy any more materials - unless I c*ck something up, so it will come in at under £100 - just.

Total time: 77hrs
Weight: 104kg
Cost: £95

Thanks for looking.
Simon
 
Looks great, an asset to any workshop!

Only thing I'd be concerned about is that front lower stretcher, given it's a flush design will you be constantly barking your shins on it? If so no matter, it's actually adding very little to the strength or rigidity of the bench, so if it gets in the way you could saw it off and you'd never miss it.
 
custard":8s6ikso2 said:
Looks great, an asset to any workshop!

Only thing I'd be concerned about is that front lower stretcher, given it's a flush design will you be constantly barking your shins on it? If so no matter, it's actually adding very little to the strength or rigidity of the bench, so if it gets in the way you could saw it off and you'd never miss it.

Thanks Custard

The main reason for the stretcher was support for a shelf - space being at a bit of a premium, but as you say, it can always come out if it's a problem.

Simon
 
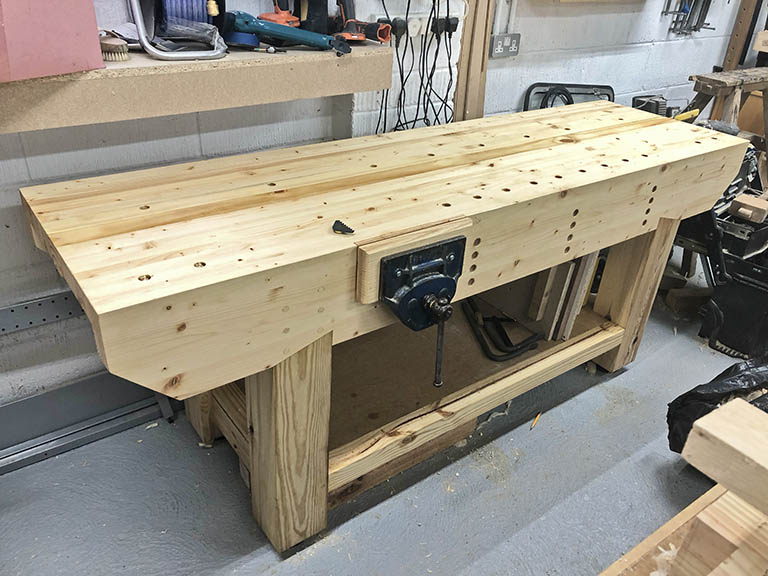
Phew, finally finished the bench!

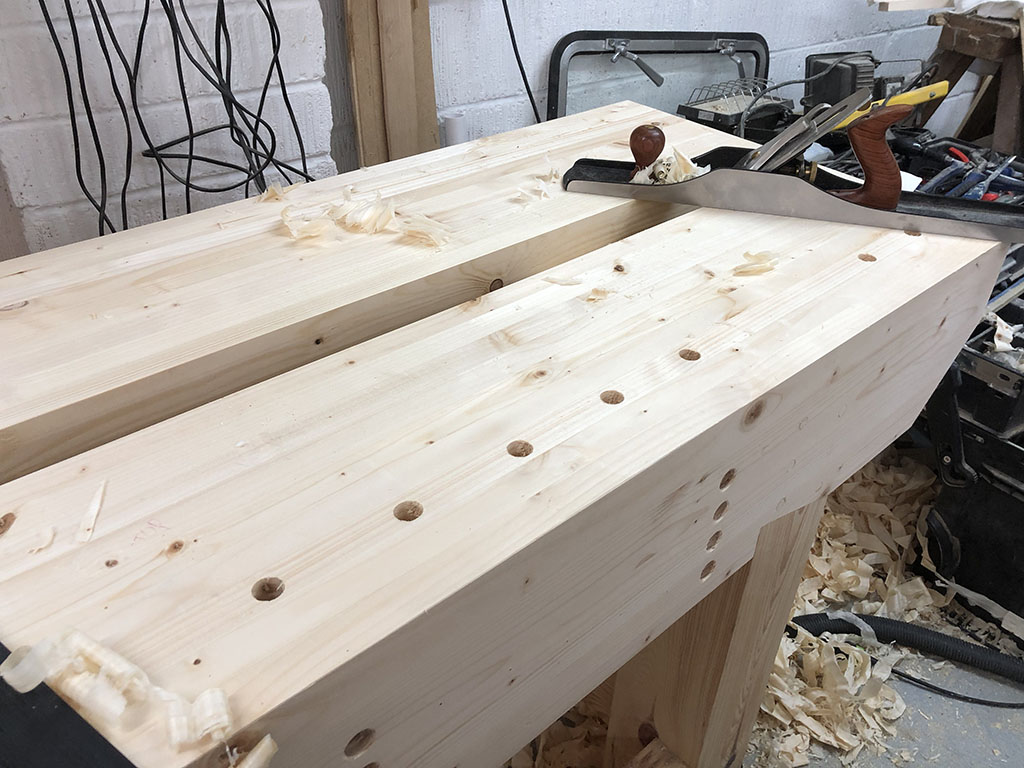
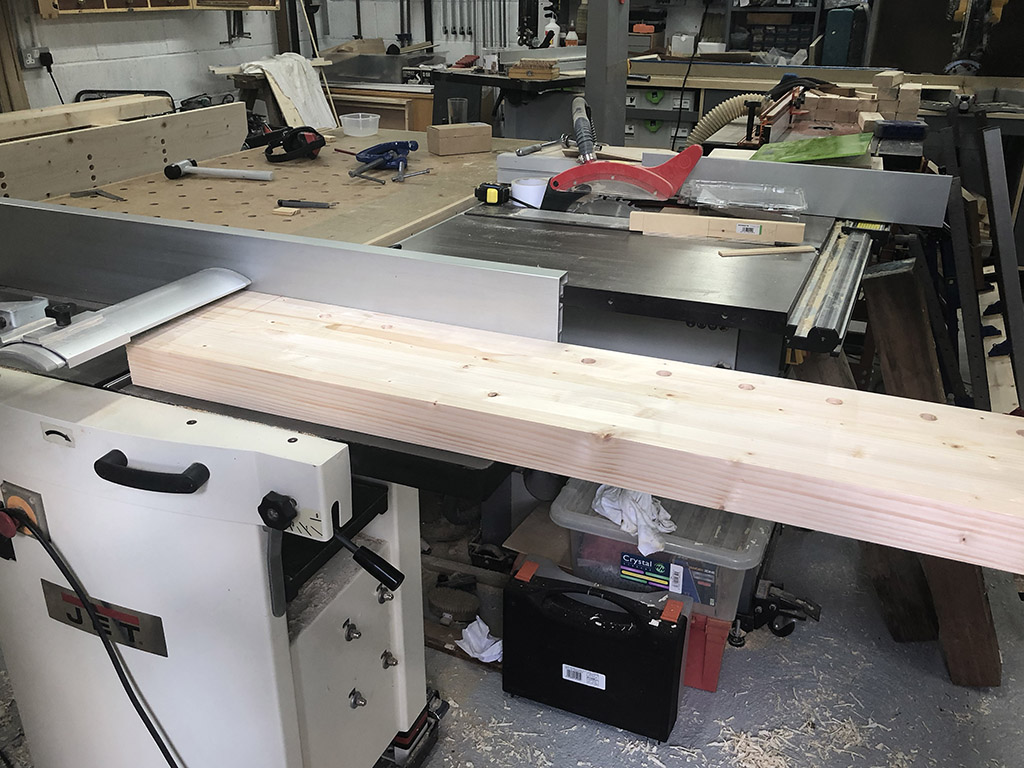
After fixing the back half of the top, I set about levelling it. A couple of hours with a hand plane had the top nice and flat.

flattening.jpg


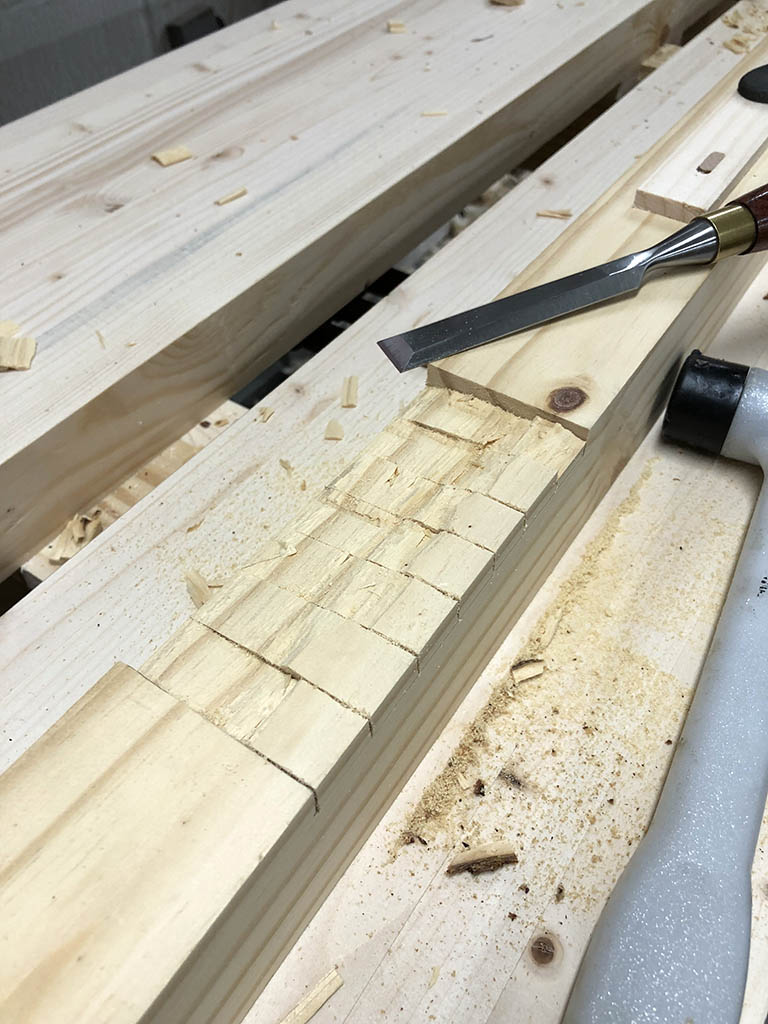
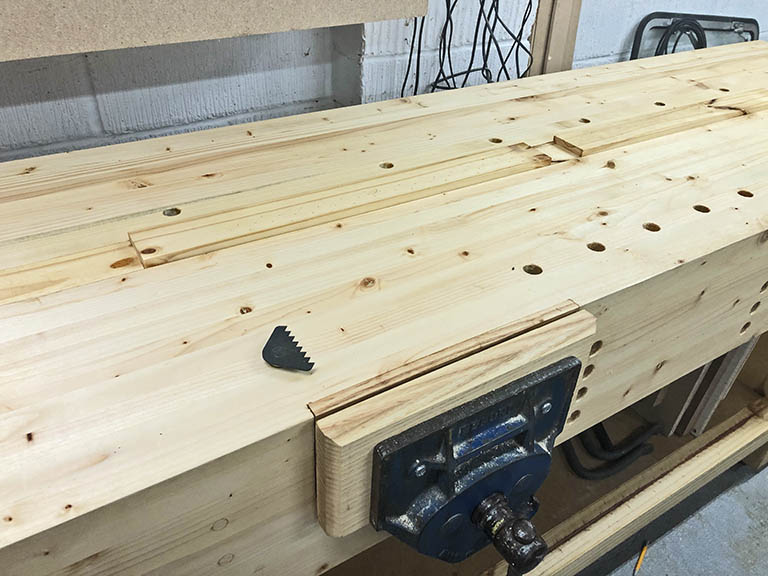
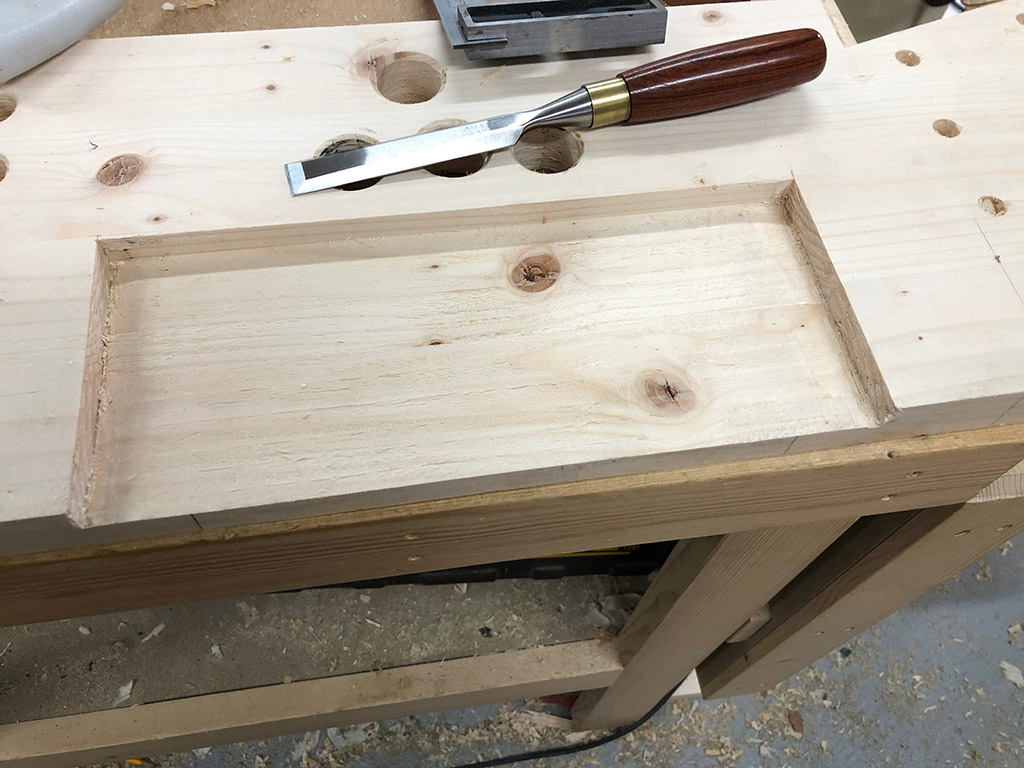
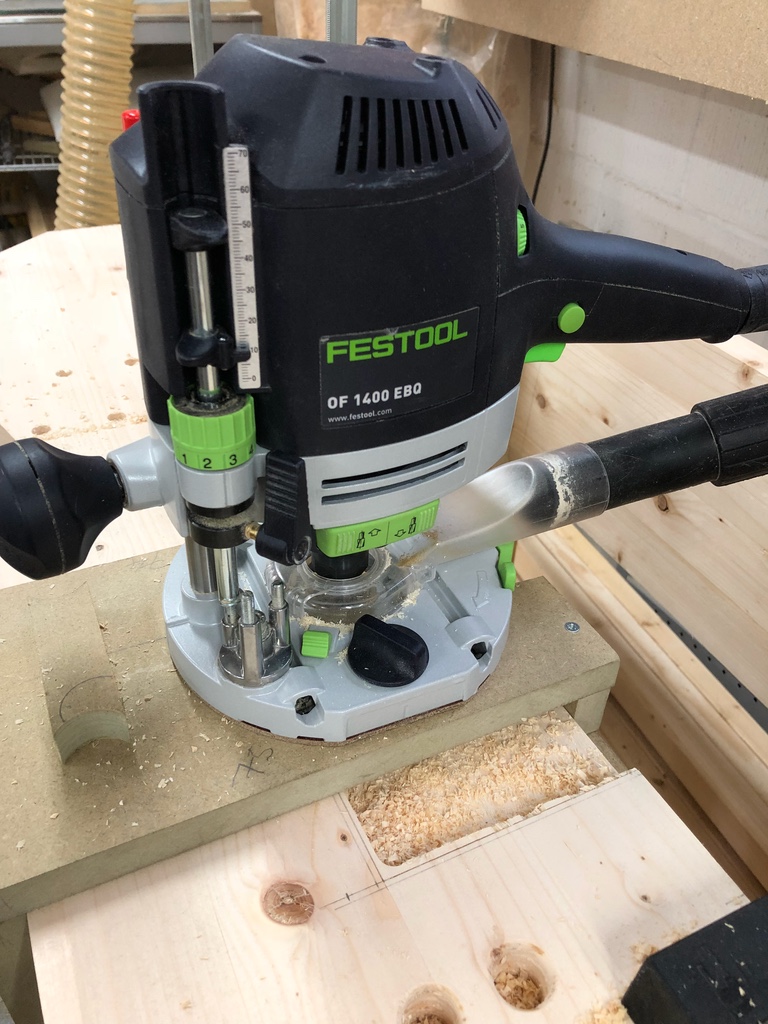
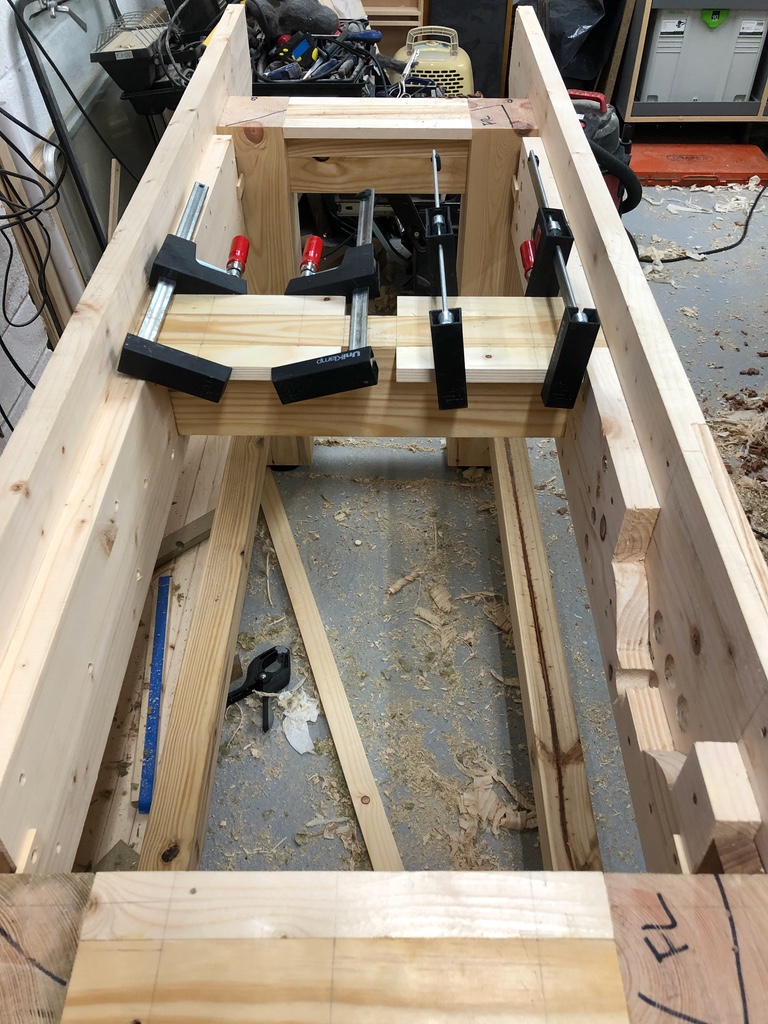
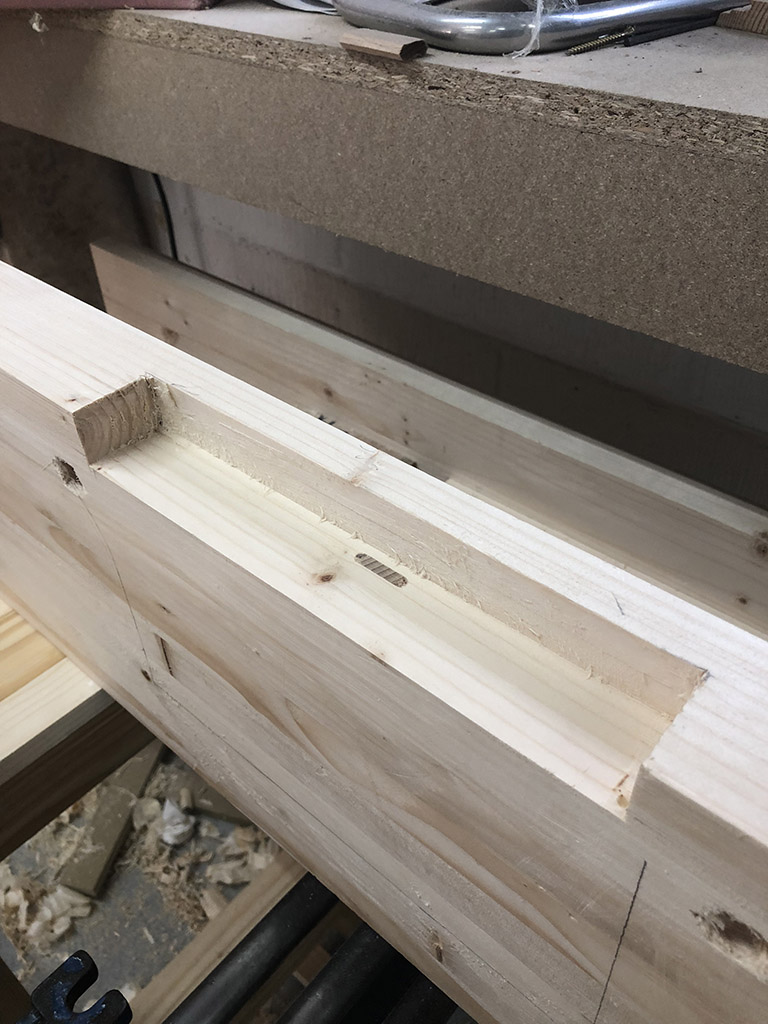
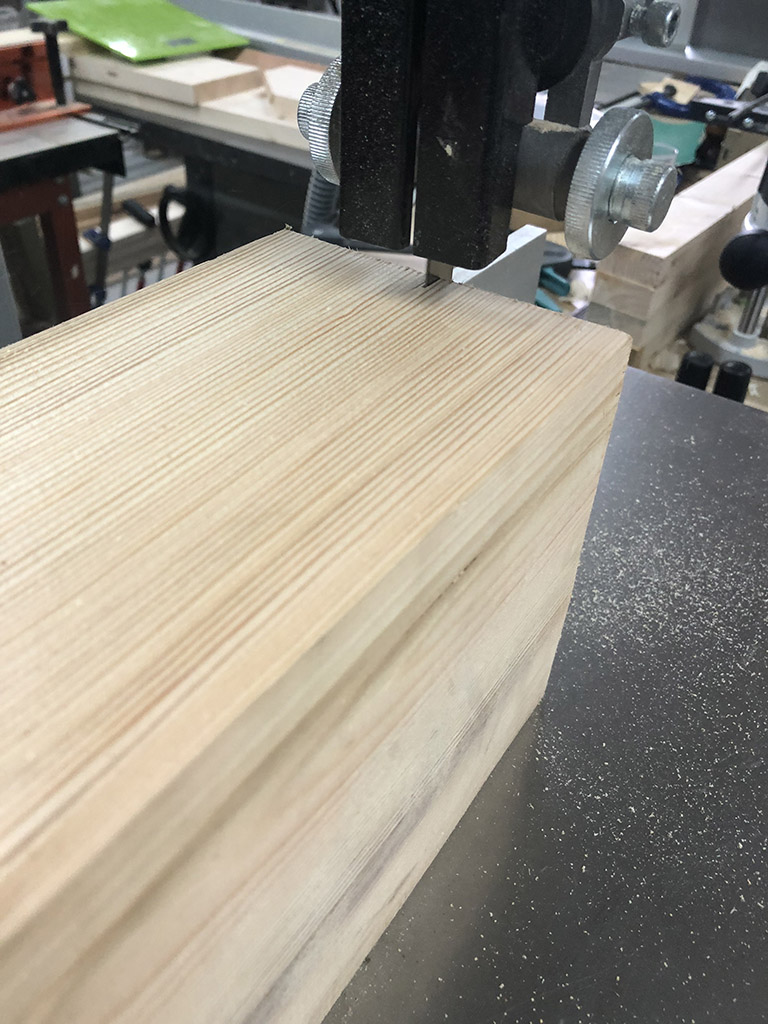
I then made the centre removable section. I've left it a couple of mm narrow to allow space for the top to move. I needed to cut recesses to fit over the bearers. I couldn't be bothered to set up a router for this, so just chopped the waste out with a saw and chisel and cleaned up with a block and shoulder plane.

cheselling.jpg


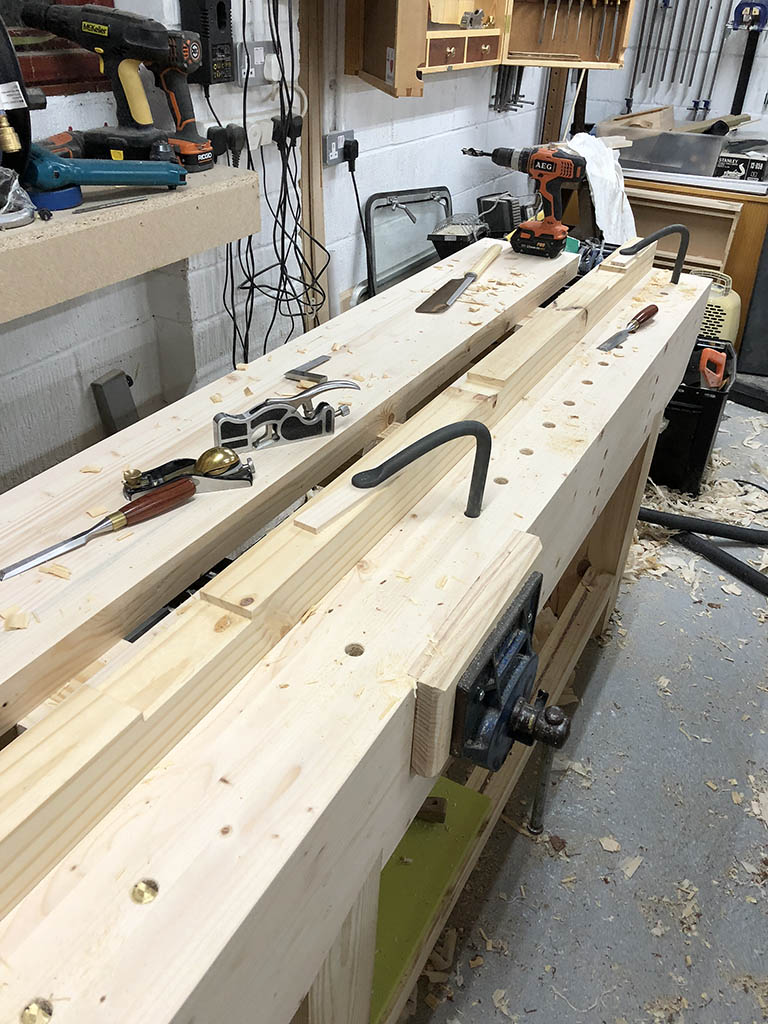
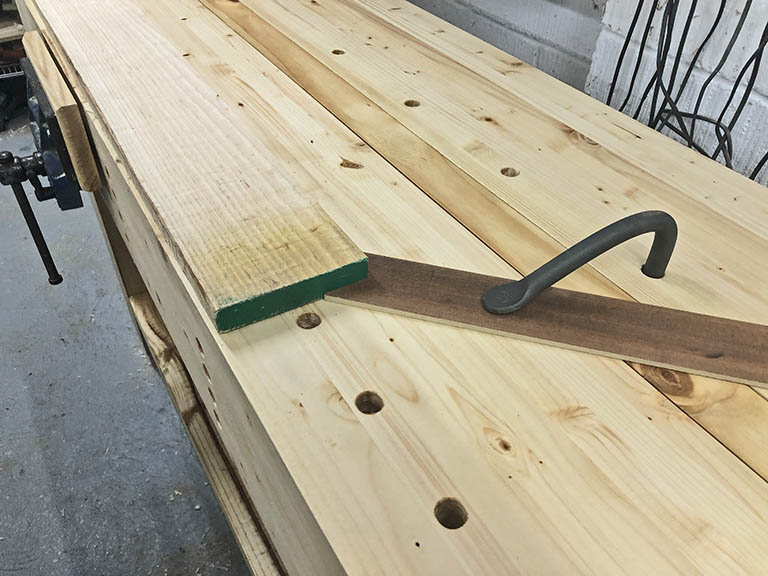
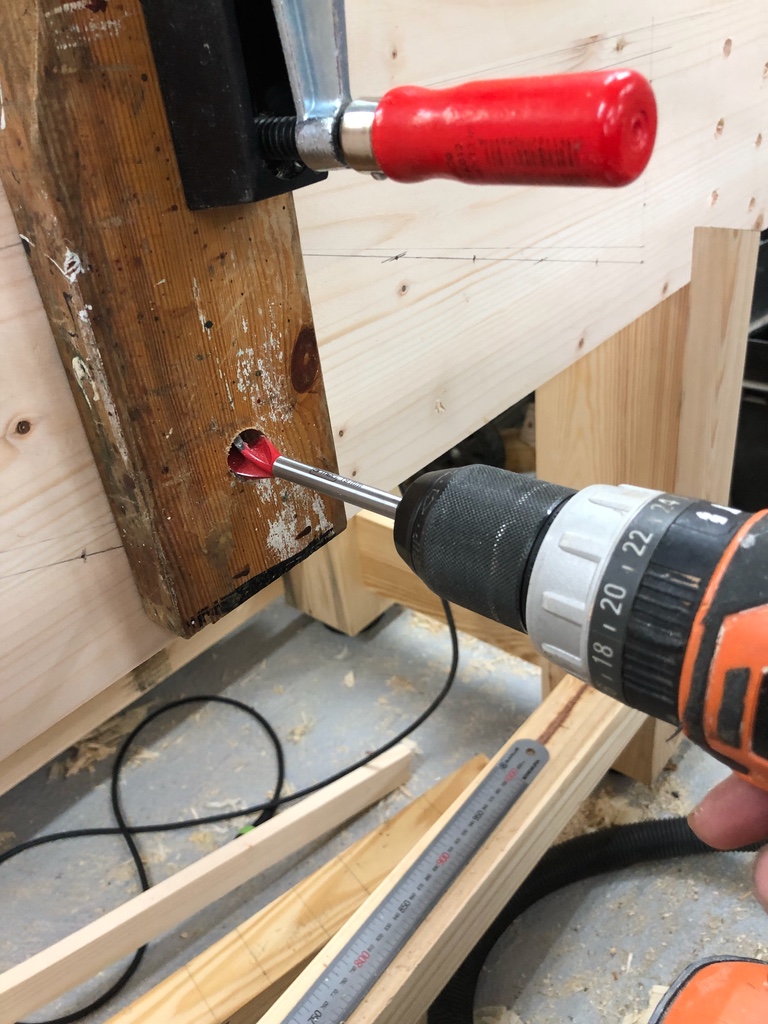
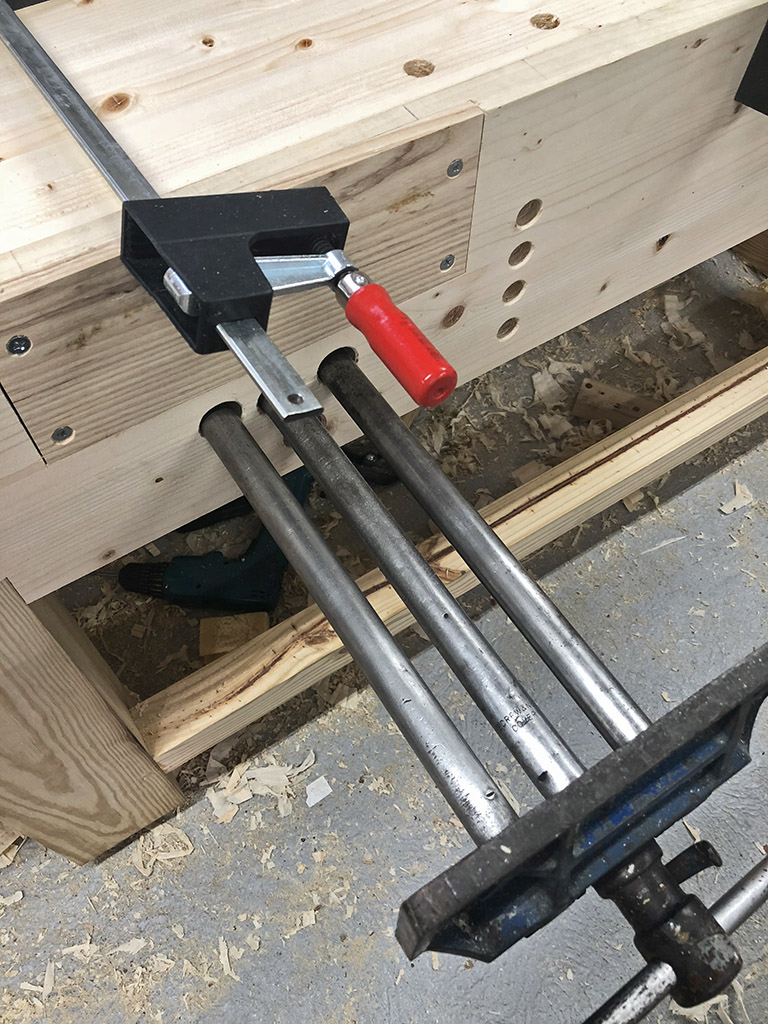
This was a good excuse to try my new Simon James holdfasts from Workshop Heaven. Had to wait quite a while for them to come back in stock, but they're absolutely brilliant. The free Star-M auger supplied with the holdfasts is also excellent, and more will certainly be purchased at some point in the future.

holdfasts.jpg


I filled some of the knot holes with epoxy filler, as I kept catching myself on the sharp edges. I drilled a few holes in the rear to section to use with the holdfasts and then sanded the bench using 60 grit paper. I left it at this as I want to keep it grippy. Then it was a couple of coats of Danish oil - it was either this or BLO, as they're what I had on the shelf. Don't mind what colour it ends up, it's just a workbench!

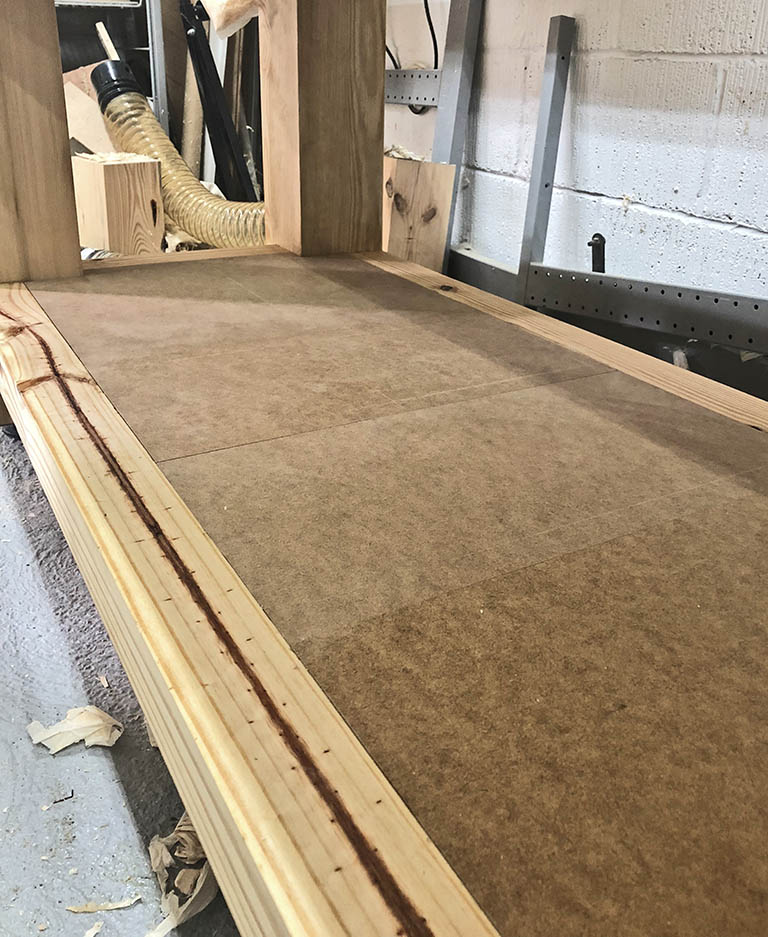
I then set about cutting the panels for the under-bench shelf. We bought some kitchen and bathroom units a few years ago with foiled doors. unfortunately, a lot of the doors started to delaminate. Luckily the company honoured its warranty and replaced all 30 doors and drawer fronts. So I stripped off the delaminating covering on some of them and used to make the shelf. Just need to find a use for the other 26!

shelf.jpg


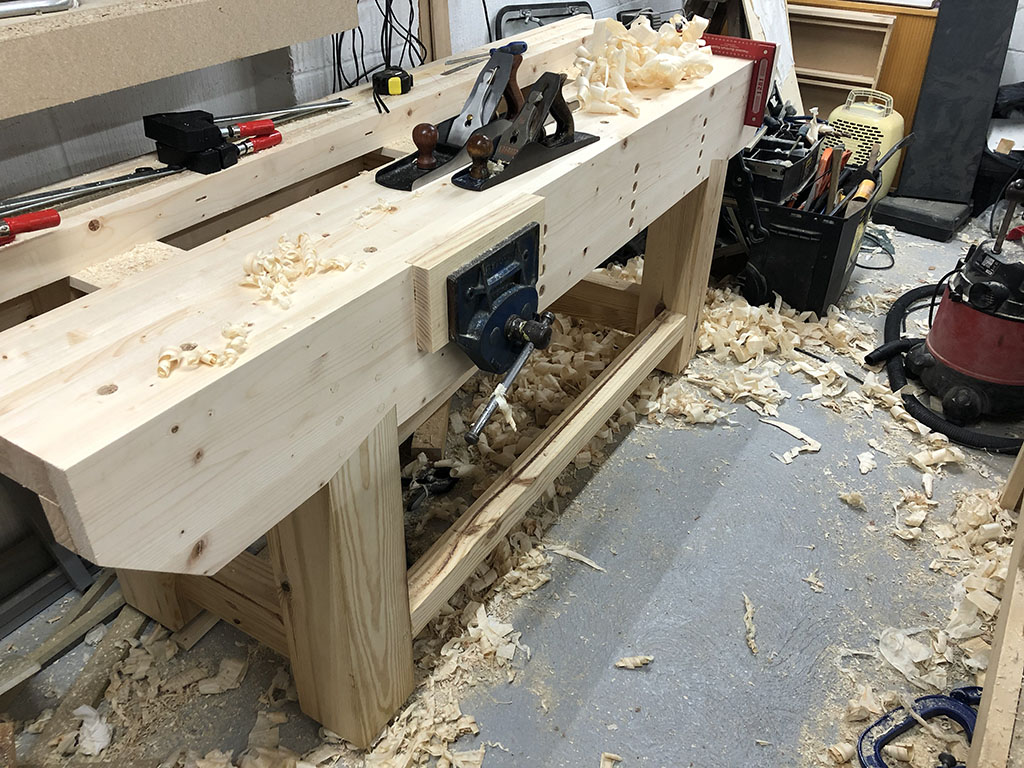
So that just about wraps it up... The finished bench.

fimished.jpg


And with the centre section reversed as a planing stop...

finishedstop.jpg


I made a 'doe's foot' from some scrap hardwood - what a revelation! Amazed just how solidly it holds the work. I did buy a Veritas Wonder Dog and a pair of bench dogs, but can't see me using the wonder Dog very much. I also bought the Simon James planing stop, which seems to work very well. The metal collar is a bit crude, it's just a brass plumber's olive, but it works well enough and seats nicely in the chamfer of the dog holes.

doesfoot.jpg


I slightly lost track of the total build time at the end, but it's approximately 90hrs
Total weight: 125kg
and the total cost was £95 - plus a similar amount for the bench hardware.

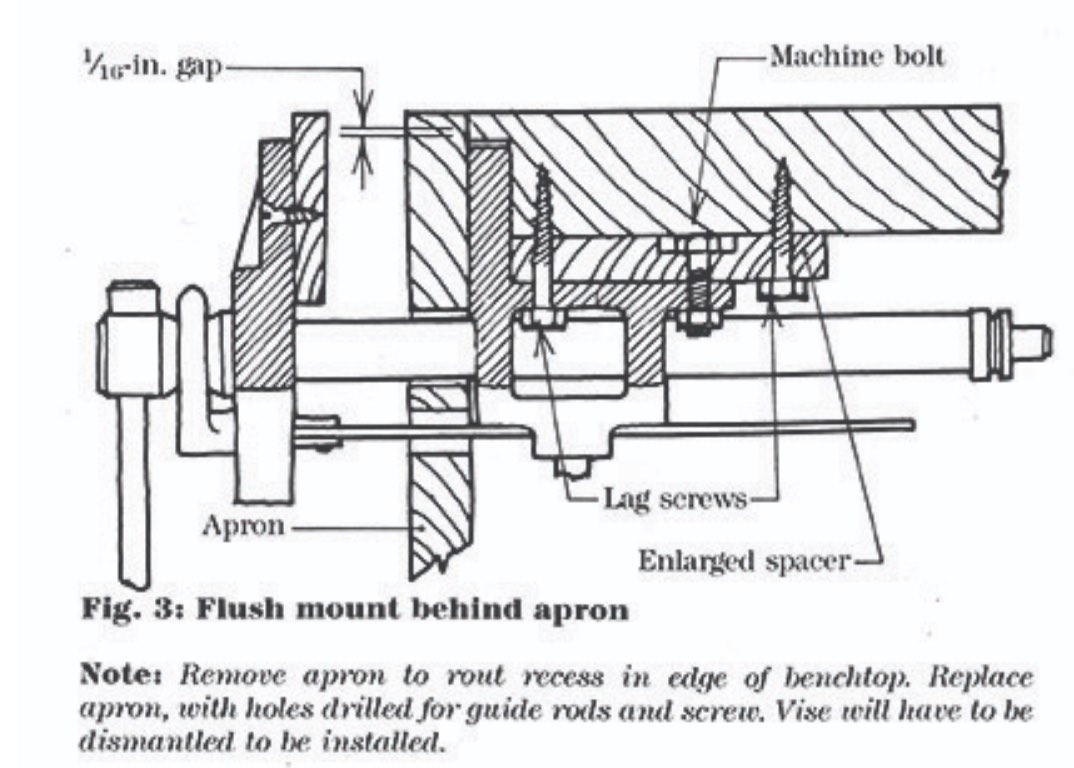
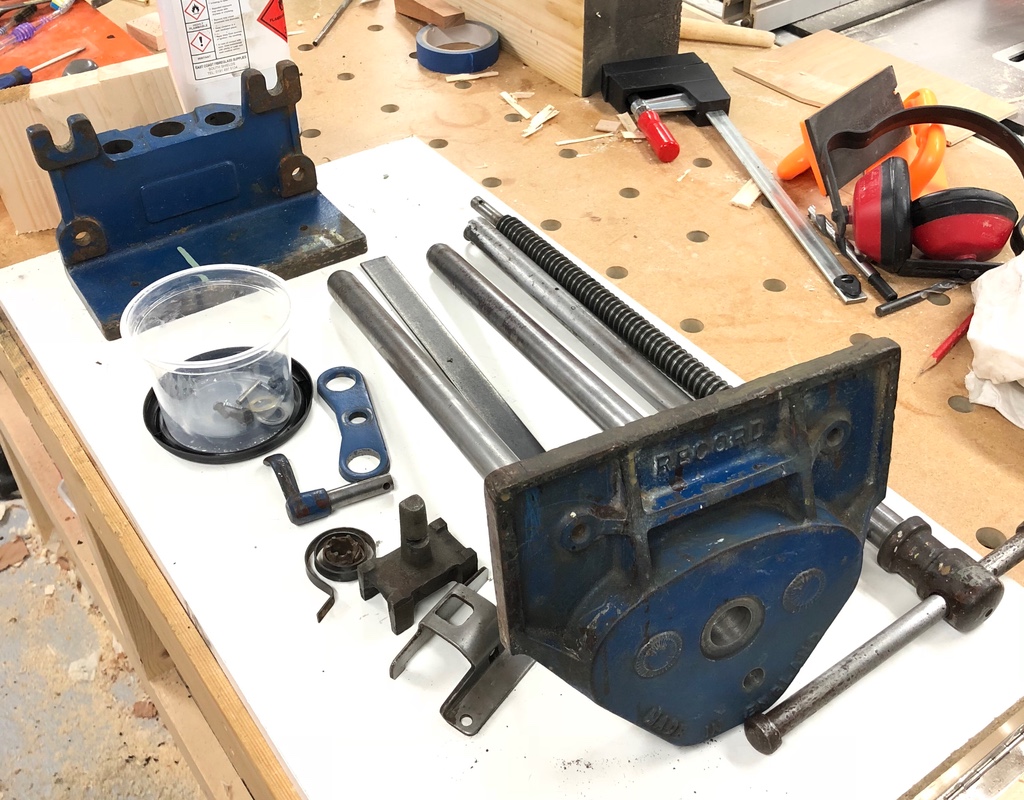
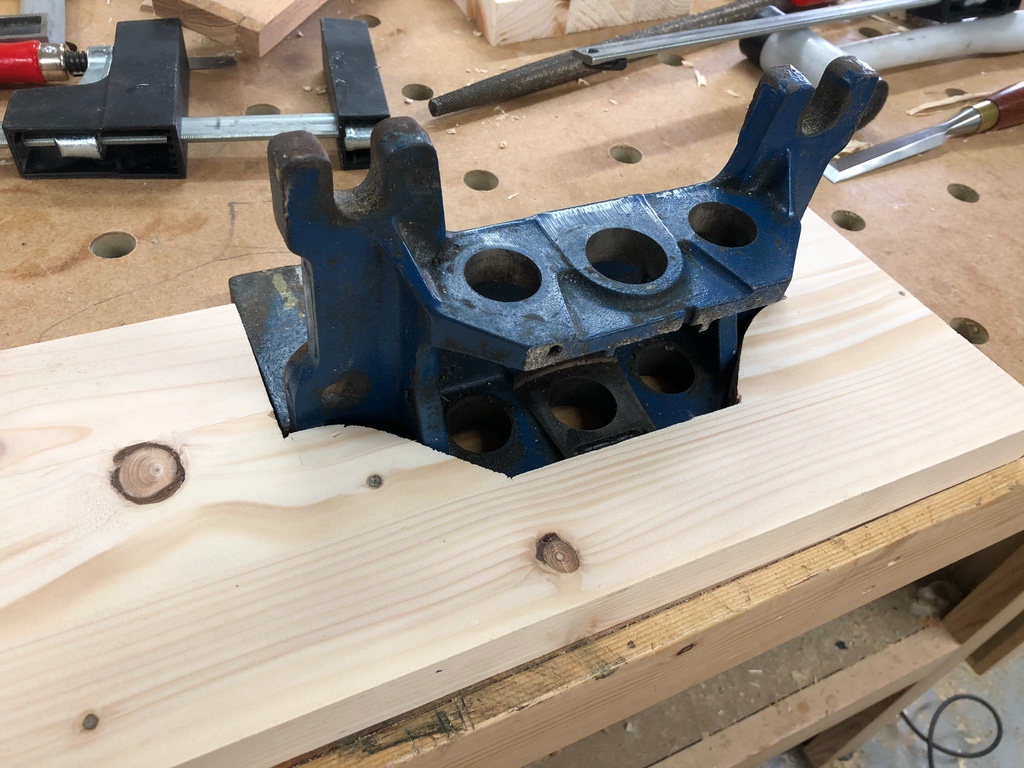
I've really enjoyed this build, and certainly learnt a lot. I'd like to thank those who persuaded me to stick with my original plan for a flush vice - it's fantastic for holding long work for jointing etc. It was a pain to fit, but more than worth it.

As for the bench, it's a keeper! From the little time I've spent with at it so far, it's a joy to work with. I'll do an update in six months or so with any observations after using it.

Thanks to all those that followed and offered advice and encouragement. Hope I didn't bore you too much!

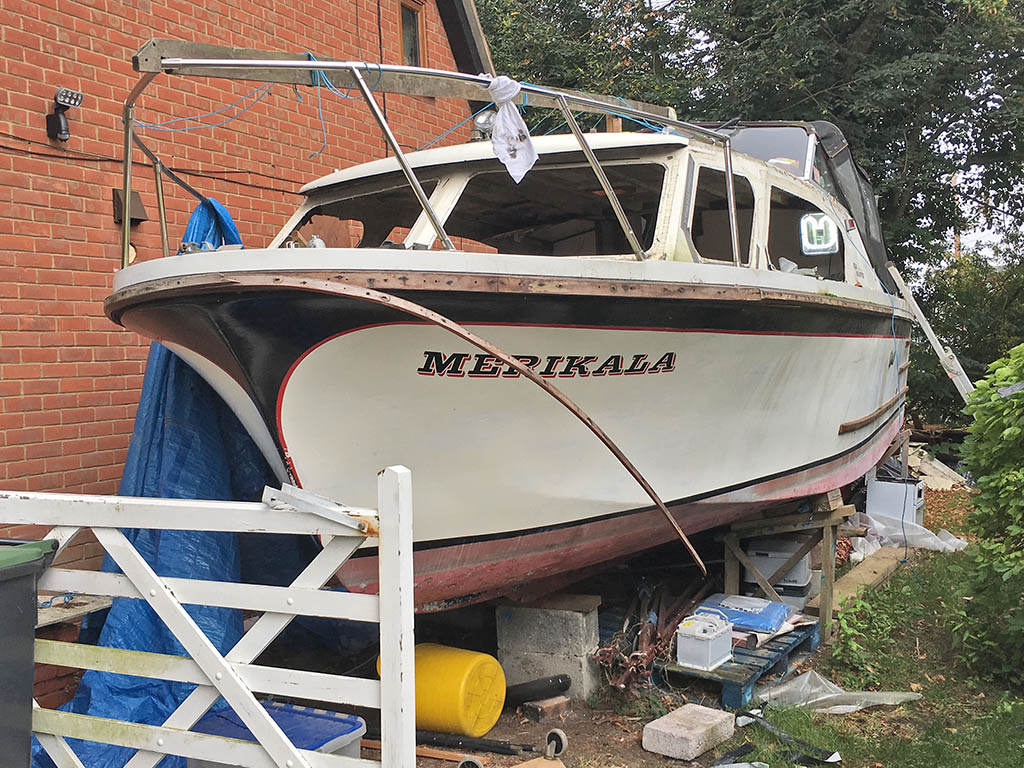
Now I can get on with the restoration and refitting of this... Should keep me busy for a couple of years!

boat.jpg
 
The reversible middle strip. What I did with mine was to graduate the height, one end is very low for planing thin parts and the other is higher to prevent larger pieces jumping over it - I can turn it end to end. The middle 200mm is flush so I can use that part of the bench without turning the strip over.
 

Latest posts

Back
Top