


kirkpoore1
Established Member
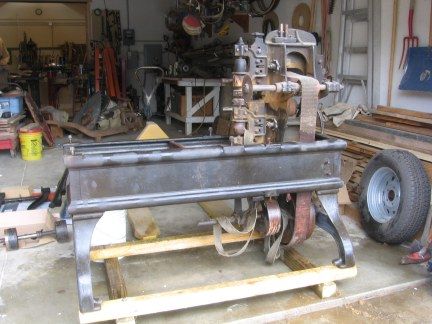
About two years ago, I bought a tenoner. Not exactly something you find in most shops, but I make a lot of stuff using mortise and tenon joints, and some of them are tough to do correctly because they're on the end of S-shaped chair legs and are hard to hold. I'd tried the bandsaw, tenoning jig on the tablesaw, and then the shaper (spindle molder), but even with the latter the results were barely adequate. So I needed to upgrade. I looked at several machines, but they were either too small or way, way too big. (One of them had a large enough table to tenon all the stiles on a door in one pass.) Finally I found a medium sized one, an 1880 Levi Houston machine:


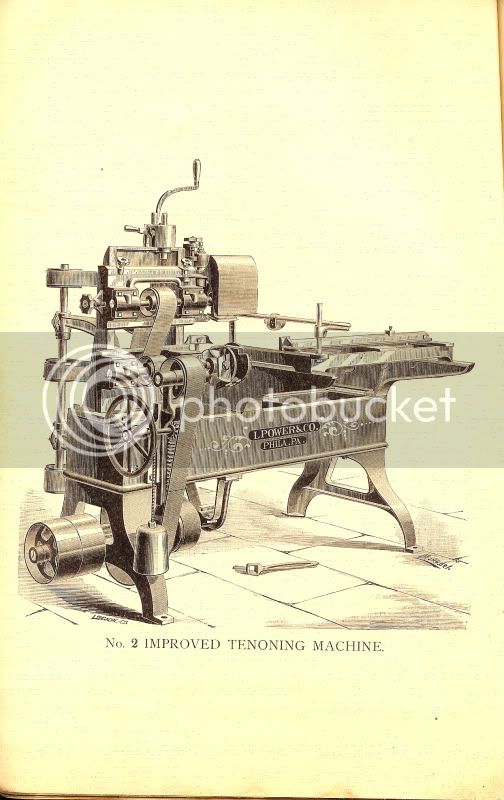
This is a close copy, from a different manufacturer, of the same era:
I finally got around to starting the restoration last October. The machine was in pretty good shape overall. After cleaning, I started repainting:
All the babbitt bearings were in good shape, though I had to replace all the wicking material. This being a fairly early machine, there was nothing really complicated, but there is a lot of simple stuff, including 14 babbitt bearings and two plain (steel on iron) bearings. A four inch flat belt winds through the main body driving two tenon heads and a cutoff saw, while a second belt drives a cope countershaft and from there two cope heads. (I'm not using the cope heads now.)
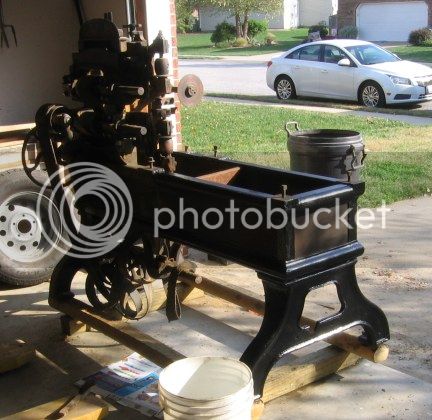
After repainting and reassembly, it looked like this:
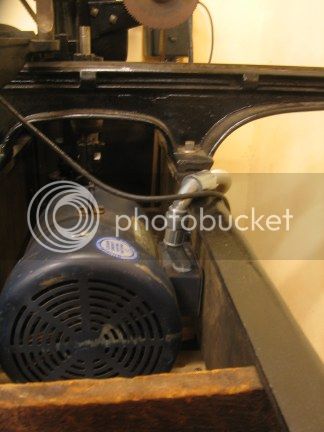
It had last been driven by a flat belt from a tractor power takeoff, so I had to cut down the countershaft and add a new pulley for the new motor. This is a 5 hp 3ph motor I mounted in the body:
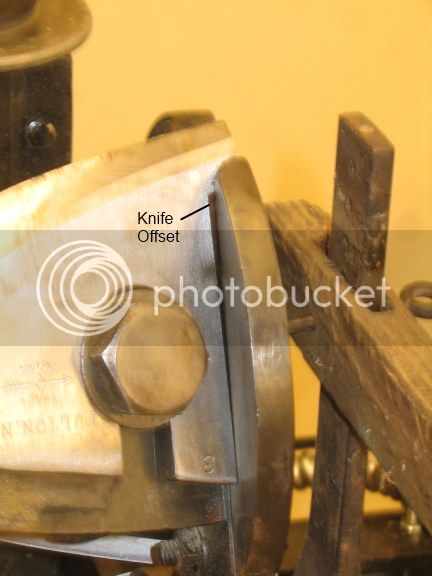
There were some complications with getting the tenon heads sharpened correctly:
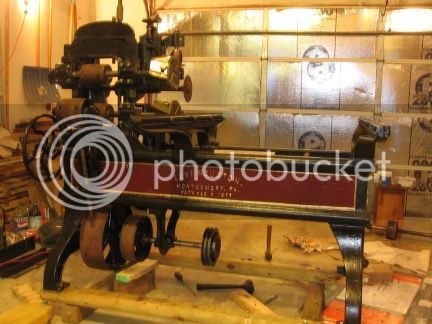
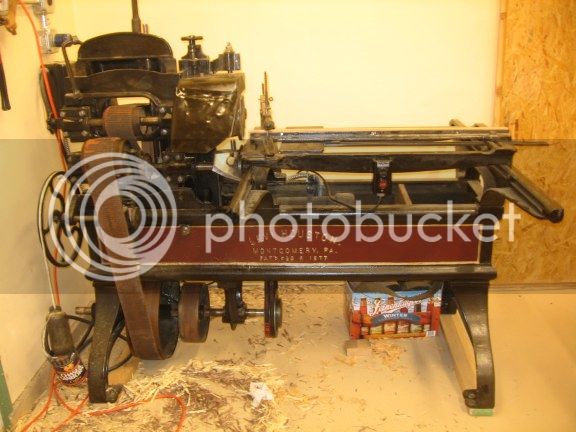
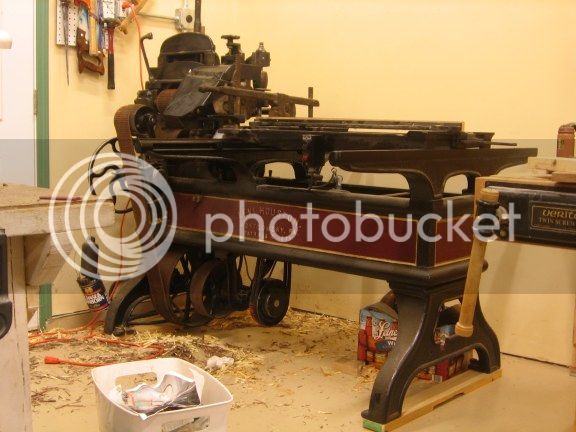
But I got them back last week, and now it's finally ready to go:
Video of it in action here:
http://www.youtube.com/watch?v=3gmOuHqWuJ4
(Please forgive the narrow frame of view--it's the first time my wife's shot a video with her Ipad.)
And the final result:
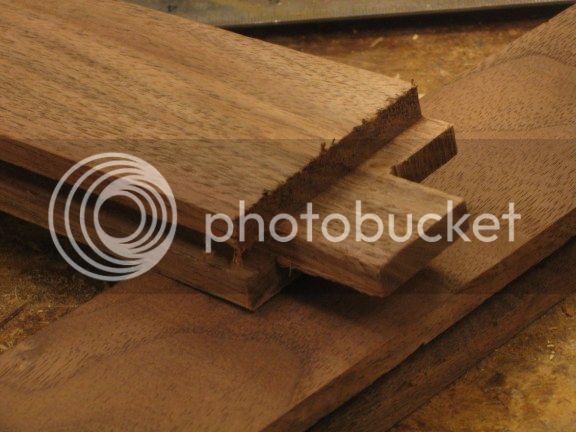
Still to come is a belt guard for the front, and a side plate added to the upper tenon guard. I'm also going to add some dial indicator mounting points so I can do fine adjustment of the tenon heads without using a lot of test pieces.
Kirk
This is a close copy, from a different manufacturer, of the same era:
I finally got around to starting the restoration last October. The machine was in pretty good shape overall. After cleaning, I started repainting:
All the babbitt bearings were in good shape, though I had to replace all the wicking material. This being a fairly early machine, there was nothing really complicated, but there is a lot of simple stuff, including 14 babbitt bearings and two plain (steel on iron) bearings. A four inch flat belt winds through the main body driving two tenon heads and a cutoff saw, while a second belt drives a cope countershaft and from there two cope heads. (I'm not using the cope heads now.)
After repainting and reassembly, it looked like this:
It had last been driven by a flat belt from a tractor power takeoff, so I had to cut down the countershaft and add a new pulley for the new motor. This is a 5 hp 3ph motor I mounted in the body:
There were some complications with getting the tenon heads sharpened correctly:
But I got them back last week, and now it's finally ready to go:
Video of it in action here:
http://www.youtube.com/watch?v=3gmOuHqWuJ4
(Please forgive the narrow frame of view--it's the first time my wife's shot a video with her Ipad.)
And the final result:
Still to come is a belt guard for the front, and a side plate added to the upper tenon guard. I'm also going to add some dial indicator mounting points so I can do fine adjustment of the tenon heads without using a lot of test pieces.
Kirk
