Taming Turnings in 2010

UKworkshop.co.uk

Help Support UKworkshop.co.uk:

This site may earn a commission from merchant affiliate links, including eBay, Amazon, and others.
CHJ":1rh01apb said:
Seems no logic on the bark security front, most of my Beech which has thin sound bark has shed it during drying, scruffy bits of burr, fruit wood and others with thick spongy stuff that looks as though it will let go as soon as you look at it, has stayed firm. Wonder if the time of year it's harvested has any bearing?

Yes it does. If you cut the tree down in the spring when the sap is rising the cambian layer (between the wood and bark) is very soft, in the autumn it is a lot tougher. I do remember reading somewhere that if you want to do bark on turning you should harvest the wood in the autumn / winter.
 
The Shark":v15ek284 said:
...Have you used the Chestnut buffing system on these?
Malc

Yes Malc, becoming my finish of choice these days, sanding sealer then buff with White diamond then Canauba wax, saves an awful lot of aggro sorting out sealer streaks, dust adhesions etc.
Just occasionally I resort to using the Tripoli but this can be too aggressive on soft woods and can discolour pale woods.

If item is likely to be handled extensively or splashed with moisture I finish coat with Chestnut Microcrystalline.
 
frugal":1pofyrek said:
Yes it does. If you cut the tree down in the spring when the sap is rising the cambian layer (between the wood and bark) is very soft, in the autumn it is a lot tougher. I do remember reading somewhere that if you want to do bark on turning you should harvest the wood in the autumn / winter.
Thought that might have a bearing, unfortunately have little choice on harvest dates as wood arrives as and when storms deem it appropriate and whenever it's thinned and dragged out of the woodland.
 
The Shark":248sune7 said:
Thanks Chas for your reply, your method certainly seems to work. The finish is very impressive.

Malc :D

Like every other finish method though it all depends upon the quality of the base surface (sanding) although I find on most pieces I do, as long as I rotary sand and avoid long circumferential scratches cellulose sanding sealer after 240/320 grit is adequate. SS is quite tough and provides a fairly high gloss finish in itself.
 
________Got stuck in a bit of a rut.
________
________

________Spalted Beech 152mm m/dia.___Spalted Beech 154mm m/dia.___Spalted Beech 180mm m/dia.___Spalted Beech 190mm m/dia.
 
Again they all look good. Have a go at doing some NE end grain while you are at it Chas, you can get some amazing shapes if you turn them wet and dry carefully. Also doing these into crotch pieces can have interesting results.

We'll get you hooked yet :lol:

Pete
 
Bodrighy":1g8lhiwz said:
.... Have a go at doing some NE end grain while you are at it Chas, you can get some amazing shapes if you turn them wet and dry carefully. Also doing these into crotch pieces can have interesting results.
..

Sadly anything that isn't already stacked up on the shelves that need to be cleared ASAP will have to wait until the next lot of supplies arrive, this lot has been cut up and drying for a couple of years and some of the sizes/cuts shall we say, 'seemed a good idea at the time'.
 
________More shelf clearing, trying to catch up on requests.
________
________

________Spalted Beech 137mm m/dia.___Spalted Beech 125mm m/dia.___Spalted Beech 155mm m/dia.___Spalted Beech 150mm m/dia.

________

_____________Ash 135mm mm
 
brilliant as standard chas, i would like to see these as blanks, then mounted, then turned if you've a mind next time, :lol: :lol:
 
stevebuk":3uc3dxg4 said:
......i would like to see these as blanks, then mounted, then turned if you've a mind next time,
OK Steve, will take the camera into the shed if I get chance tomorrow, I think there's some more similar bits in the heap somewhere.
 
Lovely collection as usual Chas. You never seem to put a foot wrong !
 
johnny.t.":37s46bdz said:
..... I like the two beech ones on the right the shape compliments the natural edge to a tee 8)

JT

Yes Johnny the shallower ones do look better balanced as stand alone pieces, the spalting on those two was also well balanced and graduated towards the rim, the deeper pair are an attempt to provide small Tree pot covers (small plastic saucer in base)
 
________
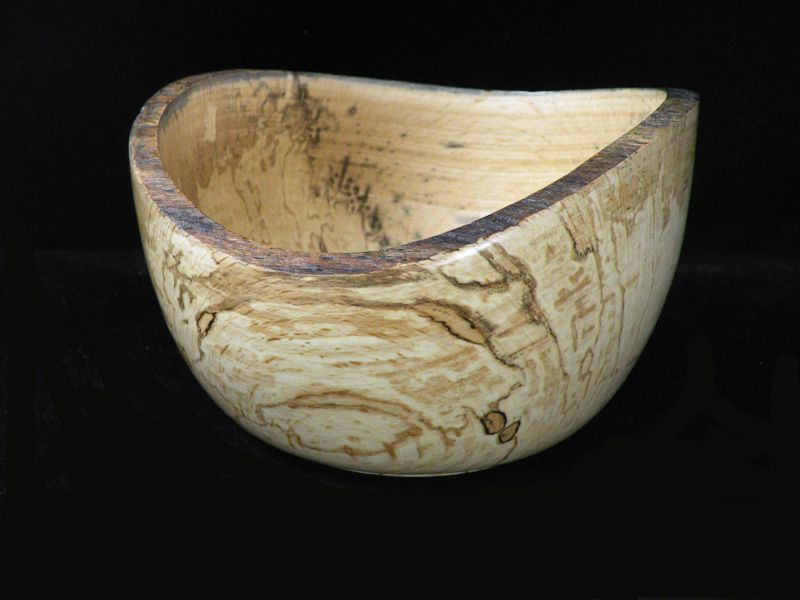
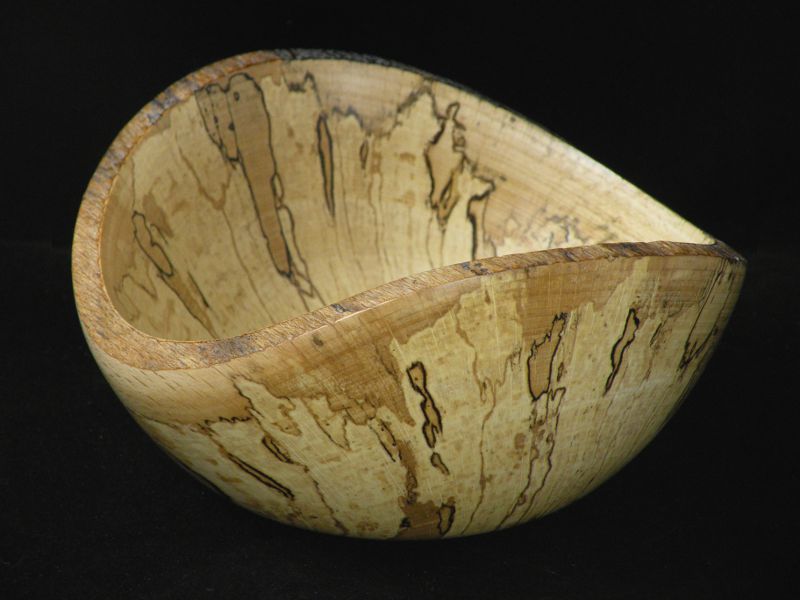
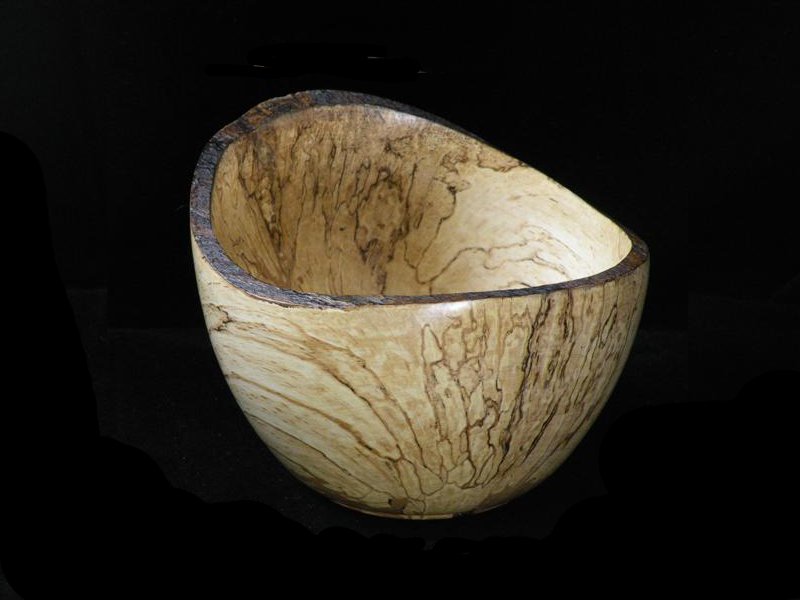
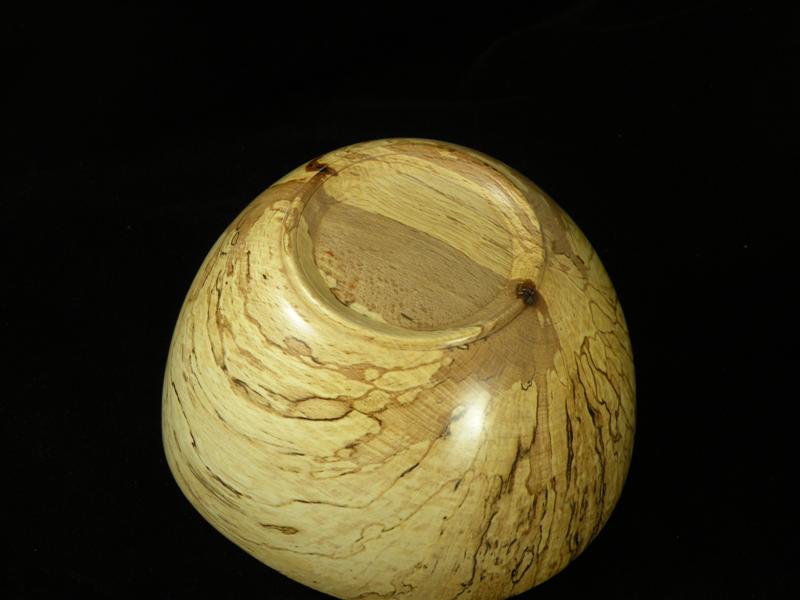
________Rough walk through of my method used for N E Bowl for Steve.
________
________

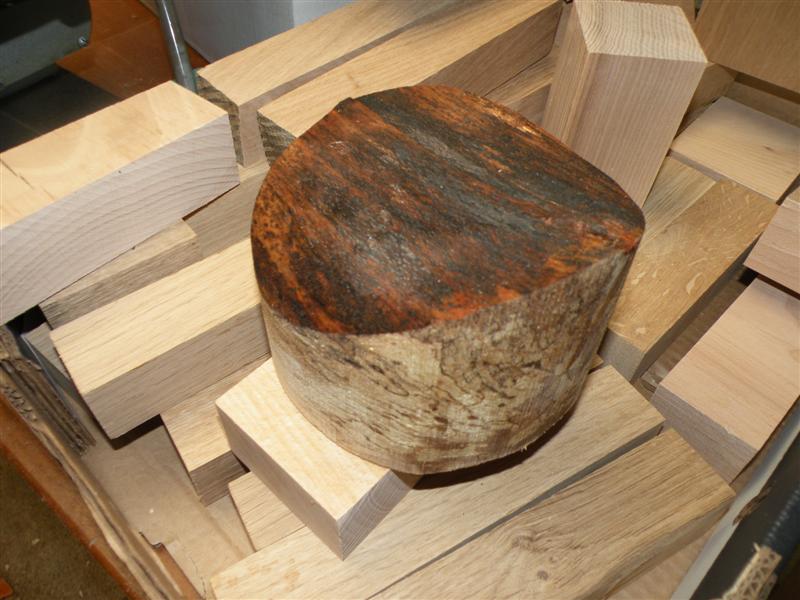
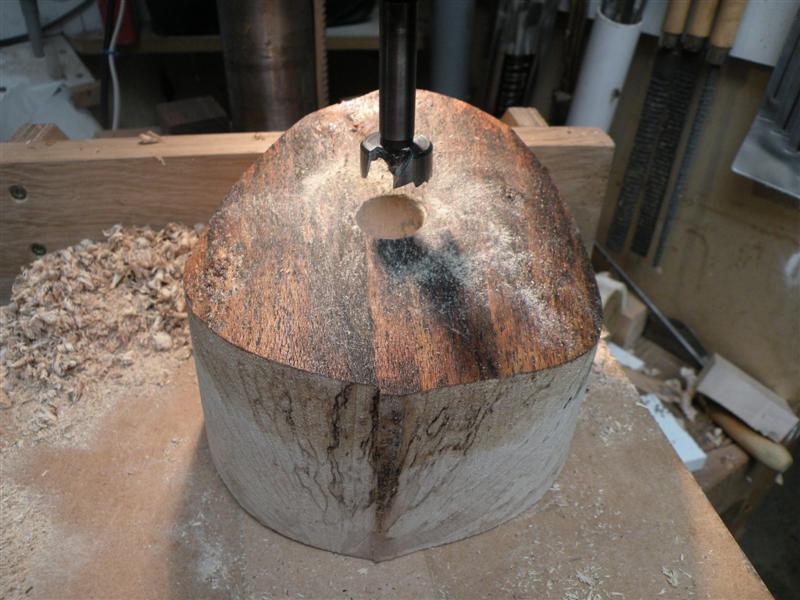
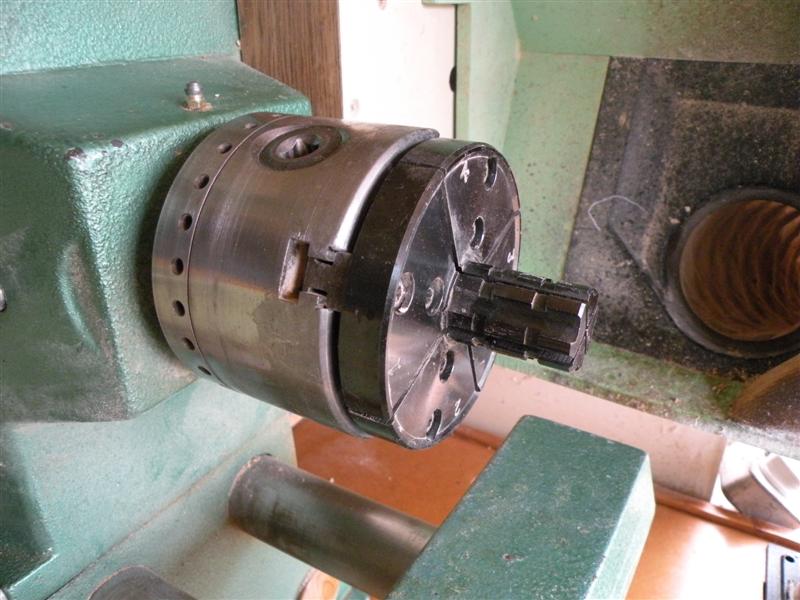
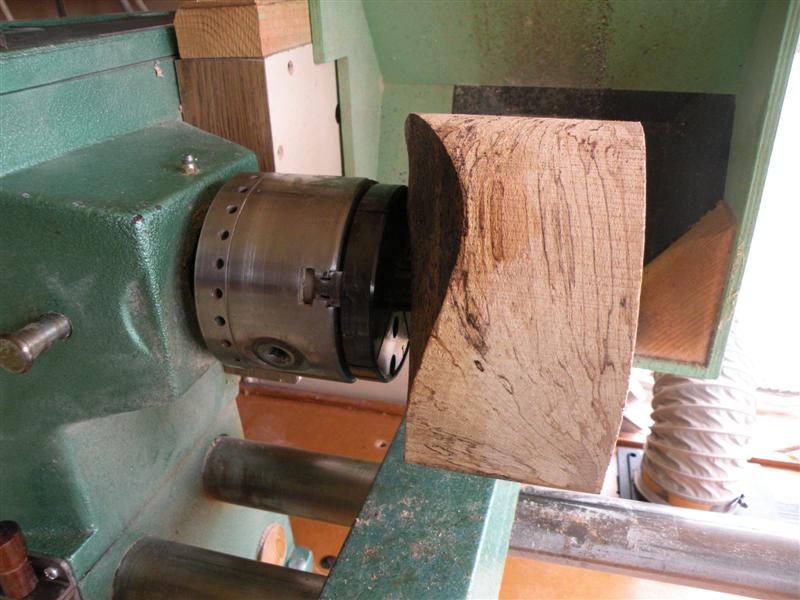
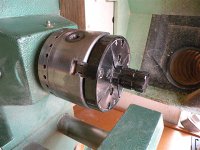
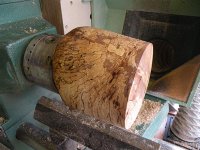
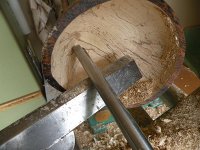
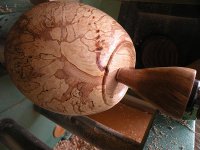
________Rough Blank and mounting method

________
________

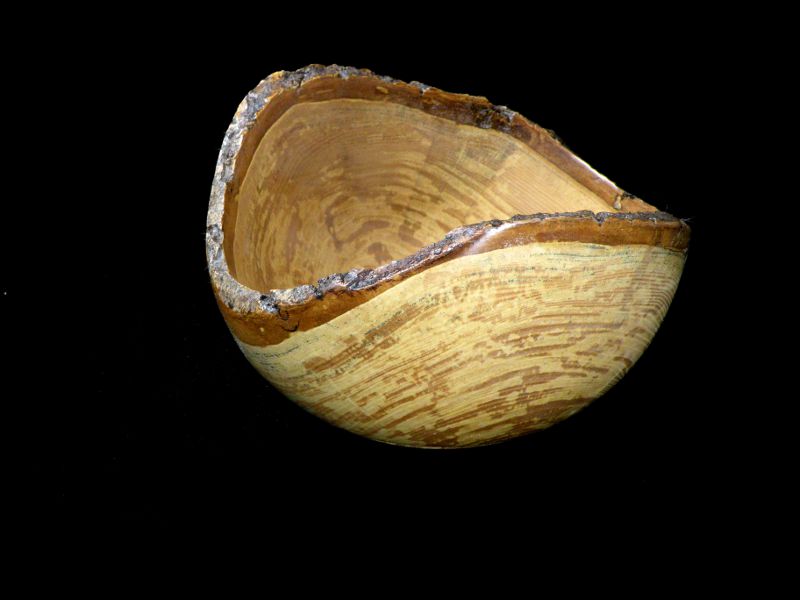
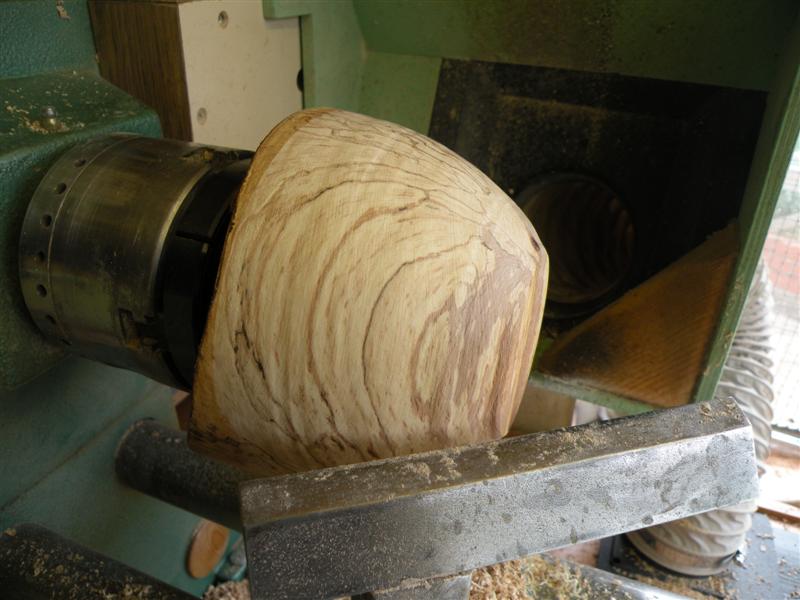
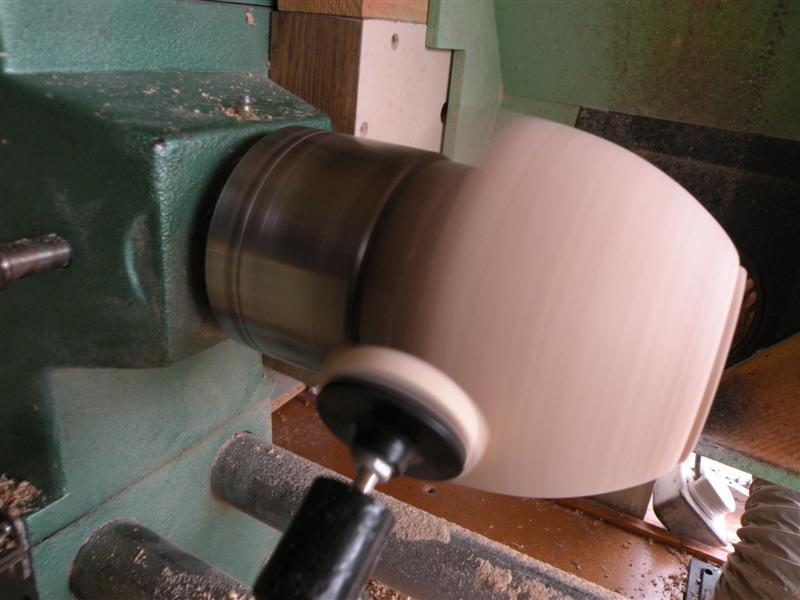
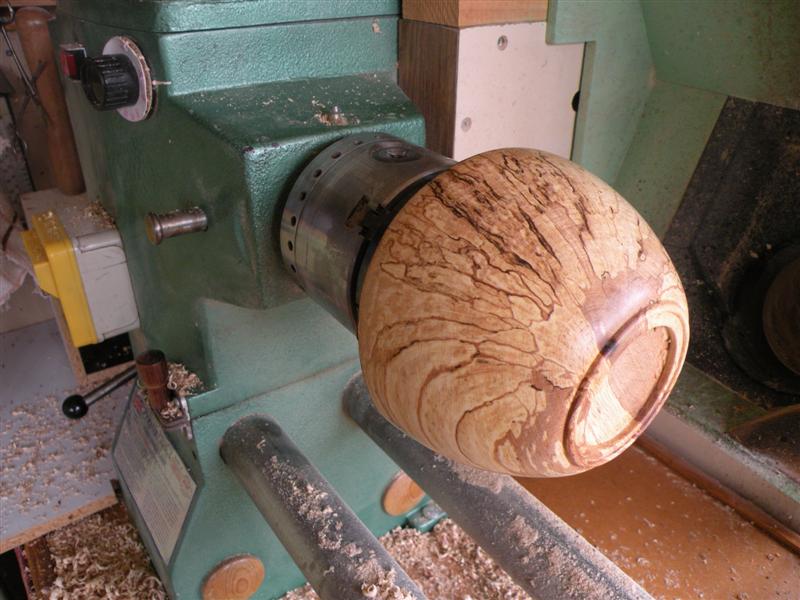
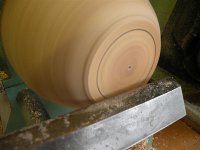
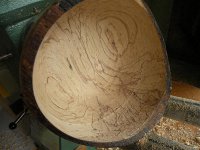
________True up cylinder/base, form basic outer shape,mark mounting socket, form socket and foot, finish outer turning.

________
________

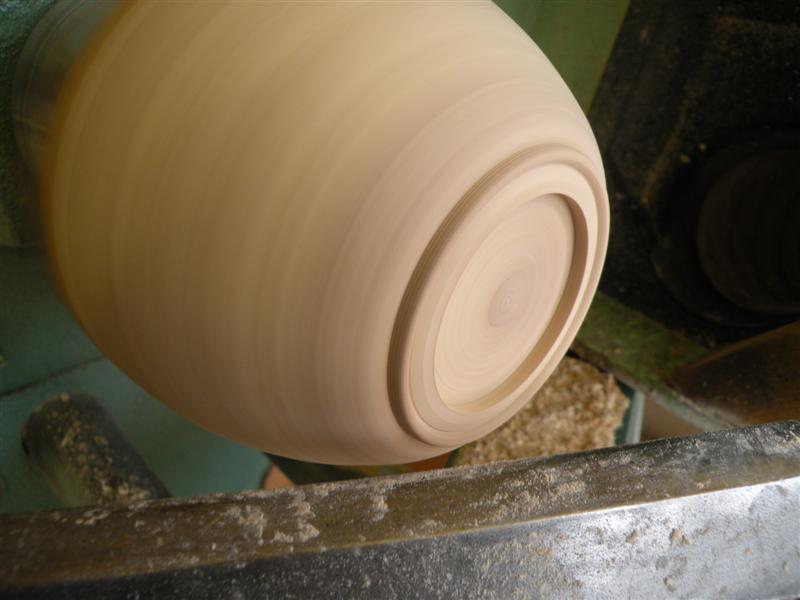
________Finish Sand, including chuck recess, using higher speed than normal to reduce catch risk on wings, coat with sanding sealer and change chuck jaws.

________
________

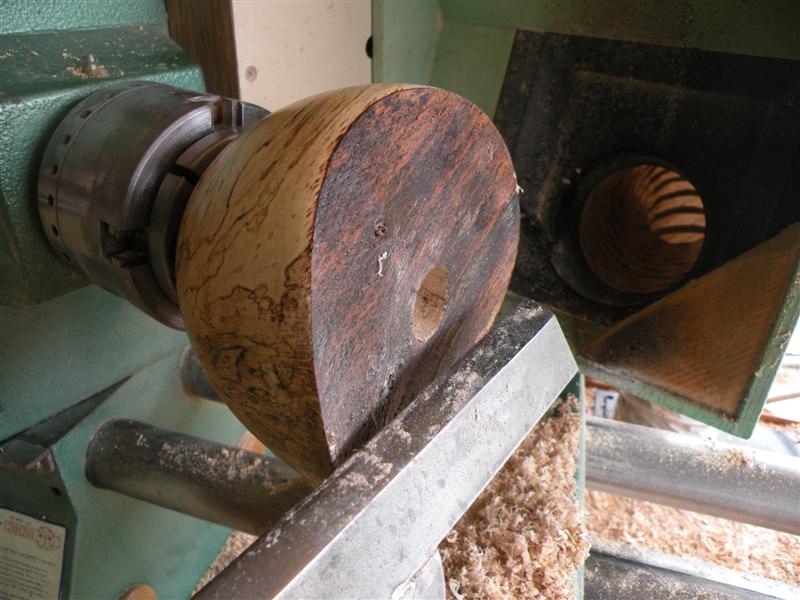
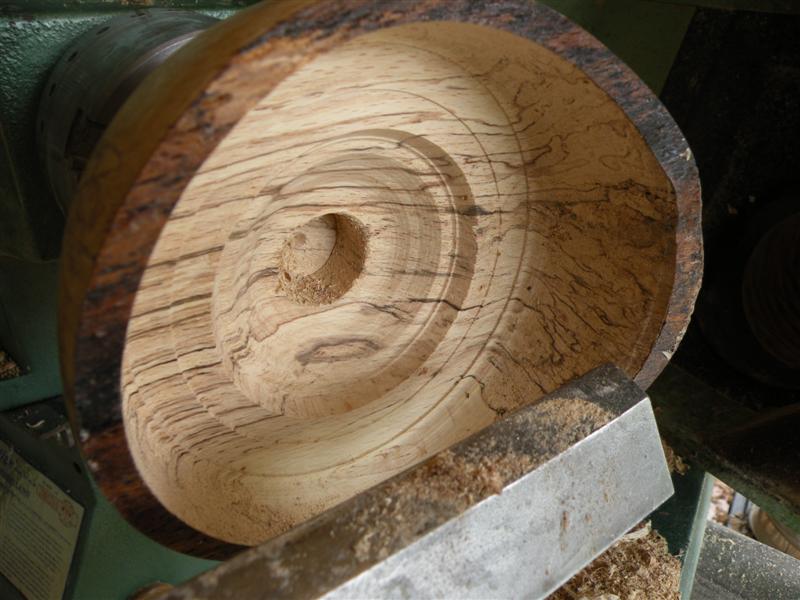
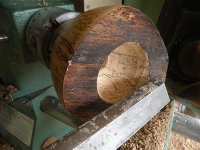
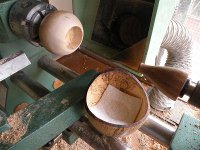
________Start by removing Centre but not much deeper than wing height to maintain wing support.
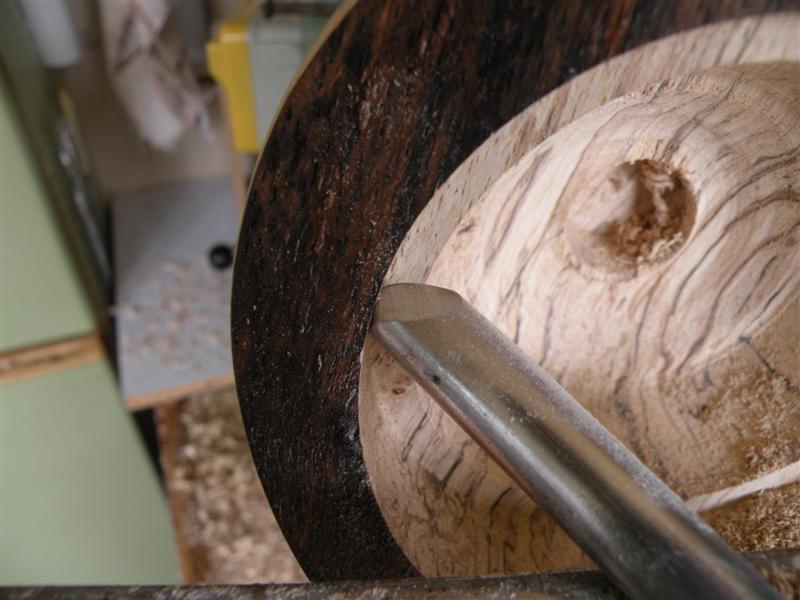
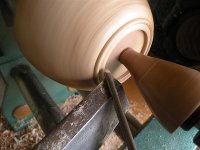
________Work down the sides of the wings with a 30-35 deg nose bevel bowl gouge, keeping bevel parallel to outer face.
________I run lathe at 2000+RPM for this as it reduces risk of tool bounce.

________
________

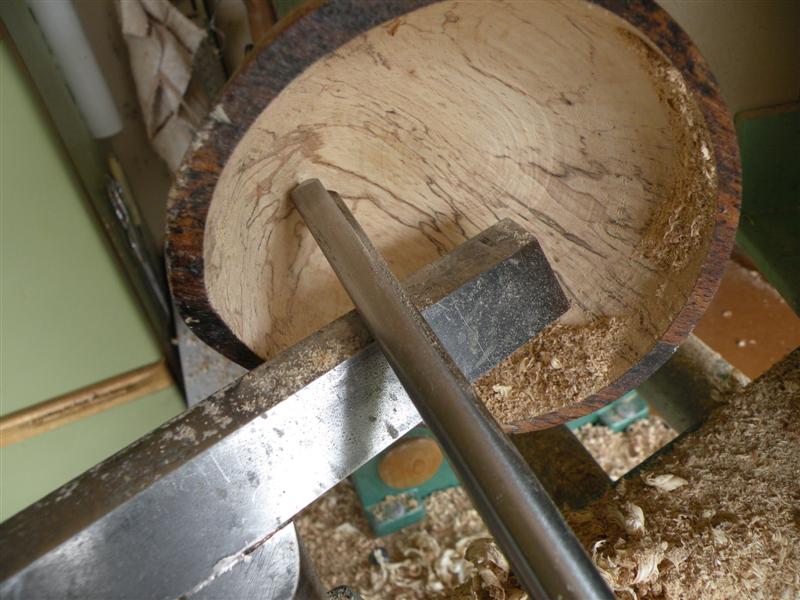
________Change to a 45-50 deg nose bevel bowl gouge to remove rest of centre, to avoid fouling wings and maintain bevel contact.
________Finish sand and coat with sanding sealer.

________
________
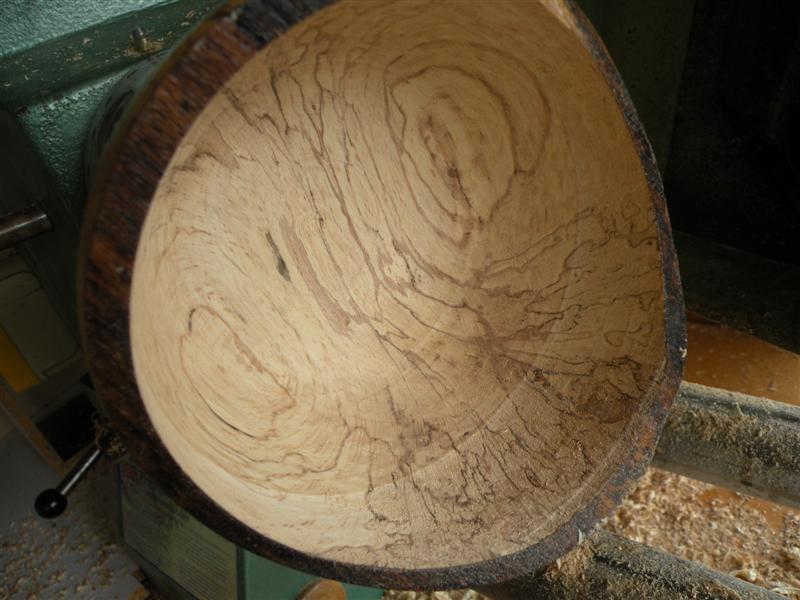
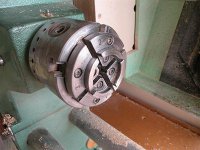
________Reverse mount with plain Nyweb for friction and padded revolving centre.
________Tidy up mounting socket with 6mm bowl gouge, sand finish and seal.

________
________

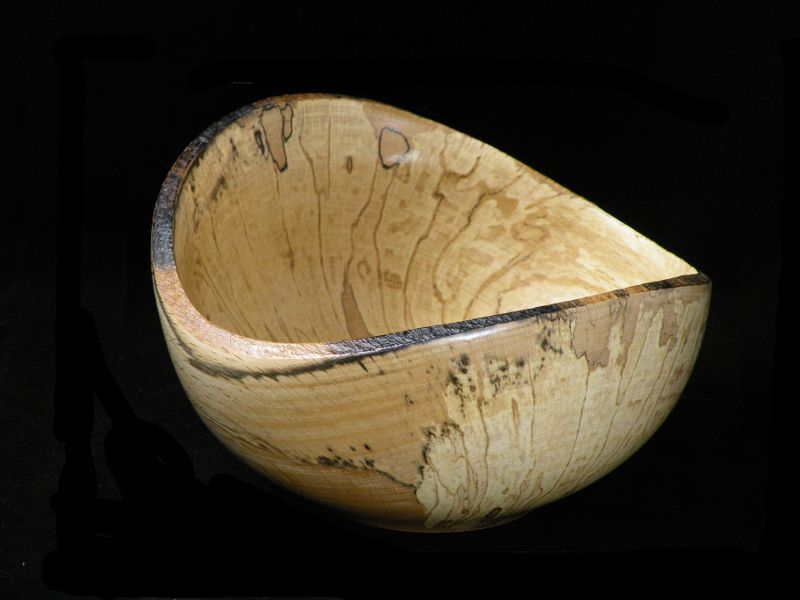
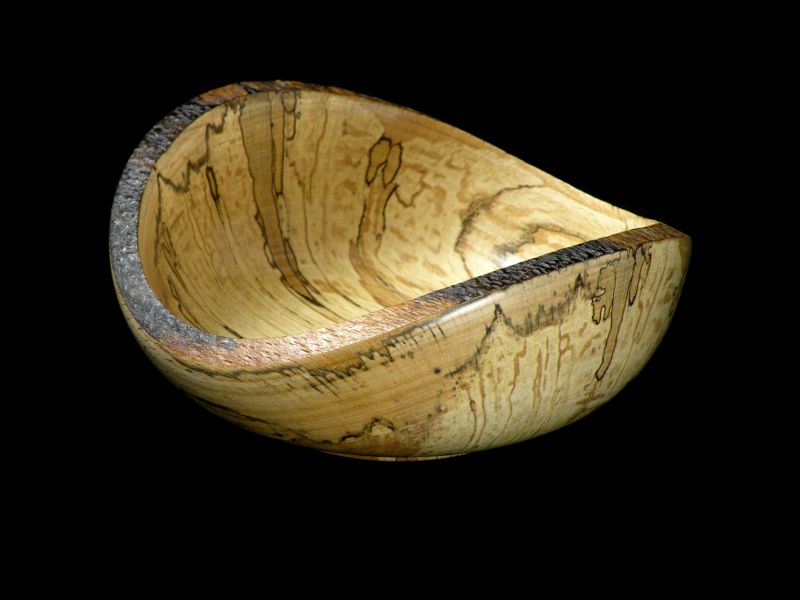
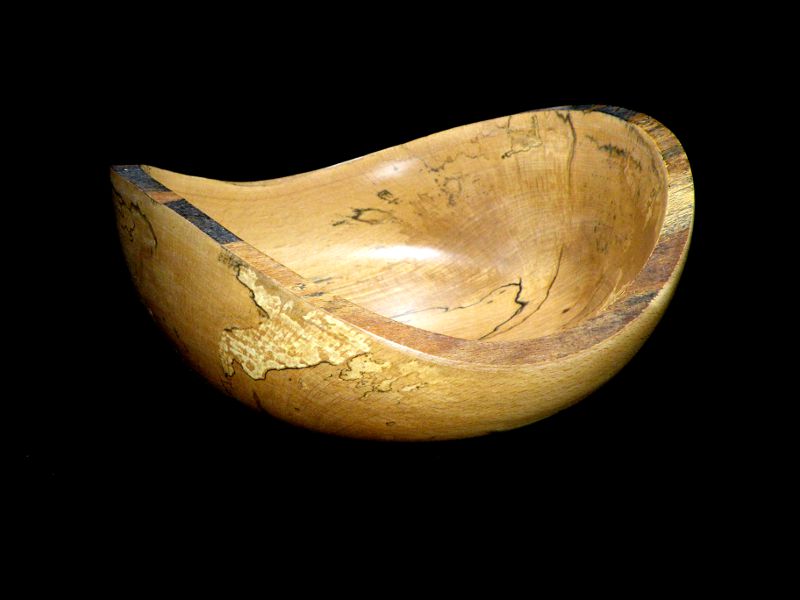
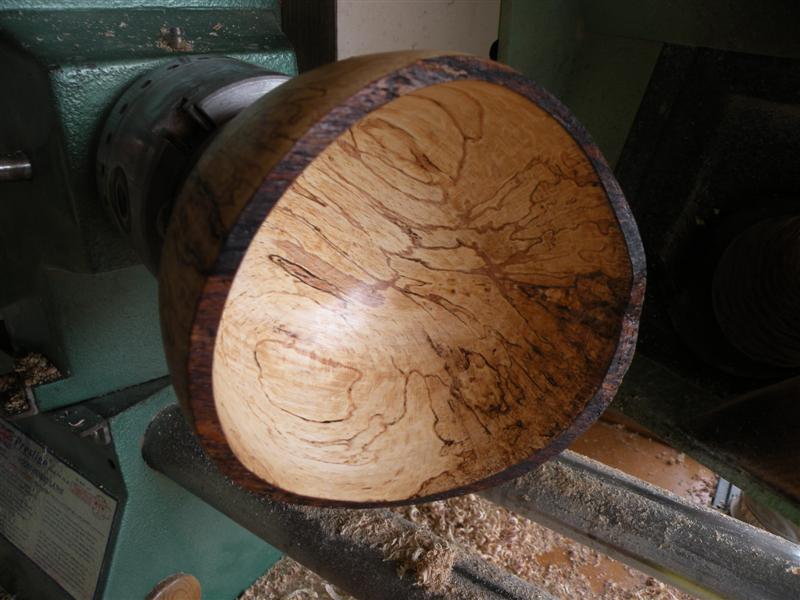
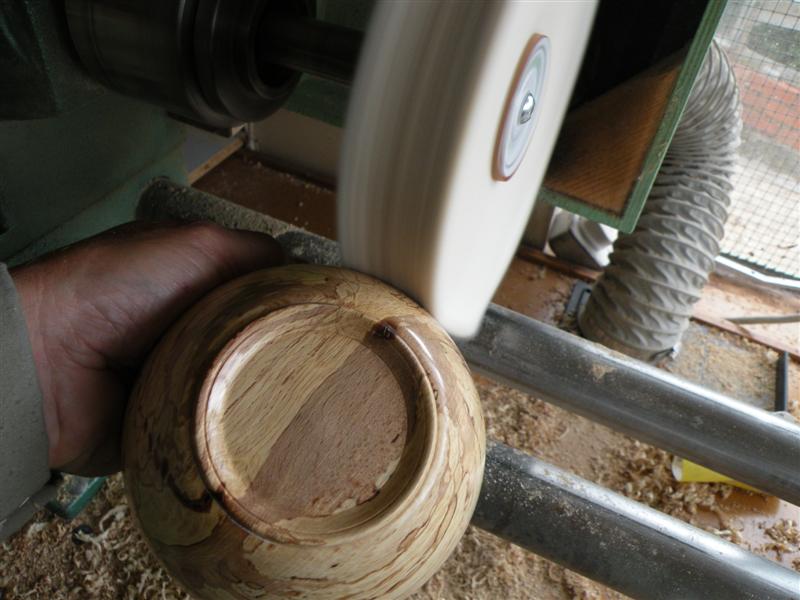
________Buff with White Diamond, you can see the shine at this stage, Finish Buff with Wax
________Smaller Buffing wheels used for inner at this size and depth but shallower pieces can be done with large mops.

________I normally do these sort of pieces in batches of 6+ to avoid changing jaws, mops etc. any more than necessary.

Edit: Bevel angles references adjusted to comply with these Charts
 
thats a great incite as to how you do your bowls chas, really appreciate this, its nice to know how the other half do it.. :lol: :lol:
 
Back
Top