Switch bypass on extractor

UKworkshop.co.uk

Help Support UKworkshop.co.uk:

This site may earn a commission from merchant affiliate links, including eBay, Amazon, and others.

Arnold9801

Established Member
Joined
26 Sep 2016
Messages
199
Reaction score
5
Location
Cornwall
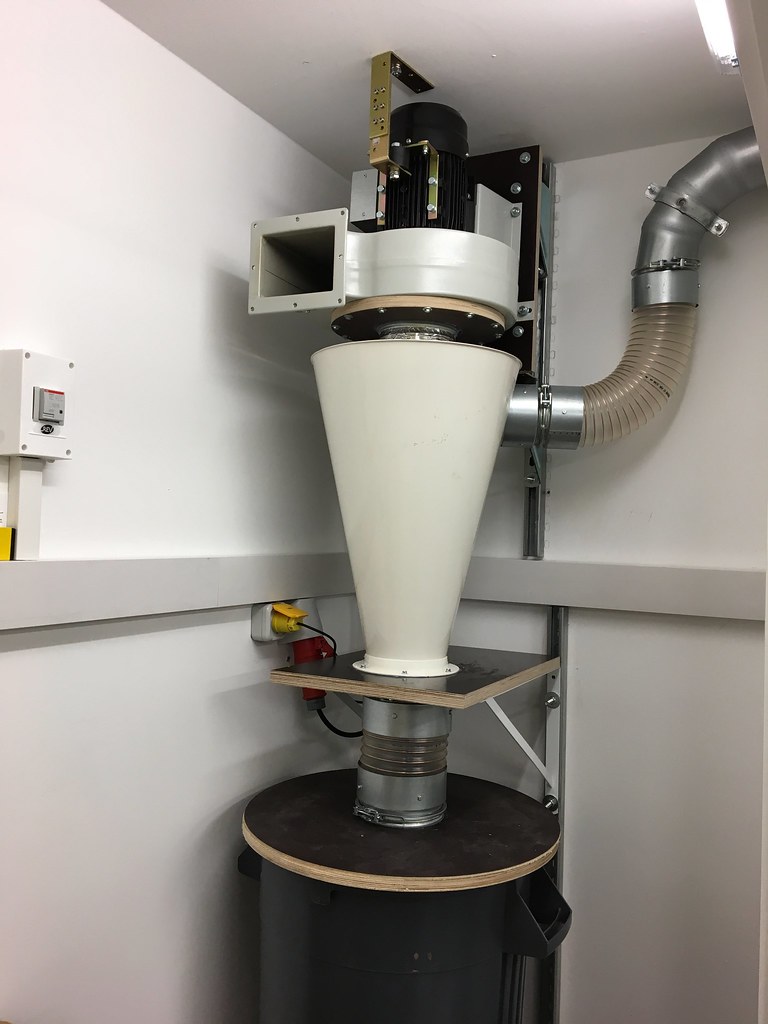
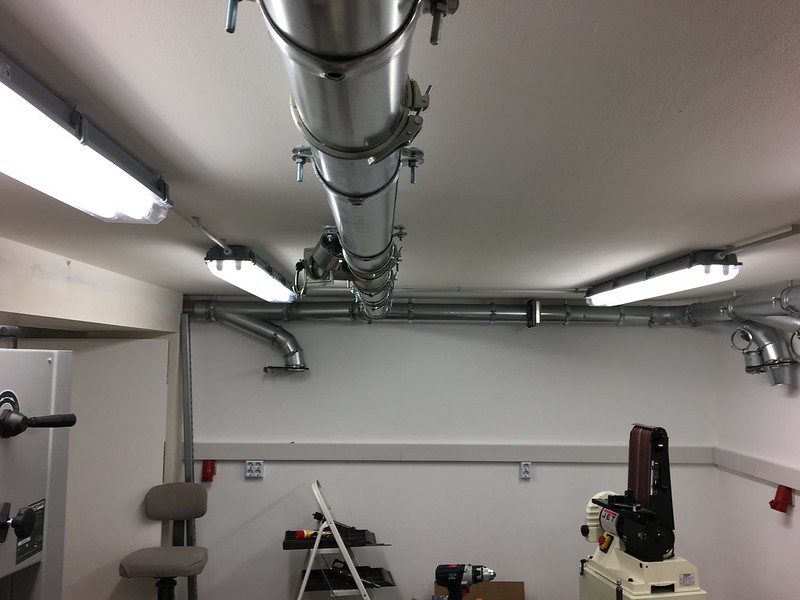
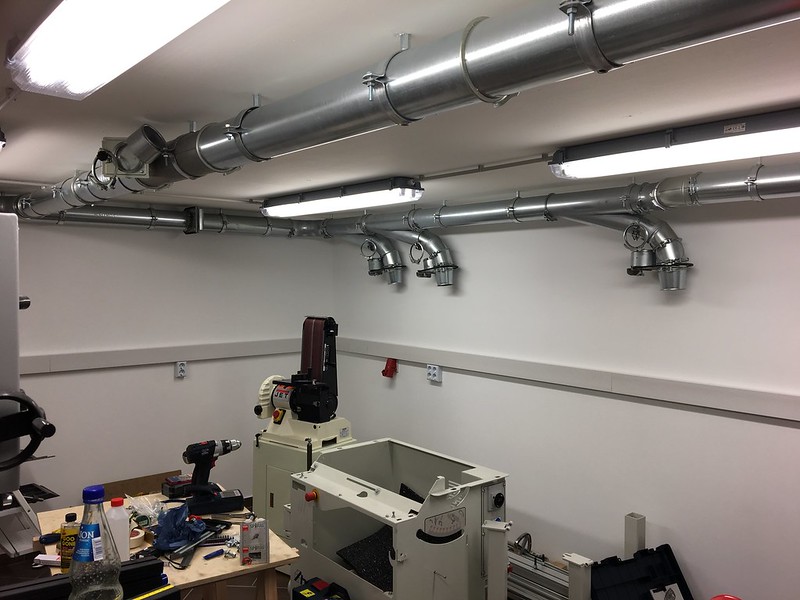
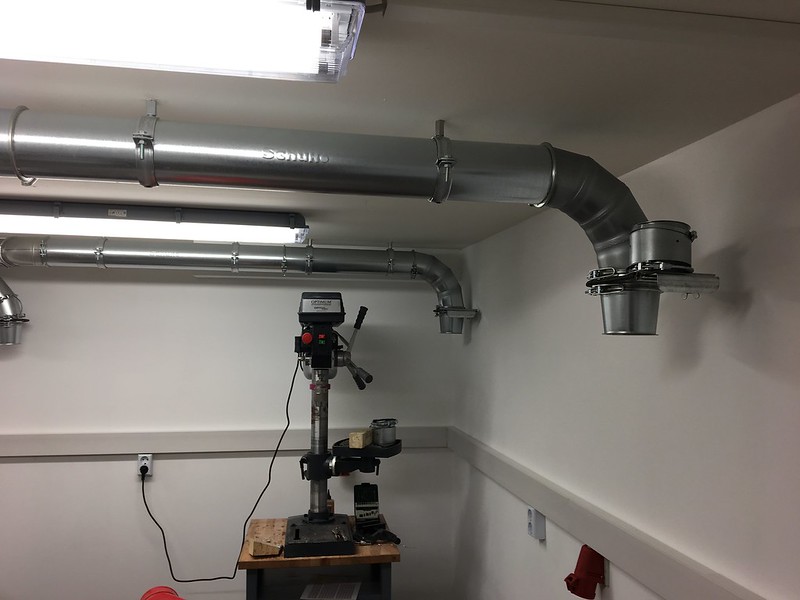
I have my extractormin another room off my workshop. I have it running to 8 outlets all sealed via blastgates. Now I know it’s not far to walk each time i switch it on and off, but it would be brilliant if the switch for the extractor was in a central position up in the actual workshop, this avoiding the need to walk back and forth.

My question is, can this be easily achieved by using a nvr switch?

For your info, my extractor is connected to a 16amp plug/switch.
 
My Bernardo three-phase extractor came with the NVR mounted to the motor, which is good as long as the unit is in the same room with me. I mounted my extractor in a closet and would not be able to reach the NVR switch once it was installed.

I replaced the NVR with a remotely operated contactor I bought at the local hardware store and a two-button switch I bought from an Amazon seller. The wiring of the contactor and the control switches ensures it operates as the NVR switch does. I attached a simple drawing showing the wiring diagram, so please excuse any non-standard icons for the UK. There's no reason why a similar setup won't work on a single-phase setup.

The 4-pole contactor is rated for a 4 HP motor, which is adequate for my 3 HP blower. The contactor is close to the blower motor, while the control switch is in the main shop area. The connection between the switches and the contactor is with a single run of 3-conductor 1.5mm cable. This contactor does not provide any overload protection, so the source for the mains must be connected through an appropriate circuit breaker. I use a 3-phase 16A Class C breaker for all of my 3-phase shop motor loads.

Extractor_Wiring.jpg
 

Attachments

  • Extractor_Wiring.jpg
    Extractor_Wiring.jpg
    83.1 KB · Views: 255
Here's a picture of my Dust Collection closet while I was building it. The contactor is in the small enclosure on the left edge of the picture. The output of the contactor goes to the red 3-phase receptacle behind the cyclone. The yellow plug is the separate connection for the thermal overload protection switch in the motor. If the thermal overload switch in the motor opens, or this plug is removed from the receptacle, the motor will stop and cannot be restarted by the remote switch.

DC_System-1 by Mike66GE, on Flickr
 
Theres a much cheaper way on a single phase motor with NVR switch.

You take the live feed from the back of the NVR switch, and run it to a wall light switch that is convenient for you. Then you run the live back to the motor connection behind the NVR.

Now you start the day by pressing the NVR switch normally, but the motor wont run. You walk back into your workshop and start / stop the extractor on the wall switch. Good practice would get you to press the red button on the NVR at the end of the day.

The safety is still fully active but you now have control where you want it, and you dont have to worry about batteries on hand held remotes.

I have this system but I use two switches, one each end of the workshop, just like upstairs downstairs light switches.
 
Mike,
that appears to be a 4" cyclone? If so, where did you get it? and was it stupid money like the cyclone central?
ta.
 
sunnybob":2f22j3zs said:
Mike,
that appears to be a 4" cyclone? If so, where did you get it? and was it stupid money like the cyclone central?
ta.
Hi Bob,

It's an Oneida Super Dust Deputy 5-inch steel cyclone. I was back in the States on vacation when I bought it from a Woodcraft store in Virginia. It was the only large cyclone the store had in stock and the cardboard box was severely damaged (the cyclone was undamaged). The store manager gave me a substantial discount because of the damaged box, so I bought it for $169 and reboxed it so I could mail it to me in Germany. I didn't really want the steel version, but the larger 6-inch plastic version exceeded the U.S. Post Office size limits for mailing and no one except Oneida had them in stock.

I have since bought the Oneida Super Dust Deputy XL 6-inch cyclone from Toolovation, a UK vendor, since there were no German vendors stocking it or willing to order it with less than a 12-week delivery time. Martin, at Toolovation, was very accommodating and I had the SDD XL five days after I placed the order.

When I have time, I'm replacing the 5-inch steel version, and all of the 120mm steel ducting and blast gates. I'll install the 6-inch XL and will use 150mm S&D pipe from my local hardware store. I already have five blast gates that will fit the 150mm S&D pipe.

Here are a few photos of the 120mm ducting, fittings, and blast gates that will be excess as soon as I start the renovation. These pictures were taken while I was building my shop and assembling the equipment. The Minimax SC2 Classic is still in pieces in one of the pictures. The reducers on the blast gates accommodate 100mm flexible ducting that connects to the equipment. The 100mm hose couplings and clamps are shown on each blast gate door.

Ducting-5 by Mike66GE, on Flickr

Ducting-4 by Mike66GE, on Flickr

Ducting-3 by Mike66GE, on Flickr
 
I'm sorry, but I dont believe thats your workshop. I've seen dirtier operating theatres! :shock: :roll:

I am really in need of a 4" cyclone. my system neither warrants not needs anything bigger. i have a home made 3/4 size traffic cone thats running at 3" outlet but only a 2 1/2" inlet, and its just not man enough for the job.

I also have shipping considerations (hammer) (hammer)
 
That’s a beautiful ducting system. Not spiral tubing but seamless, locking joints, elongated reducers and wonderful sweeps on each joint.......then I looked at Mikes location.......Germany. No wonder they are renound for their engineering.

Trying to find anything that could be improved.....the solatory T junction rather than a Y / swept T junction.
 
I've seen those pictures before on Sawmill Creek. Nice ducting but top of the line here. Way out of my price range, so is most everything else actually. :roll: Using the same motor and impeller or upgrading it too?

Sorry for continuing with the hijack Arnold.
Pete
 
sunnybob":2emzb6zp said:
I'm sorry, but I dont believe thats your workshop. I've seen dirtier operating theatres! :shock: :roll:

Thanks, but it doesn't look as neat now, as I am shuffling stuff from room to room as I sort through 20 years of accumulated stuff to determine trash or treasure prior to trips to the bulk recycling center.

Inspector":2emzb6zp said:
I've seen those pictures before on Sawmill Creek. Nice ducting but top of the line here. Way out of my price range, so is most everything else actually. :roll: Using the same motor and impeller or upgrading it too?

It was expensive, but I don't confuse cost with value. Once I made up my mind to go with the larger cyclone, the 120mm ducting became the limiting factor, so it and the 5-inch cyclone have to go. The only part of the DC system I'm keeping is the blower assembly, mainly because I can't fit a larger motor and blower in the closet. I had to build a 35-gallon dust collection bin out of 19mm plywood because the new cyclone won't fit with the existing 35-gallon plastic container.
 
Nice work!

MikeK":1wfqxcob said:
Here's a picture of my Dust Collection closet while I was building it. The contactor is in the small enclosure on the left edge of the picture. The output of the contactor goes to the red 3-phase receptacle behind the cyclone. The yellow plug is the separate connection for the thermal overload protection switch in the motor. If the thermal overload switch in the motor opens, or this plug is removed from the receptacle, the motor will stop and cannot be restarted by the remote switch.

DC_System-1 by Mike66GE, on Flickr
 

Latest posts

Back
Top