


Like many people I have to suffer with a single garage as a workshop. This inevitably gets filled up with all the other stuff that normally lives in a shed / garage, the lawn mower, bikes, garden tools ect so I set to building somewhere for this all to live.
The major construction details are below;
Concrete raft slab ontop of a DPM, 200mm in the corners raising to 150mm in the middle.
Three courses of bricks backed by a single course of blocks.
Softwood frame.
Green oak frame at the front.
Featheredge cladding.
Clay tile roof.
Dimensions - 3.4m long, 1.65m wide, 2.3m high.
A lot of the details have been borrowed from Mike G's workshop build over on The Wood Haven 2 forum, if you're planning a build its certainly worth a read.
All of the structural work is now complete so here is the build so far;
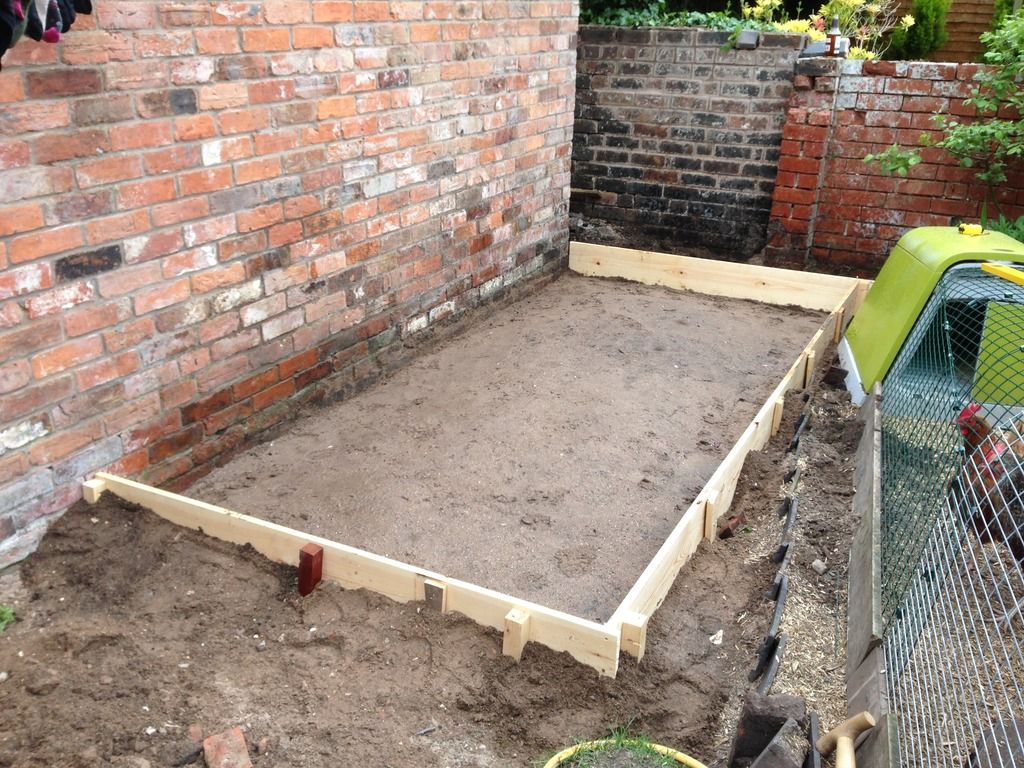
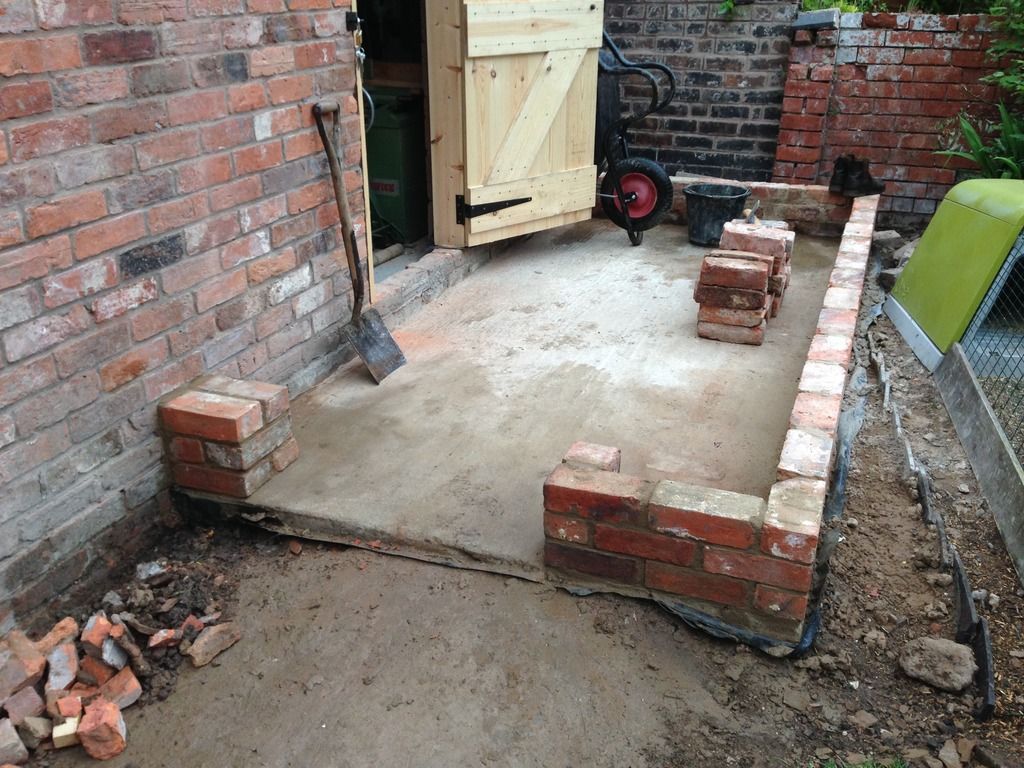
Formwork for the slab, there is approx. 100mm of MOT 1 and 50mm of sharp sand;
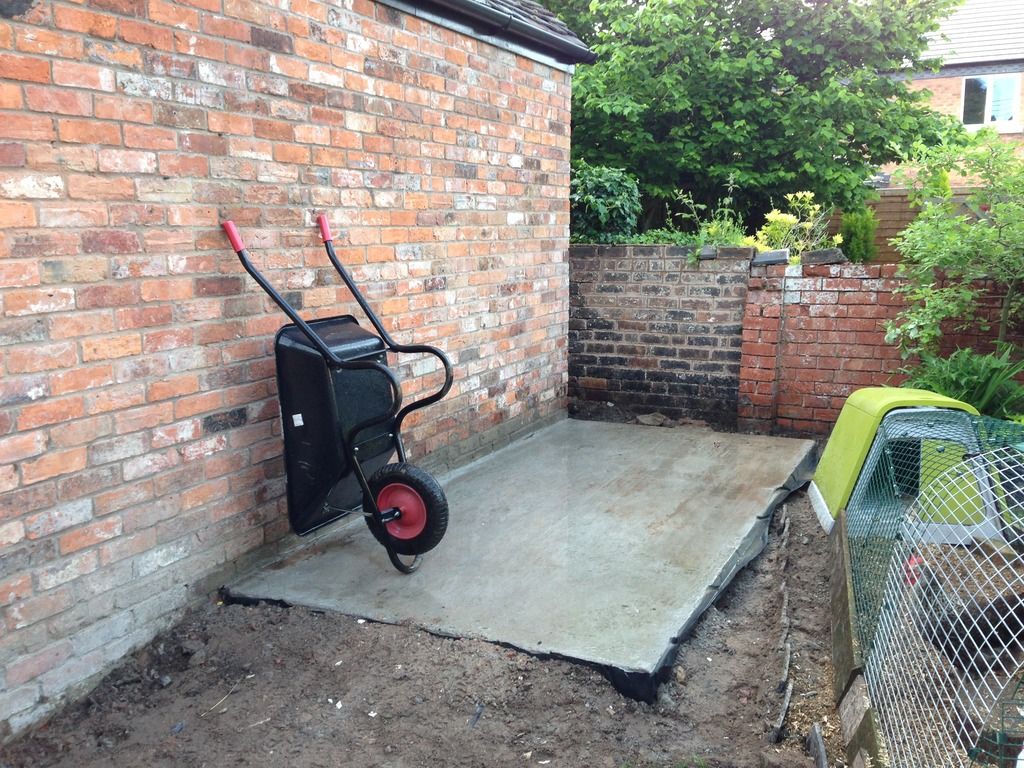
Concrete - I borrowed an electric mixer from a friend which cooked its capacitor half way through which caused a bit of stress!.. Another mixer was quickly hired and the concrete finished. It's not the best job but will do for this.
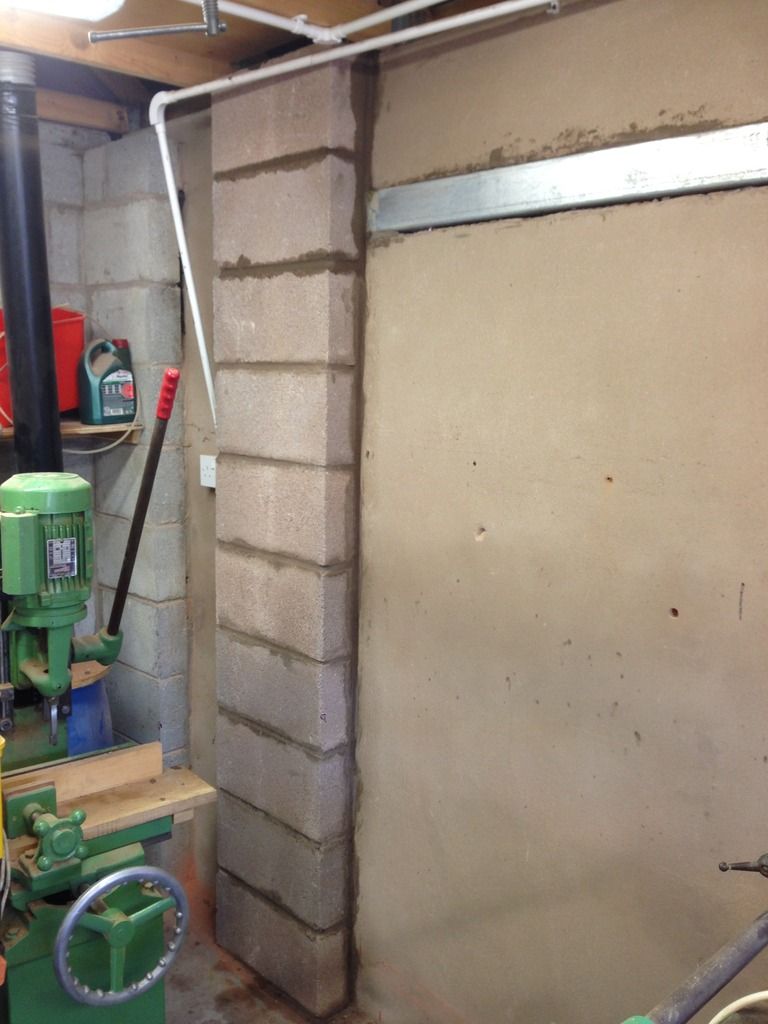
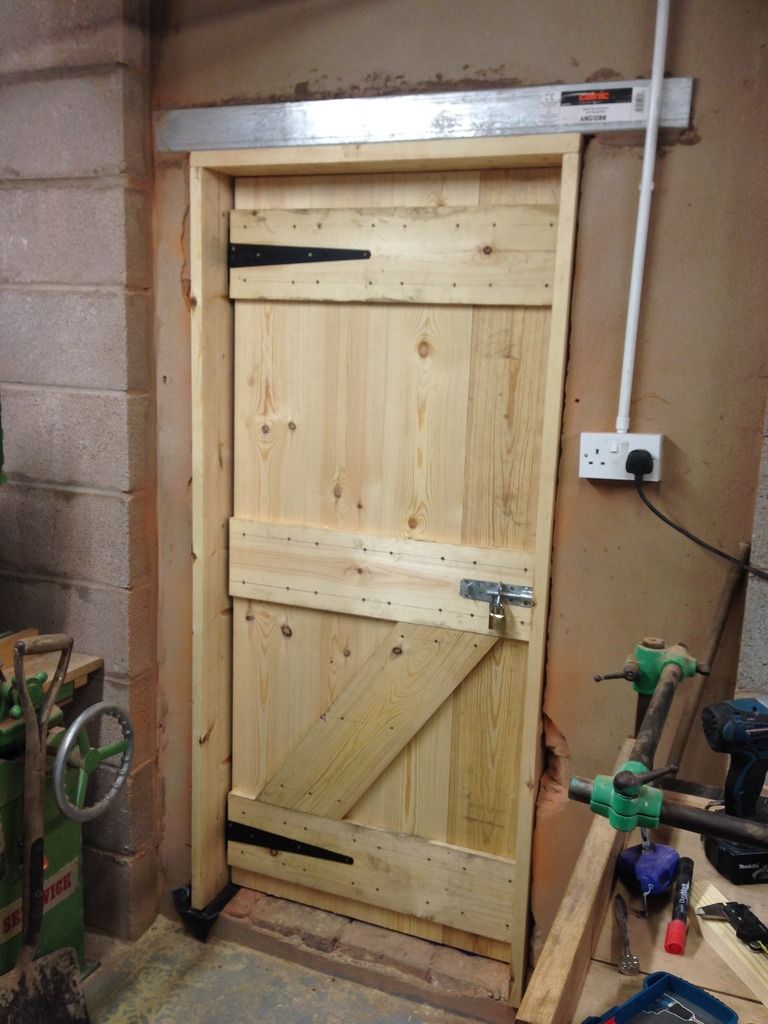
The only way into the garage was through the main door. This was a pain as to fit the cars on the drive one has to be right up against it, so every time I need in it's a matter of moving cars so a side door was required. A lintel was fitted and a blockwork pier built and tied into the existing wall using wall starters. The pier was perhaps not required but it can only add strength.
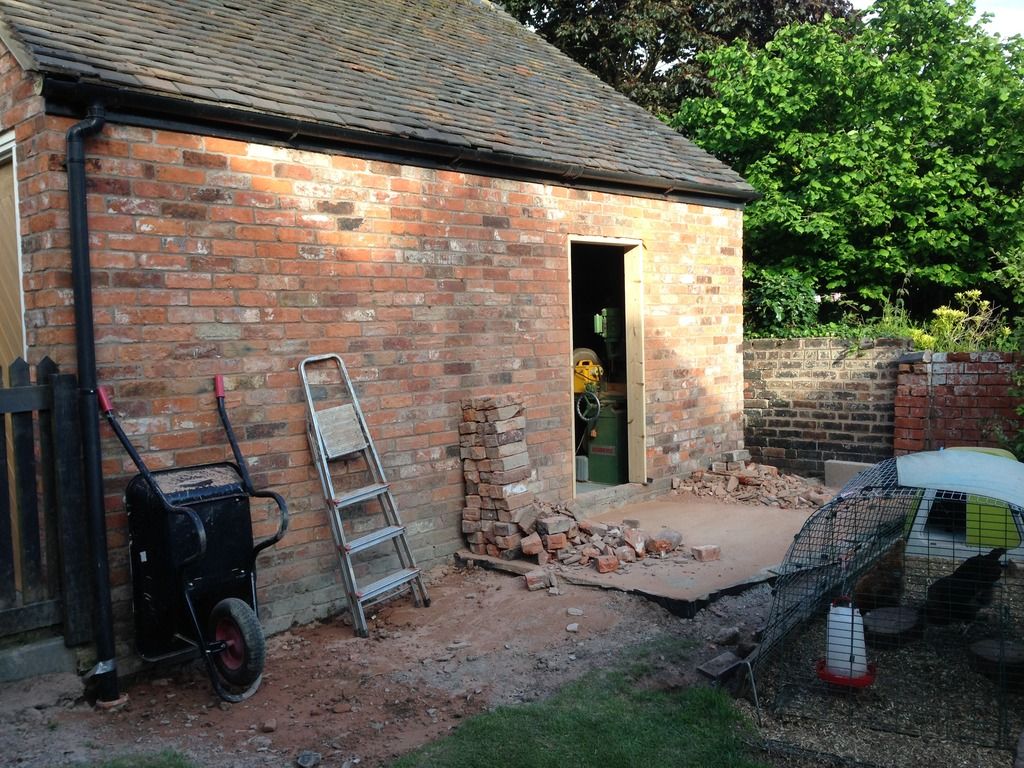
Doorway cut out and a temporary door fitted as it won't open fully when the rafters on are;
Brickwork - This was my first time laying bricks, they're Cheshire wirecuts which don't seem to have any straight edges. Again not the best job so don't look too close!
Galvanized ties were fixed to the slab then blocks laid on top.
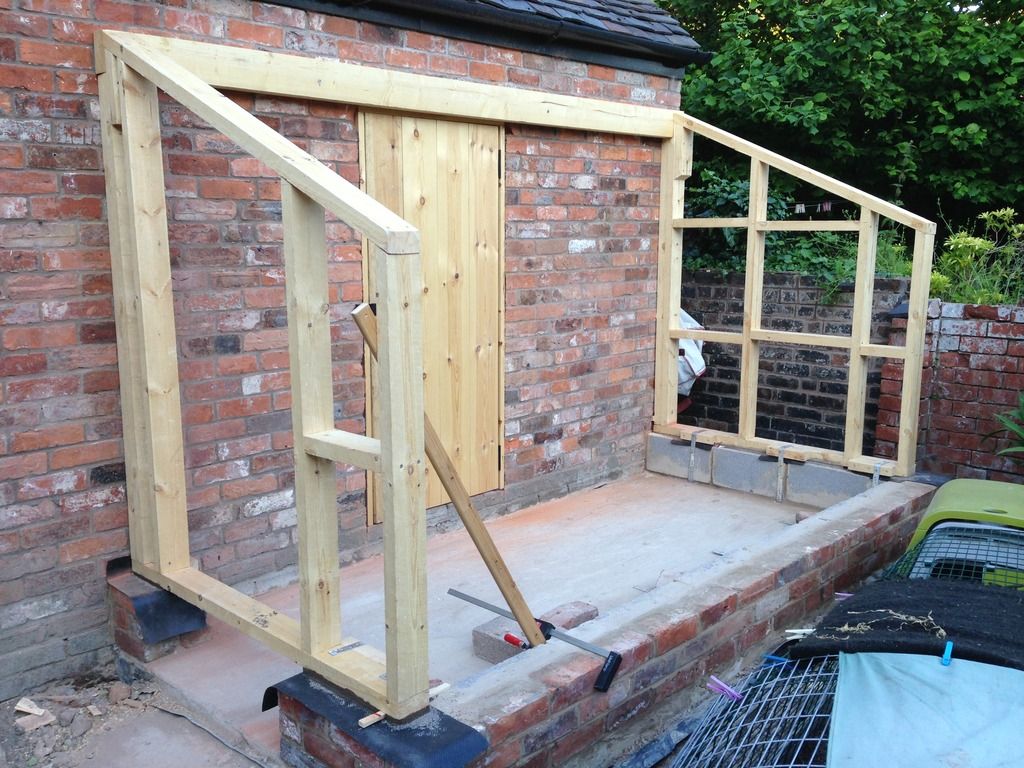
Framework - The end frames were fitted on a bed of mortar, strapped down with the ties and fixed into the wall. Originally i'd planned on using 50mm blocks however I couldn't find any so packing pieces were used to align the frame in the correct position. A 150mm x 75mm beam is fitted to support the rafters at the top.
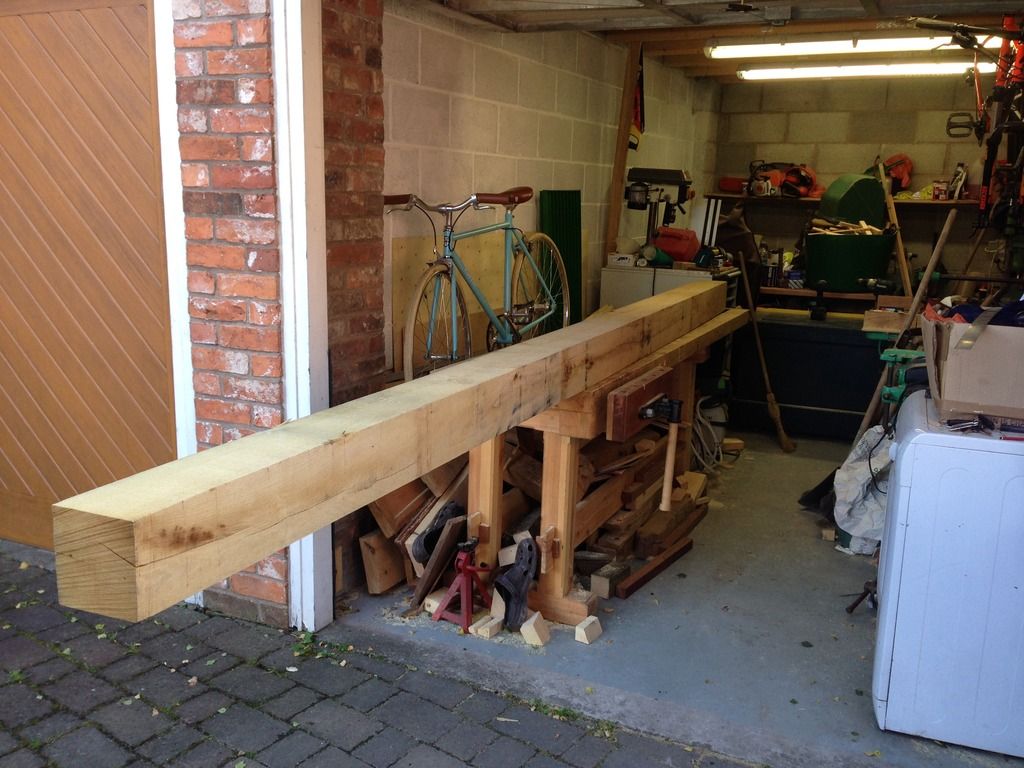
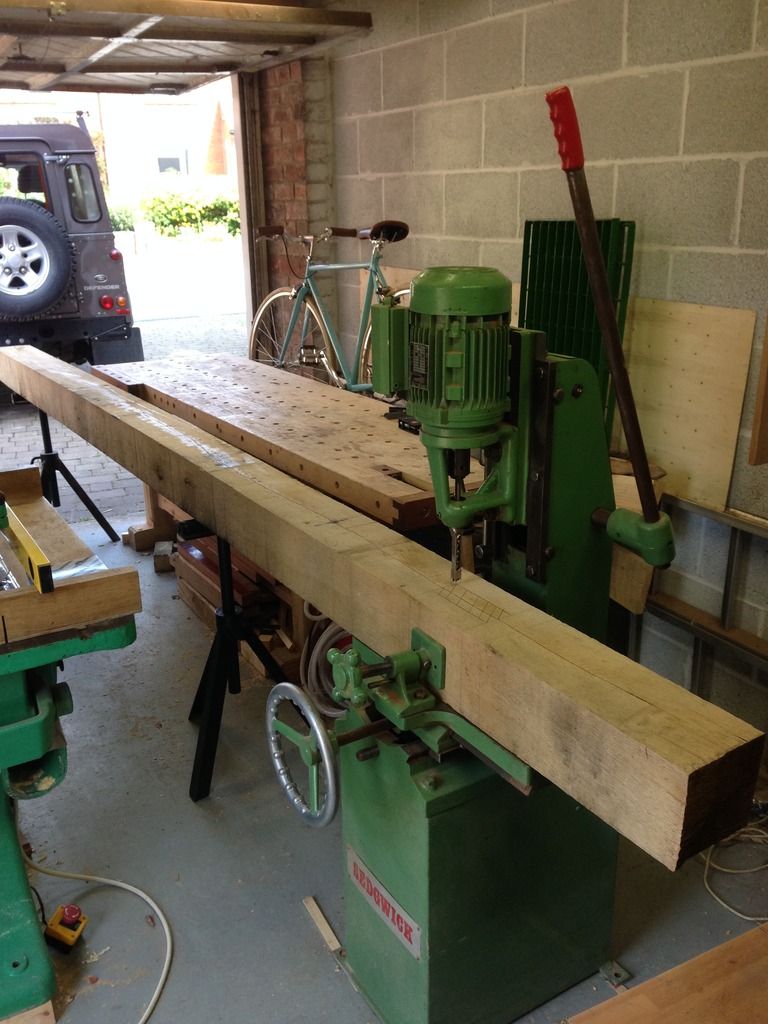
Next up is the oak frame, all in 150mm square green oak, here's a view of the horizontal beam on my 8' bench. :shock:
The mortices were nibbled away with my largest chisel, a 1/2" until complete, it beats doing it by hand!
While you can't see it the vertical members are located on stainless steel dowels glued into the masonry, a lead capping was positioned under each member to keep the moisture out.
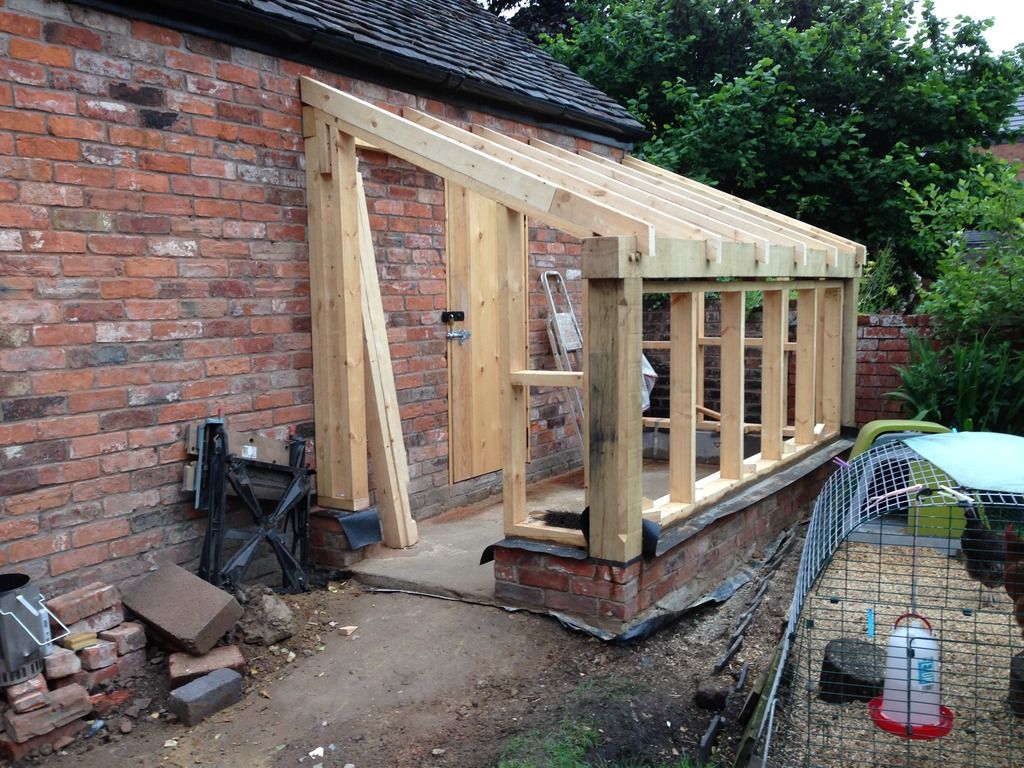
Oak frame in position with front framework and rafters;
I made a cock-up of the first birdsmouth which is why the rafter is in two parts! It's well supported by the frame underneath so shouldn't cause any problems.
Its hard to see from the pictures but all of the end rafters at approx. 25mm lower, this is to account for a bituminous sheet (ondutile) which will live under the tiles acting as a second roof as the low pitch of 24 degree's is below the minimum pitch for a plain clay tile.
The next step is to OSB the inside then insulate. (hammer)
The major construction details are below;
Concrete raft slab ontop of a DPM, 200mm in the corners raising to 150mm in the middle.
Three courses of bricks backed by a single course of blocks.
Softwood frame.
Green oak frame at the front.
Featheredge cladding.
Clay tile roof.
Dimensions - 3.4m long, 1.65m wide, 2.3m high.
A lot of the details have been borrowed from Mike G's workshop build over on The Wood Haven 2 forum, if you're planning a build its certainly worth a read.
All of the structural work is now complete so here is the build so far;
Formwork for the slab, there is approx. 100mm of MOT 1 and 50mm of sharp sand;

Concrete - I borrowed an electric mixer from a friend which cooked its capacitor half way through which caused a bit of stress!.. Another mixer was quickly hired and the concrete finished. It's not the best job but will do for this.

The only way into the garage was through the main door. This was a pain as to fit the cars on the drive one has to be right up against it, so every time I need in it's a matter of moving cars so a side door was required. A lintel was fitted and a blockwork pier built and tied into the existing wall using wall starters. The pier was perhaps not required but it can only add strength.

Doorway cut out and a temporary door fitted as it won't open fully when the rafters on are;


Brickwork - This was my first time laying bricks, they're Cheshire wirecuts which don't seem to have any straight edges. Again not the best job so don't look too close!

Galvanized ties were fixed to the slab then blocks laid on top.
Framework - The end frames were fitted on a bed of mortar, strapped down with the ties and fixed into the wall. Originally i'd planned on using 50mm blocks however I couldn't find any so packing pieces were used to align the frame in the correct position. A 150mm x 75mm beam is fitted to support the rafters at the top.

Next up is the oak frame, all in 150mm square green oak, here's a view of the horizontal beam on my 8' bench. :shock:

The mortices were nibbled away with my largest chisel, a 1/2" until complete, it beats doing it by hand!

While you can't see it the vertical members are located on stainless steel dowels glued into the masonry, a lead capping was positioned under each member to keep the moisture out.
Oak frame in position with front framework and rafters;

I made a cock-up of the first birdsmouth which is why the rafter is in two parts! It's well supported by the frame underneath so shouldn't cause any problems.
Its hard to see from the pictures but all of the end rafters at approx. 25mm lower, this is to account for a bituminous sheet (ondutile) which will live under the tiles acting as a second roof as the low pitch of 24 degree's is below the minimum pitch for a plain clay tile.
The next step is to OSB the inside then insulate. (hammer)
