


9fingers
Established Member
I've been experimenting with digital scales recently. Essentially these are a metal bar with a sensitive strip built into the top surface with a pattern that repeats every 0.2". A read head slides along the bar and using an electronic technique can measure the position of the read head to 0.001" or 0.01mm.
The read head is 75mm long and the supplied mounting bracket each obscure 12.5mm of the scale bar. So the device can only measure a total displacement of 100mm less than the length of the bar. Or can it?????
I started by removing the end brackets and as expected another 25mm (2 x 12.5) can be measured but I then found that the read head would continue to work until the bar had been with drawn up to nearly 50mm after which the display read gobbledegook.
So I concluded that the bar could be extended by say 60mm at each end (50 +12.5 less a safety margin) and set about doing this.
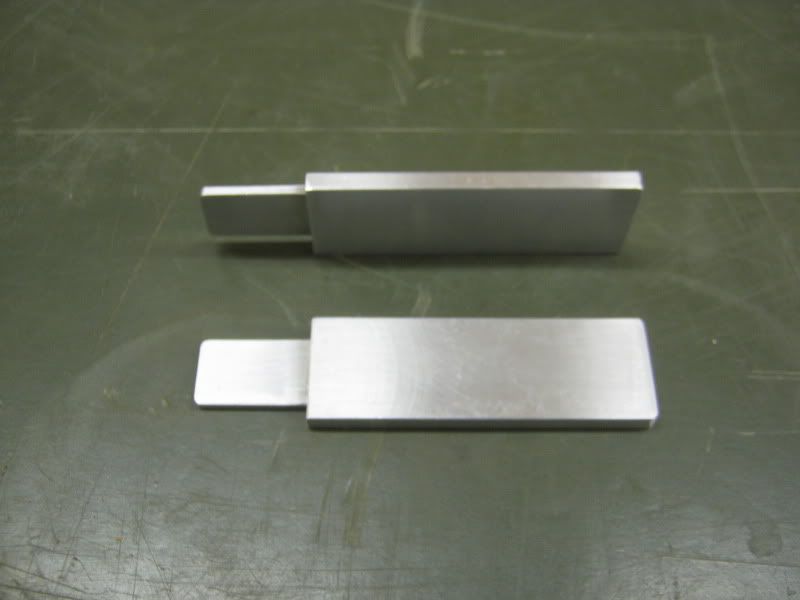
The bar cross section is 20mm x 4mm but I only had 1" x 0.25" ( most aluminium bar is still sold in imperial dimensions)
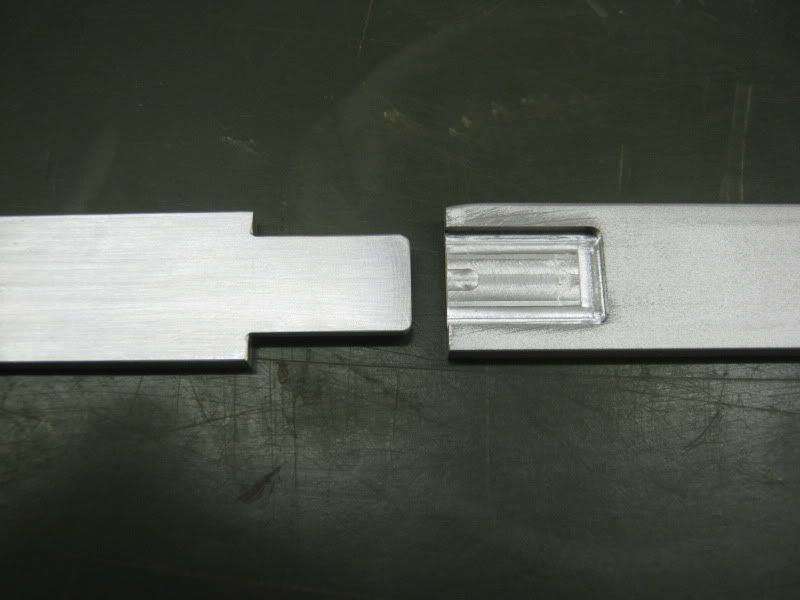
So some careful machining brought it down to size whilst keeping it flat and straight. Metal can be like wood in that it has stresses in it and is best machined with equal amounts removed from each side. I then cut a 2mm thick tongue on one end of each extension and a matching recess in each end of the back of the scale. The recess was abut 0.001" deeper to allow for a film of epoxy to glue the two parts together and yet provide a smooth surface back and front.
Two extensions
Recess in the scale rear and matching extension
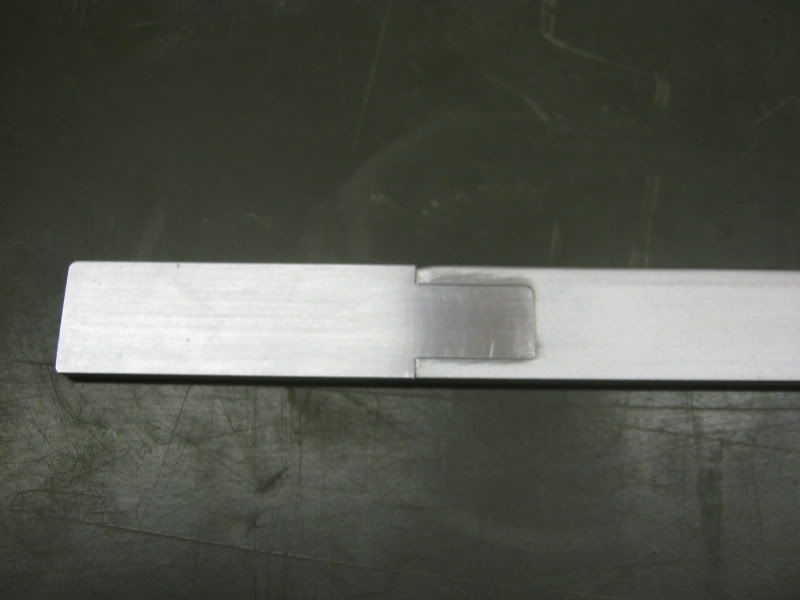
All the surfaces to be joined were thoroughly degreased and some slow setting epoxy mixed. I have no faith in the quick setting stuff for long-term use. A trial fit squeezed out any excess glue which was then removed and to pieces re-assembled and clamped against straight edges.
Assembled - rear view
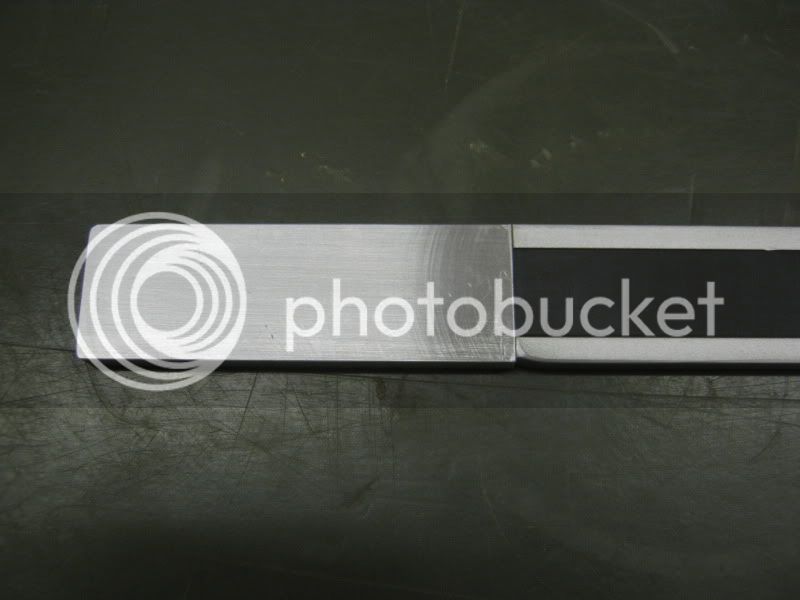
Assembled - Front view
Now to see if it works....
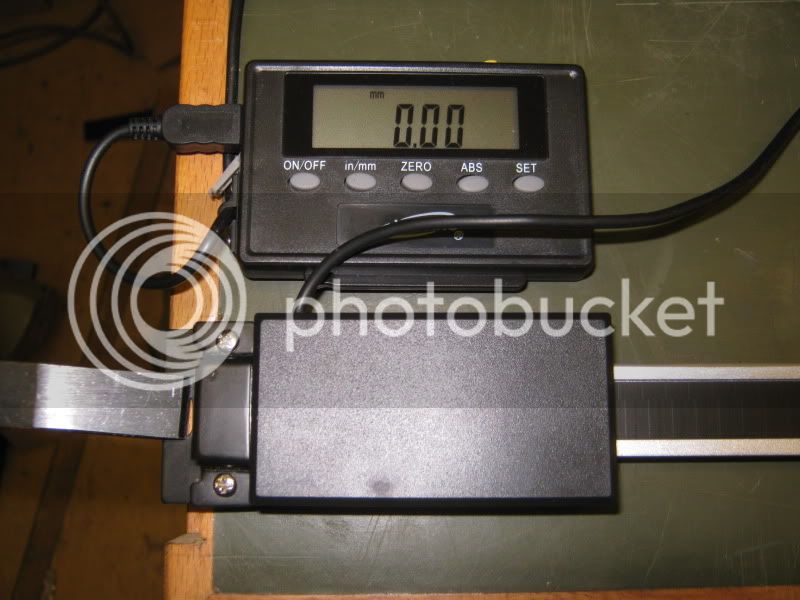
I clamped an end bracket to the bench and ran the read head to the left most position and set zero
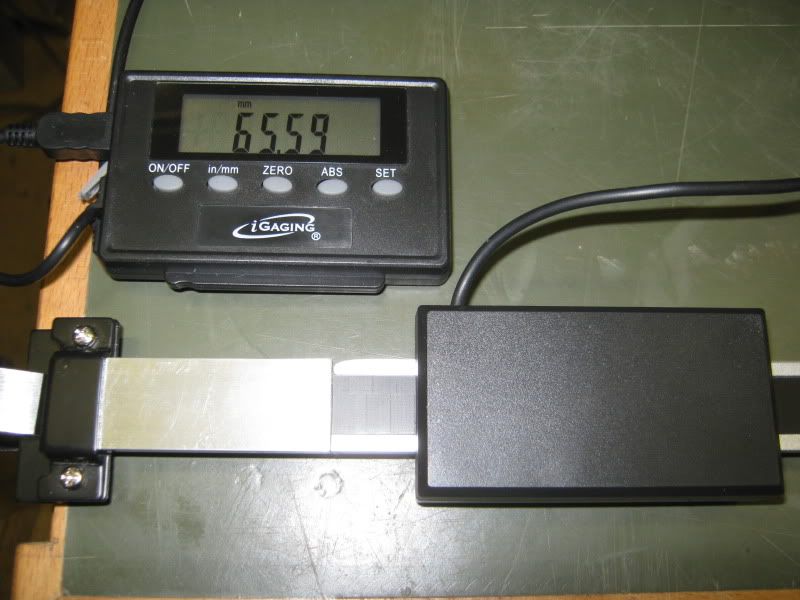
Moving to the right and over the first join
flipped the scale end for end and into the end clamp
over the other join and to the end stop

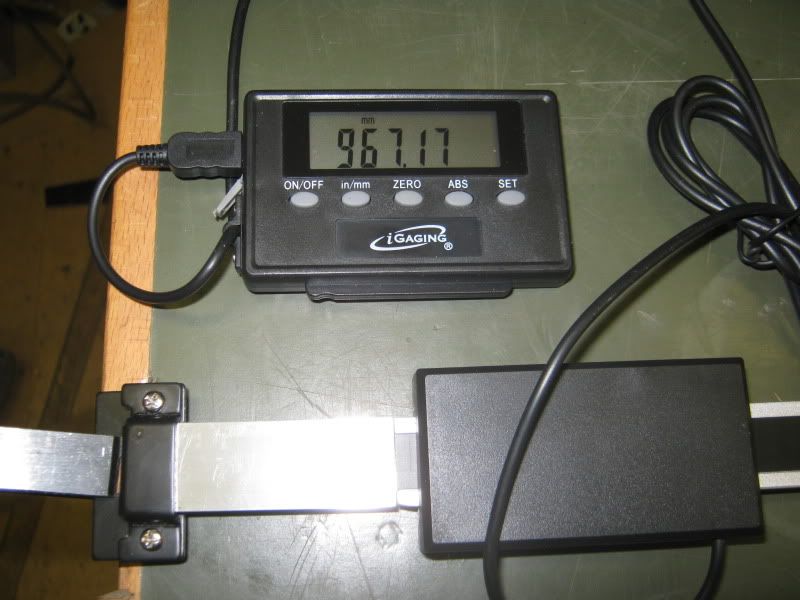
Result! a 900mm scale indicating 1020mm! an extra 120mm of useful operation.
Toward the end of my research I did find a web reference to a gunsmith who had come to the same conclusion as I had so I can claim true originality but you will have to believe me that I came up with the scheme before looking on line")
This is quite an exacting project and needs access to metal machining facilities but as the maximum length scales currently made by that company are a little short for some table saws, the extra might just be worth the work. I did it mainly for academic interest.
Maybe one day I will have a go at joining two scales end to end and see how small I can get the error.
Once the epoxy has fully cured, I'll do a WIP on fixing the scale to my saw.
Bob
The read head is 75mm long and the supplied mounting bracket each obscure 12.5mm of the scale bar. So the device can only measure a total displacement of 100mm less than the length of the bar. Or can it?????
I started by removing the end brackets and as expected another 25mm (2 x 12.5) can be measured but I then found that the read head would continue to work until the bar had been with drawn up to nearly 50mm after which the display read gobbledegook.
So I concluded that the bar could be extended by say 60mm at each end (50 +12.5 less a safety margin) and set about doing this.
The bar cross section is 20mm x 4mm but I only had 1" x 0.25" ( most aluminium bar is still sold in imperial dimensions)
So some careful machining brought it down to size whilst keeping it flat and straight. Metal can be like wood in that it has stresses in it and is best machined with equal amounts removed from each side. I then cut a 2mm thick tongue on one end of each extension and a matching recess in each end of the back of the scale. The recess was abut 0.001" deeper to allow for a film of epoxy to glue the two parts together and yet provide a smooth surface back and front.
Two extensions
Recess in the scale rear and matching extension
All the surfaces to be joined were thoroughly degreased and some slow setting epoxy mixed. I have no faith in the quick setting stuff for long-term use. A trial fit squeezed out any excess glue which was then removed and to pieces re-assembled and clamped against straight edges.
Assembled - rear view
Assembled - Front view
Now to see if it works....
I clamped an end bracket to the bench and ran the read head to the left most position and set zero
Moving to the right and over the first join
flipped the scale end for end and into the end clamp
over the other join and to the end stop
Result! a 900mm scale indicating 1020mm! an extra 120mm of useful operation.
Toward the end of my research I did find a web reference to a gunsmith who had come to the same conclusion as I had so I can claim true originality but you will have to believe me that I came up with the scheme before looking on line
This is quite an exacting project and needs access to metal machining facilities but as the maximum length scales currently made by that company are a little short for some table saws, the extra might just be worth the work. I did it mainly for academic interest.
Maybe one day I will have a go at joining two scales end to end and see how small I can get the error.
Once the epoxy has fully cured, I'll do a WIP on fixing the scale to my saw.
Bob