Stickley Morris Chair - finished

UKworkshop.co.uk

Help Support UKworkshop.co.uk:

This site may earn a commission from merchant affiliate links, including eBay, Amazon, and others.
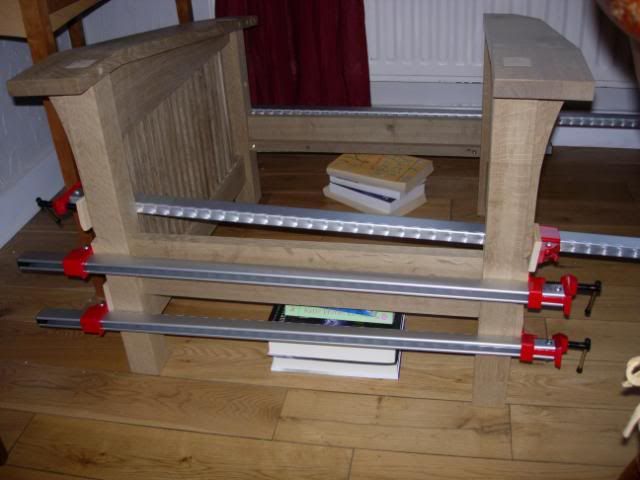
Getting close to the finish now, I had my 2 halves of chair which needed bringing together. A test fit of the joints showed that they were a lot tighter than I remembered, combine this with my assistant being away and I knew I was in for some pain.

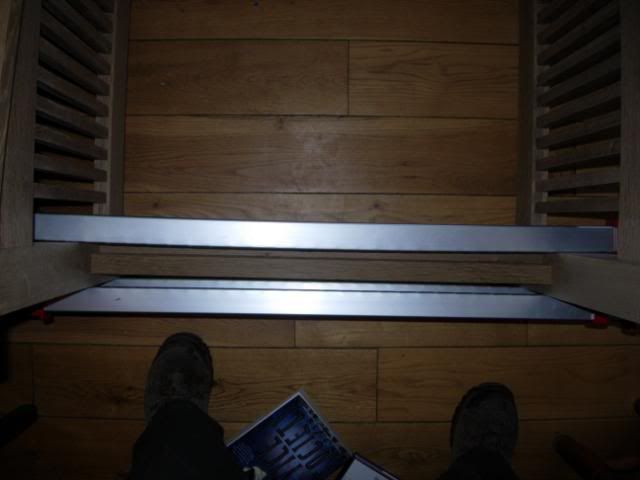
Went for the alu clamps again as they'd worked well before and are easier to manhandle on your own - think I pretty much tested them to the limit and should have gone for the steel ones. Took quite a while to get them in and a lot swearing, but finally had a chair shaped object.

morris95.jpg


You can see (just about) that I was on the limit for these clamps, as they had a visible bend in them.

morris96.jpg


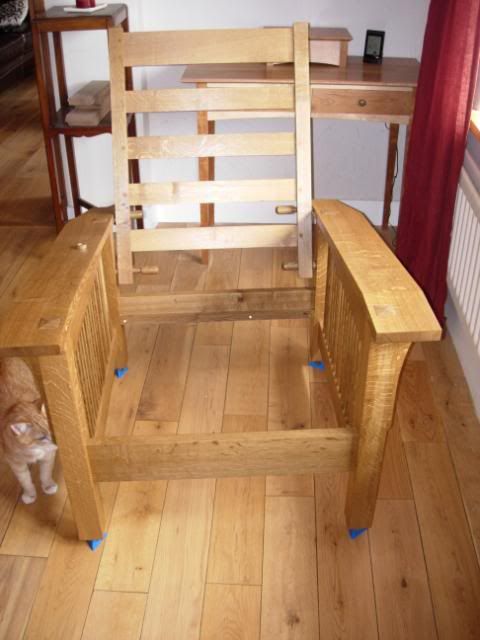
Before going to the finish I knew I had to effect a small repair at the top of the legs on one side. I was struggling to get a perfect fit when assembling leg, rail and arm, the key problem being a slight bow in the length of the rail that had appeared over a period of months. Almost imperceptible but it was there and nothing I could do about it. The upshot was that there was a slight gap at the top of the legs where they met the arm, approx 1mm at the back and 1.5mm at the front. I could have tried removing bits of wood in the joints to try and fix, but my worry was that I'd end up with a sloppy joint, at least I could have a (very) tight joint with repairable gap.

This is where my set of legs that went wrong came in handy, cleaned up a section and took one to the tablesaw, removing 2 very thin slivers that just needed trimming to fit. This was the end result, not too bad and in a spot that in normal use won't get seen - but I would have known was there

morris97.jpg


You can also see another of the oak dowels there. That Clico forstner really is the dogs danglies, perfect holes every time and there were 30-40 across the chair and stool.

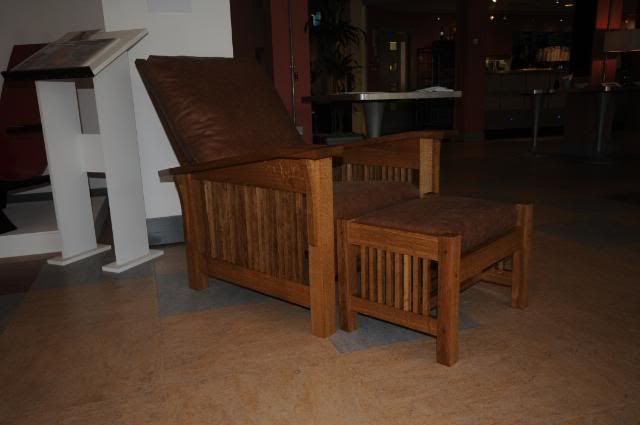
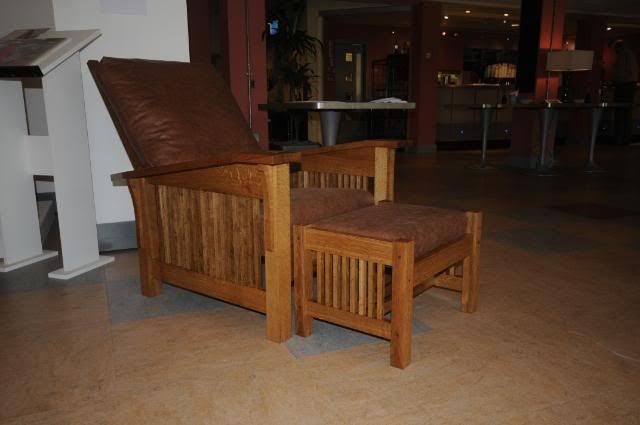
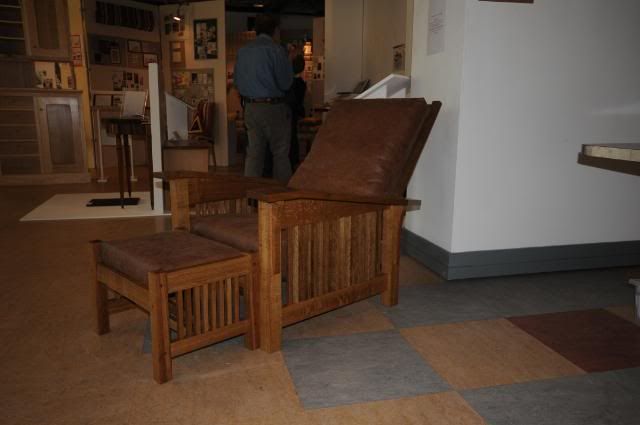
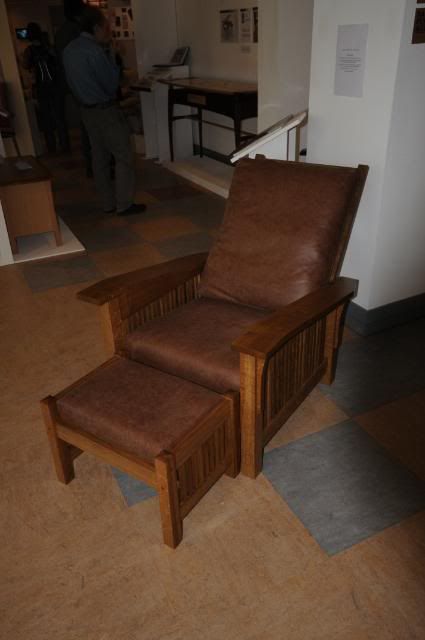
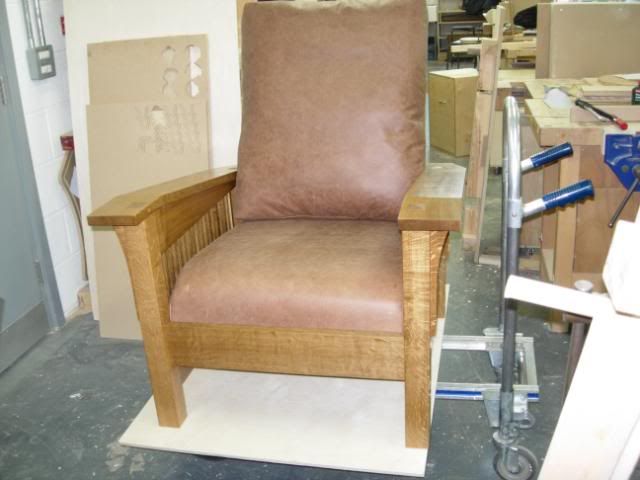
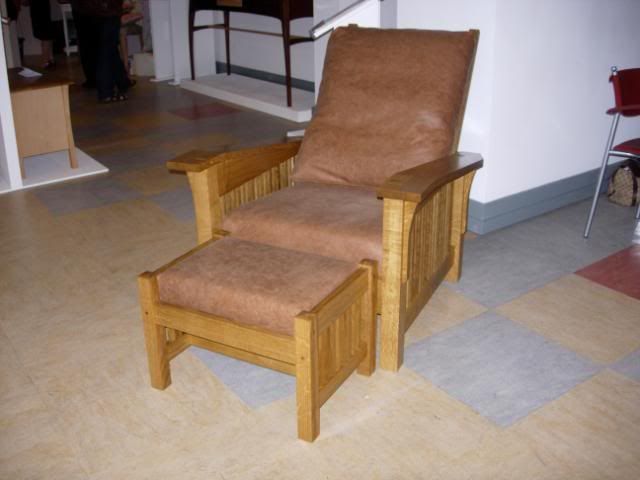
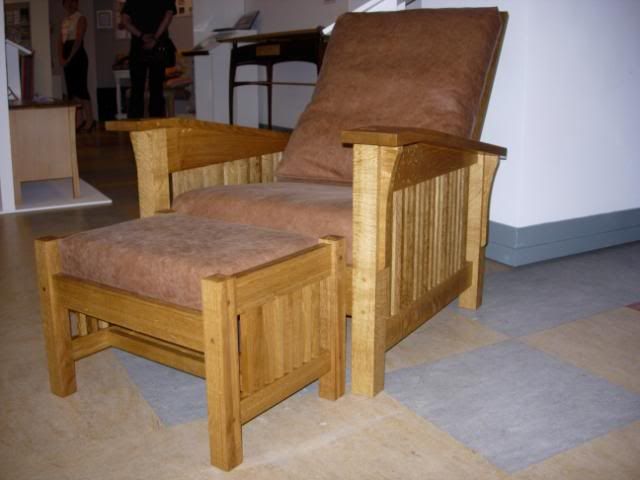
Finish was with Liberon Superior Danish Oil after sanding to 320 grit. Pictures here are after coat number 4 and it's coming out beautifully. Next coat is to be applied with 320 grit paper to smooth and fill and pores that might still be open (this oak has been pretty thirsty), final coat is to be number 6 which will be applied after it comes back from the upholsterer to have to cushions made and fitted. The upholsterer is a local chap who is an ex-student of Leeds College, his website shows some pretty impressive pieces.

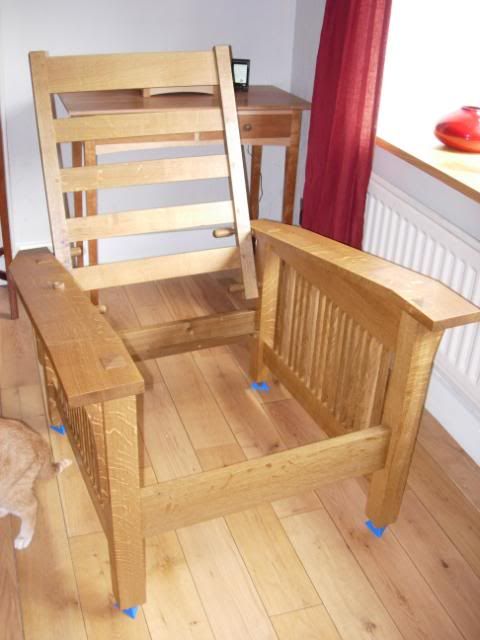
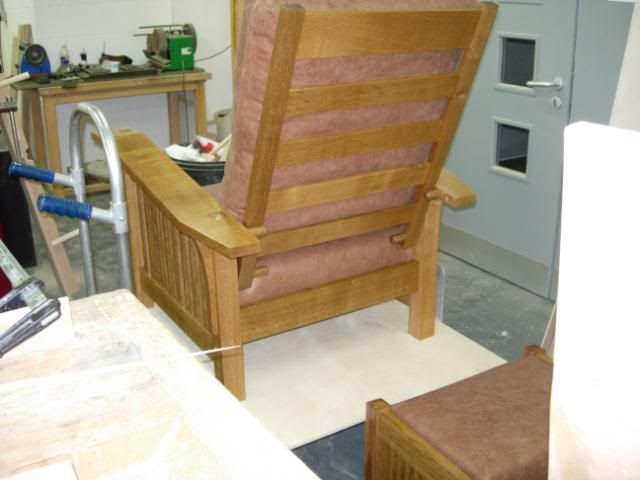
You can see from the pics that I was trial fitting the back, this showed I needed to sand down the washers a little and gave me the correct length for the pivot and adjustment pins. Hopefully the next time you see this it will have the final finish and cushions - aiming to get it done in time to display at the college's end of year show

morris98.jpg


morris99.jpg
 
Lovely work mate, but come on you tease lets have a look at the Cobra. Where did you buy the kit and how much is yours up for?

Cheers

Mike
 
Cobra now sold Mike and I bought it ready built (second hand), will dig out a picture and stick it up. Now on the hunt for a TVR :twisted:

Got the chair and stool back from the upholsterers today, finished in a beautiful aniline leather. Last coat of finish went on tonight and it's off to the college end of year show tomorrow. Will post up pictures when it's all back together
 
Ironballs":km75a6id said:
Cobra now sold Mike and I bought it ready built (second hand), will dig out a picture and stick it up. Now on the hunt for a TVR :twisted:

Good choice this is mine <--- cerbera speed six 4.0l.
 
Test drove a Tamora today, life will never be the same again. Not sure how I walked out of the showroom without buying it
 
Yep they are very addictive cars, had mine 5 years now don't think I will ever sell.
Have a look on www.pistonheads.com on the TVR forums lots of helpfull advice on there and the TVR club website.
 
Right, enough TVR talk (for the minute).

My chair is finished and was finished in time for the college end of year show, many thanks to Ian Hackett at Holme Upholstery for a quick job - and proper pro job.

Here's my chair en route to the display

DSCN3179.jpg


DSCN3180.jpg


Had to do a last minute adjustment on the adjuster pins to reduce the shaft length a little.

And here it is in situ, taking pride of place at the entrance to the show area - next to some awesome work from the degree students, there are some very talented designer makers there.

Got some nice comments and an offer of marriage from one lady who was a fan of Stickley furntiure. Best of all the in house customer loved it when I finally got it home and she sunk into the soft leather. I think she may be angling for a reclining prairie settle next. pipper....

DSCN3181.jpg


DSCN3182.jpg


DSCN3182.jpg
 
That looks great with the foot stool, nice work! Its definitely given me pause for thought of what to build next... a desk, or one of these stickleys...

The only thing that I would have changed is the colour of the upholstery. I would have gone for something with a little more contrast to bring out the wood, however that is purely a personal taste issue, and doesn't detract from the fine work you have done to produce such a wonderful piece.
 
Yep deliberately went for that colour, but dark browns and reddy browns also go well - the one in the plans had green cushions in the picture.

I would love to do a mission style prairie settle, I just can't bring myself to machine all those bloody spindles and then fit the smeggers at glue up. One of the hardest glue ups I've done.

Stickley style furniture does lend itself to machine batch production, which may not fit with your hand tool approach - though you could do your take on the craftsman/arts and crafts style...........
 
Good job Damian. I agree with BB about the colour of the upholstery, it looks a bit insipid to me, but it's a very personal thing.
What about a nice Ferarri red, or BRG? - Rob
 
That is lovely mate. Excellent job.

It really does look like one of them chairs you want to sit in.
 
thanks a bunch mate

loml has just said - "you could make a pair of those, couldnt you ?" Honest answer: Well i could if I wasnt comuting three hours a day and didnt have the woodworking skills of a small wombat ! , Answer given " yes dear - i'll put it on the list" (at the bottom where hopefully it will be forgotten about)

very nice work - and if i do try and make a set i'll know who to bother with stupid questions
 
Ironballs":3klvtlwc said:
Yep deliberately went for that colour, but dark browns and reddy browns also go well - the one in the plans had green cushions in the picture.

I would love to do a mission style prairie settle, I just can't bring myself to machine all those bloody spindles and then fit the smeggers at glue up. One of the hardest glue ups I've done.

Stickley style furniture does lend itself to machine batch production, which may not fit with your hand tool approach - though you could do your take on the craftsman/arts and crafts style...........

Fantastic job Damian.

For me - the leather would have to be oxblood\blood red - but that's just me. As for the mission style prairie settle - that's high on my list of things (furniture wise) along with the matching chairs.

As BSM put it - I too know who to bug with the daft questions. :wink:
 
Fantastic! I agree with the other comments on the colour of the upholstery but, I wouldn't know what else to suggest and the flash (?) on your camera may not give an accurate sense of colour?

The oak's come out very nicely as well.

Anyone can make a comfy upholstered chair... :D Now, try making a comfortable wooden one!! :wink:
 
Damian - :shock: :shock: :shock: :shock: ....fantastic work, brilliant skills, wonderful patience AND a sports car owner............................


GIT!!!!! :wink: :wink:

Well done fella

Mark :D
 
Not currently a sports car owner Mark, as I'm now Cobra-less, having another look at a TVR today though :D

Thanks for all the kind comments chaps, technically it's not a difficult project being M&T joinery all the way, but you do need to be accurate. And patient. Especially with those spindles. The project would have been a lot quicker if I hadn't had to find whatever waney Q-sawn boards I could get to ensure I had the figure I wanted.

Feel free to comment on the colour, as it's very much an individual choice, however I took some more photos with the new DSLR (still getting to grips with it) as my little Coolpix can overexpose with the flash and it's also having difficulty producing crystal clear pics lately. The photos below are a more representative view of the colour - of the upholstery and timber. A bit darker

DSC_1054.jpg


DSC_1055.jpg


DSC_1056.jpg


DSC_1057.jpg


It is also the most comfortable chair too, very easy to nod off in. Mrs IB loves it and spends every possible moment sat in it - so much so that she's wanting to oust one the sofas from the living room. What have I done....
 
That's a bostin' job IB

It just looks the part.. Well done.
And please... What the heck is a 'smegger' when it's about?

Got me flummoxed. Mind you I had to look up 'corbel'!

:wink:
Regards
John :)
 
Back
Top