scratch stock - in the rough

UKworkshop.co.uk

Help Support UKworkshop.co.uk:

This site may earn a commission from merchant affiliate links, including eBay, Amazon, and others.

condeesteso

Established Member
Joined
10 Mar 2011
Messages
1,929
Reaction score
2
Location
Sevenoaks, Kent
Still working on this, but based on a budget marking gauge (in my case Wickes, about £7, beech, plastic lock screw...). I started by removing the pin and just cutting a slit in the end to take a 2mm blade (some steel I had around, which might be off a nasty v cheap plane), and using a screw threaded straight into the beech to lock the blade - one of those screws that fixes switch-plates to the wall.
That established that I was heading where I wanted. Next a new bar (proper name please?), beech again, with thin kerf 1mm (for ex bandsaw blades).
And a longer fence - happens to be oak, just what was around (the moulding was already on it, way too soon to make this pretty!)

Next steps:, the fence is too deep, the length helps but depth doesn't, especially if you want to hold the stock in a vice. Also the depth of fence is a bit irelevant as 'square' is how well you set (make, even) the blade, and that is quite variable. In practice, if one side cuts deeper than the other, I'll probably look at adjusting the blade relative to the stock - taps etc, like an old plane.

For narrower beads I need one like Garrett Hack's on his video, so I should end up with one pair. In the end I'll try and make them pretty - but not till they work for me first.

Any hot tips and tune ups please - most of this has been guesswork and looking at articles etc. I'm happy a really cheap marking gauge is a good starting point for what I wanted though.
 

Attachments

  • scr2.jpg
    scr2.jpg
    164.7 KB · Views: 1,819
  • scr3.jpg
    scr3.jpg
    147.3 KB · Views: 1,819
  • sc1.jpg
    sc1.jpg
    117.1 KB · Views: 1,819
Nice looking, especially for a prototype.

I'm not sure why you needed the long fence. I have this Veritas scratch stock:
05p0401g1.jpg

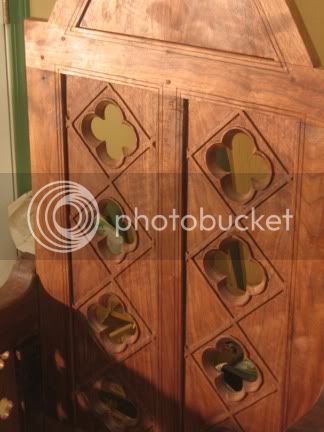
It's got plenty of body for use against and edge, and is short enough to get close to inside corners, like the incised lines around these panels:
back_closeup2.jpg


Is there a particular advantage to the long fence?

Kirk
 
condeesteso":2rwx71qk said:
Still working on this, but based on a budget marking gauge (in my case Wickes, about £7, beech, plastic lock screw...). I started by removing the pin and just cutting a slit in the end to take a 2mm blade (some steel I had around, which might be off a nasty v cheap plane), and using a screw threaded straight into the beech to lock the blade - one of those screws that fixes switch-plates to the wall.
That established that I was heading where I wanted. Next a new bar (proper name please?), beech again, with thin kerf 1mm (for ex bandsaw blades).
And a longer fence - happens to be oak, just what was around (the moulding was already on it, way too soon to make this pretty!)

Next steps:, the fence is too deep, the length helps but depth doesn't, especially if you want to hold the stock in a vice. Also the depth of fence is a bit irelevant as 'square' is how well you set (make, even) the blade, and that is quite variable. In practice, if one side cuts deeper than the other, I'll probably look at adjusting the blade relative to the stock - taps etc, like an old plane.

For narrower beads I need one like Garrett Hack's on his video, so I should end up with one pair. In the end I'll try and make them pretty - but not till they work for me first.

Any hot tips and tune ups please - most of this has been guesswork and looking at articles etc. I'm happy a really cheap marking gauge is a good starting point for what I wanted though.

shaft
 
thank you - shaft it is then!. I have often almost bought the Veritas, and that would be the end of that - anything Veritas I ever get is good, often extremely good.
The only thing with the longer fence is when the cutter is further from the face, I manage to keep it tracking more accurately. It's probably not impossible with the shorter fence, but I wanted to try it longer. And I haven't found a down-side to its length yet... if I do it'll get shortened. Actually, as it evolves it may get ever closer to the Veritas.
I did this partly to replace a shoddy earlier version, and also because I consider scratch stocks to be traditionally shop made - OK I cheat with the Wickes gauge! But so far I'm in for about £7, the Veritas is £55 :)
 
Hi Douglas

Great start my friend.

Re the fence...perhaps this could be made detachable....then you could put different sizes of fence on depending on the job. If it registered ok and remained square that is.

Can't wait to see the results of ths scratchings!

Cheers

Jim
 
condeesteso":1jlrh5xz said:
...Actually, as it evolves it may get ever closer to the Veritas.
I did this partly to replace a shoddy earlier version, and also because I consider scratch stocks to be traditionally shop made - OK I cheat with the Wickes gauge! But so far I'm in for about £7, the Veritas is £55 :)

I agree that shop made would be best--I bought mine a long time ago, and would probably make one now instead. (I think it was about $30 back then--they're showing $57 in the US now). I've never had a serious issue keeping it straight, but I suppose some cutter shapes and wood species could have a more of a problem.

As far as tips on use, just take light cuts to start. A little patience goes a long way. But then, if you weren't patient, you'd be using a rounter and have a different design.:)

Kirk
 
A million thank yous for posting this with such detailed pictures. In the near future I've got to copy a short section (about a metre) of moulding in our house to replace a bit that's missing and I was going to try and make something like this. The one bit that still confuses me though is how the cutter is made. I'm guessing you just file a piece of steel into shape? Is the end left square or do you put a bevel on it, I can't quite tell from the photos but it looks slightly bevelled. How thick should the steel be, I'm guessing yours is a little under 2mm.

Cheers, Graham
 
I have had the pleasure of playing with these scratch stocks this afternoon...as Douglas is nearby, and I have to day that the finish and ease of use are superb...especially since this is only a prototype.

I have not had the need to use a scratch stock before but I think this is something I will be investigating and developing as part of my arsenal. Very impressive piece of kit!

Jim
 
I agree the Garret hack video is a must see - I was making the mistake of failing to polish the profile of the cutter. A fine file isn't near enough. The 2 keys to a great cutter are super square (edge to flat, 90 degrees or really close); and a polished surfaces, all 3, both sides and formed profile. I don't have an assortment of slips that are fine enough, so was using v fine wet&dry wrapped round any suitable shape. Various screwdrivers for rounds, and old Stanley blades for vees etc.
I made a little one like Garret's as well as the ones in pics - am very happy with results (will take a couple of pics today).
To be honest the longer fence is prob not a big deal. I expect the Veritas works really well, but if the cutter is further from the head, I do find it easier to track esp if the grain is less than straight . I also suspect that if I get ambitious and make a wide cutter profile (40mm say) the fence will be more helpful. So it isn't a must have, but I don't see a downside. I must reduce fence depth though as that is not useful or helpful.
Sharpening tip - I mounted a small clamp-fix vice onto a bit of L shaped stock, so I can drop the jaws down to just above bench height. When filing and polishing I can use the bench top as a reference for 90 degrees (left hand finger as depth stop, sliding over bench) - it's a development of the way I hone 90 degrees on cabinet scrapers - and I think you can get really close repeatable results with a little practice. Lube the w&dry with spit - no matter how close you keep your WD40 or whatever, spit is always closer ;)

more news as it breaks...
 
Here's the small Garrett Hack style one I made. For the moment it's beech with an M4 that was lying around - the bolt is just threaded straight into the beech as it cuts its own thread fine (bit of linseed oil makes it smooth).
The test beading was on an old bit of pine (might be pitch, not sure) and I was pleased with the result. Obviously getting the blade exactly against the fence is a little tricky, the 6" rule was used to slip in the slot and nudge the blade very small amounts.
Blade stock is tired 1" bandsaw - I have a lifetime's worth as each blade is 12 feet long. If anyone needs any bits (each about 1 foot long) get in touch, i'll mail some out (OK Jim, yours are aside already). I can hacksaw this stock, cutting off teeth just behind them, as they are locally hardened, the rest of the band is workable but hard and springy enough to take a good edge.
The posh version will be the bog oak (kindly donated by Jim). He warned me it's a blade killer, but my LN block took whisper shavings no problem at all. (In my humble opinion, they are extremely good little planes.)
The brass screw was scrounged from Tony at Marples and will need a brass bar extension.
As with all cutting tools, almost all the difference is in the blade... which I am getting better at making sharp.
 

Attachments

  • scratch2.4.jpg
    scratch2.4.jpg
    176.7 KB · Views: 1,561
  • scratch2.3.jpg
    scratch2.3.jpg
    149.8 KB · Views: 1,561
  • scratch2.2.jpg
    scratch2.2.jpg
    120.7 KB · Views: 1,561
  • scratch2.1.jpg
    scratch2.1.jpg
    165.6 KB · Views: 1,561
Fantastic updates Douglas and glad to see that the offcut of bog oak is going to turn into something beautiful. I think if you try turning that stuff you will see what I mean...but then I use old technology steel so maybe the posh steel is the way to go! :mrgreen:

I look forward to the continued development of this project...in between fixing up the giant sander...I have been cutting some yew....sap and heart in strangely "bowsaw" shaped bits...

I think you might be interested in that little tangent...WIP coming soon!

Jim
 
J - the clue was always in the name... bow saw tells us all how to make it. You're on to a cracker... needs a v stiff stretcher though, hickory may be good, but pit props are chestnut and they hold mother earth up but they are a tads thick. Over to you, you know what to do. You should see the new scratch-stock with the bog-oak, and a lemonwood face to the fence, and Marples brass screw - looks better than Caddie who does SE weather, and Caddie makes even the bad weather look nice :)
 
It's done, working, cutting nice. V3 is now on the bench... you know how wenge, birds-eye maple and lemonwood look nice together?

Meanwhile, if anyone else is interested, here's Kaddy with yet another sunny tuesday. Good grief.
 

Attachments

  • Picture 5.png
    Picture 5.png
    161.7 KB · Views: 643
V2 working well and looking nice, V3 underway... wenge maple sandwich - tasty!!
 

Attachments

  • sc2.jpg
    sc2.jpg
    238.4 KB · Views: 632
  • sc1.jpg
    sc1.jpg
    155.7 KB · Views: 632
Alf":31fd7i5l said:
bosshogg":31fd7i5l said:
condeesteso":31fd7i5l said:
Next a new bar (proper name please?)
shaft
Stem, I believe.

Also a rod...in fact quite a few terminologies have been used from time to time, although stem is often more of an Americanisation in books and mags and I believe online. Autonopedia being one example. But again I refer to my earlier statement, quite a few variations have been used from time to time.. the stem and stock...shaft and fence...rod and head (or block) my own experience, taught to me by my Journeymen, was shaft and fence...bosshogg :|
You can't help a man who doesn't tell you what he wants
(homer)
 
*shrug* Regional differences? I went with Salaman's dictionary, which is neither recent, American, or, heaven forbid, an internet source.
 
Back
Top