I made several modifications to my Record Power BS350S bandsaw over the past few weeks and decided to post them here in case anyone with a similar bandsaw was interested.
Here are the modifications I made and will be documenting here. I’ll update the list below with links to the other threads as I add them::
1. Upgrade upper and lower blade guides with the Rikon tool-less kit made for the Rikon 10-324 and 10-325 bandsaws.
2. Add an electrical outlet to the upper frame so I can power the magnetic base LED lamp.
3. Add blade shroud to improve dust collection.
4. Rip Fence Upgrade
5. Replace the stock wheeled base with a sturdy cabinet with drawers, locking casters, and push handle.
=====
I watched several YouTube videos about the Rikon 10-324 bandsaw and noticed immediately how similar it was to the Record Power BS350S. I decided to take a chance on the tool-less upgrade kit, fully expecting it to not be a simple install as shown in the Rikon videos. It was not a simple install, but I accomplished everything using common tools. The only powered tools I used were a cordless drill and a Dremel with a cutoff wheel. If I had some metal cutting blades for my jigsaw, I would have used it instead of a hacksaw.
Note: If you are concerned about the warranty of your bandsaw, this is not the kit for you. A complete installation requires making several permanent modifications to the bandsaw frame.
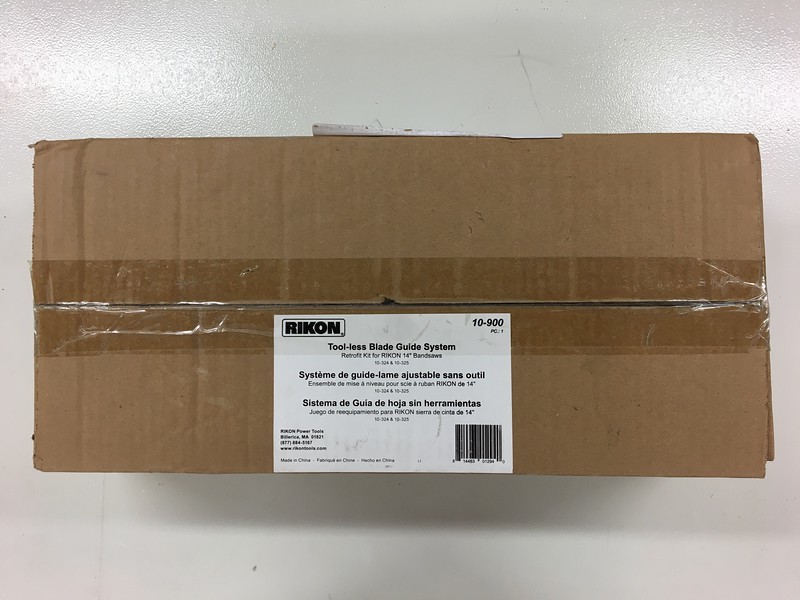
Here is the Rikon tool-less kit as it arrived in the mail.
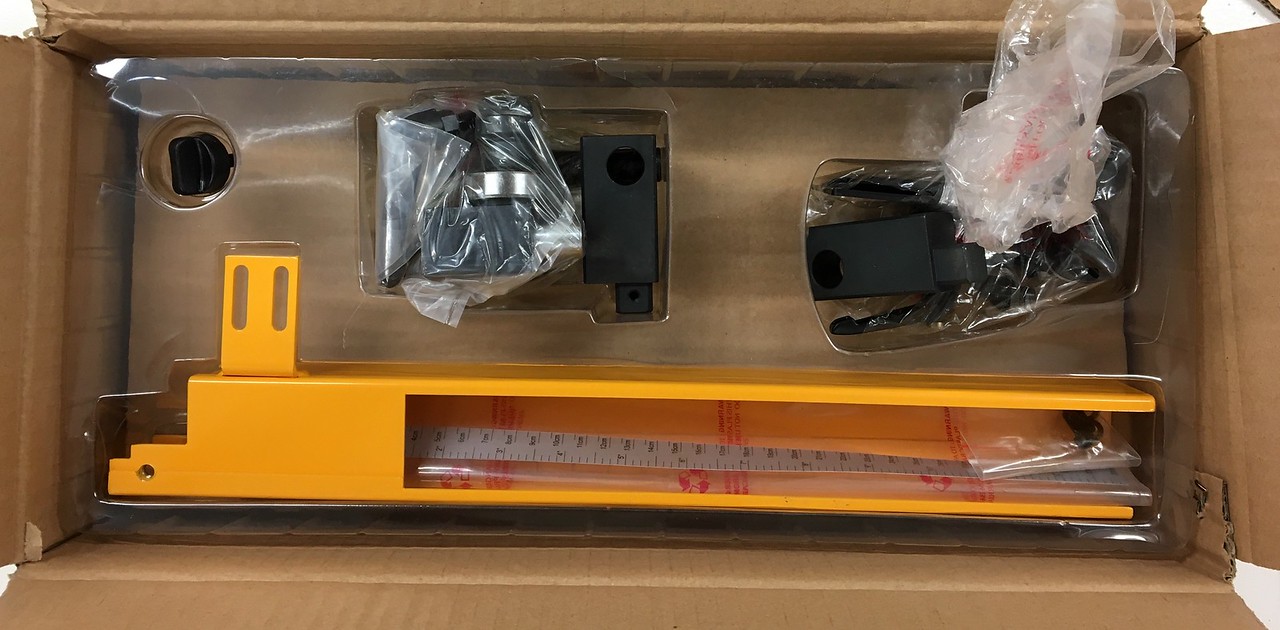
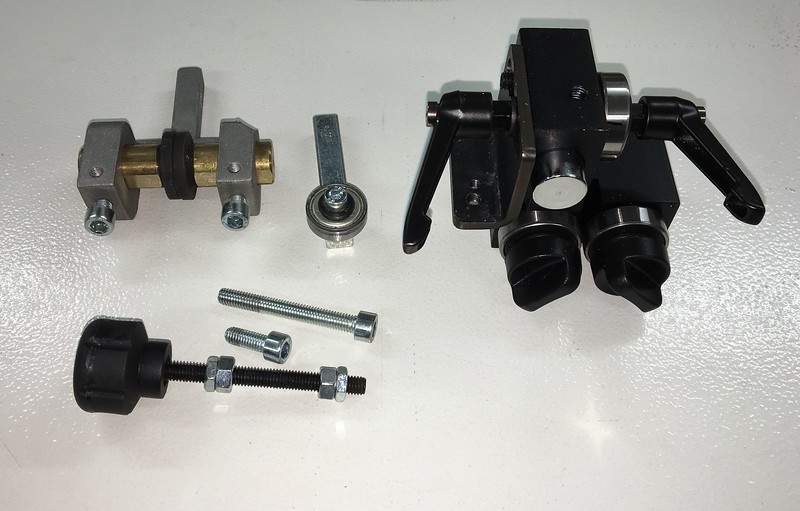
A view of the inside of the box showing the components. I first noticed that the upper blade guard was longer than the OEM guard, so this would have to be cut in order to fit in the upper wheel section. I also noticed that the optional scale for the upper blade guard was marked in imperial and metric; however, for some metric haters, the scale was in centimeters.
A comparison of the stock and upgrade upper blade guides. The Record Power BS350S guide is on the left and the Rikon tool-less blade guide is on the left. The upper blade guide was the only part that was a one-for-one exchange and did not require any modifications to the bandsaw to install and adjust.
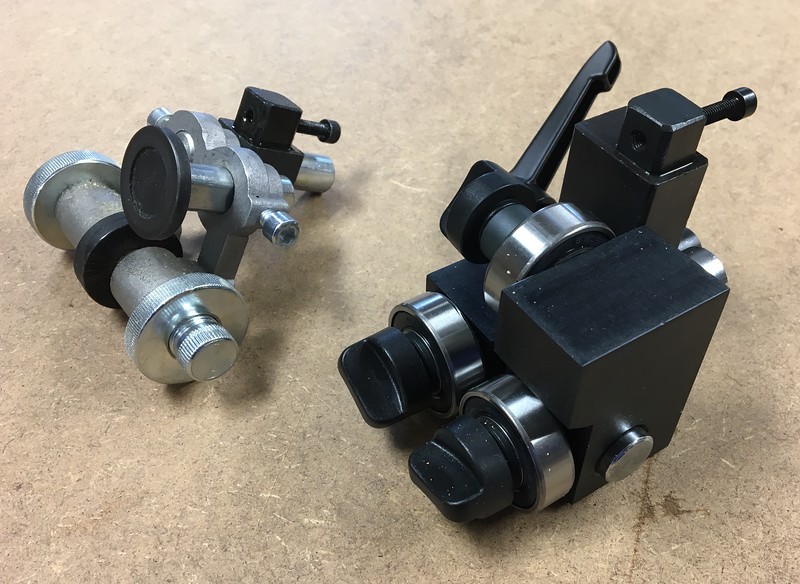
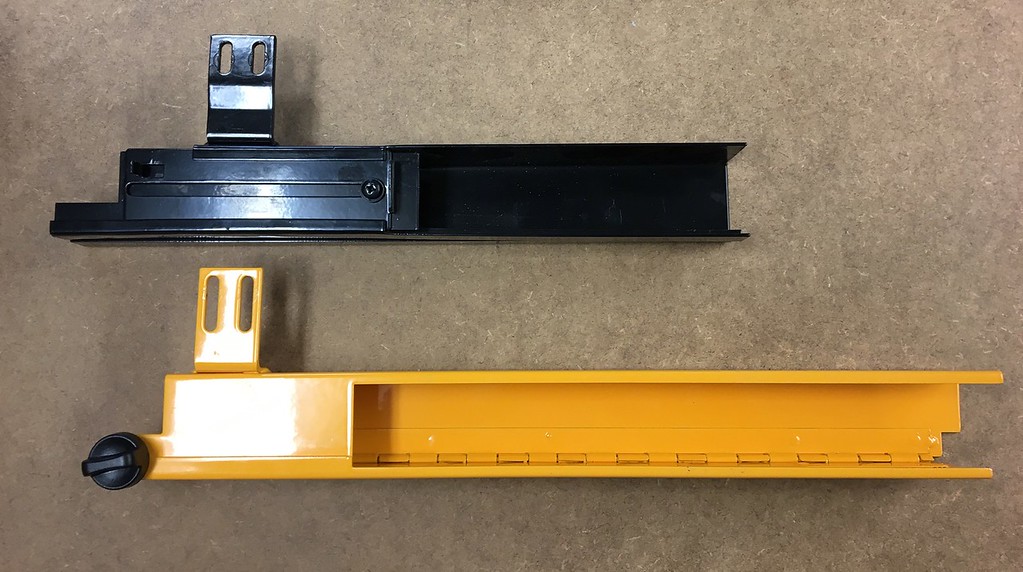
A comparison of the stock and upgrade lower blade guides. The Record Power BS350S lower guide components are on the left and the Rikon tool-less lower blade guide is on the right. All of the RP components are mounted to the trunnion, while the Rikon guide is attached to the frame. Unlike the upper blade guide, the lower blade guide required some modification to the bandsaw frame in order to fit.
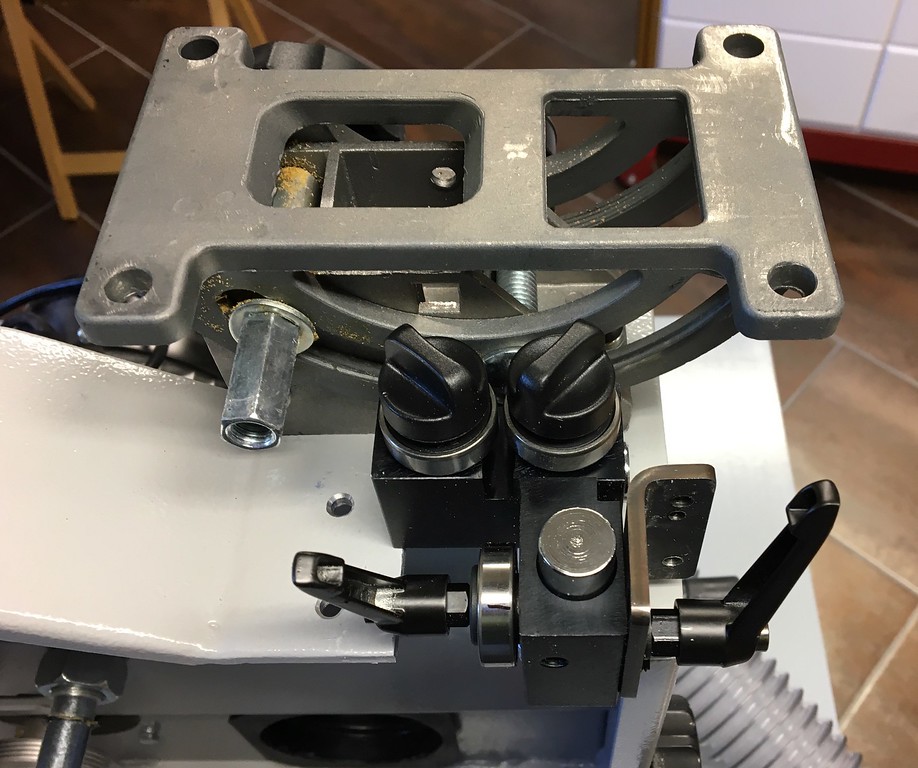
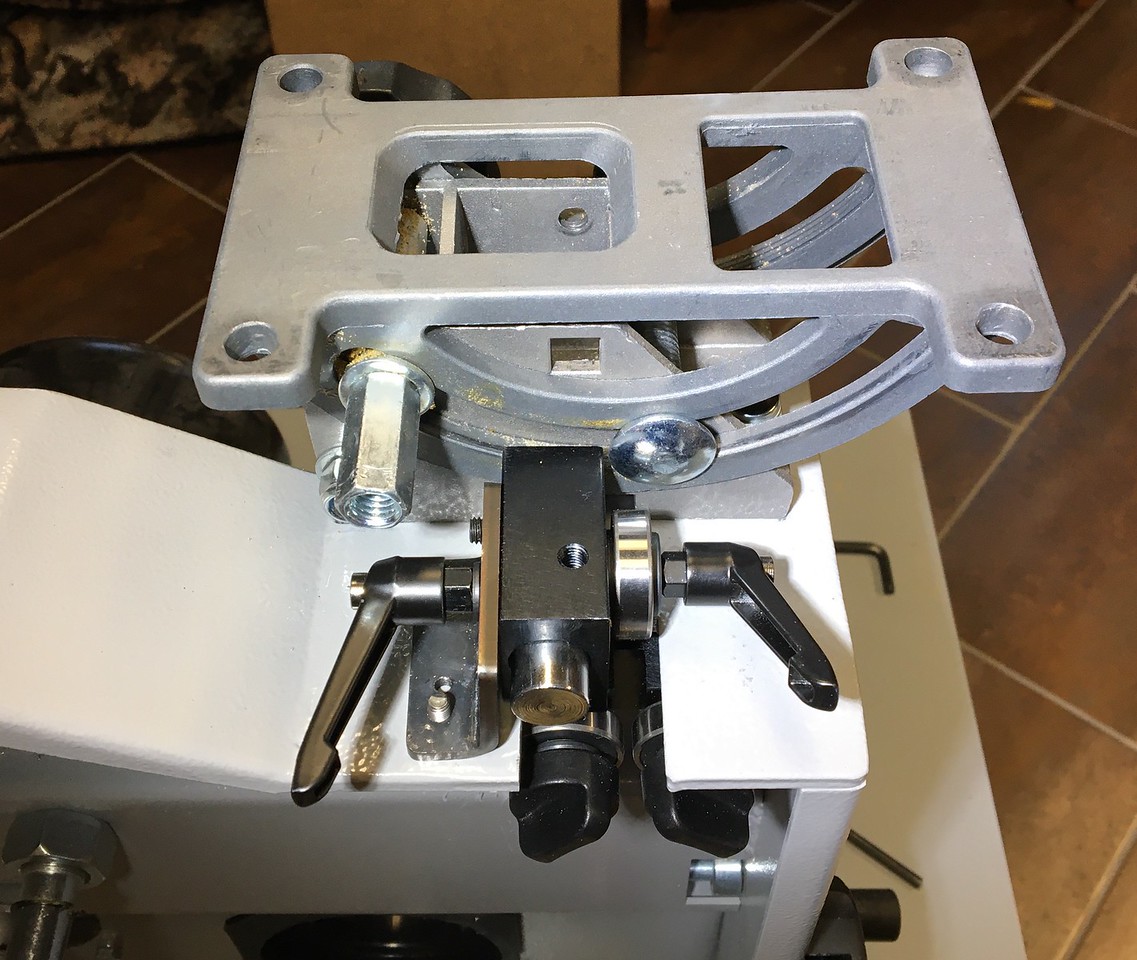
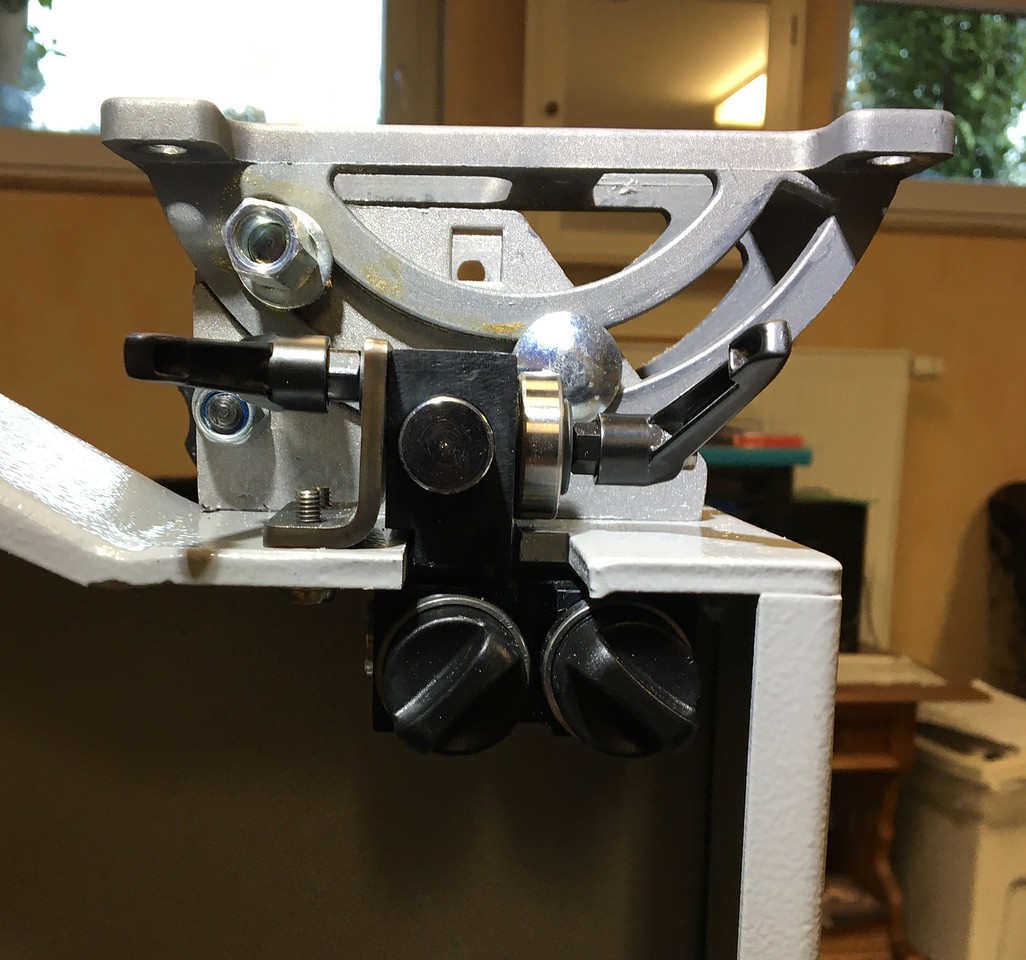
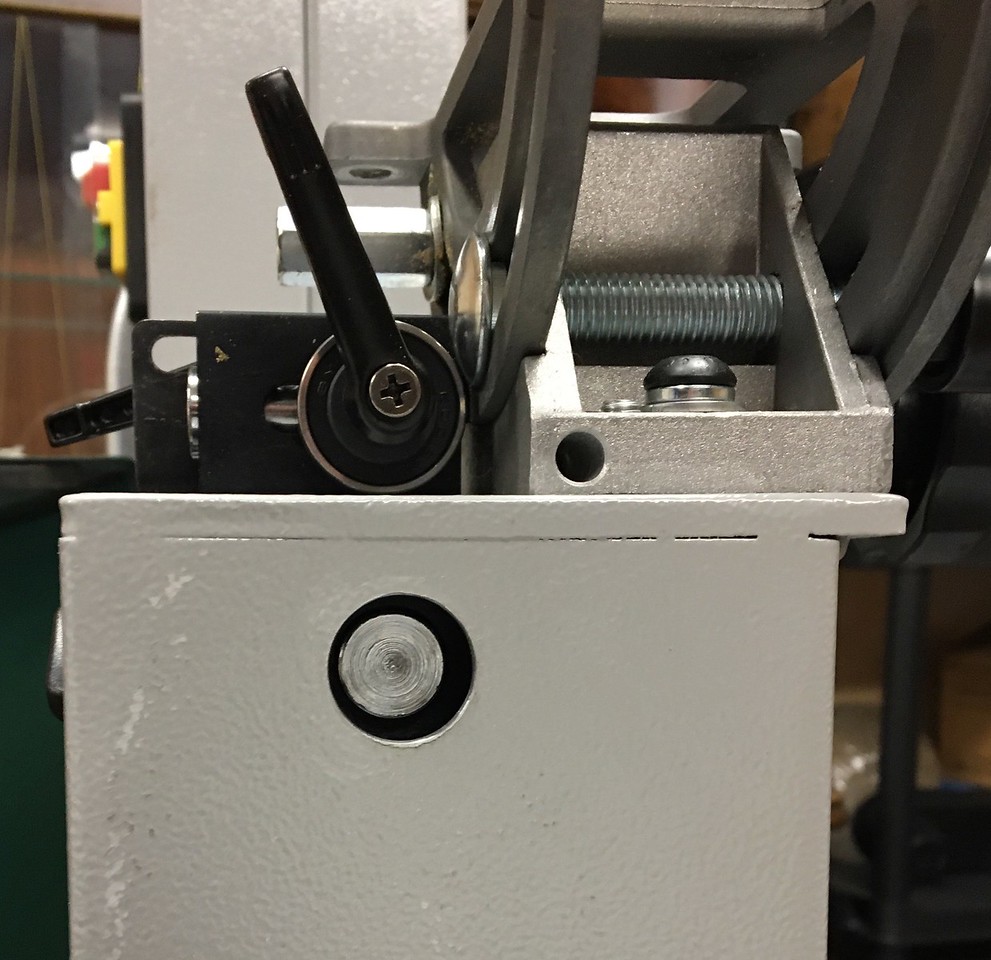
Here is an image of the Rikon tool-less upper blade guide attached. The exchange was easy and took seconds. One bolt holds the blade guide to the upper arm.
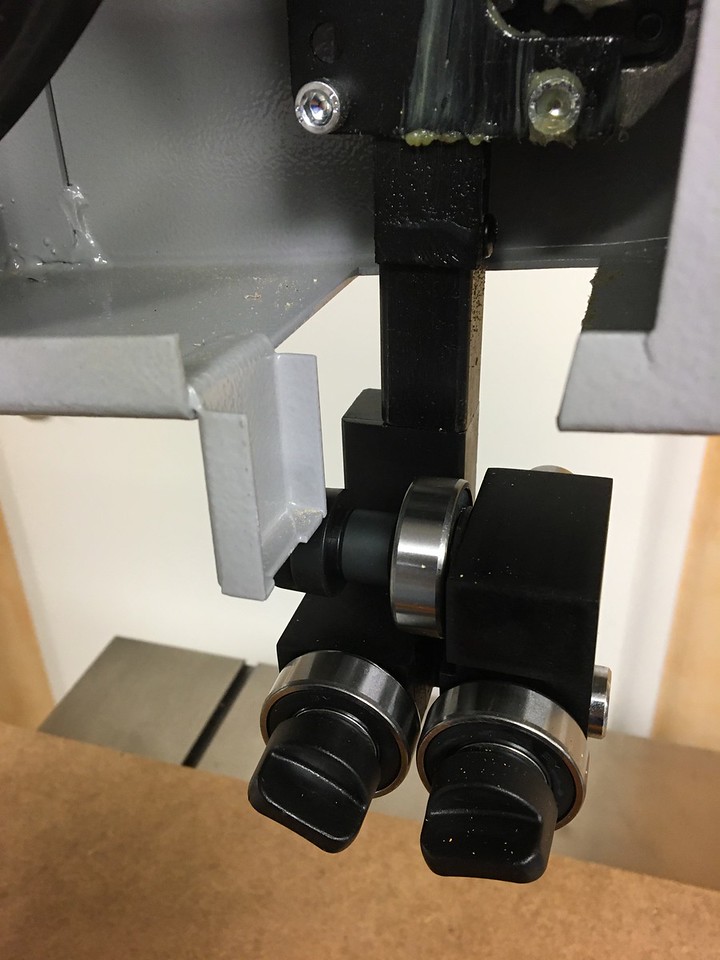
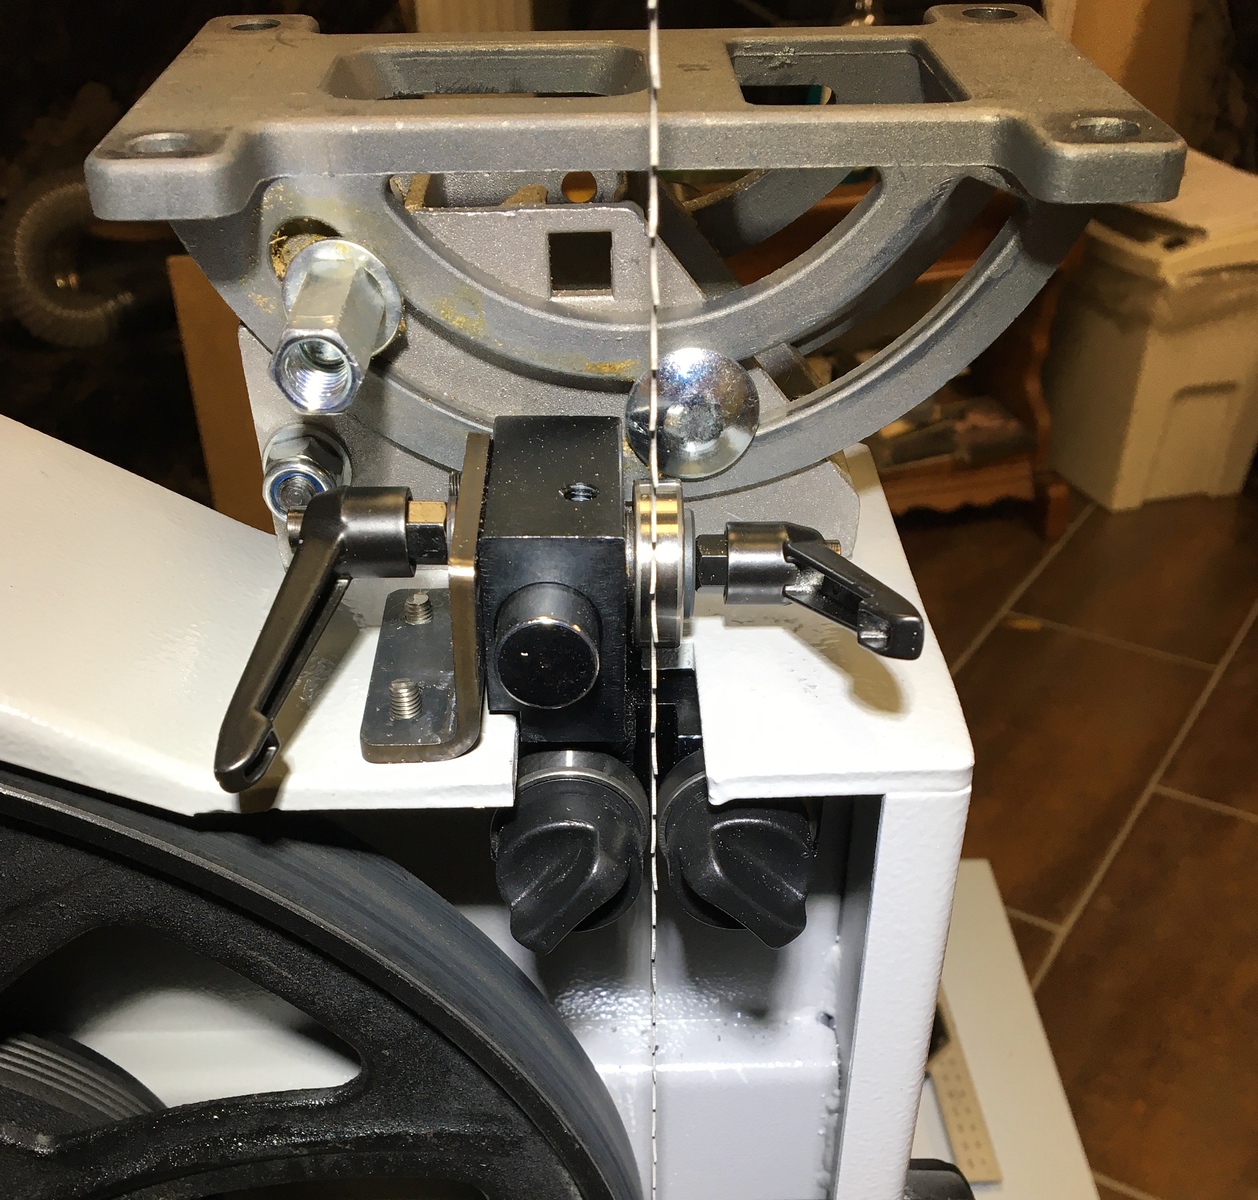
Here is another view of the Rikon upper blade guide installed. The black knobs on each roller bearing lock the bearing in place. When the knob is loosened, the spring-loaded shaft moves the bearing away from the blade, so you have to push the bearing back to the blade for each adjustment.
Here is a comparison of the Record Power and Rikon upper blade guards. The Record Power blade guard cannot be used with the Rikon upper blade guide, because of clearance issues. Likewise, the Rikon blade guide can’t be used as is because it hits the upper wheel housing safety switch.
Another interference issue is with bracket that is part of the upper wheel housing. The bracket prevents the upper arm from fully raising because it makes contact with the blade guard and the upper blade guide. The only purpose for this bracket is to catch a moving slide on the stock upper blade guard. Since I removed the stock blade guard, this bracket is no longer required. A single pass with the Dremel cutoff wheel, and the bracket is history.
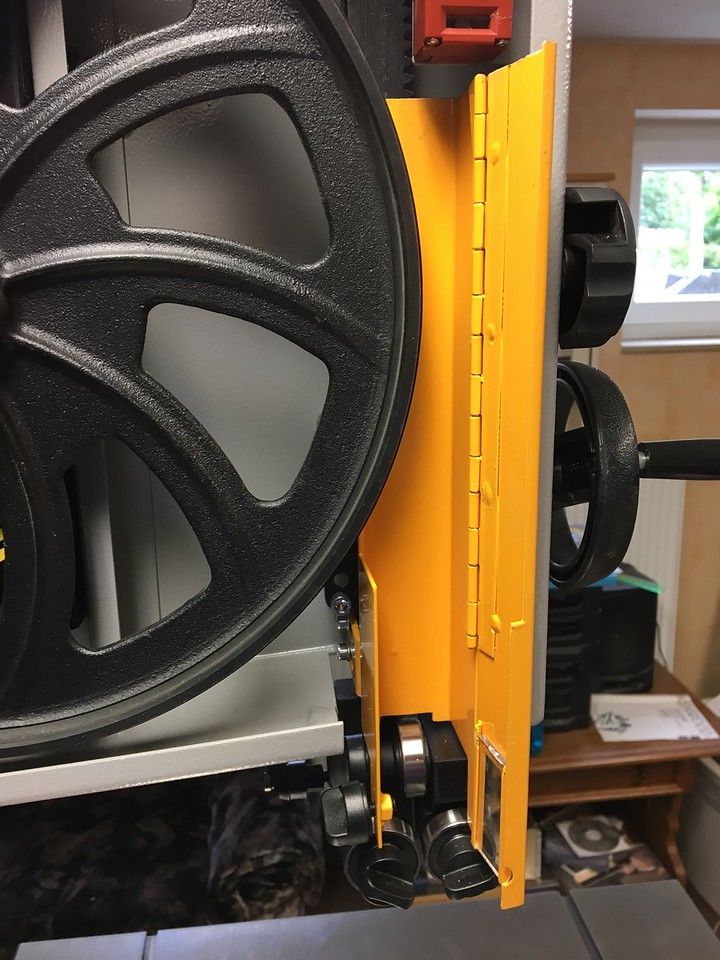
The modified blade guard and blade guide installed. The blade guard has a clear plastic window in order to see the upper bearing and make adjustments.
Another view of the new blade guard and blade guide in the fully raised position.
A view of the upper blade guard with the access door opened.
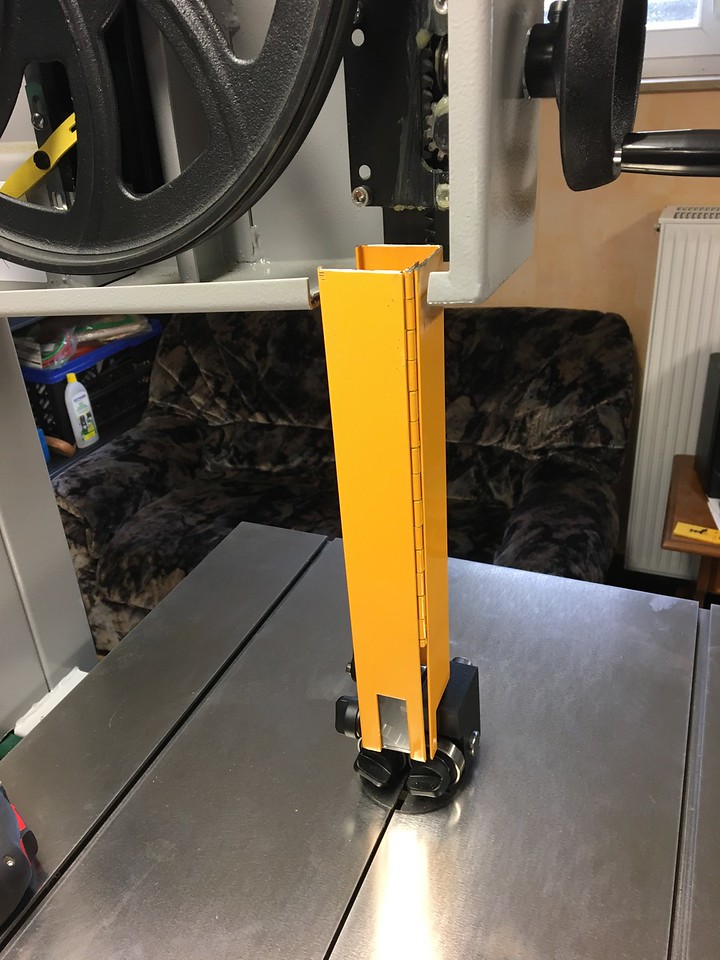
A view of the upper arm in the fully lowered position. The bearings are in contact with the table.
Available height of cut with the stock Record Power BS350S blade guides installed.
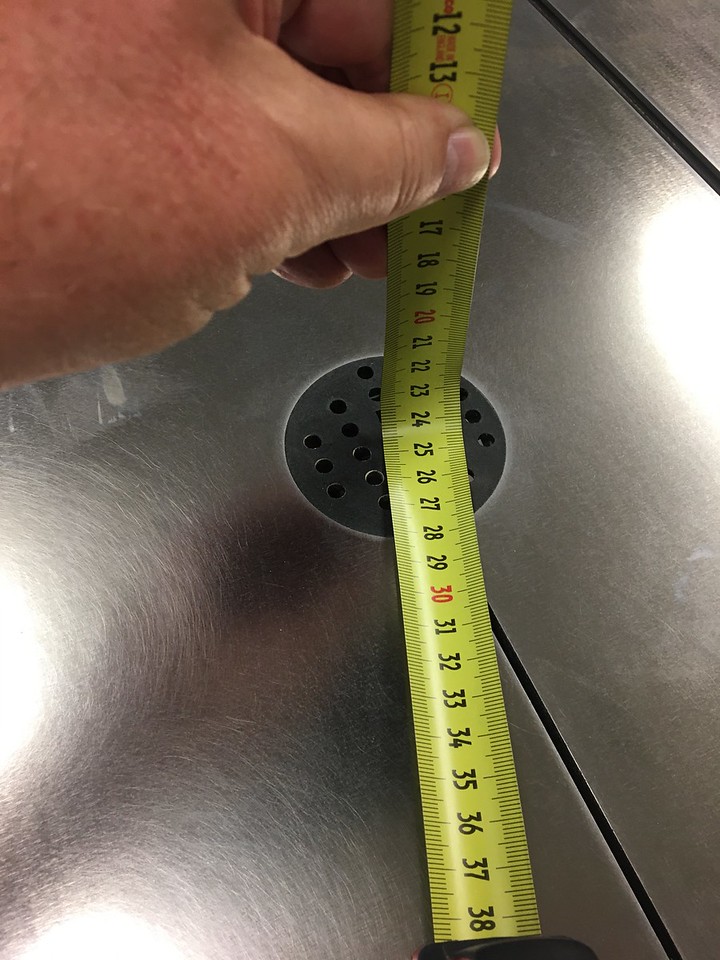
Available height of cut with the Rikon tool-less blade guide upgrade kit installed. I lost about one centimeter of cut height (10mm for those of you who fear or despise the lovely centimeter).

And now the fun begins. I realized as I unpacked the Rikon tool-less kit and tried to dry fit the parts, that the lower blade guides would require most of the effort in this project. Here is the stock lower blade guide. Despite several cleanings, the only roller bearing in the stock setup constantly seizes. It might as well be a stack of washers for all the good it does.
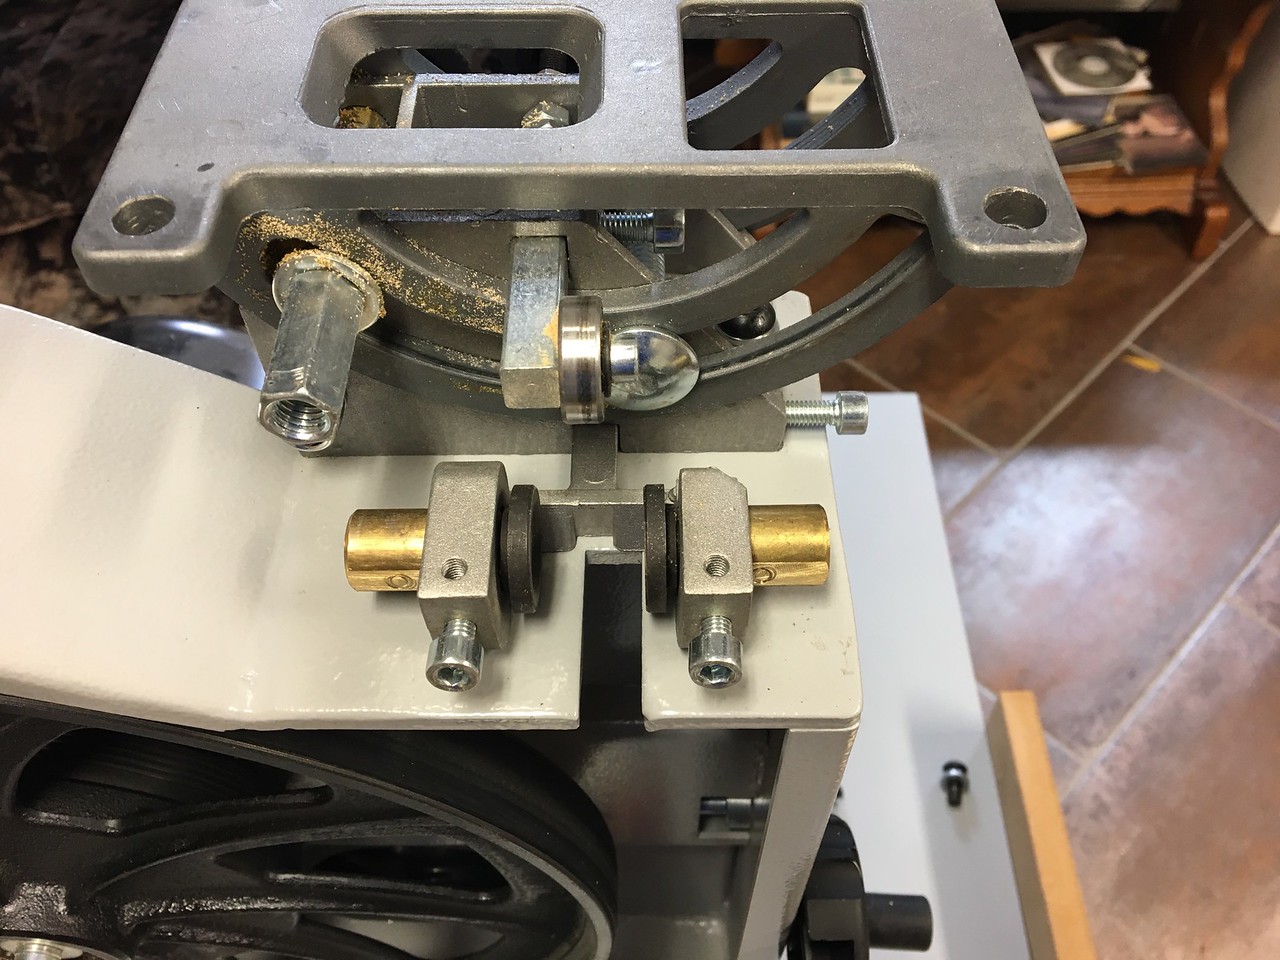
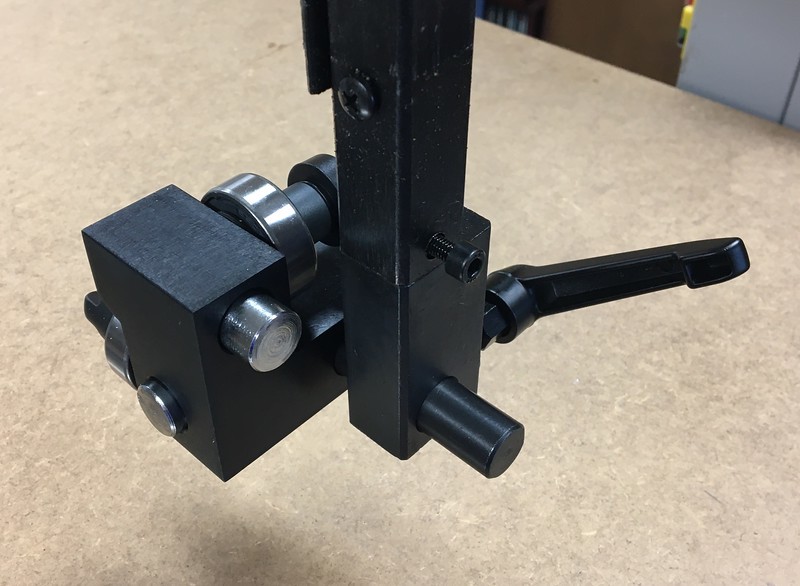
I had to cut a wider section in the lower frame to accommodate the Rikon lower blade guide assembly. I also drilled two holes in the lower frame to allow attaching of the guide bracket using two M5 screws. The normal installation uses one screw and a locator grub screw in an elongated hole already drilled in the Rikon 10-324 lower frame. I like my version better, since there is no way for the lower blade guide to twist.
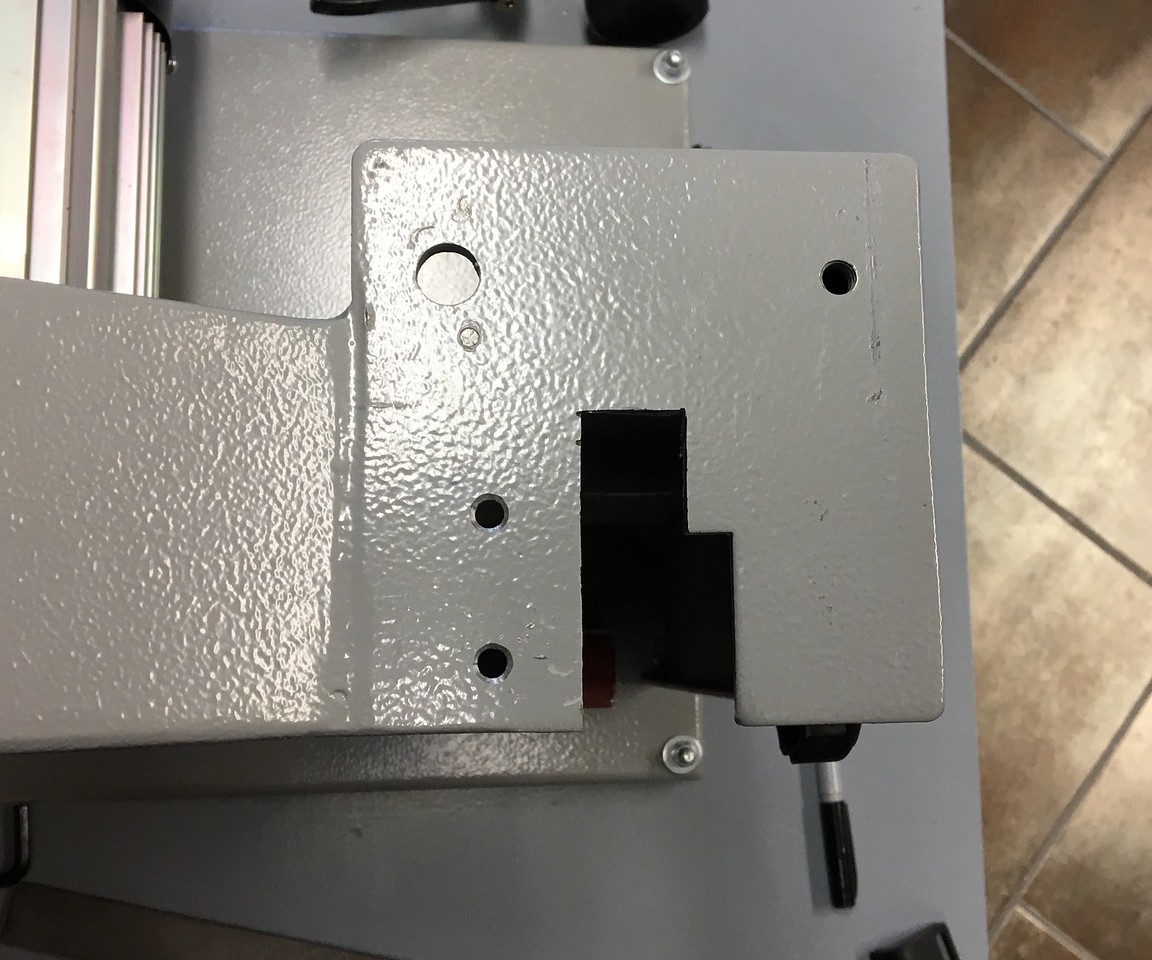
Another view of the lower wheel housing showing the modification to the frame.
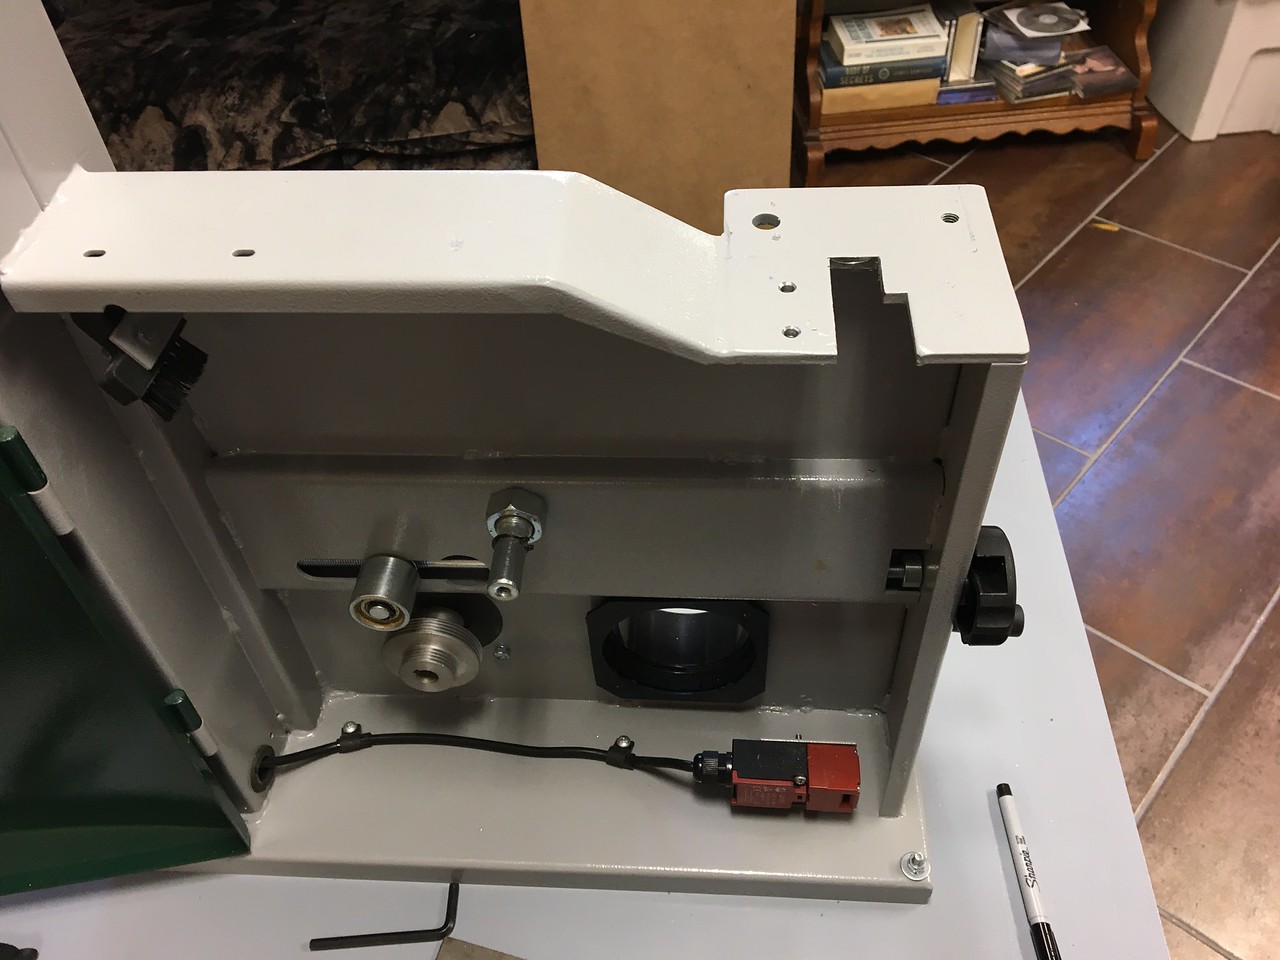
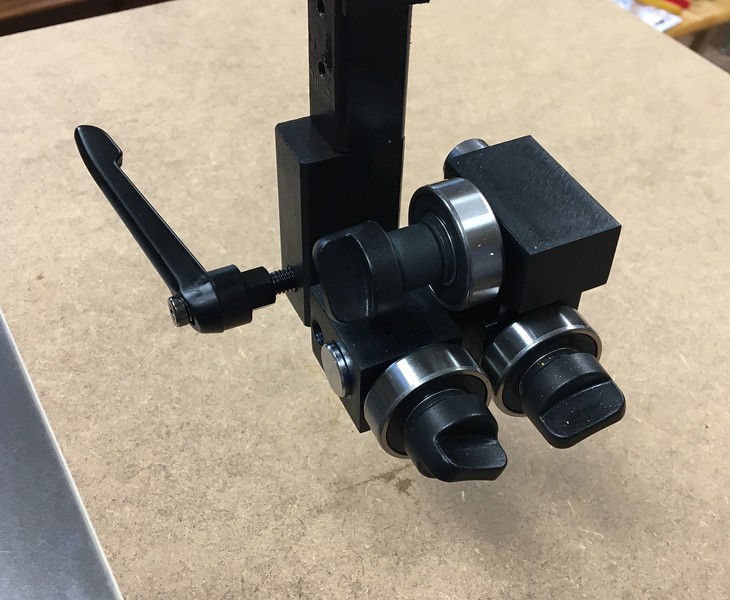
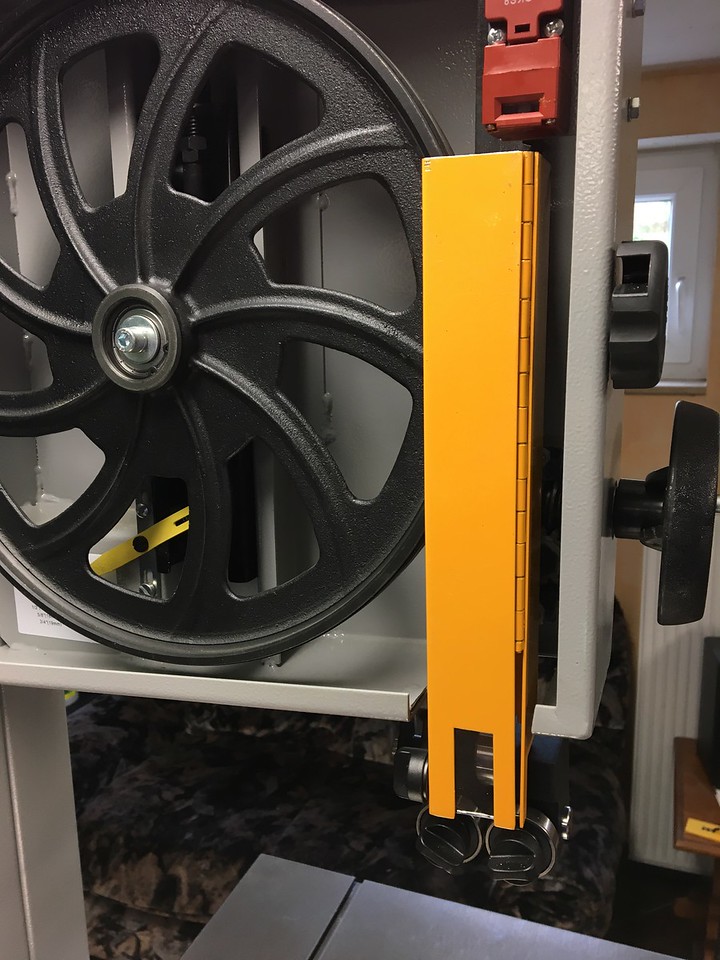
The new Rikon tool-less lower blade guide upgrade installed. There is plenty of room for movement to accommodate a 3/4-inch 3TPI blade without the side roller bearings interfering with the teeth.
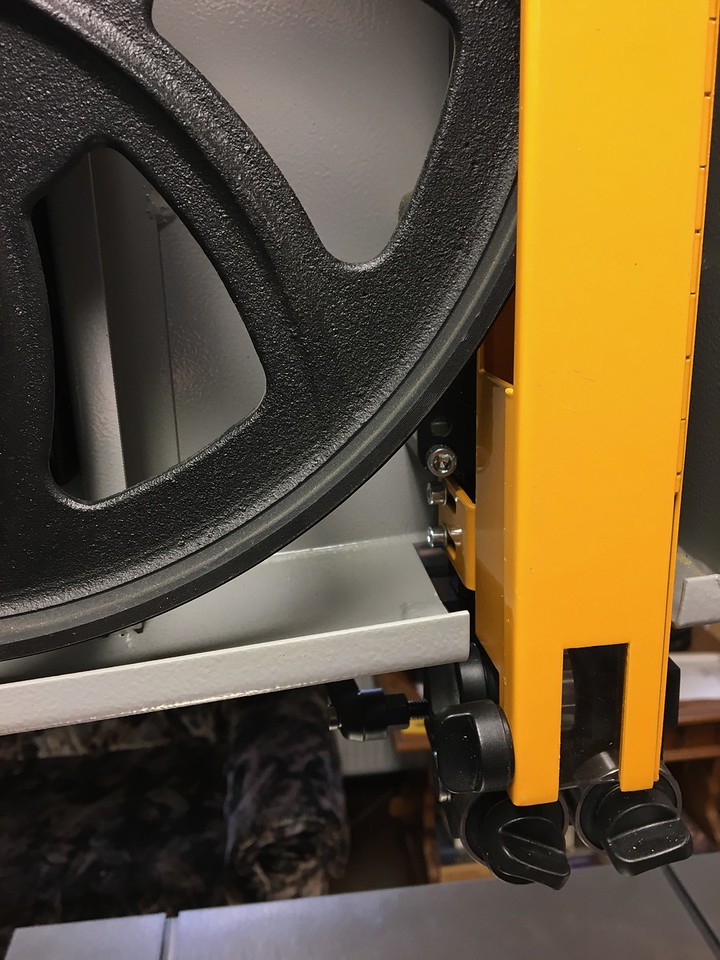
Another view of the Rikon upgrade.
To make adjusting the right roller bearing a bit easier, I drilled a 20mm hole in the side of the frame. The hole is covered up in normal use by a bracket I made for the blade shroud dust collection modification.
I fitted a 1/2-inch 3TPI M42 blade I bought from TuffSaws and set the rollers.
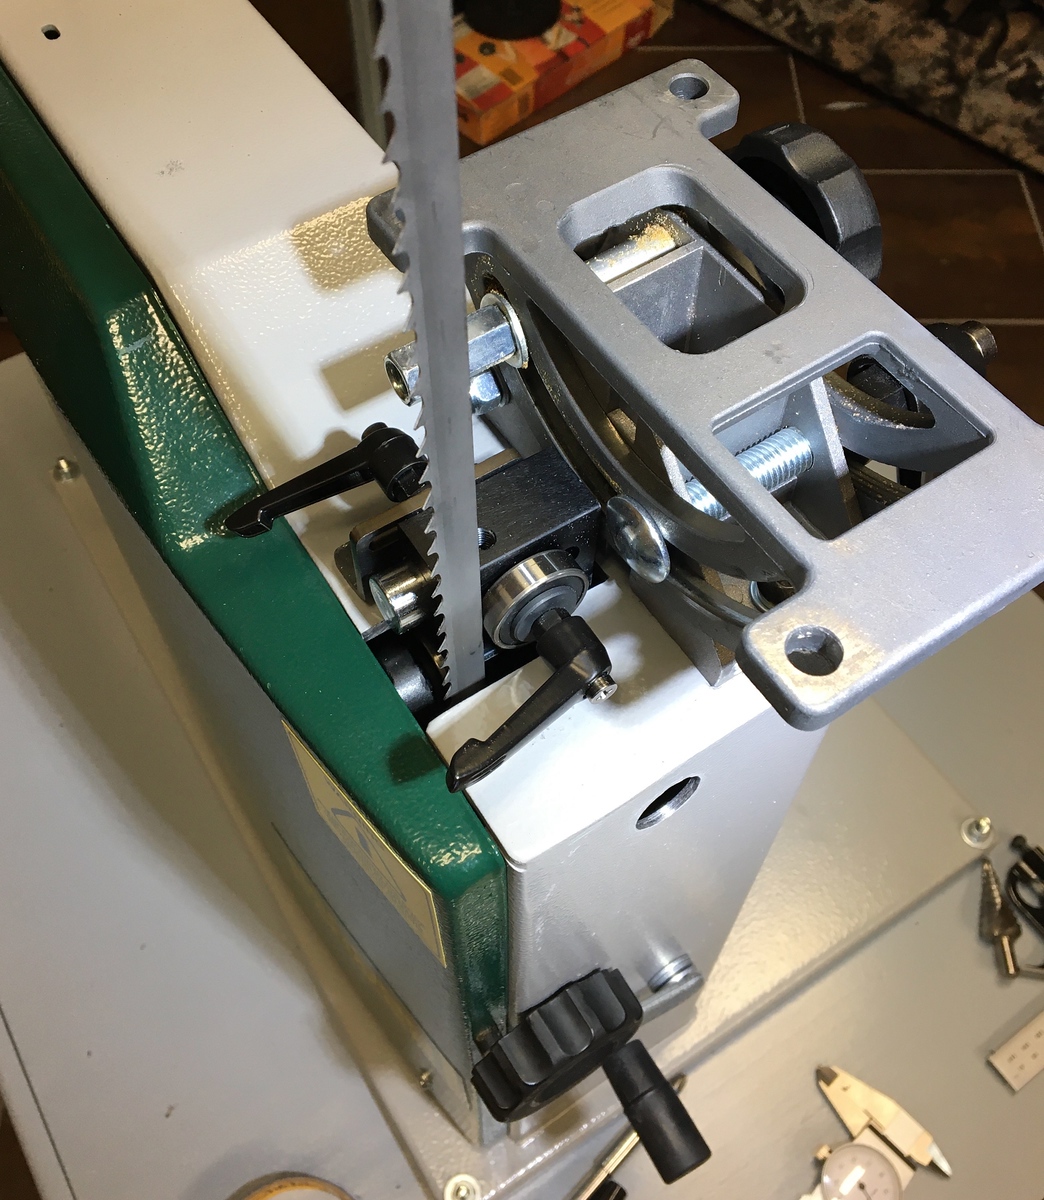
Another view of the lower blade guide with the blade fitted.
Here are the modifications I made and will be documenting here. I’ll update the list below with links to the other threads as I add them::
1. Upgrade upper and lower blade guides with the Rikon tool-less kit made for the Rikon 10-324 and 10-325 bandsaws.
2. Add an electrical outlet to the upper frame so I can power the magnetic base LED lamp.
3. Add blade shroud to improve dust collection.
4. Rip Fence Upgrade
5. Replace the stock wheeled base with a sturdy cabinet with drawers, locking casters, and push handle.
=====
I watched several YouTube videos about the Rikon 10-324 bandsaw and noticed immediately how similar it was to the Record Power BS350S. I decided to take a chance on the tool-less upgrade kit, fully expecting it to not be a simple install as shown in the Rikon videos. It was not a simple install, but I accomplished everything using common tools. The only powered tools I used were a cordless drill and a Dremel with a cutoff wheel. If I had some metal cutting blades for my jigsaw, I would have used it instead of a hacksaw.
Note: If you are concerned about the warranty of your bandsaw, this is not the kit for you. A complete installation requires making several permanent modifications to the bandsaw frame.
Here is the Rikon tool-less kit as it arrived in the mail.
A view of the inside of the box showing the components. I first noticed that the upper blade guard was longer than the OEM guard, so this would have to be cut in order to fit in the upper wheel section. I also noticed that the optional scale for the upper blade guard was marked in imperial and metric; however, for some metric haters, the scale was in centimeters.
A comparison of the stock and upgrade upper blade guides. The Record Power BS350S guide is on the left and the Rikon tool-less blade guide is on the left. The upper blade guide was the only part that was a one-for-one exchange and did not require any modifications to the bandsaw to install and adjust.
A comparison of the stock and upgrade lower blade guides. The Record Power BS350S lower guide components are on the left and the Rikon tool-less lower blade guide is on the right. All of the RP components are mounted to the trunnion, while the Rikon guide is attached to the frame. Unlike the upper blade guide, the lower blade guide required some modification to the bandsaw frame in order to fit.
Here is an image of the Rikon tool-less upper blade guide attached. The exchange was easy and took seconds. One bolt holds the blade guide to the upper arm.
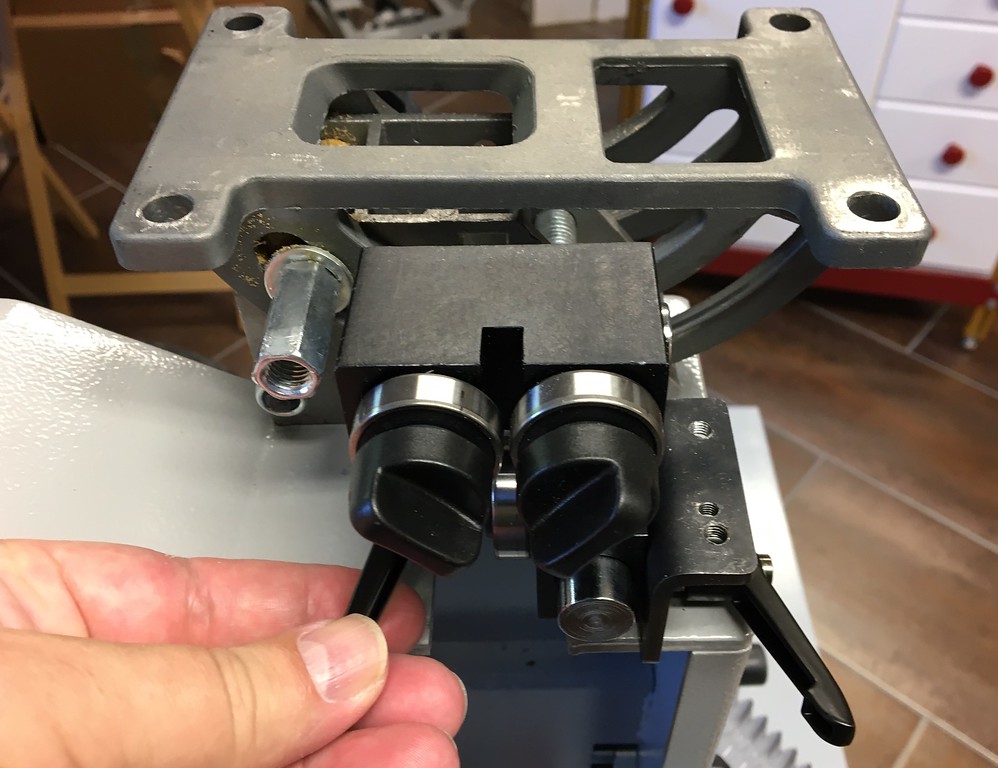
Here is another view of the Rikon upper blade guide installed. The black knobs on each roller bearing lock the bearing in place. When the knob is loosened, the spring-loaded shaft moves the bearing away from the blade, so you have to push the bearing back to the blade for each adjustment.
Here is a comparison of the Record Power and Rikon upper blade guards. The Record Power blade guard cannot be used with the Rikon upper blade guide, because of clearance issues. Likewise, the Rikon blade guide can’t be used as is because it hits the upper wheel housing safety switch.
Another interference issue is with bracket that is part of the upper wheel housing. The bracket prevents the upper arm from fully raising because it makes contact with the blade guard and the upper blade guide. The only purpose for this bracket is to catch a moving slide on the stock upper blade guard. Since I removed the stock blade guard, this bracket is no longer required. A single pass with the Dremel cutoff wheel, and the bracket is history.
The modified blade guard and blade guide installed. The blade guard has a clear plastic window in order to see the upper bearing and make adjustments.
Another view of the new blade guard and blade guide in the fully raised position.
A view of the upper blade guard with the access door opened.
A view of the upper arm in the fully lowered position. The bearings are in contact with the table.
Available height of cut with the stock Record Power BS350S blade guides installed.
Available height of cut with the Rikon tool-less blade guide upgrade kit installed. I lost about one centimeter of cut height (10mm for those of you who fear or despise the lovely centimeter).
And now the fun begins. I realized as I unpacked the Rikon tool-less kit and tried to dry fit the parts, that the lower blade guides would require most of the effort in this project. Here is the stock lower blade guide. Despite several cleanings, the only roller bearing in the stock setup constantly seizes. It might as well be a stack of washers for all the good it does.
I had to cut a wider section in the lower frame to accommodate the Rikon lower blade guide assembly. I also drilled two holes in the lower frame to allow attaching of the guide bracket using two M5 screws. The normal installation uses one screw and a locator grub screw in an elongated hole already drilled in the Rikon 10-324 lower frame. I like my version better, since there is no way for the lower blade guide to twist.
Another view of the lower wheel housing showing the modification to the frame.
The new Rikon tool-less lower blade guide upgrade installed. There is plenty of room for movement to accommodate a 3/4-inch 3TPI blade without the side roller bearings interfering with the teeth.
Another view of the Rikon upgrade.
To make adjusting the right roller bearing a bit easier, I drilled a 20mm hole in the side of the frame. The hole is covered up in normal use by a bracket I made for the blade shroud dust collection modification.
I fitted a 1/2-inch 3TPI M42 blade I bought from TuffSaws and set the rollers.
Another view of the lower blade guide with the blade fitted.
")