Richard T
Established Member
About a month ago, SWMOM went to visit her folks in Felixstowe. Her brother is a furniture dealer and she went to an auction with him.
Being the well trained girl that she is, when a box of planes and old tat came up she bought it for me.")
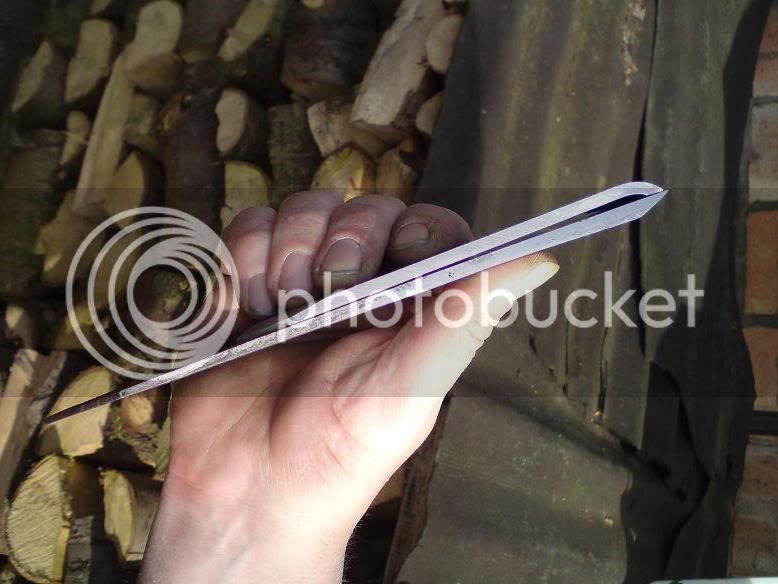
Unfortunately, there was nothing of much excitement in it except for a wooden shoulder plane with a (still half - there) Mathieson iron in it and and old coffin smoother which some one had re - soled with brass sheet.
I put an iron in it and gave it a go. It was quite pleasant to use but the brass work was certainly wanting.
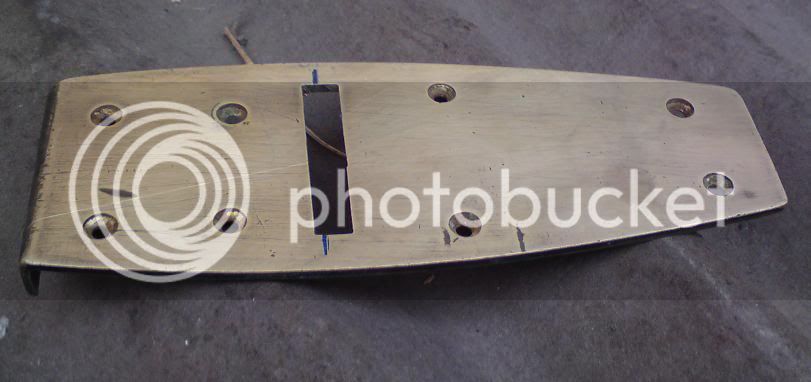
The mouth had been cut about twice as wide as it needed to be, also the front of the mouth had been cut square; whoever did this had failed to notice that the plane is slightly skew.
Also the screw holes were far from symmetrical - purely an aesthetic point but irksome nevertheless.
So I sorted out some 4mm steel sheet and had the idea of attaching a frog block and letting it into the wood.... seems like a good idea in theory - pineappleing tricky in practice.
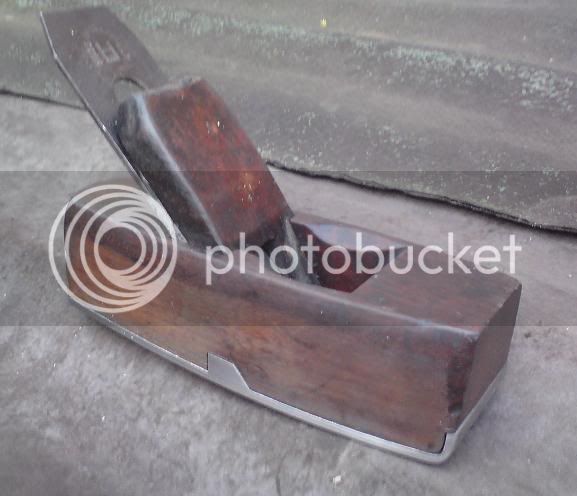
It's turned out all right though. As you can see, the patina on the sides has been removed by the previous re - soling, so I'm not too worried about disturbing the brief patination that has built up in the mean time ... but compare with the beautiful depth of colour on top. This is a very old plane I think.
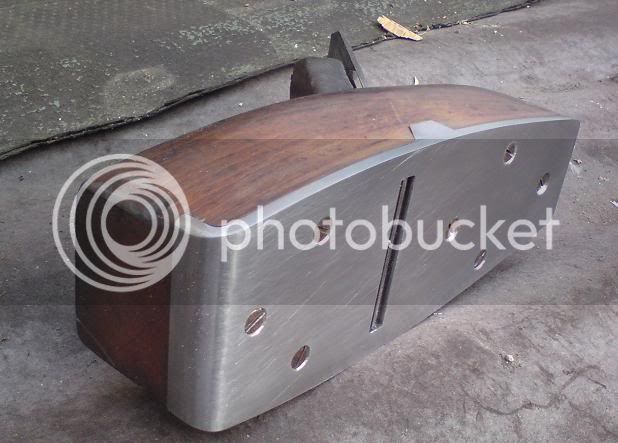
I left the mouth a gnat's crotchet open - grain direction doesn't bother it much. Also note the screws in a much prettier pattern 8)
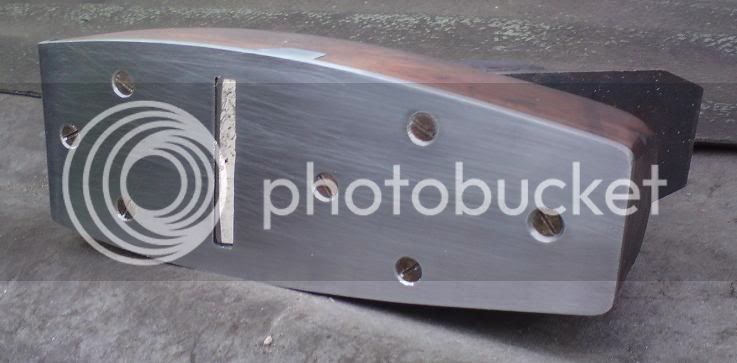
But what I'm most pleased with are the rivets that hold the frog block on ... the three of them there, just behind the mouth. I've never succeeded in fully invisible riveting before.
All in all it's been some very good practice for making the full ironclads as Gary would call them.
The block makes a big difference - I can't wait to get my dt infill to the stage when I can finally feel what having a lever cap on the other side is like .... this one whistles as it is...
Being the well trained girl that she is, when a box of planes and old tat came up she bought it for me.
Unfortunately, there was nothing of much excitement in it except for a wooden shoulder plane with a (still half - there) Mathieson iron in it and and old coffin smoother which some one had re - soled with brass sheet.
I put an iron in it and gave it a go. It was quite pleasant to use but the brass work was certainly wanting.
The mouth had been cut about twice as wide as it needed to be, also the front of the mouth had been cut square; whoever did this had failed to notice that the plane is slightly skew.
Also the screw holes were far from symmetrical - purely an aesthetic point but irksome nevertheless.
So I sorted out some 4mm steel sheet and had the idea of attaching a frog block and letting it into the wood.... seems like a good idea in theory - pineappleing tricky in practice.
It's turned out all right though. As you can see, the patina on the sides has been removed by the previous re - soling, so I'm not too worried about disturbing the brief patination that has built up in the mean time ... but compare with the beautiful depth of colour on top. This is a very old plane I think.
I left the mouth a gnat's crotchet open - grain direction doesn't bother it much. Also note the screws in a much prettier pattern 8)
But what I'm most pleased with are the rivets that hold the frog block on ... the three of them there, just behind the mouth. I've never succeeded in fully invisible riveting before.
All in all it's been some very good practice for making the full ironclads as Gary would call them.
The block makes a big difference - I can't wait to get my dt infill to the stage when I can finally feel what having a lever cap on the other side is like .... this one whistles as it is...