You are using an out of date browser. It may not display this or other websites correctly.
You should upgrade or use an alternative browser.
You should upgrade or use an alternative browser.
Post a photo of the last thing you made
- Thread starter DTR
- Start date


Help Support UKworkshop.co.uk:
This site may earn a commission from merchant affiliate
links, including eBay, Amazon, and others.


Dr Al
Established Member
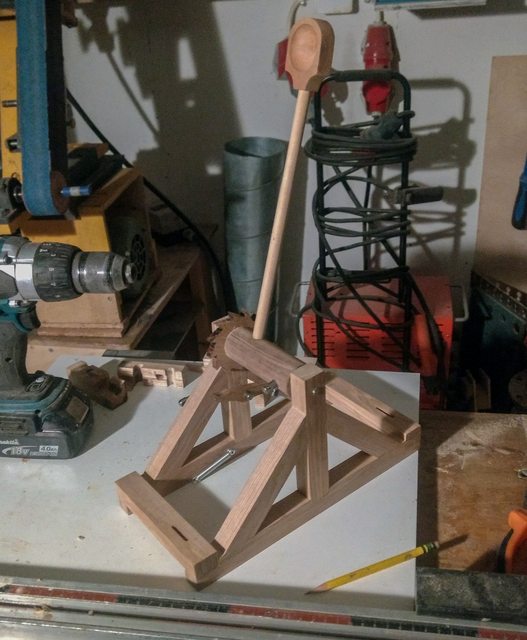
Not yet finished, and I am making two identical ones:
I recognise that... think I might have "Liked" that on another forum recently!
Dr Al
Established Member
Today I made (or at least nearly finished making) four planes (based on an idea from a book):

Made out of beech, walnut and gauge plate. They're for ploughing grooves in box/drawer sides for a base. One day I'll get a plough plane, but most uses for it will probably be this and it would take me far longer to set up a plough plane than it would to grab one of these planes and plough a groove. They're in pairs so that I can pick the appropriate one for a given grain direction: two make 3 mm grooves, 3 mm deep, 3 mm from the fence; the other two are similar but replace all the 3s with 5s.
After a fair amount of fettling and getting them set up, I did some test grooves in a couple of offcuts of oak (visible in the picture). In those short lengths, it takes about 10 seconds to plough a groove. I doubt I could even find the right router cutter in that time, let alone set up a router, so I think these will get a fair amount of use.
They'll get a coat of oil once I've finished fettling.
I made some spare cutters in other sizes too (although I've only hardened & tempered the 3 mm and 5 mm ones). For some reason the 3 mm and 10 mm ones didn't make it into this photo:

Here's another view:

and an in-progress photo showing how they're constructed:

Made out of beech, walnut and gauge plate. They're for ploughing grooves in box/drawer sides for a base. One day I'll get a plough plane, but most uses for it will probably be this and it would take me far longer to set up a plough plane than it would to grab one of these planes and plough a groove. They're in pairs so that I can pick the appropriate one for a given grain direction: two make 3 mm grooves, 3 mm deep, 3 mm from the fence; the other two are similar but replace all the 3s with 5s.
After a fair amount of fettling and getting them set up, I did some test grooves in a couple of offcuts of oak (visible in the picture). In those short lengths, it takes about 10 seconds to plough a groove. I doubt I could even find the right router cutter in that time, let alone set up a router, so I think these will get a fair amount of use.
They'll get a coat of oil once I've finished fettling.
I made some spare cutters in other sizes too (although I've only hardened & tempered the 3 mm and 5 mm ones). For some reason the 3 mm and 10 mm ones didn't make it into this photo:
Here's another view:
and an in-progress photo showing how they're constructed:
The post mentions gauge plate, which is typically 01 tool steel.
I keep fancying making a wooden plane or two, being laminated those seem fairly straight forward, but imagine there’s a bit of fettling to get them performing well
I keep fancying making a wooden plane or two, being laminated those seem fairly straight forward, but imagine there’s a bit of fettling to get them performing well
matkinitice
Established Member
- Joined
- 11 Jun 2019
- Messages
- 137
- Reaction score
- 270


A small table for my daughter. She is 18 months old and we've recently discovered she loves tables, just the act of putting something down and picking it up.
When we moved into our house a few months back she used a cardbox box and was distraught when we removed it. This is to replace that. I'll make her a small chair for her birthday, but for now this should be good enough.
I'm quite happy with the finish. First time doing breadboard ends too. I used up 6m of scrap Meranti for the build, with a small amount left over.
Orraloon
Established Member
Nice jobToday I made (or at least nearly finished making) four planes (based on an idea from a book):
View attachment 98918
Made out of beech, walnut and gauge plate. They're for ploughing grooves in box/drawer sides for a base. One day I'll get a plough plane, but most uses for it will probably be this and it would take me far longer to set up a plough plane than it would to grab one of these planes and plough a groove. They're in pairs so that I can pick the appropriate one for a given grain direction: two make 3 mm grooves, 3 mm deep, 3 mm from the fence; the other two are similar but replace all the 3s with 5s.
After a fair amount of fettling and getting them set up, I did some test grooves in a couple of offcuts of oak (visible in the picture). In those short lengths, it takes about 10 seconds to plough a groove. I doubt I could even find the right router cutter in that time, let alone set up a router, so I think these will get a fair amount of use.
They'll get a coat of oil once I've finished fettling.
I made some spare cutters in other sizes too (although I've only hardened & tempered the 3 mm and 5 mm ones). For some reason the 3 mm and 10 mm ones didn't make it into this photo:
View attachment 98919
Here's another view:
View attachment 98920
and an in-progress photo showing how they're constructed:
View attachment 98921
Nice job on those planes. Grab and go is good. I can see that being very handy if you use those settings on a regular basis. I have an old wooden plow and while it does a good job setting up is a fiddle.Today I made (or at least nearly finished making) four planes (based on an idea from a book):
View attachment 98918
Made out of beech, walnut and gauge plate. They're for ploughing grooves in box/drawer sides for a base. One day I'll get a plough plane, but most uses for it will probably be this and it would take me far longer to set up a plough plane than it would to grab one of these planes and plough a groove. They're in pairs so that I can pick the appropriate one for a given grain direction: two make 3 mm grooves, 3 mm deep, 3 mm from the fence; the other two are similar but replace all the 3s with 5s.
After a fair amount of fettling and getting them set up, I did some test grooves in a couple of offcuts of oak (visible in the picture). In those short lengths, it takes about 10 seconds to plough a groove. I doubt I could even find the right router cutter in that time, let alone set up a router, so I think these will get a fair amount of use.
They'll get a coat of oil once I've finished fettling.
I made some spare cutters in other sizes too (although I've only hardened & tempered the 3 mm and 5 mm ones). For some reason the 3 mm and 10 mm ones didn't make it into this photo:
View attachment 98919
Here's another view:
View attachment 98920
and an in-progress photo showing how they're constructed:
View attachment 98921
Regards
John
Derek Cohen (Perth Oz)
Established Member
Dr Al
Established Member
What steel do you use for the blades?
I guess you could use cheap 6mm chisels
Cheers James
Gauge plate, which is O1 tool steel as @--Tom-- said. It's supplied in a very flat condition and is easy to harden. I had some 3 × 30 mm bar, which made all the cutters except the 5 mm ones: most are 3 mm thick; I made the 3 mm ones a bit thicker (4 mm) for strength. The 5 mm ones are actually 5 × 5 mm as I had some 5 × 5 mm gauge plate so that made it *really* easy.
The post mentions gauge plate, which is typically 01 tool steel.
I keep fancying making a wooden plane or two, being laminated those seem fairly straight forward, but imagine there’s a bit of fettling to get them performing well
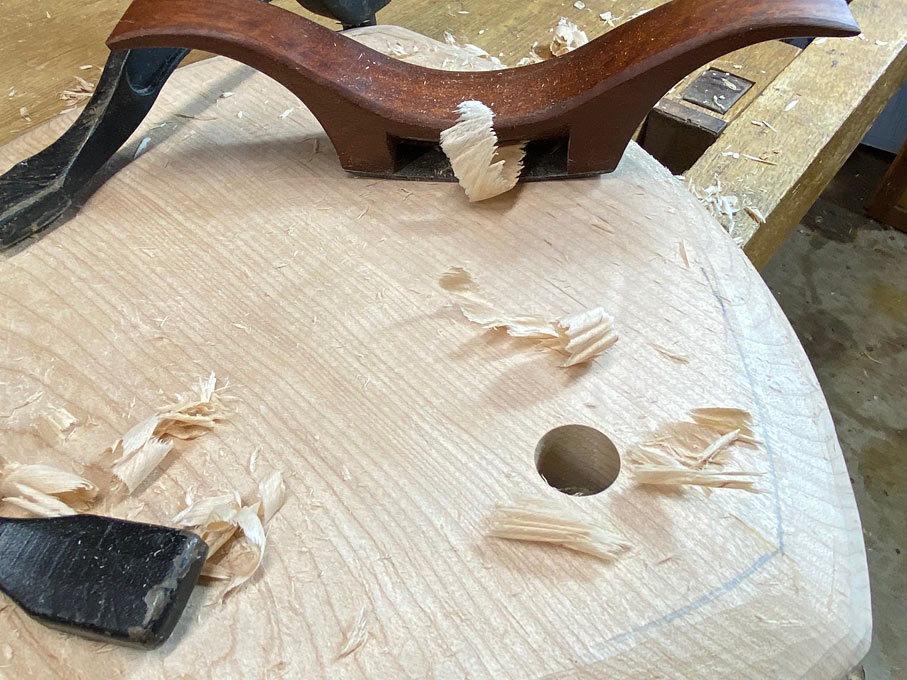
There is a fair amount of fettling; more than I expected. As I said, the design was based on one in a book, which made them look really easy. The thing that wasn't mentioned in the book and I realised as I made them (and would do differently if I make more or had to make them again) is that the inner lamination needs to be (very slightly) thicker than the blade where it's in the body and very slightly narrower than the blade where it comes out of the body at the bottom. If the former isn't true, the blade doesn't fit; if the latter isn't true, the walnut bit won't fit in the groove made by the blade and it jams.
I ended up doing a lot of careful sanding to get the protruding bit of walnut down in thickness, which was a pain on the fence side of the 3 mm planes. If I did it again, I'd carefully mark where the walnut protruded from the fence-side piece of walnut and skim it down a bit before gluing it in place (and then use some sort of jig or dowels) to make sure it was glued in the right place).
PaulArthur
Established Member
Right then. Christmas presents for the kids complete. I have wanted to make an anarchist’s tool chest Schwartz style, but I don’t have room in my workshop for one. The kids needed toy chests though, so I thought I would build them one each, and make them so that they can be converted at a later date if needed.
They were a bit of a mission to build, to be honest. Made of beech, the stock prep took me weeks as there was so much of it, and I was making it out of rough sawn boards with live edges.
Looking forward to getting my workshop back!


They were a bit of a mission to build, to be honest. Made of beech, the stock prep took me weeks as there was so much of it, and I was making it out of rough sawn boards with live edges.
Looking forward to getting my workshop back!
Bigbadmarky
Established Member
I finally got around to finishing my first 'proper' project down the workshop. Its a side table with a beech frame and an oak parquet-esque top.
The frame is inlaid with a contrast (sapele) wood and contrast dowels with mortice and tennon joints. Its finished with Rag n Bone Brown's wax oil.
The top is reclaimed oak flooring arranged in a parquet-esque pattern. The top is bound with oak trim and its all finished with Osmo Polyx.


The frame is inlaid with a contrast (sapele) wood and contrast dowels with mortice and tennon joints. Its finished with Rag n Bone Brown's wax oil.
The top is reclaimed oak flooring arranged in a parquet-esque pattern. The top is bound with oak trim and its all finished with Osmo Polyx.


Just finished this in the last couple of weeks and sent of to its new home
Attachments


Rorton
Established Member
really nice, love how the top is hidden - does it pivot, or do you lift it by hand and rotate it?
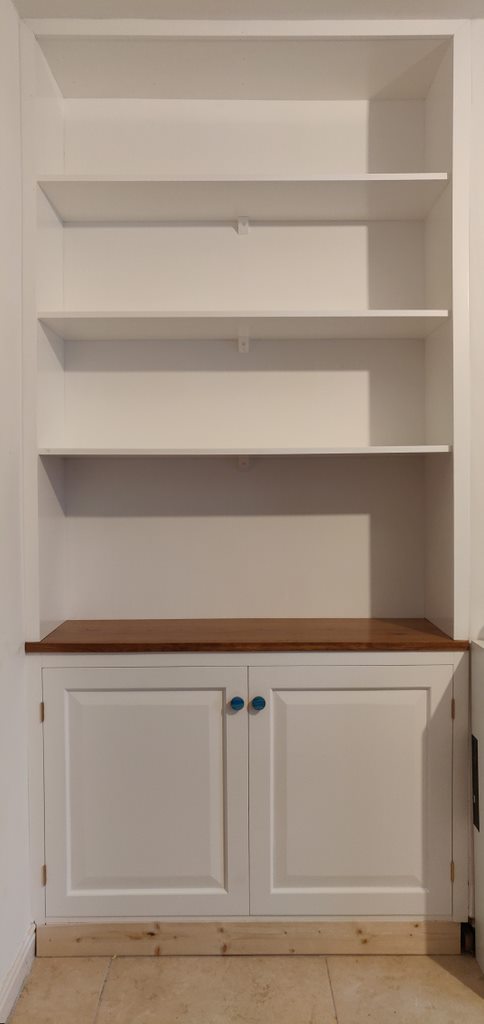
A fairly big project by my standards came out nicely though.
Just need to nail on some skirting board now...
Just need to nail on some skirting board now...
fezman
Established Member
Thats really nice Sean33 - I have something similar in mind for a project next year
Benchwayze
Established Member
Well such a smart job. That's how the living room looked at our 'ouse when I was a nipper. Funny how things go around and come around. But yes you made a nice job.
Regards
John
Regards
John
Thanks Rorton, the top sits in the recess and you just lift it and turn it over.really nice, love how the top is hidden - does it pivot, or do you lift it by hand and rotate it?
Similar threads
- Replies
- 625
- Views
- 47K
- Replies
- 44
- Views
- 3K
Latest posts
-
-
Record Power Planer Thicknesser - RSPT260 - Connect Motor to Mains
- Latest: guineafowl21
-

-
-
