Cabinetman
Established Member
So no way to just transfer it " en bloc"? I can redo do it all of course but it would be easier to just move it.


Part of me was hoping that you hadn't asked thatHi JG how on Earth do you turn an ellipse?
") Up to about the 1950's there were commercially made 'Ellipse Chucks' but with the advent of CNC the need dwindled. I saw a mention of one being made from wood by David Springett and due to my Ellipse 'fetish' became so intrigued that I spent about two years working out how it was done. The first time I 'drew' an ellipse with a felt tipped pen in the toolpost I 'cheered' I eventually made version 3 with various improvements, the last being to make the ratio of Major to Minor Axis variable.
Up to about the 1950's there were commercially made 'Ellipse Chucks' but with the advent of CNC the need dwindled. I saw a mention of one being made from wood by David Springett and due to my Ellipse 'fetish' became so intrigued that I spent about two years working out how it was done. The first time I 'drew' an ellipse with a felt tipped pen in the toolpost I 'cheered' I eventually made version 3 with various improvements, the last being to make the ratio of Major to Minor Axis variable.


And now for something completely different...
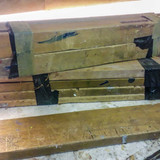
Not the finest of woodworking, but what the chief bee keeper ordered. A honey tipper to allow the honey once it has been extracted into the bucket to be decanted into jars with as few air bubbles as possible.
The legs are detachable for storage with the black knobs. To increase the angle of tilt it is simply a case of moving the bar forwards which has angled slots planed in the bottom to lock with the angles slots cut in the plywood. I cut the latter with a small router, using a dovetail bit and an angled sub base so the side of the dovetail bit was vertical. I finished the whole thing in some Ronseal quick drying varnish as it is bound to get sticky and need washing.
View attachment 92232
View attachment 92234
 Right
Right


That’s nice work Doug, I’m sorry I can’t help you as it’s not my line of work, but I don’t think you could’ve made them any bigger to fit that iregular shaped opening. The only thing I do know from personal experience is you need to fit damp proof membranes in the right places – sorry that’s not much help is it ha ha. Ian
That’s some beautifully scribed sides against the stone there matmac. What method did you use to achieve such accurate results?
Thank you, just a compass and patience. Took me longer than I wanted but I was happy how it all came out. The one piece on the right I had to add a fillet as the stone was so off plumbThat’s some beautifully scribed sides against the stone there matmac. What method did you use to achieve such accurate results?
Enter your email address to join:
