Oak TV cabinet

UKworkshop.co.uk

Help Support UKworkshop.co.uk:

This site may earn a commission from merchant affiliate links, including eBay, Amazon, and others.

mailee

Established Member
Joined
26 Jun 2005
Messages
5,502
Reaction score
4
Location
grimsby Humberside
I made a start on my next job today an oak TV cabinet. Most of the carcass will be veneered MDF as usual. I am waiting for a delivery of more boards but had almost enough materials to make a start on the front. Using Bob's system I made the shaker panels and drawer front.

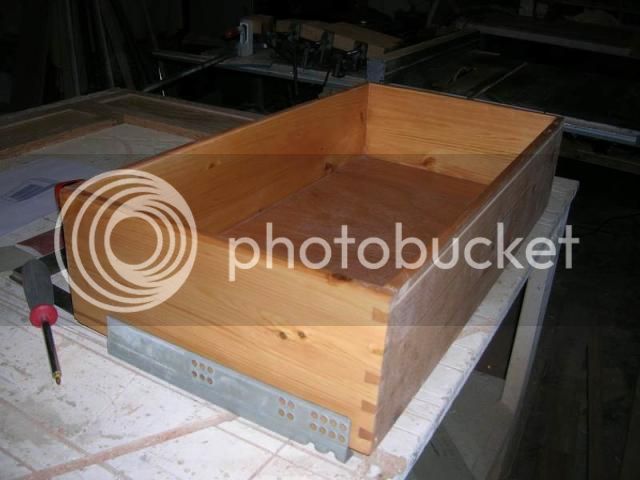
As you can see I ran out of 6mm veneered for the drawer front :oops: I shall assemble this when it arrives. You can make out the design of the cabinet from the plan laid on the bench. With this part done I then made a start on the drawer box which is in pine. (keeping cost down for customer)
By the end of the day I had this assembled and the runners mounted.

My boards should arrive Monday so I shall crack on with the carcass after the weekend. :D
 
I have been lipping the MDF today using solid wood. I am lipping the edges with 10mm strips apart from the top, bottom and shelf which will overhang and have a detail routed on the edges.
 
Looking good mailee, as always.
Are your sides flush with top or in a bit ? If they flush what is your trick to plunge Domino at the edge of a board? :D
 
As you probably know Pete to cut a slot for the internal shelf you clamp the shelf onto a line and use the base of the machine, I do the same with the ends but add a scrap piece of material butted up against the edge to rest the base plate on. Only thing to be careful of is that both pieces are flat and level with each other. HTH.
 
After spending this morning fitting the arts and crafts shelf in the summer house I got back into the shop and got stuck in with the cabinet again. I took the panels out the clamps and trimmed the lipping. I then put a detail on the top and bottom edges with the router. Finally had a dry fit to make sure everything fitted before a good sanding.

Will get back onto this on Monday.
 
Looking good Alan. How do you trim leaping with a router trimming bit or plane?
Do you use dominos to glue a lipping on?
I've been watching some of your pics on photobucket, lots of great stuff and inspiration a question re spraying. When you spray carcass do you have a back glued in too if yes how do you deal with bounce back?
 
I trim the lipping with a router bit. I made a base plate for the router with a step in the base and set the depth on a level surface. It works great as long as you remember to put your weight on the plate to keep it level. (Don't ask me how I know this) :oops: I don't bother using dominos for lipping. I just run the edges over the planer and apply the lipping with a couple of mil extra to trim off later. Then it is just a case of a tickle with the ROS.
I always try to finish a project before any assembly if I can as it's easier to get a good finish. It does of course mean having to mask the gluing points but I think the time involved is worth it as it saves time later not having to polish any over spray off. If I do have to spray a unit already assembled I would leave the back off to minimise any bounce back.
Got to agree with you Mar_mite Oak does look classy and I like working with it. (much more satisfying than MDF)
 
mailee":p37cr3qb said:
I made a base plate for the router with a step in the base and set the depth on a level surface. It works great as long as you remember to put your weight on the plate to keep it level.
How does it look like this step, sound really usefull. :)
 
I haven't got a photo of the jig to hand but have knocked this up in Sketchup to give you the idea of how it works Peter.

The router is mounted on the stepped end with a straight cutter which protrudes through the base. I set the depth of the cutter on a flat level surface and then putting my weight on the knob end on the panel run the cutter down the lipping to trim it flush with the panel veneer. On my De Walt 625 when I set the depth I release it and wind the fine adjuster one quarter turn out to make sure it just cuts above the veneer so I can fine sand it to finish level. (Just to make sure I don't rout through the veneer) another tip is to start along the outer edge of the lipping with a climb cut so there is no breakout of the lipping. HTH. :wink:

Thanks John, I do like the look of oak too. :D
 
Yes, I wouldn't be without the Domino now. I didn't get much done on this today. I did manage to finish all the lipping and made a stay for the back. I have been machining up some more oak ready for my next job.

Here is the router jig in action Peter.
 
Thanks for that Alan. Great little jig. I was always using Palm router with bottom bearing, but usually bearing was leaving marks on the veneers. Now I will definitely switch to your idea. :)
 
I had exactly the same problem with my palm router. I saw this method when I visited another cabinet makers shop and was impressed how well it worked so made myself one. Just make sure you don't put any pressure on the router end in case the base flexes. I just guide the router with my right hand while applying pressure on the other end of the base with my left. :wink:
 
Almost there. Got the finish on and assembled today. The removable shelf needs polishing up. (I just put it in place for the photo) All that remains now is to fit the handles and catches and deliver it. :D

 
Thanks Peter. I used small brass butts on the doors with ball catches. I was originally going to use push to open catches but it would have left too big a gap on the door edge. with the catches and handles all fitted. I will deliver this tomorrow. :D
 
Back
Top