You are using an out of date browser. It may not display this or other websites correctly.
You should upgrade or use an alternative browser.
You should upgrade or use an alternative browser.
Oak balustrading job,WIP. (loads of pic's)
- Thread starter Alex
- Start date


Help Support UKworkshop.co.uk:
This site may earn a commission from merchant affiliate
links, including eBay, Amazon, and others.
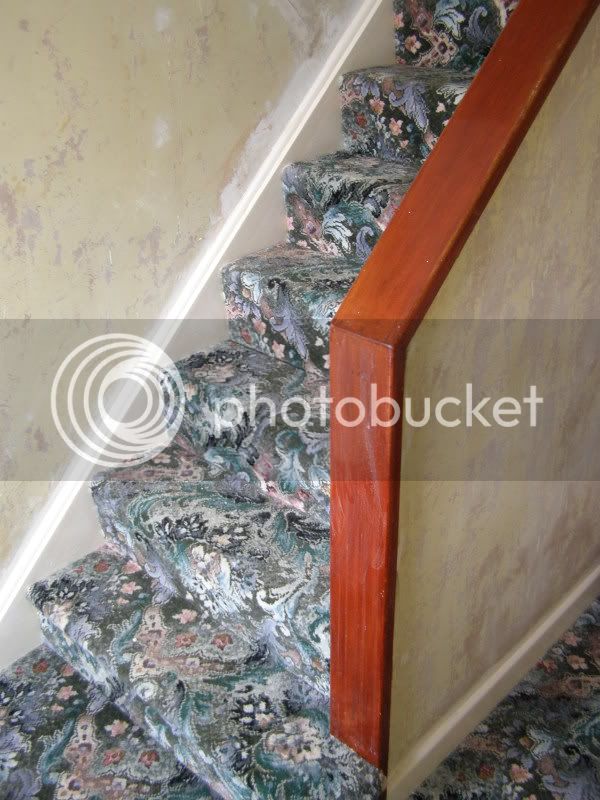
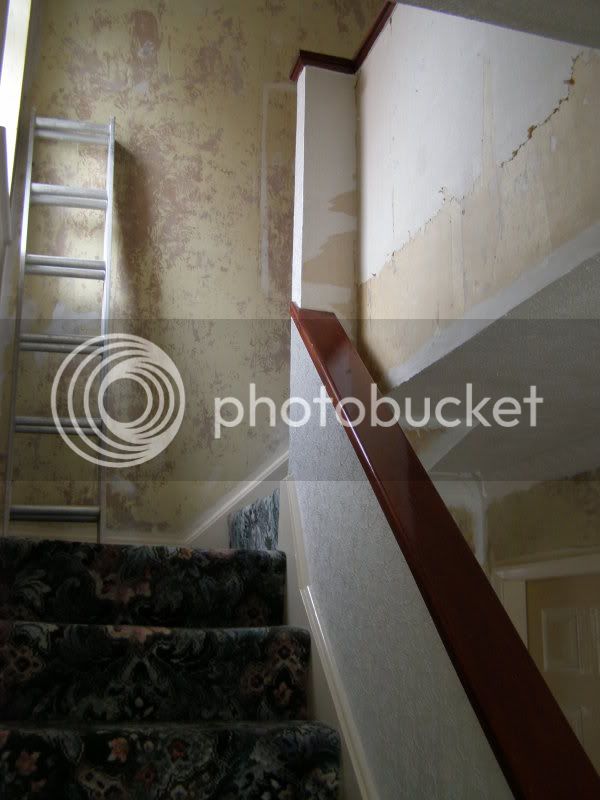
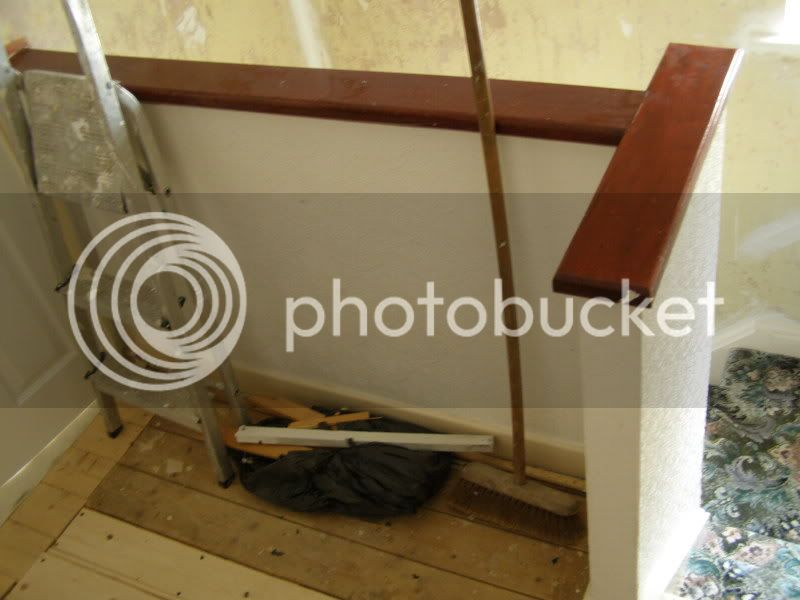
No not that! That's the before pics :lol:
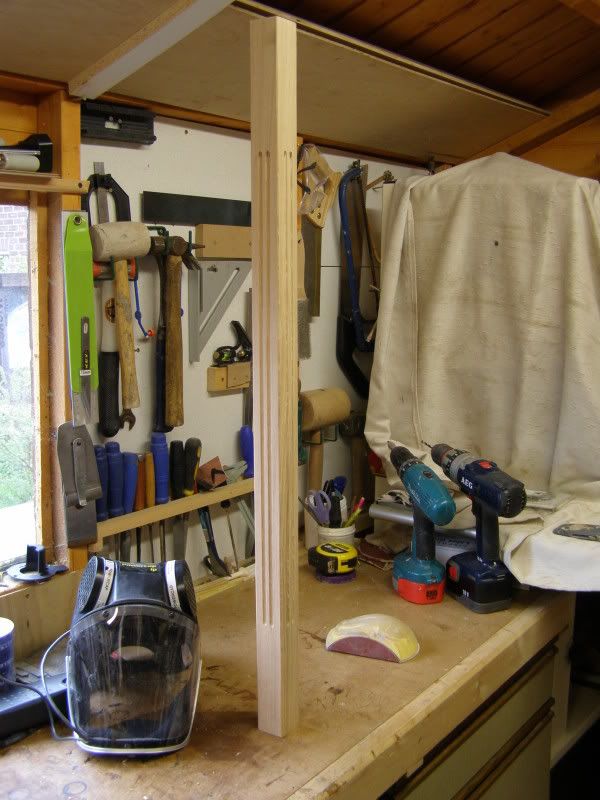
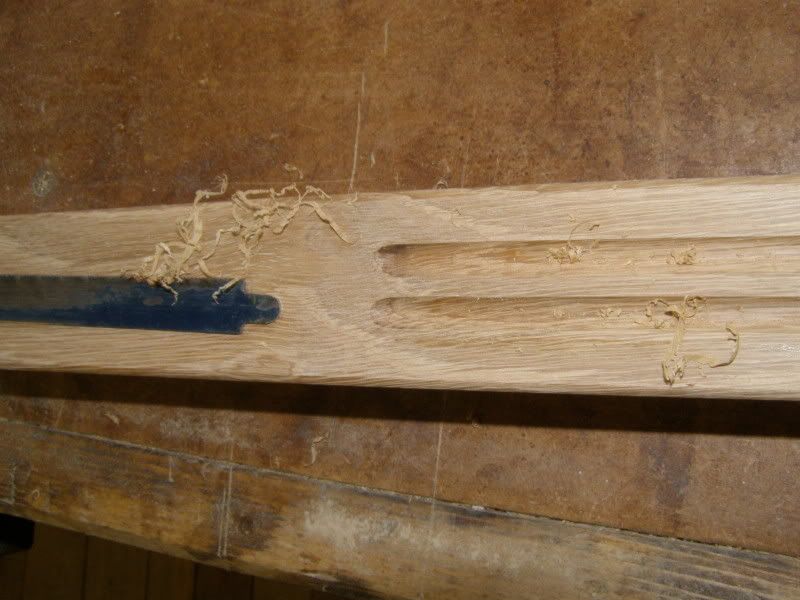
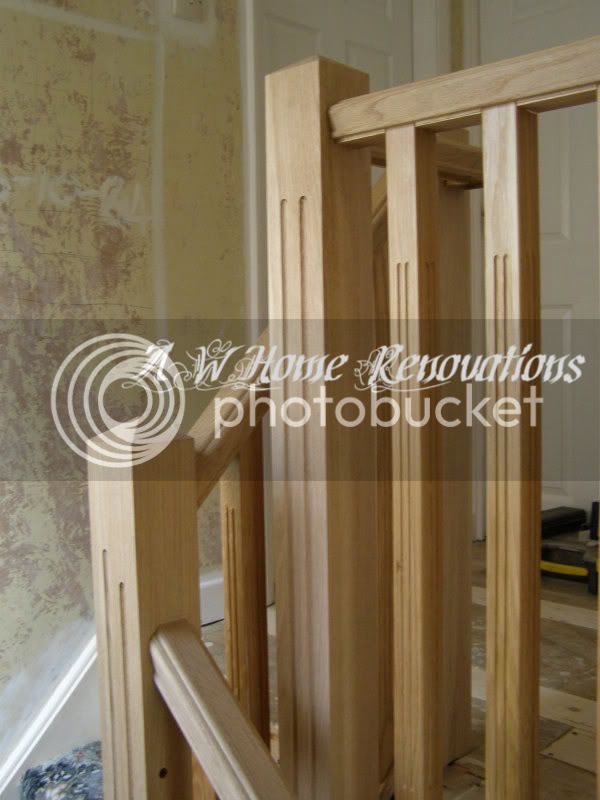
I went with blank 41mm American white Oak spindles and fluted them myself. I chooses this route after finding I could only get spindles fluted on two sides. I also ordered blank 90mm AWO and did the fluting after cutting mortises etc, on site.
I started on the spindles. After buying a twin flute cutter for the router from Wealdens, I went with 8mm shank version just for the baby 1010. I was going to do these on the router table till i found the worktop router table had bowed. Going to have to make mk2 one day. So i ended up making this jig and using the 1010 solely.
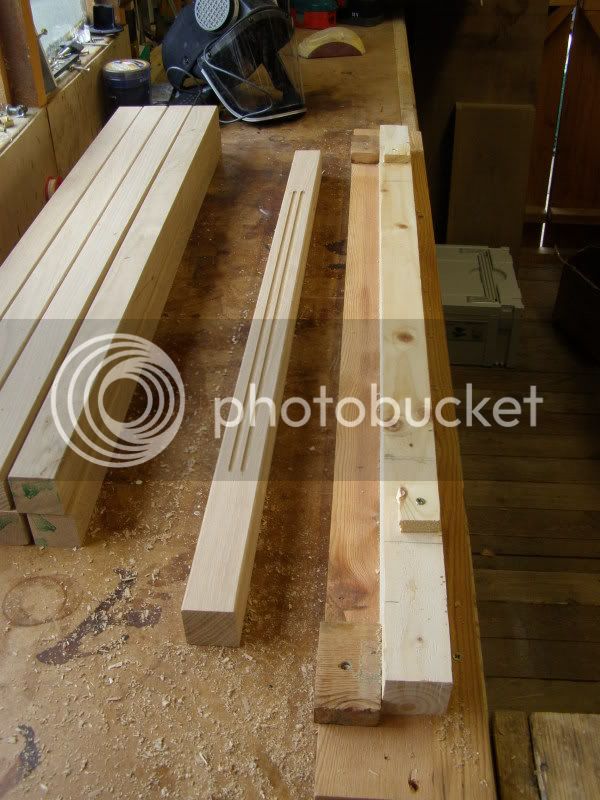
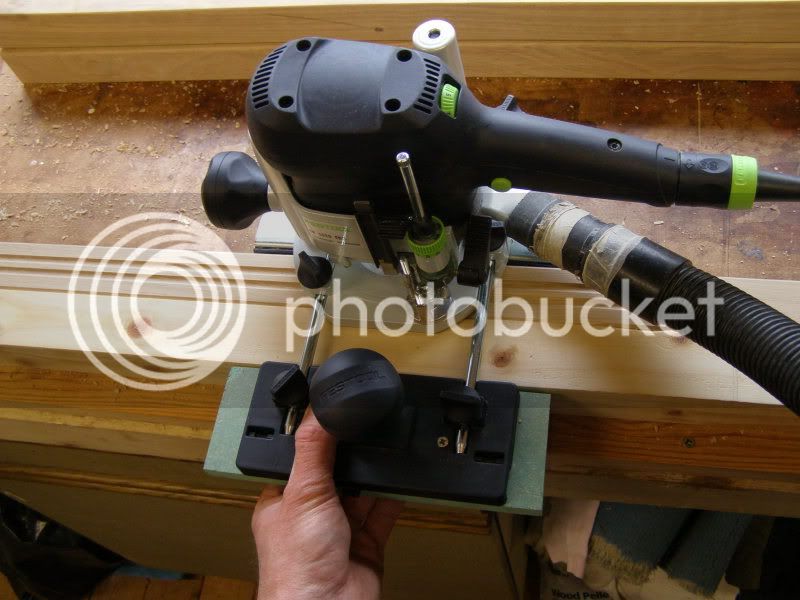
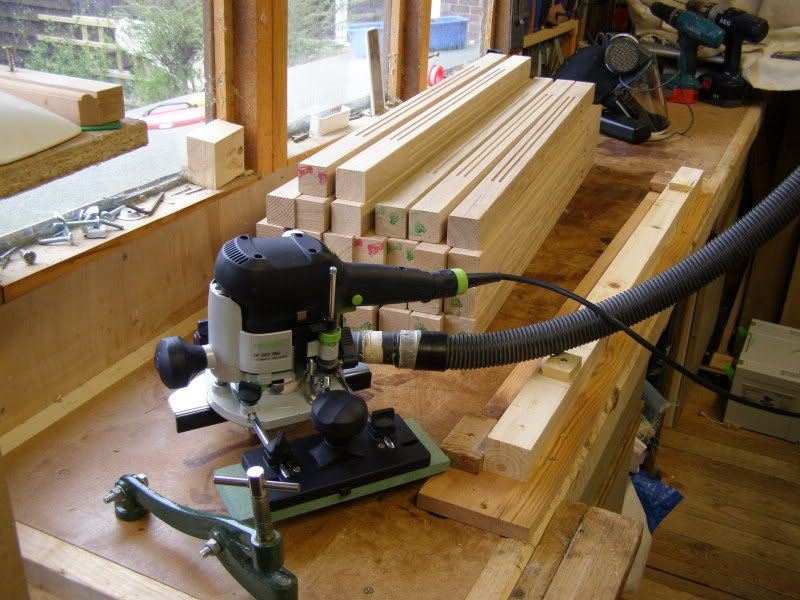
Just to add the little beast didn't even get warm after hours work, 120 cuts which is 30 spindles 4 sides.
I went with blank 41mm American white Oak spindles and fluted them myself. I chooses this route after finding I could only get spindles fluted on two sides. I also ordered blank 90mm AWO and did the fluting after cutting mortises etc, on site.
I started on the spindles. After buying a twin flute cutter for the router from Wealdens, I went with 8mm shank version just for the baby 1010. I was going to do these on the router table till i found the worktop router table had bowed.
Going to have to make mk2 one day. So i ended up making this jig and using the 1010 solely.
Just to add the little beast didn't even get warm after hours work, 120 cuts which is 30 spindles 4 sides.
rileytoolworks
Established Member
Wow, I made a scraper almost identical to that this week to clean up some fluted corbels. Great minds...
Nice work on the spindles. Should look the dogs danglies once it's done...
Adam.
Nice work on the spindles. Should look the dogs danglies once it's done...
Adam.
Thanks Riley/Adam. I'd explained and given descriptions of the style and general look i was going for but I didn't get round to making samples for the customer. Then when I fitted they where overseas so it was a relief to hear they love it.
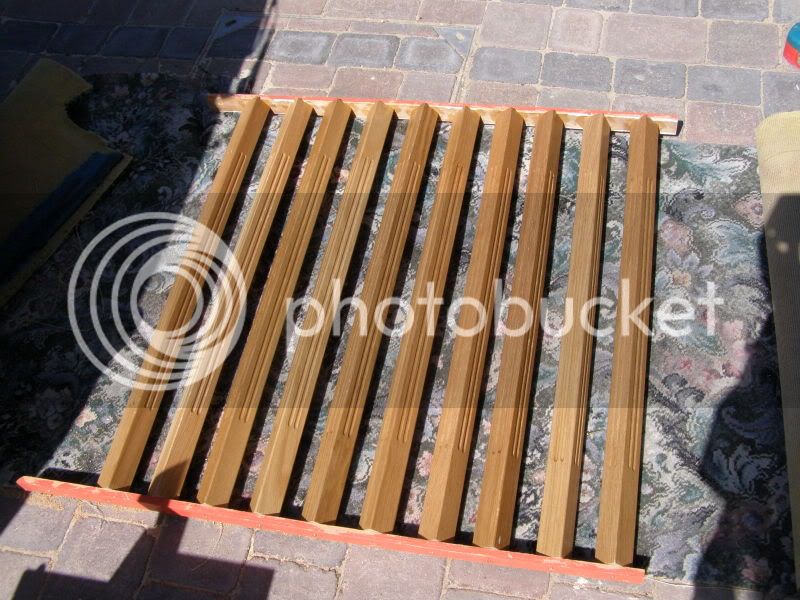
I put the finish on the spindles before taking them to site. Fiddes Hard wax oil. They're laid down on carpet here to remove screwed on temporary battens
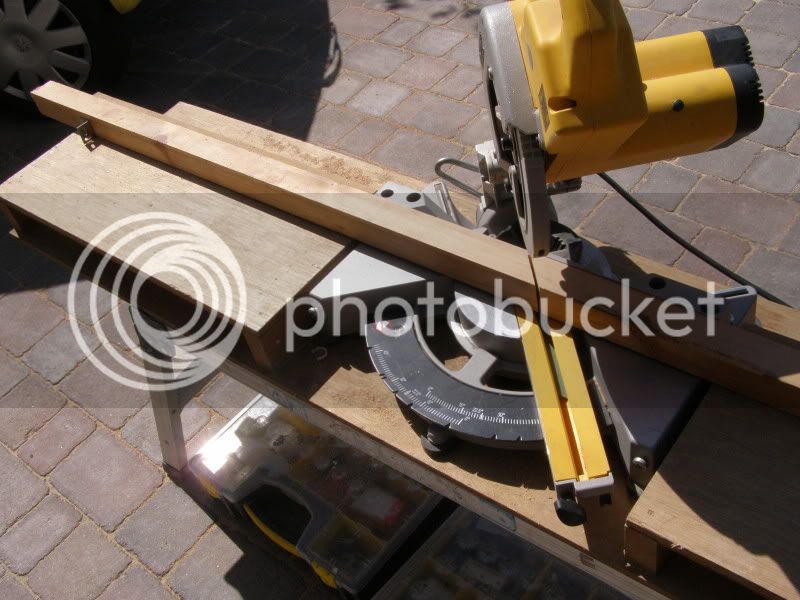
My SCM on home made stand with sacrificial fence. I found having the back of the blade buried in the fence at least 40mm behind the cut piece hugely reduces splintering.
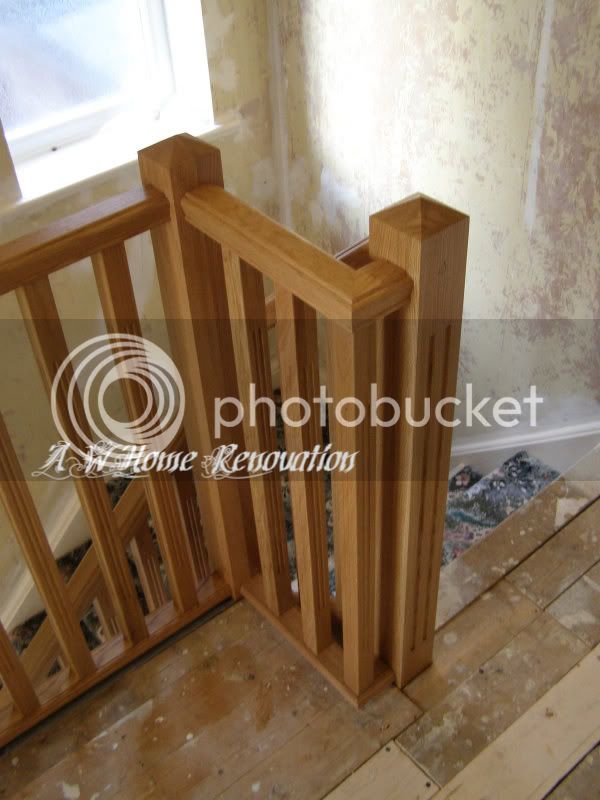
To get the shallow Pyramid on the newel,I scribe a 25mm from the end line round the post and set the saw to bevel to 30 deg. They where then mortised out to saddle the existing strings and fluted. This newel was the worst for grain and colour deviation between the laminates but it finished not really noticeable, the camera definitely makes it stand out.

editted to say if this is a landing newel that extends through ceiling so Pyramid end cut both sides and half lap jointed into landing joist then screwed with 5" coach screws.
I put the finish on the spindles before taking them to site. Fiddes Hard wax oil. They're laid down on carpet here to remove screwed on temporary battens
My SCM on home made stand with sacrificial fence. I found having the back of the blade buried in the fence at least 40mm behind the cut piece hugely reduces splintering.
To get the shallow Pyramid on the newel,I scribe a 25mm from the end line round the post and set the saw to bevel to 30 deg. They where then mortised out to saddle the existing strings and fluted. This newel was the worst for grain and colour deviation between the laminates but it finished not really noticeable, the camera definitely makes it stand out.
editted to say if this is a landing newel that extends through ceiling so Pyramid end cut both sides and half lap jointed into landing joist then screwed with 5" coach screws.
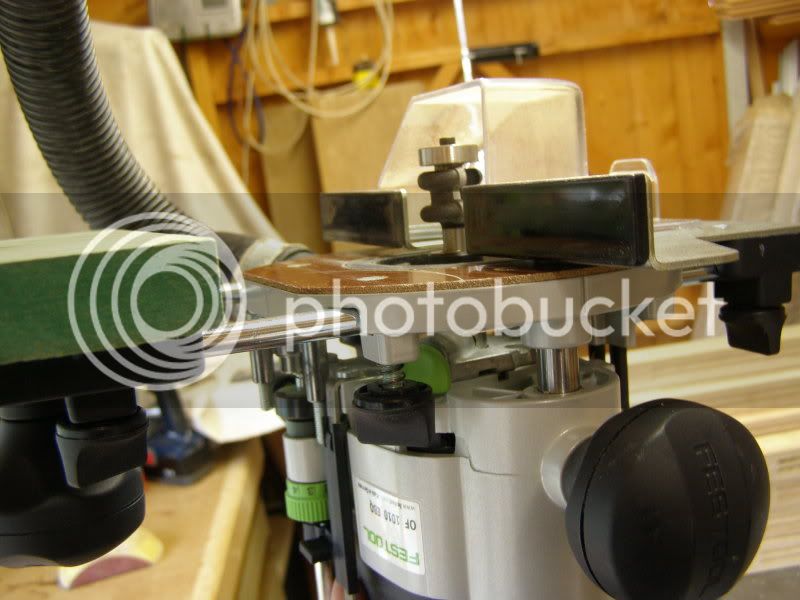
Yeah i really love this 1010 nuffing seems to phase it. It's the only router I have that plunges through the base, which was another problem with this router bit been two short and my other routers collet's not plunging all the way to base. I don't need to many excuse's to play with fessy do I?:twisted: Did you notice the little mod to the rail fence?
It's taking a bit of getting use to with side handle and locking knob.
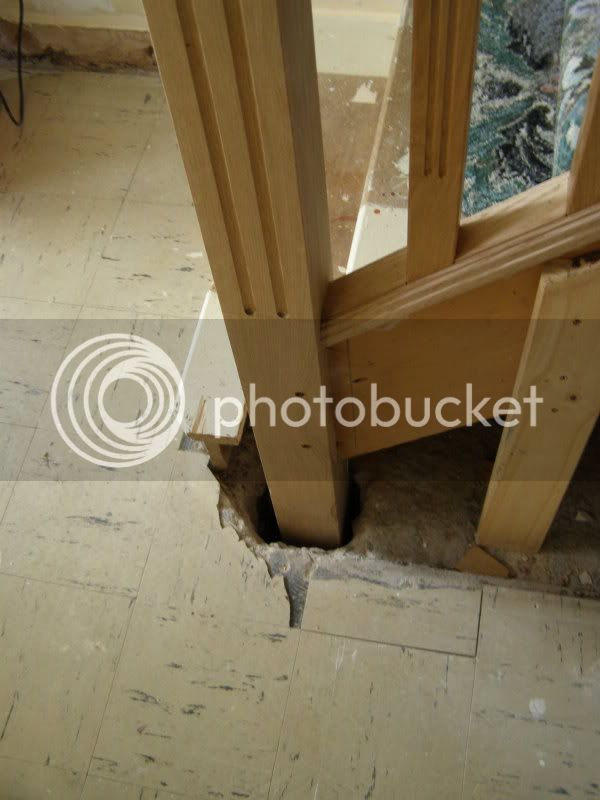
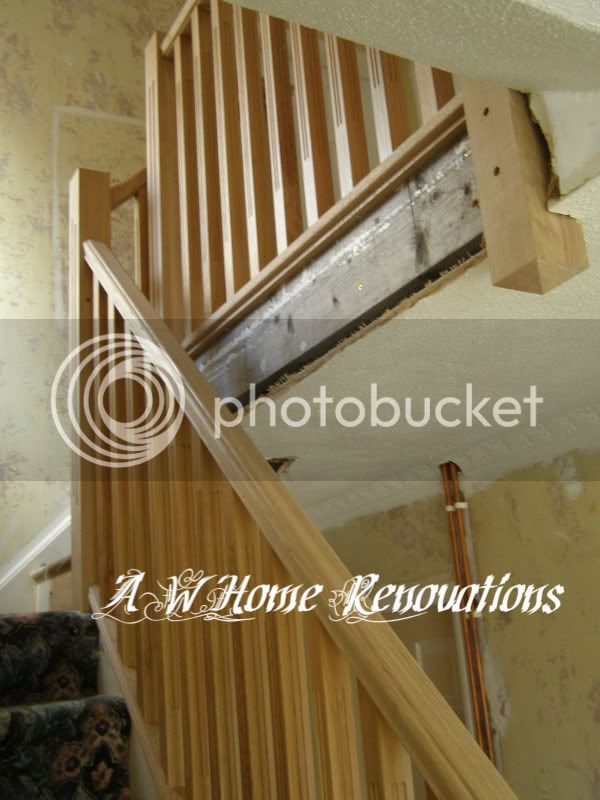
I couldn't remove the first step like I like as this one was screeded in. So I chopped an extra bit out of the first step to slide the newel in then knock it back over the stringer tenon, in this case I left the stringer same thickness and chopped bigger mortice into post. The post is dug and buried a foot into the concrete. She is solid Captain. :twisted: This post is a full 1.8m long. Pic before concreted.
It's taking a bit of getting use to with side handle and locking knob.
I couldn't remove the first step like I like as this one was screeded in. So I chopped an extra bit out of the first step to slide the newel in then knock it back over the stringer tenon, in this case I left the stringer same thickness and chopped bigger mortice into post. The post is dug and buried a foot into the concrete. She is solid Captain. :twisted: This post is a full 1.8m long. Pic before concreted.
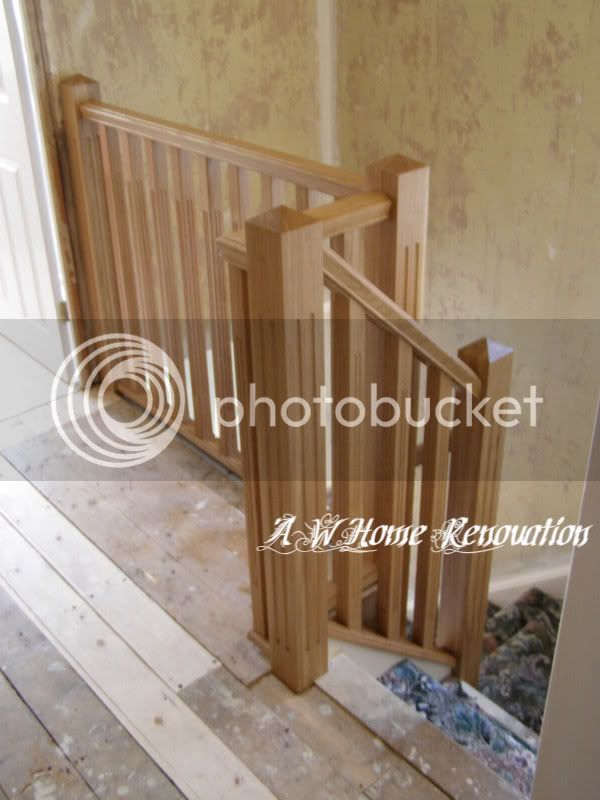
No finish on post,handrail or base rail here.

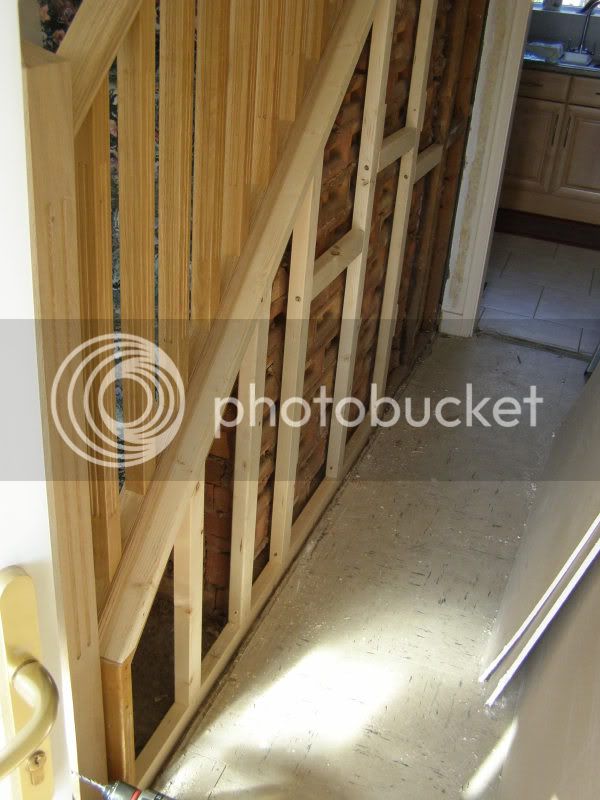
|'d originally wanted to take the old stud wall completely out. And bring it up just over the string fitting nicely under the wide oak base rail but no can do very wonky brick and after 1st landing would have had a step in the wall. So 55mm sticky out drywall it had to be.
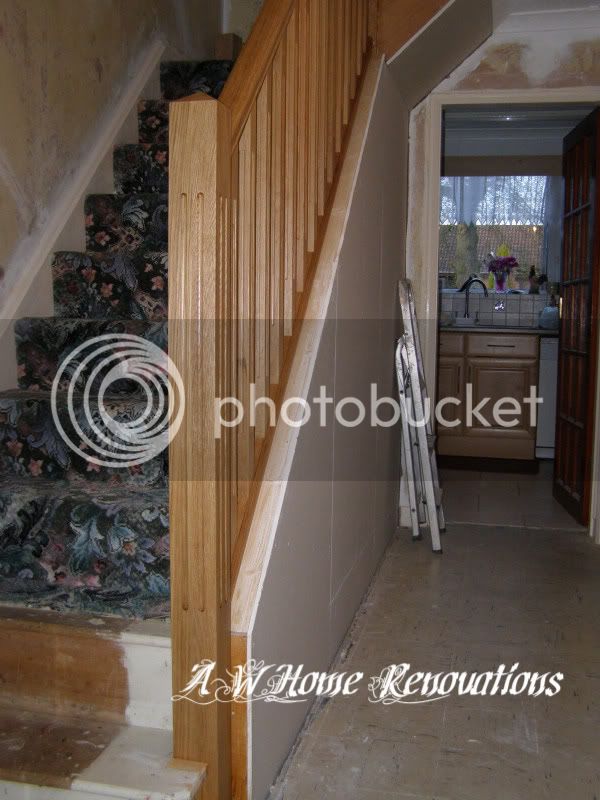
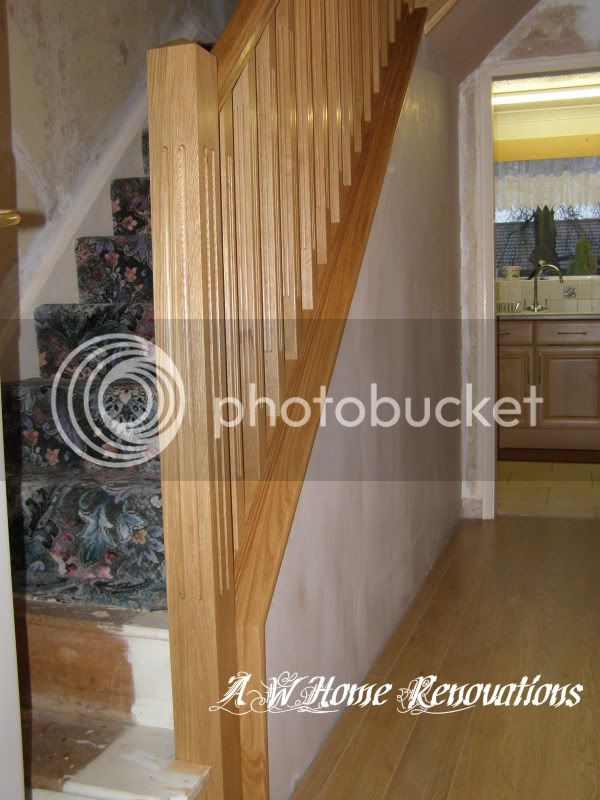
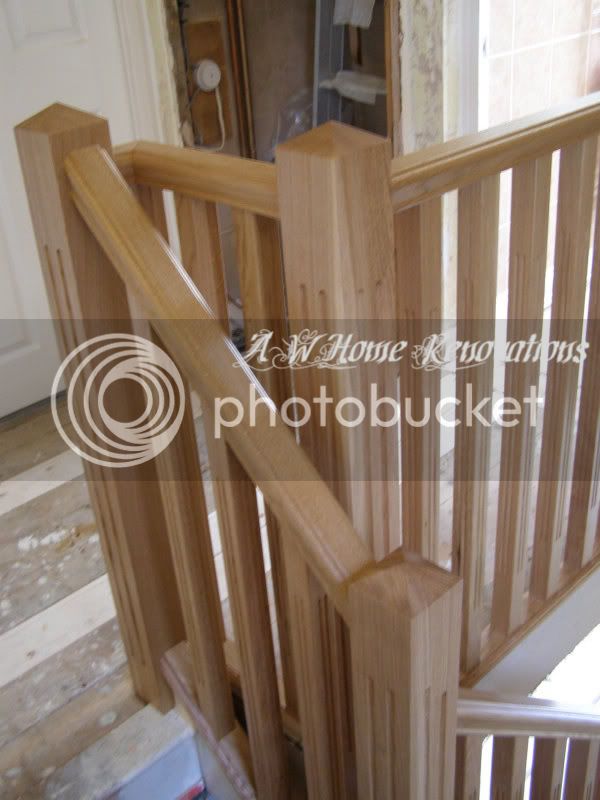
Last pic has the finish Hardwax Oil on. And note repaired bottom step.
|'d originally wanted to take the old stud wall completely out. And bring it up just over the string fitting nicely under the wide oak base rail but no can do very wonky brick and after 1st landing would have had a step in the wall. So 55mm sticky out drywall it had to be.
Last pic has the finish Hardwax Oil on. And note repaired bottom step.
Stairs look great , love it 8)
Are you going to put a cap / trim piece to cover the edge of the plasterboard to stop it getting damaged ?
Are you going to put a cap / trim piece to cover the edge of the plasterboard to stop it getting damaged ?
Steve Jones
Established Member
Nice looking job Alex, hope the customer was pleased.
Steve
Steve
Wow
That trim piece made all the difference. Very nice job, they now need to get shot of the carpet
Mick
That trim piece made all the difference. Very nice job, they now need to get shot of the carpet
Mick
GCR
Established Member
Thanks for the post. Rather spookily my wife wanted me to do a similar job on our house! Now she is very keen having looked through your posting. May I ask the source of your oak, I presume the parts were standard stair components before you added the fluting?
Bob
Bob
The oak is American white oak and most stair parts suppliers will sell you plain 41mm spindles and Plain 90mm newels or PAR 90mm square. I think i bought these from online tradestairparts.co.uk.
I'd stay away from these DIY quick fix solutions/brackets that wickes and sheds sell. A staircase balustrading takes some serious abuse and is a large part of a staircases structual strength so needs to put in right. Not saying it's beyond anyone just take into consideration your skill level and level of safety you have to build into this. And of course you need to meet current regulations, not to hard.
Need any pointers just ask.
billw
The Tattooed One
I need something virtually identical doing in my house, I'd be interested in knowing how much that cost?
Similar threads
- Replies
- 47
- Views
- 4K