Have had some requests for plans on this so here goes.
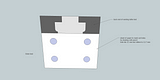
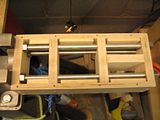
the pic above shows the back end of existing bed of lathe
Cut out a piece of thick paper 100mm x 70mm and tape it to the end as above.
Use a pencil to shade and reveal the bed threaded holes at the exact location - this is crucial and must be accurate as everything else references off this.
Cut out 4 pieces of ply 100 x 70 mm - and drill holes as per template created to 12mm initially but refine to 12.7mm with a router bit later , this will allow the M12threaded rod to pass thro without any wobble/binding.
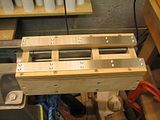
The 4 pieces above form the horizontal supports.
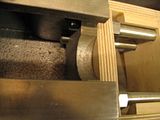
The runners come next - ignore the stainless steel bit for now but remember it is 2mm thick and your construction must allow for this.
The runners are best created as a hardwood/12mm plywood sandwich as shown in original pics, the hardwood piece is 36mm wide and 8mm thick allowing for a 2mm stainless steel runner.
The plywood part of the sandwich is about 30mm in width and 12mm thick.
The outer skin on either side is 12mm ply cut to size
All lengths depend on the size of extension you want to make - in my case 300mm , remember however that the threaded rod has to be much longer to allow for the bit mating to the existing bed and some for the nut outside.
You will also see that I have a small vertical support between the horizontal supports at the far end - this is to distribute the considerable compression force that will result when you tighten the nuts
All joints must be very precise - a good table saw cut will probably do but I refined them on my shooting board .
When you are gluing the horizontal ribs to the outer skin plywood insert the threaded rods and ensure alignment is good, on a flat surface with the top of the extension referencing off the flat surface - this should be fine if your cuts were precise
Use only screws for fitting the runners as you will need to remove the runners to get at the nuts if you want to remove the extension anytime.
Finally fine adjustment can be achieved by using double stick tape on the underside of the stainless steel runners to make it flush with your lathe bed.The drill holes must be appropriately countersunk.
If the joinery is precise the extension is much like a torsion box and incredibly strong so do take your time it will be worth it
Hope this helps.
Enjoy