................UPDATE................
I have transferred all the photos from photo bucket to Flickr and placed them back in the original post.
................UPDATE................
I have since complete 2 of my tasks that were left to do on this machine.
1: Extraction outlet
2: Digital thickness gauge.
Both of these items were on my list to do and was the main reason for getting my 3D printer.
So both these modifications have been done on it.
1: The extraction outlet.
My current setup calls for a 100mm extraction hose connector. Using CAD I designed this connector thats fits into the thin rectangular slot, then gently morphs into the 100mm outlet I needed.
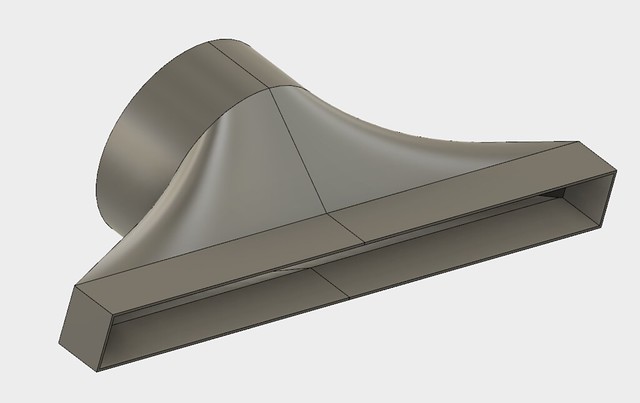
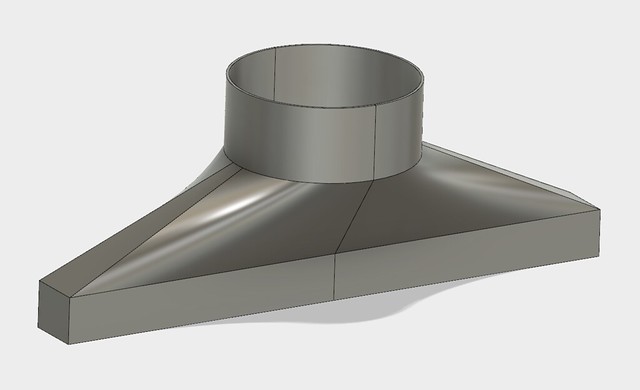
I then 3d printed it in two halves then glued together after.
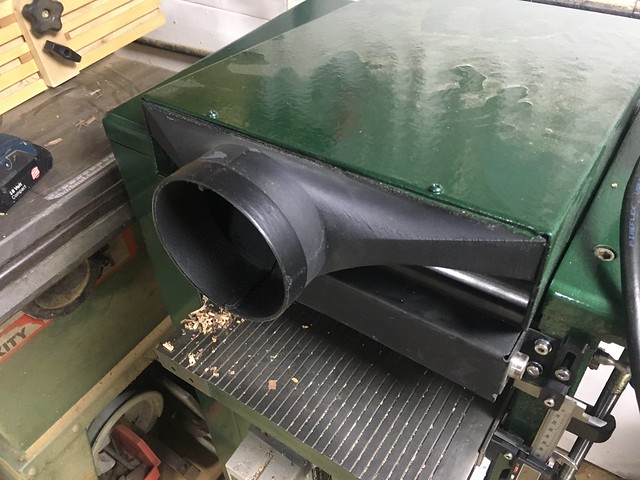
After a quick test I found that the hose always covered the out feed end as it dangled down. This meant that wood just pulled the hose off.
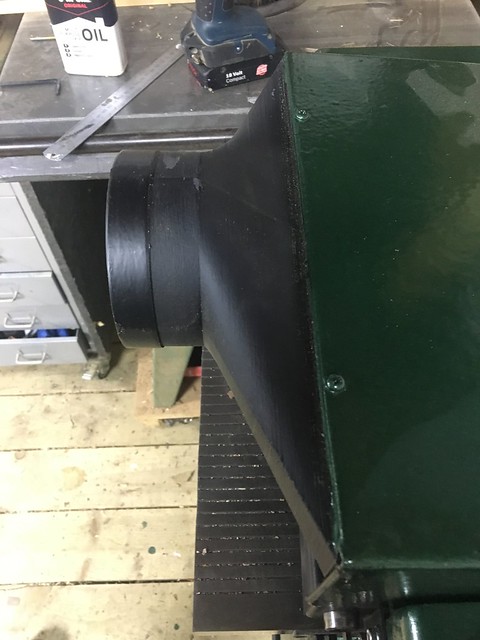
So next I printed an adapter that connected to a 45 100mm pipe connector. I have it loose enough that i can rotate it depending on where the hose is coming from.
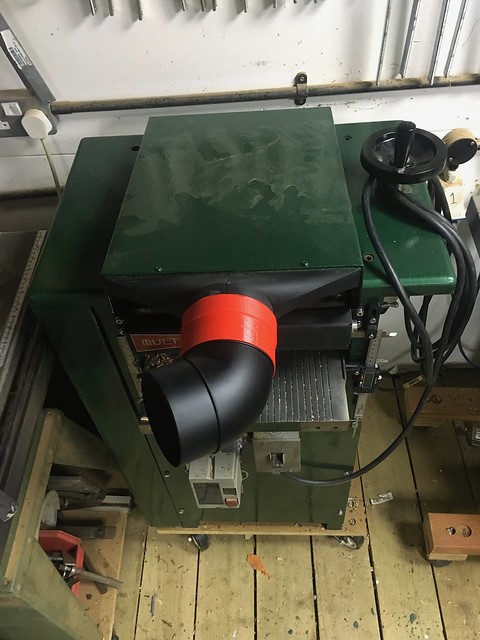
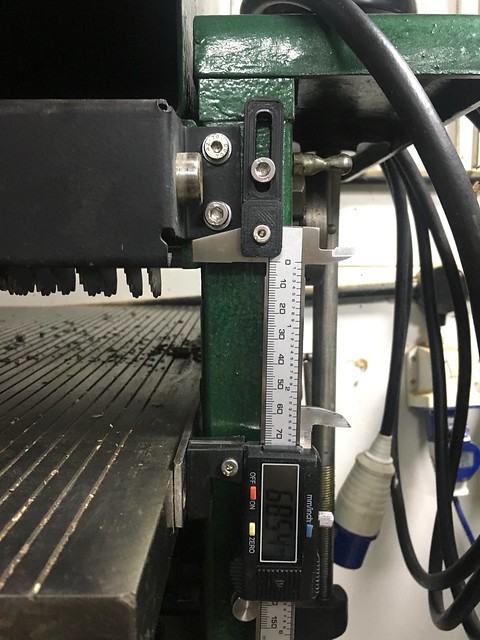
2: Digital thickness gauge.
I had wanted to get a digital thickness gauge on it. Looking around for specific ones for this purpose they tend to be around the £100 mark. I had seen digital callipers modified to work will drill presses and lathes so thought a thickneser is no difference.
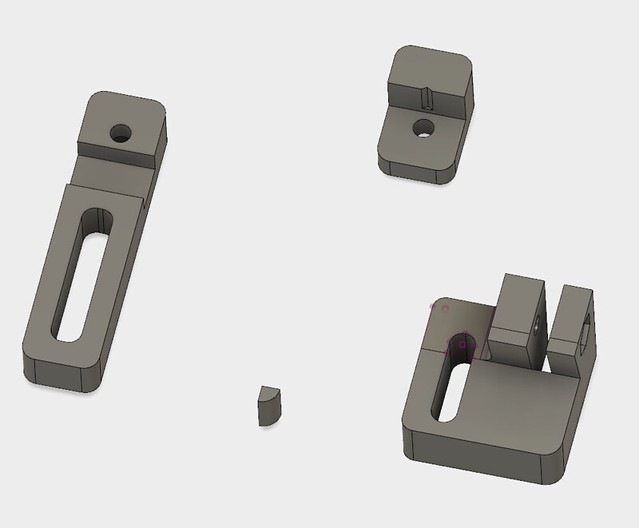
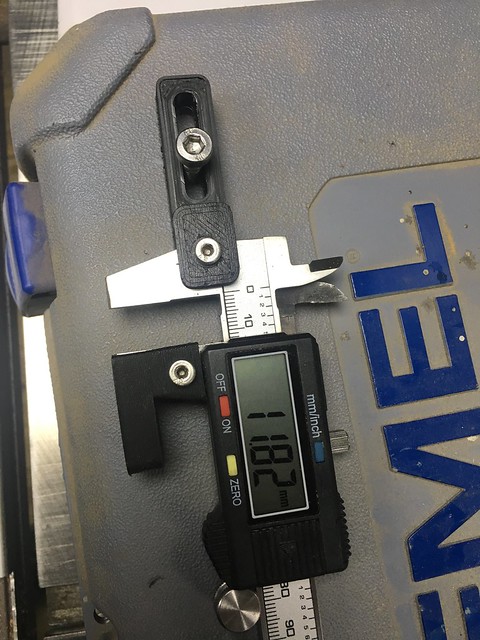
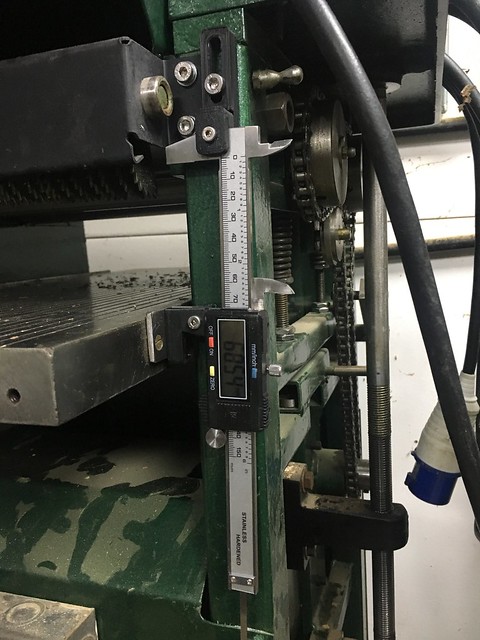
I started out with a cheap £13 digital calliper and designed some brackets to hold it.
There are 2 main components: An upper adjustable bracket and a lower fixed bracket.
The idea is as follows: The top of the calliper is fixed to the body of the machine. The lower bracket attaches to the thicknesser table. As the table moves down it pulls down the calliper and the measurement is read out.
To calibrate: I send a piece of timber though the machine then measure it using a separate calliper.
Using the adjustable top bracket I adjust it until the read out is the same as the thickness of the piece of wood.
The i run a test piece through and check.
So 2 jobs remain:
1: Switch Gear.
I would still like new switch gear for the machine. Ideally one higher up as the current one is low to the ground.
2.Side panel.
I still need to manufacture a new side panel to cover up the gears and chain/
Potentially...
I have a potential idea to turn this into a jointer. By removing the top cover i have access to the cutter with no obstructions. There are also multiple possible mounting points to add feed tables without having to alter the machine directly
Similar to how Matthias Wandle's homemade jointer is made. But this will have to wait for now.
Thanks for looking and the kind comments before.


